Admin Tools | Purchase Order System
Power Users have a range of administration options available to them which allow them to make administrative changes to the purchase order system and users. To access this, select the Admin option from the Tools drop down menu.
Click below to watch a video guide for the Administration Tools on the purchase order system:
User Admin
The User Admin section is useful as it allows power users to carry out a number of actions such as adding new users, editing existing permissions, passwords, data settings and MFA. It also allows them to unlock user accounts and set various user-level approval rules.
Only users with the User Admin permission enabled can access this section. For more information on user permissions click here.
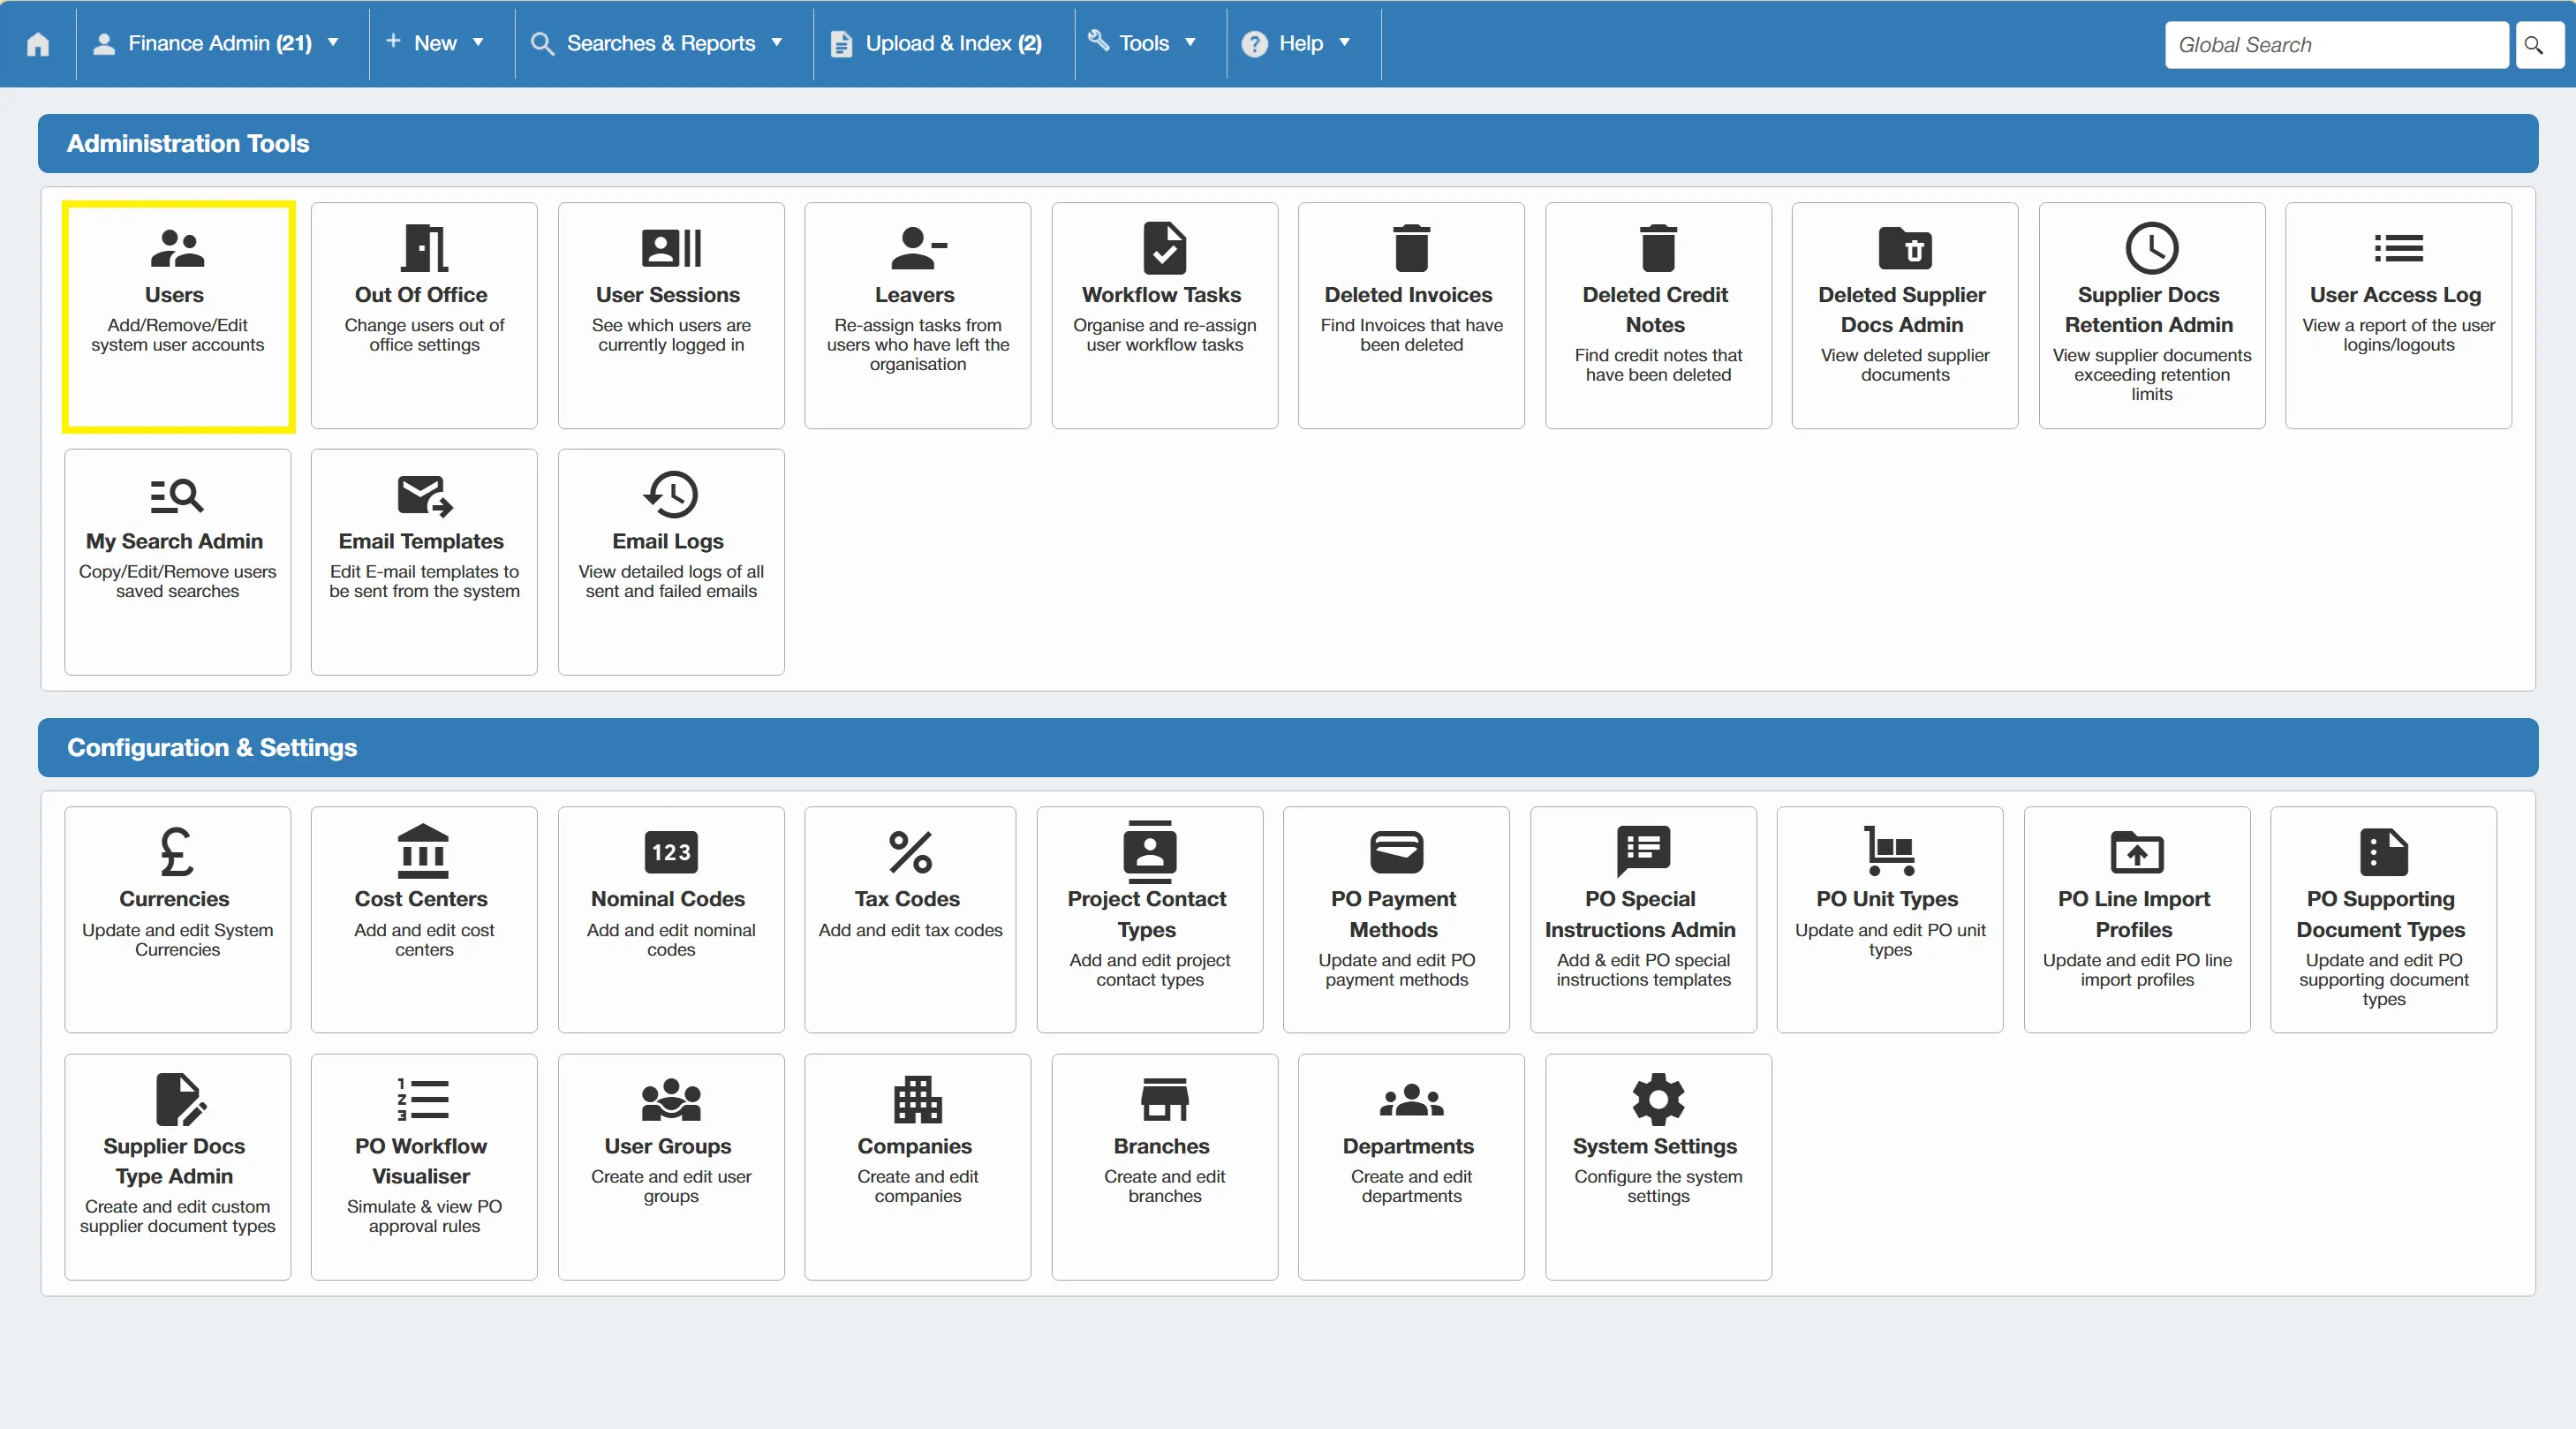
Access the User Administration section by simply clicking Users on the Administration Tools section.
This brings you to the User Admin List, which shows all of the user accounts within the system.
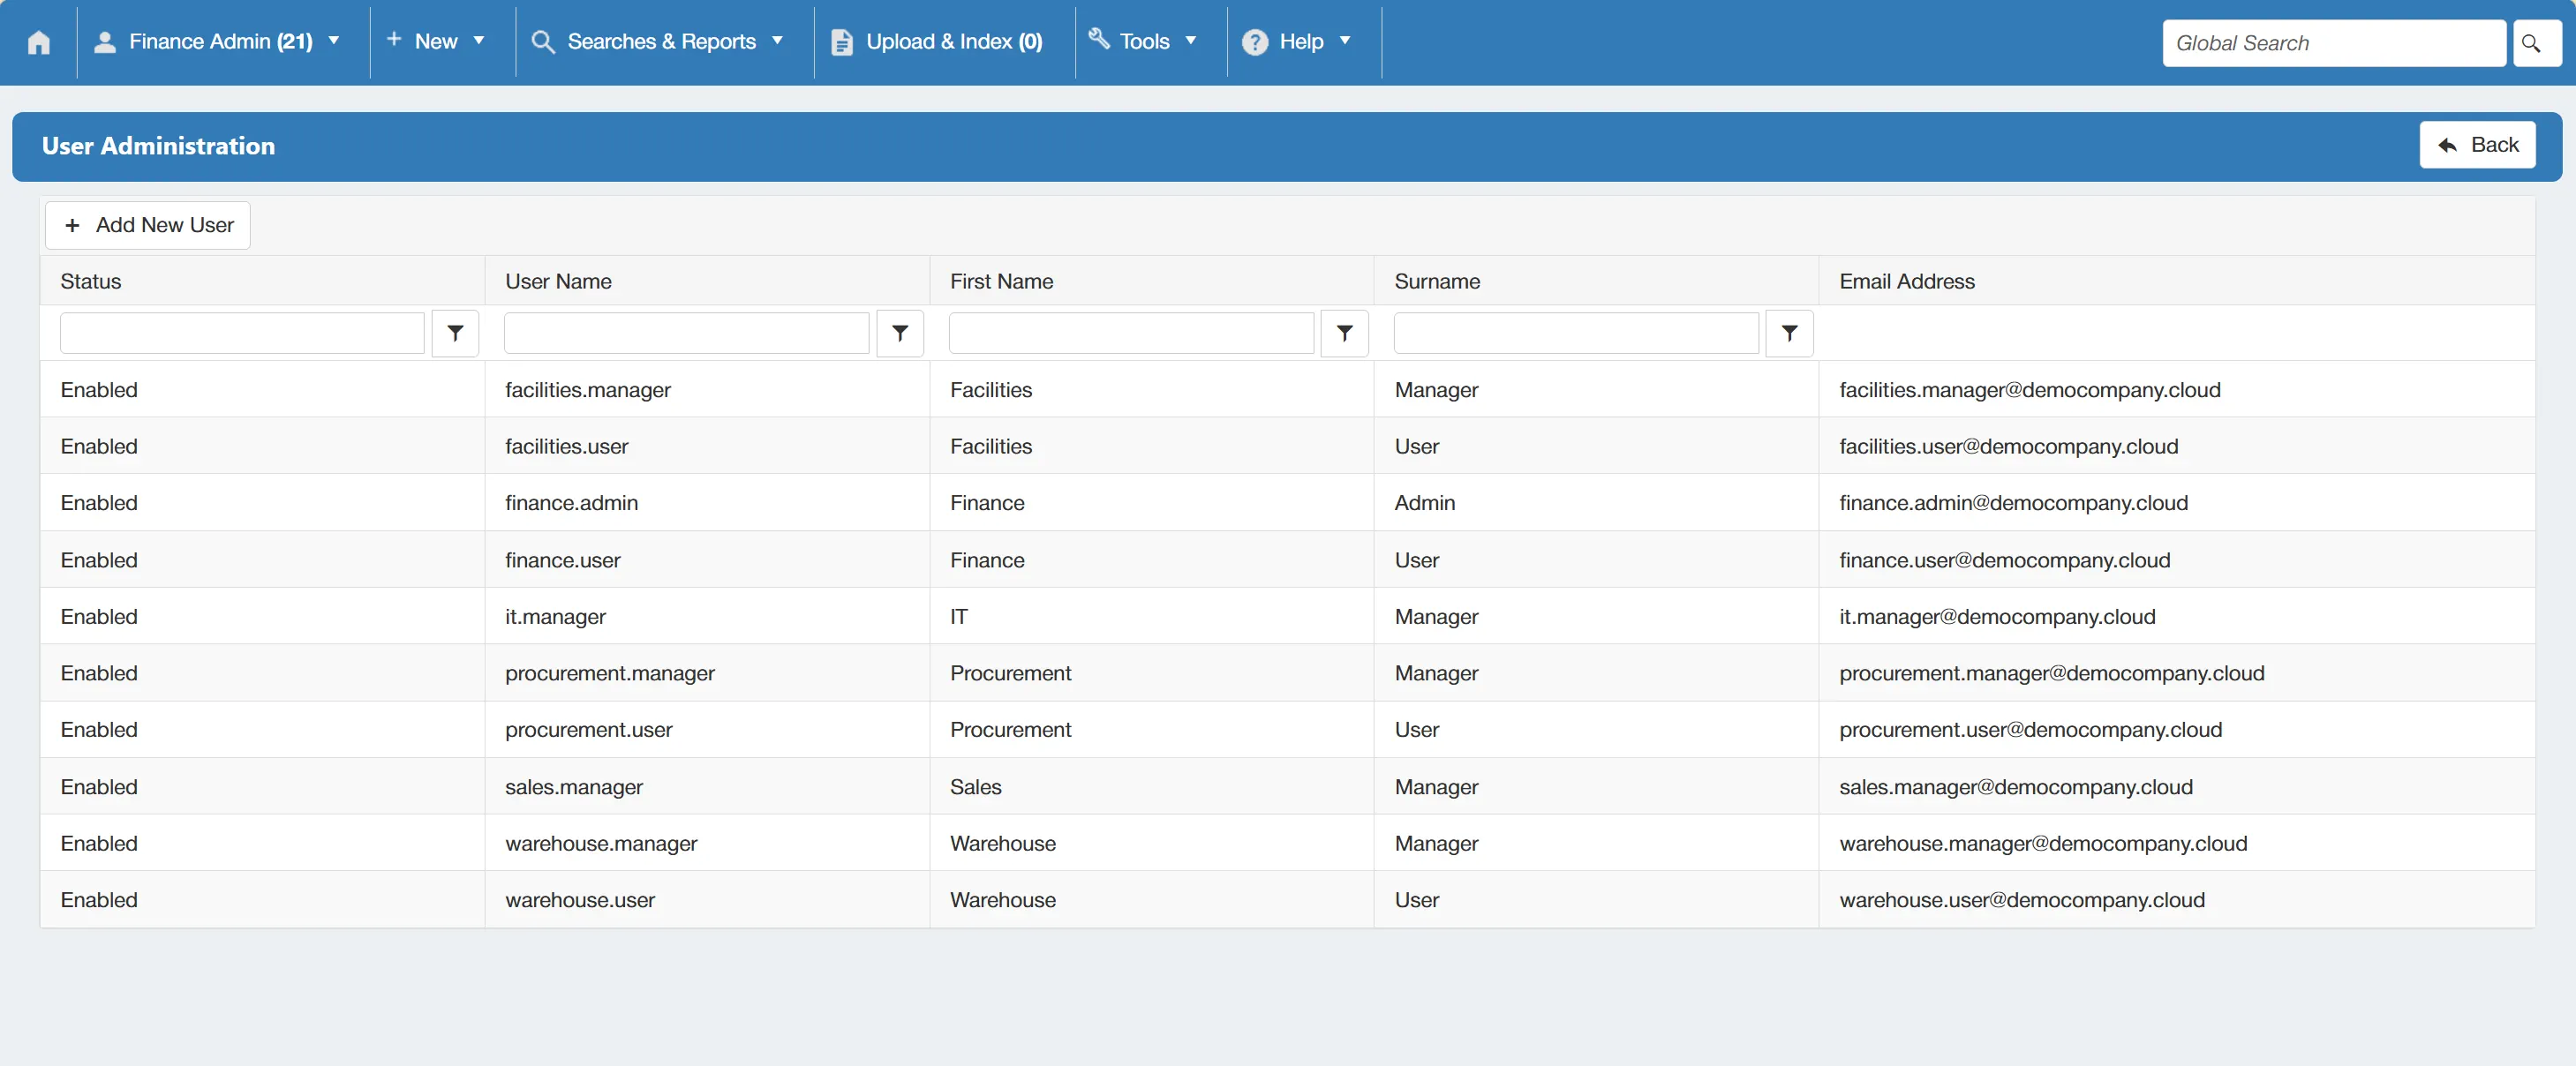
From this menu, you can carry out the following actions:
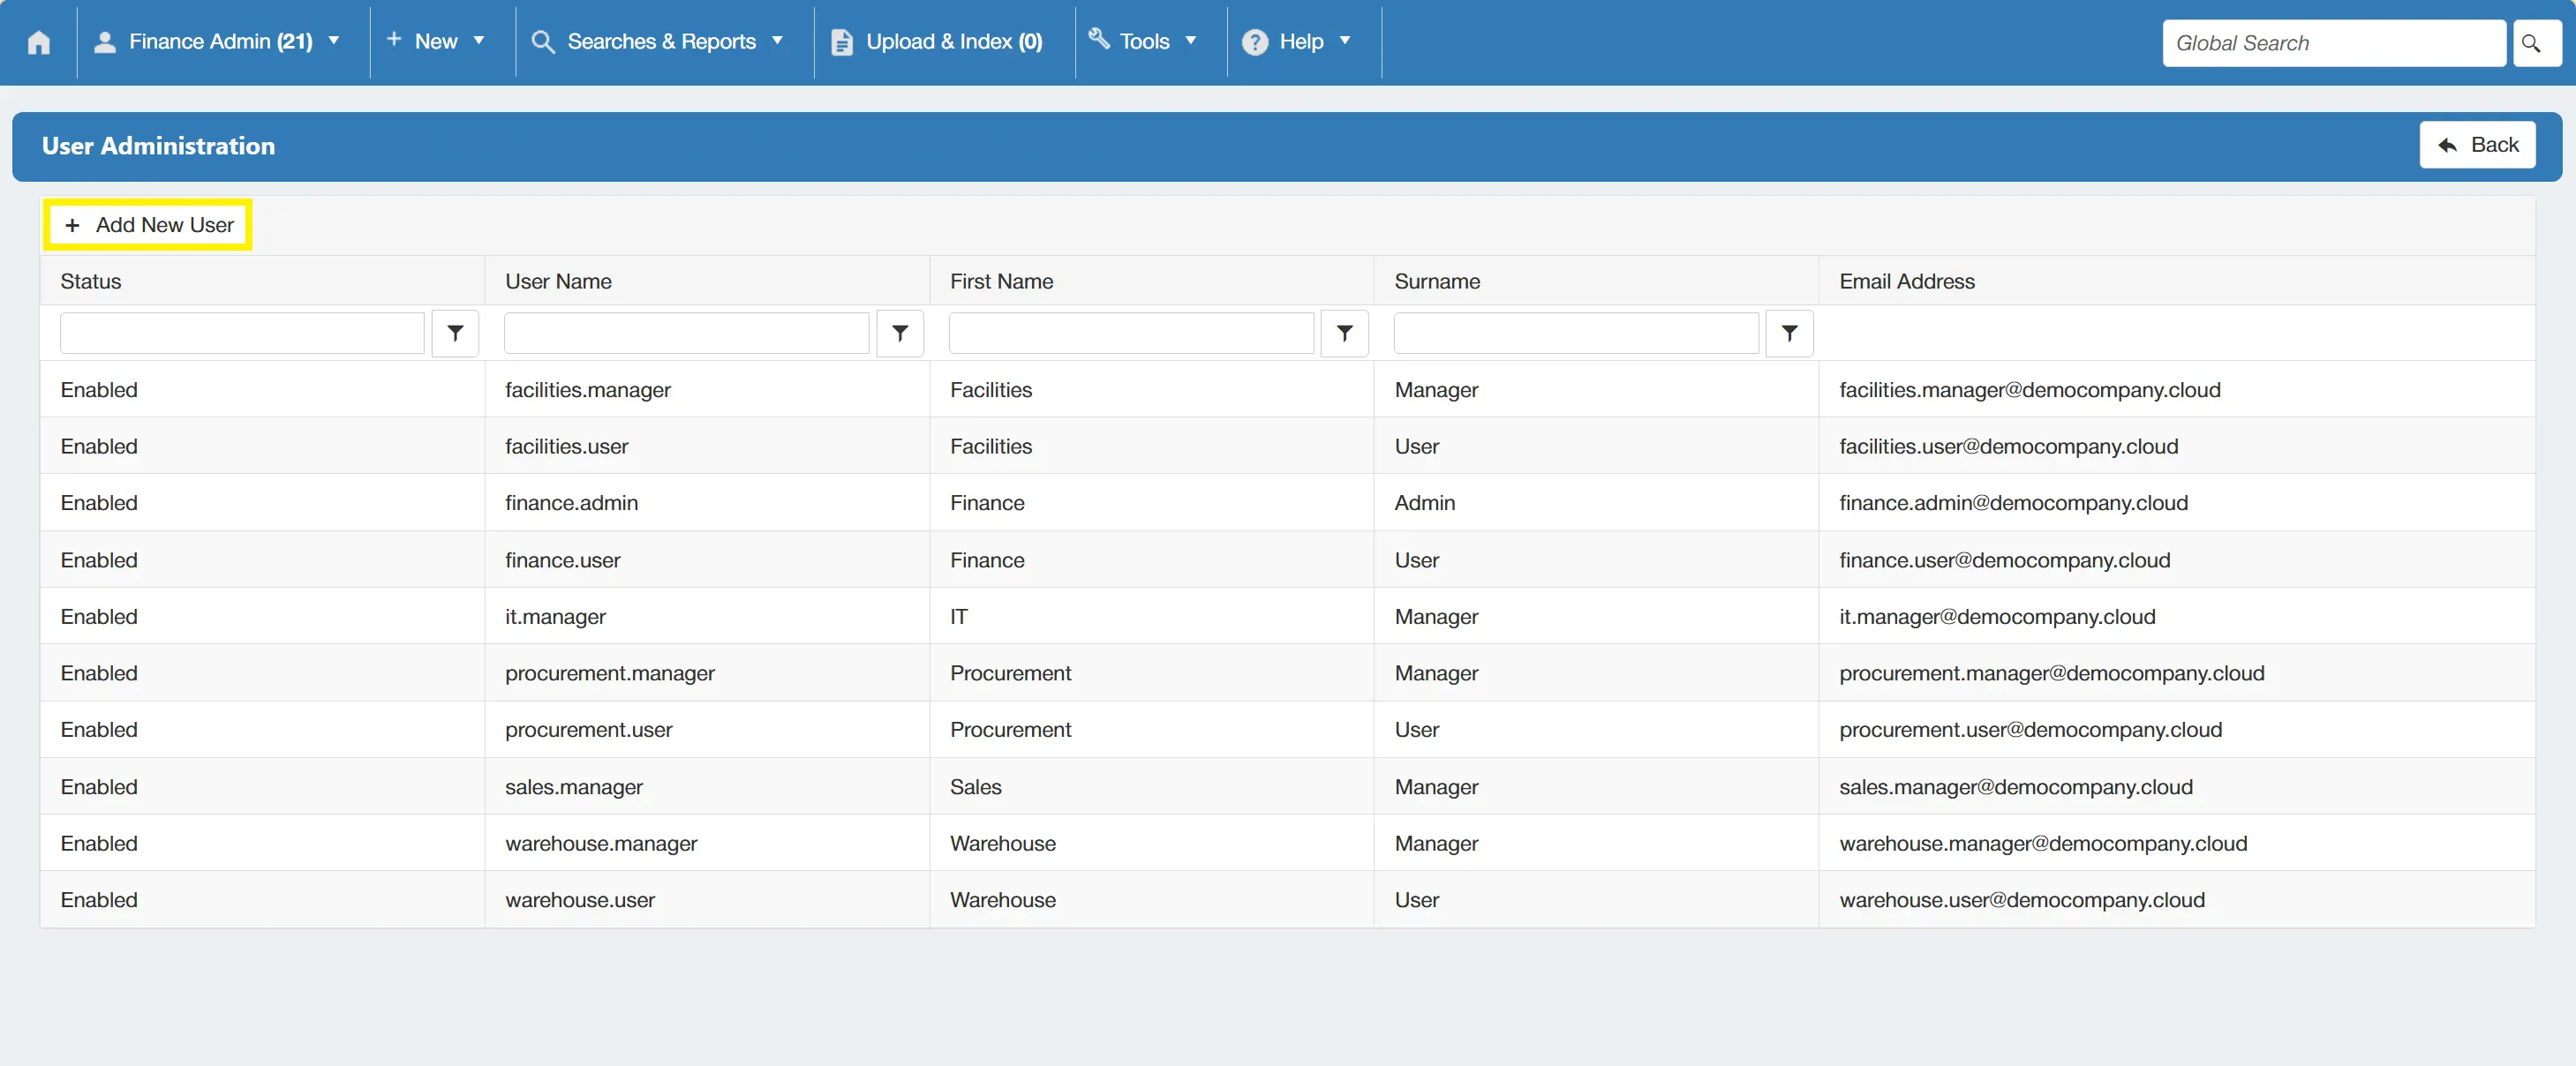
Add New Users
Add new users by clicking on the button.
You can then fill out the relevant details for the user including setting a username and password. You also have the option to enable MFA if required.
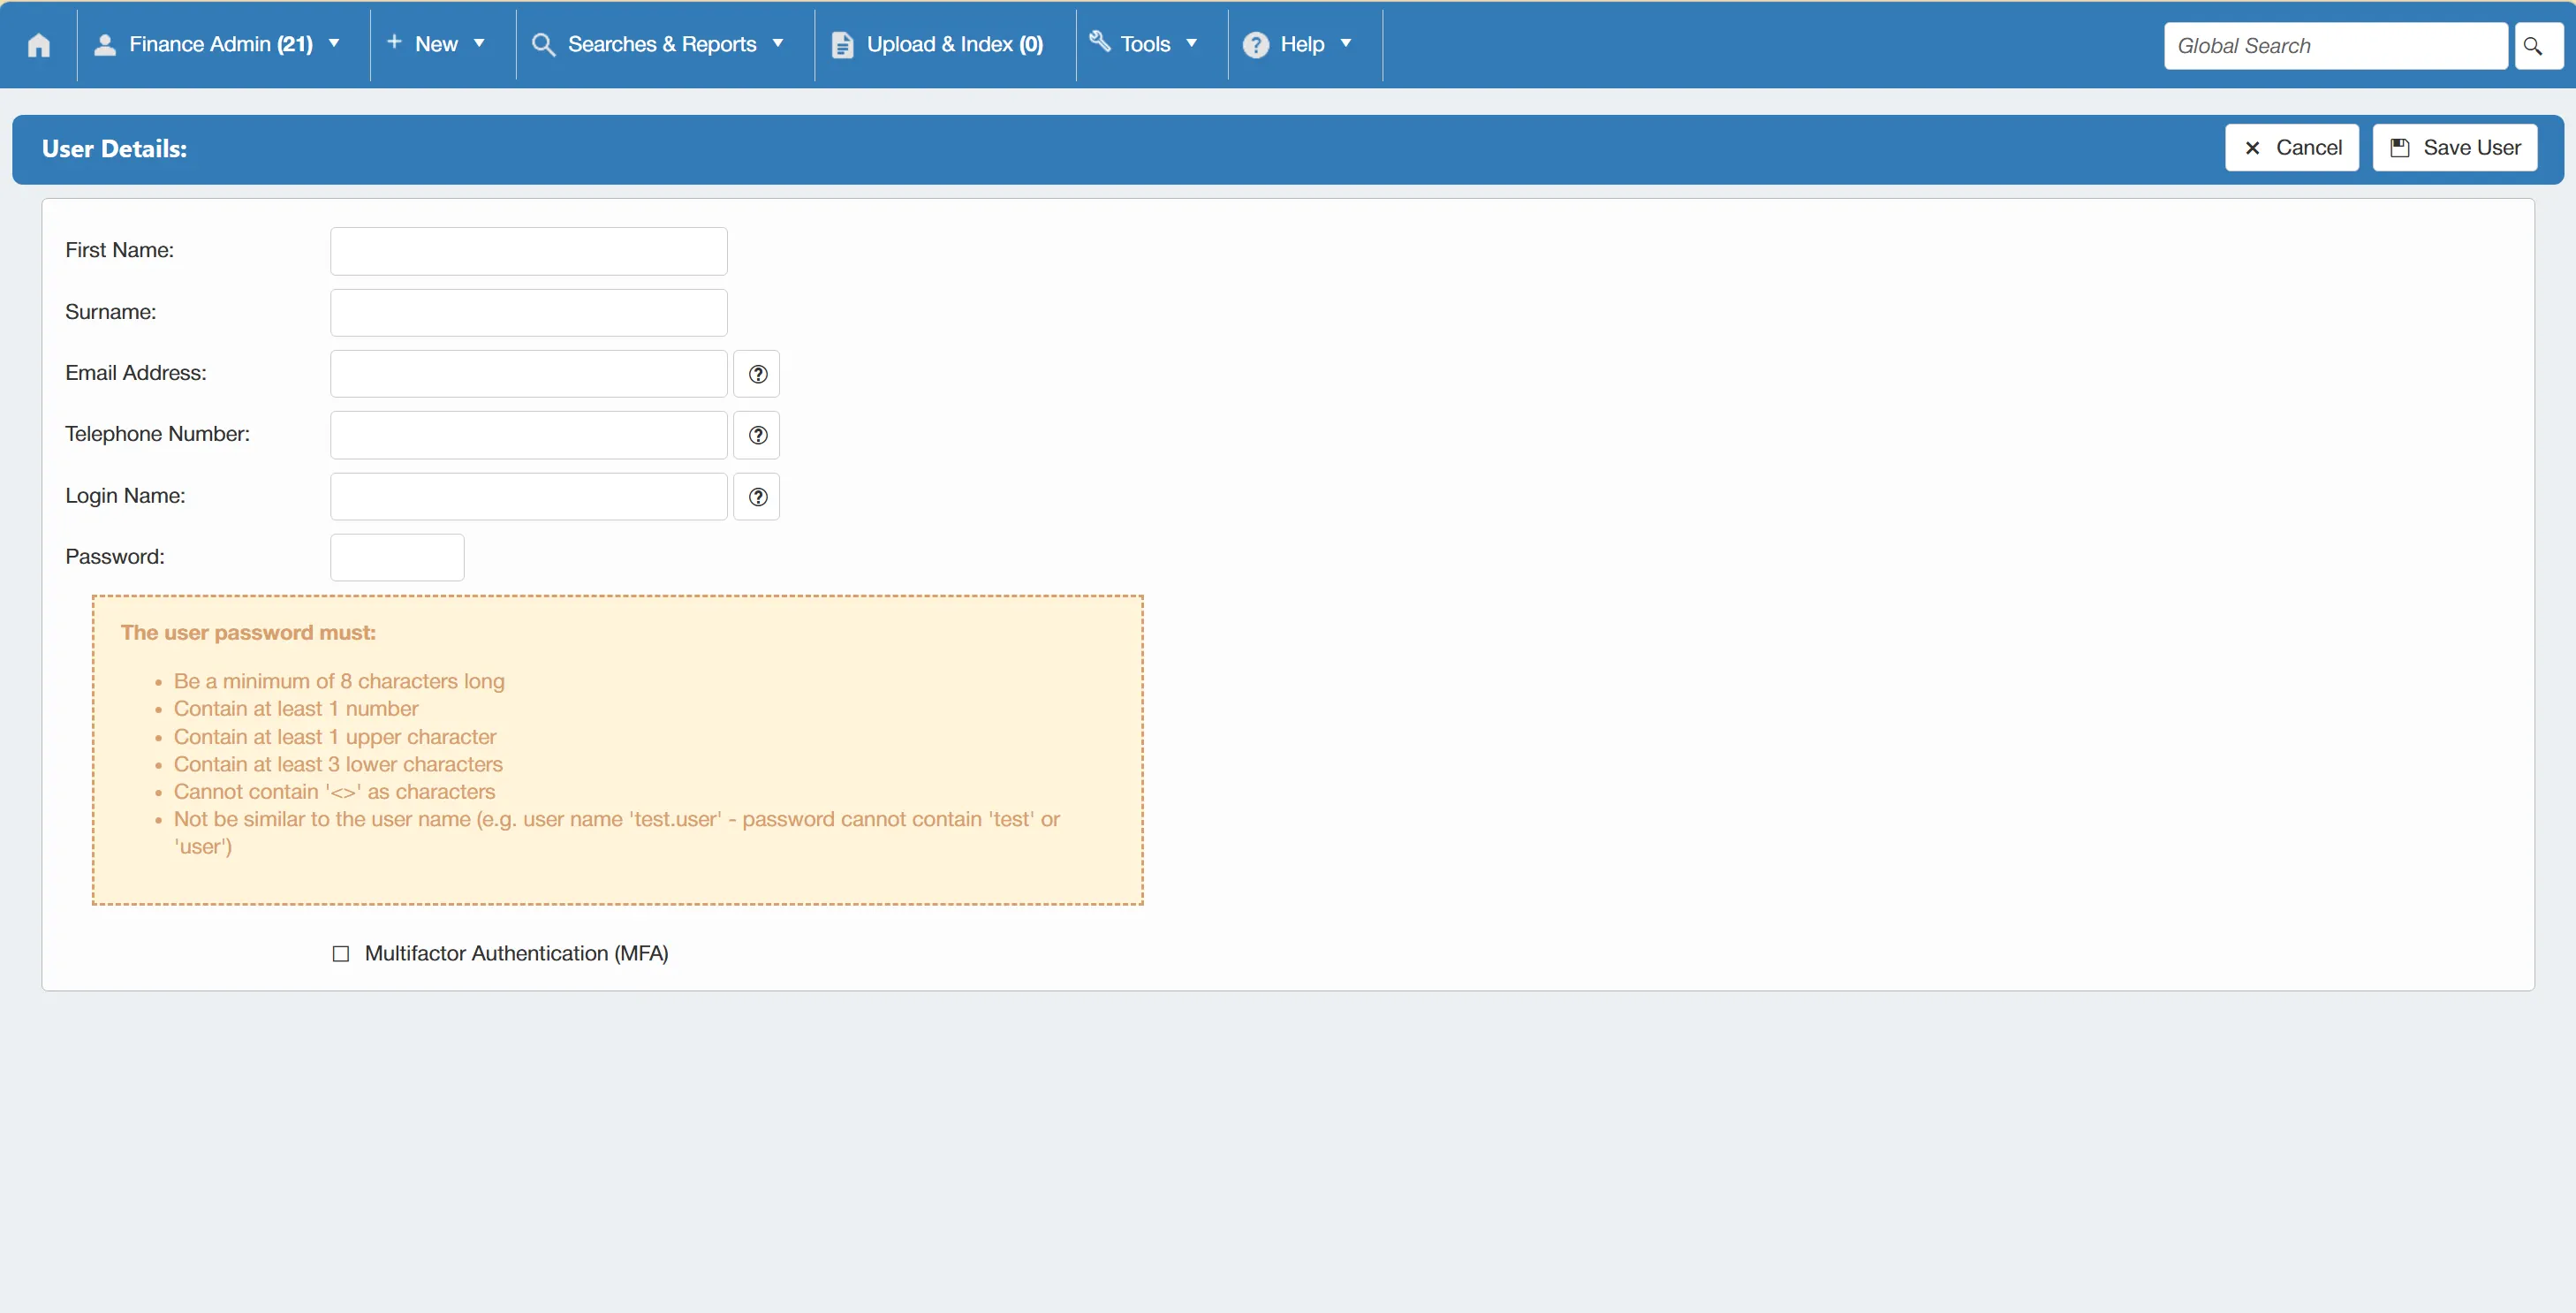
Once you are happy with the information, click to add the user to the system.
Edit Users
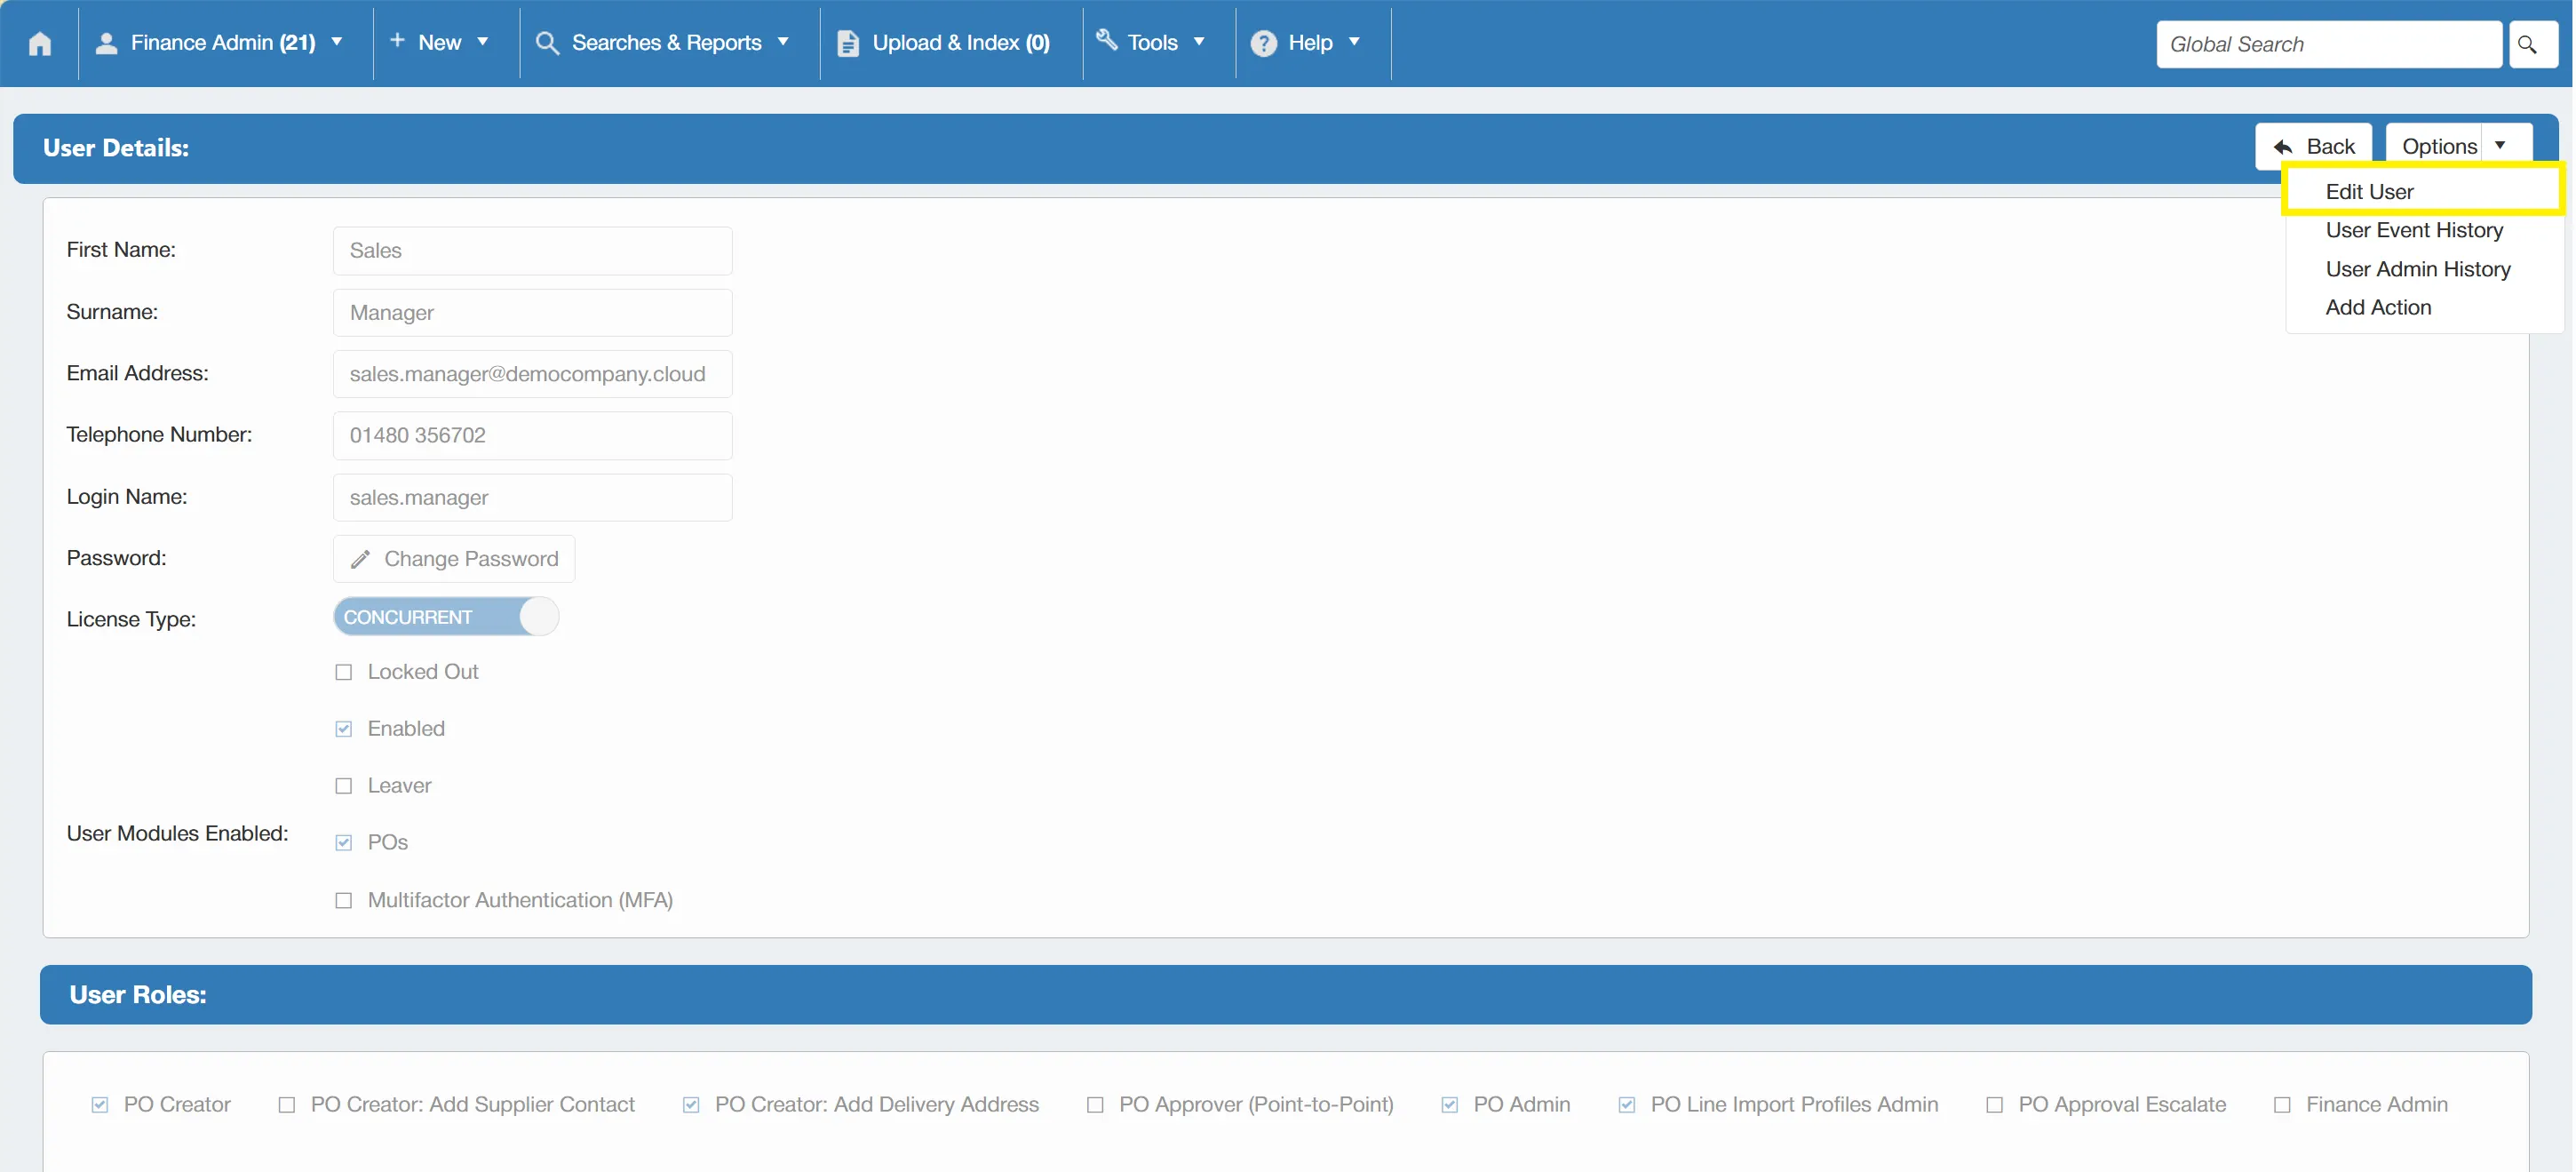
To edit a user, select the user from the User Admin List and select from the drop down menu. This unlocks the rest of the fields, enabling you to make changes.
Remember to click when you are done making changes!
Change User Permissions
With the option enabled, you can now change user permissions by ticking or un-ticking the relevant boxes.
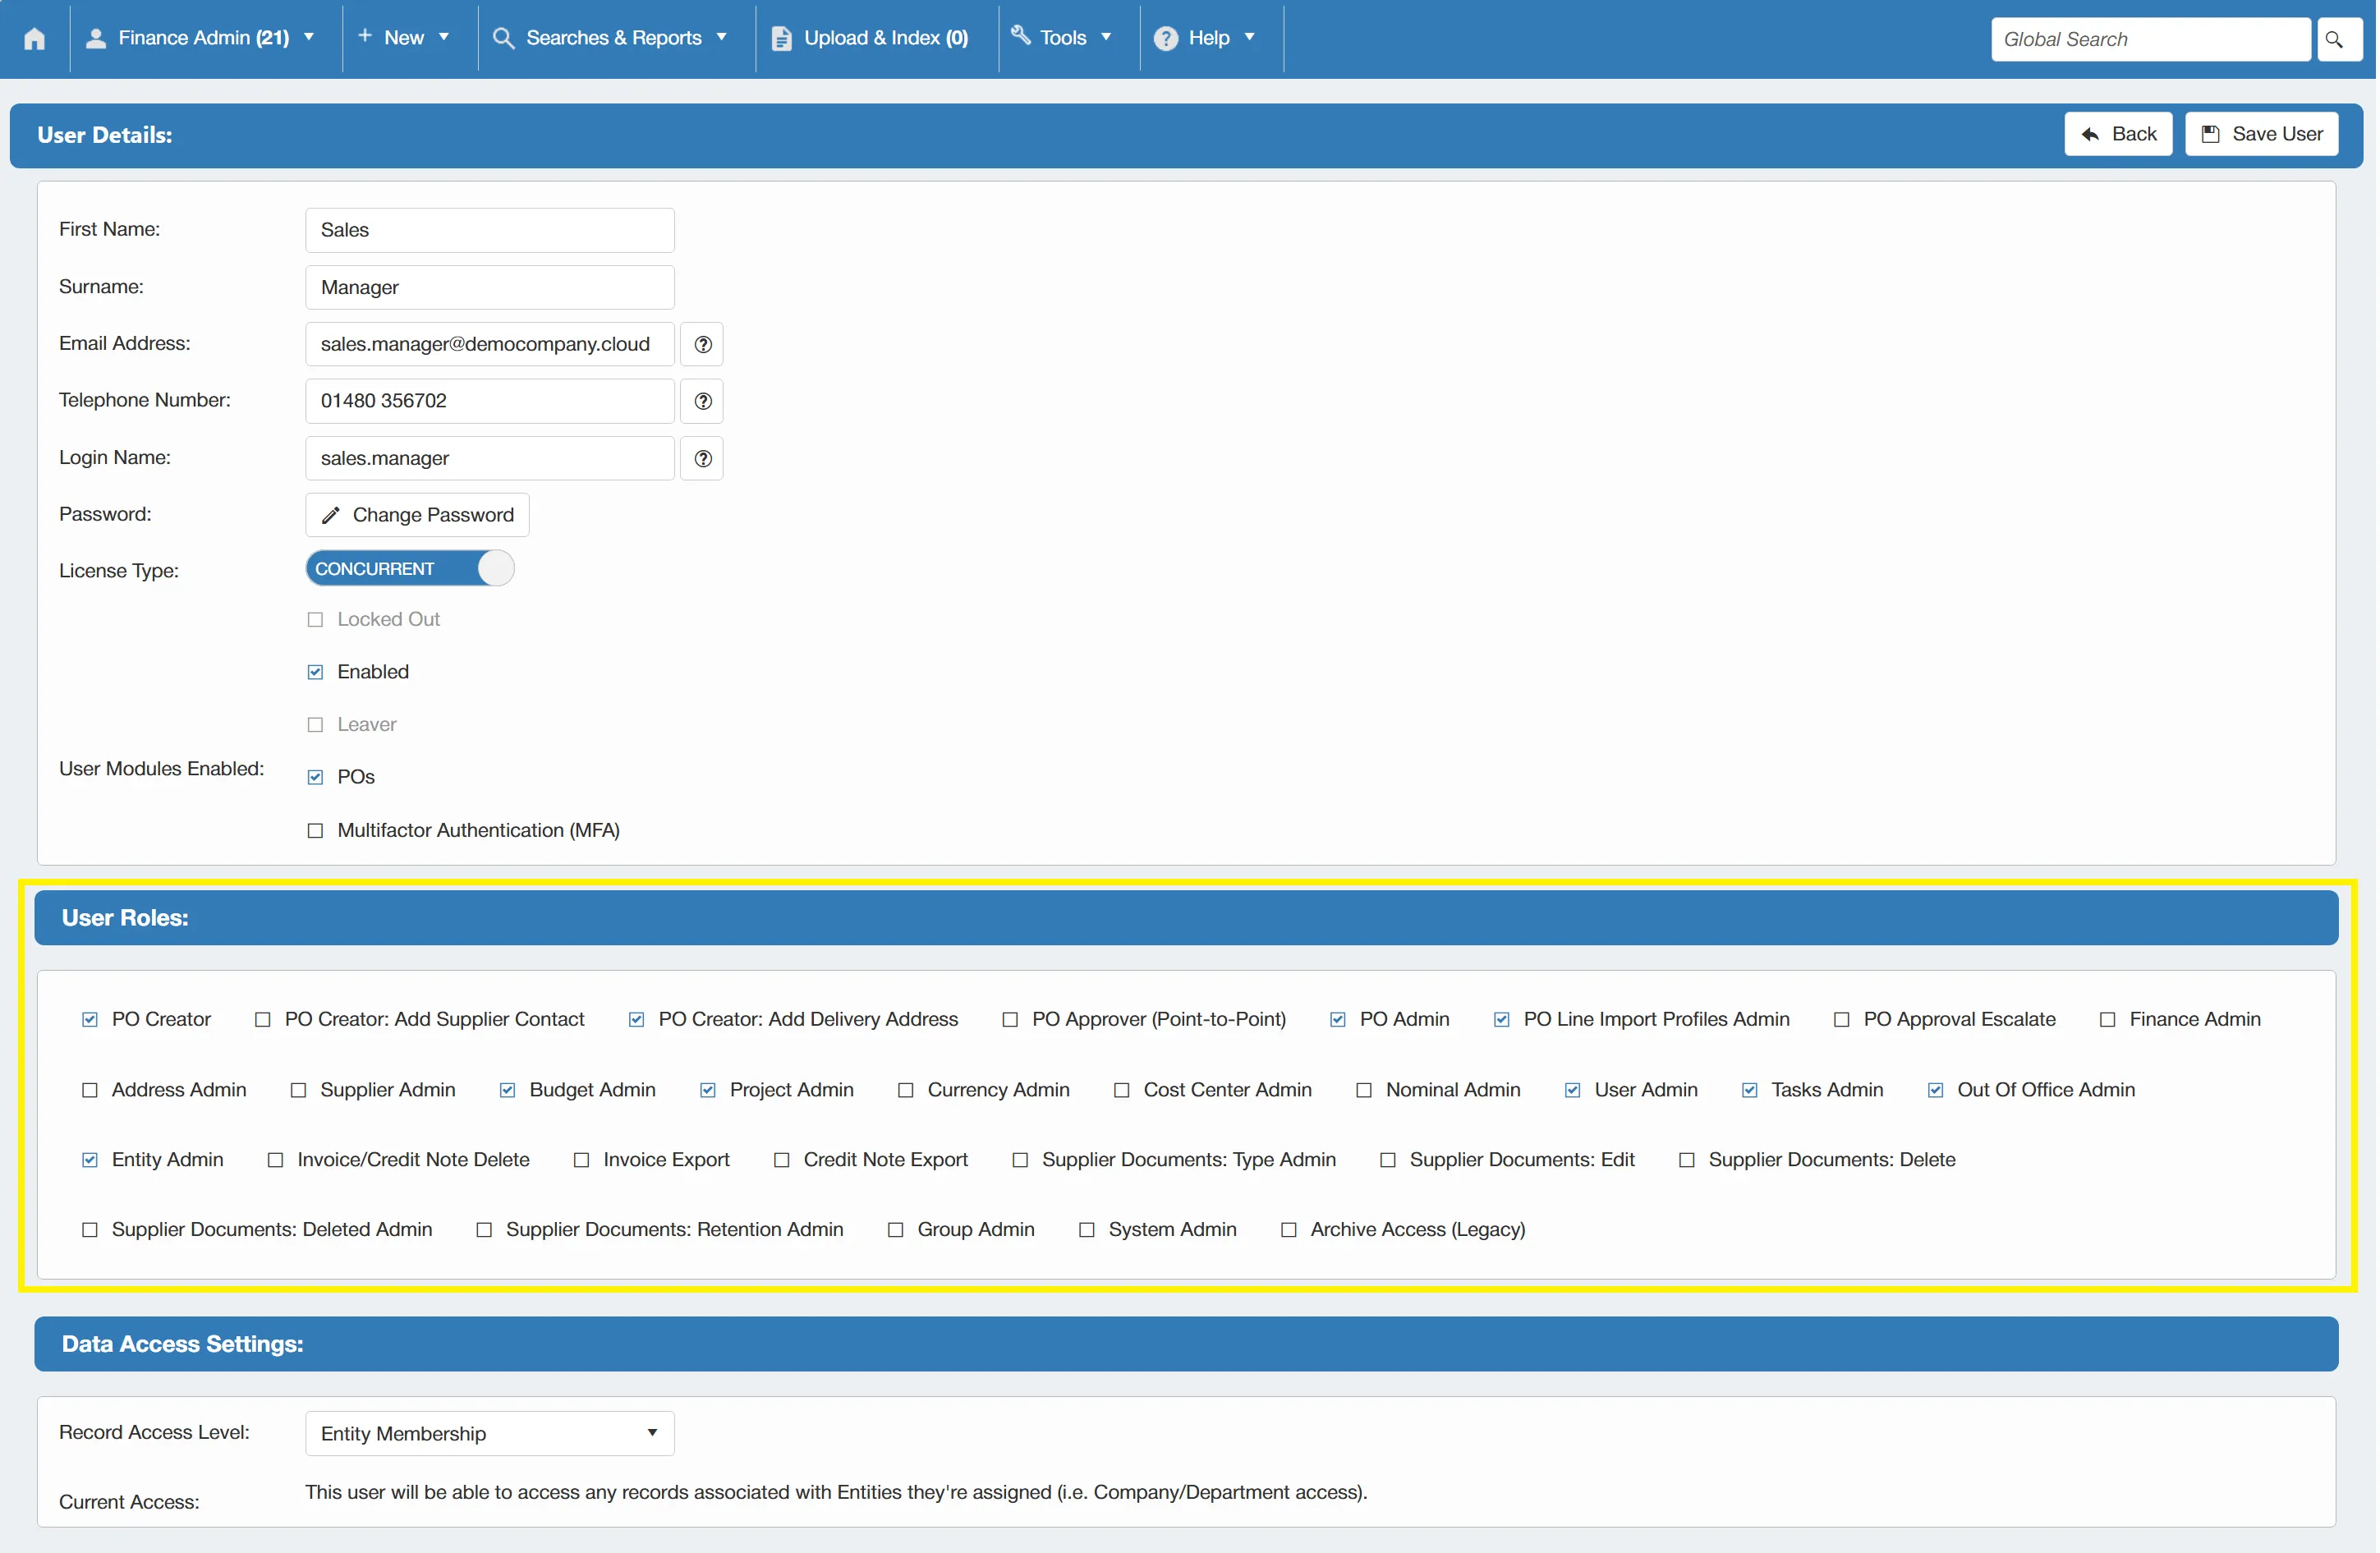
Only Power Users should be given access to high-level features such as Supplier Admin, Budget Admin and User Admin!
The User Permissions within the system are as follows:
- PO Creator: This dictates whether a user can create purchase orders.
- PO Creator: Add Supplier Contact: Users with this permission can add new supplier contacts whilst creating a PO, this is useful if the contact is not already added to the relevant supplier.
- PO Creator: Add Delivery Address: Users with this permission can add new delivery addresses whilst creating a PO, rather than being limited to the addresses already set up within the system.
- PO Approver (Point-to-Point): Users with this permission enabled will appear within the "1st Level Approver" field when other users create purchase orders. - This only takes effect when the system has 1st Level Point-to-Point Approval enabled. For more information on this feature, click here.
- PO Admin: This permission allows users to Edit/Re-submit Pending PO's on behalf of other users. It also allows them to manually Close and Un-Close PO's.
- PO Line Import Profiles Admin: Users with this permission enabled can add, edit, and delete PO Line Import Profiles.
- PO Approval Escalate: When a user has this permission enabled, they will be able to escalate any PO approval tasks to another user on an ad-hoc basis. They will also appear within the list for other users to escalate approval tasks to.
- Finance Admin: Dictates whether or not a user can index invoices or credit notes.
- Address Admin: Users with this permission can add/edit delivery and invoice addresses.
- Supplier Admin: Users with this permission can add/edit supplier accounts, terms, and price lists.
- Budget Admin: Users with this permission can add/edit budgets.
- Project Admin: Users with this permission can add/edit projects
- Currency Admin: Users with this permission can update, edit and view currency exchange rates.
- Cost Center Admin: Users with this permission can add/edit cost centers.
- Nominal Admin: Users with this permission can add/edit nominal codes.
- User Admin: Users with this permission can add/edit other users within the system.
- Tasks Admin: Users with this permission can access the Workflow Tasks section, where they can re-assign tasks on behalf of other users.
- Out Of Office Admin: Users with this permission can set Out Of Office on behalf of other users.
- Entity Admin: This permission enables the user to add/edit various entities within the system such as Companies, Branches, and Departments.
- Invoice/Credit Note Delete: This permission allows users to delete invoices and delete credit notes.
- Invoice Export: Users with this permission can carry out invoice exports.
- Credit Note Export: Users with this permission can carry out credit note exports.
- Supplier Documents: Type Admin: This permission allows users to create and edit supplier document types. This feature is only applicable to systems with the Supplier Documents module enabled.
- Supplier Documents: Edit: This permission enables users to edit supplier document properties. This feature is only applicable to systems with the Supplier Documents module enabled.
- Supplier Documents: Delete: This permission enables users to delete supplier documents. This feature is only applicable to systems with the Supplier Documents module enabled.
- Supplier Documents: Deleted Admin: This permission grants the user access to the Deleted Supplier Docs Admin section of the system.
- Supplier Documents: Retention Admin: This permission grants the user access to the Supplier Docs Retention Admin section.
- Group Admin: Users with this permission can set up and edit user groups.
- System Admin: The System Admin permission allows users to make changes to key items such as Tax Codes, Payment Methods, Unit Types, and Contacts.
- Archive Access (Legacy): Users with this permission enabled can access the archive section of the system.
Change User Passwords
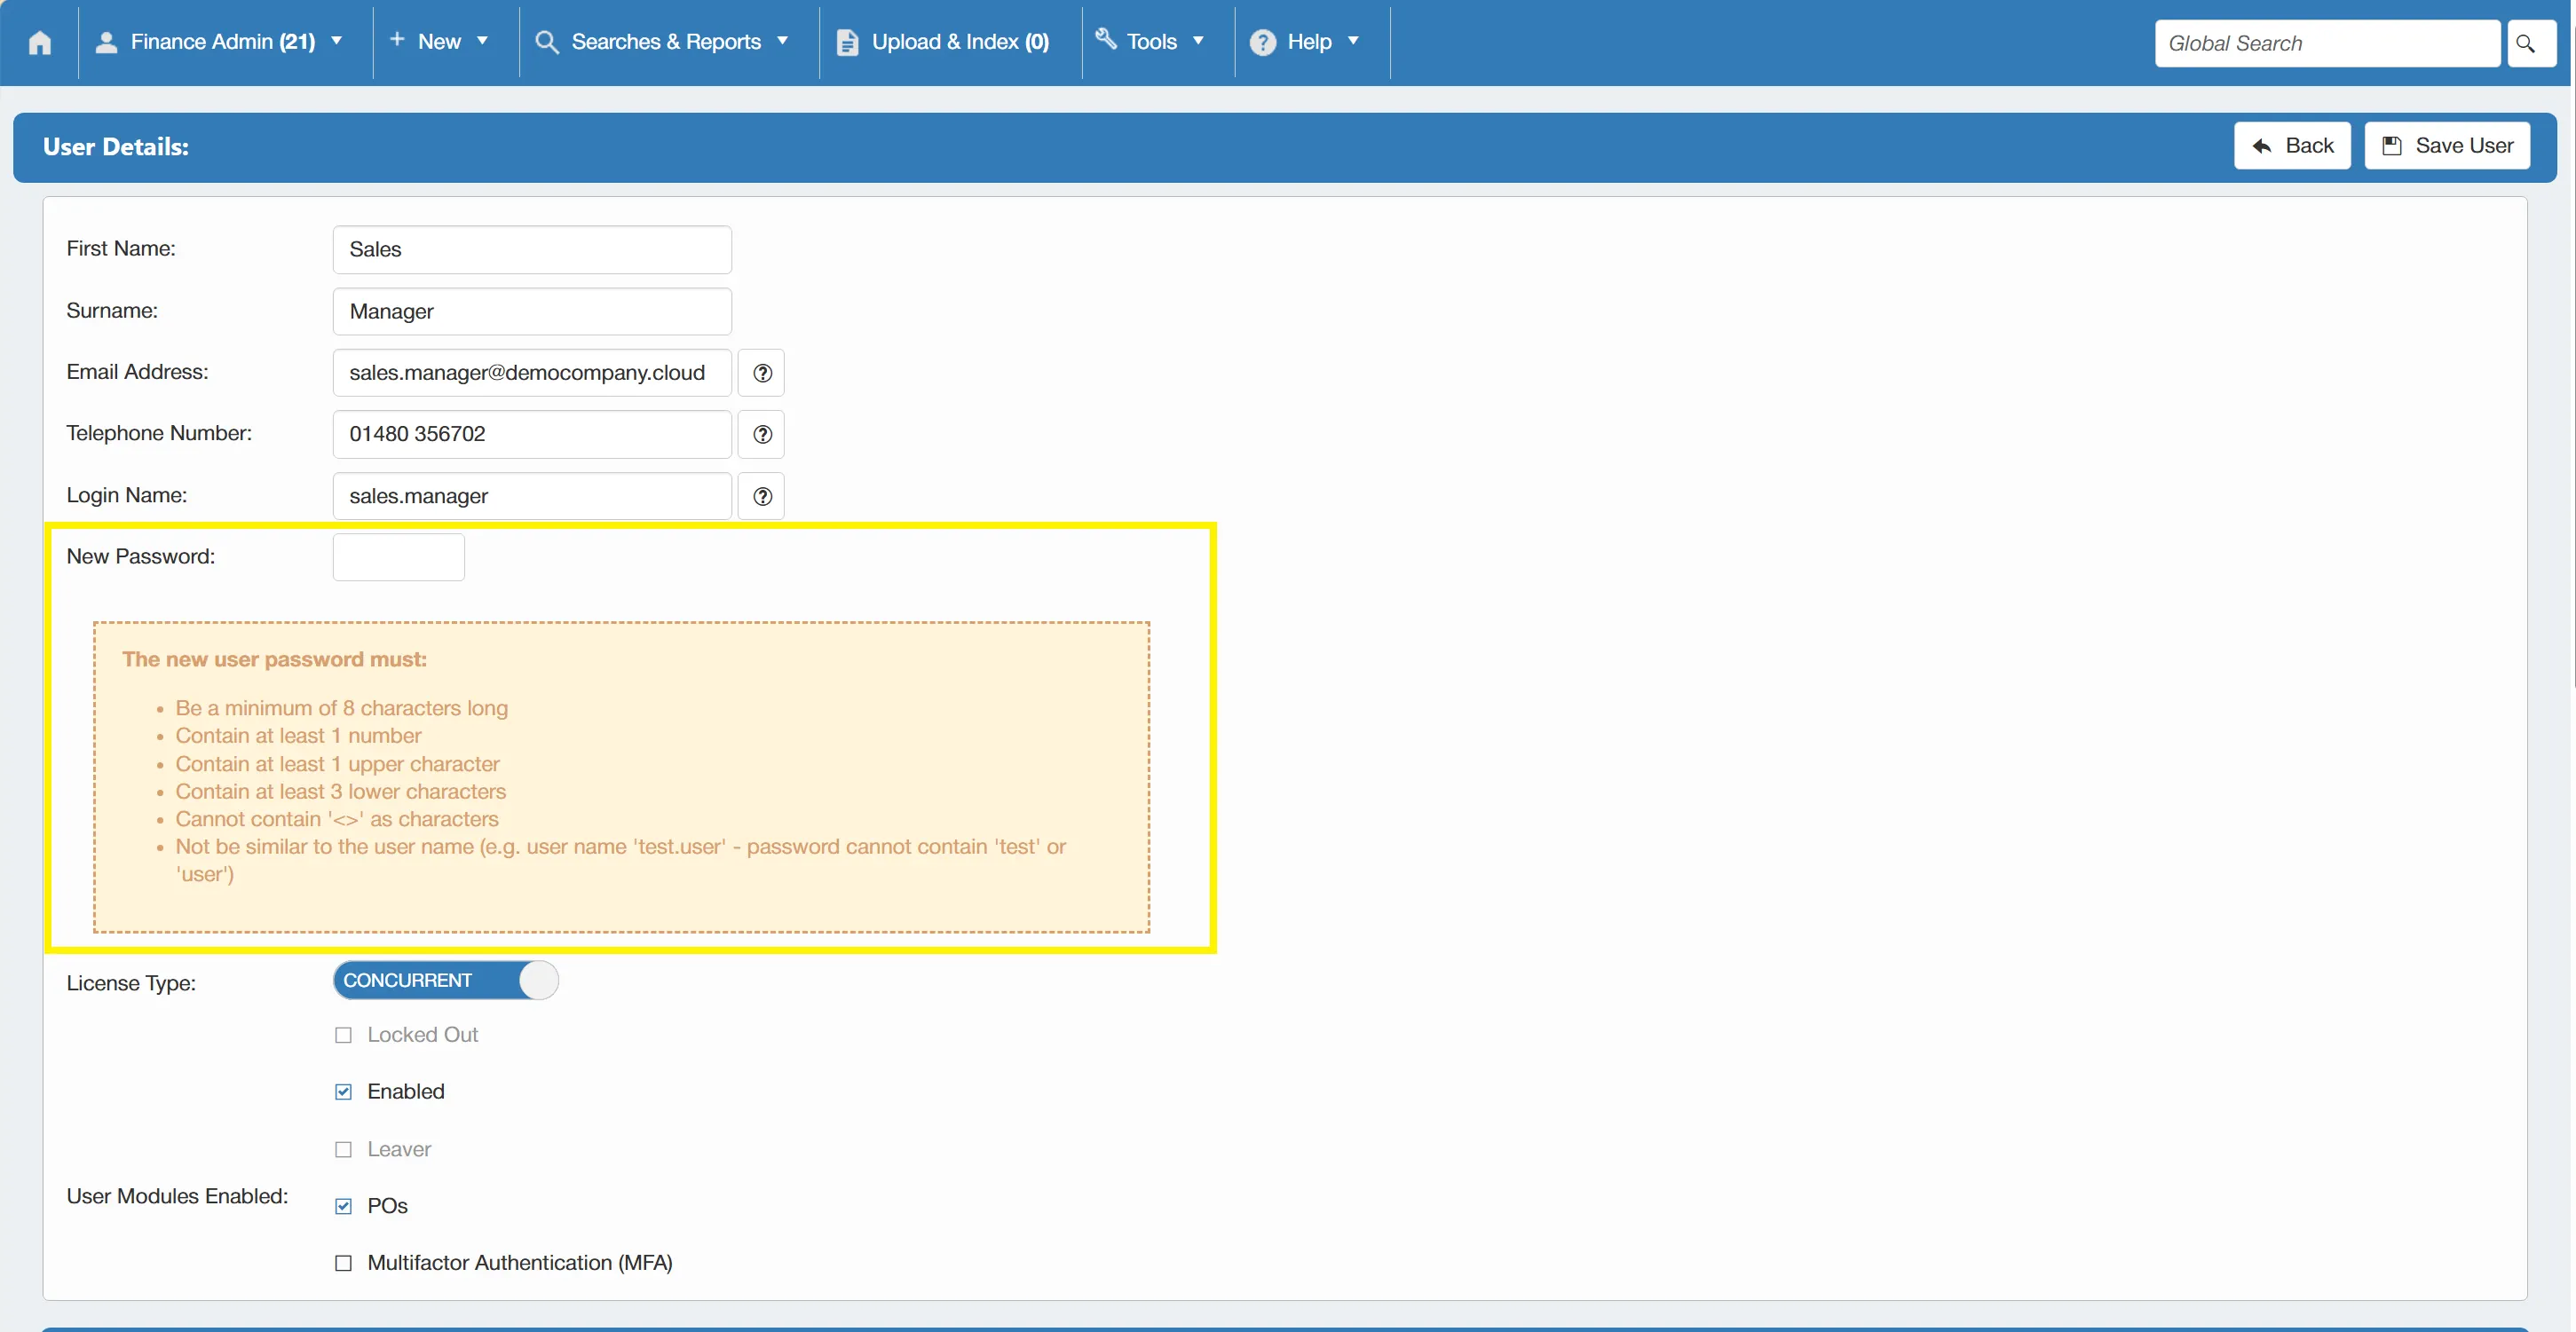
To change a user's password, ensure that is enabled and simply click . You can then enter the new password and click when you are happy.
Change User License Type
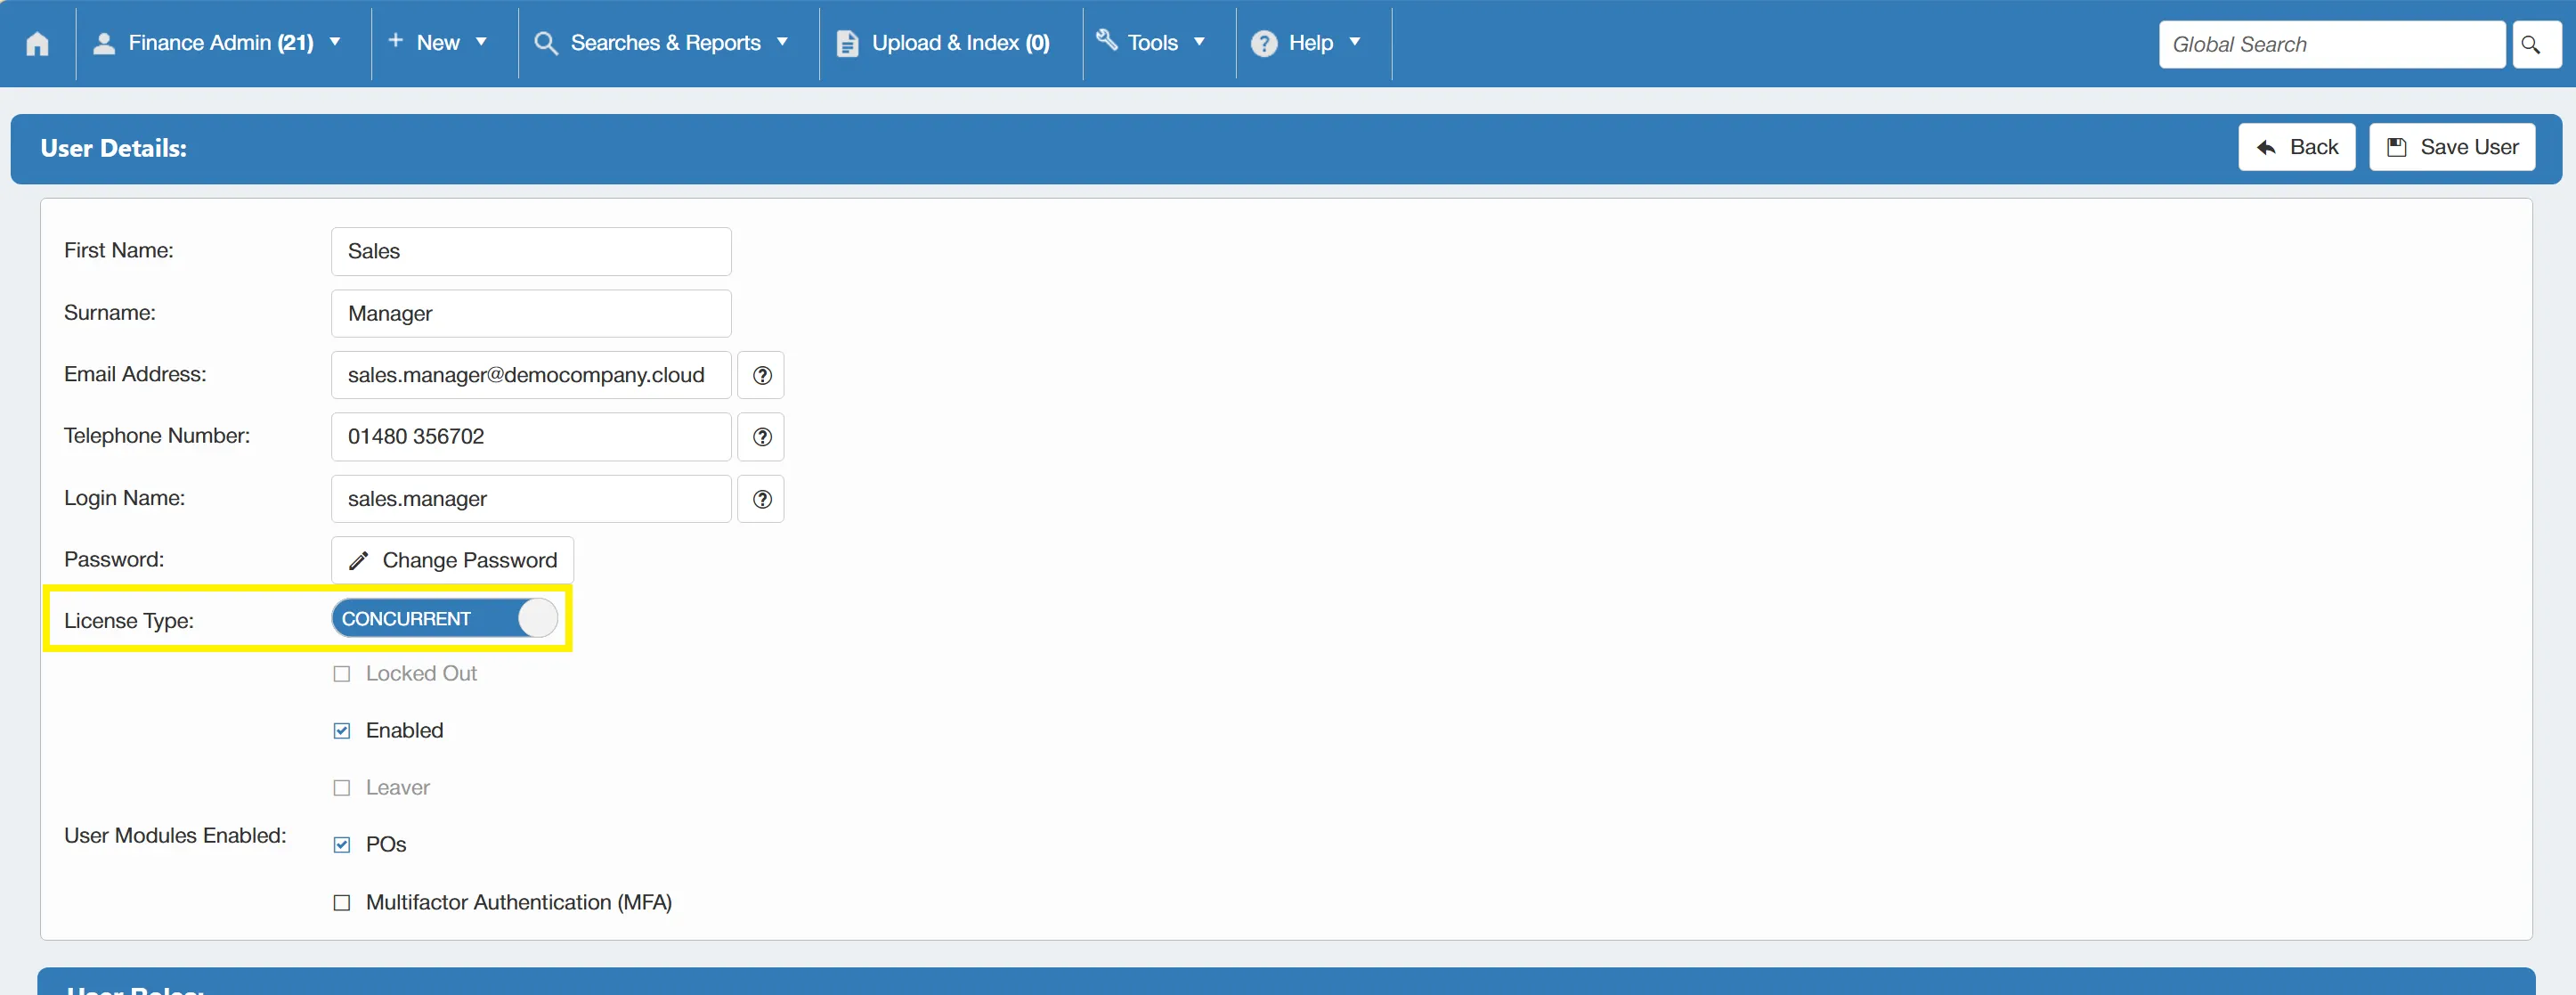
To change a user's license type, simply click on the toggle. This allows you to switch between a Concurrent license and a Seat license.
Concurrent License
- Concurrent licenses are shared between users and dictate the number of users that can access the system simultaneously. For example, if a system has three concurrent licenses, then three users can access at the same time. If a fourth user tries to access the system when the other licenses are in use, they will not be able to do so.
Seat License
- Seat licenses are tied to a specific user and therefore allows them to access the system at any time, regardless of how the other concurrent licenses are being used. This is the setting applied for Super User Licenses.
Once you are happy with your selection, then click to finalise this.
Unlocking User Accounts
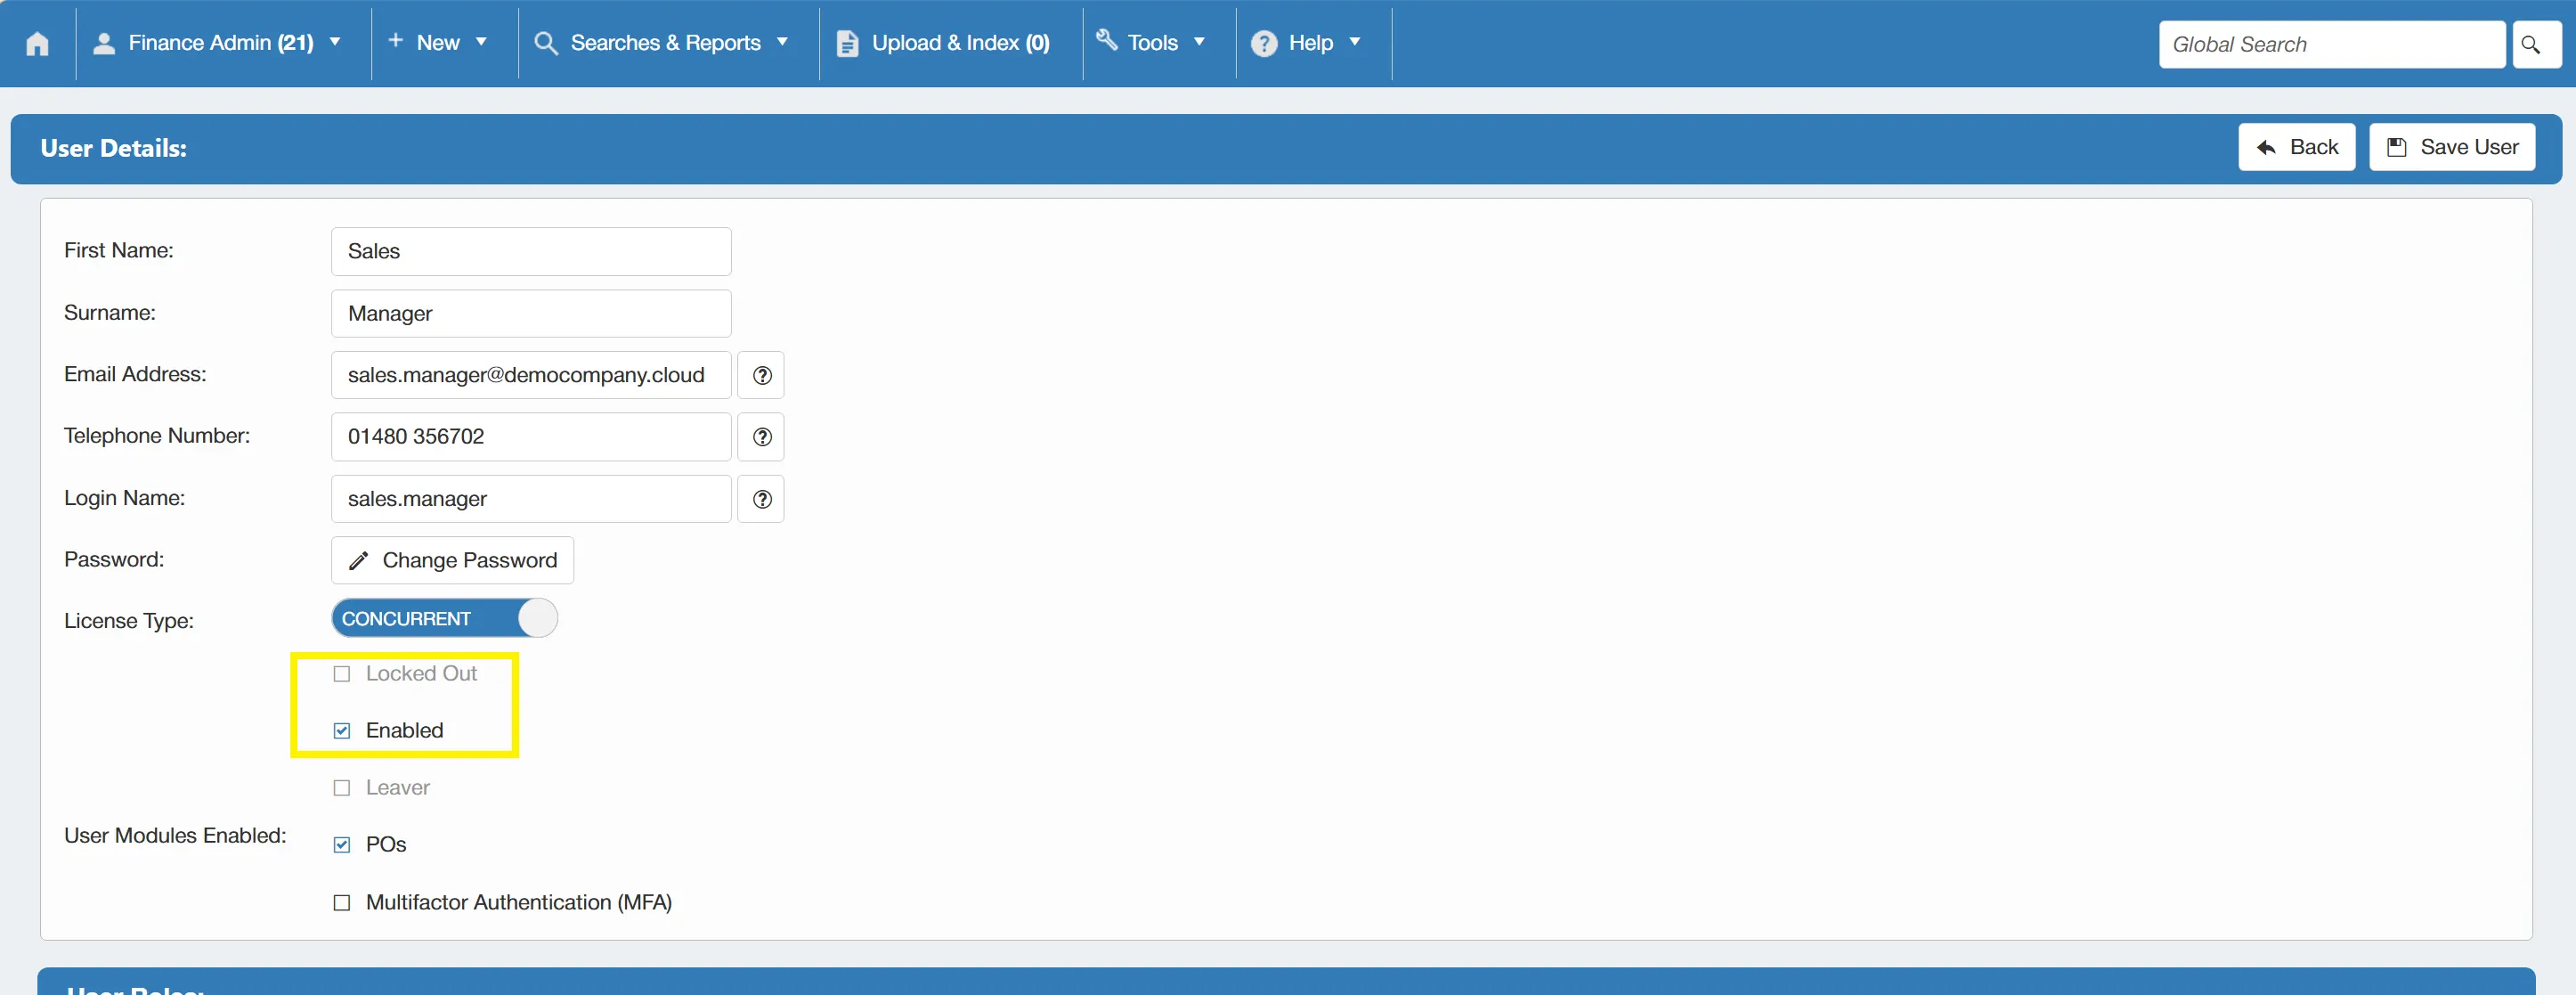
After too many unsuccessful log-in attempts, a user will be locked out of their account. To unlock a user's account, the power user can simply find the user on the User Admin list, enable the option from the drop-down list and then un-tick whilst ensuring the is ticked. Finally, click to finalise this change.
Enabling MFA
To enable Multi-factor Authentication (MFA) on a user's account, ensure is enabled and simply tick . A new drop down MFA Mode will appear, this allows you to determine whether you would like to use Email MFA only or an Authenticator App.
You also have the option to .
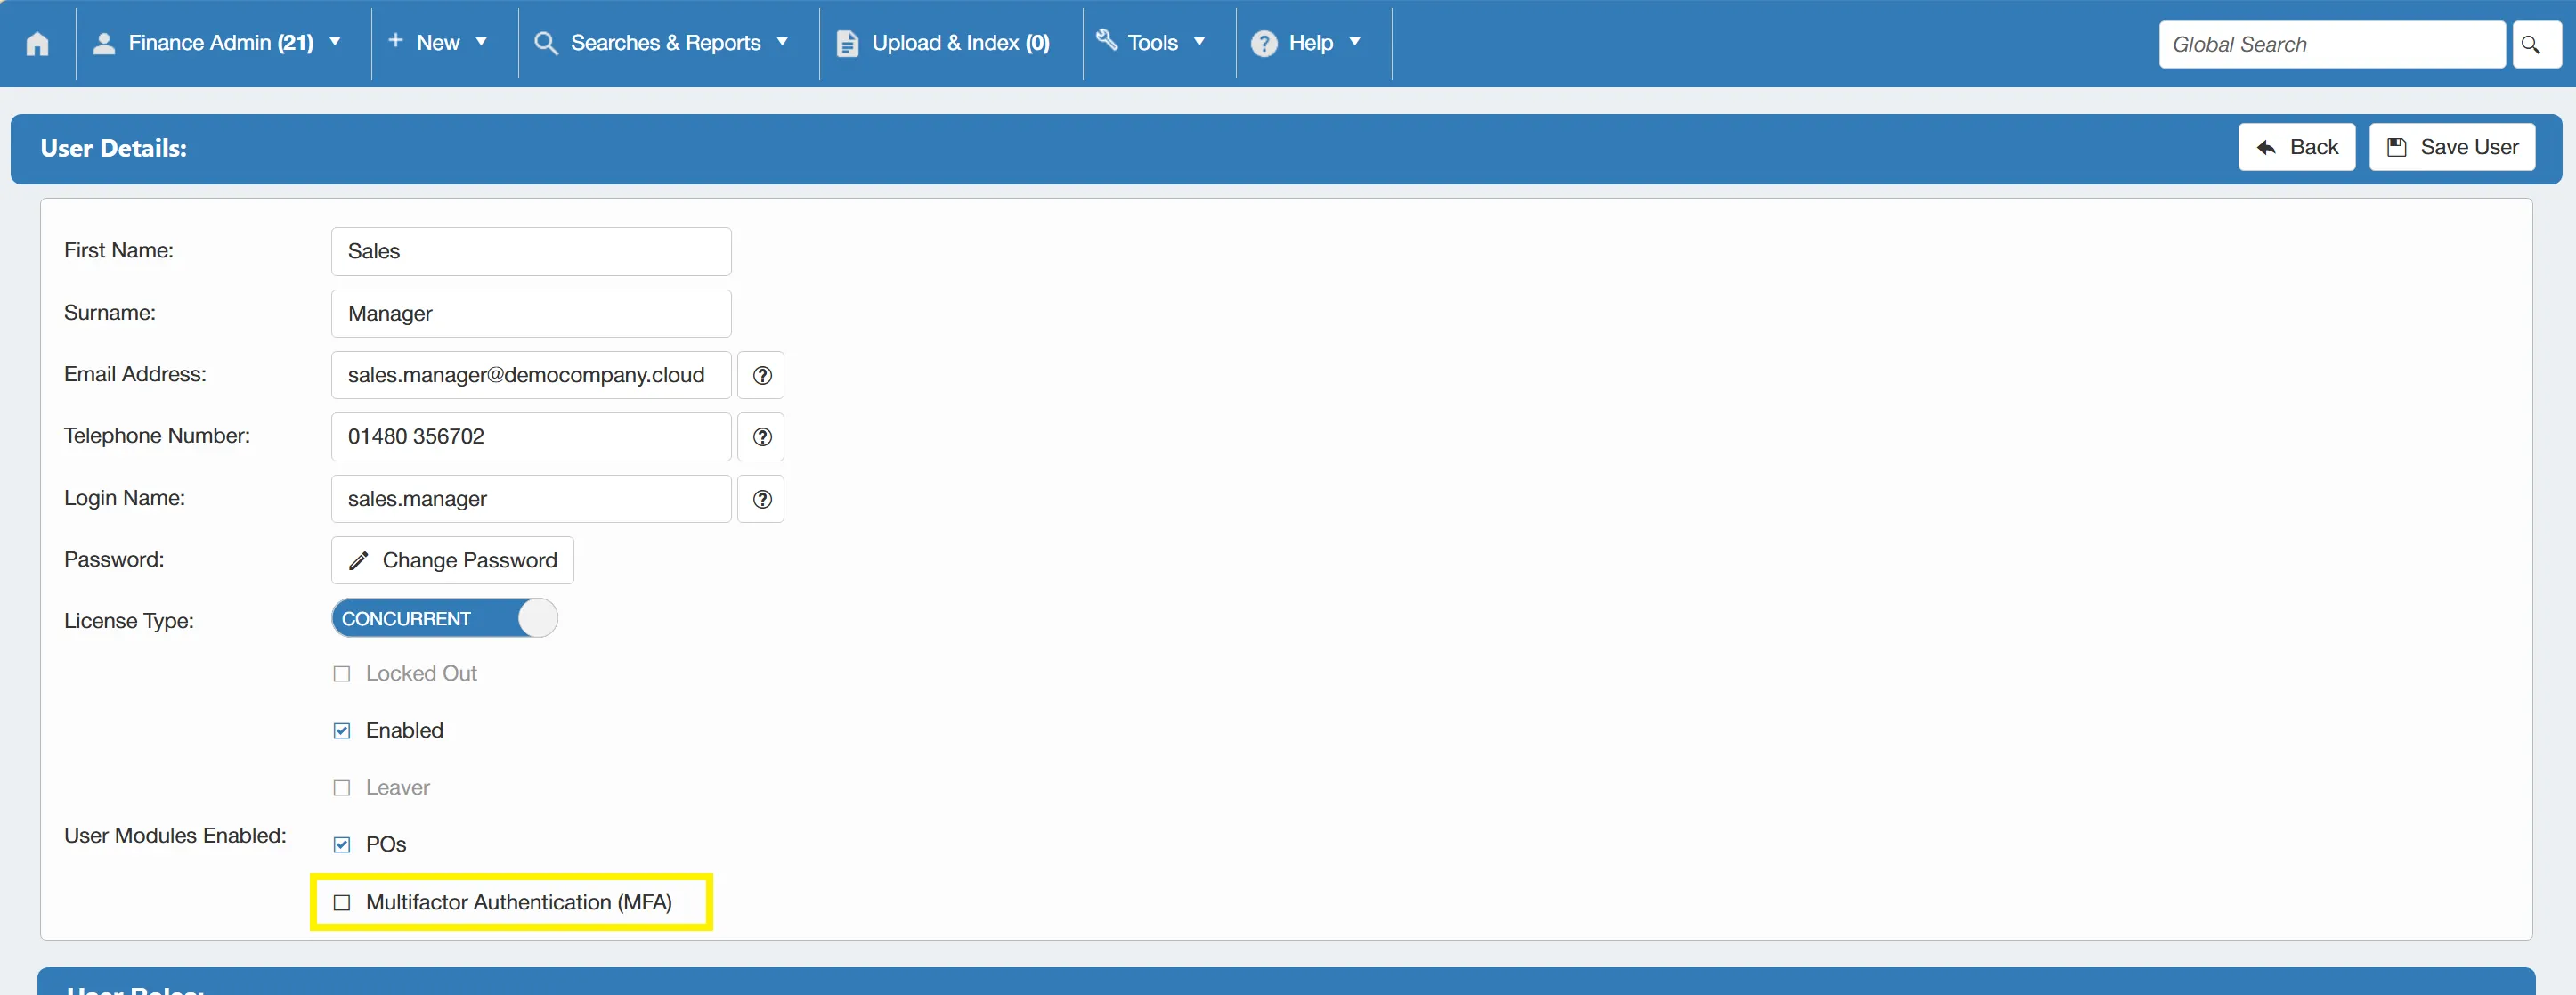
Once you are happy with the selection, click to finalise the changes.
Amending User Data Access Settings
Whilst viewing a user with the option enabled, you can configure the user's Data Access Settings. To do this, scroll down to the Data Access Settings section and from here you can change the Record Access Level.

Entity Membership gives a user access to any records associated with Entities they're assigned to (i.e. Company/Department access).
Own Only will only give the user access to Purchase Orders that they have created, along with associated records.
Once you are happy with your selection, click to finalise this.
Amending User Data Roles
You can also configure the user's Data Roles. With the option enabled, simply tick or un-tick the relevant roles to provide the user access to the desired data. (This will override the Data Access Settings).

Click to finalise the options.
Changing a User's Department
To change a user's department, ensure the option is enabled and scroll down to the User Departments section. From here, you can add and remove departments.
To add a department, click the button.

This opens a new window showing the available departments that can be assigned to this user.
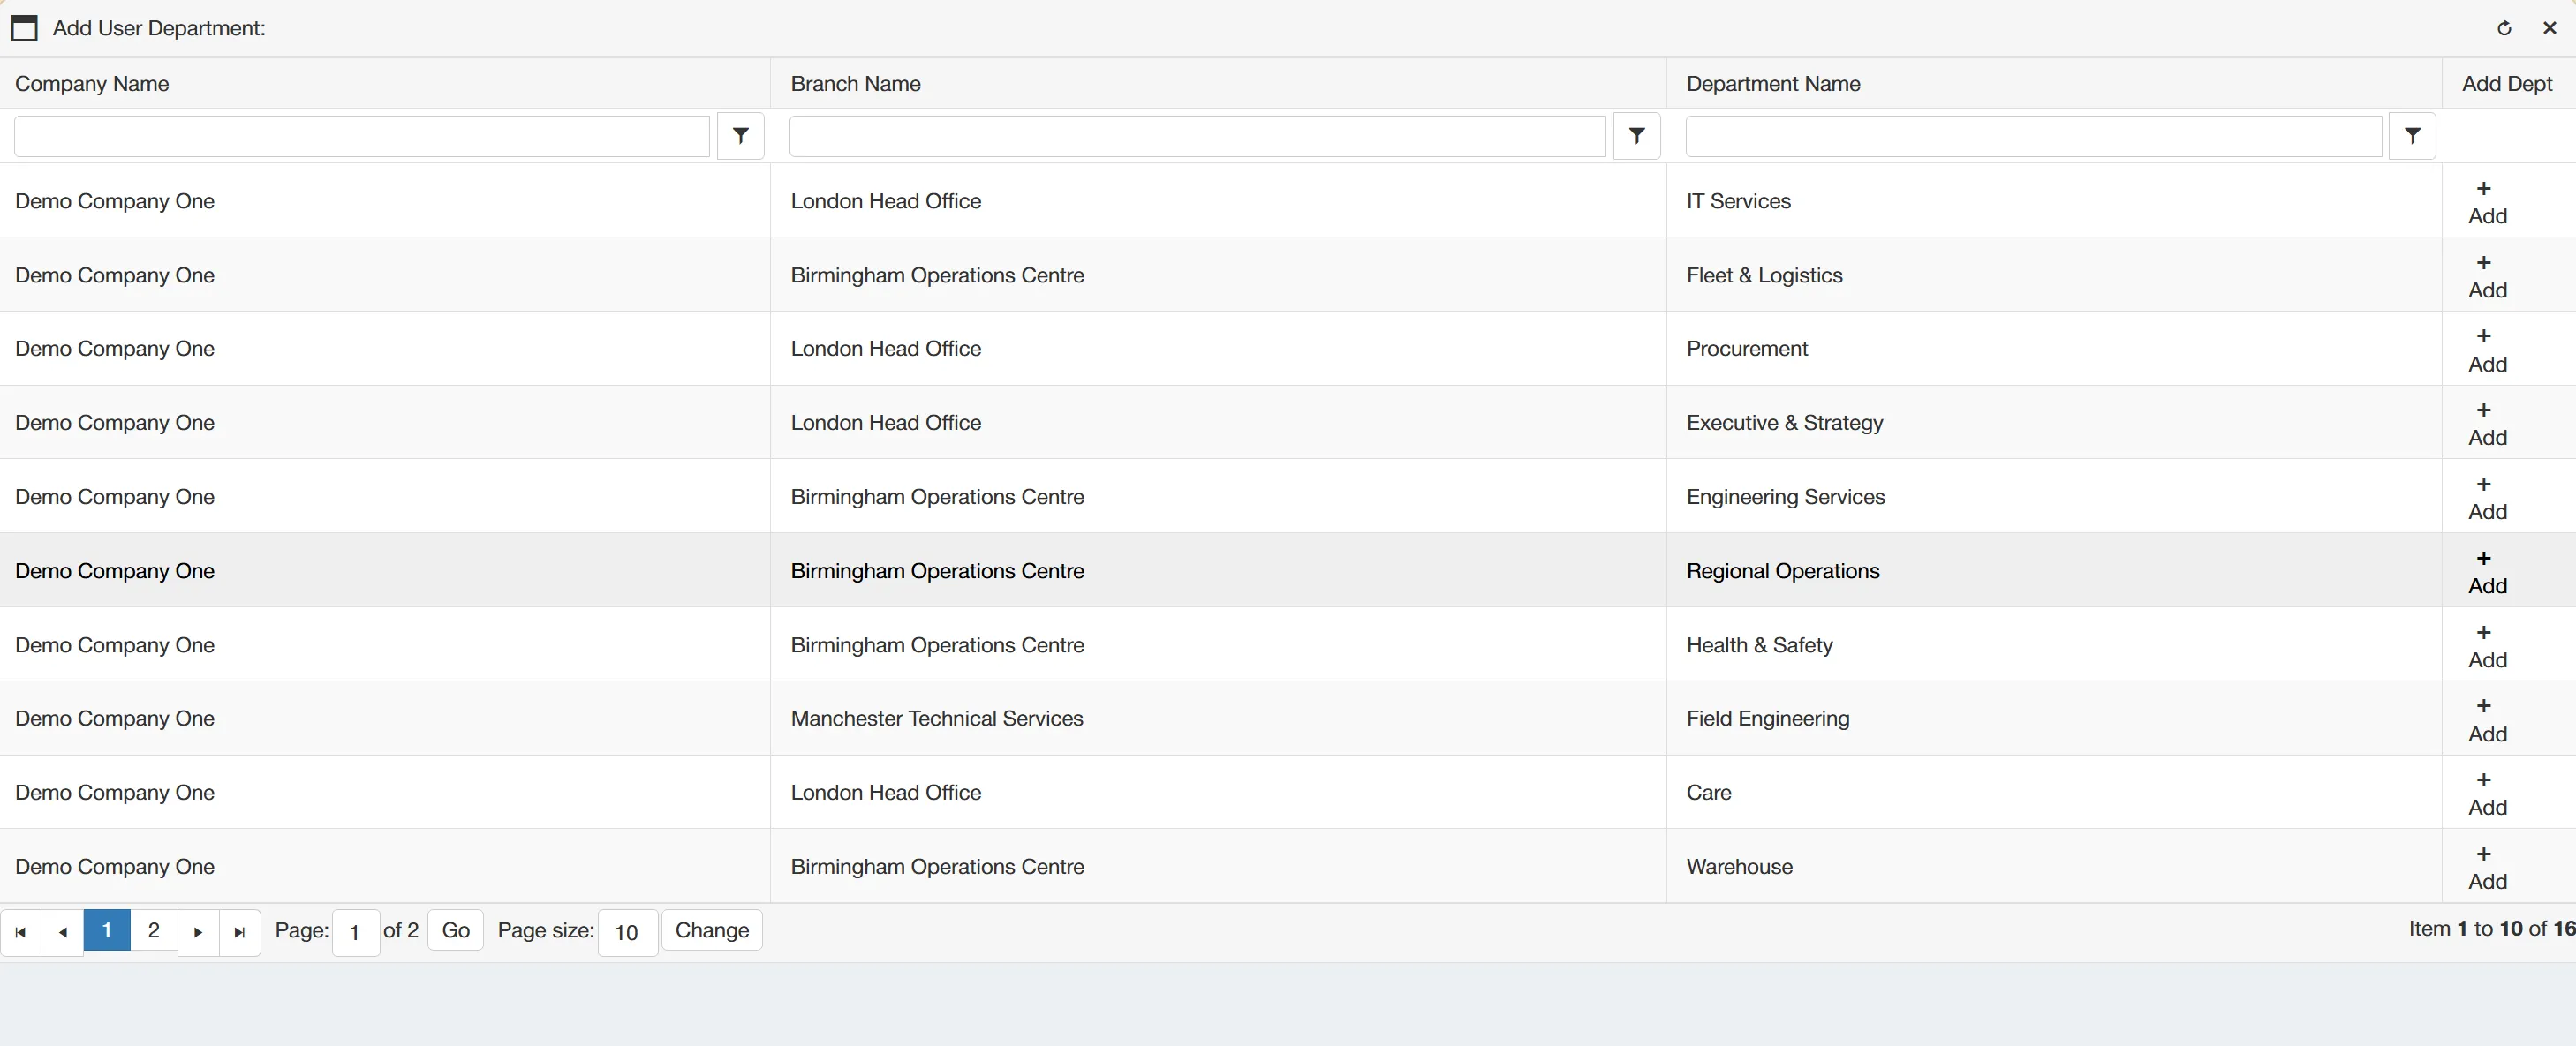
To add a new department to the user, simply click on the icon.
When you close the window, you will see that the User Departments table has updated to include the new department. A user can be assigned to multiple departments within the system.
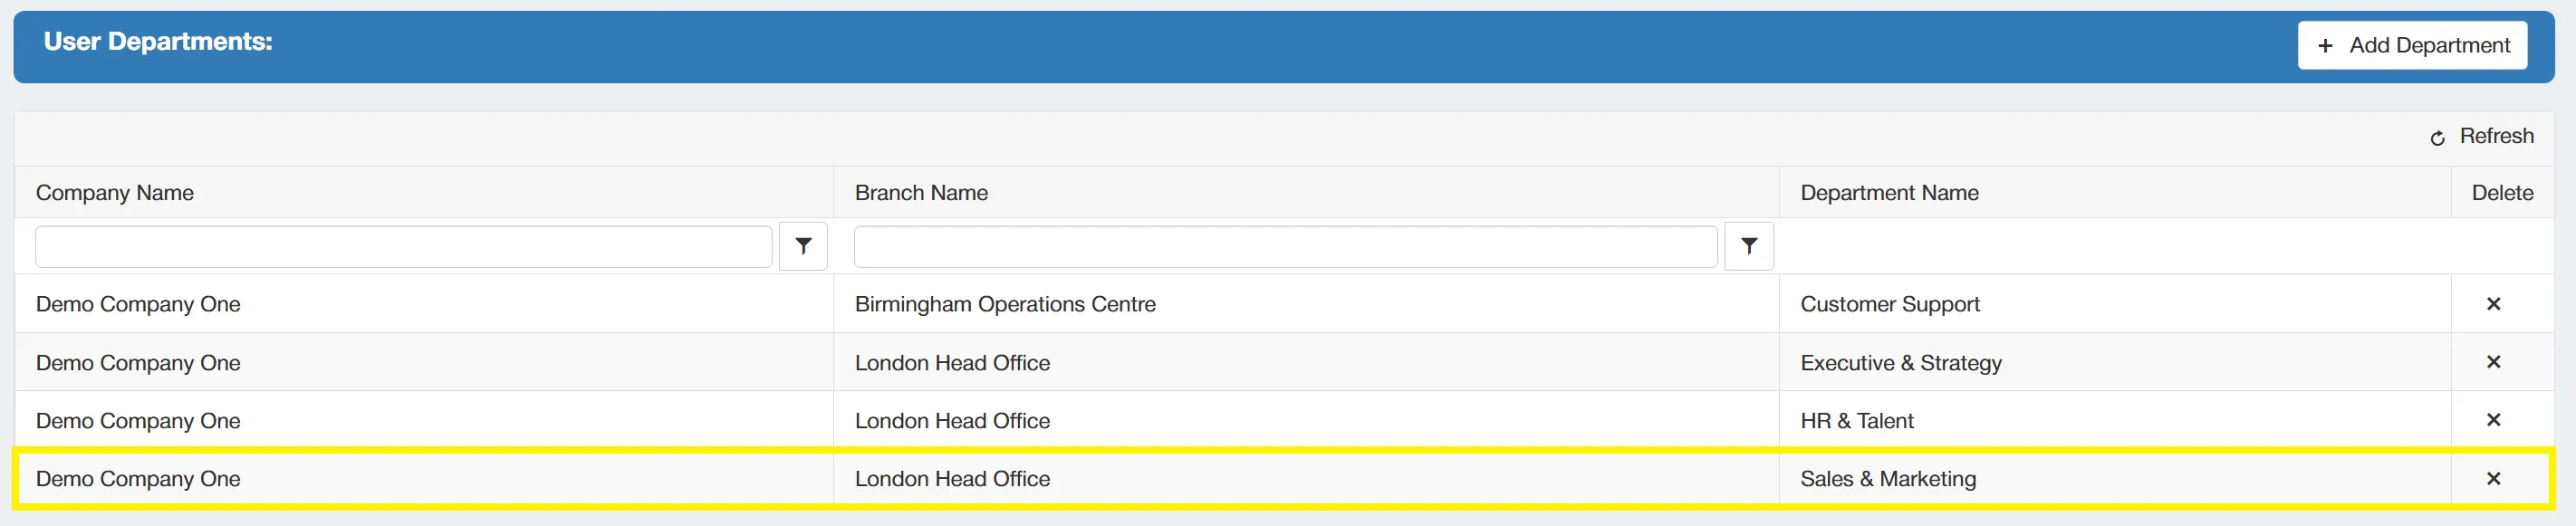
You can also remove departments from the user by clicking on the at the end of each line.
Once you are happy with the selection, click to finalise your choices.
Setting User Level Approval Rules
With the option enabled, you can set user level PO approval rules. To do this, scroll down to the PO Approval Rules section and click .
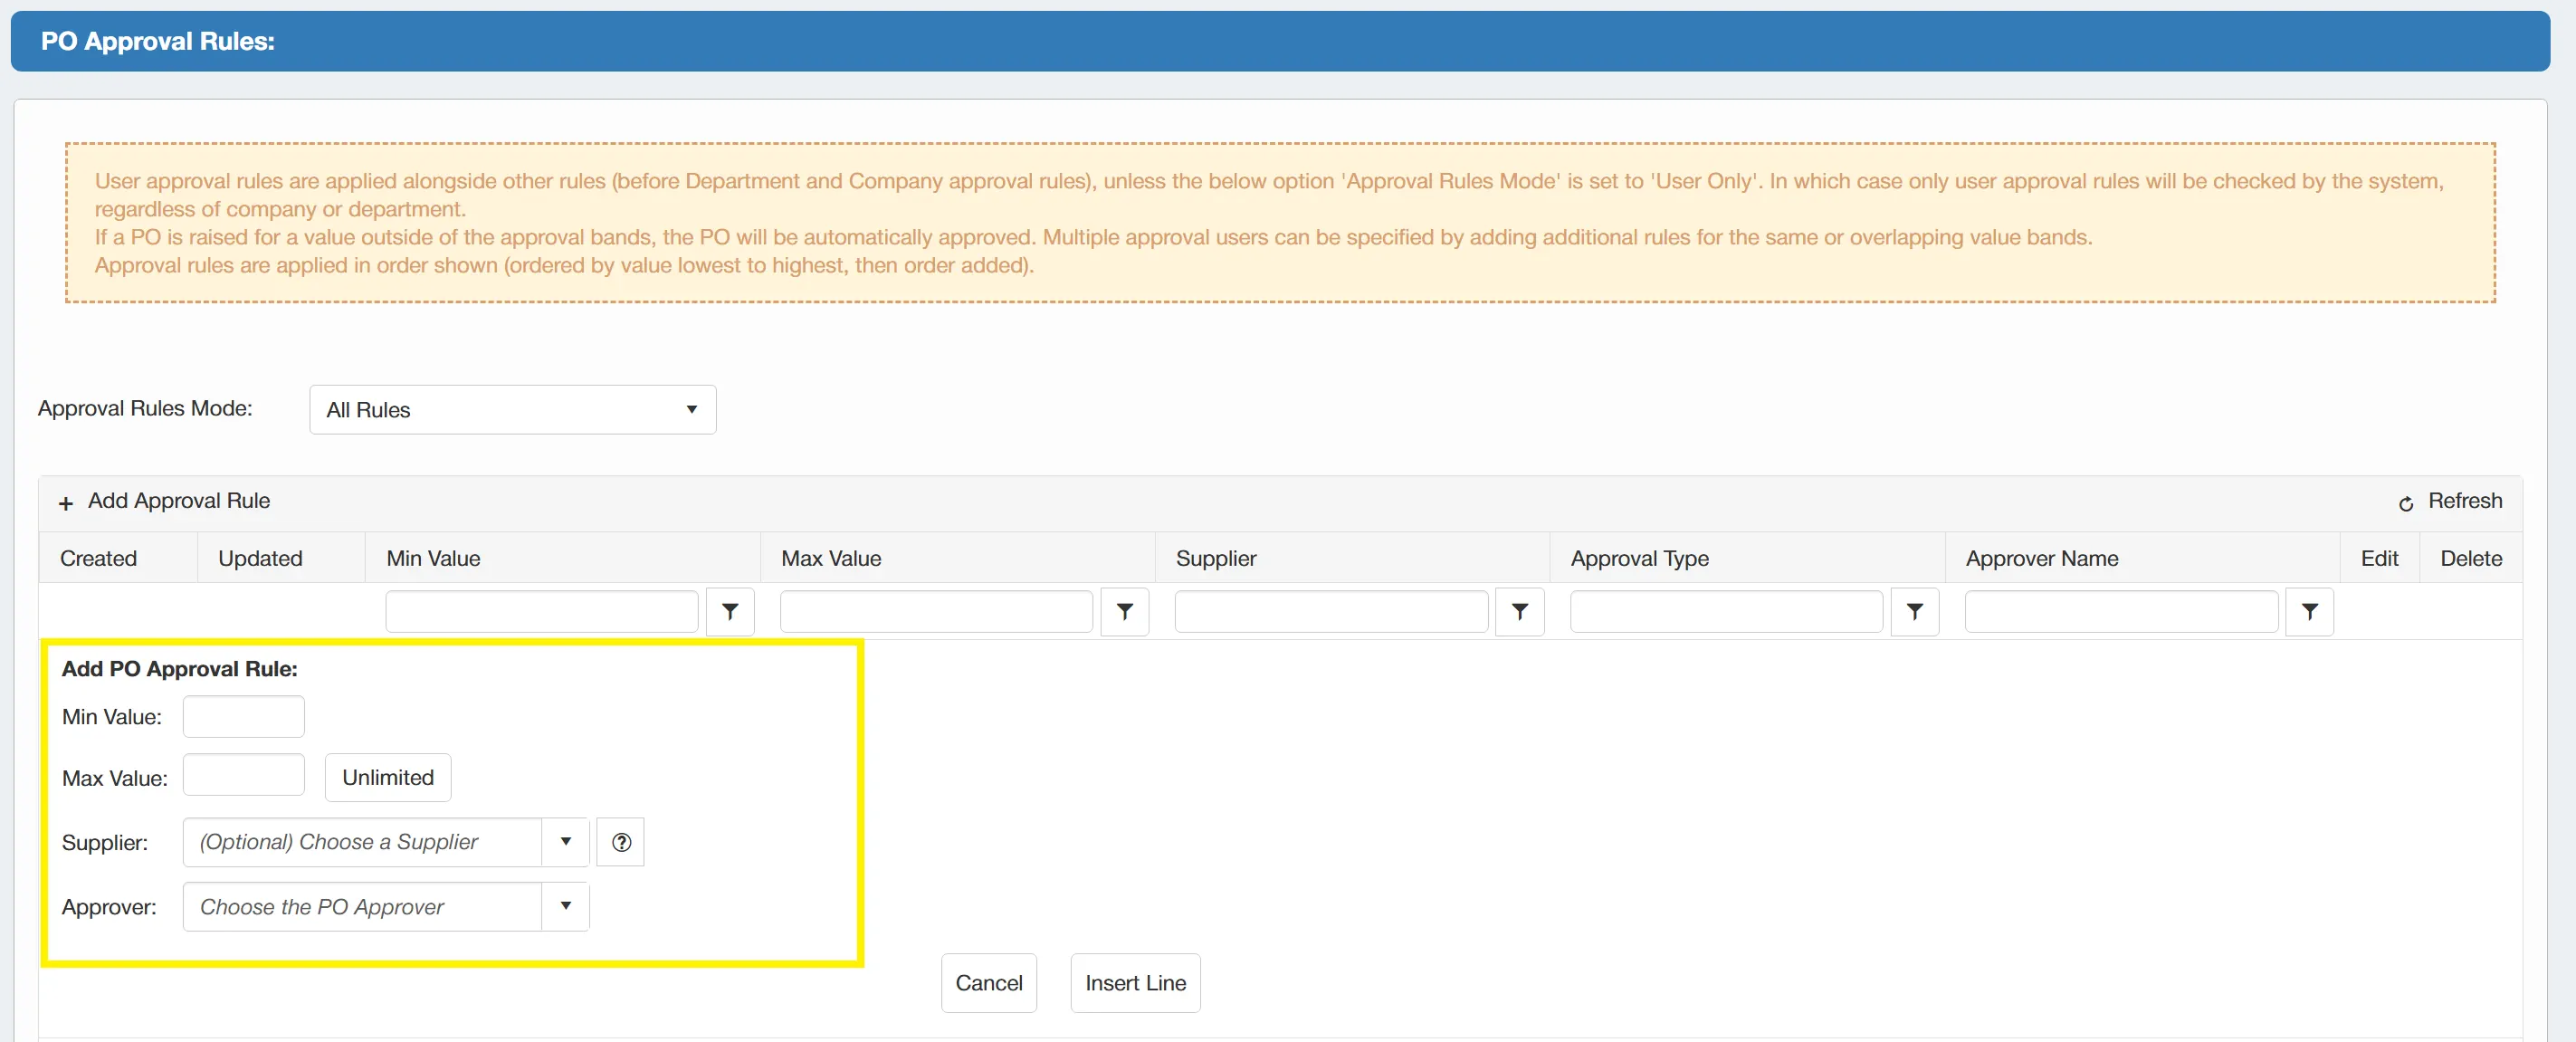
This brings up a new set of fields which allow you to set the minimum value, maximum value and select the designated approver. You also have the option to select an "unlimited" maximum value for the rule. For example, if you would like to set a rule to ensure that any PO's for the ClearPath Telecoms supplier with a value of £500 and above require approval, you would complete the fields as follows:
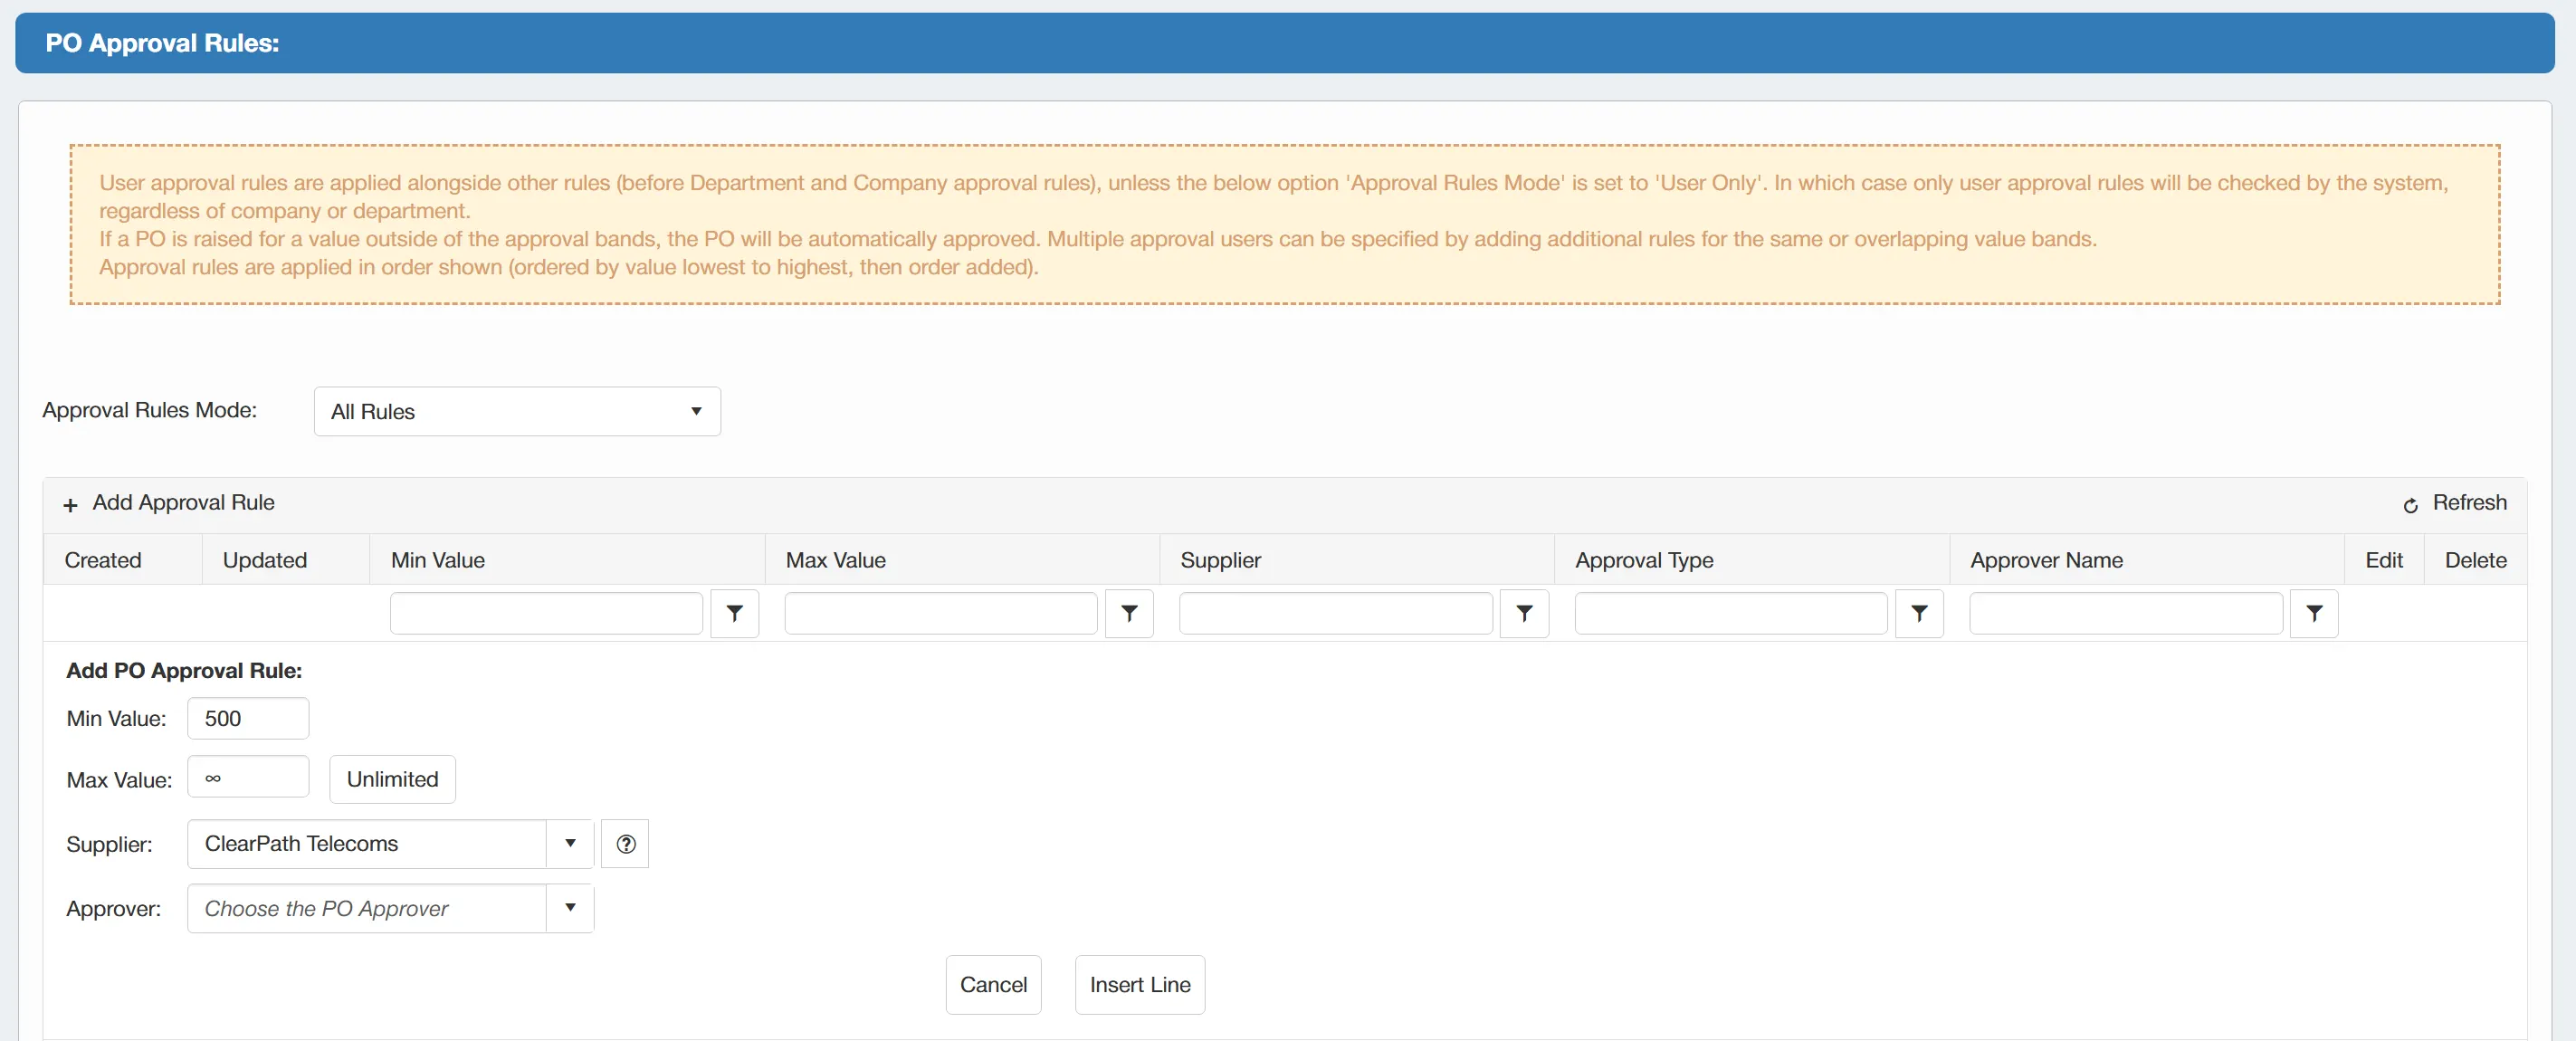
Once you are happy with this rule, click to commit this to the user.
You can have multiple rules set up against a user in order to allow multiple approvers depending on PO value. For example, if you want all PO's between £0 - £500 to be approved by a different person, you would set another rule with these parameters set accordingly.
The Supplier field is optional. If the field is left blank, the PO approval rule will apply to all PO's created by this user regardless of the supplier.
When your approval rules have been added, click to finalise this.
Disable Users
To disable a user, ensure that is enabled and un-tick the box. You can set a user with a leaver status by ticking the box. Once you are happy to proceed, click .
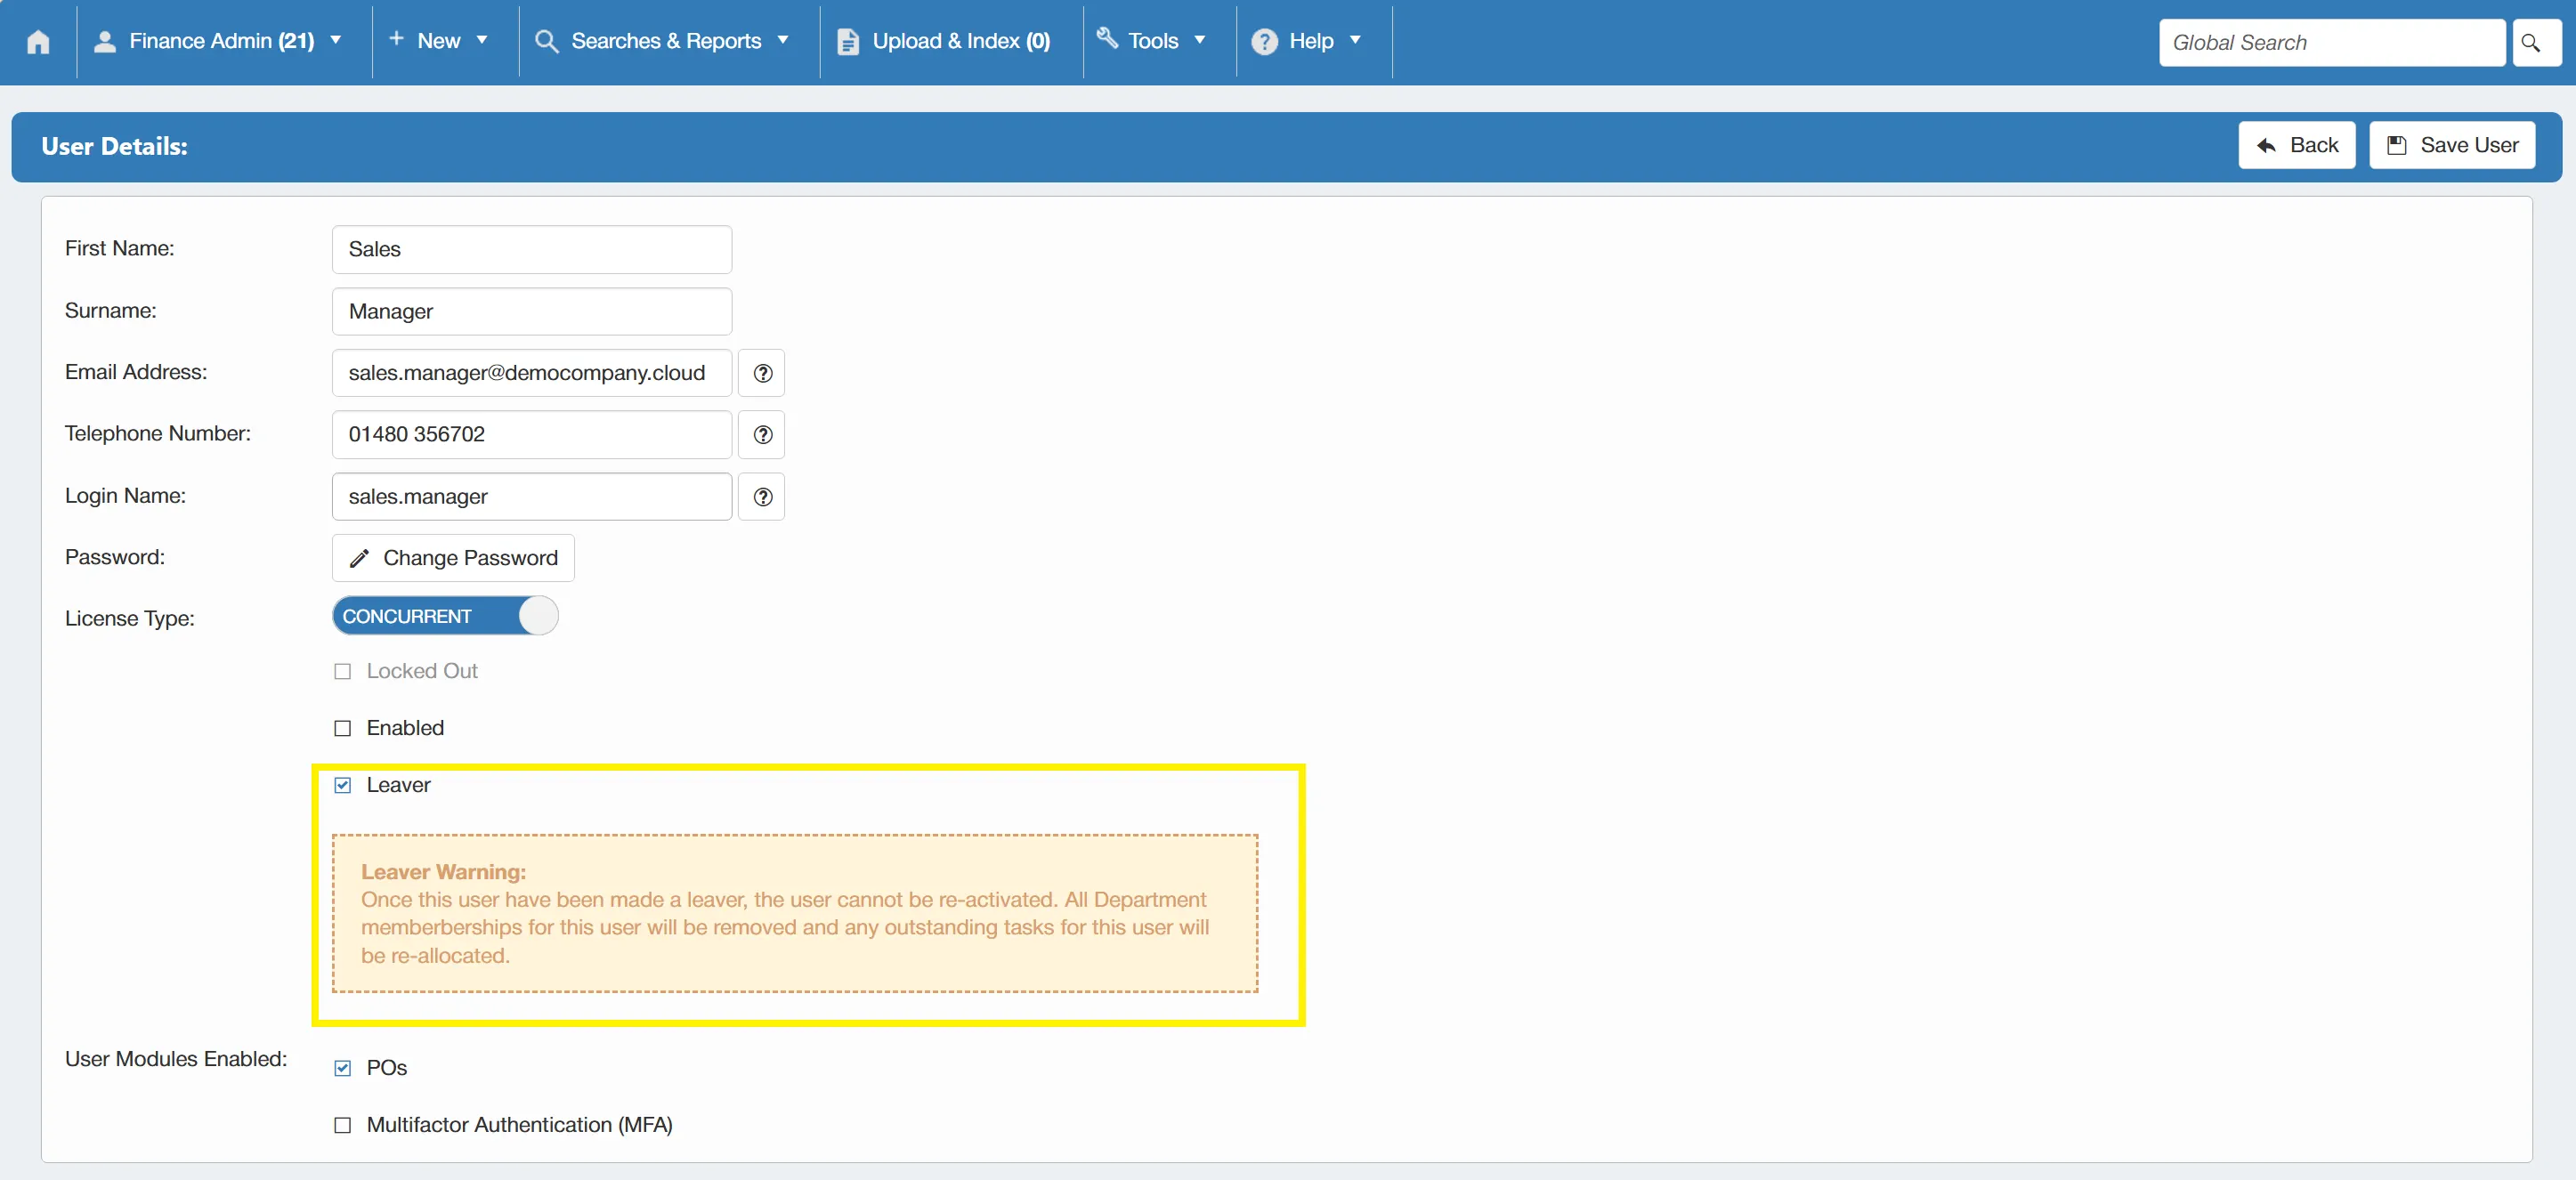
Once a user is marked as leaver, they cannot be re-activated. This will remove any department memberships and any outstanding tasks will be re-assigned.
Viewing User Event History
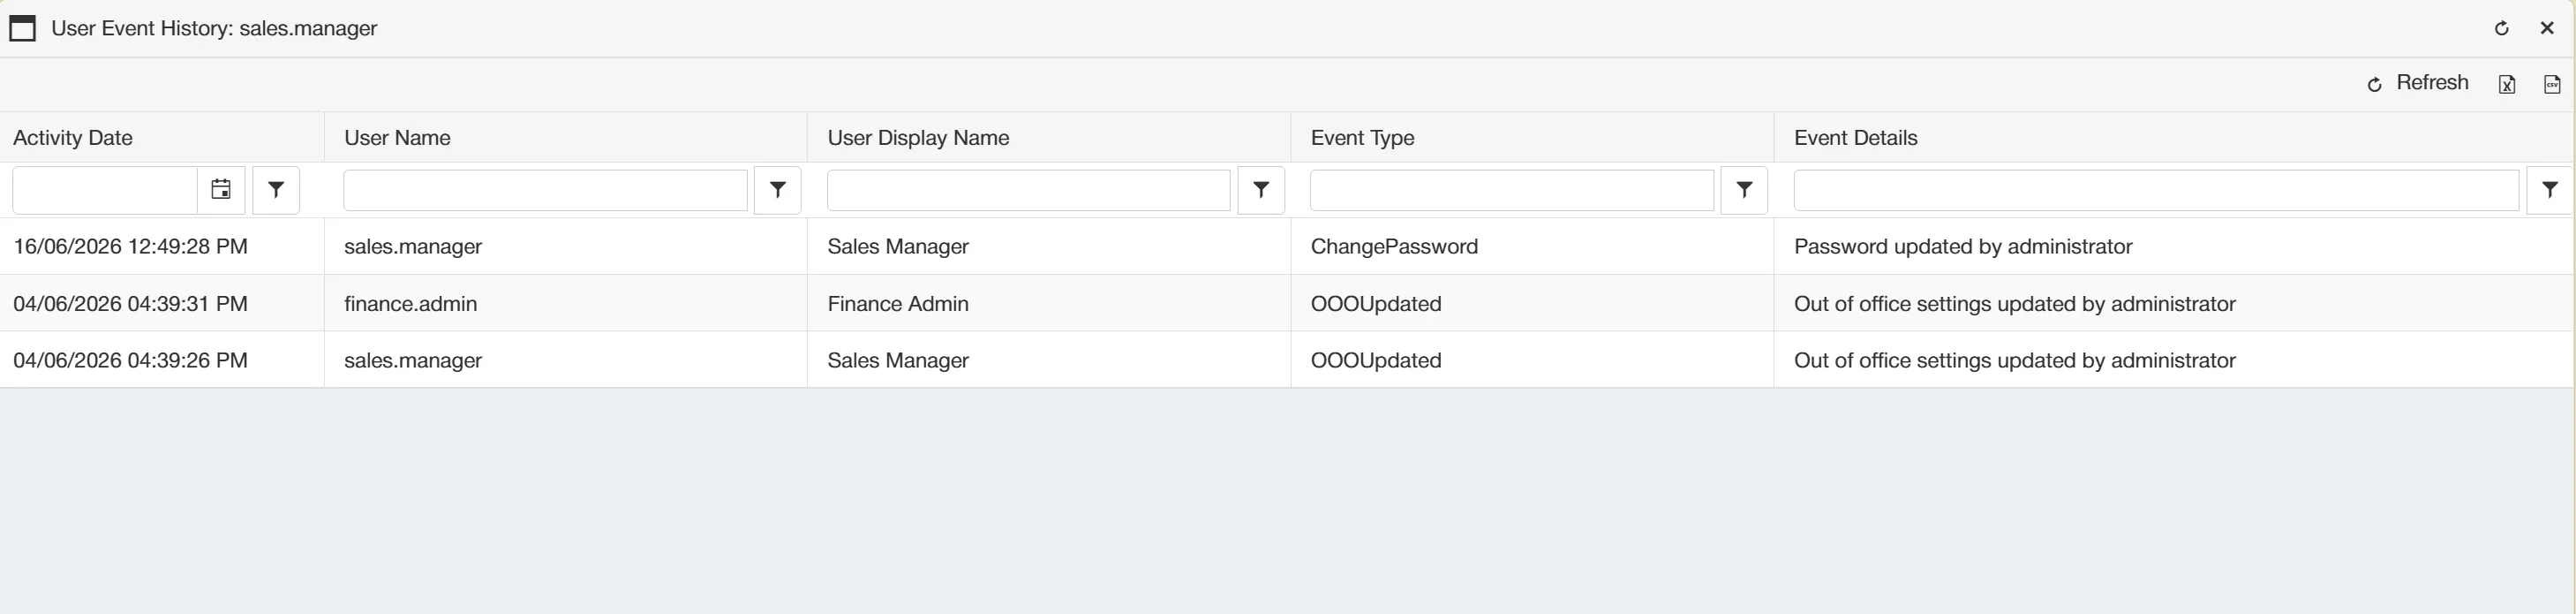
To view a user's event history, select from the drop down box.
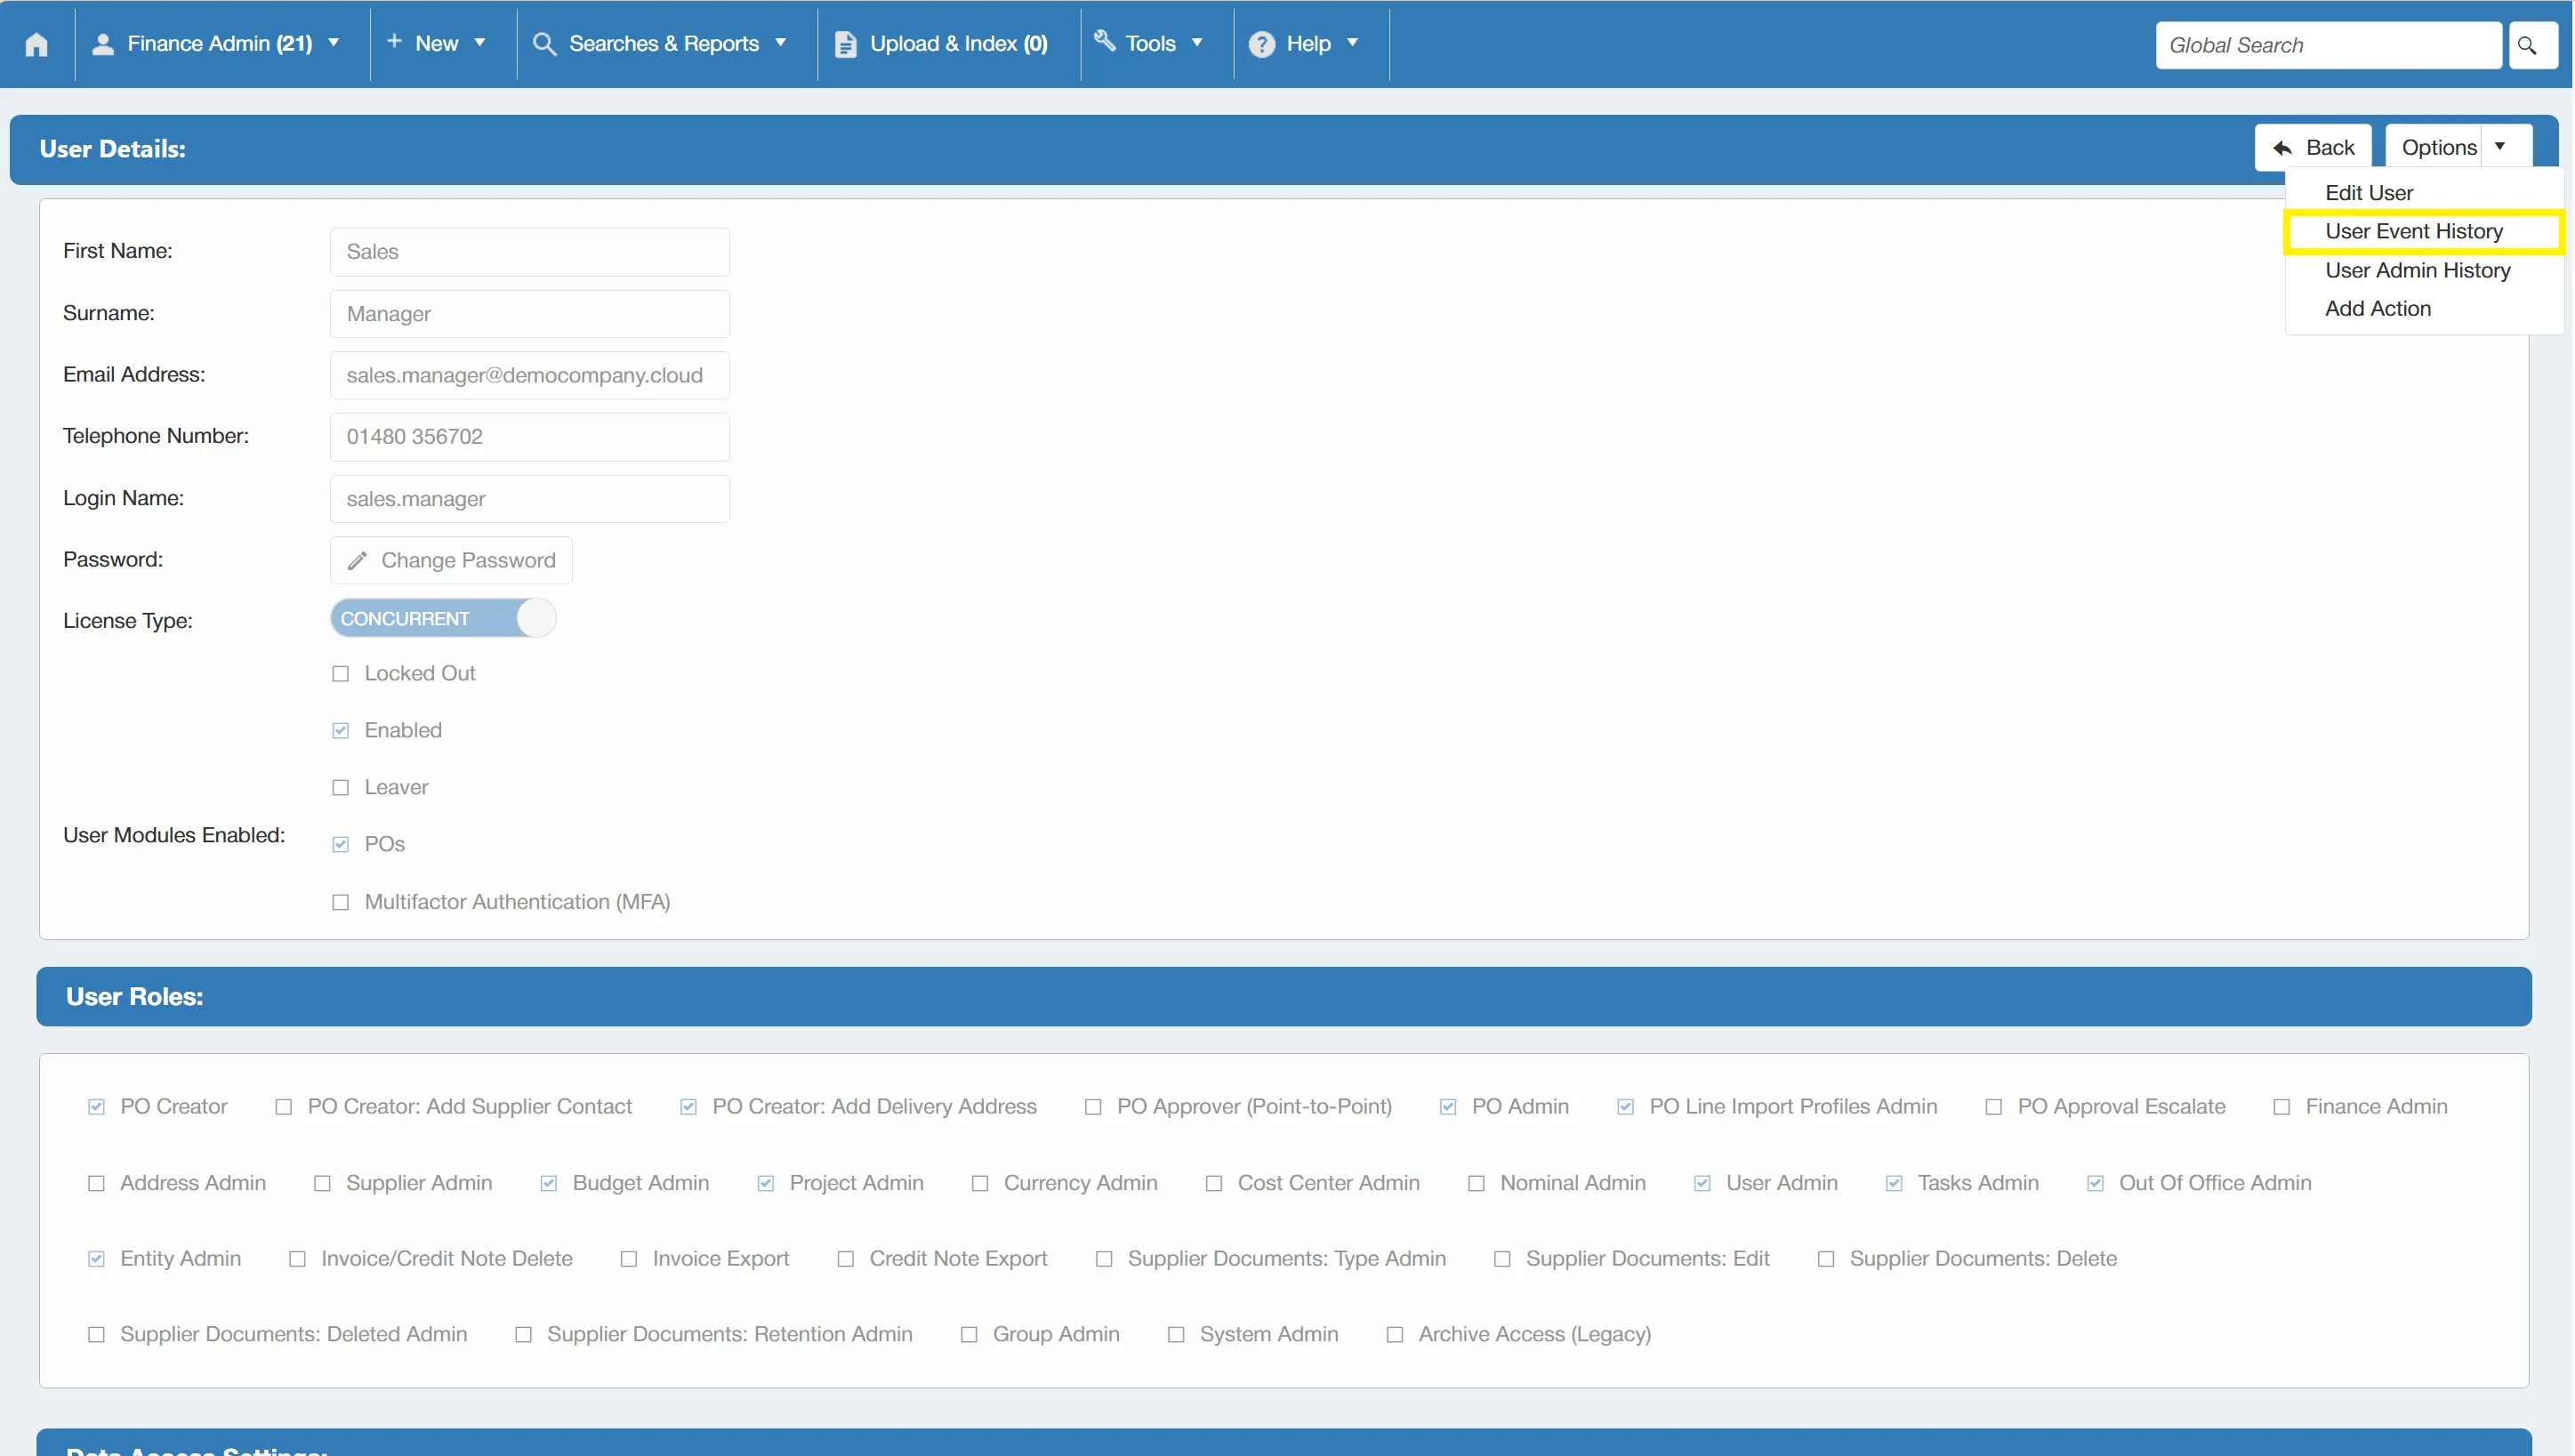
This opens a new window showing the user's event history such as log-ins, log-outs and preference updates. This information can then be exported in csv and excel format by selecting the relevant icons.
Viewing User Admin History
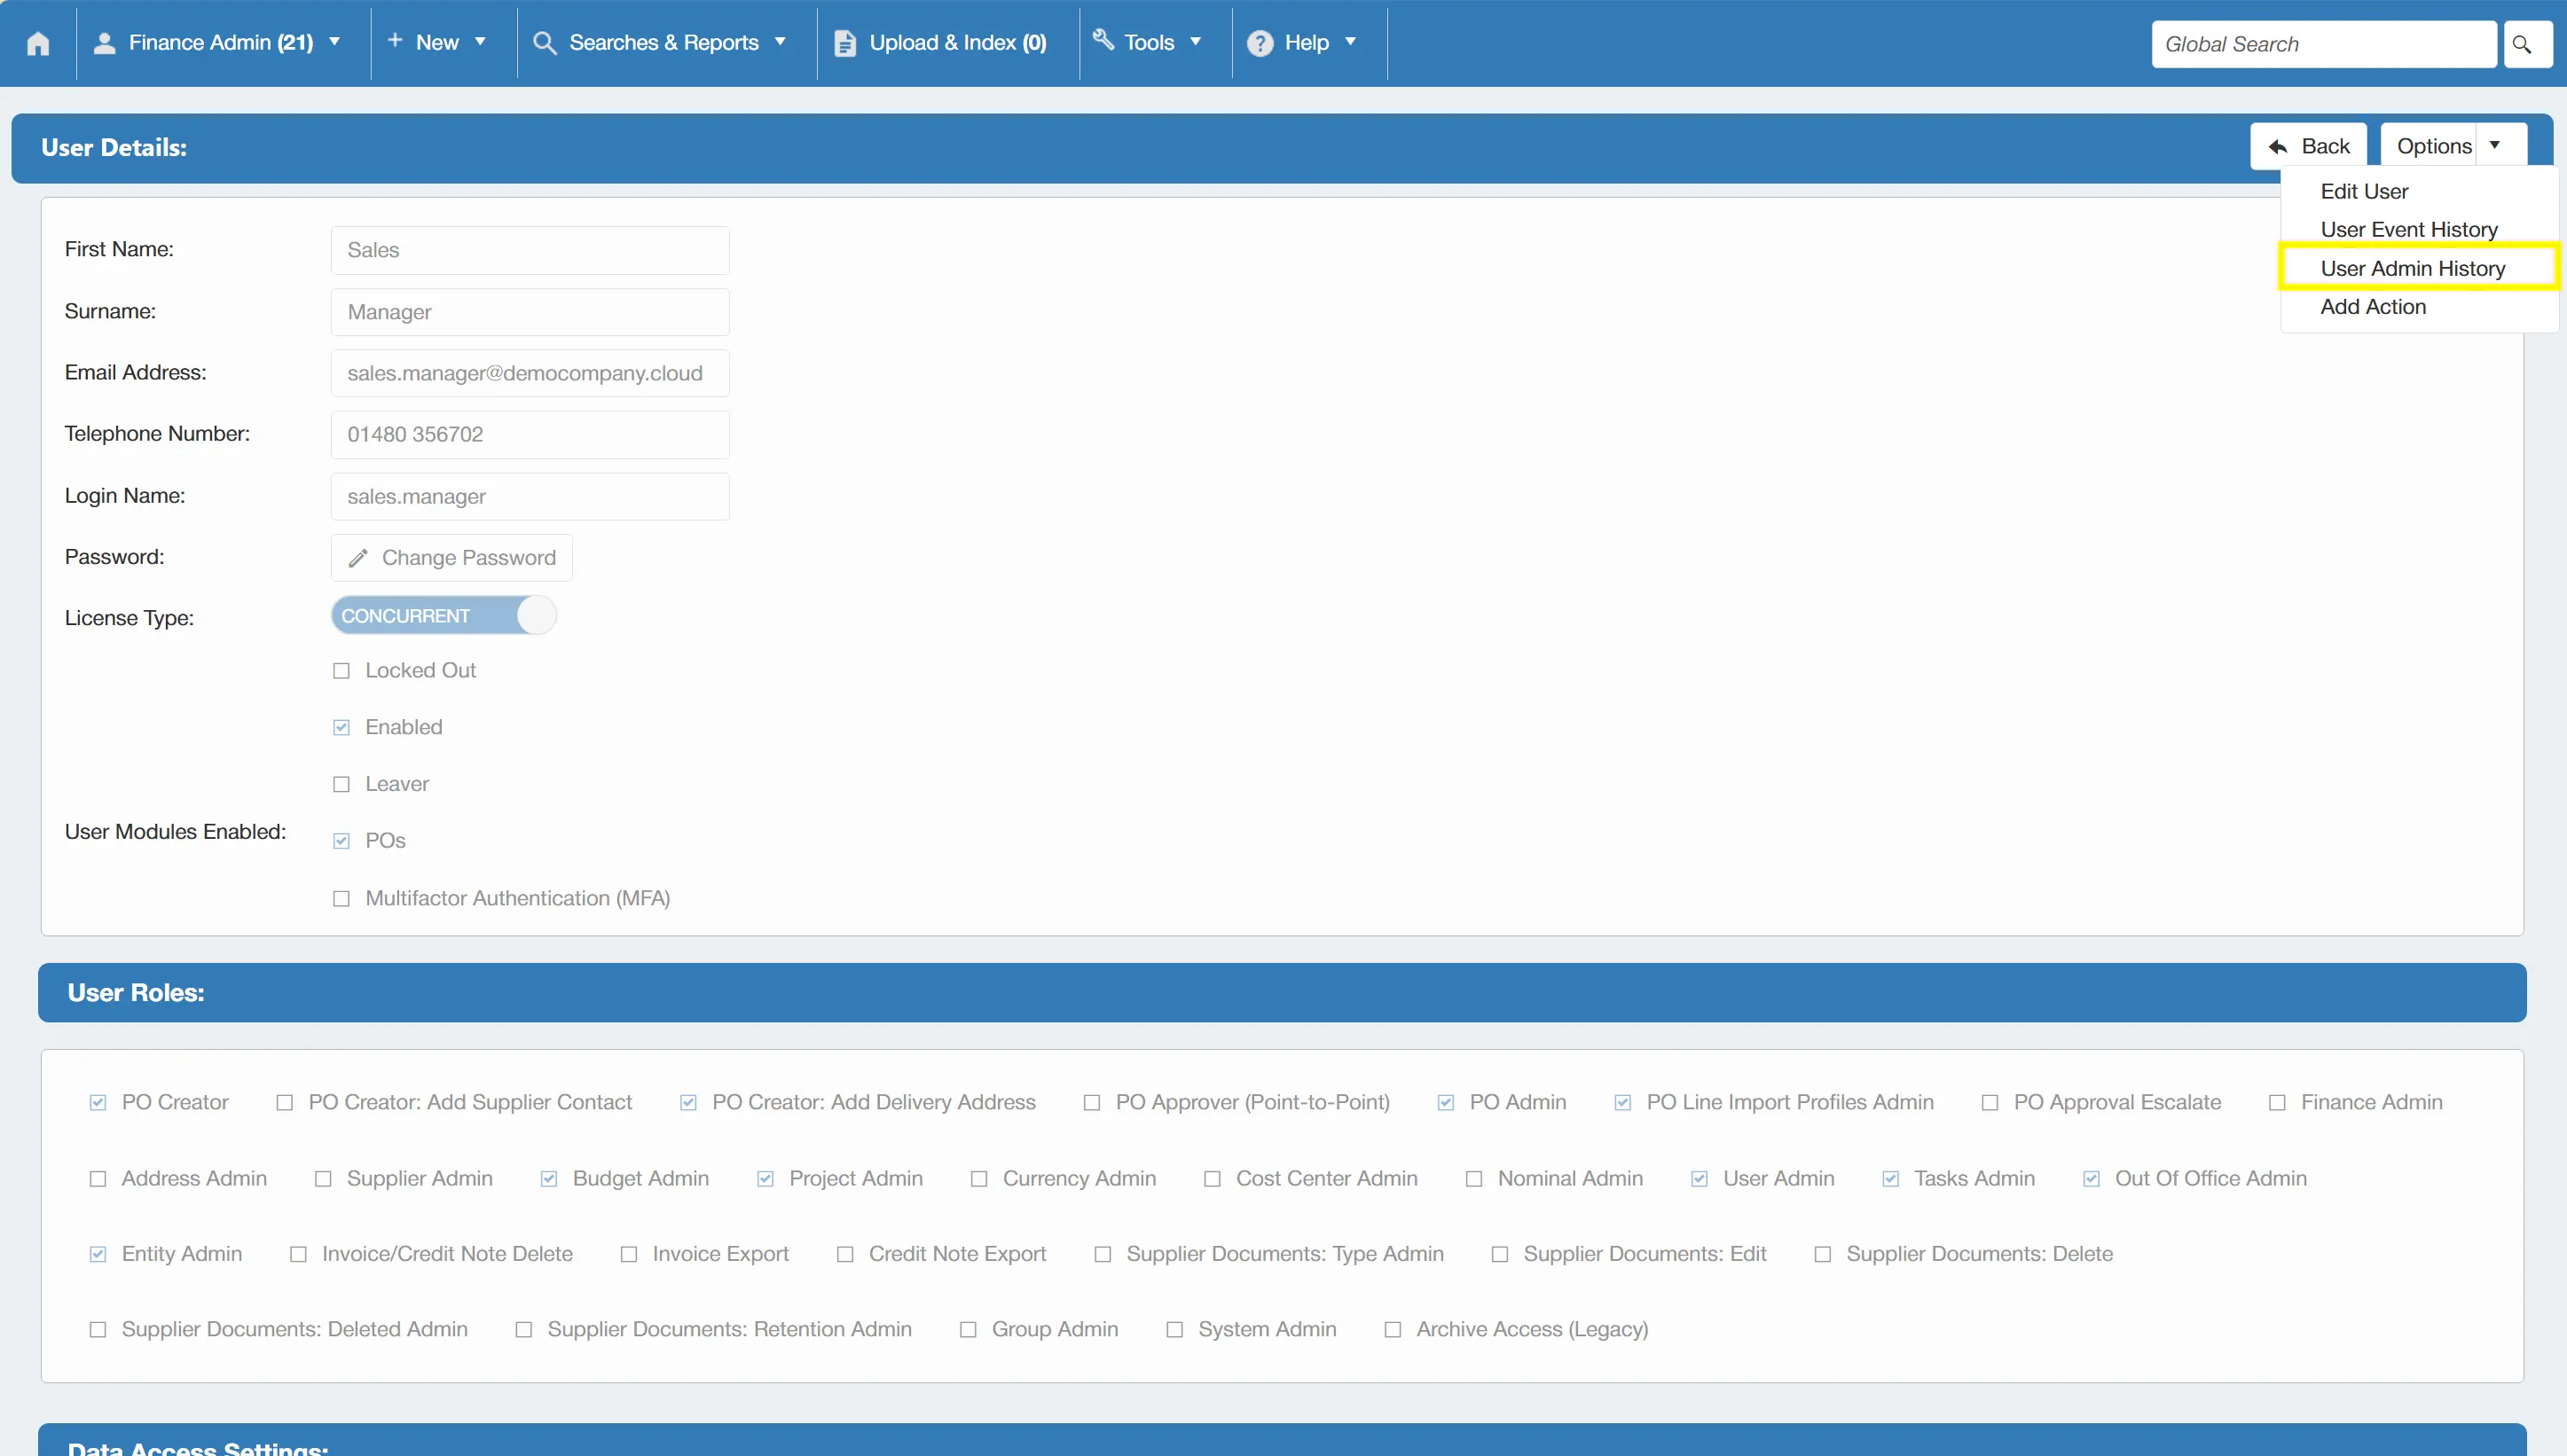
To view a user's admin history, select from the drop down box.
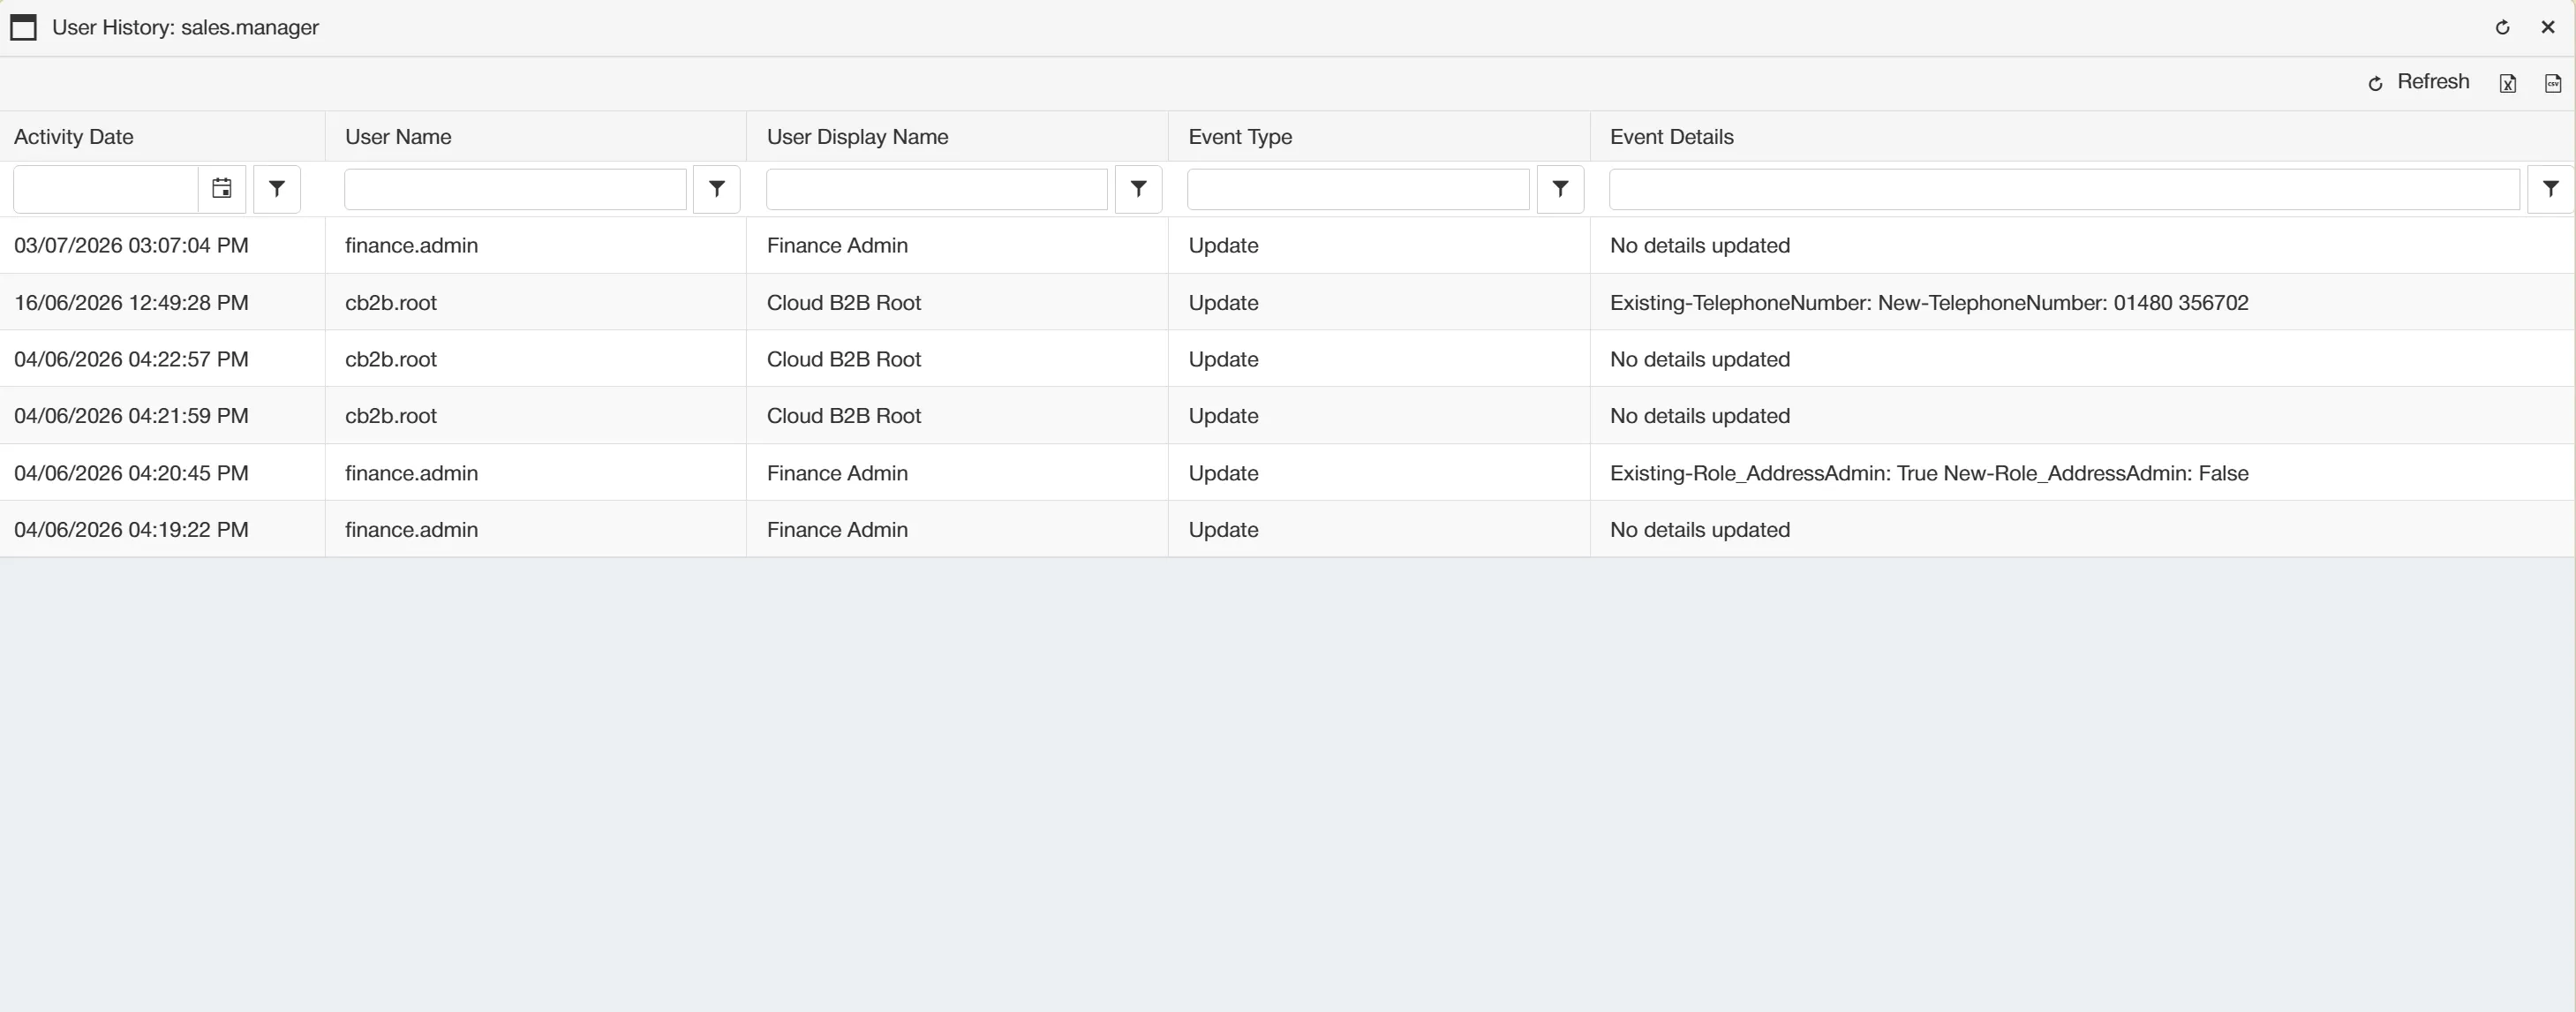
This opens a new window showing the user's admin history such as role creations and detail updates. This information can then be exported in csv and excel format by selecting the relevant icons.
Adding a User Action
You can also create a user action from the User Admin section. To do this, simply click under the drop down box.
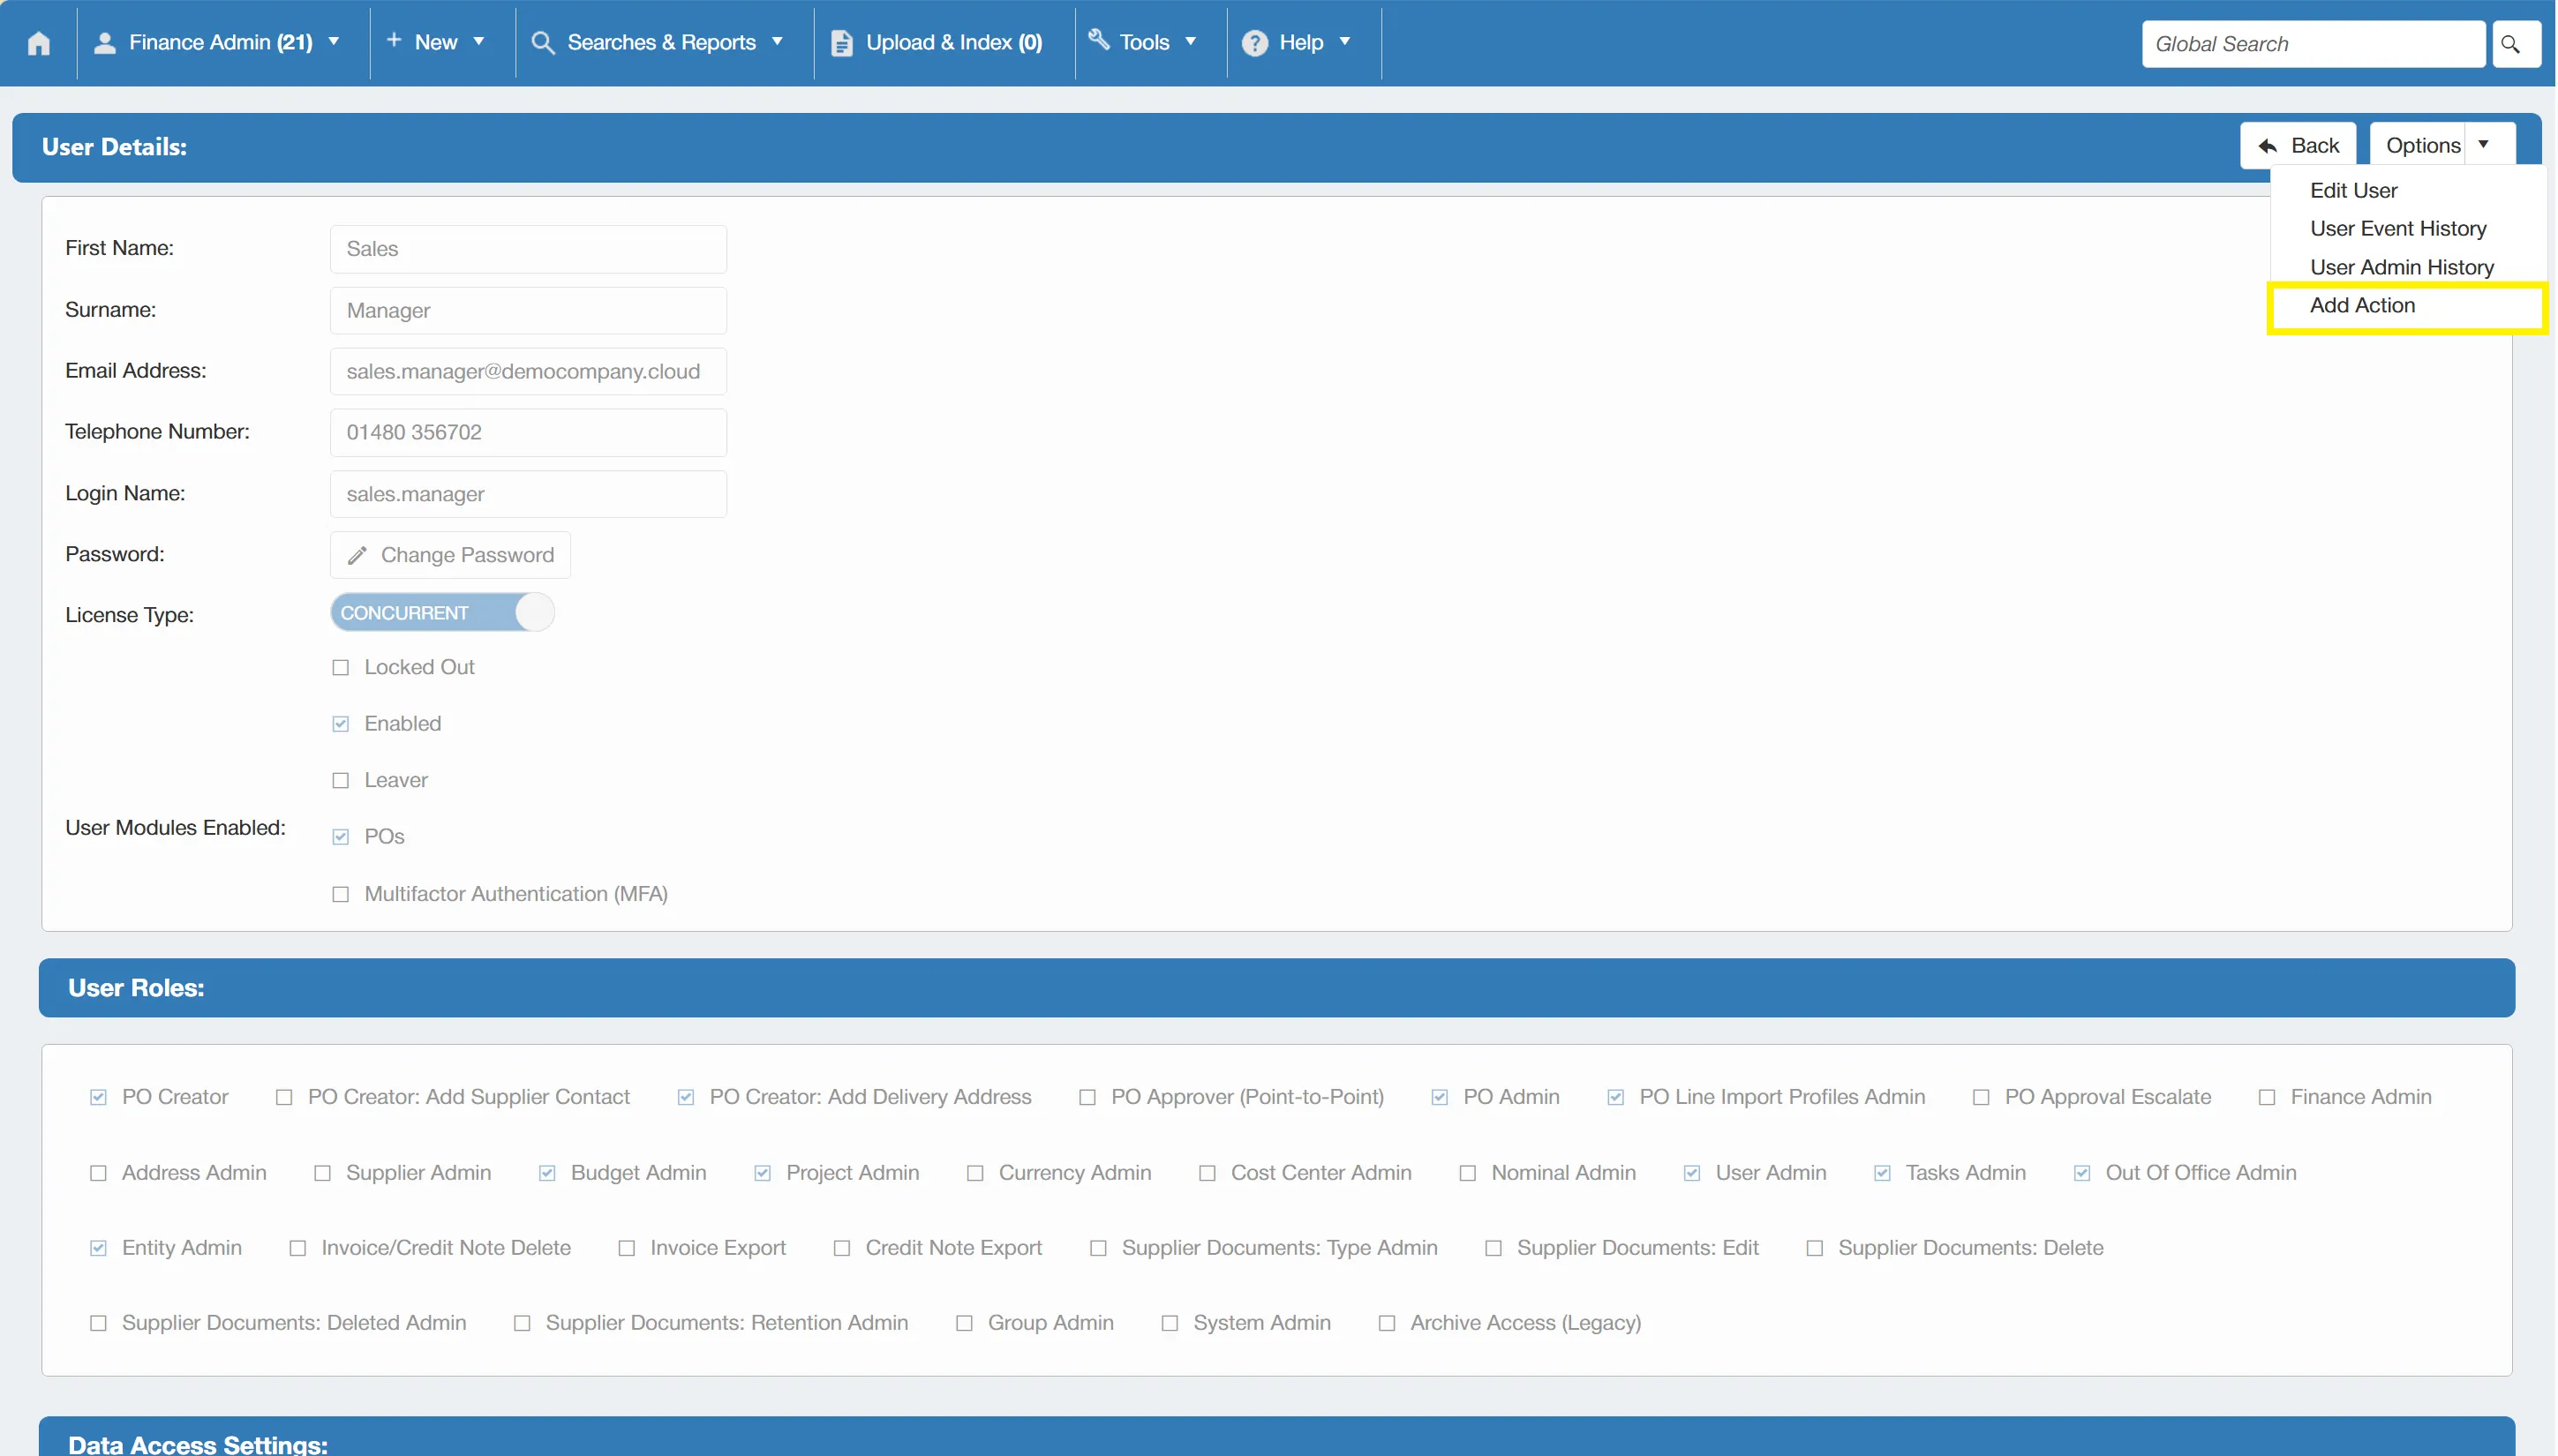
This opens a new window which allows you to create a new action for that user.
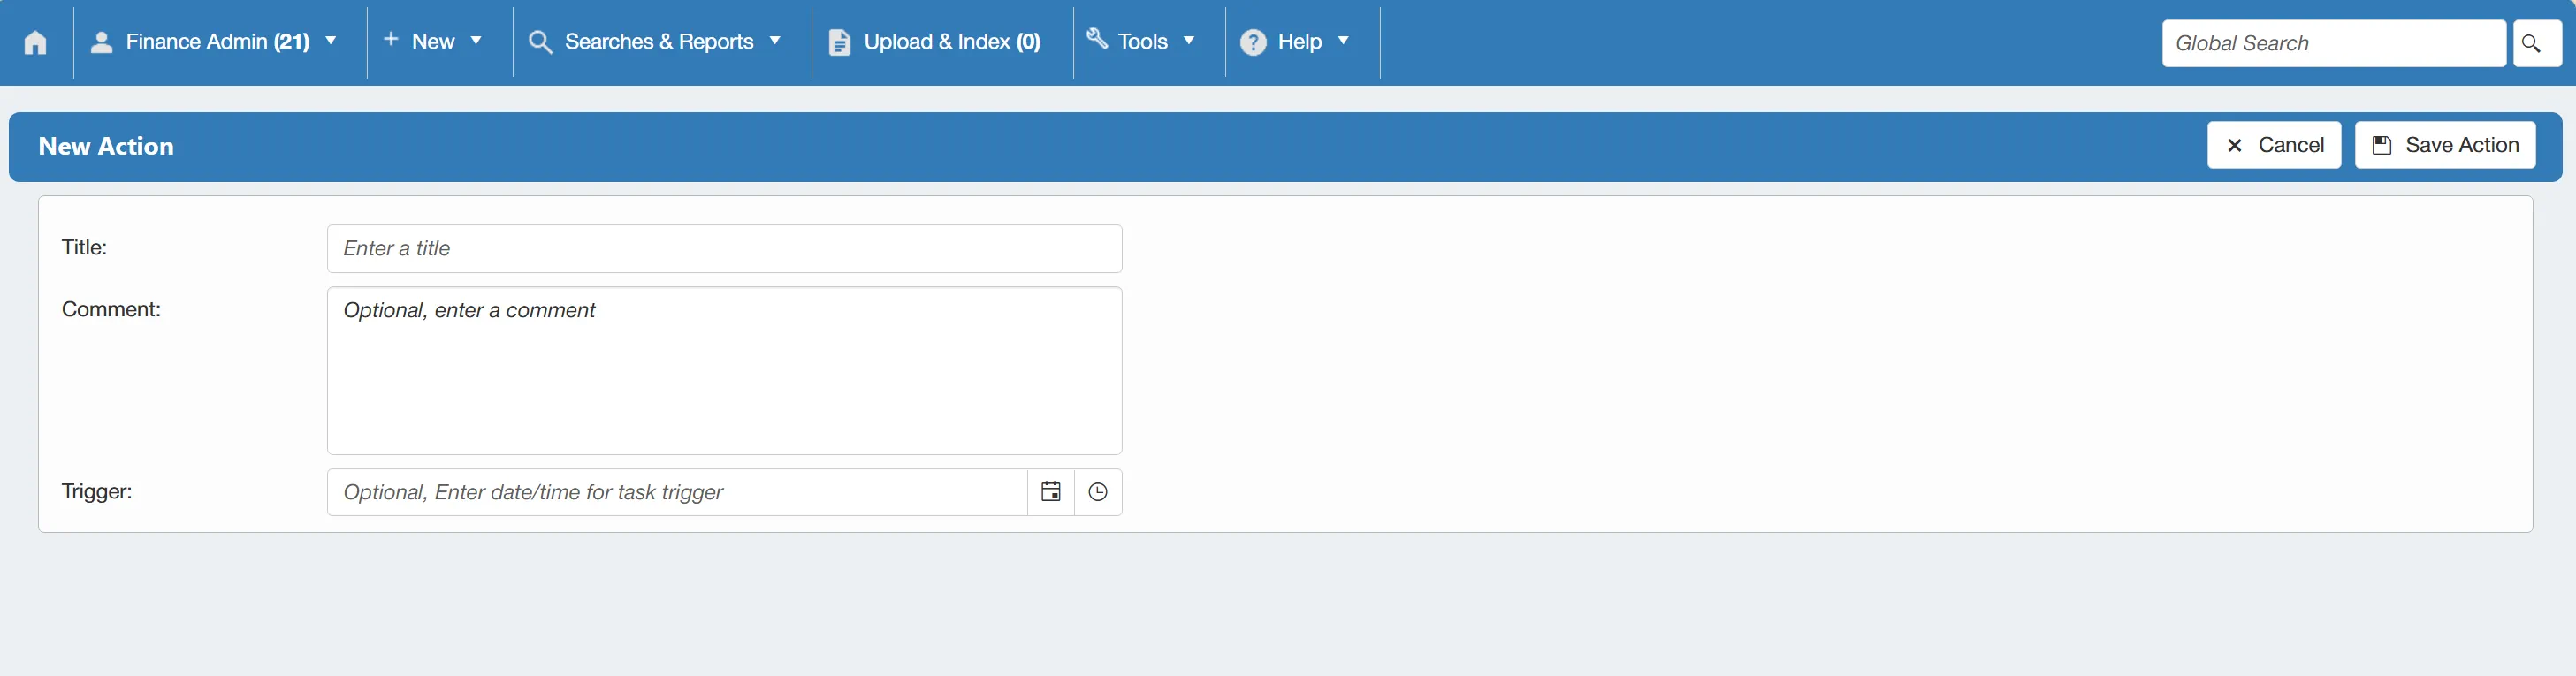
Once the details are filled in, click .
Out Of Office
Access the Out Of Office administration page by selecting Out Of Office from the Administration Tools section. This is useful as it enables you to set activate out of office functions for other users in the event of unplanned absence.
Only users with the Out Of Office permission enabled can access this section. For more information on user permissions click here.
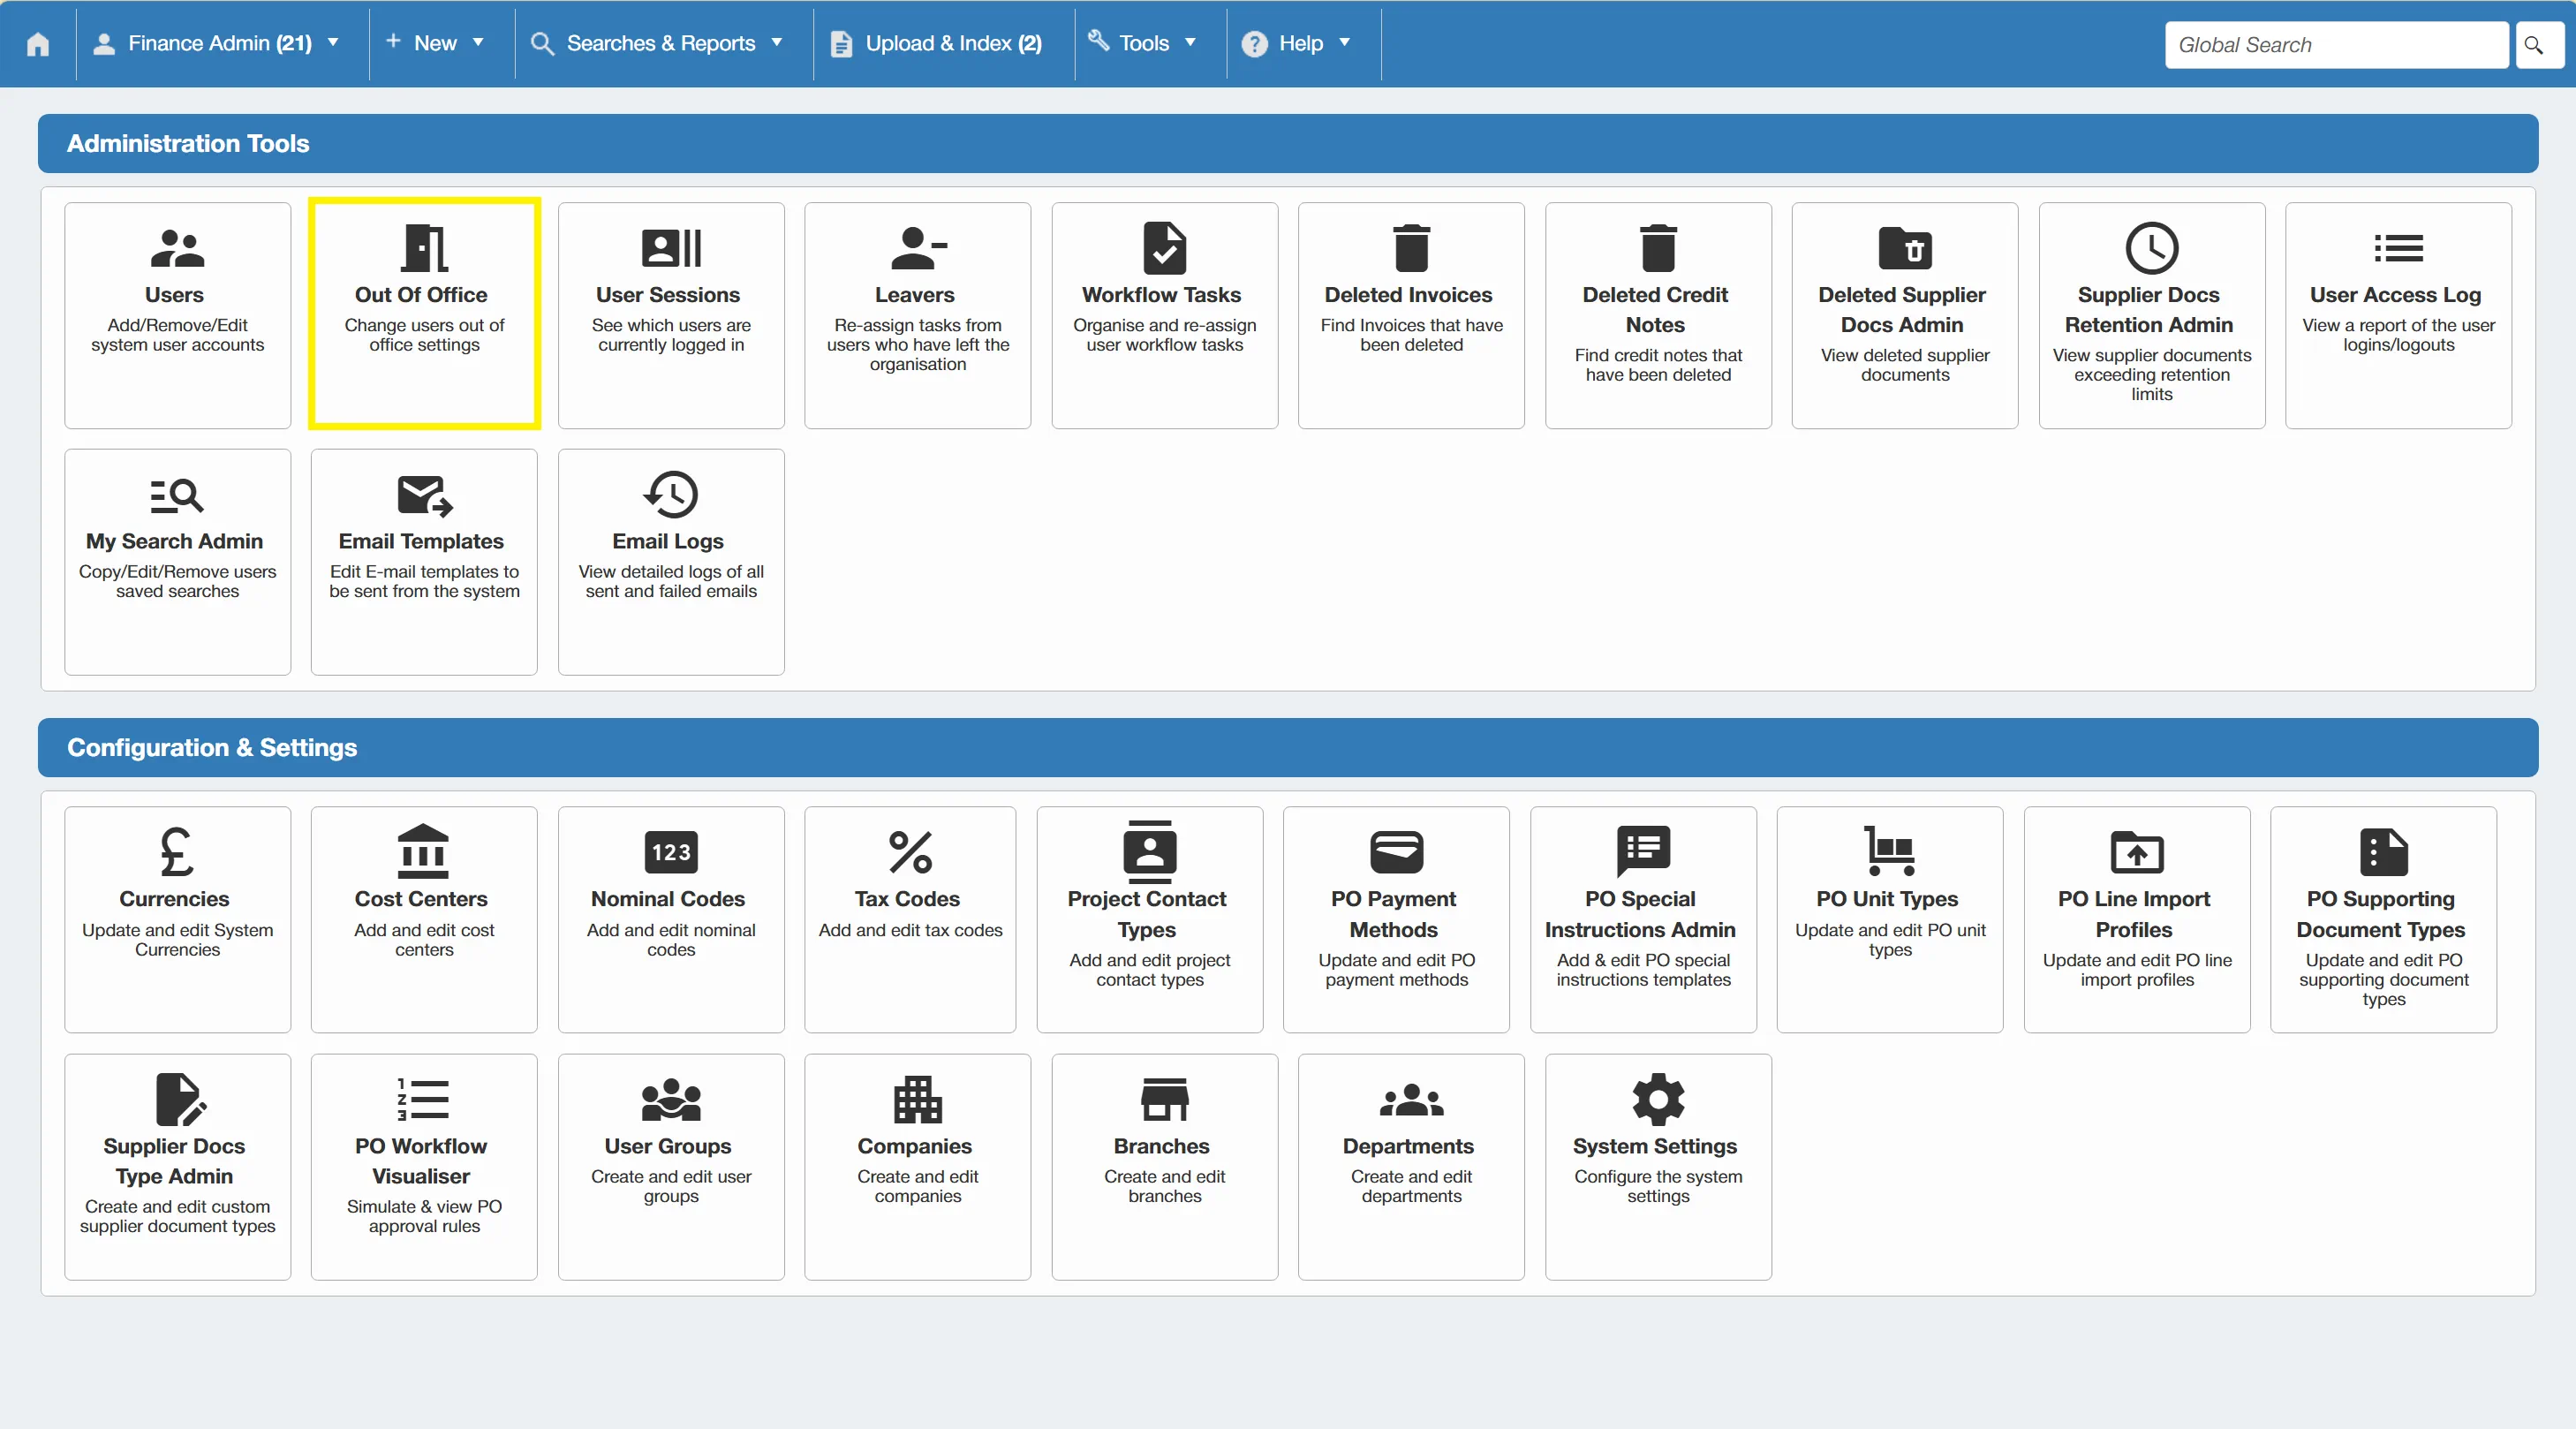
Enabling Out Of Office for Users
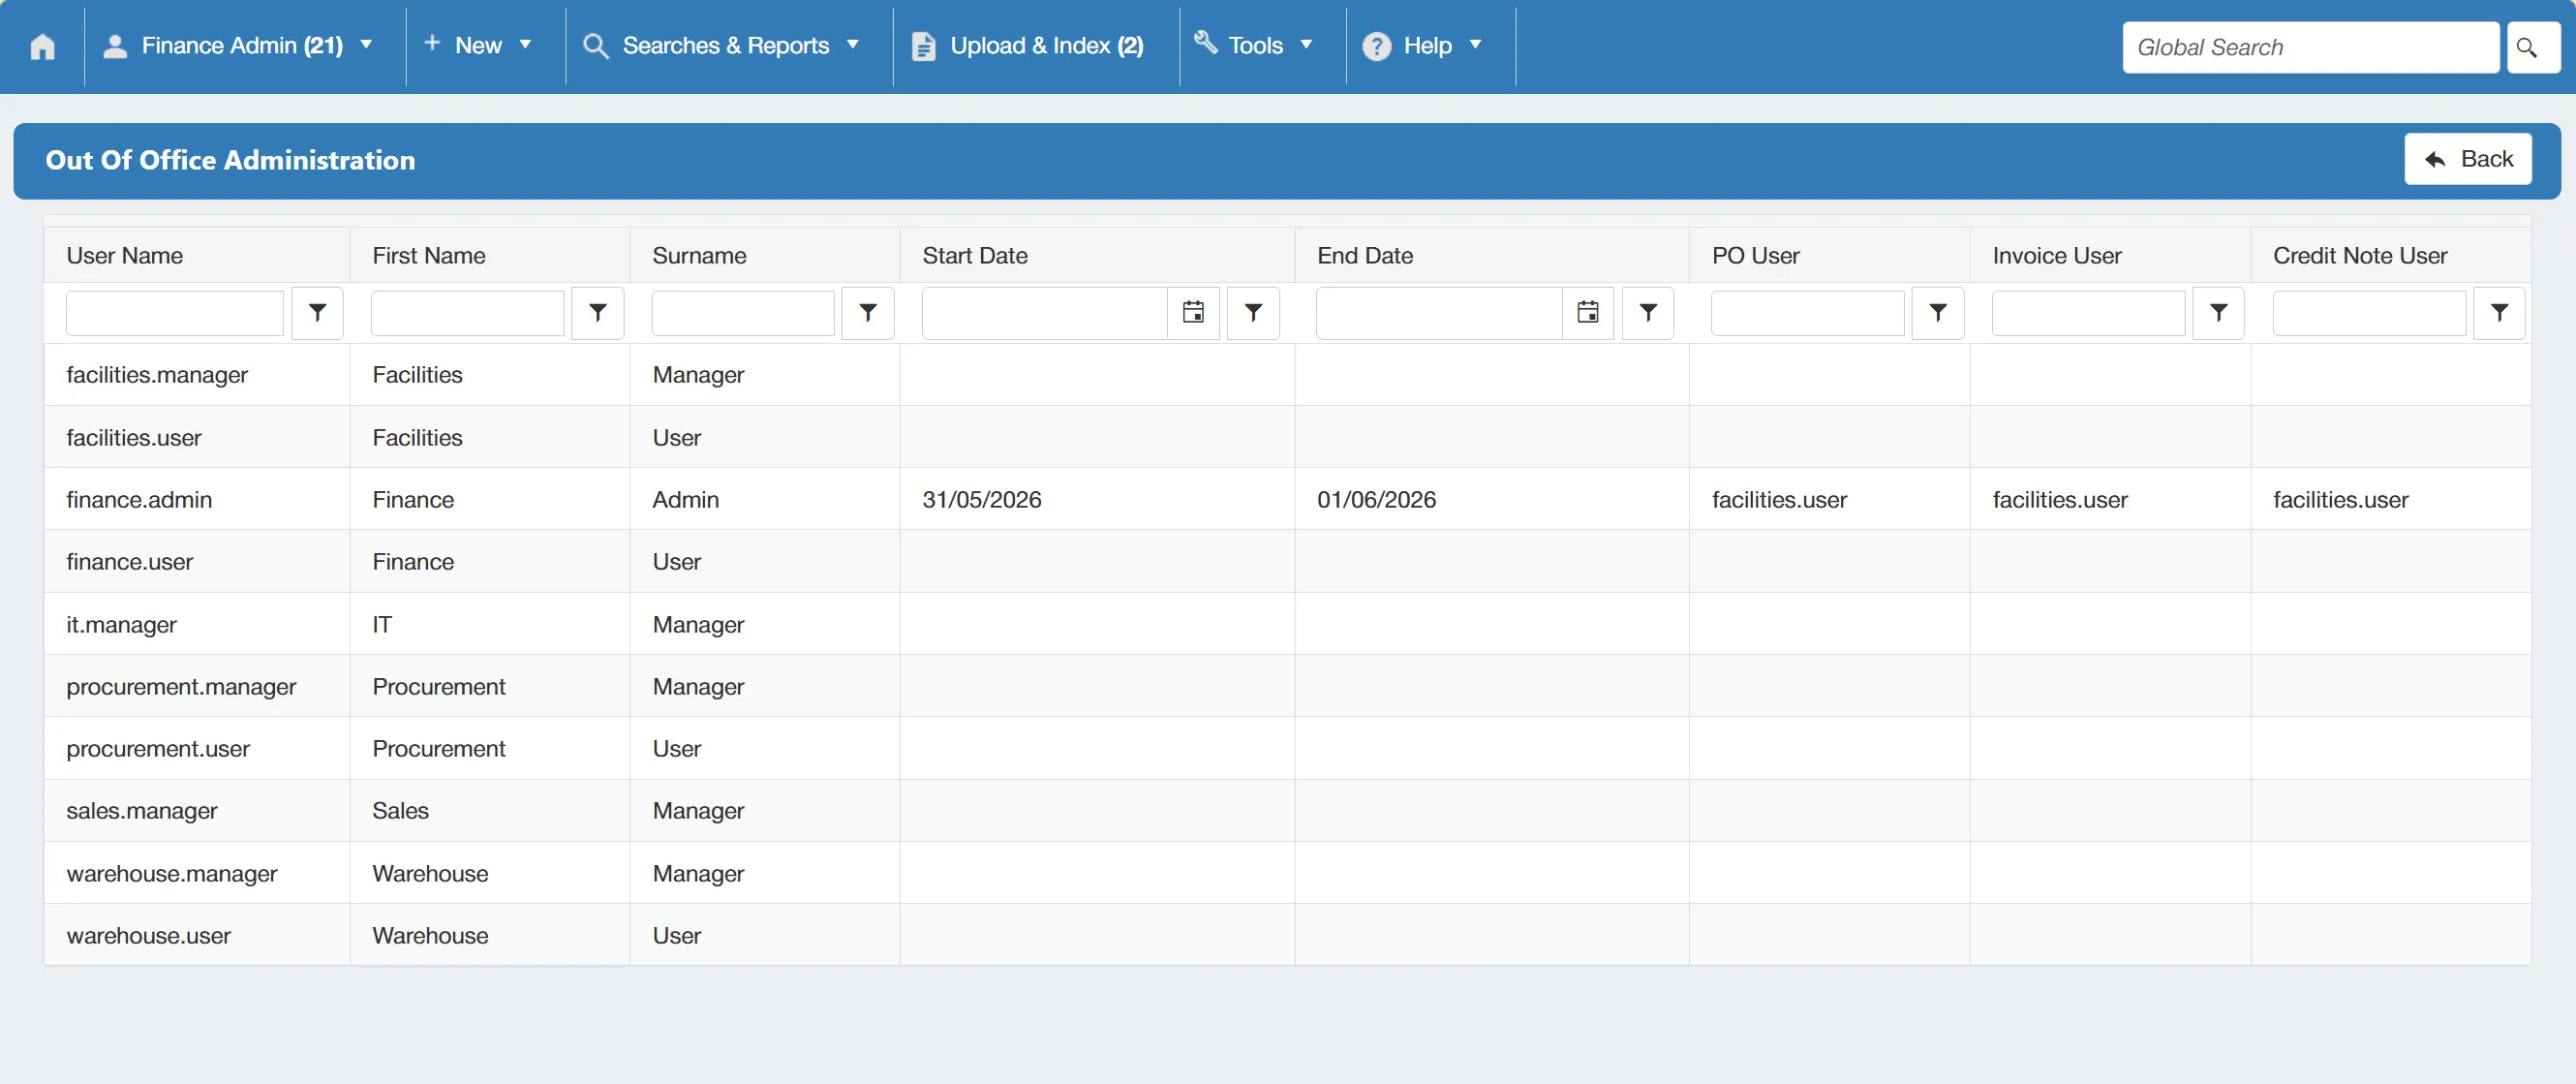
As a power user, you can set out-of-office functionality for other users. To do this, simply select the relevant user from the Out Of Office Administration table.
Once you have selected the desired user, you can fill out the required details such as; Start Date and End Date. You then need to select the designated users to re-assign the various tasks to. This is set for PO Tasks, Invoice Tasks and Credit Note Tasks.
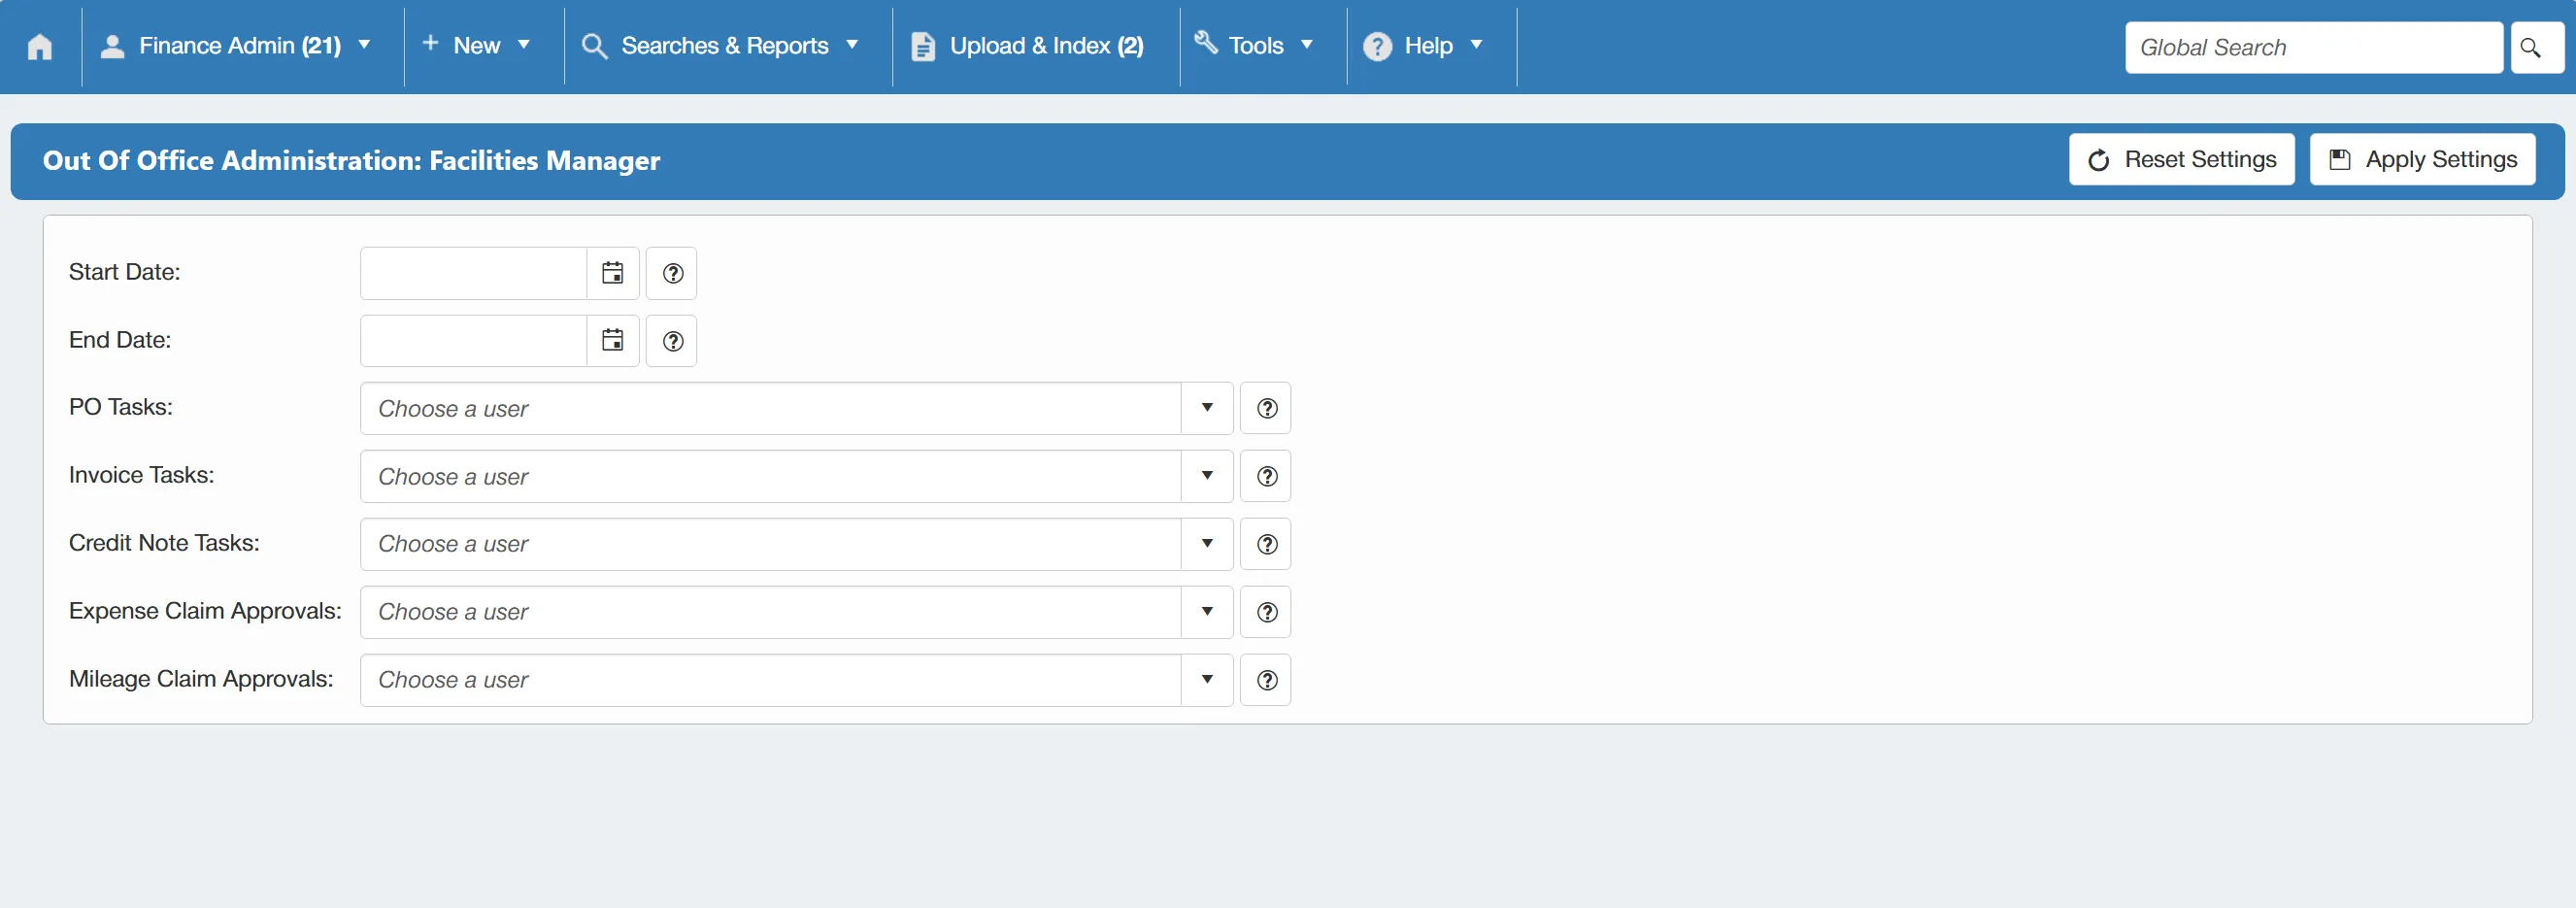
Invoice Tasks and Credit Note Tasks are only applicable to systems with Invoice Processing features enabled.
Once you have completed the details, click to confirm.
User Sessions
A power user has access to User Sessions administration which allows them to see which users are currently logged in and, if needed, terminate their sessions. This is helpful when you need to free up a concurrent license by ending an un-used session.
Only users with the User Admin permission enabled can access this section. For more information on user permissions click here.
To access this section by selecting User Sessions from the Administration Tools section.
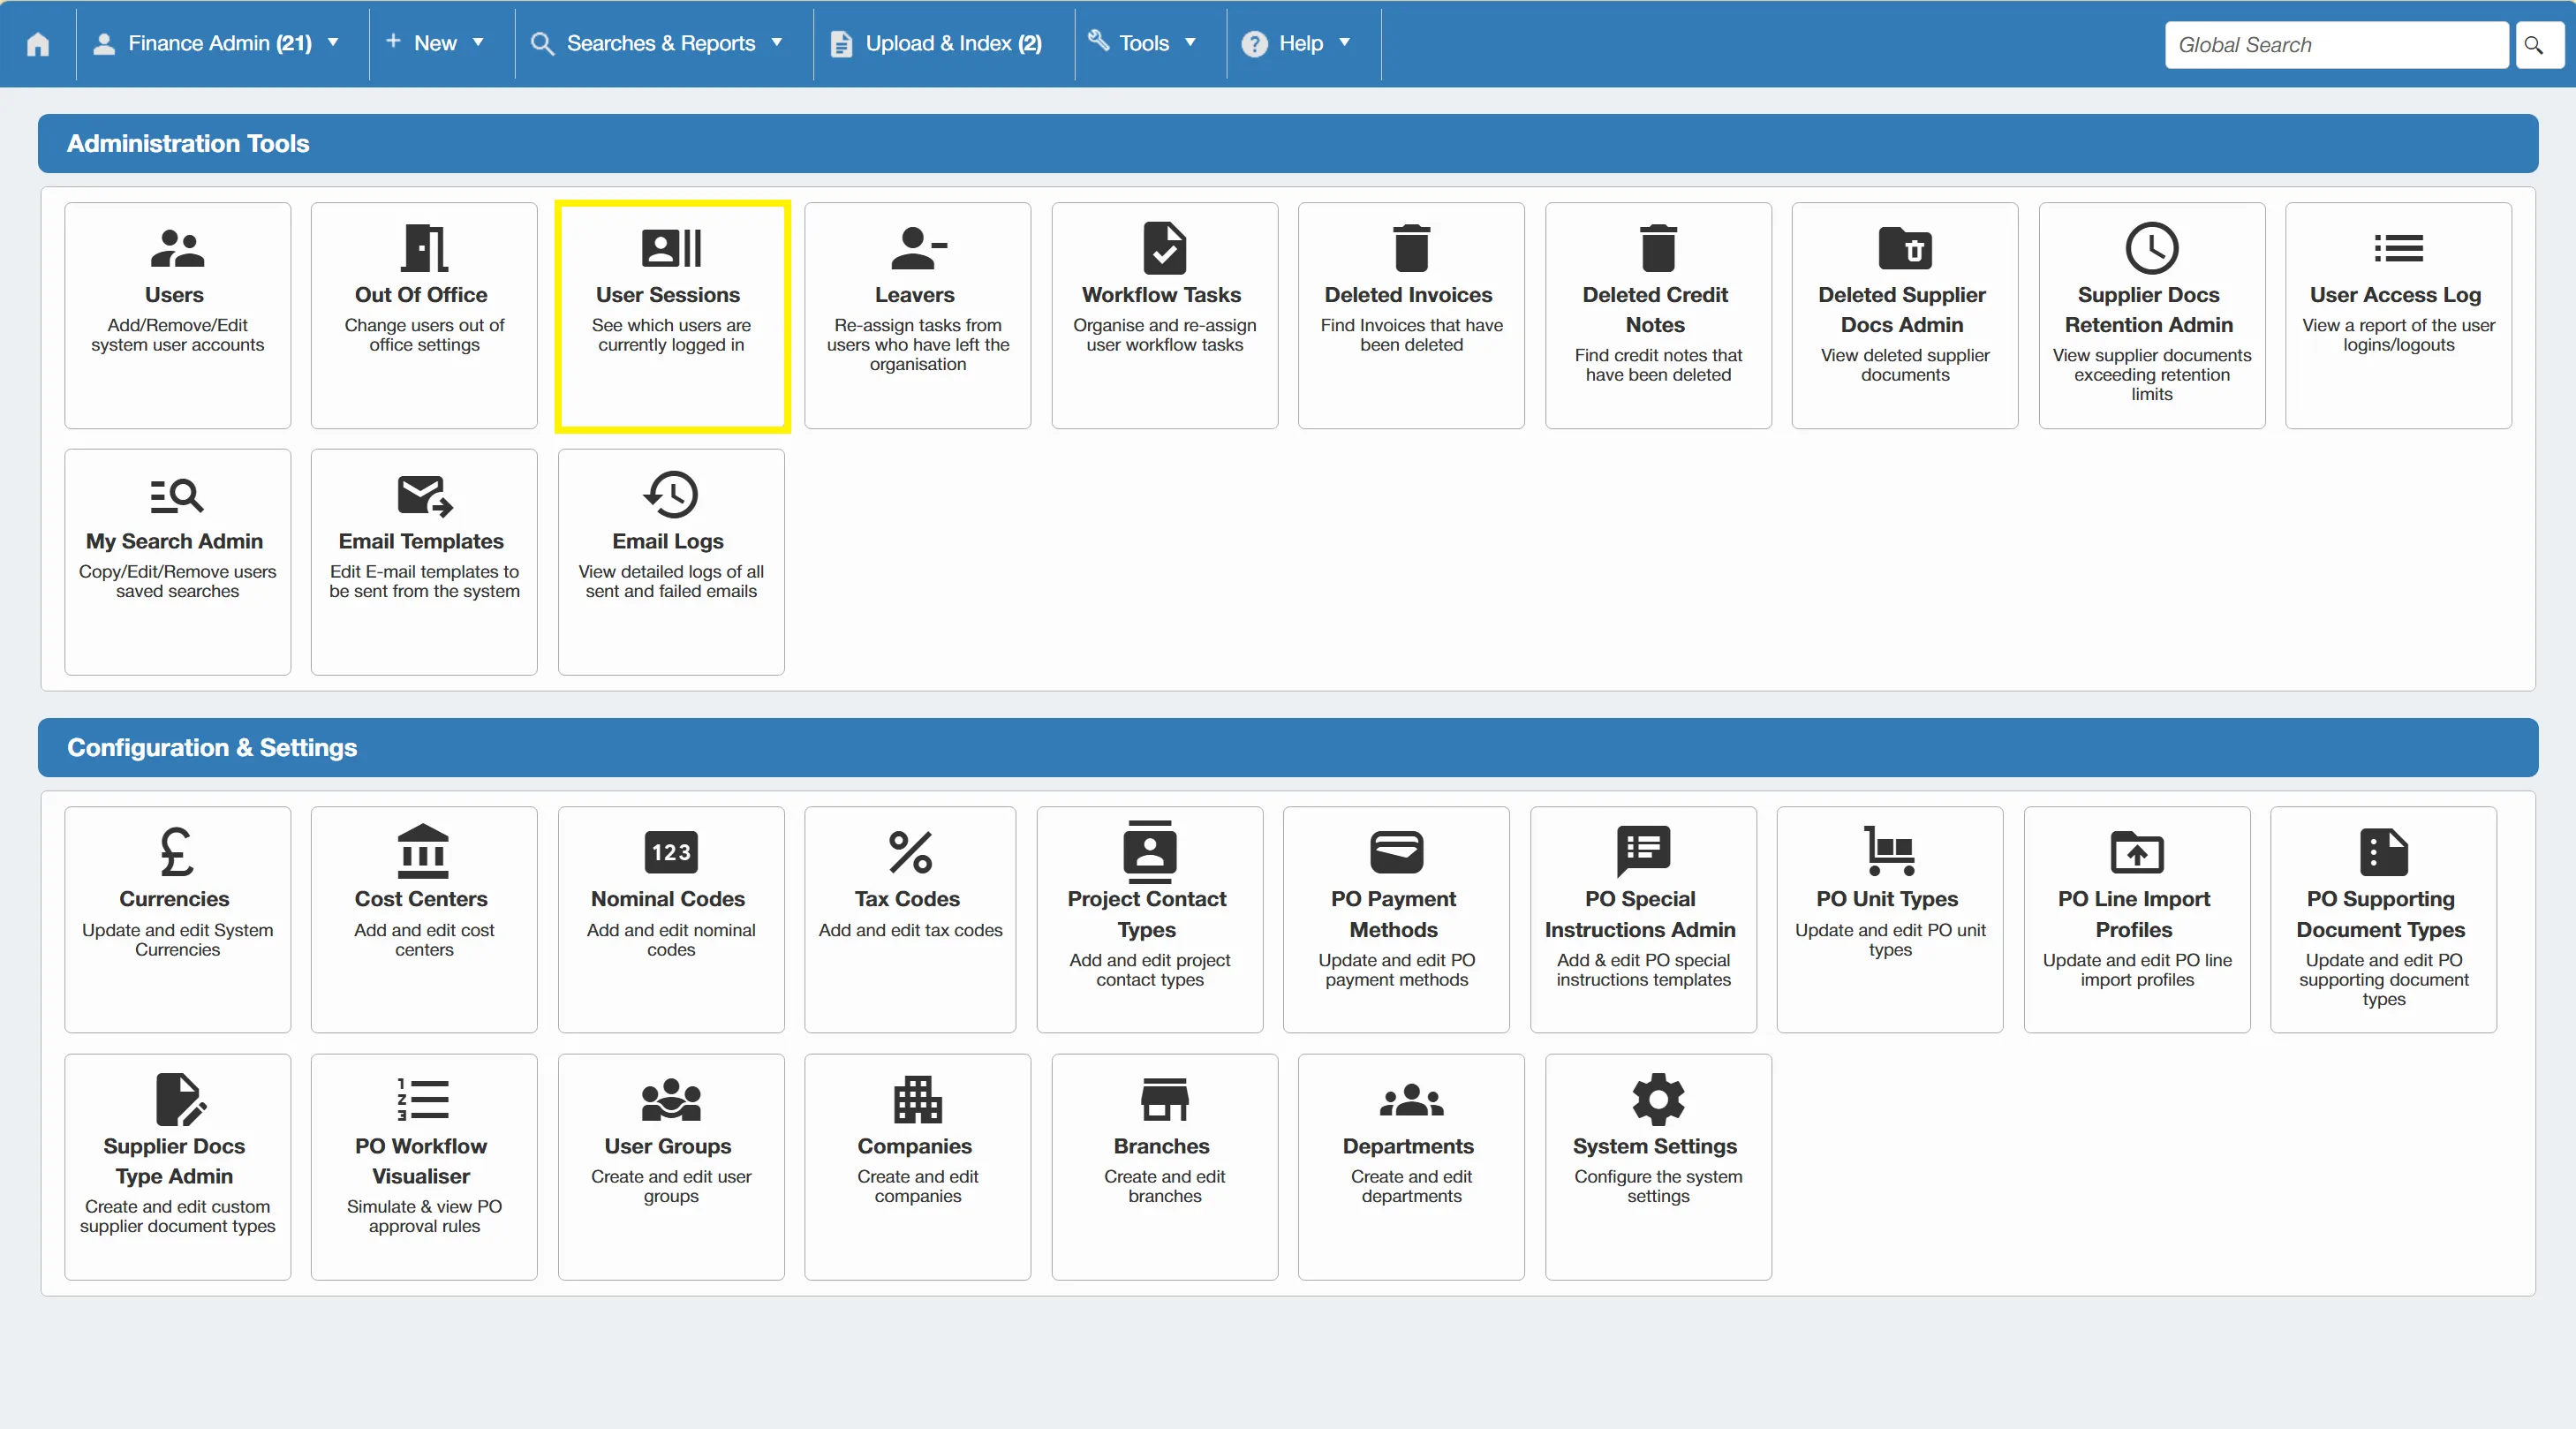
Clicking on this, will bring you to a table showing any users currently logged into the system. It also shows key information such as log-in time and license type.
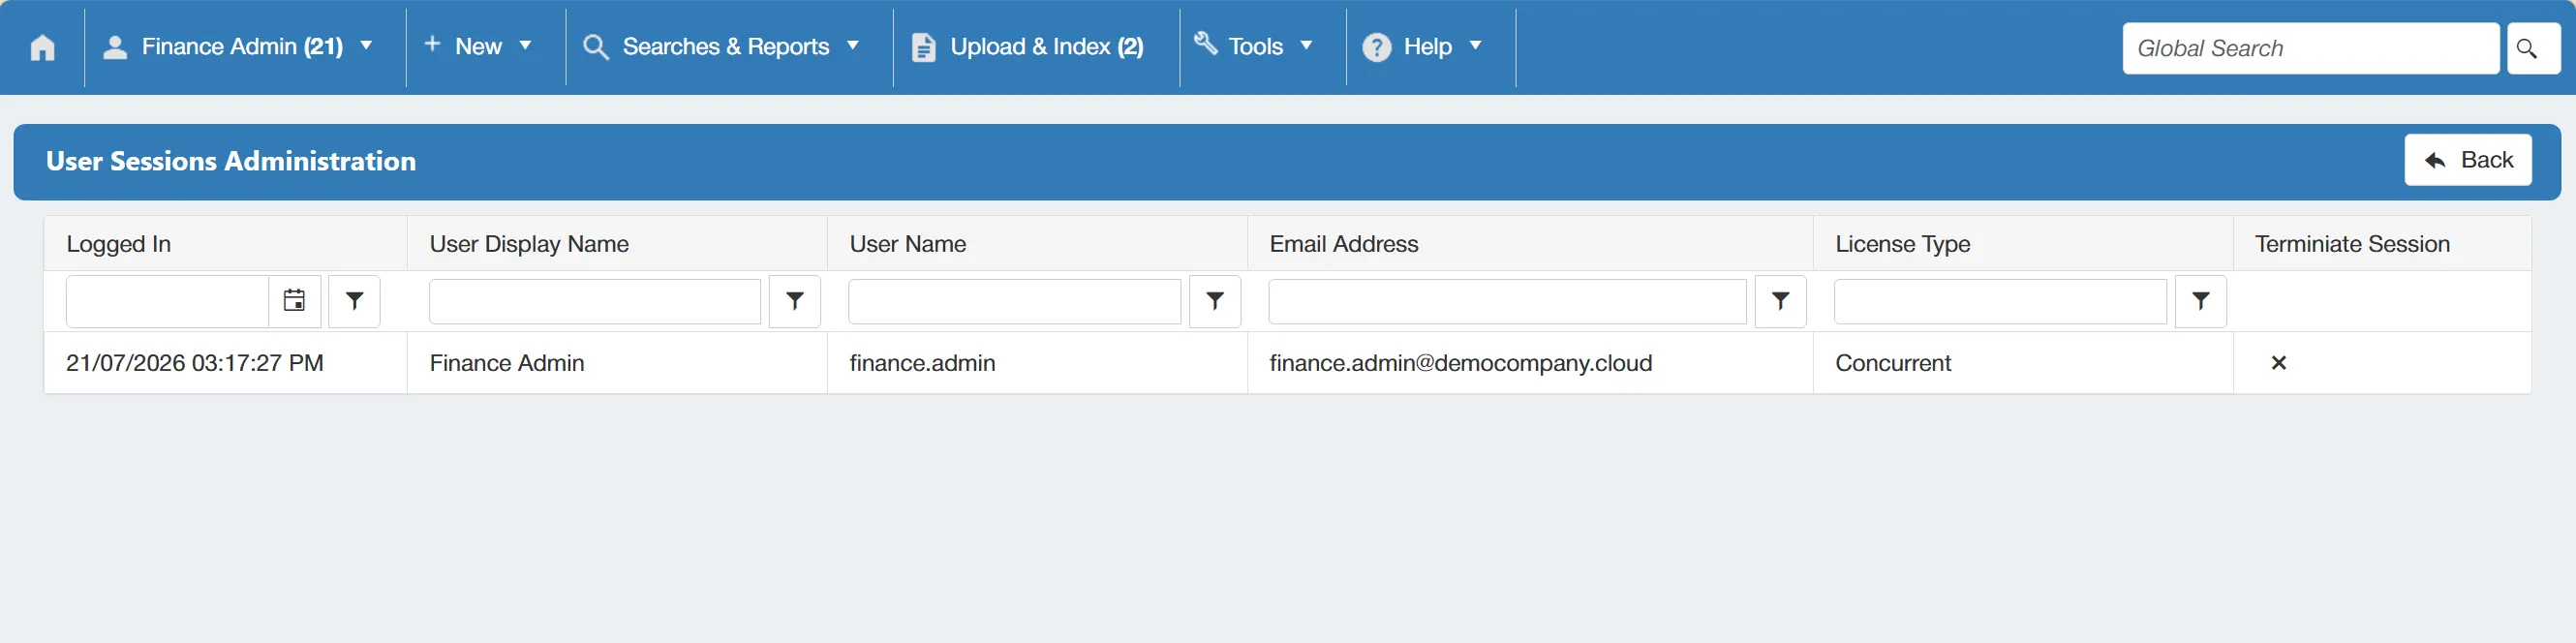
You can then terminate a user's session if required, by clicking the in the Terminate Session column for the corresponding user. This will log the user out of the system, freeing up the license for another user.
Permission for this function should only be given to power users.
Leaver Administration
You can view any users that have left the organisation and re-assign their tasks. This ensures continuity in the workflow process in the event of a user leaving.
Only users with the User Admin permission enabled can access this section. For more information on user permissions click here.
Access this section by selecting Leavers from the Administration Tools section.
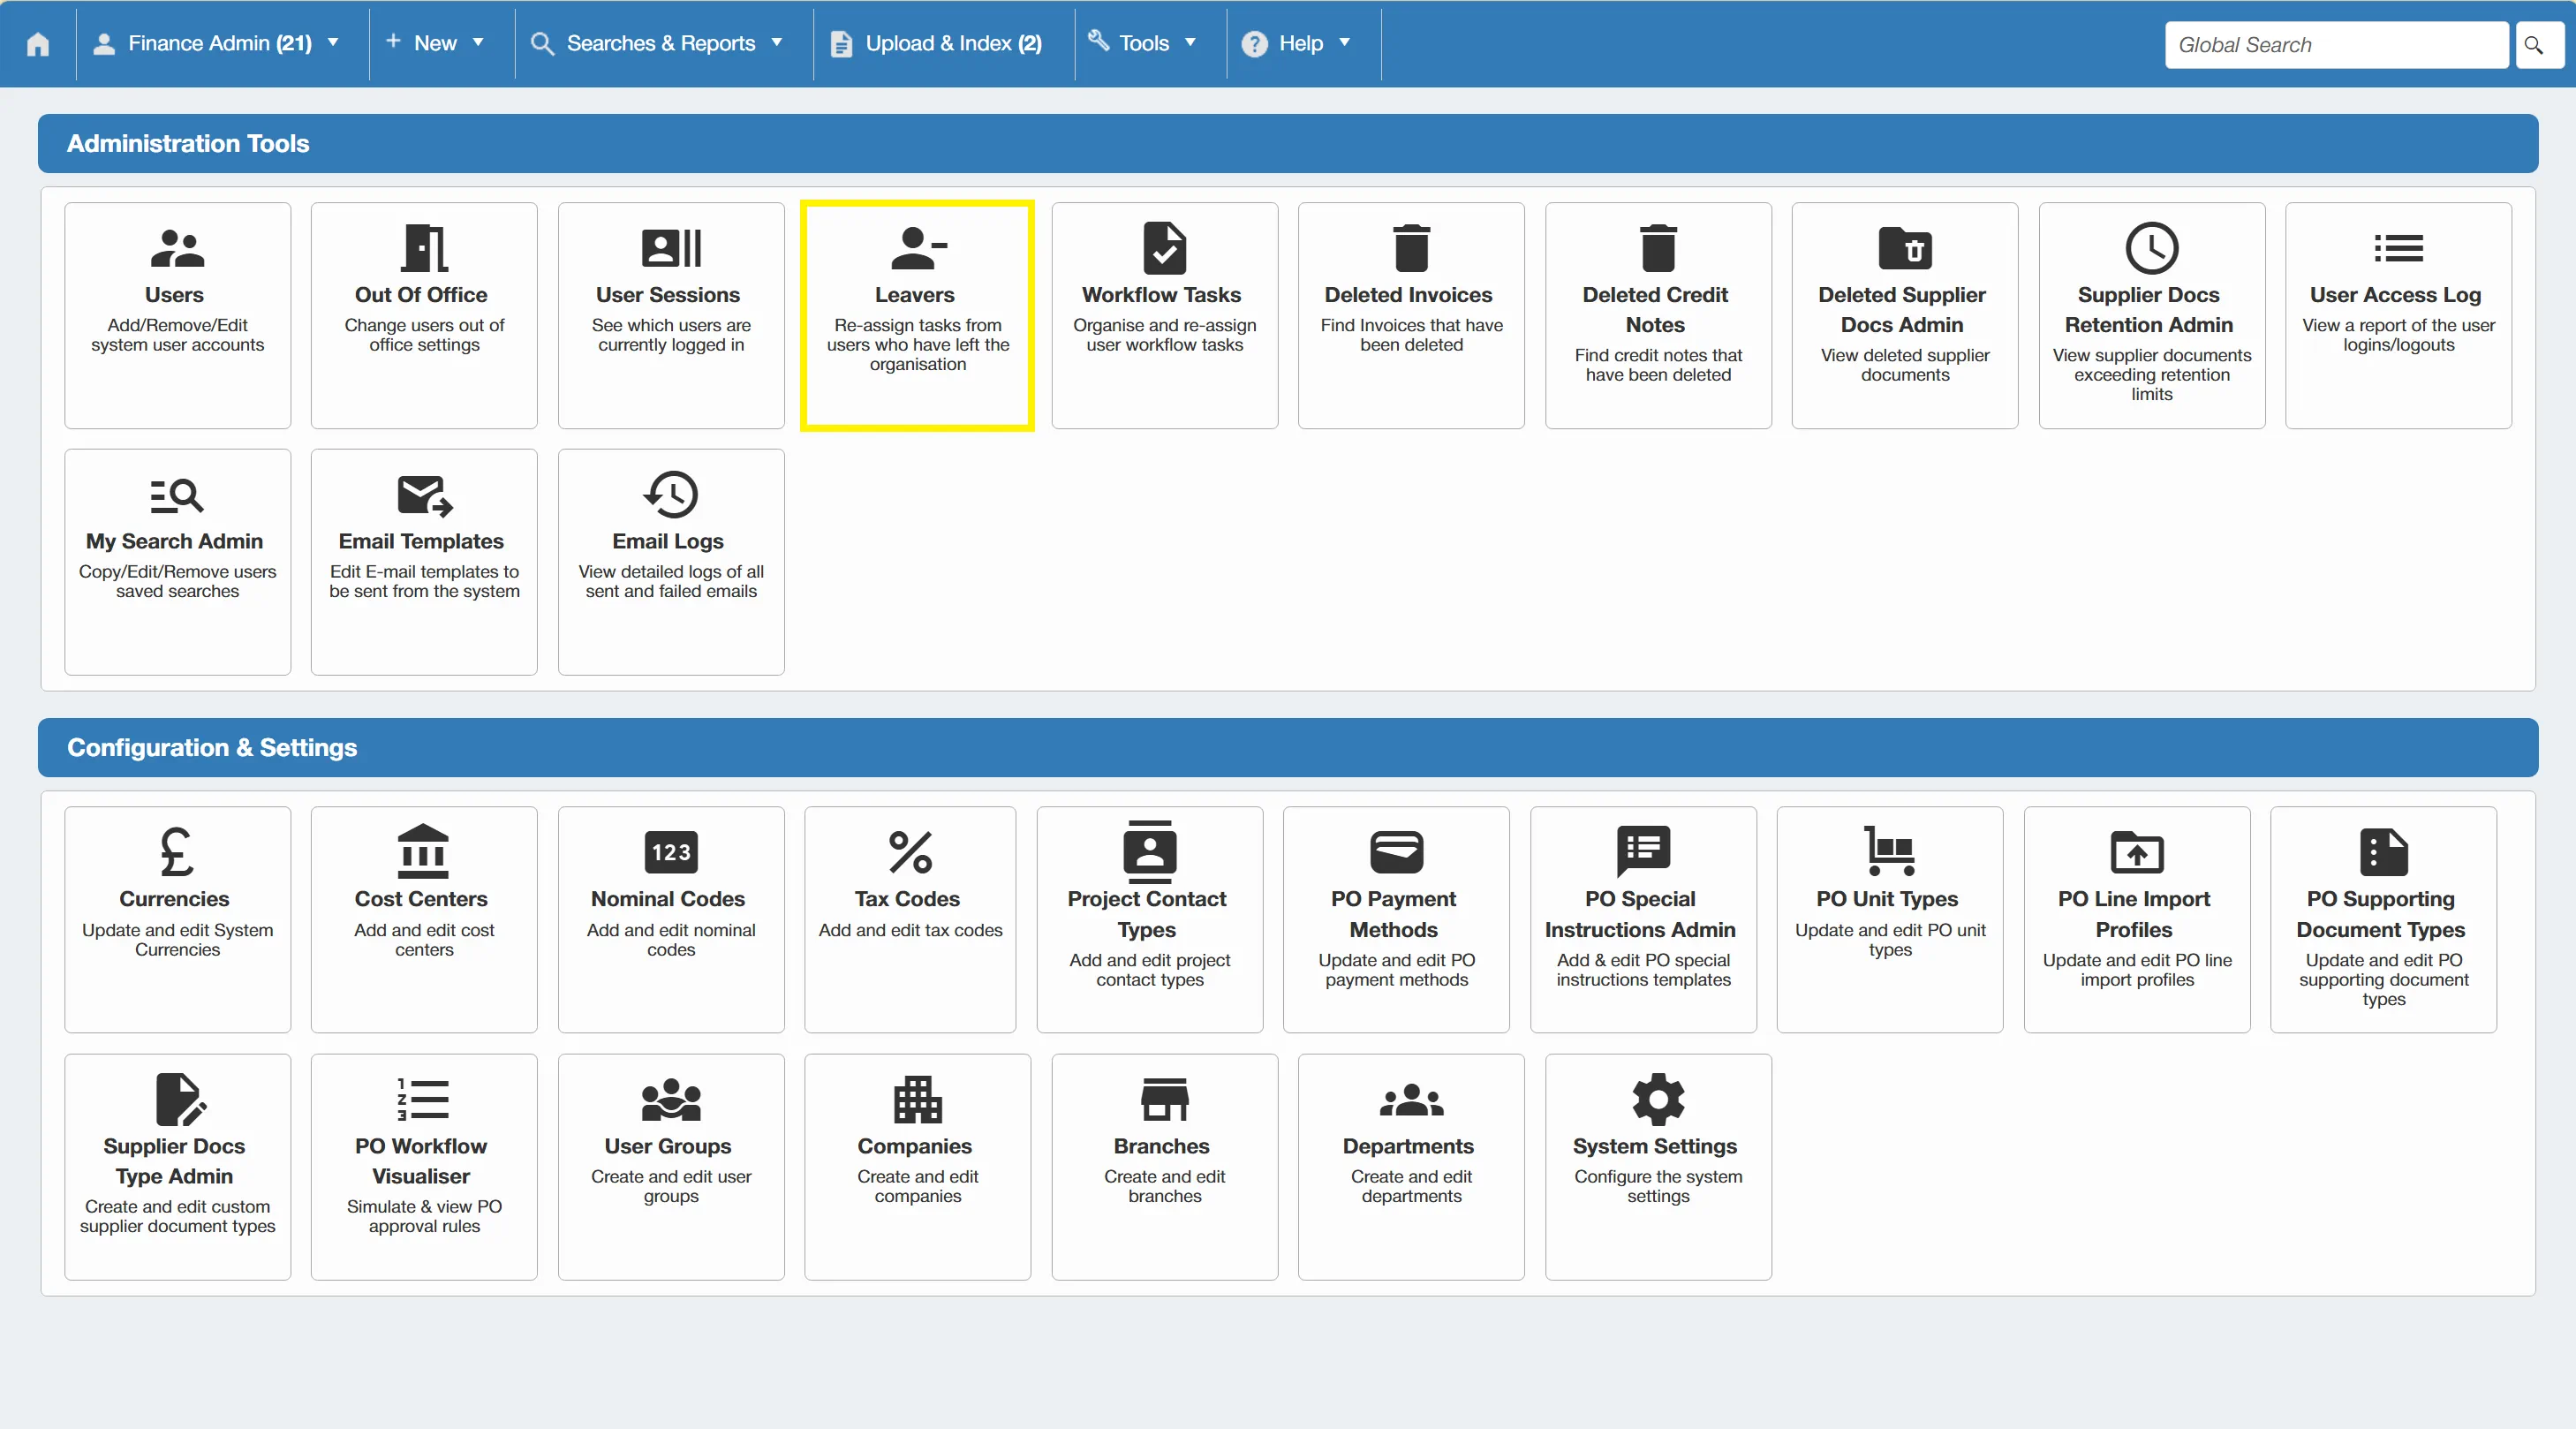
This brings you to a table showing all leavers within the system. From here you can access each user and re-assign their tasks accordingly.
Workflow Tasks
Power users have the ability to view and re-assign workflow tasks for all users. This is helpful if you need to manually redirect a task from one user to another.
Only users with the Tasks Admin permission enabled can access this section. For more information on user permissions click here.
To view all workflow tasks, simply click Workflow Tasks on the Administration Tools Section.
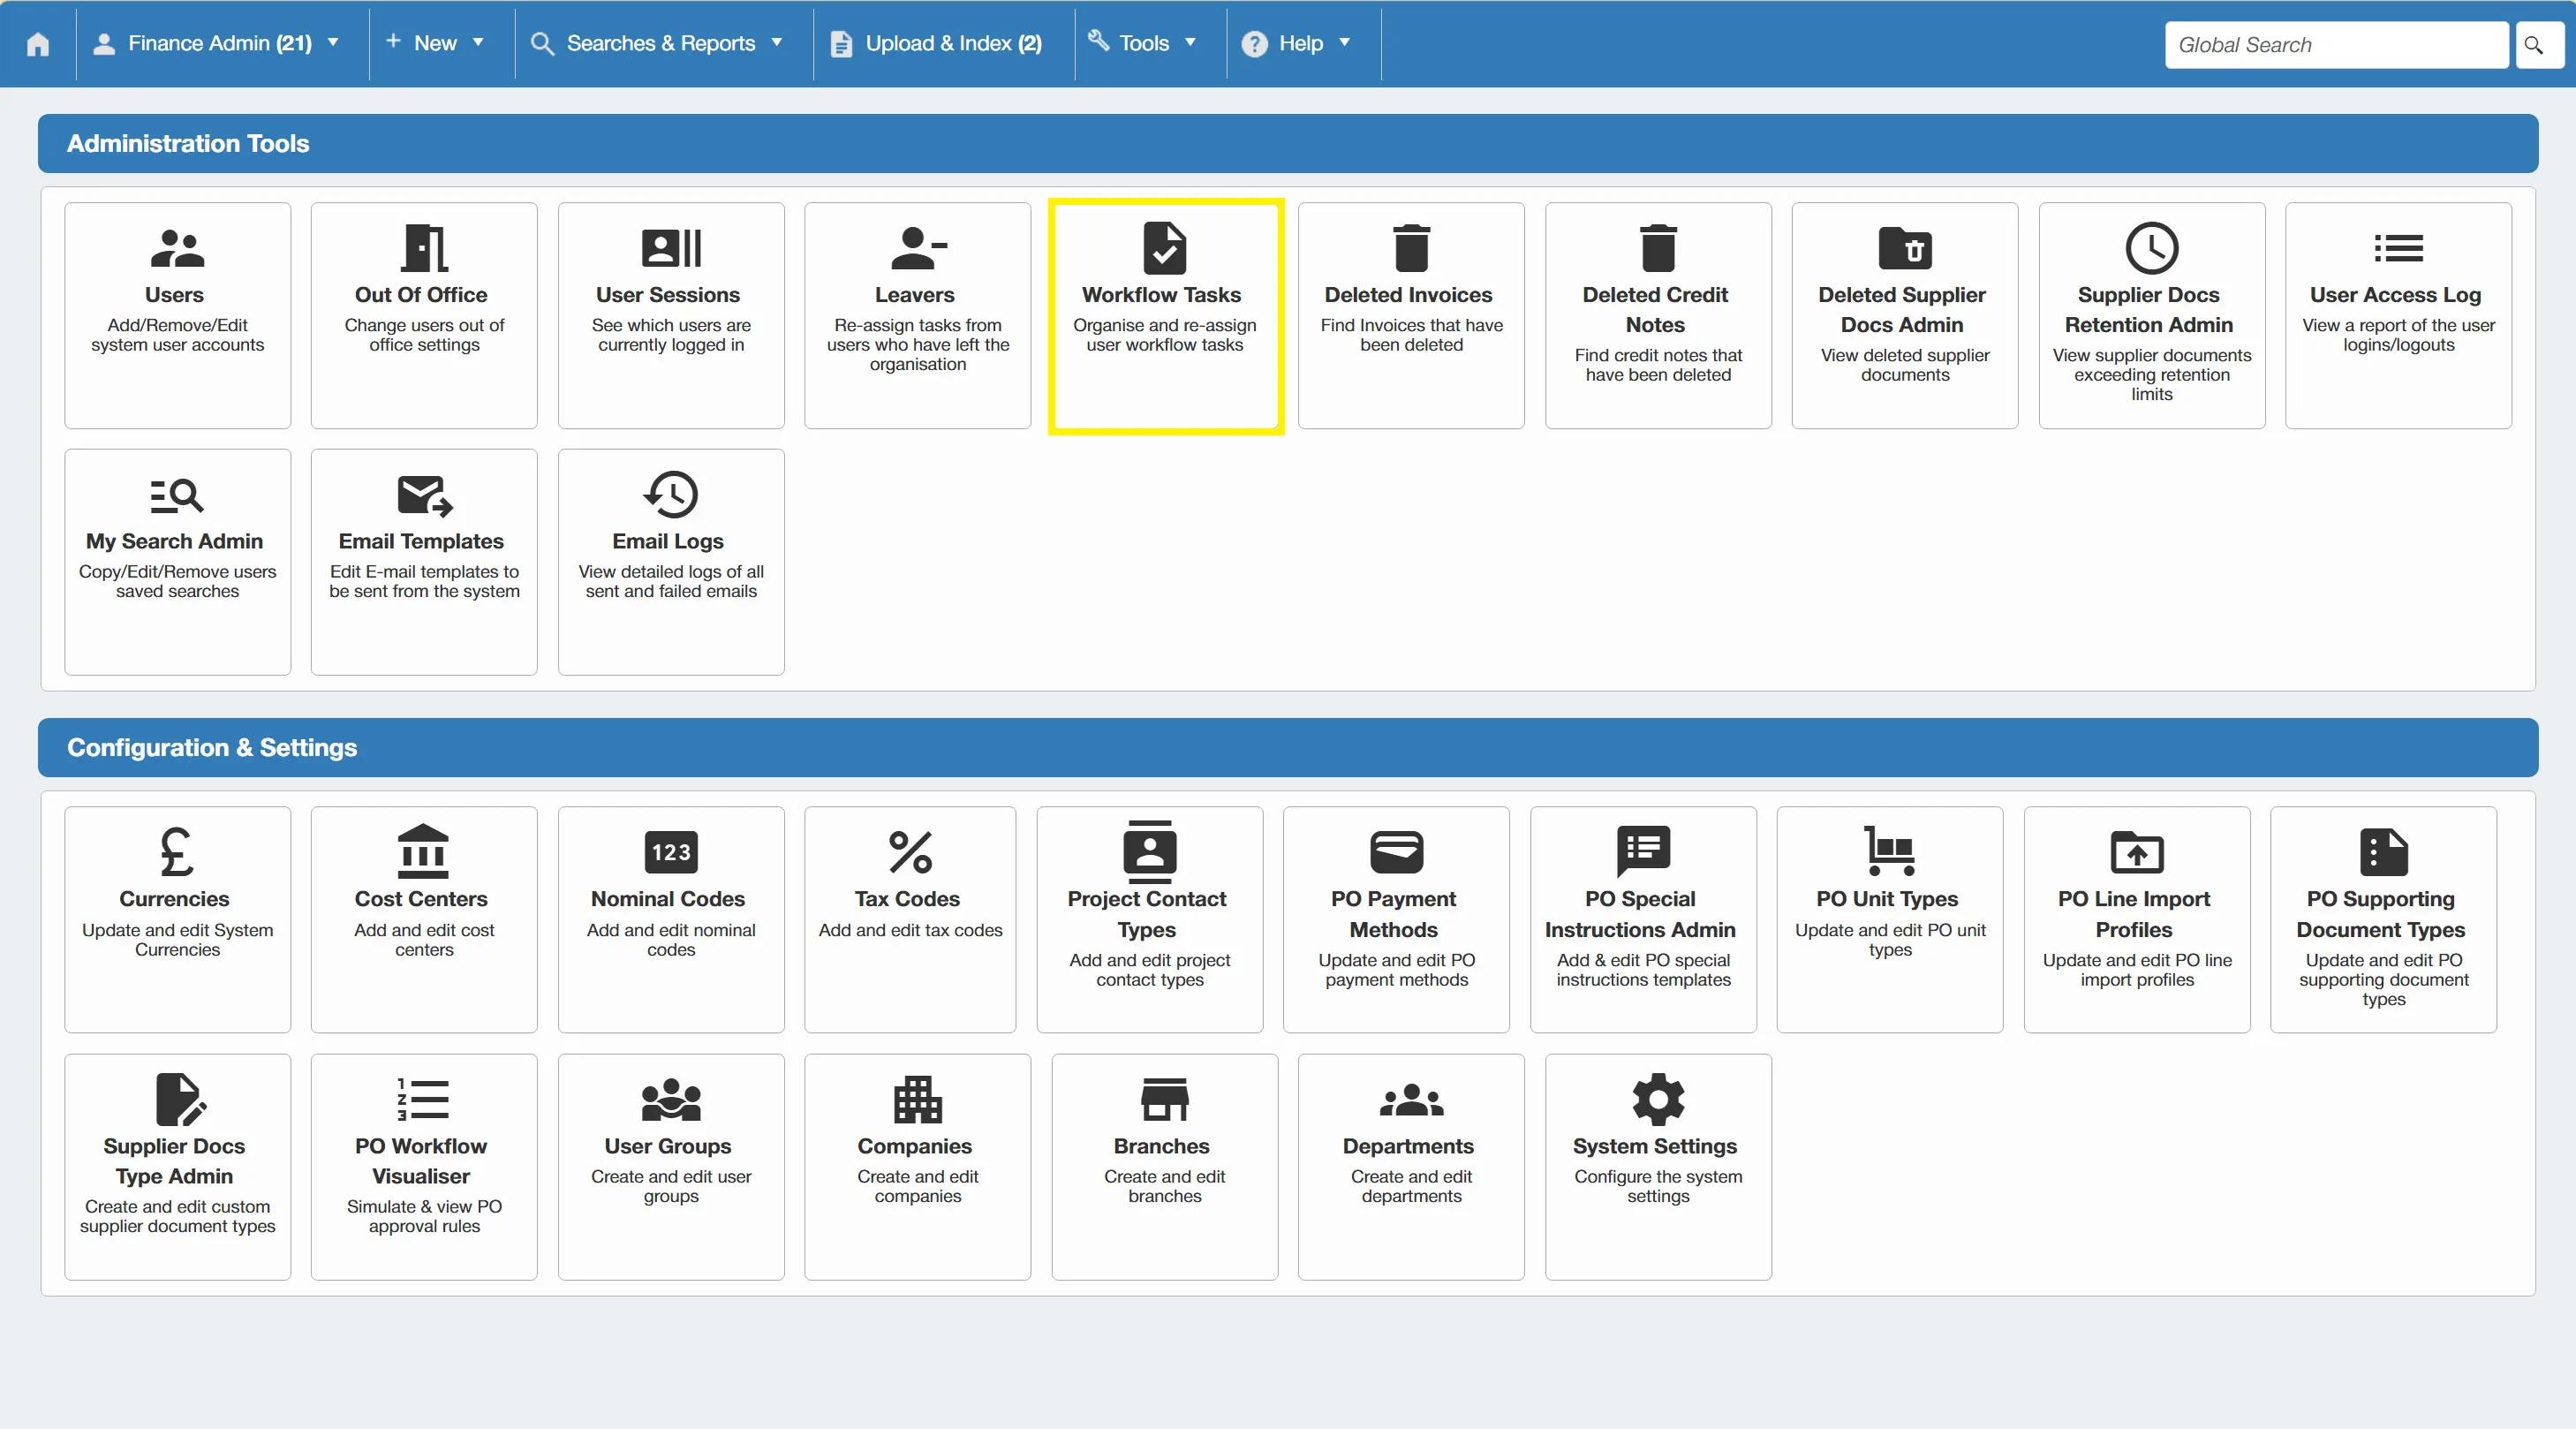
This opens a table showing all workflow tasks along with information such as the type of task, when it was assigned and who it was assigned to.
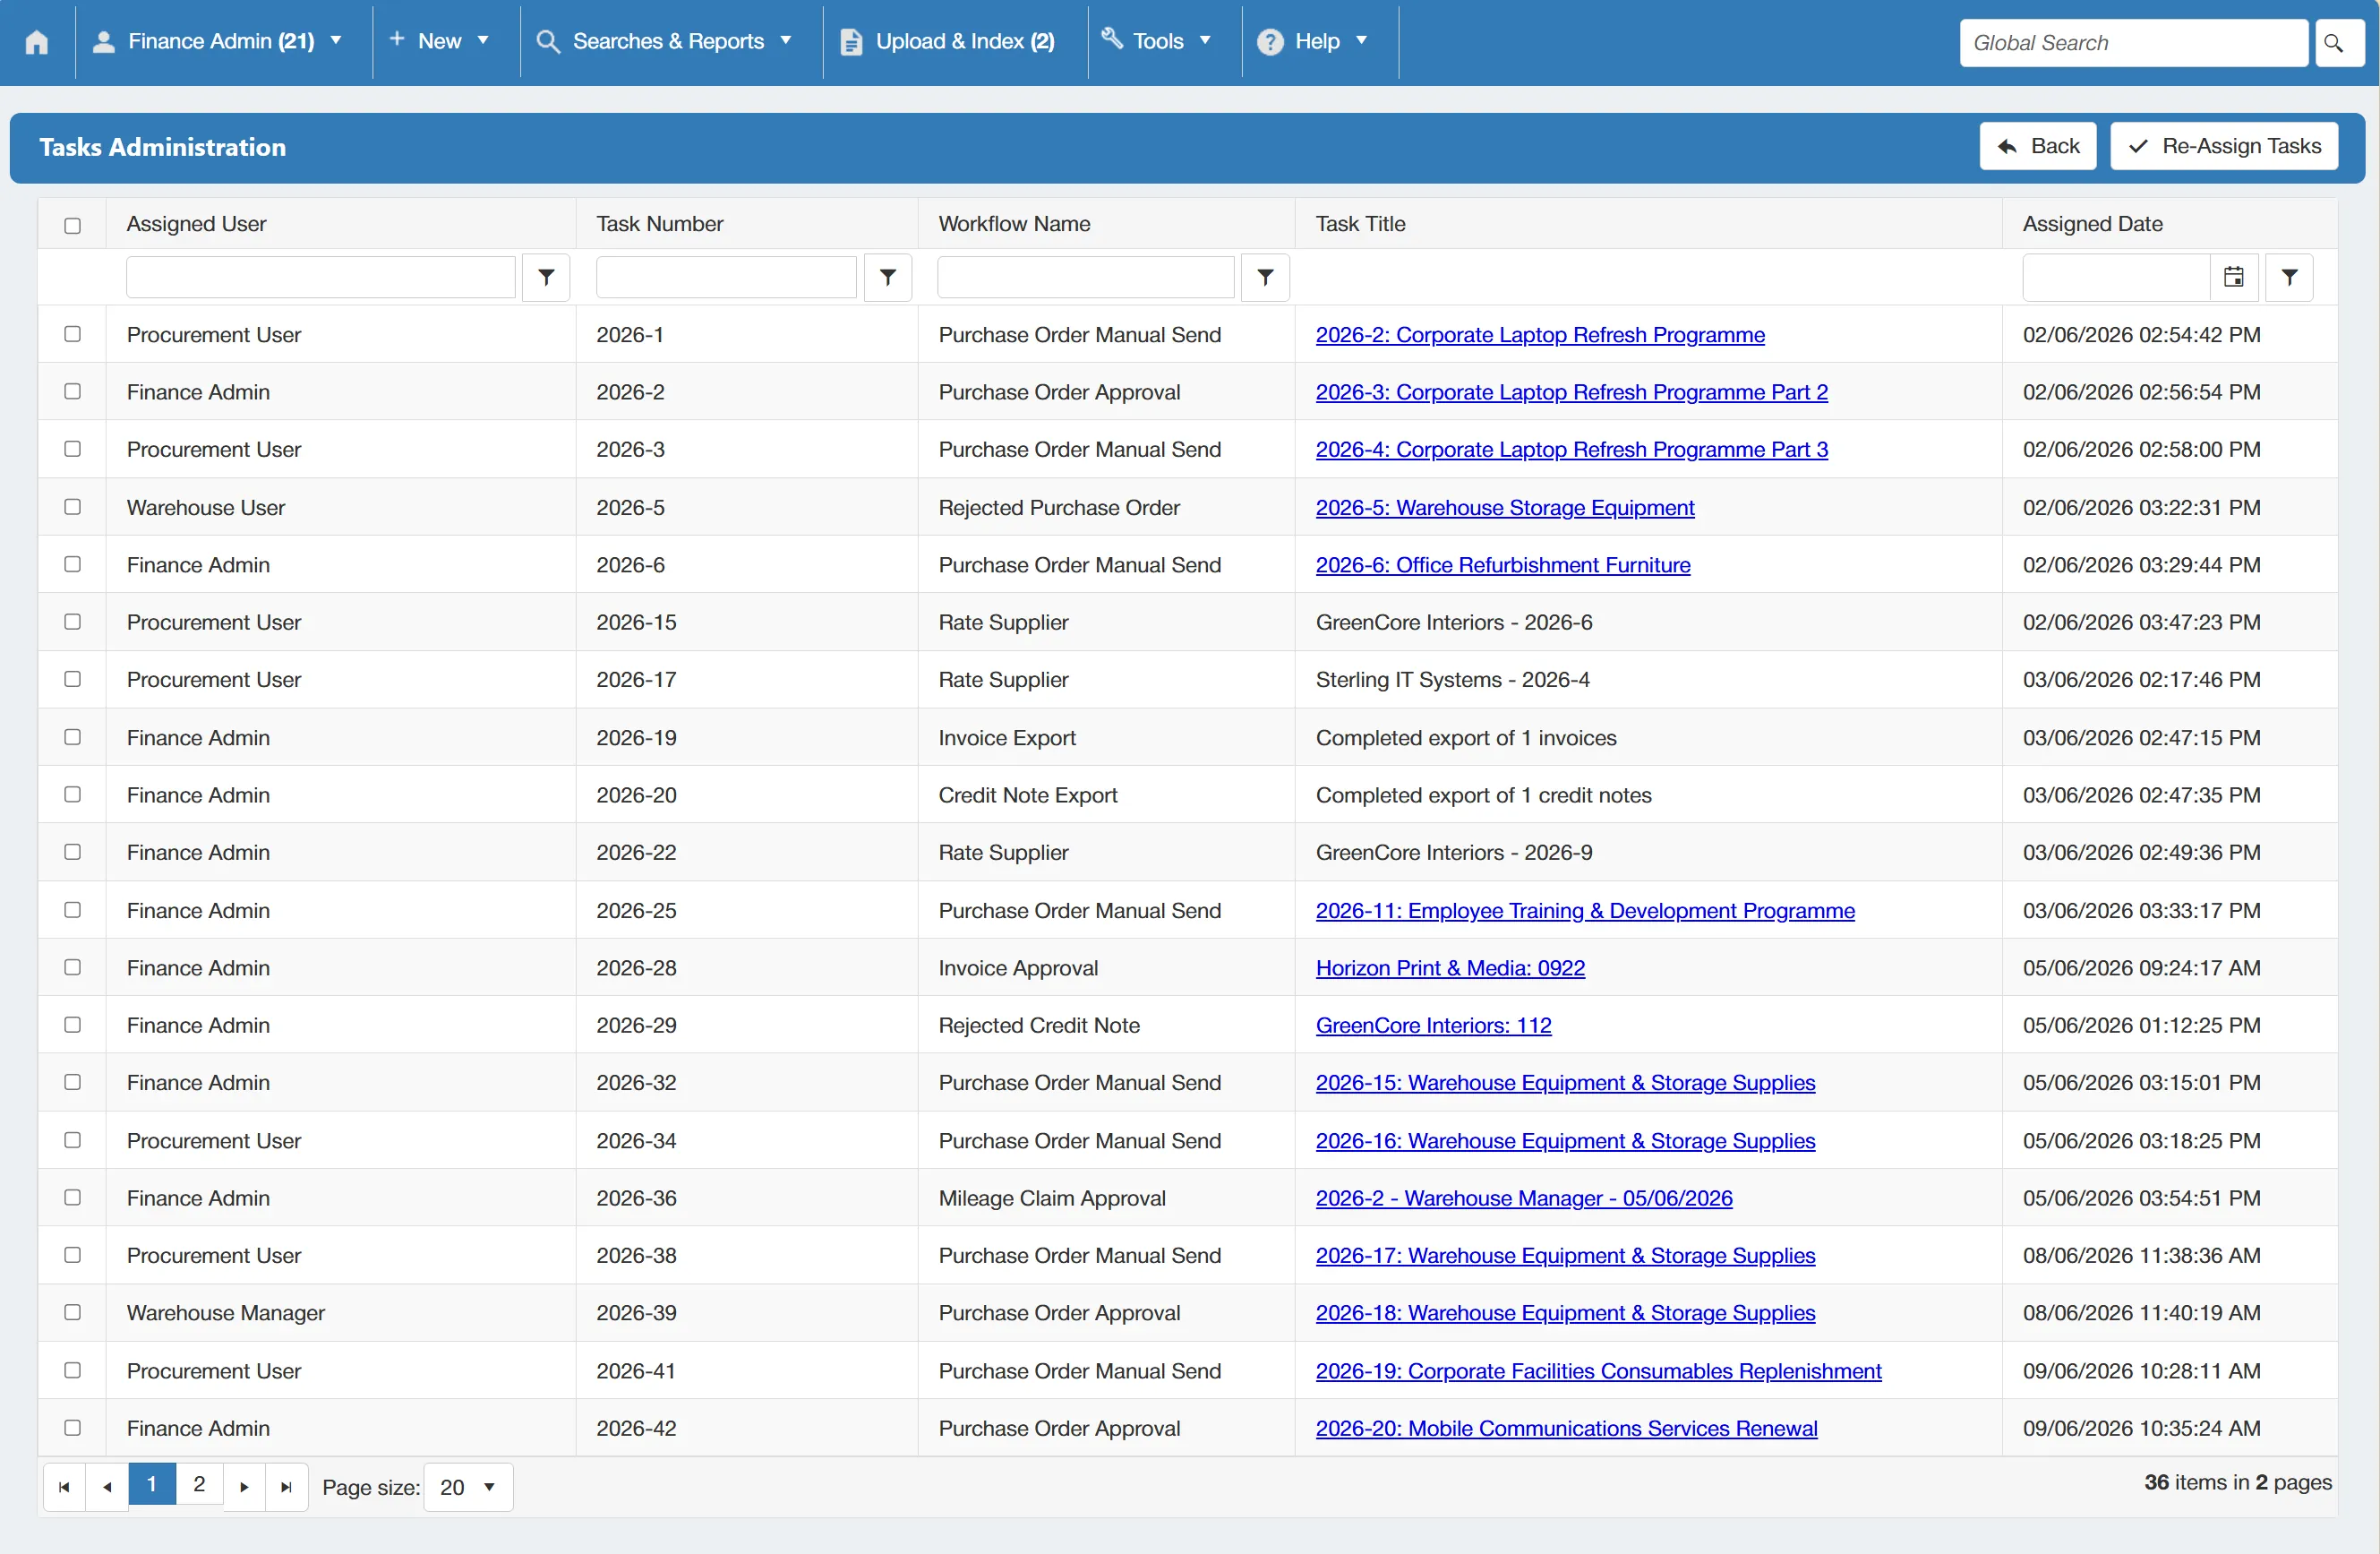
From this table you can re-assign a task by clicking on it to select it and then clicking in the top right corner.
You can re-assign multiple tasks at once by holding CTRL and clicking on each task (this allows you to select more than one line). Once the lines are selected, click as normal.
When you click , a new page opens allowing you to choose the desired user to re-assign to.
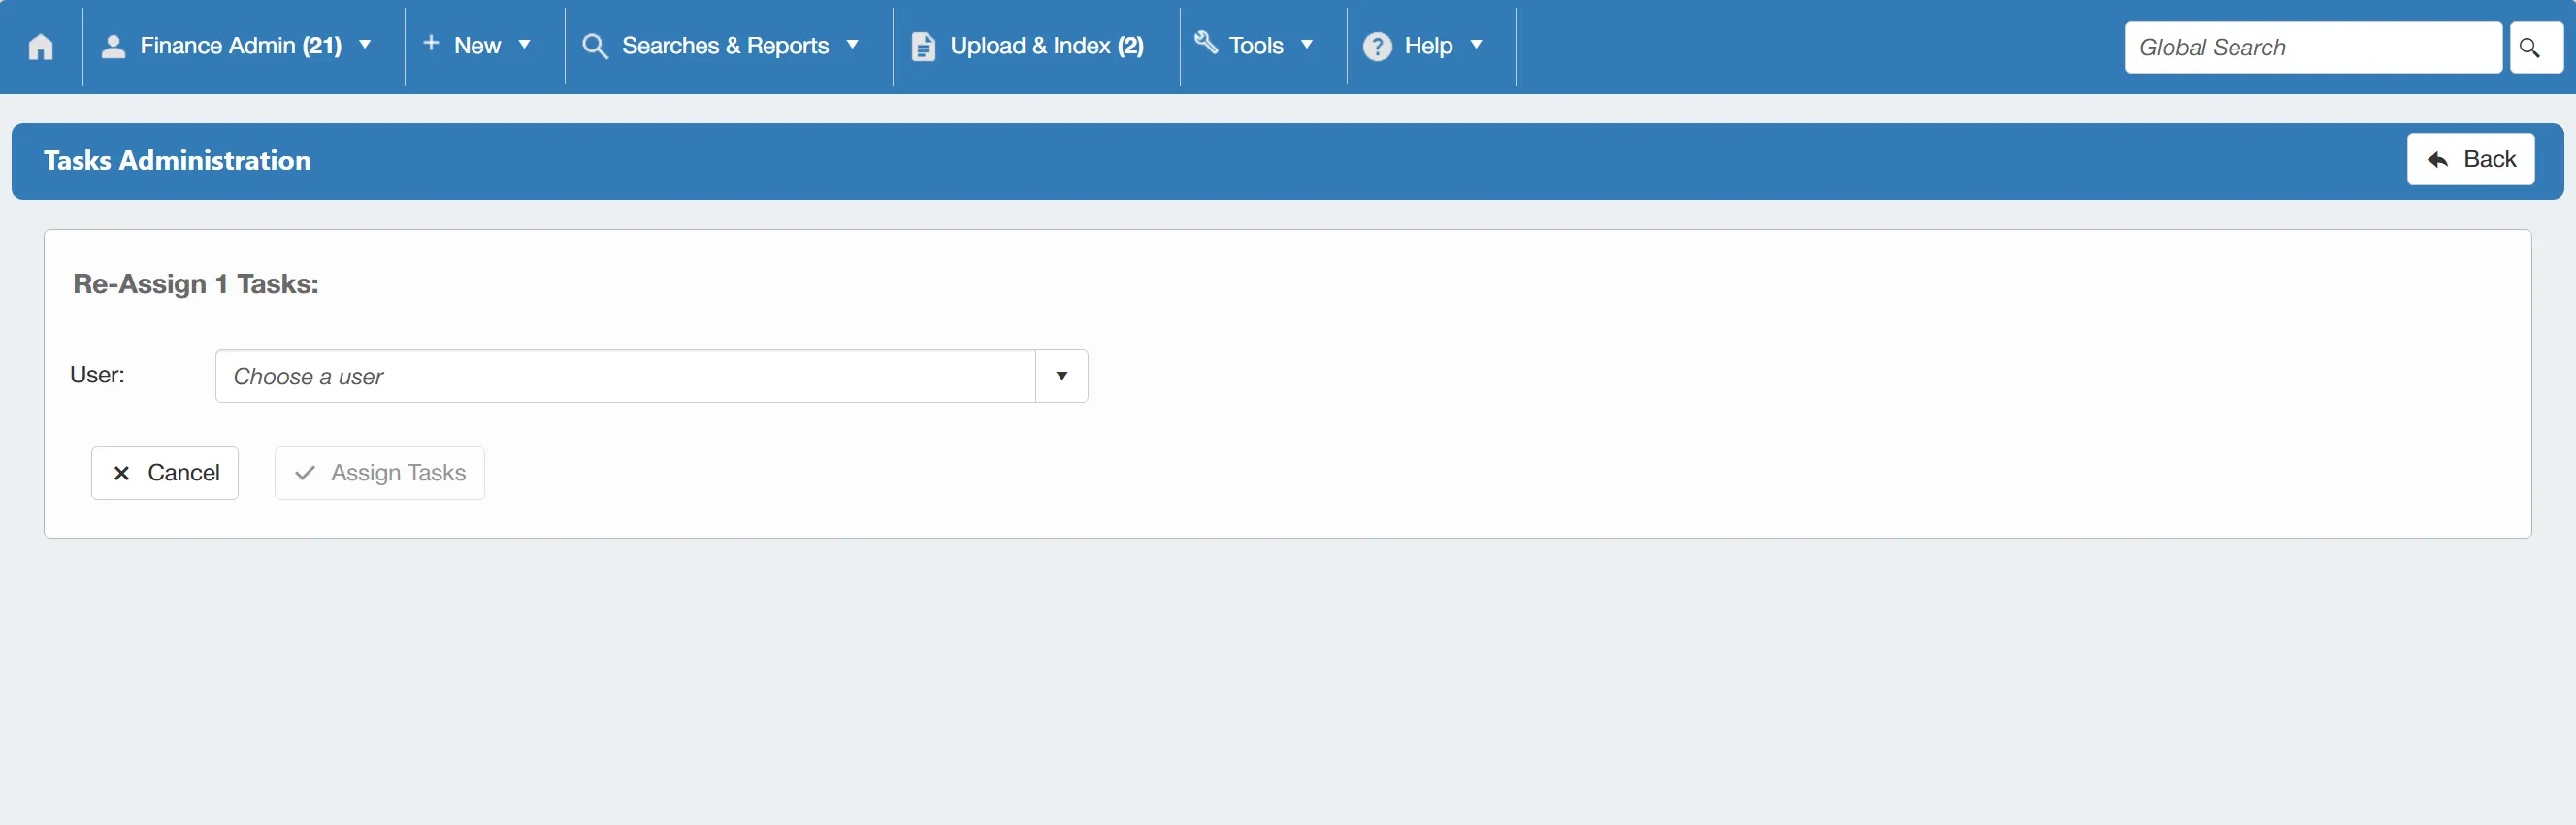
Once you have filled in the details, click to complete the re-assignment.
Deleted Invoices
Any Invoices that have been deleted are sent to the Deleted Invoices Administration grid.
Only users with the Invoice/Credit Note Delete permission enabled can access this section. For more information on user permissions click here.
To access the grid, simply click Deleted Invoices on the Administration Tools Section.
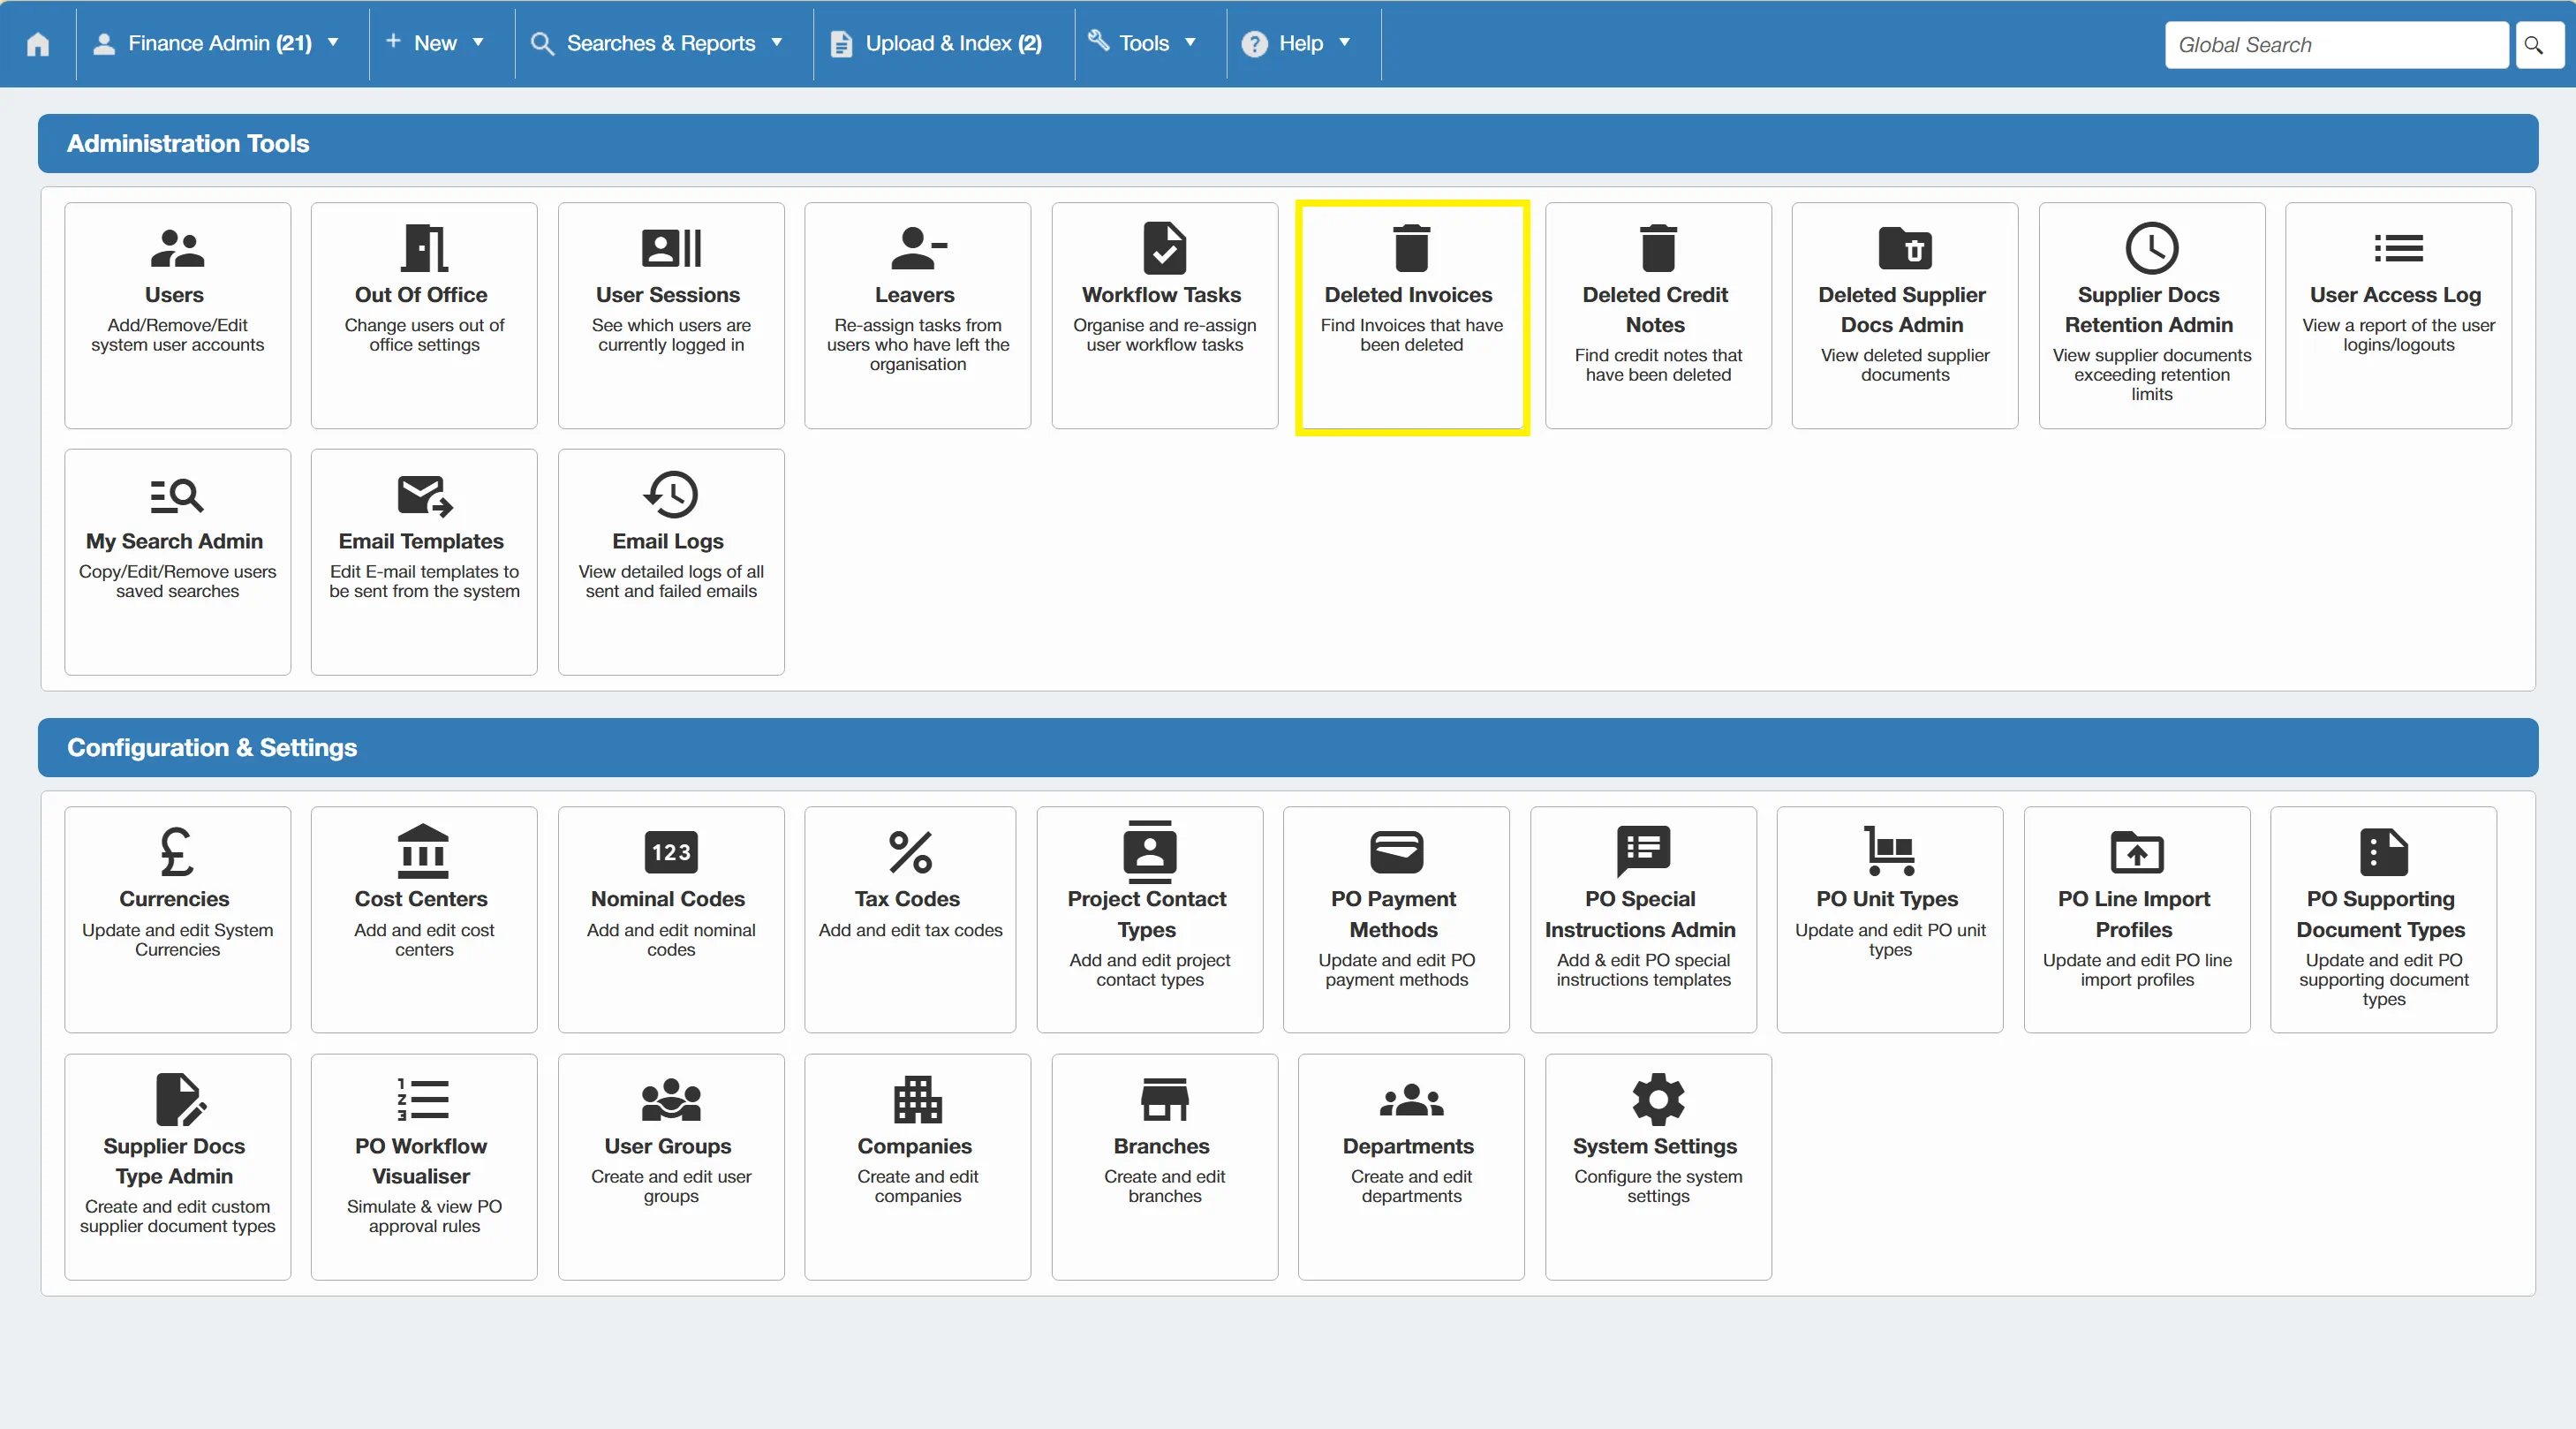
This opens a table showing all deleted invoices along with information such as the Supplier, Invoice Number, Deletion Date, and who deleted it.
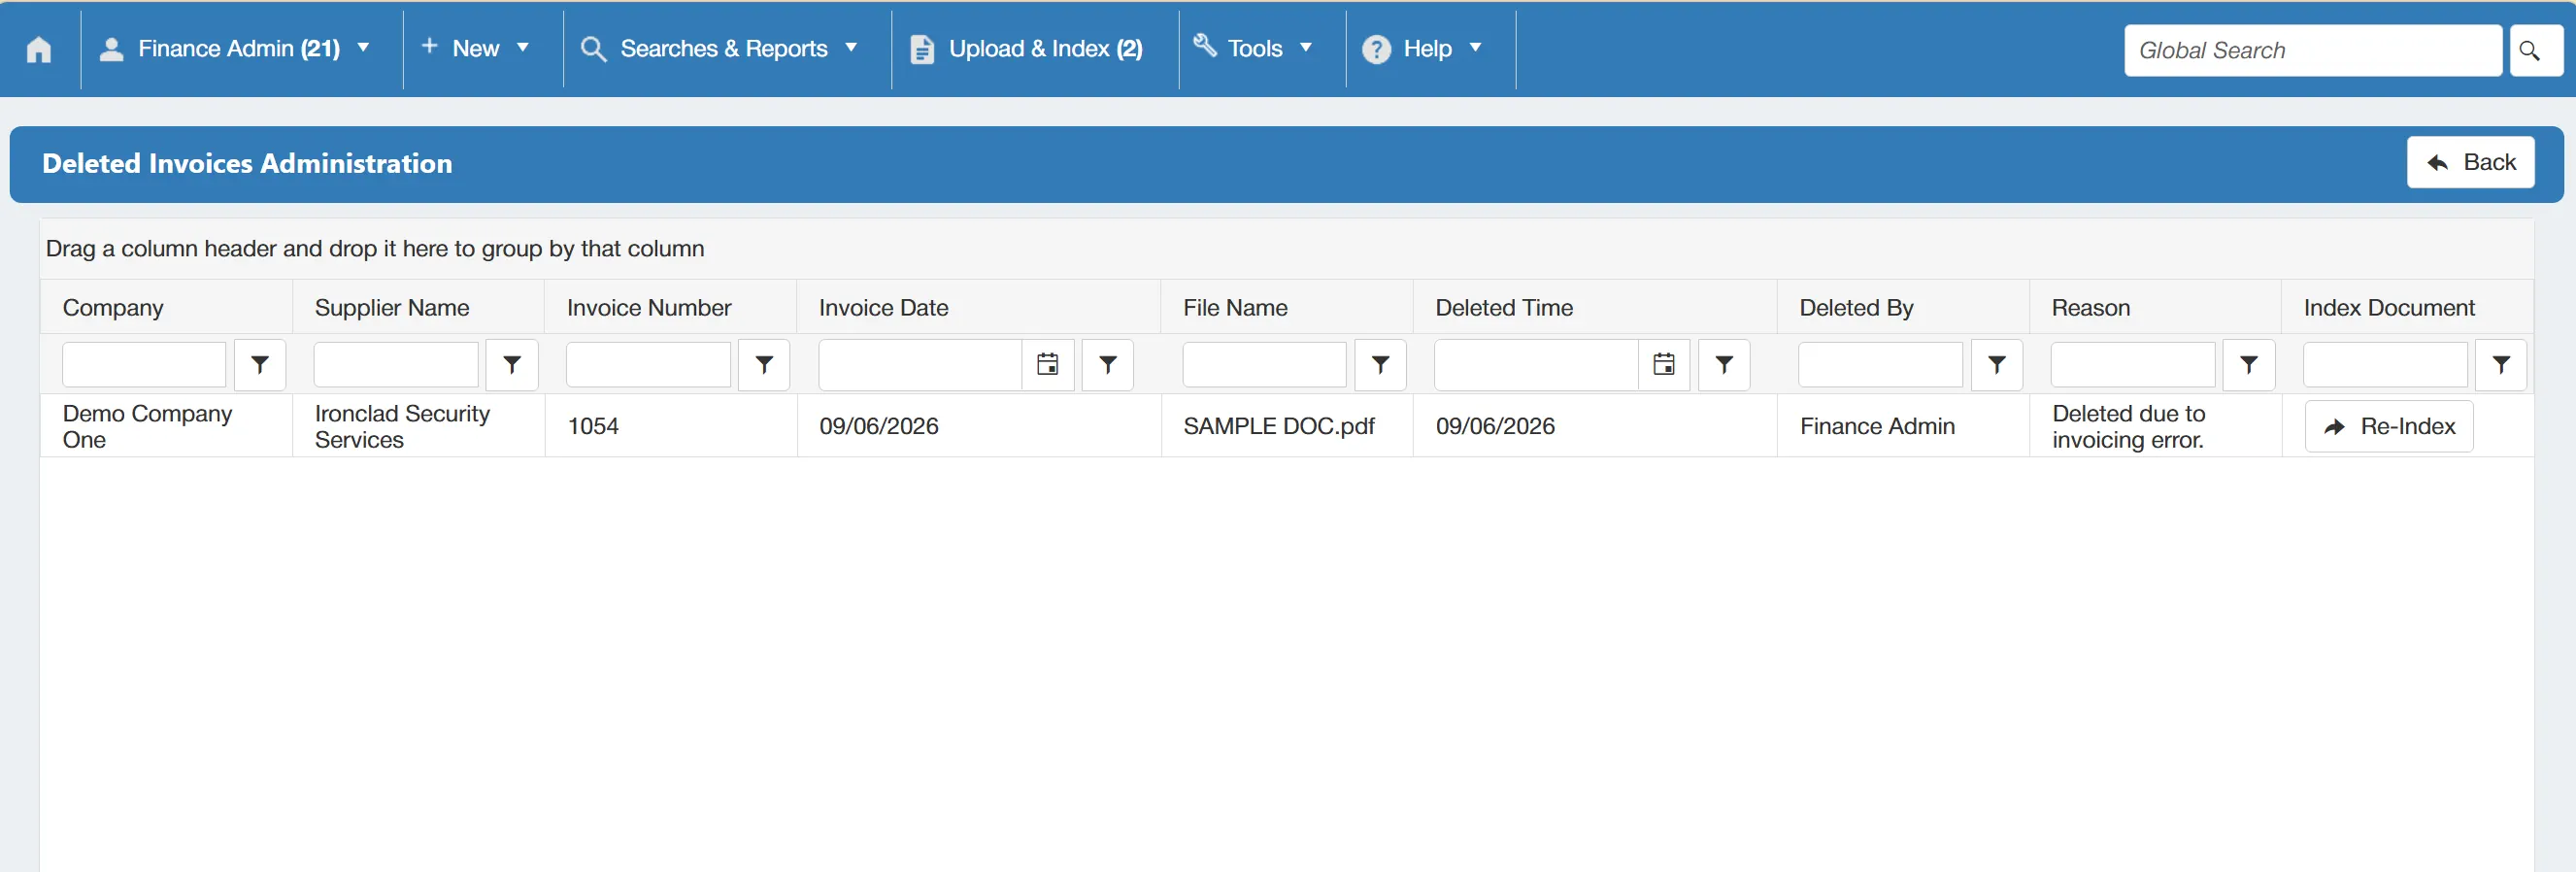
From this table, you can view the deleted invoice, and re-index it directly.
To re-index the invoice, simply click on the button. This will take you to the Invoice Indexing window.
For more information on indexing an invoice, click here.
Deleted Credit Notes
Any Credit Notes that have been deleted are sent to the Deleted Credit Notes Administration grid.
Only users with the Invoice/Credit Note Delete permission enabled can access this section. For more information on user permissions click here.
To access the grid, simply click Deleted Credit Notes on the Administration Tools Section.
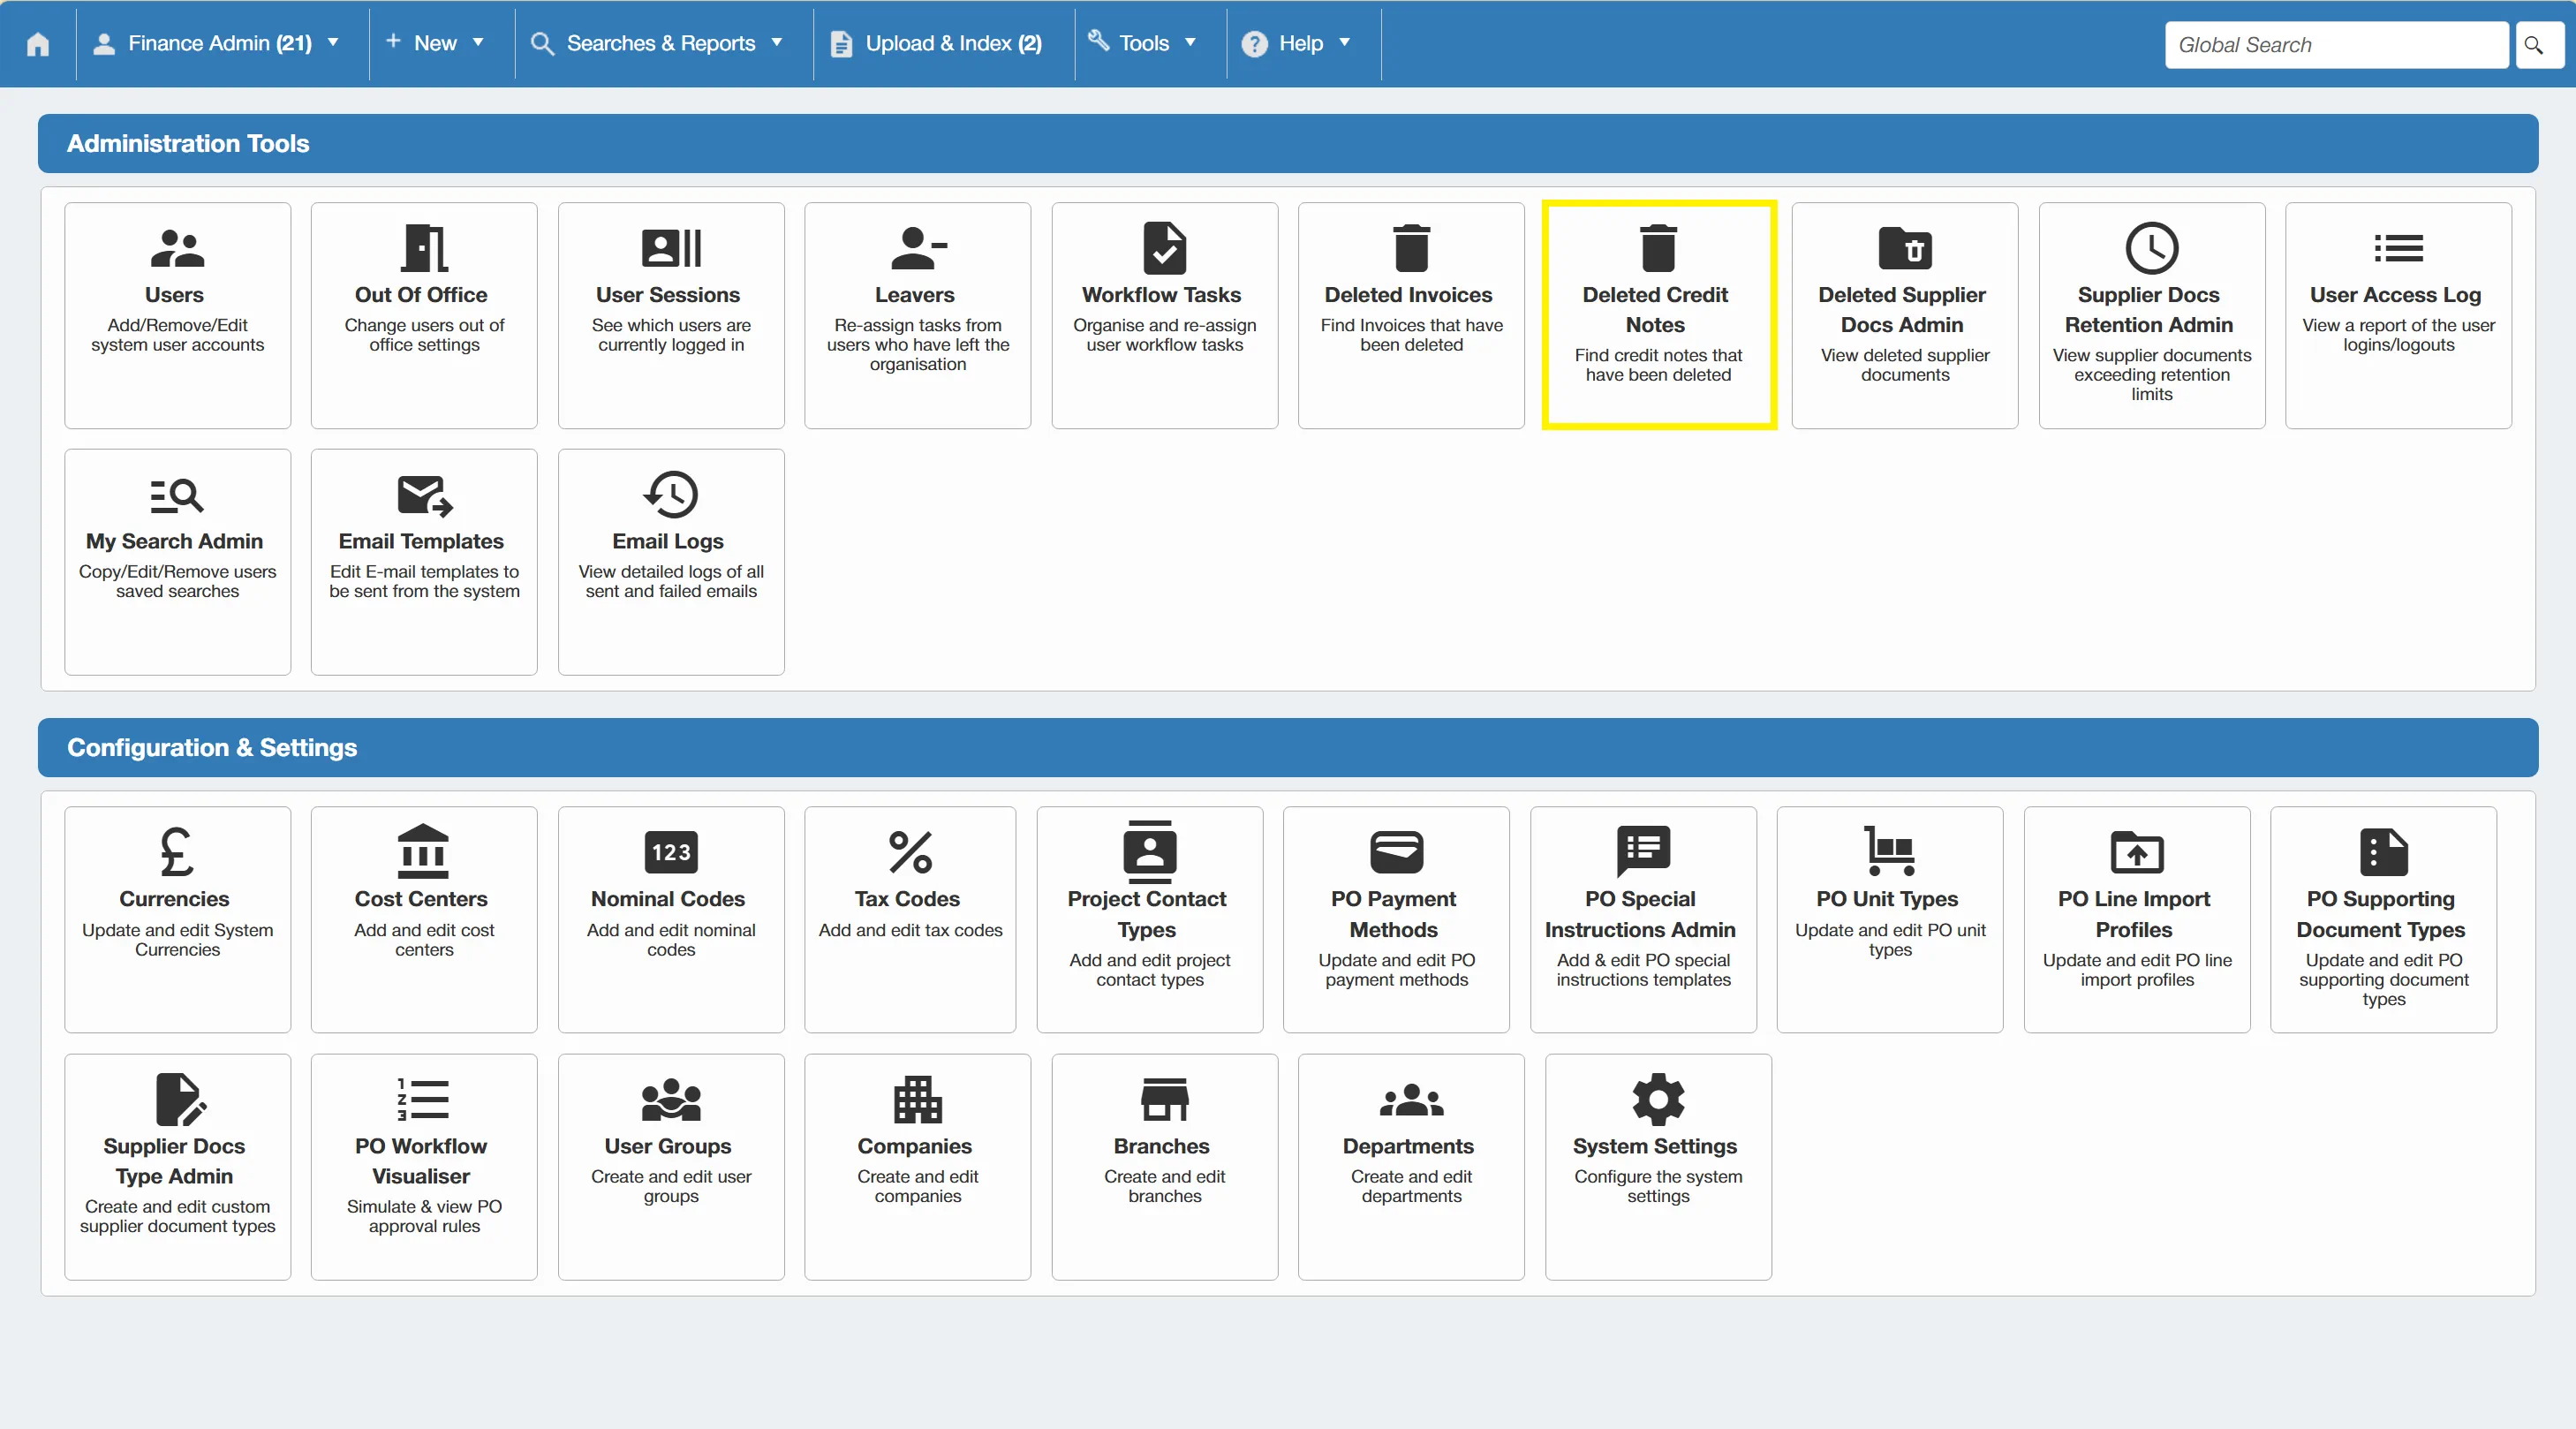
This opens a table showing all deleted credit notes along with information such as the Supplier, Credit Note Number, Deletion Date, and who deleted it.
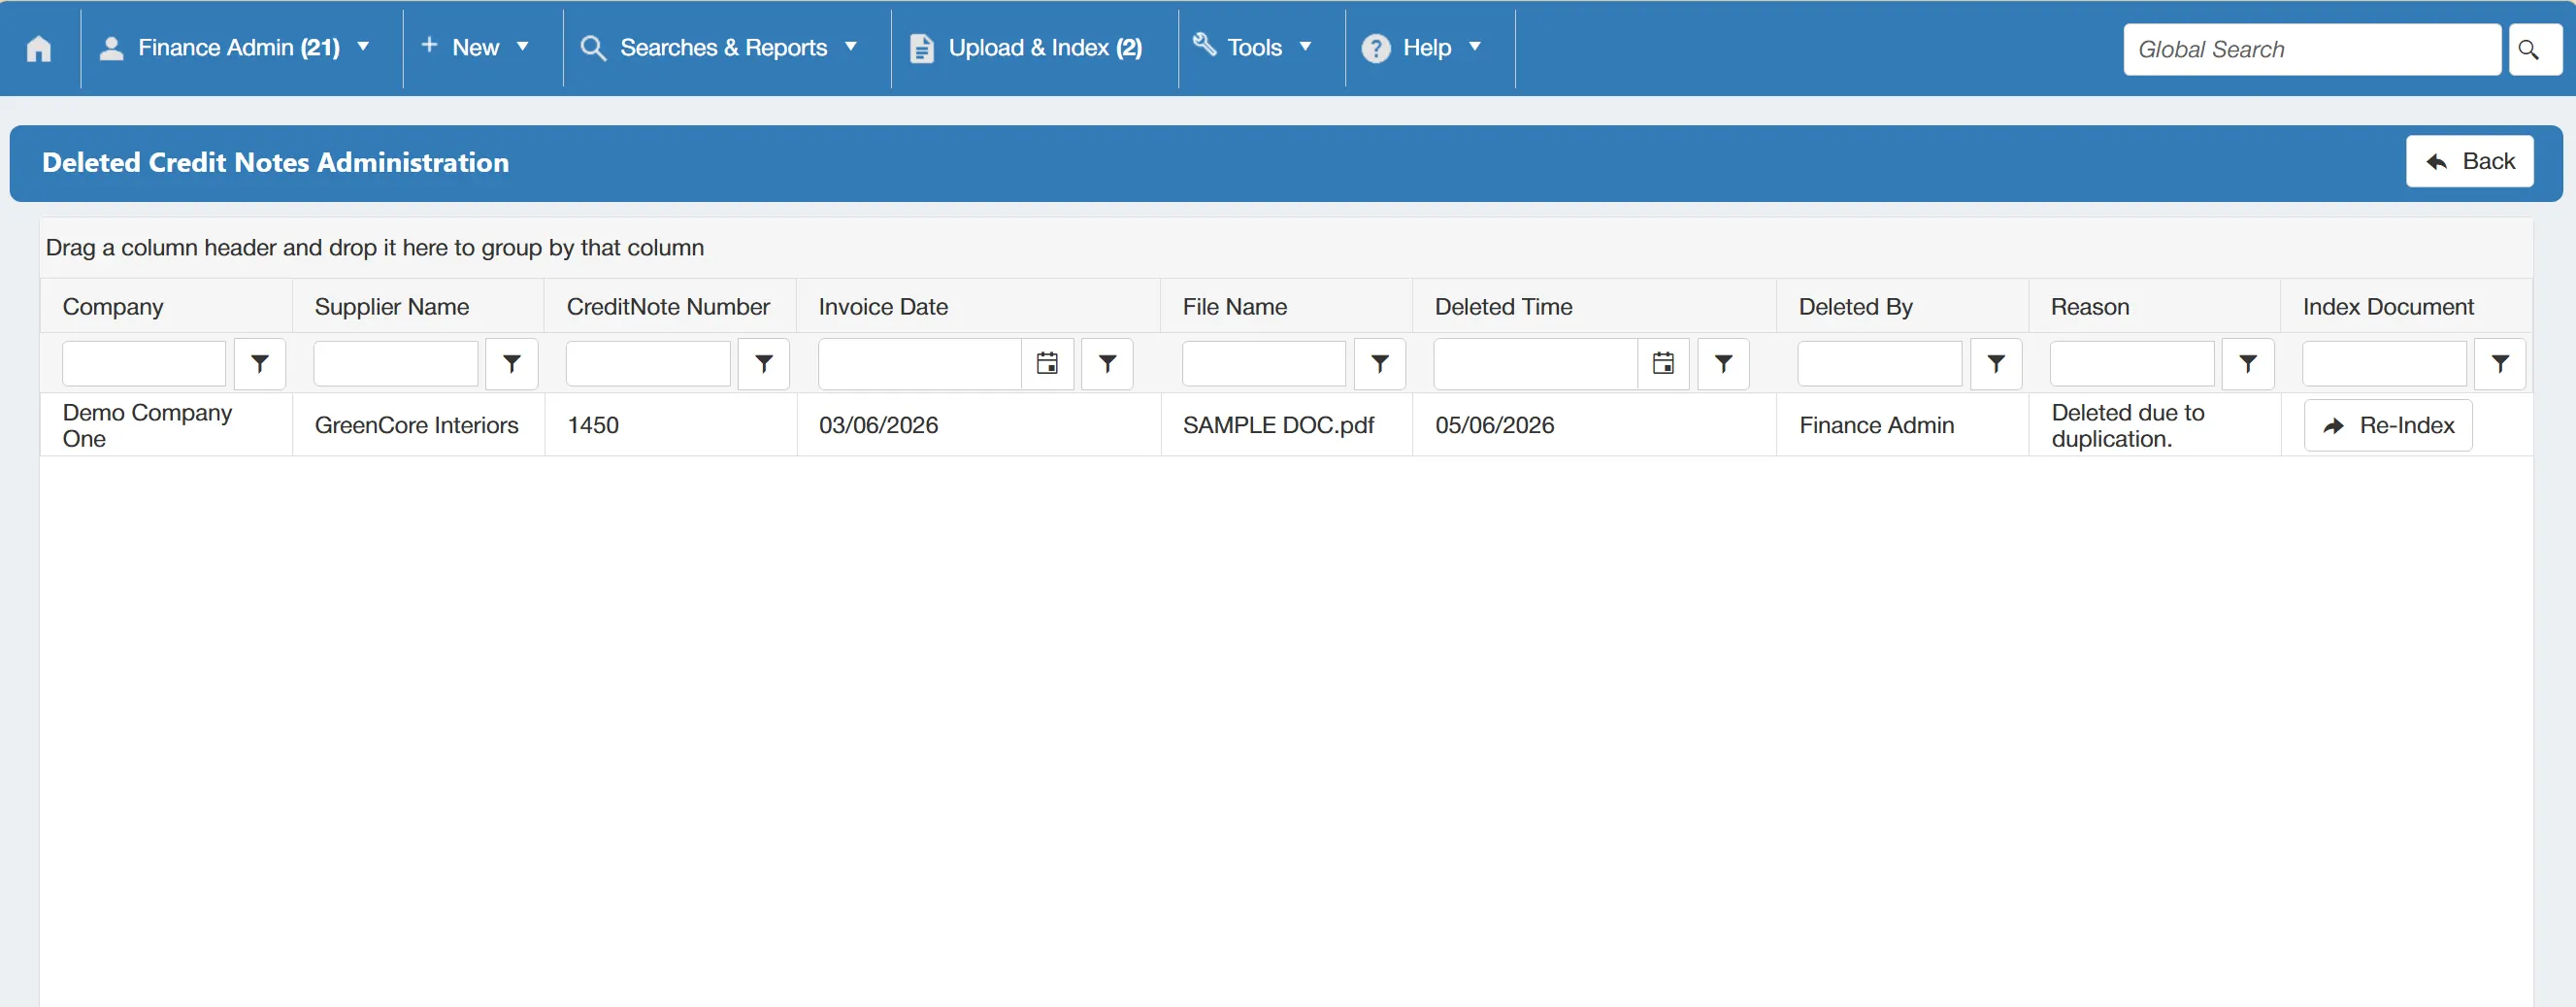
From this table, you can view the deleted Credit Note, and re-index it directly.
To re-index the credit note, simply click on the button. This will take you to the Credit Note Indexing window.
For more information on indexing a credit note, click here.
Deleted Supplier Docs Admin
When a Supplier Document is deleted, it is stored within the Deleted Supplier Docs Admin section. From this section you can permanently delete these documents or restore them.
Only users with the Supplier Documents: Deleted Admin permission enabled can access this section. For more information on user permissions click here.
To view the deleted documents, simply click Deleted Supplier Docs Admin on the Administration Tools Section.
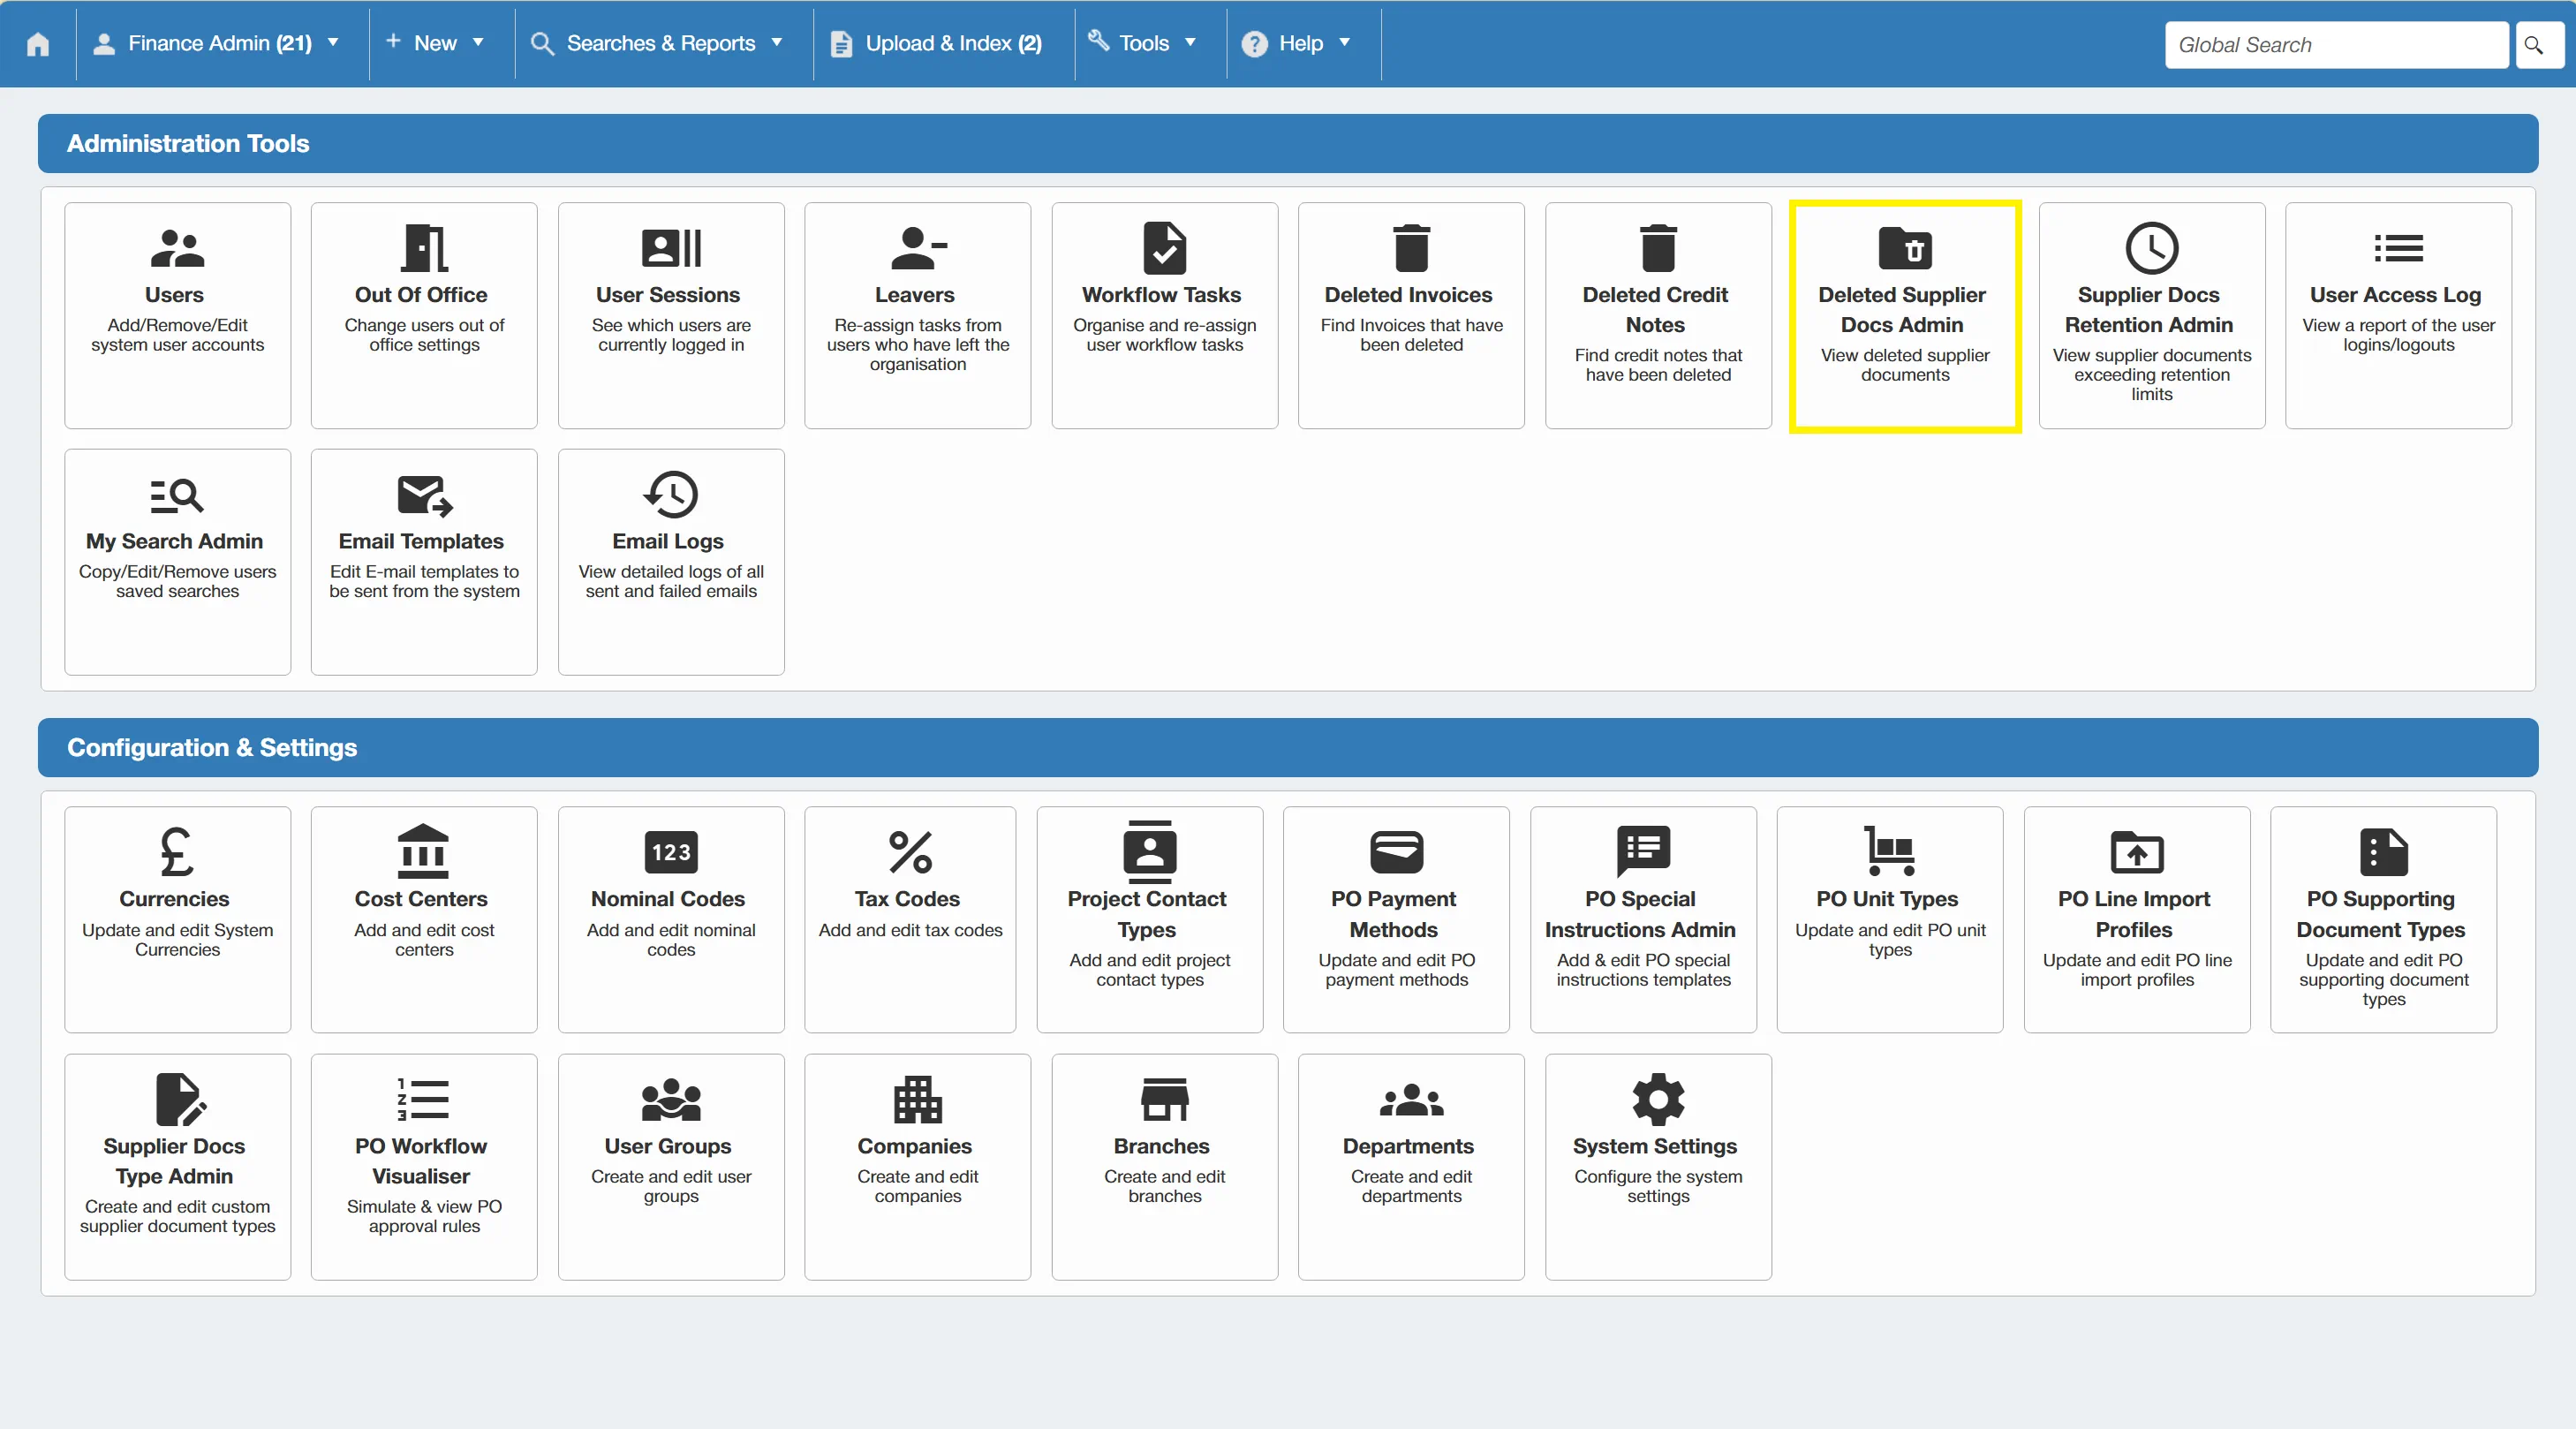
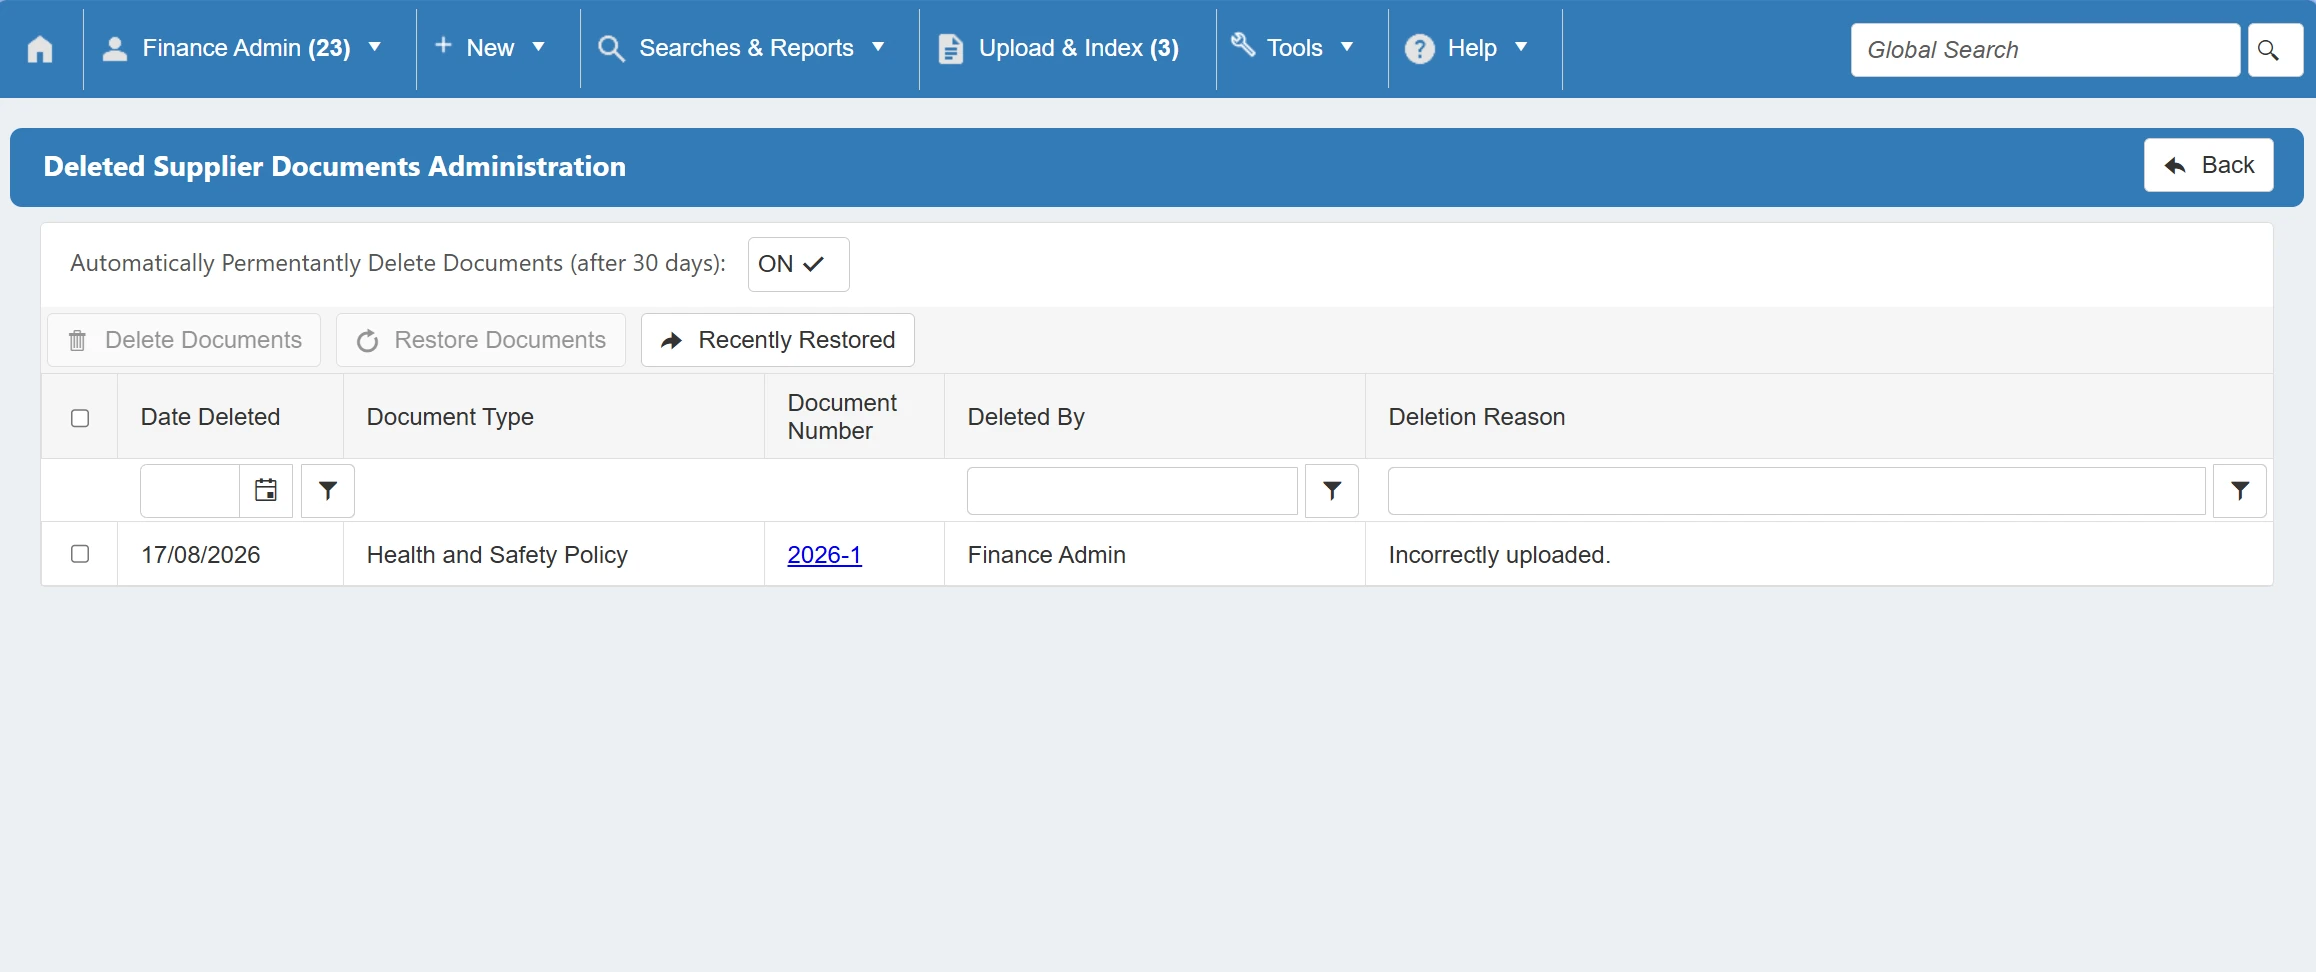
This opens a grid containing any deleted supplier documents.
Permanently Deleting Supplier Documents
From the Deleted Supplier Docs Admin grid, you can select documents to manually delete. To do this, simply select the desired document by clicking in the checkbox for the corresponding row.
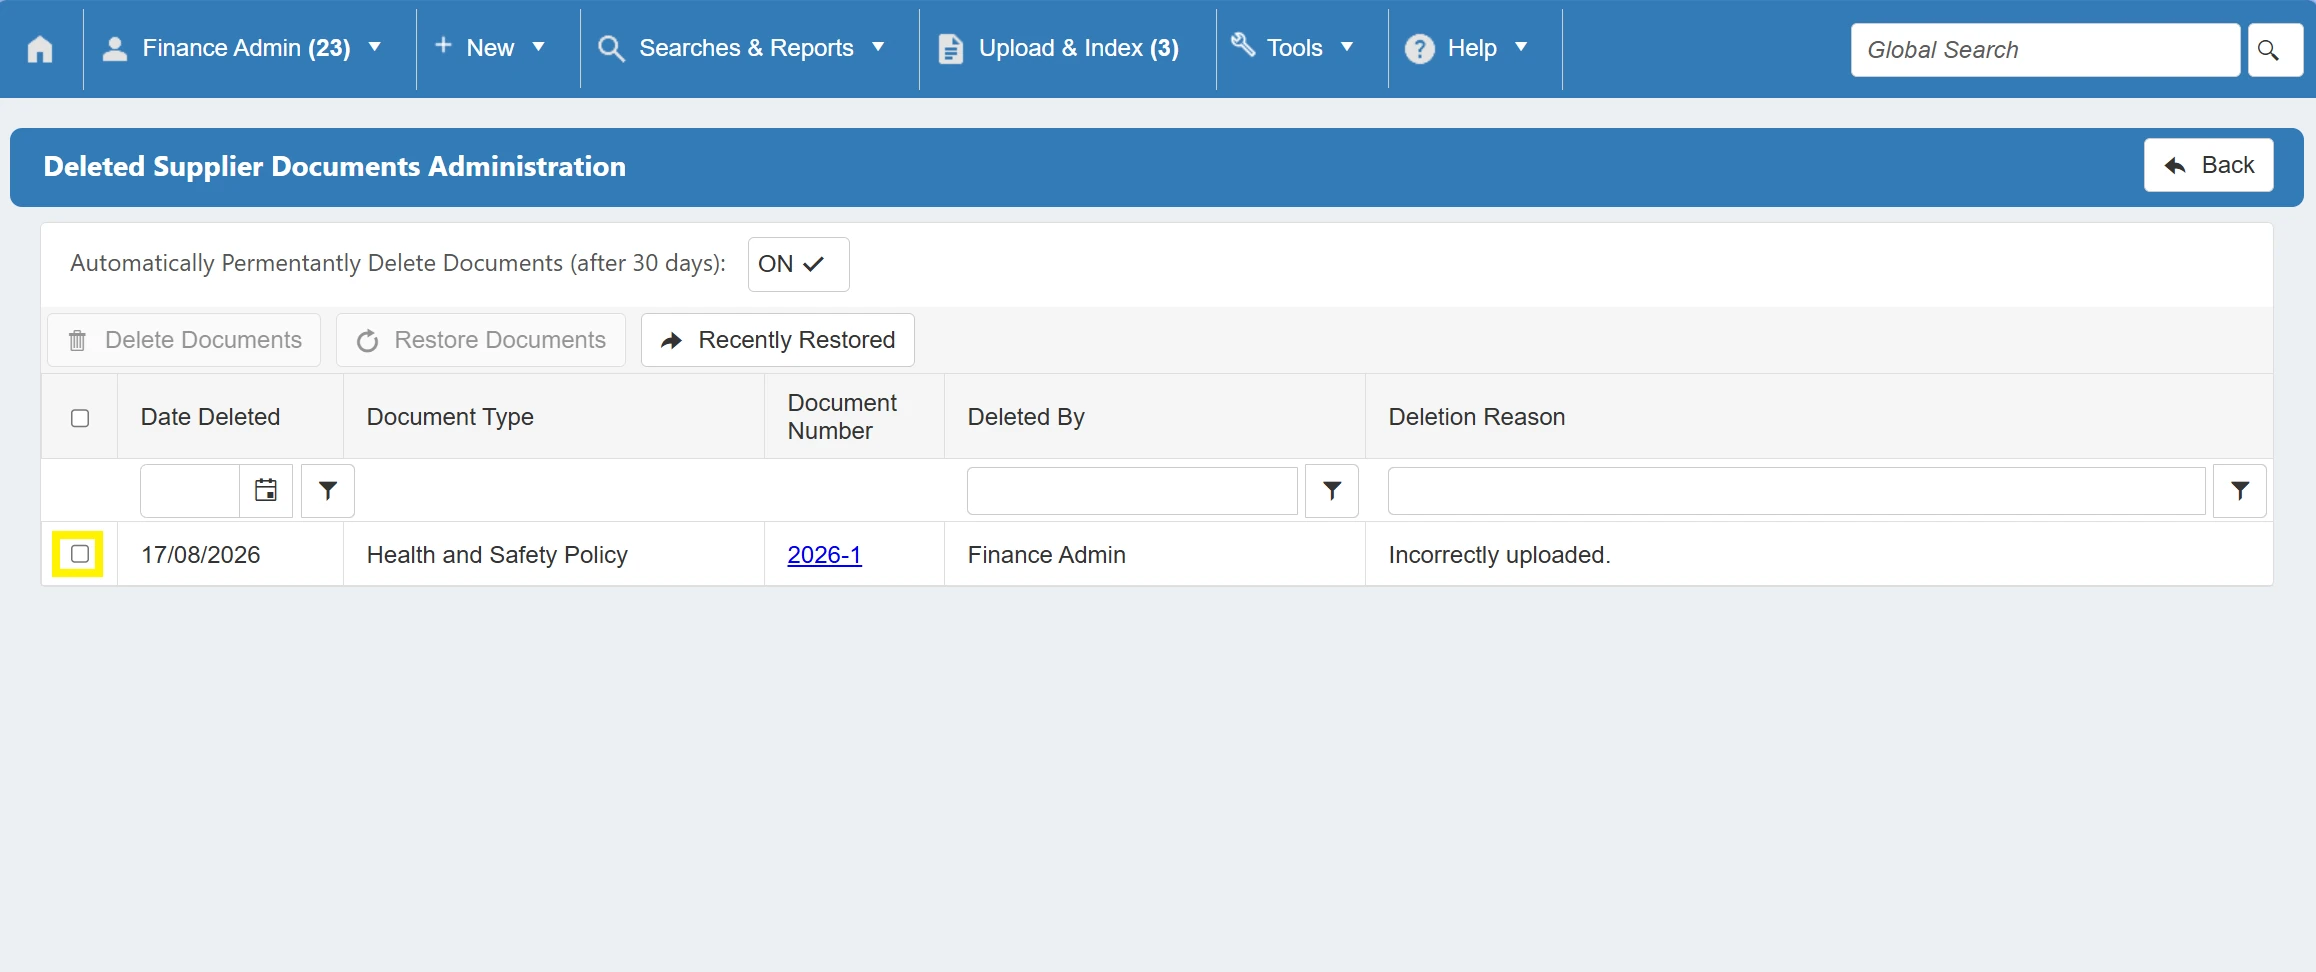
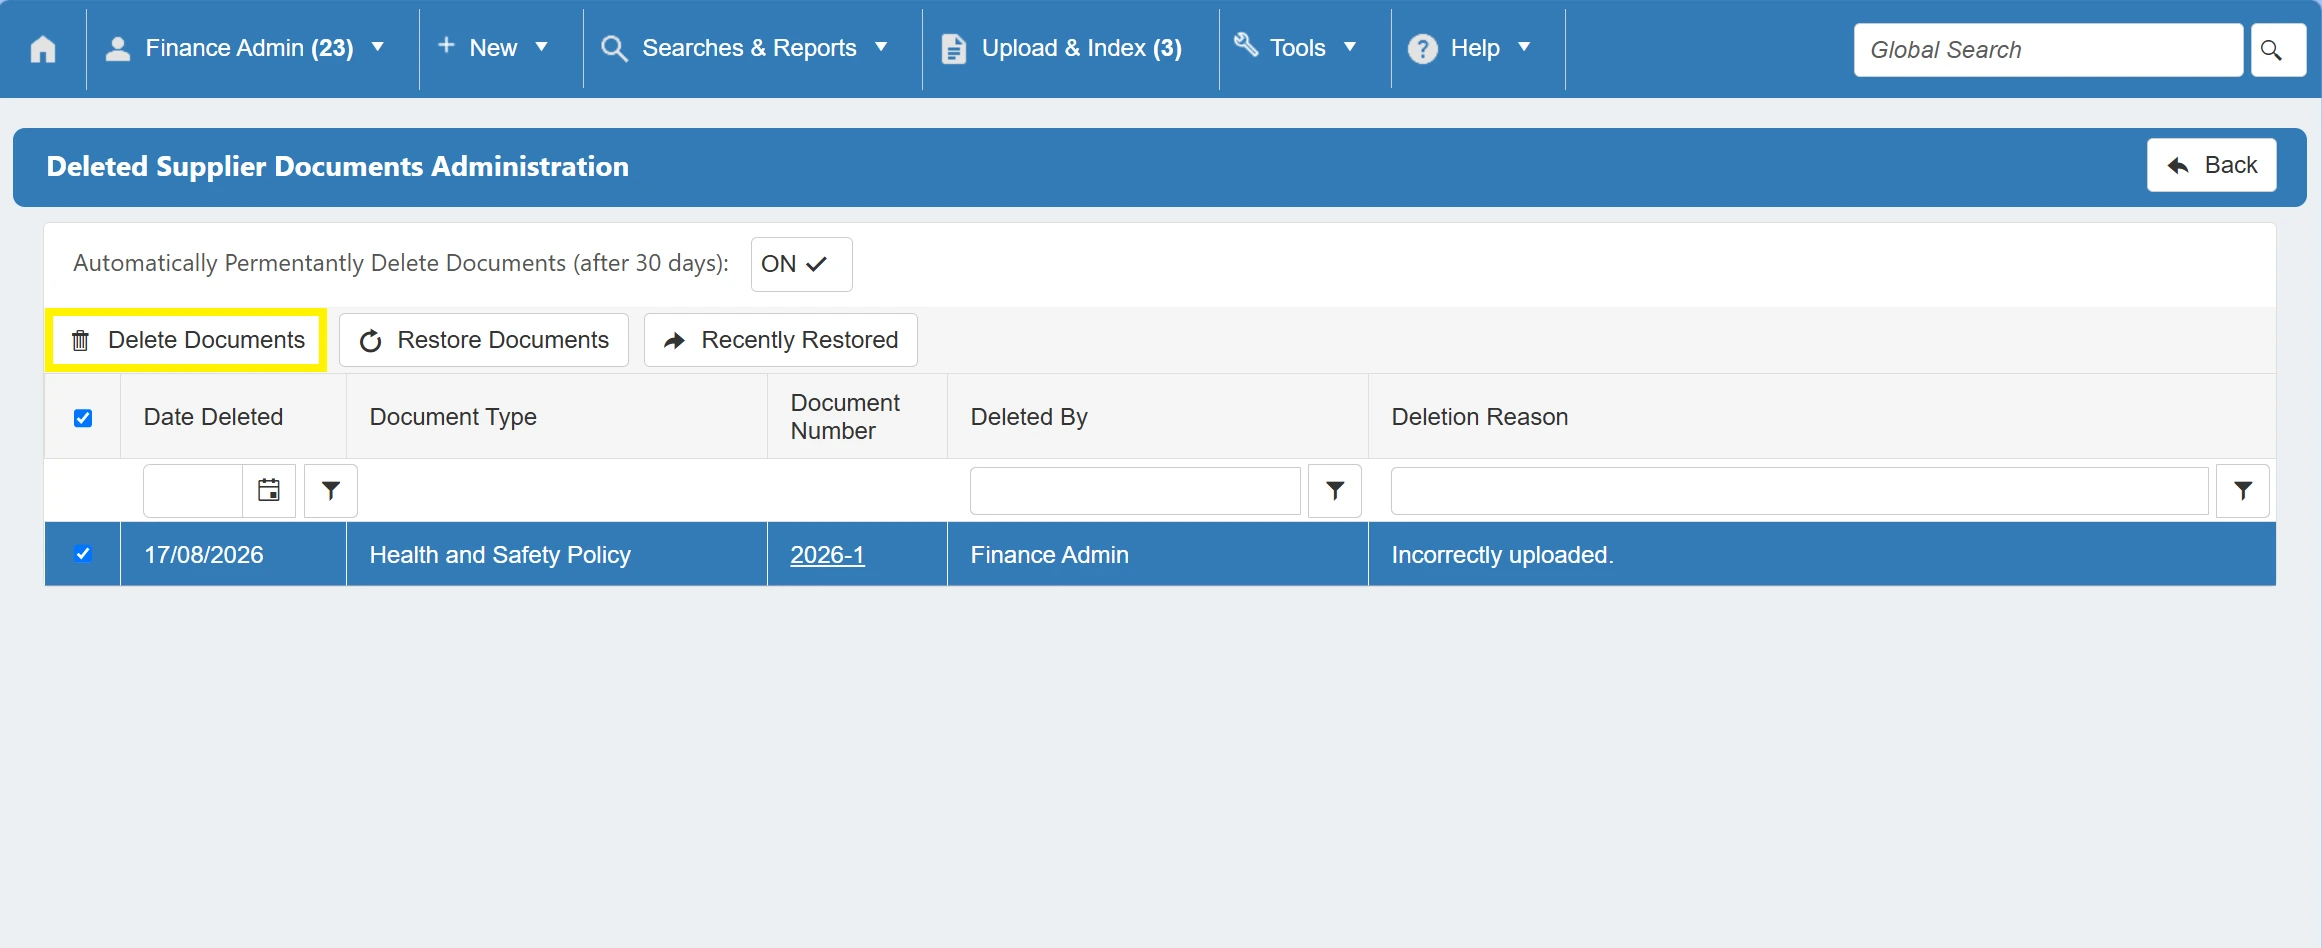
With the row selected, you can now click Delete Document. This will permanently delete any selected documents.
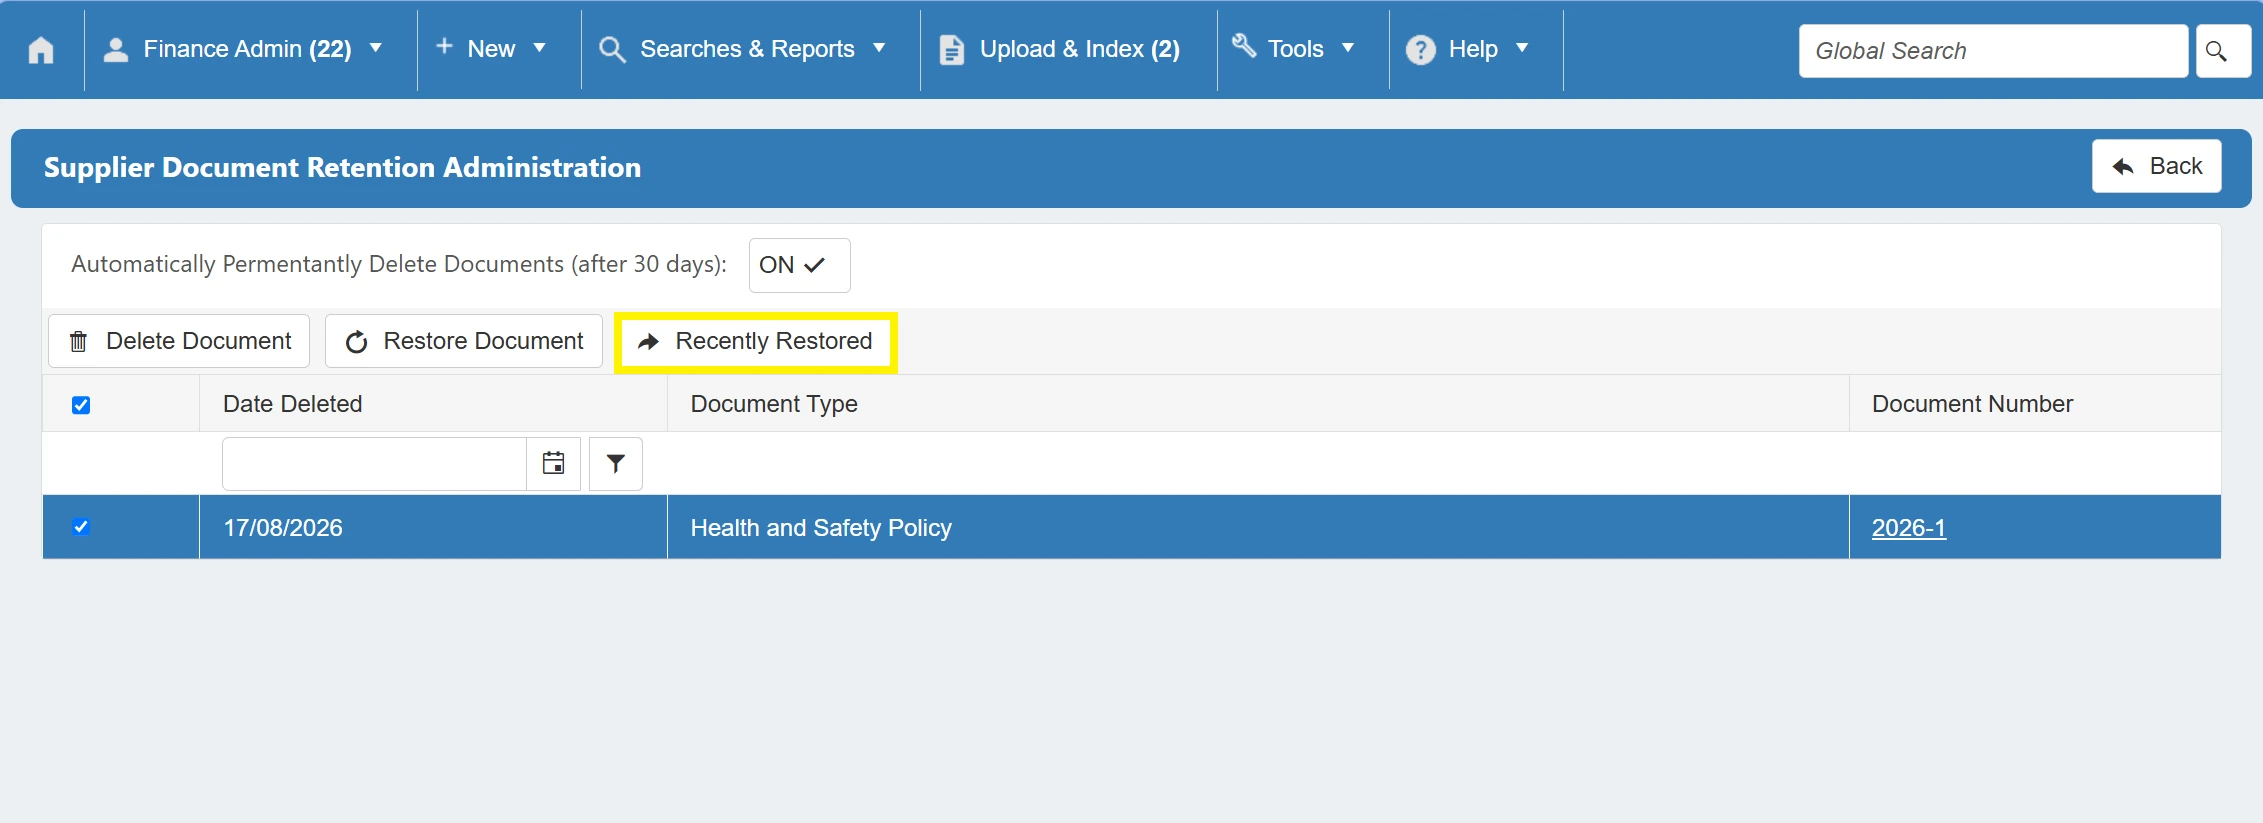
The system also has the ability to automatically permanently delete documents from this grid after 30 days. To enable this, ensure that the Automatically Permanently Delete Documents (after 30 days) toggle is set to ON.
Restoring Deleted Supplier Documents
From the Deleted Supplier Docs Admin grid, you can select documents to restore. To do this, simply select the desired document by clicking in the checkbox for the corresponding row.
With the row selected, you can now click Restore Documents. This will restore the deleted document and remove it from the grid.
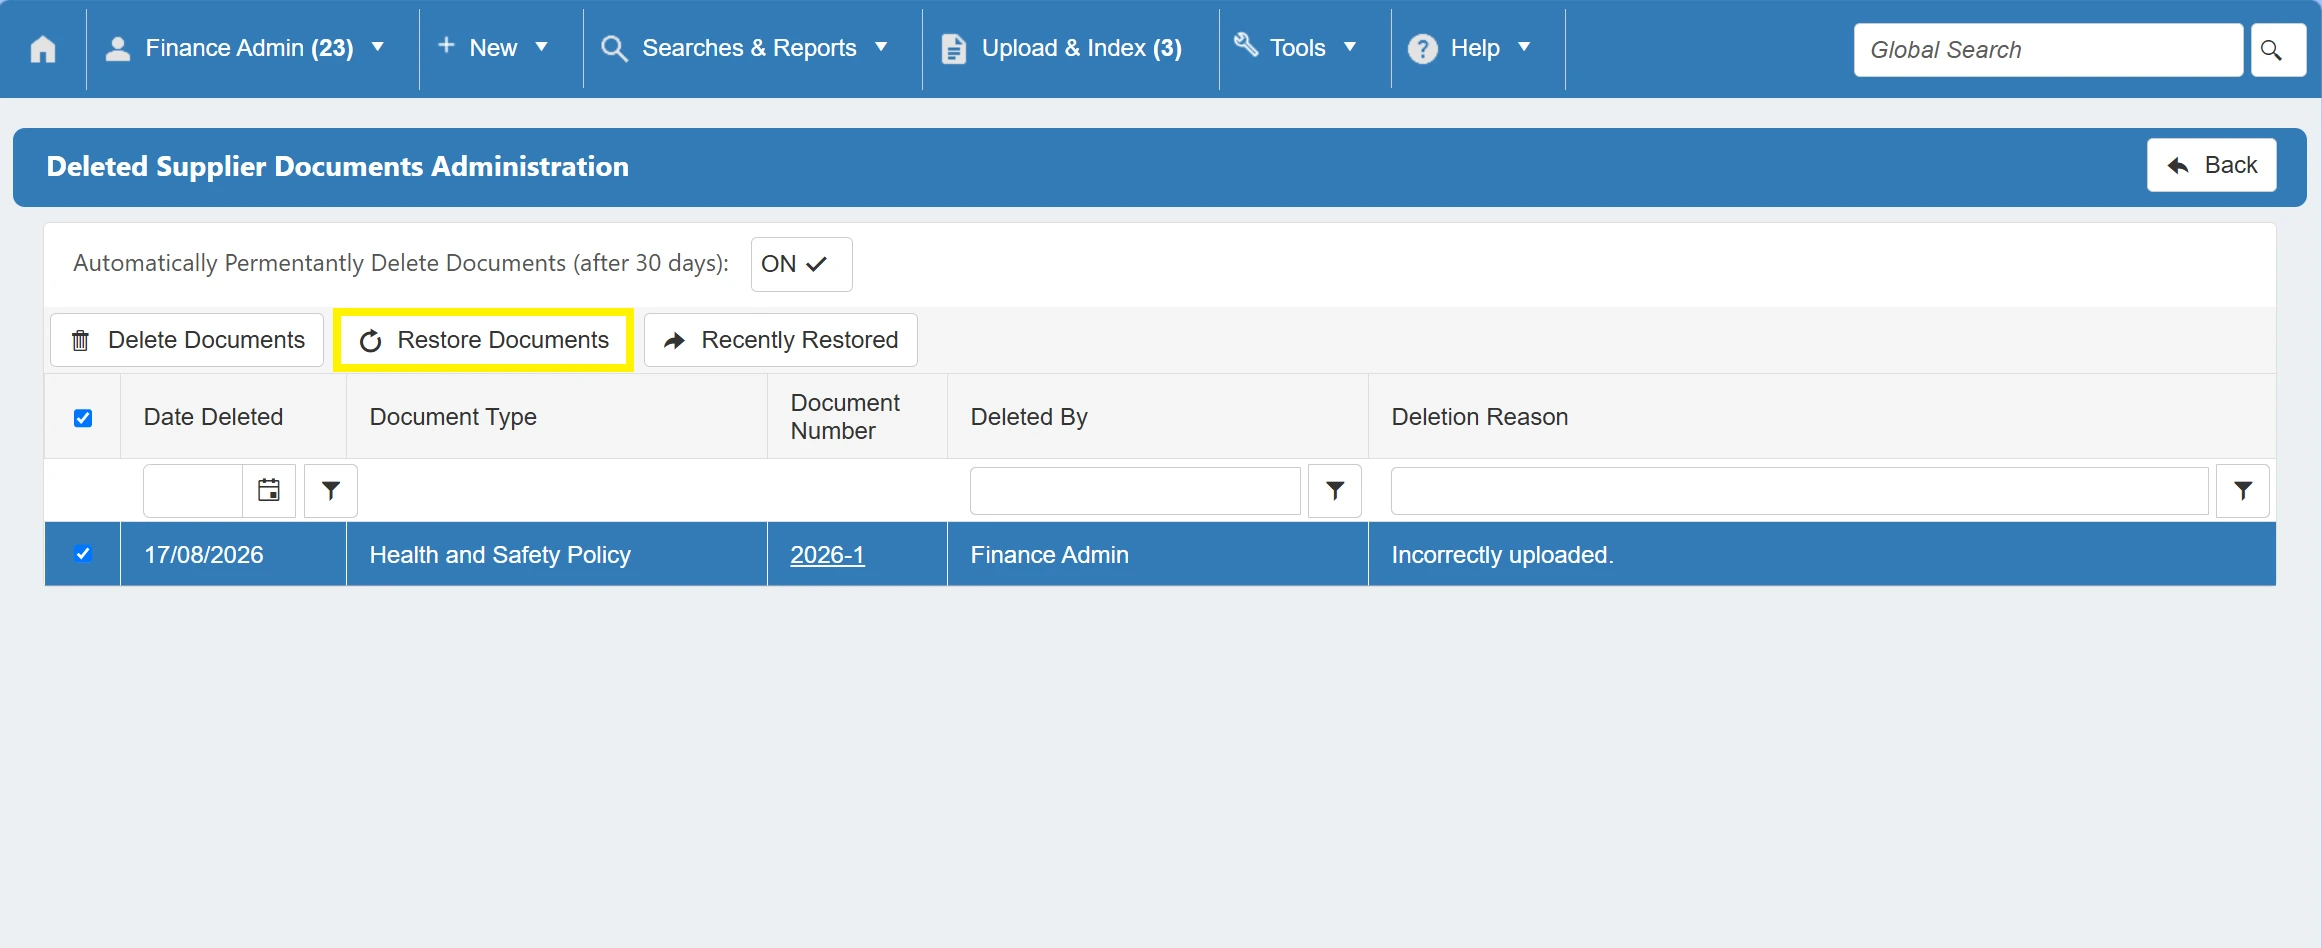
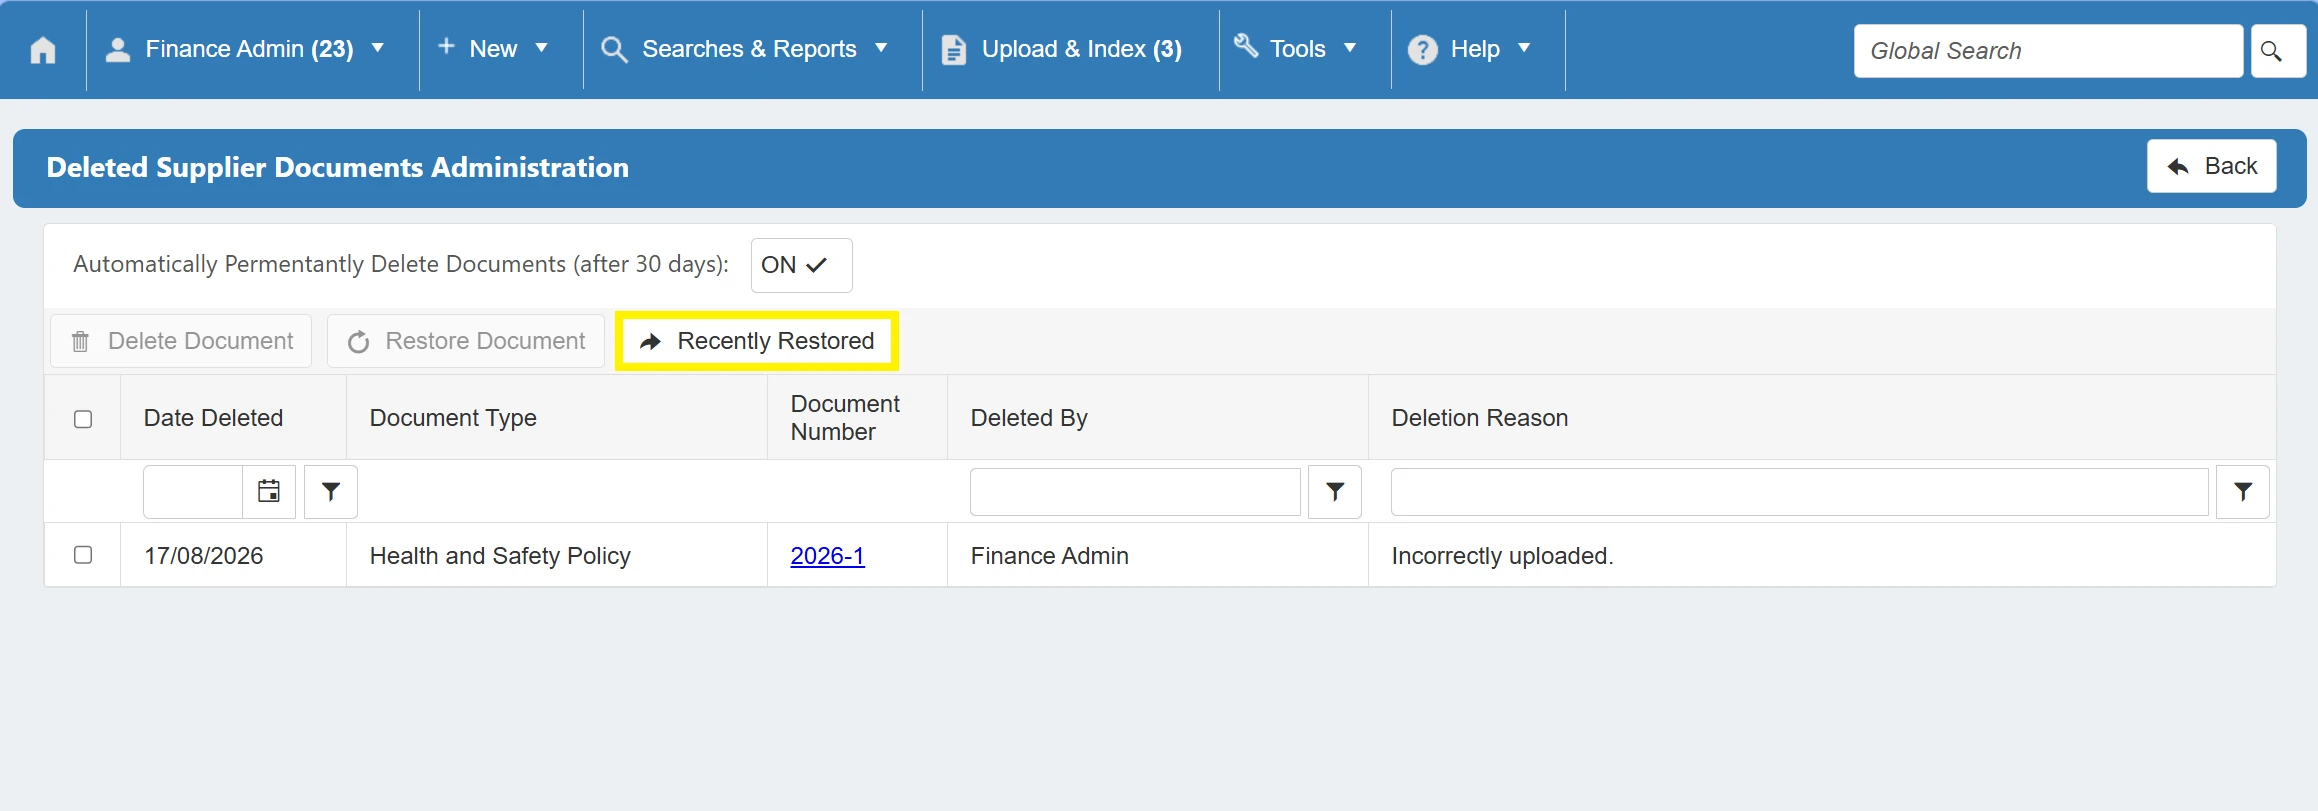
Once the document is restored, it can easily be found by clicking on the Recently Restored button.
Supplier Docs Retention Admin
When indexing a supplier document, you can set a retention date. When this date arrives, the document will be sent to the Supplier Docs Retention Admin grid.
Only users with the Supplier Documents: Retention Admin permission enabled can access this section. For more information on user permissions click here.
To view the Supplier Docs Retention Admin grid, simply click Supplier Docs Retention Admin on the Administration Tools Section.
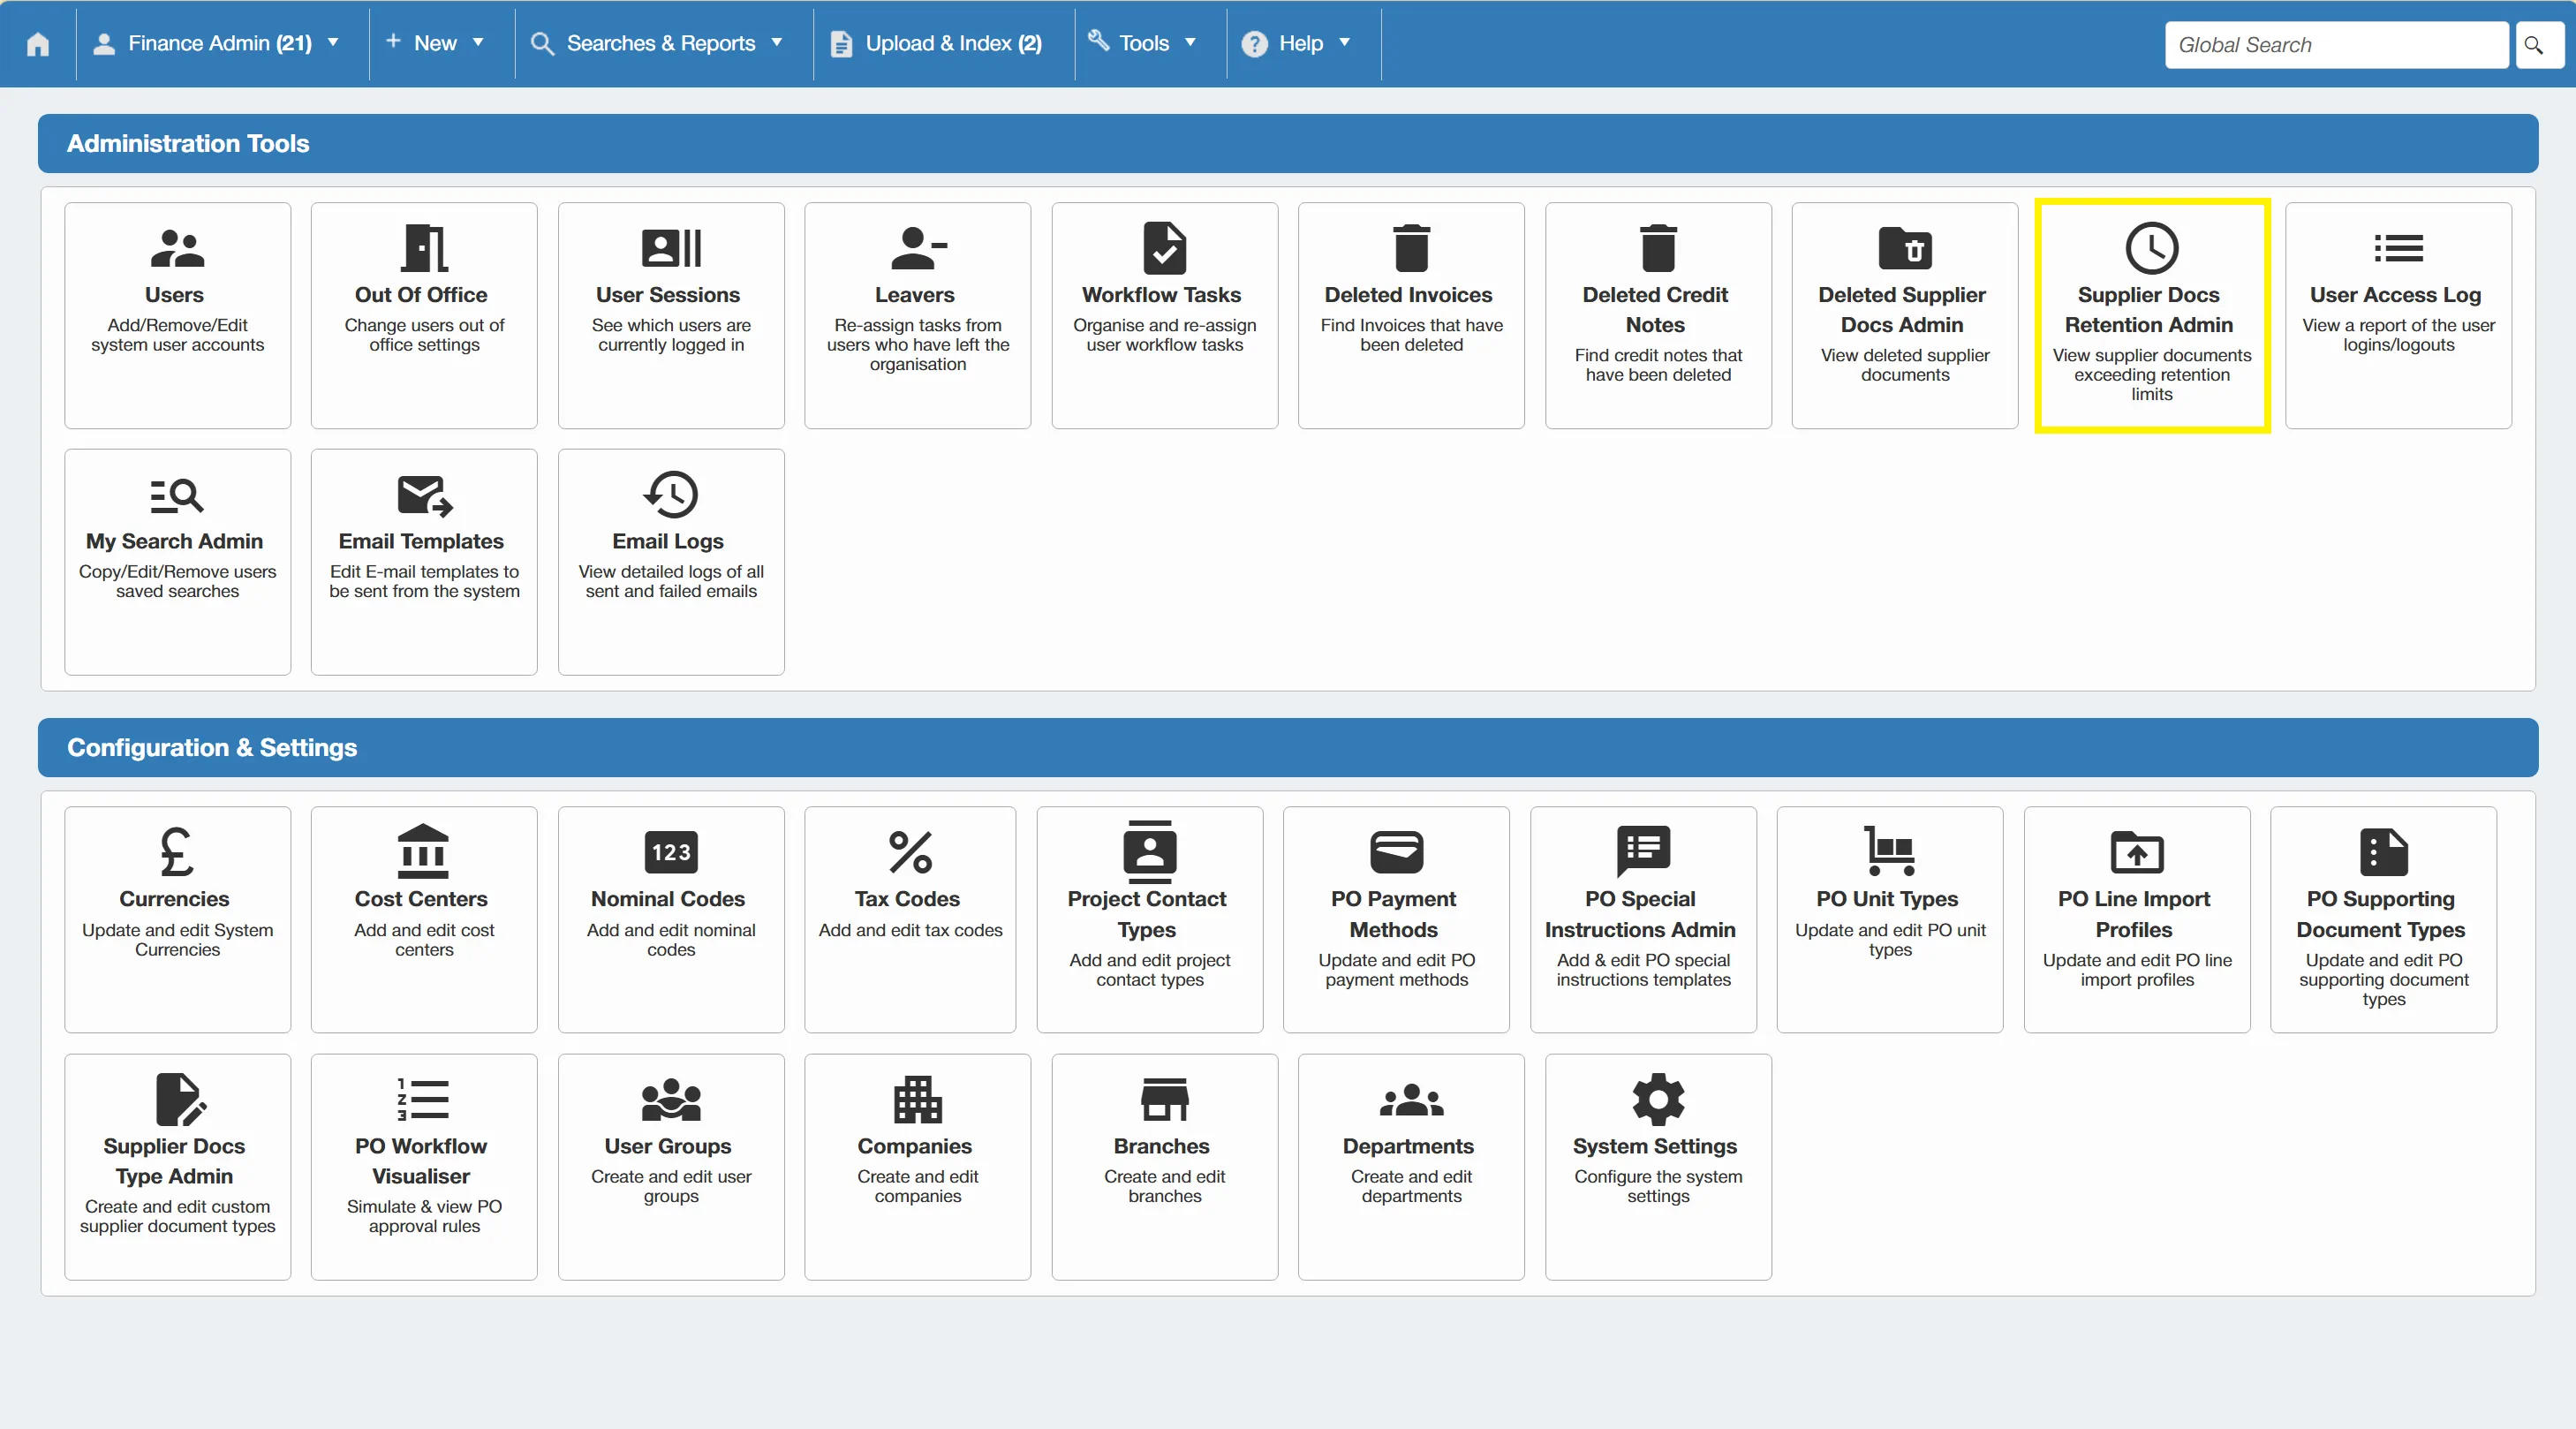
This opens a grid containing any documents that have exceeded their retention date.
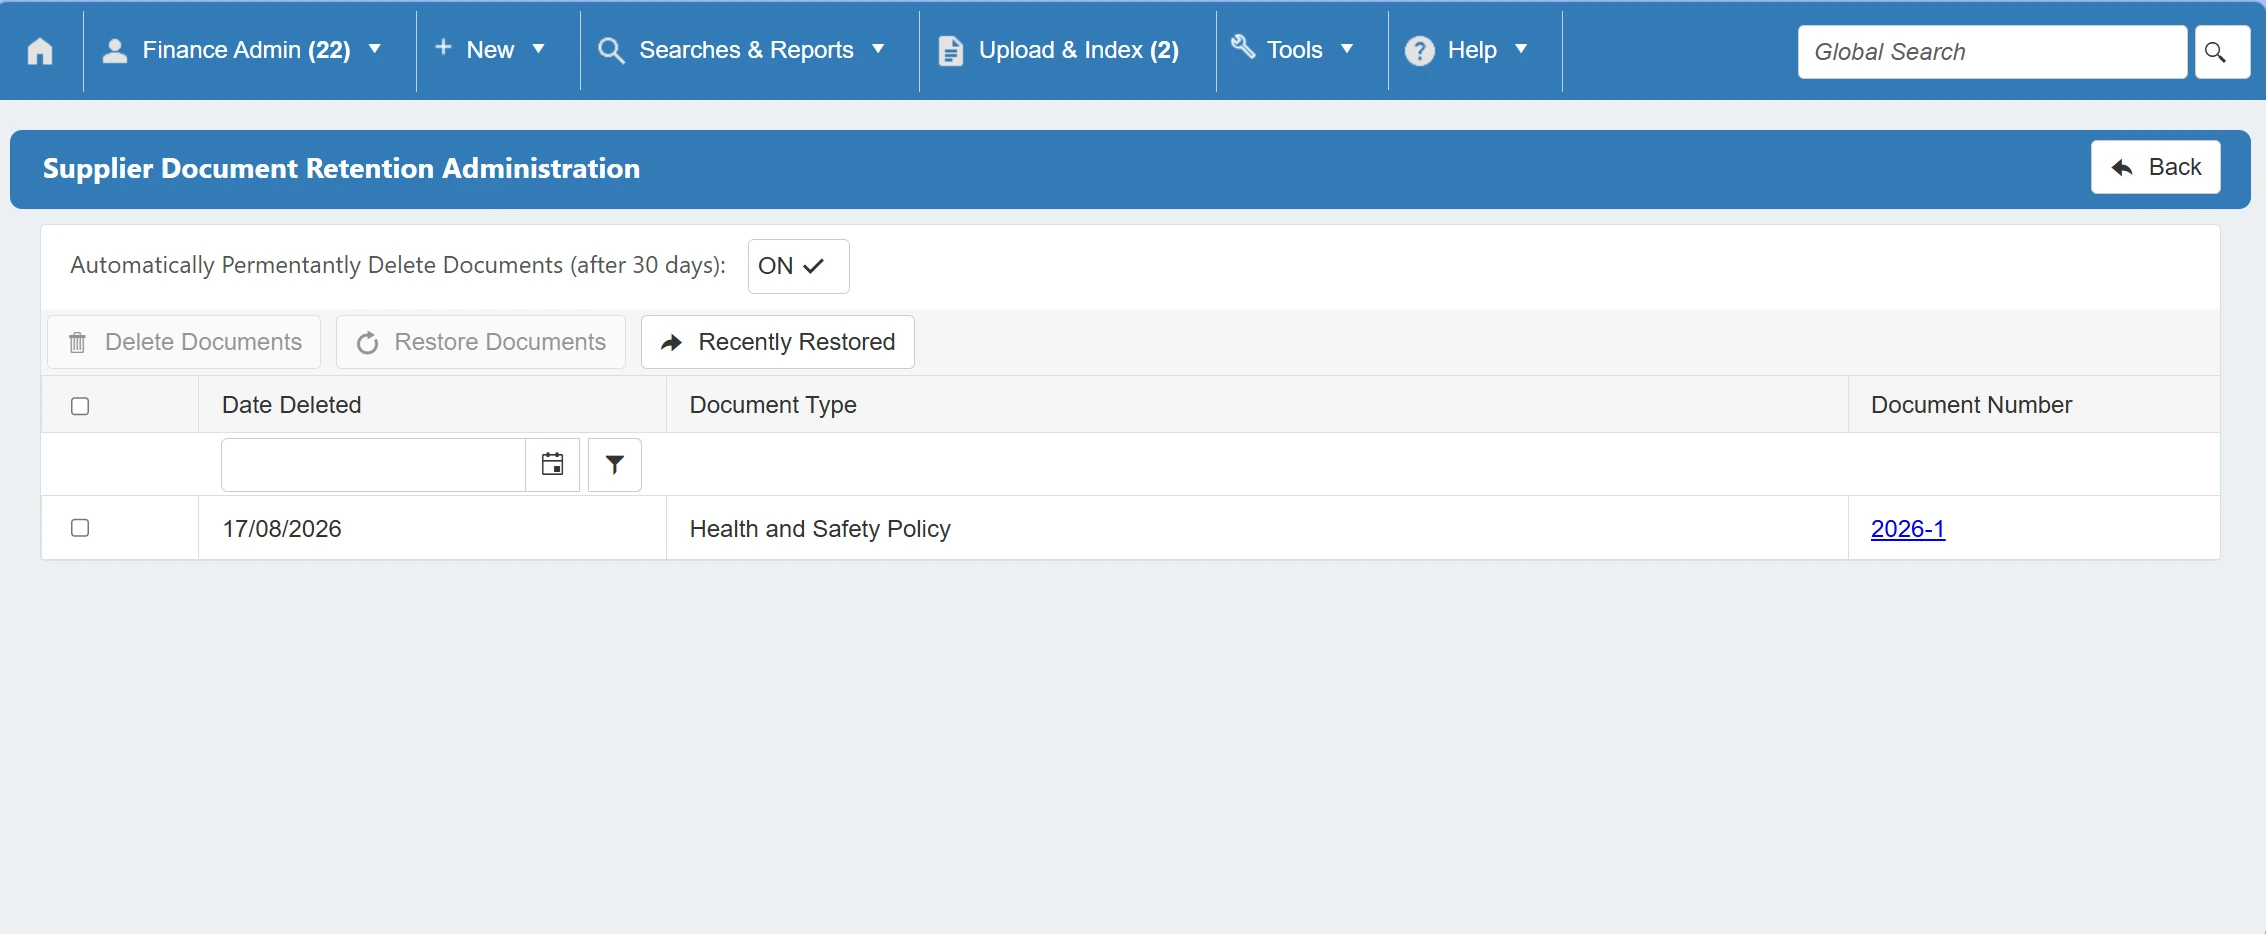
Permanently Deleting Supplier Retention Documents
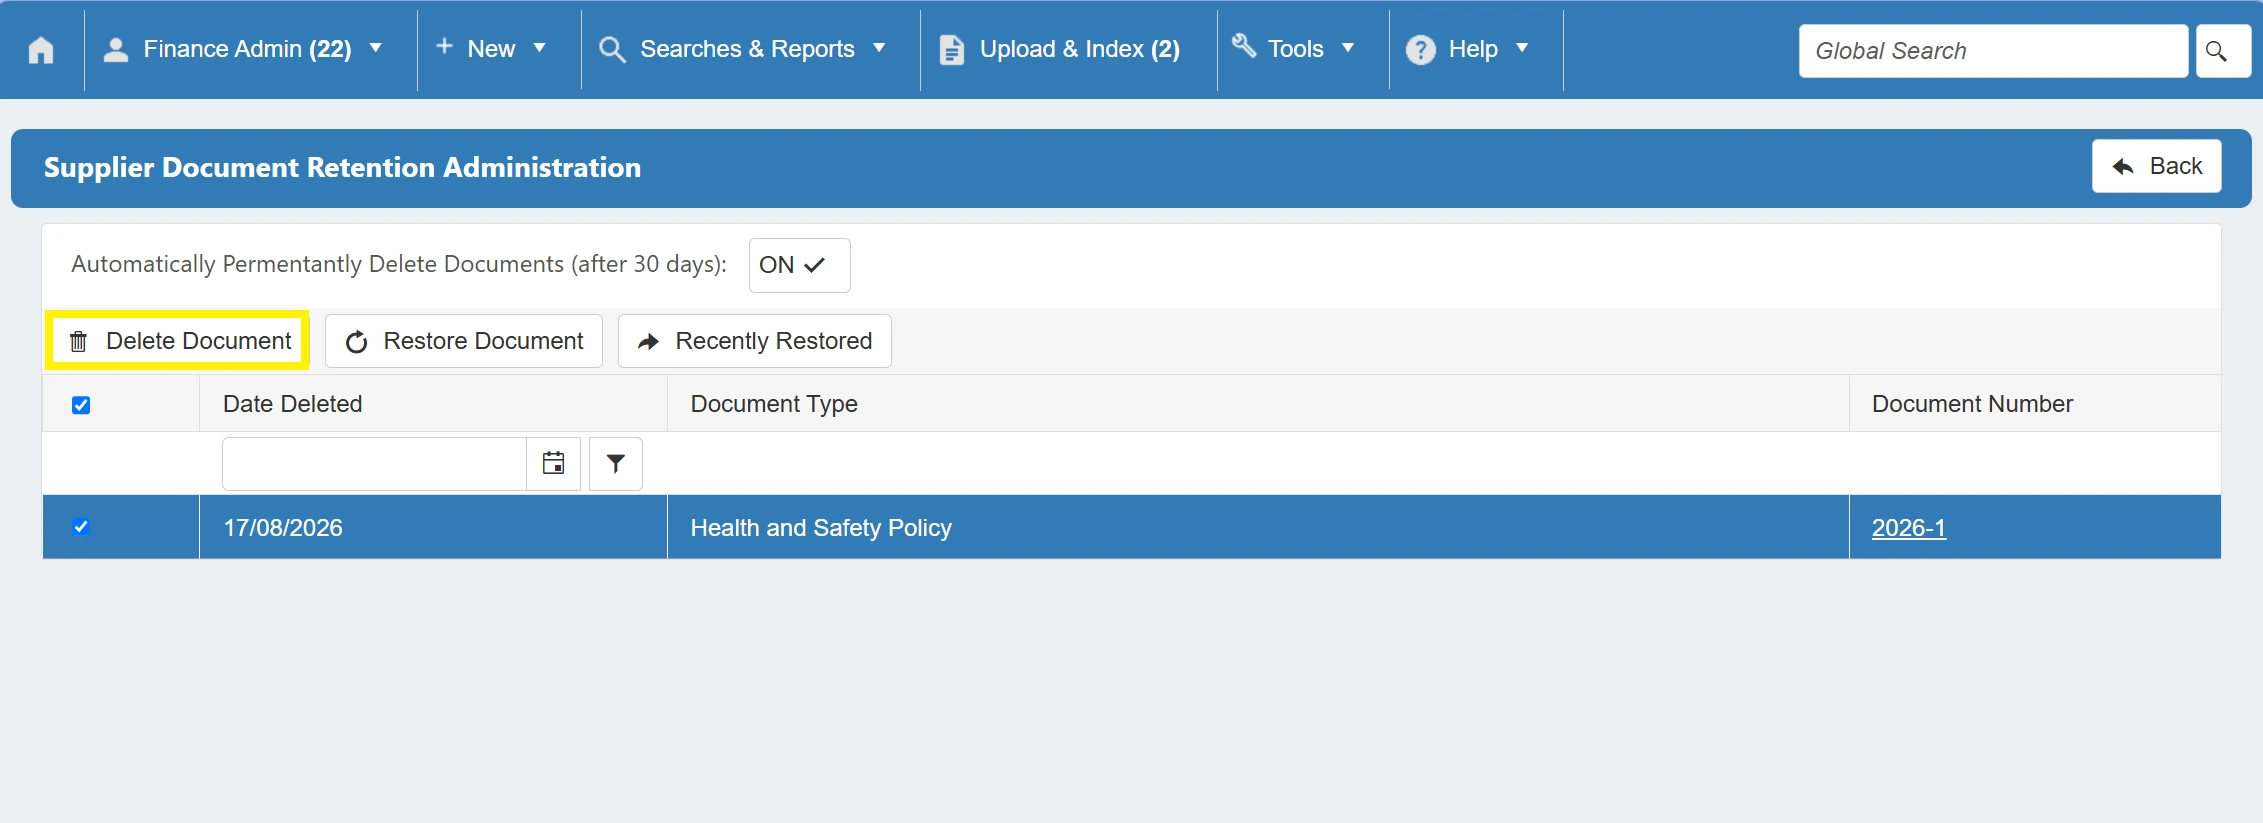
From the Supplier Document Retention Admin grid, you can select documents to manually delete. To do this, simply select the desired document by clicking in the checkbox for the corresponding row.
With the row selected, you can now click Delete Document. This will permanently delete any selected documents.
The system also has the ability to automatically permanently delete documents from this grid after 30 days. To enable this, ensure that the Automatically Permanently Delete Documents (after 30 days) toggle is set to ON.
Restoring Deleted Supplier Retention Documents
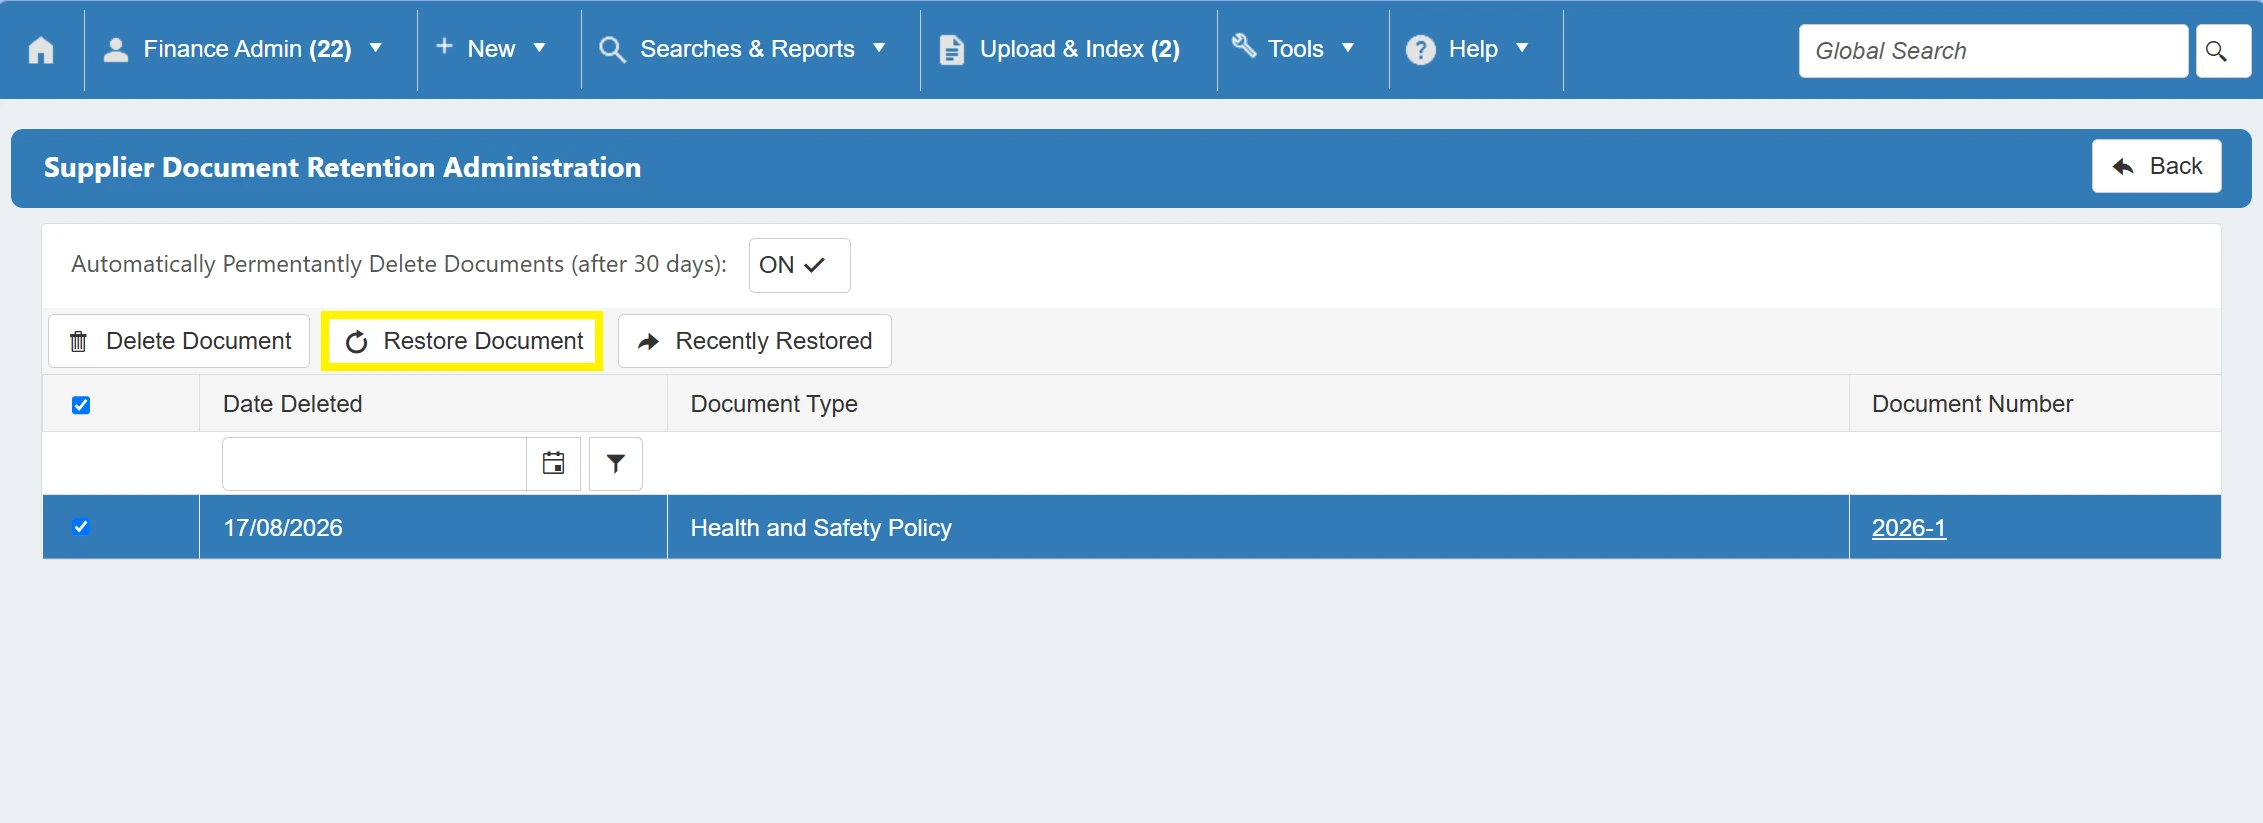
From the Supplier Document Retention Admin grid, you can select documents to restore. To do this, simply select the desired document by clicking in the checkbox for the corresponding row.
With the row selected, you can now click Restore Documents. This will restore the deleted document and remove it from the grid.
Once the document is restored, it can easily be found by clicking on the Recently Restored button.
User Access Log
You can view the user access log to get a report of when users are logging in and out of the system. This function is beneficial if you wish to monitor or review how and when the system is being used.
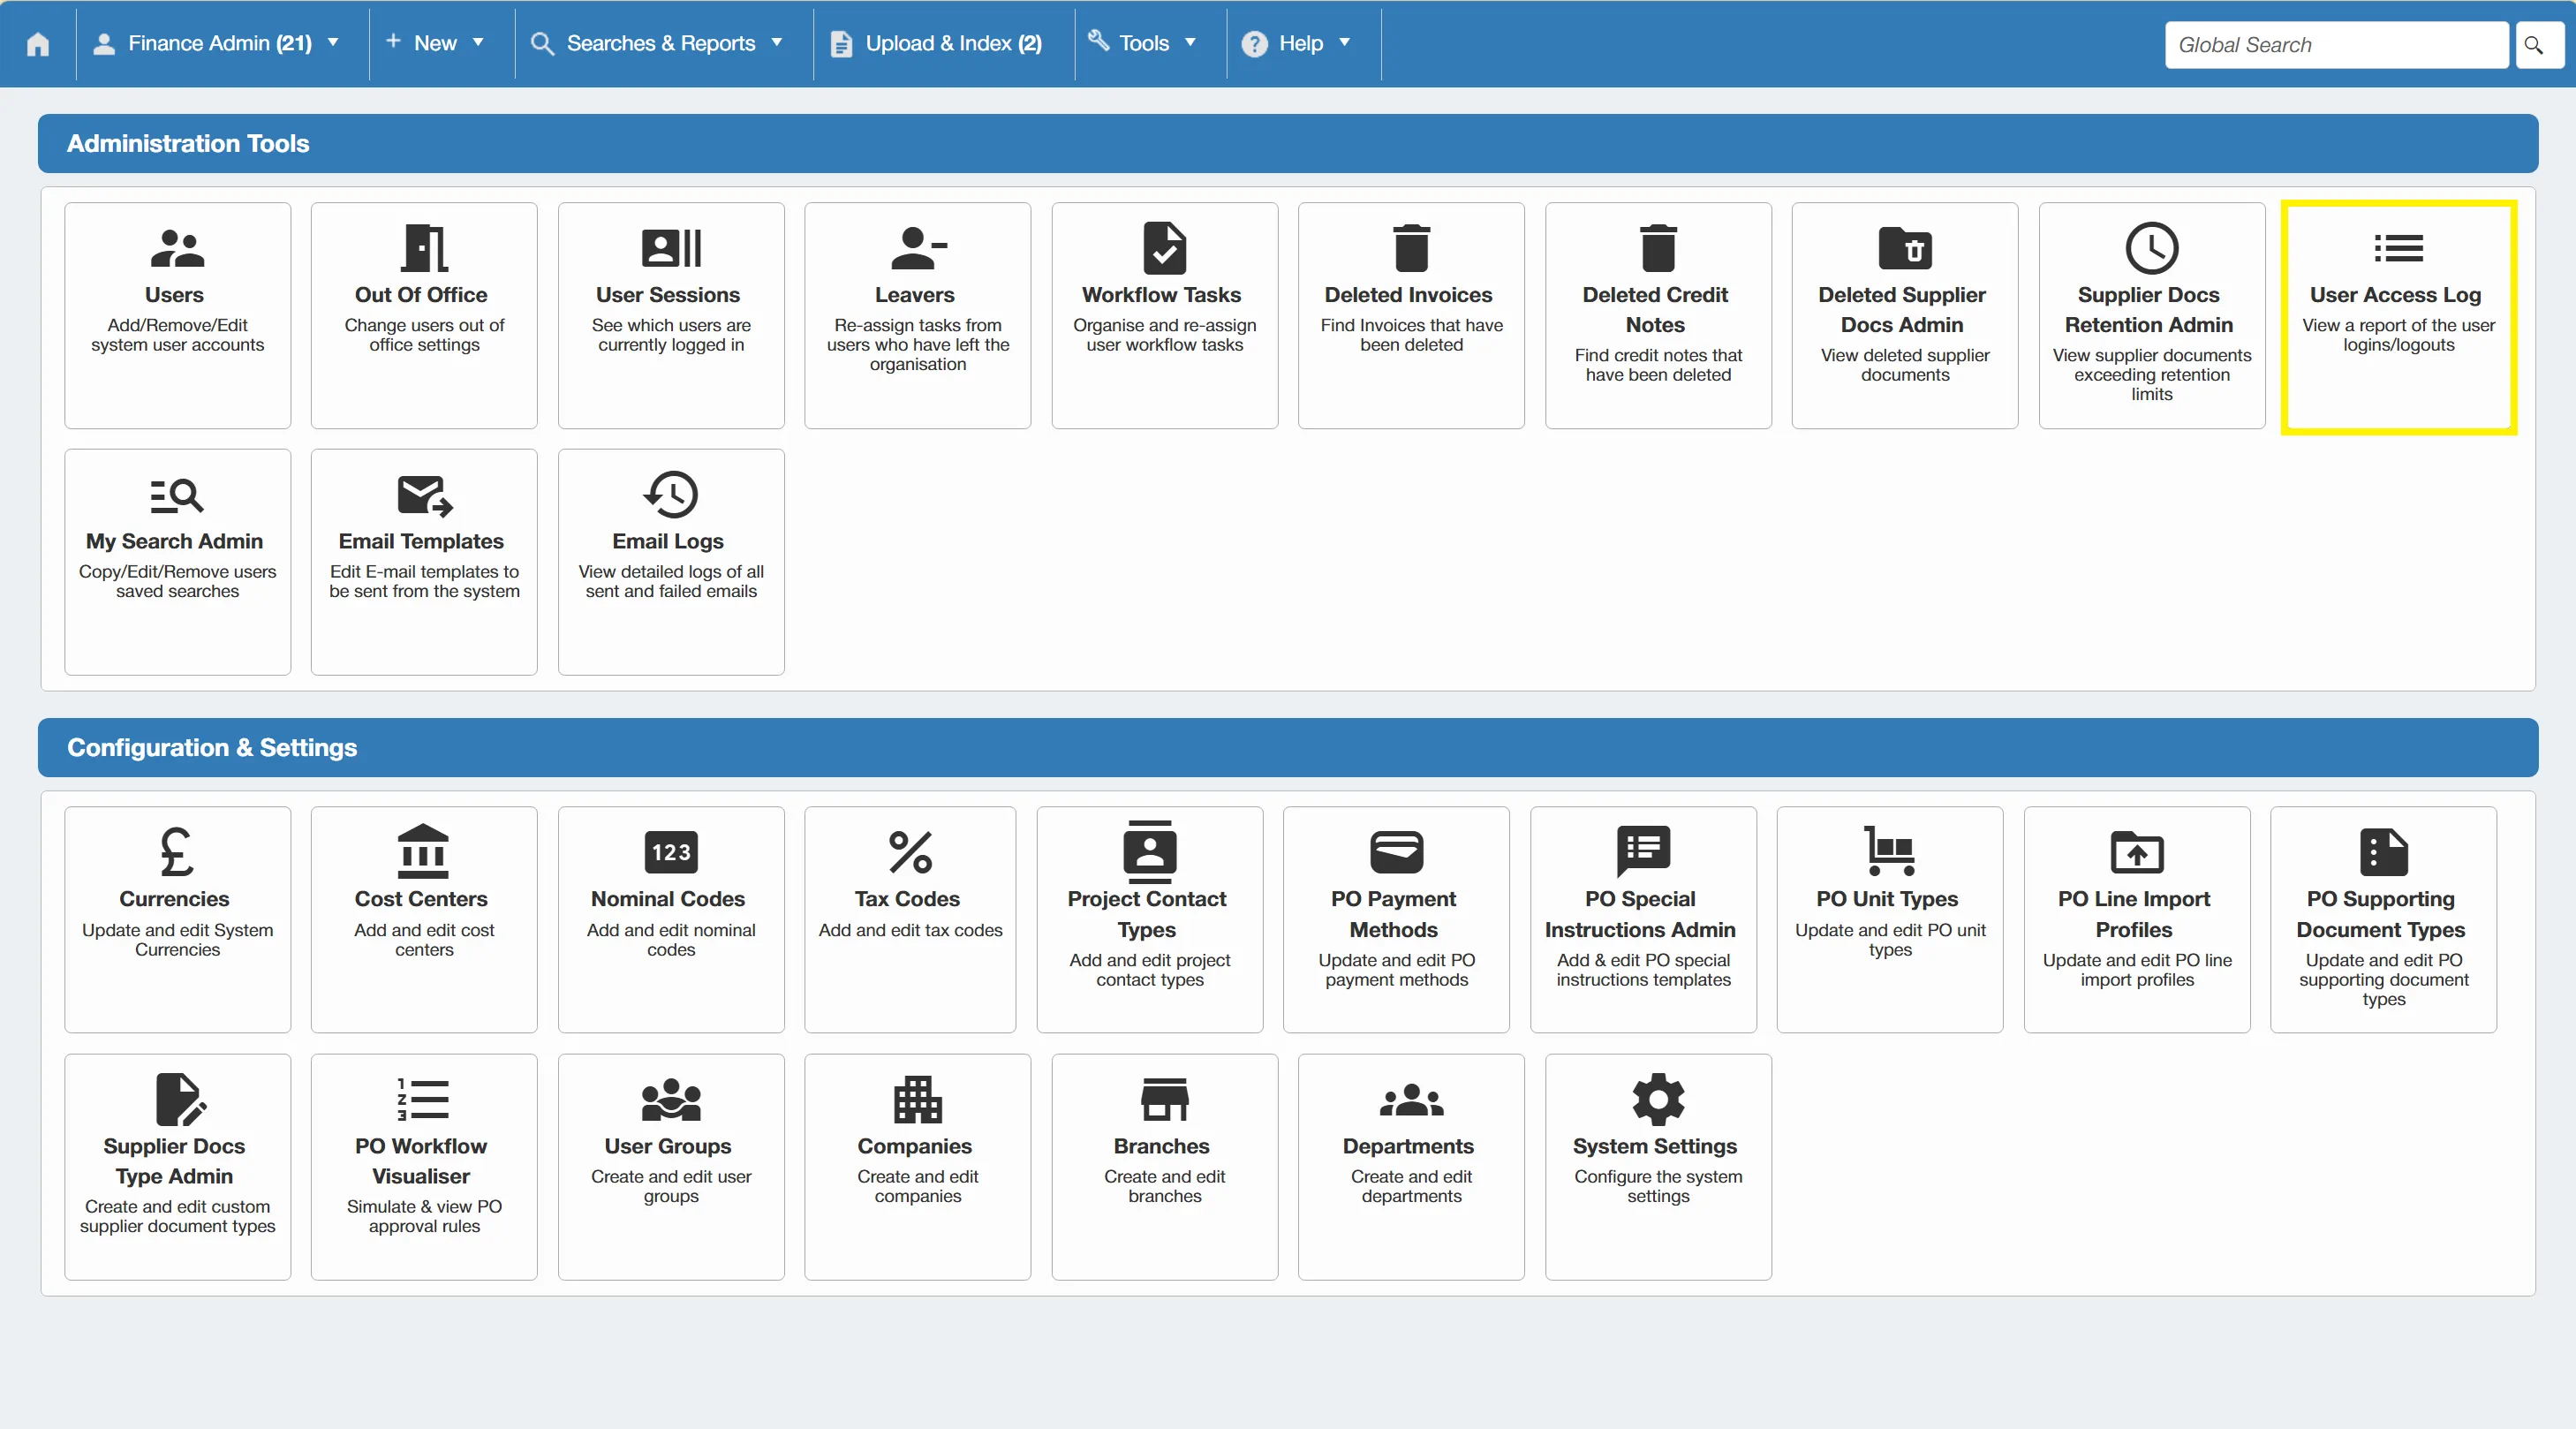
To view this report, select the User Access Log from the Administration Tools Section.
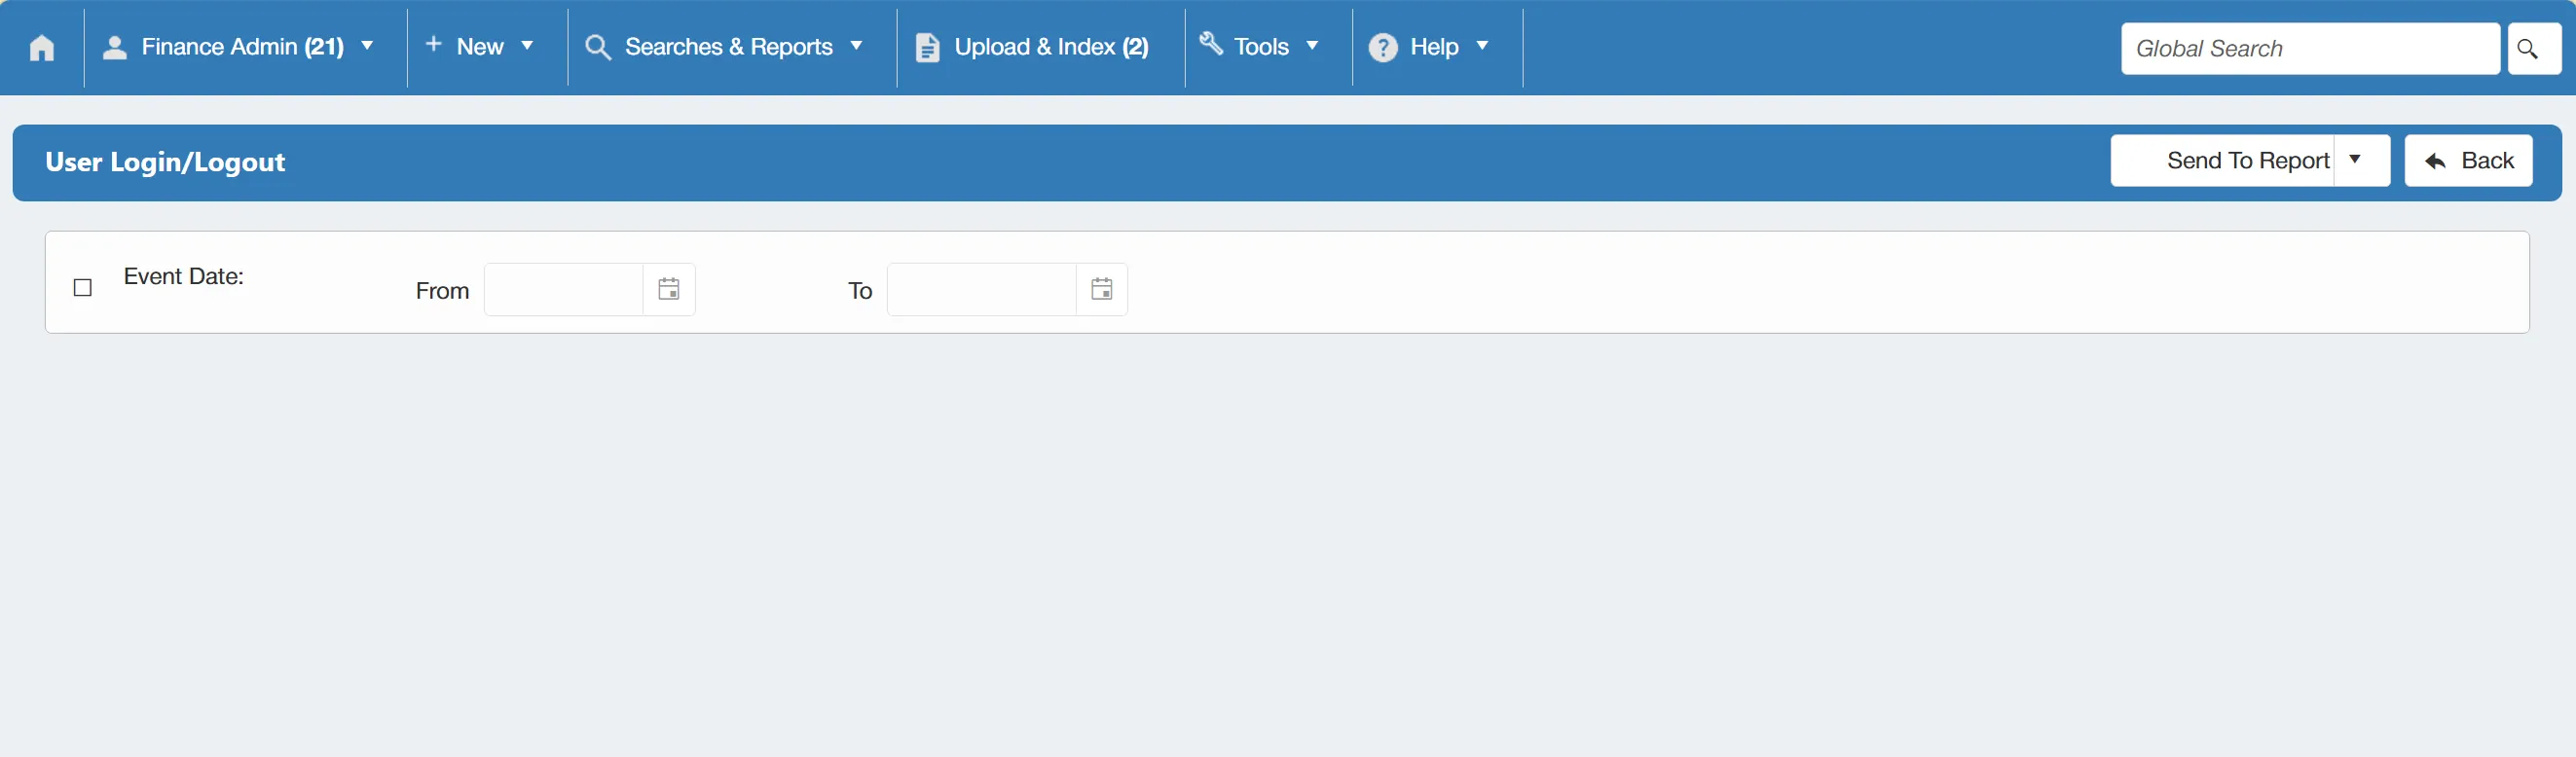
This brings you to the User Access Log Search page where you need to input your desired parameters. To do this, simply tick the Event Date box and fill in the From & To fields.
Once you are happy with the parameters, click on the drop down and select . This generates the report.
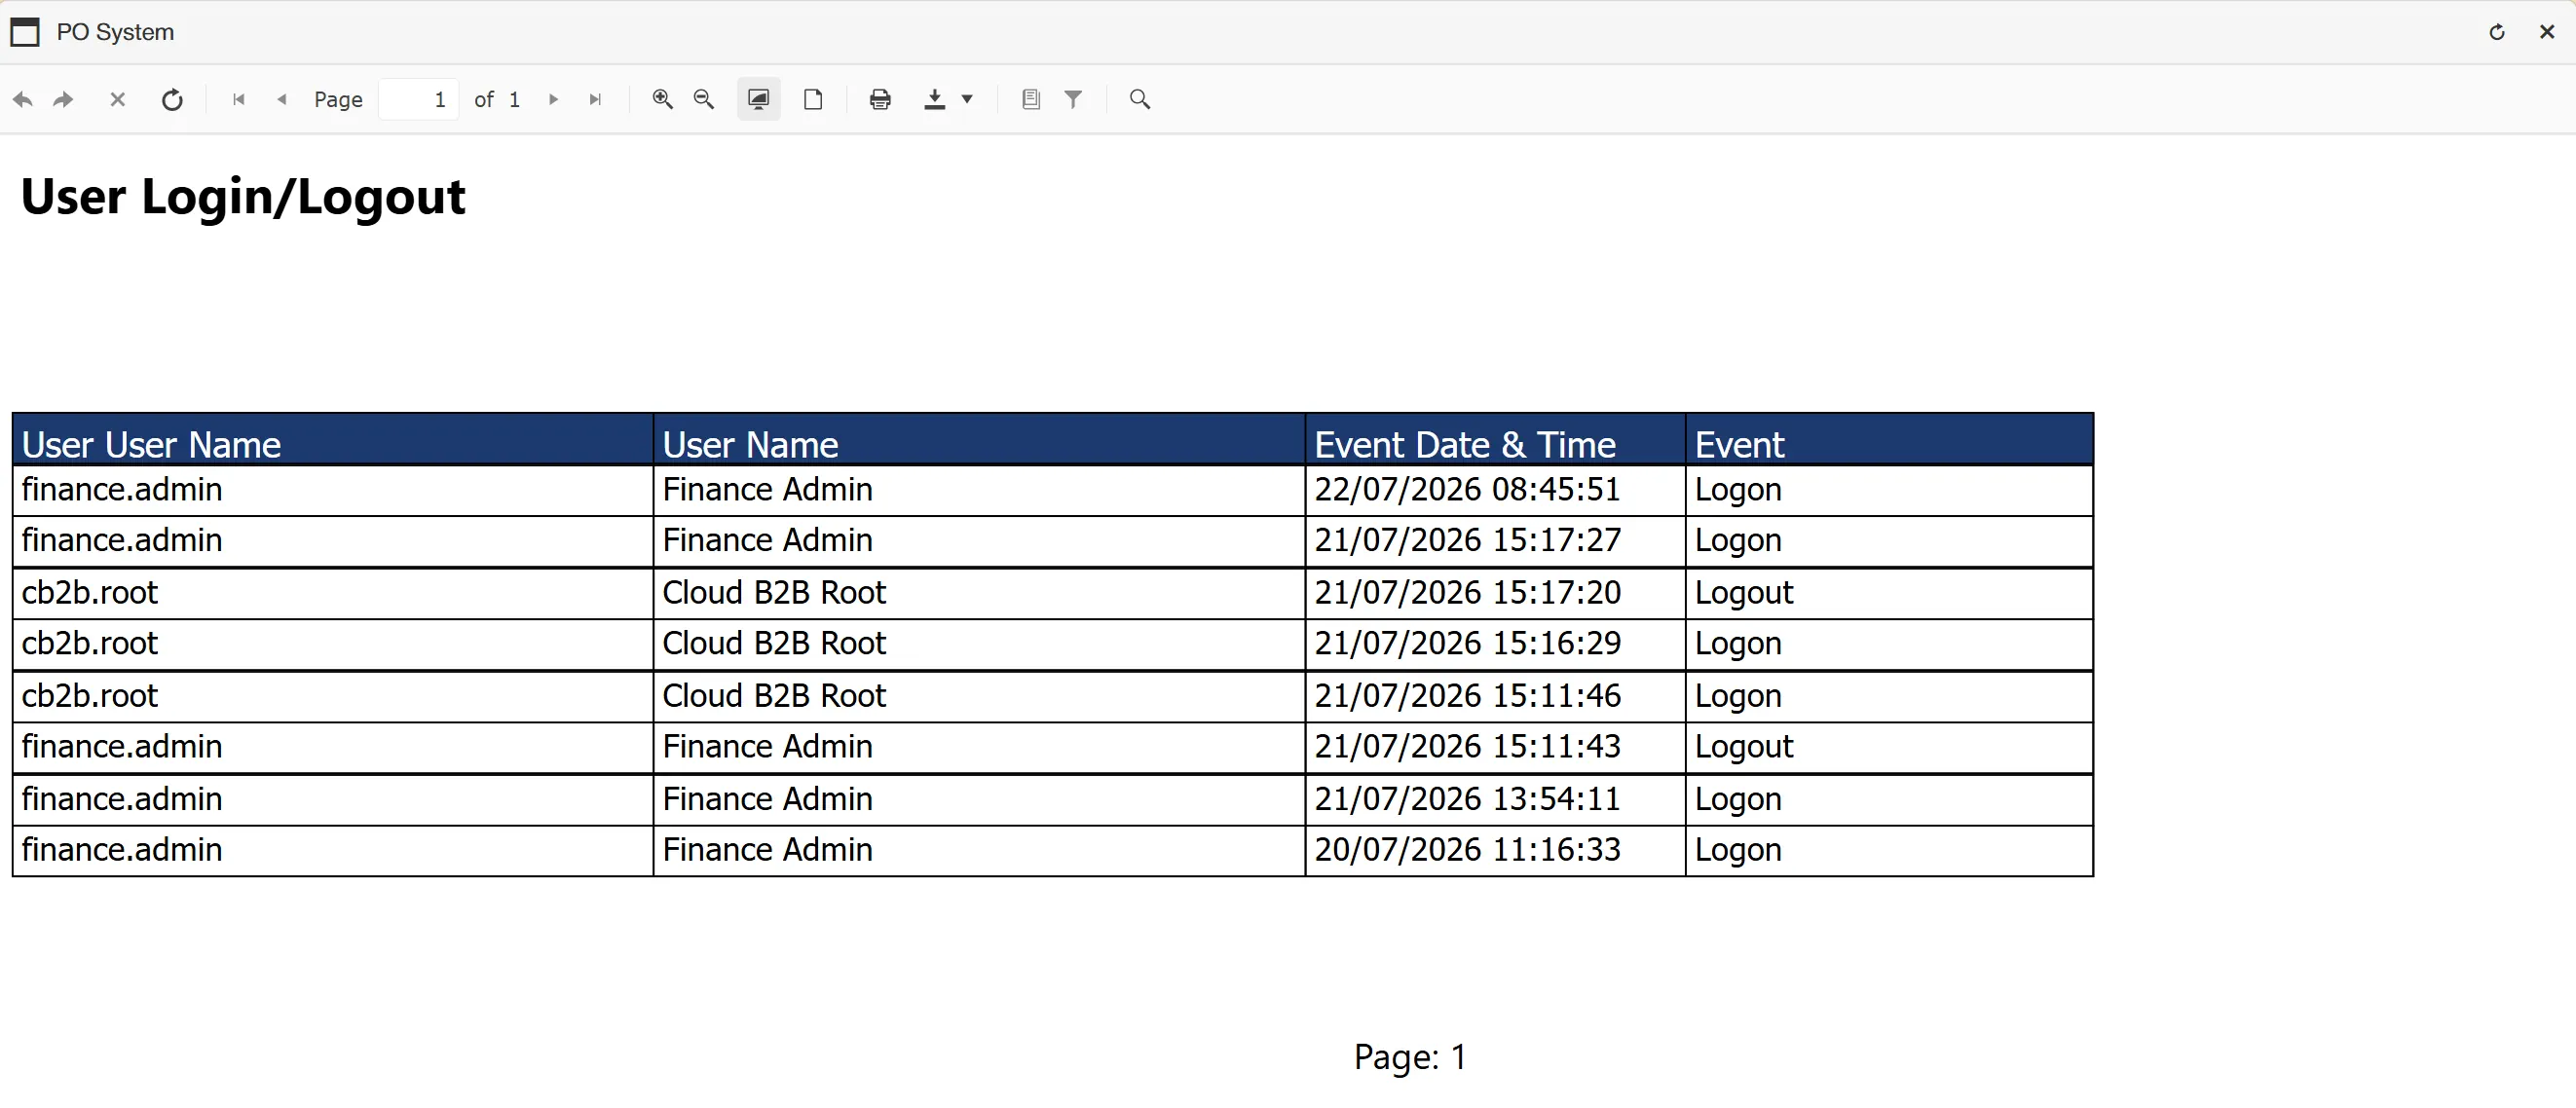
You can then export the report in a number of formats by selecting the download icon .
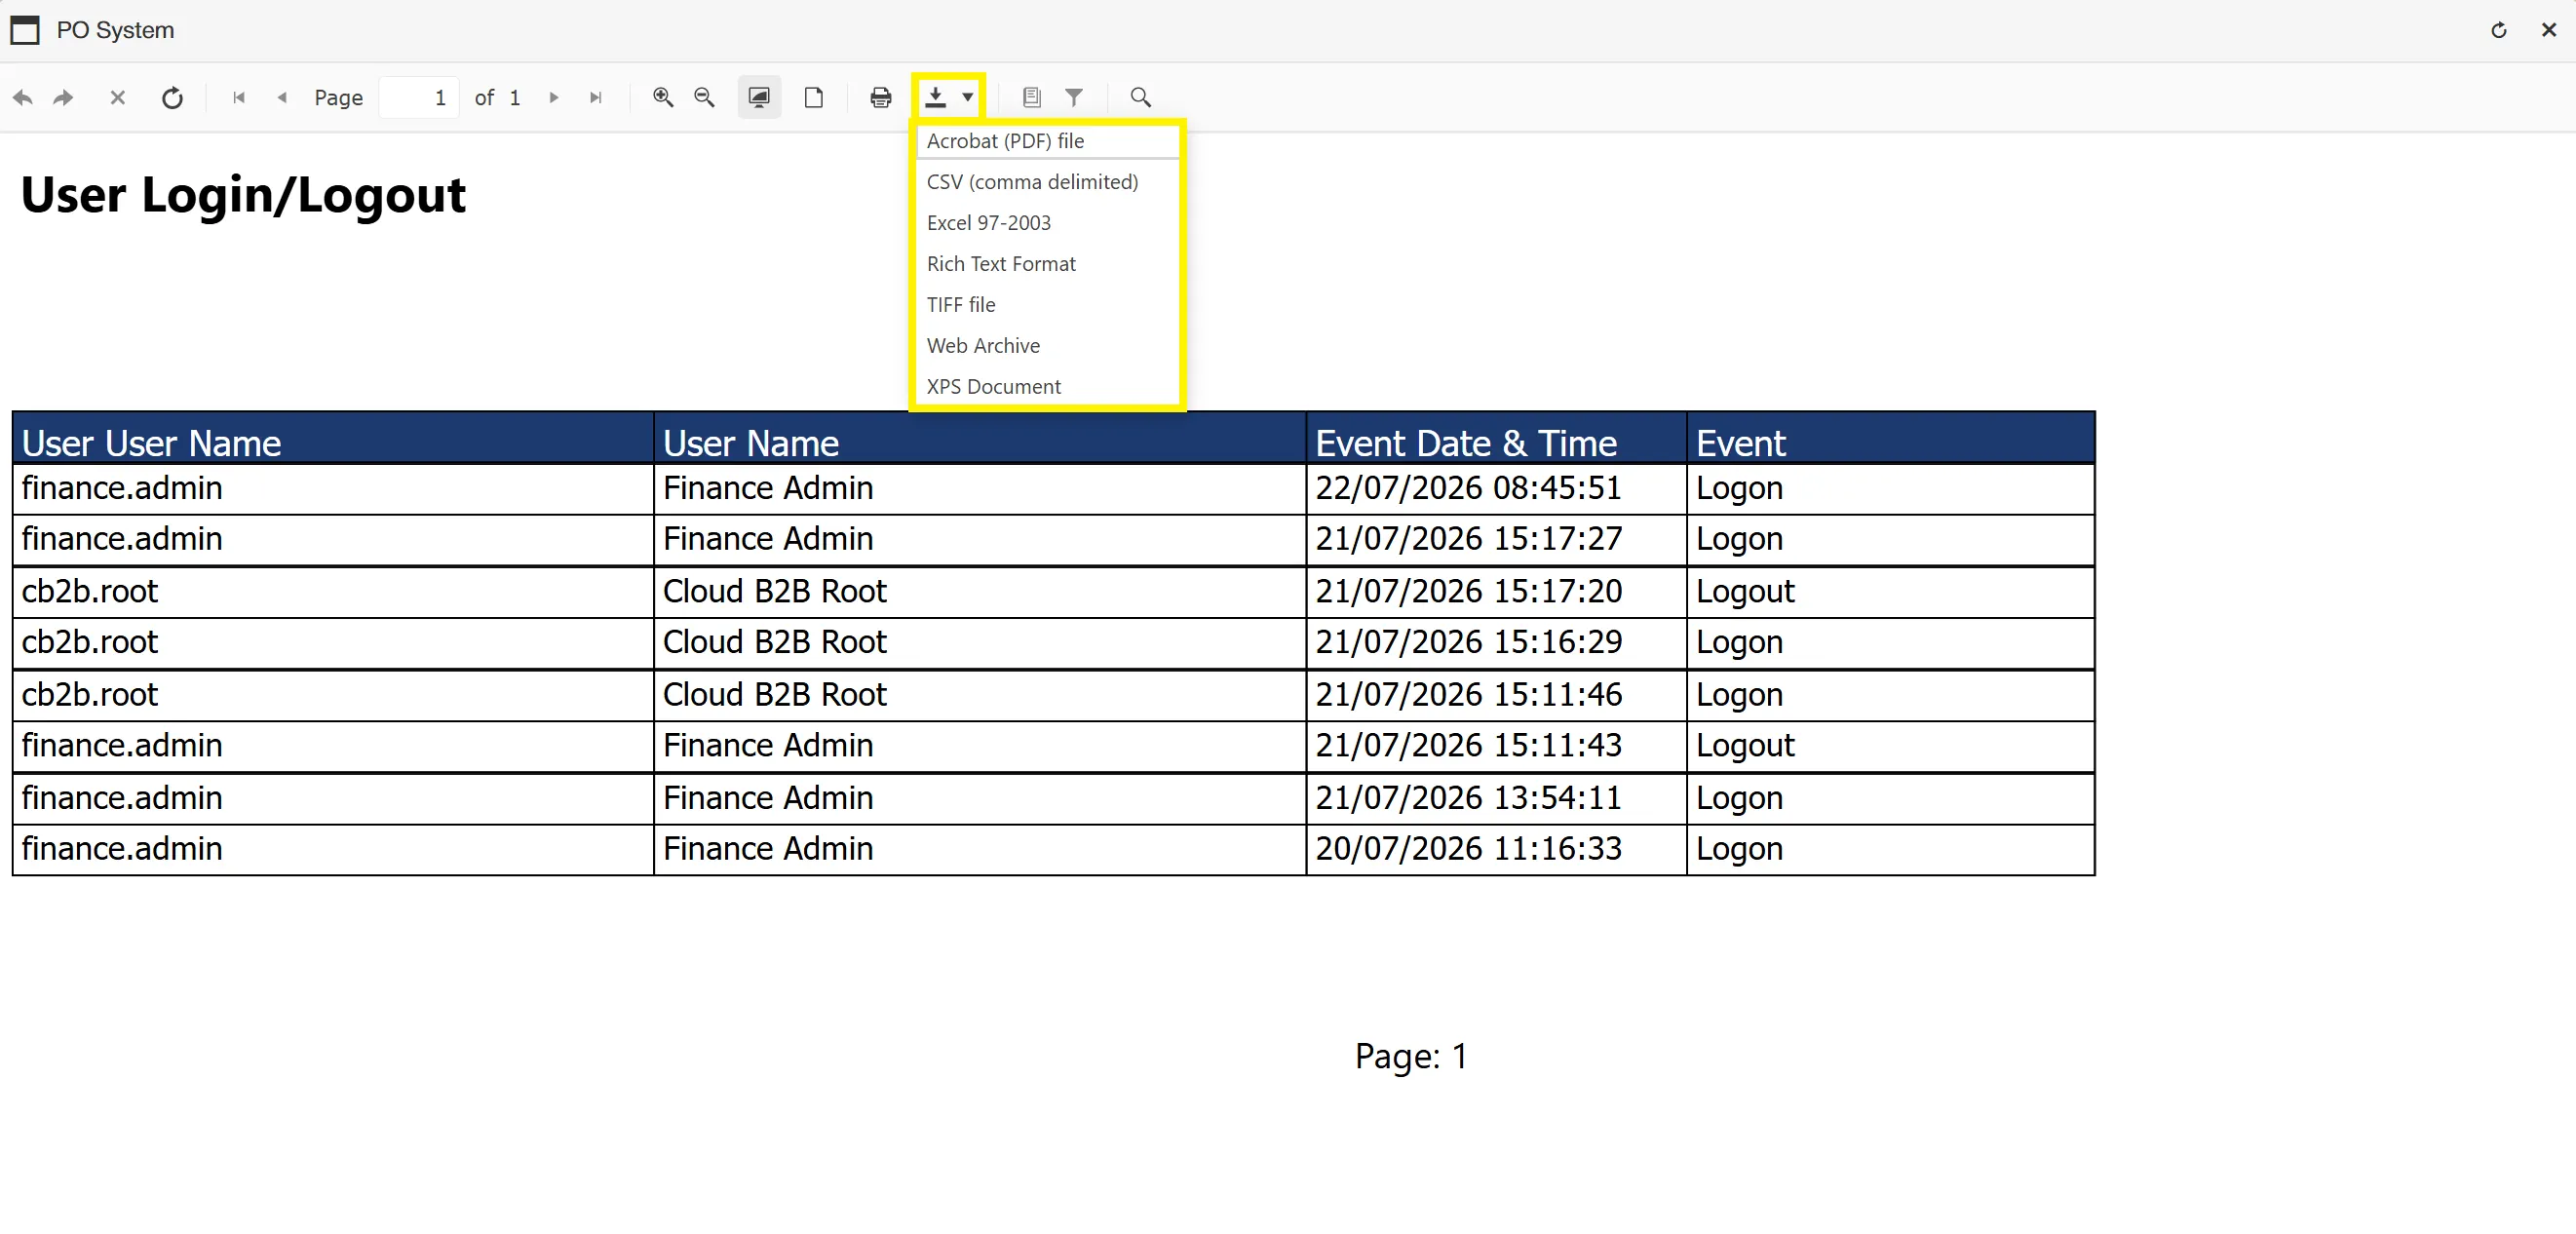
You can also print the report for a hard copy if required.
My Search Admin
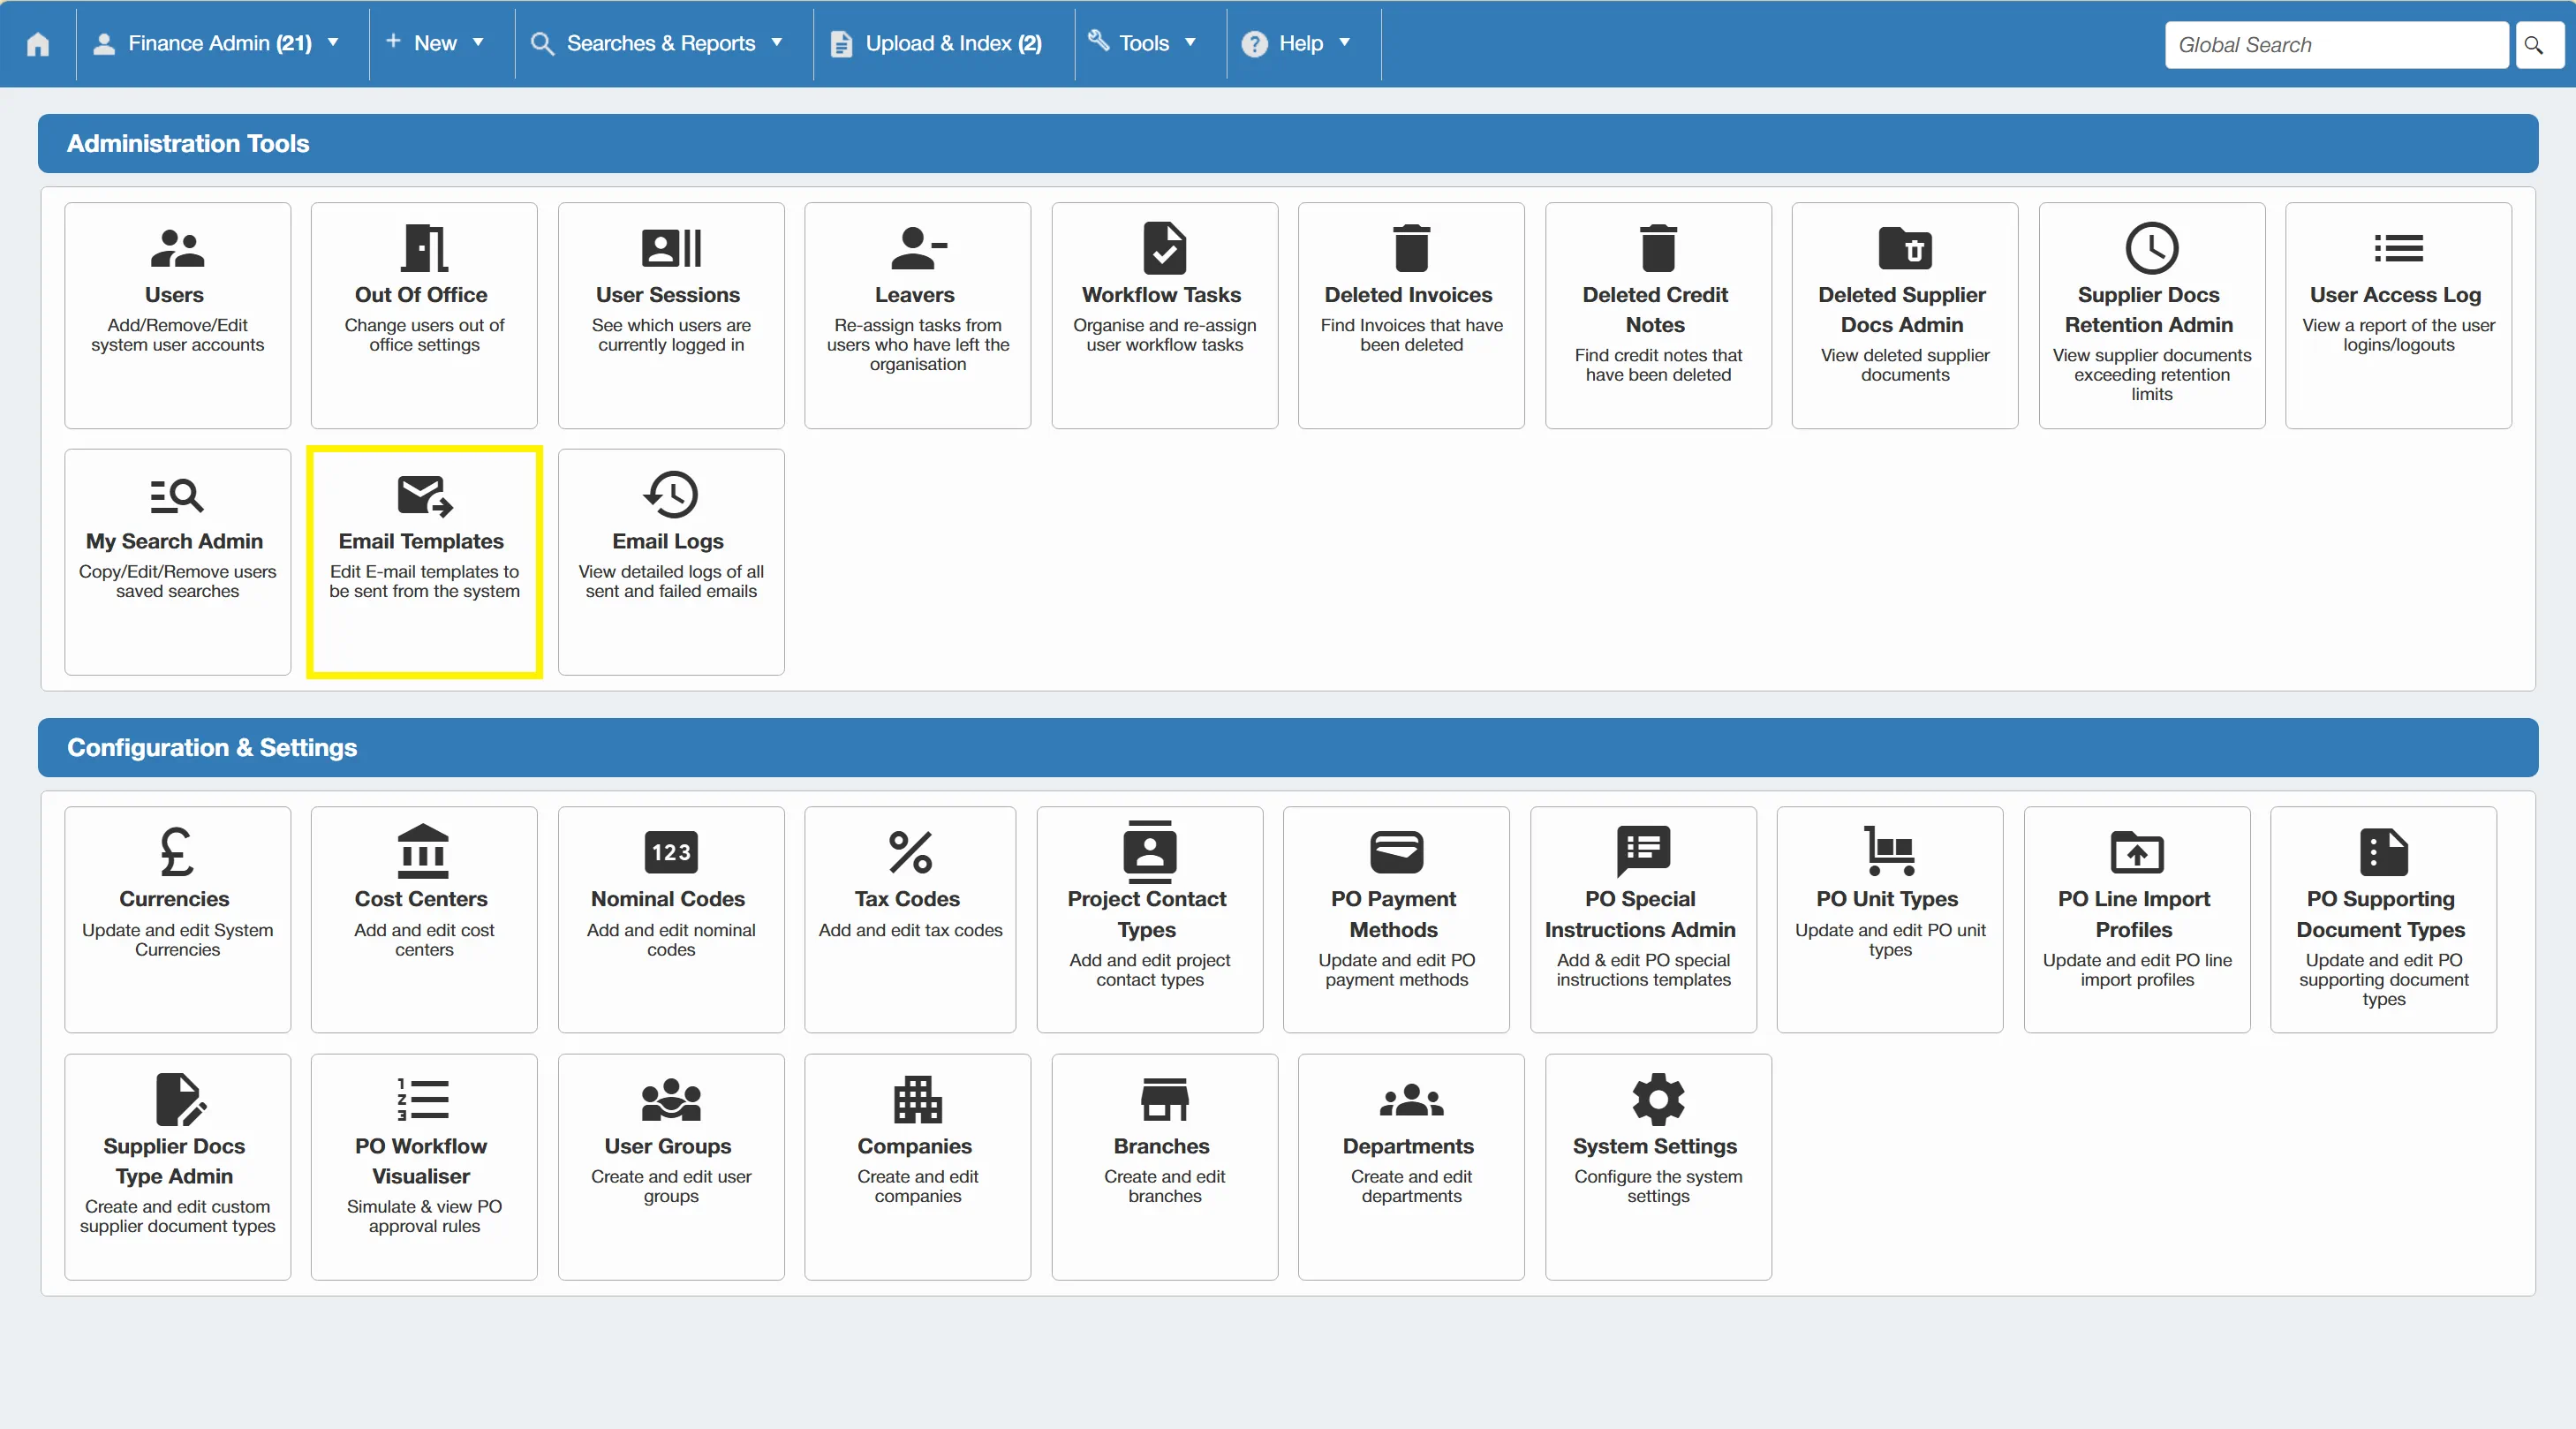
Users with the User Admin permission enabled will be able to access the My Search Admin section from the Administration Tools Section.
Only users with the User Admin permission enabled can access this section. For more information on user permissions click here.
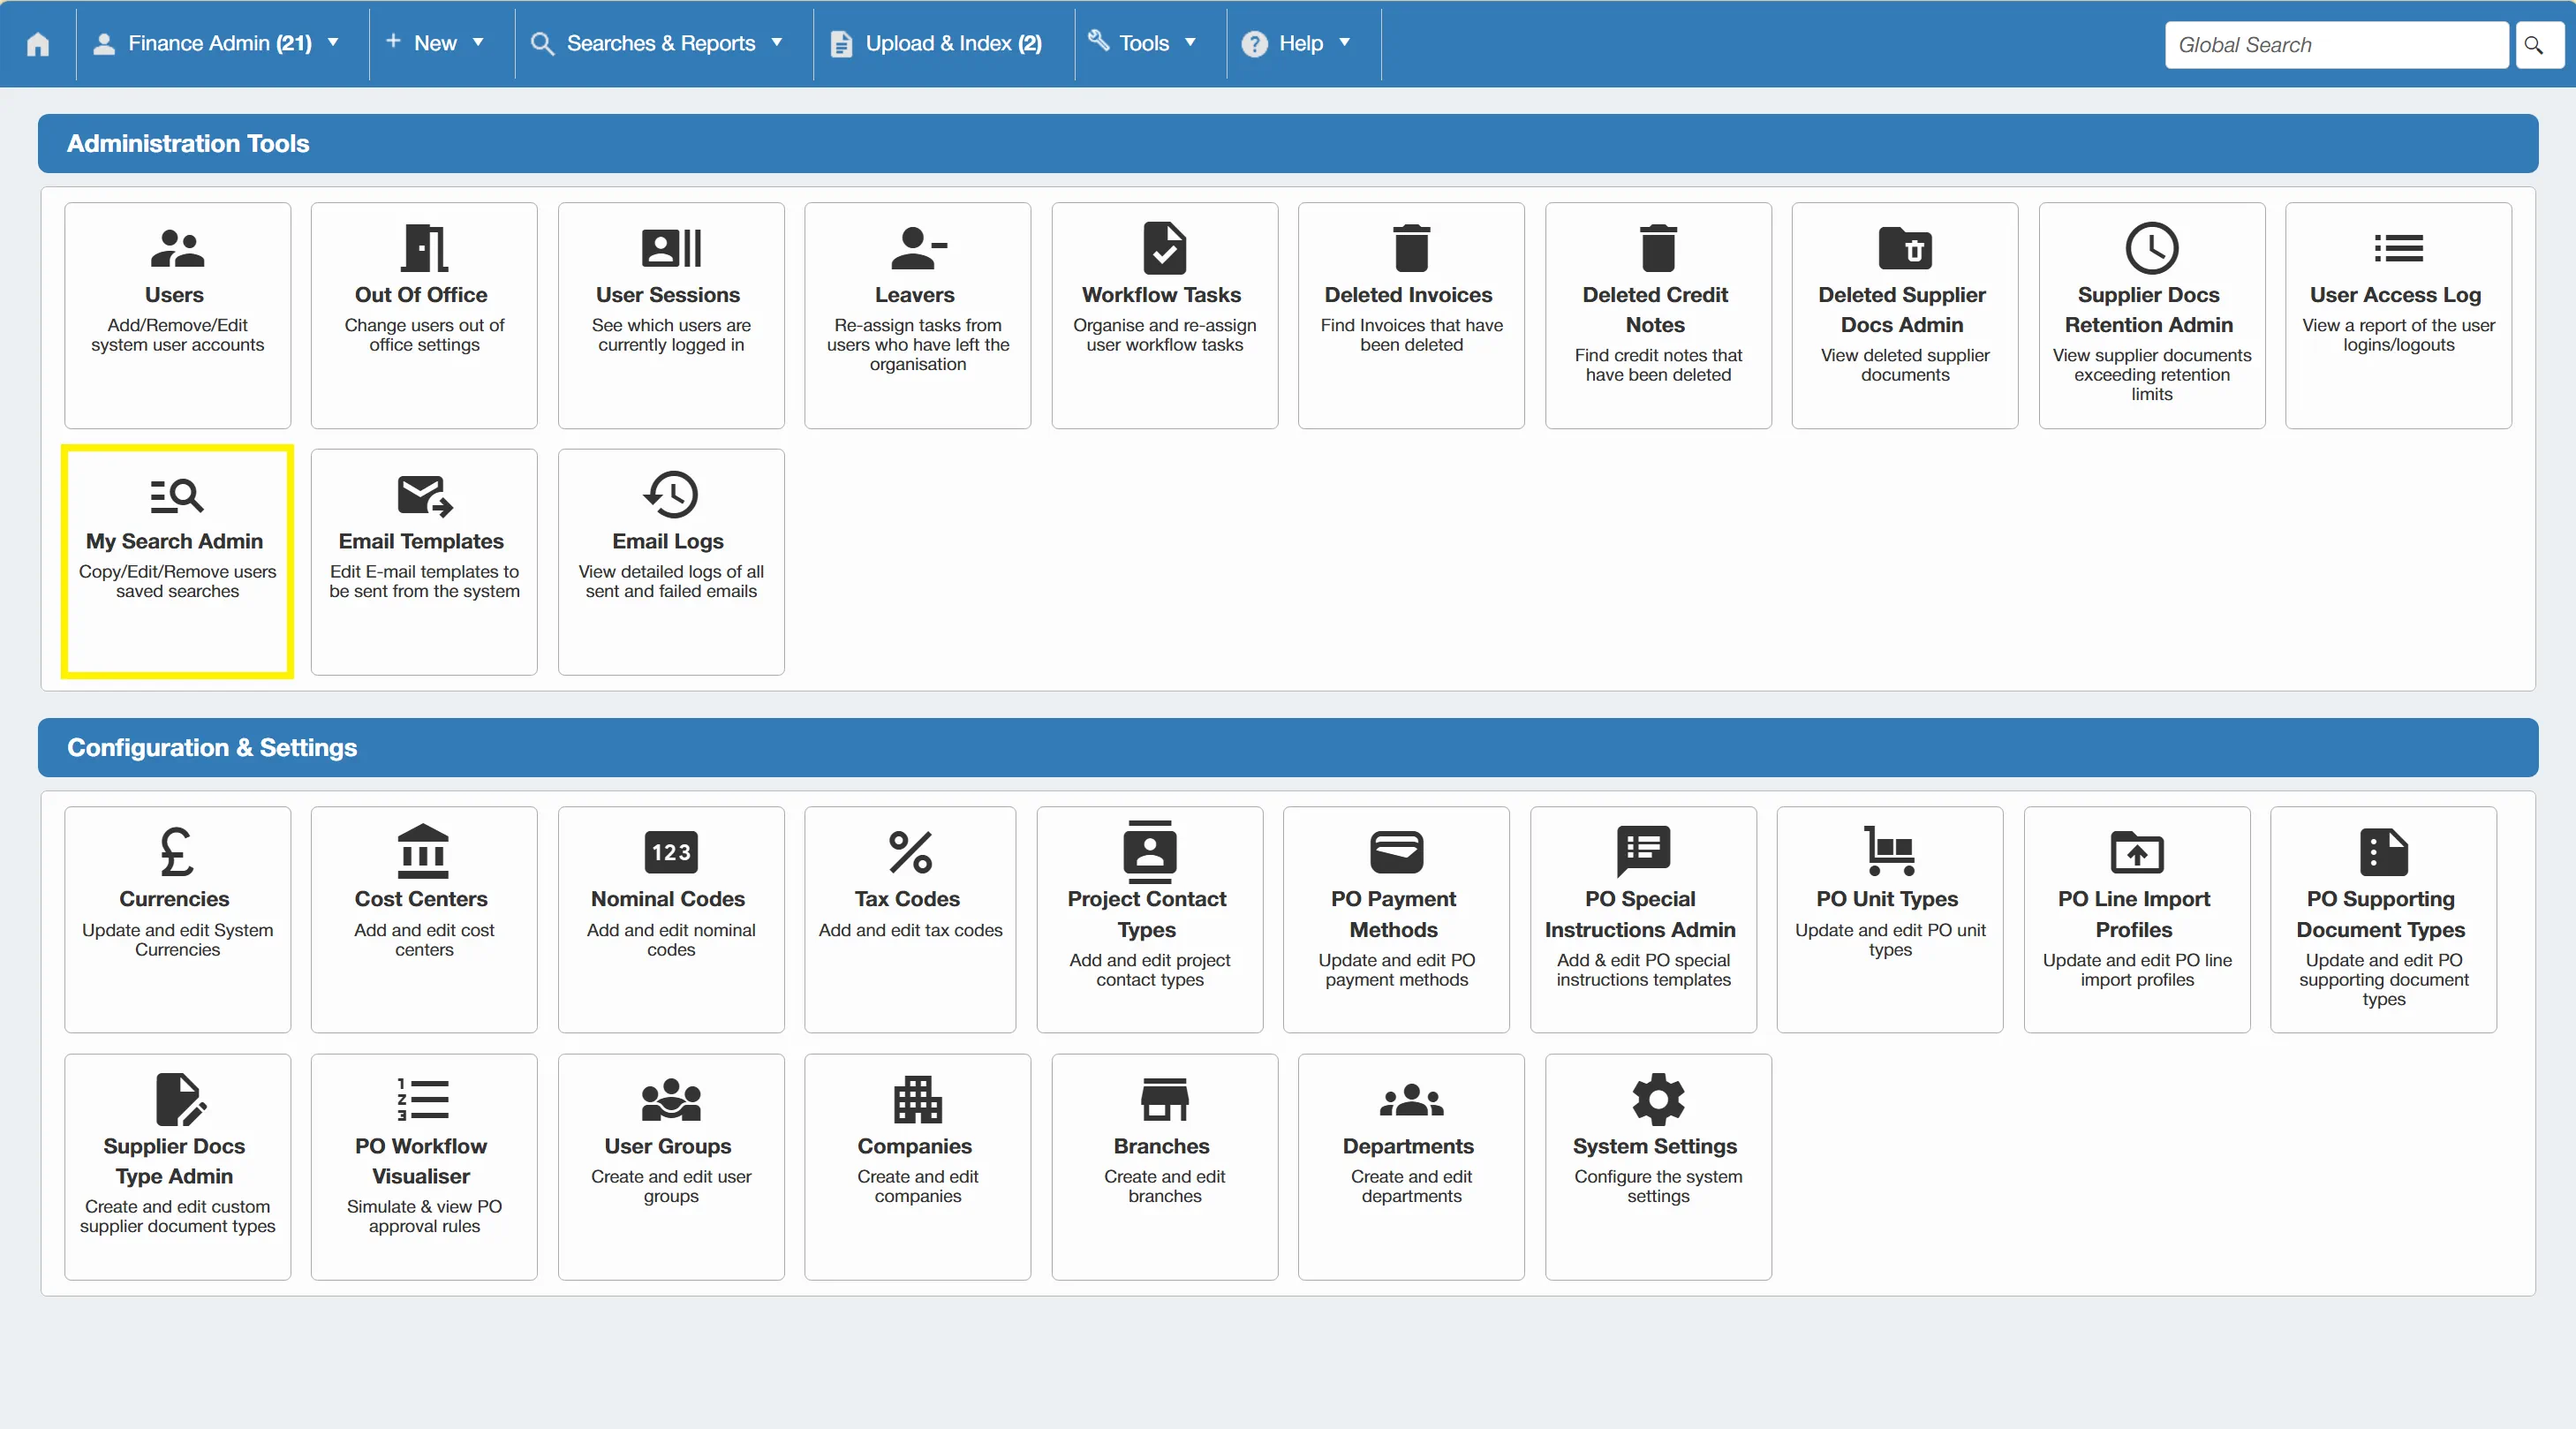
For more information on user permissions, click here.
Clicking on My Search Admin will display a Saved Searches Administration grid.
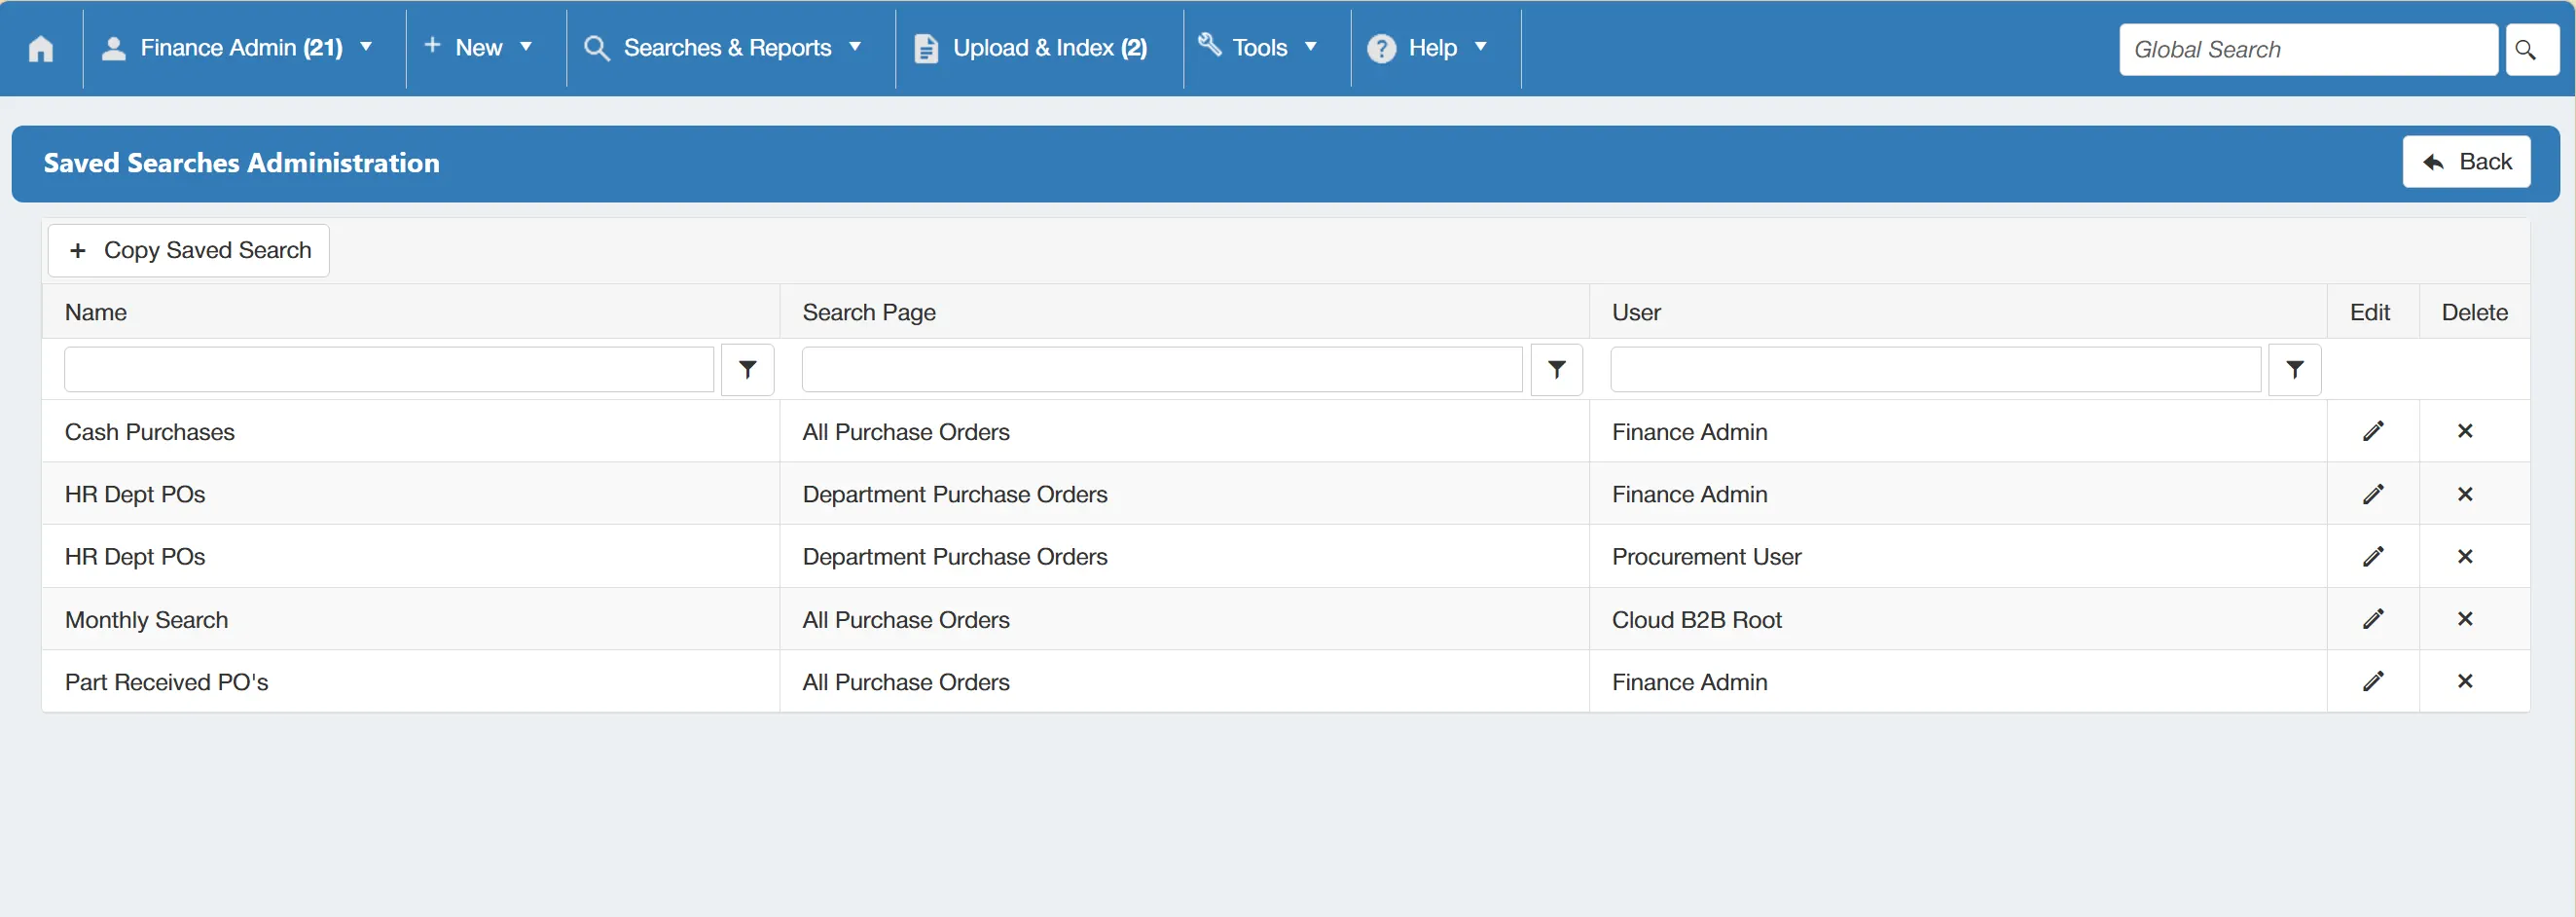
From this grid, you can manage Saved Searches belonging to other users.
Select the icon to edit the name of the search, alternatively you can select to delete the search.
You also have the ability to copy existing saved searches from one user to another.
To do this, simply select the .
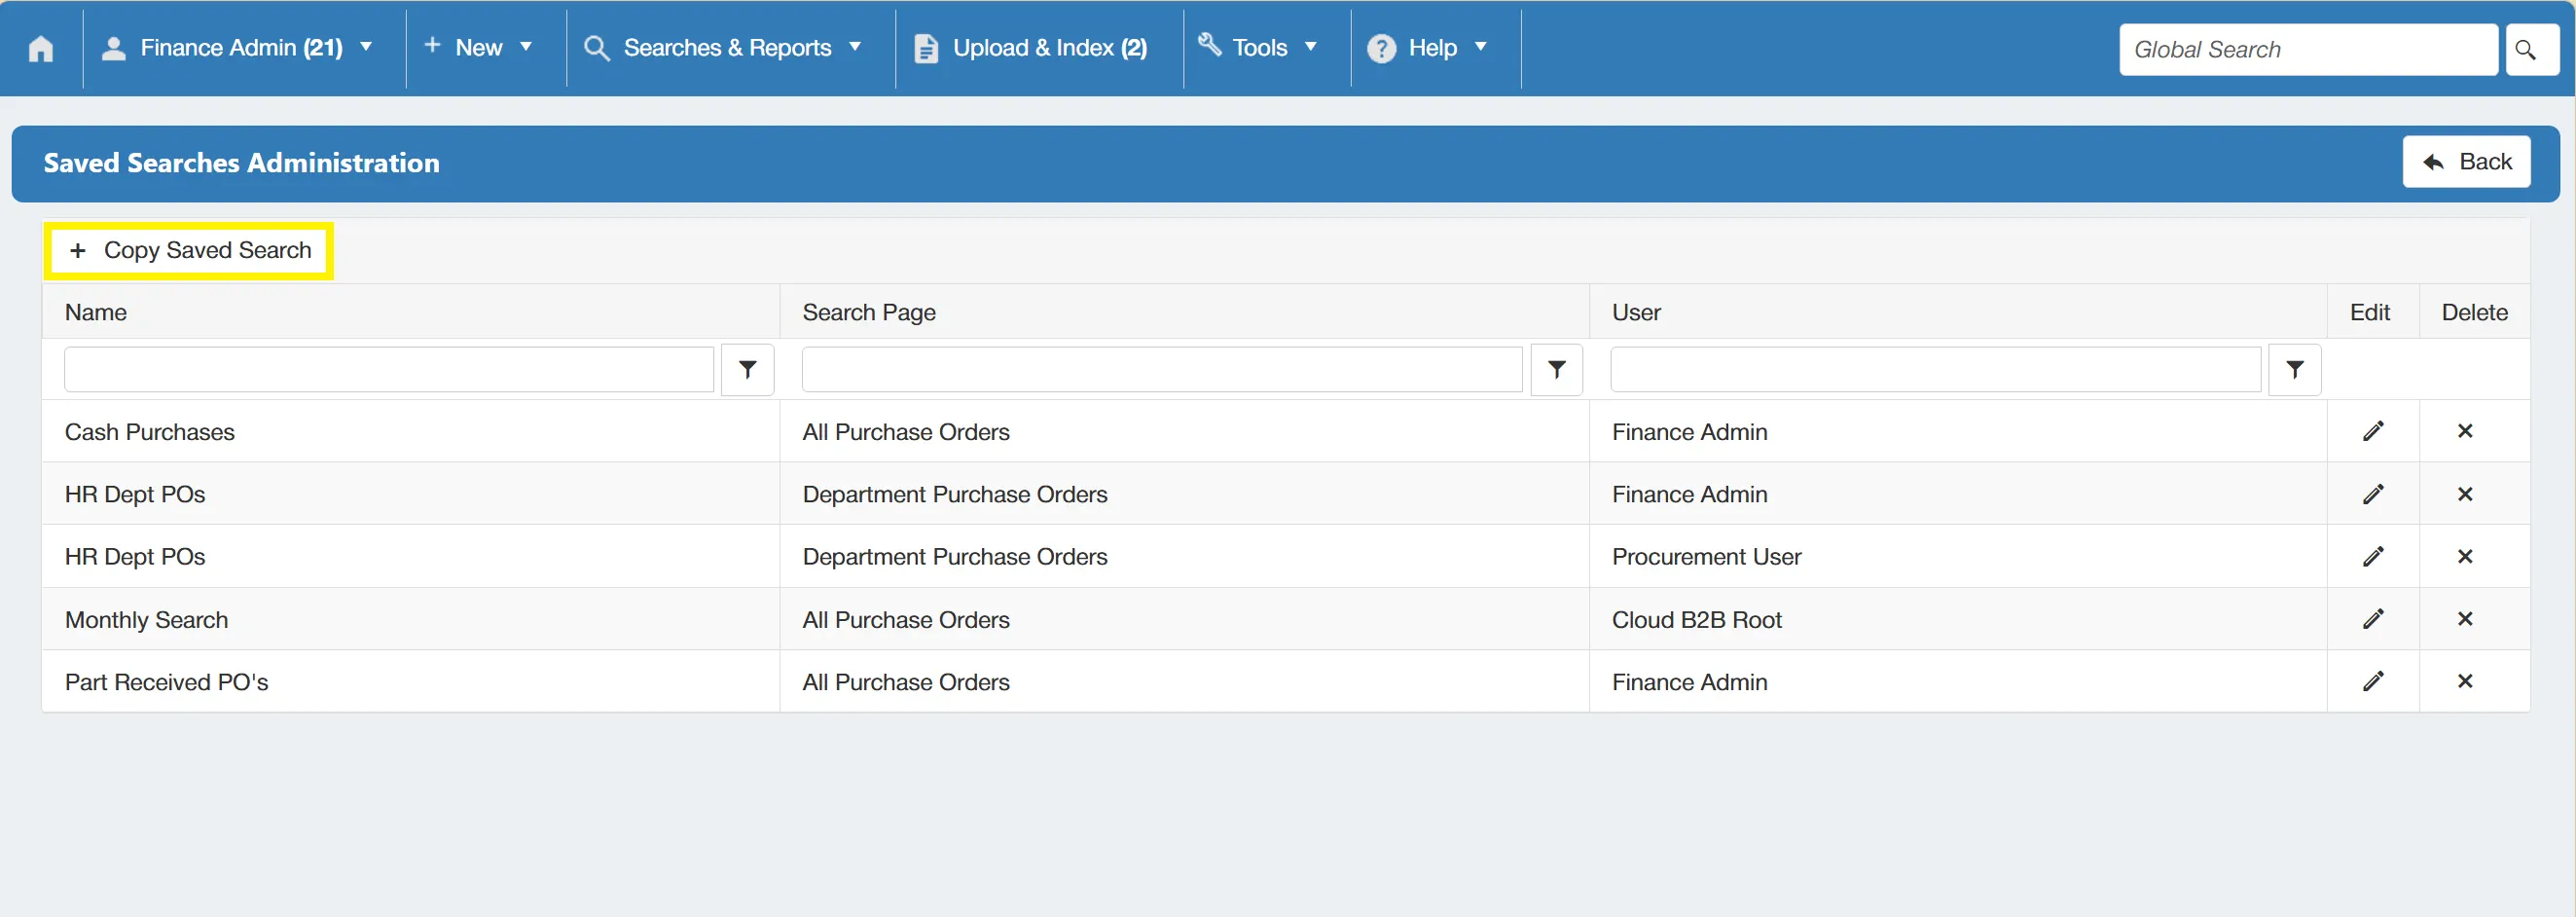
This will bring up a new field allowing you to dictate which user the specified searches shall be copied to.
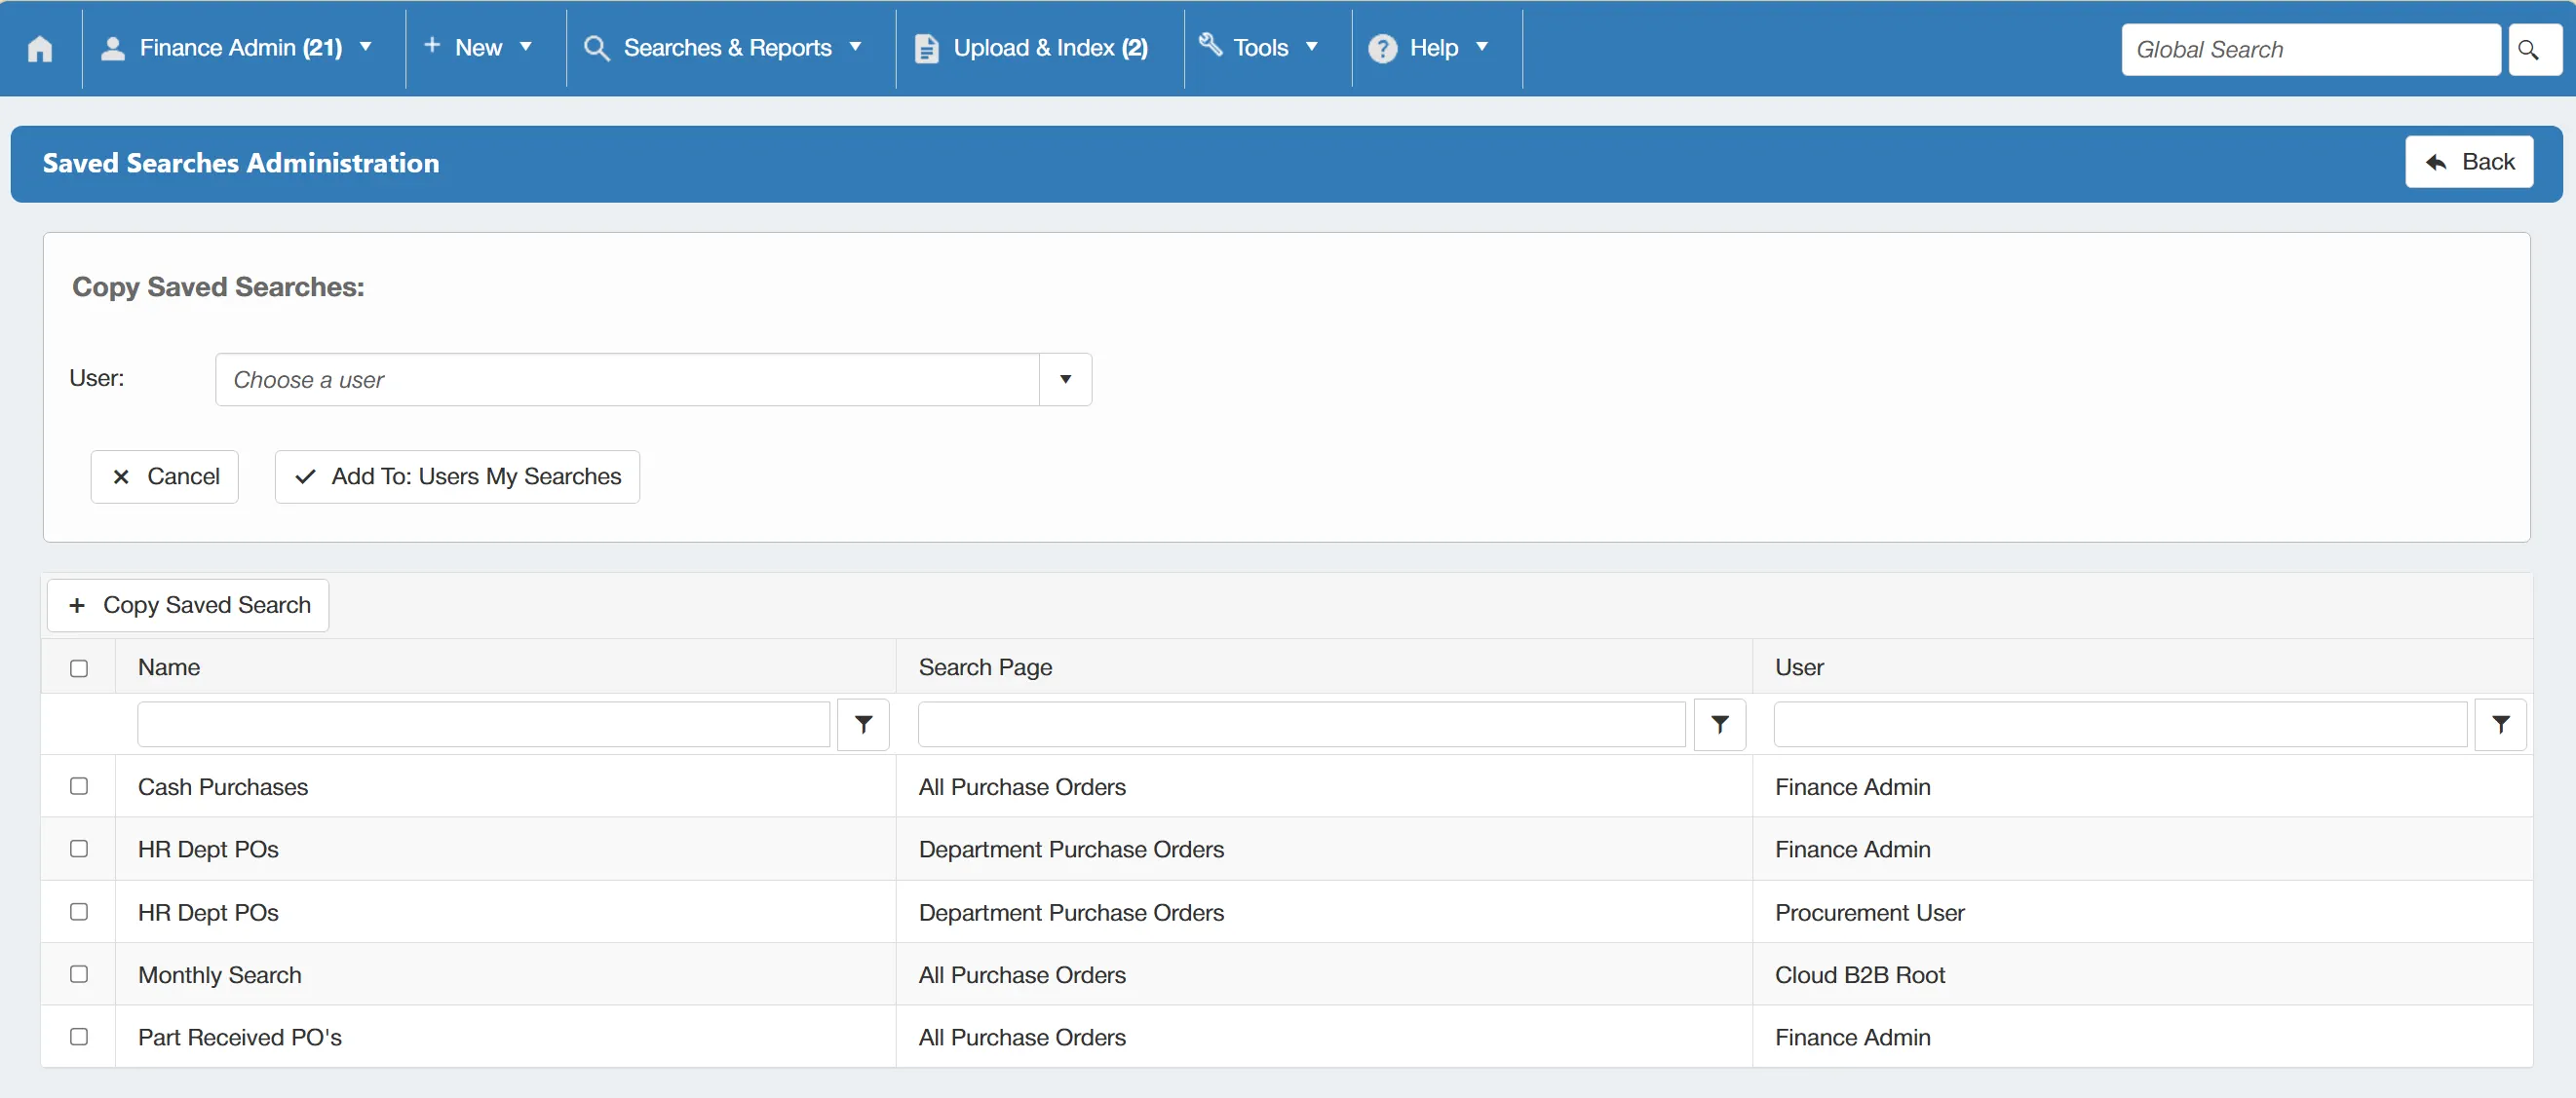
You can then select the desired searches using the tick boxes on the left-hand side of the grid.
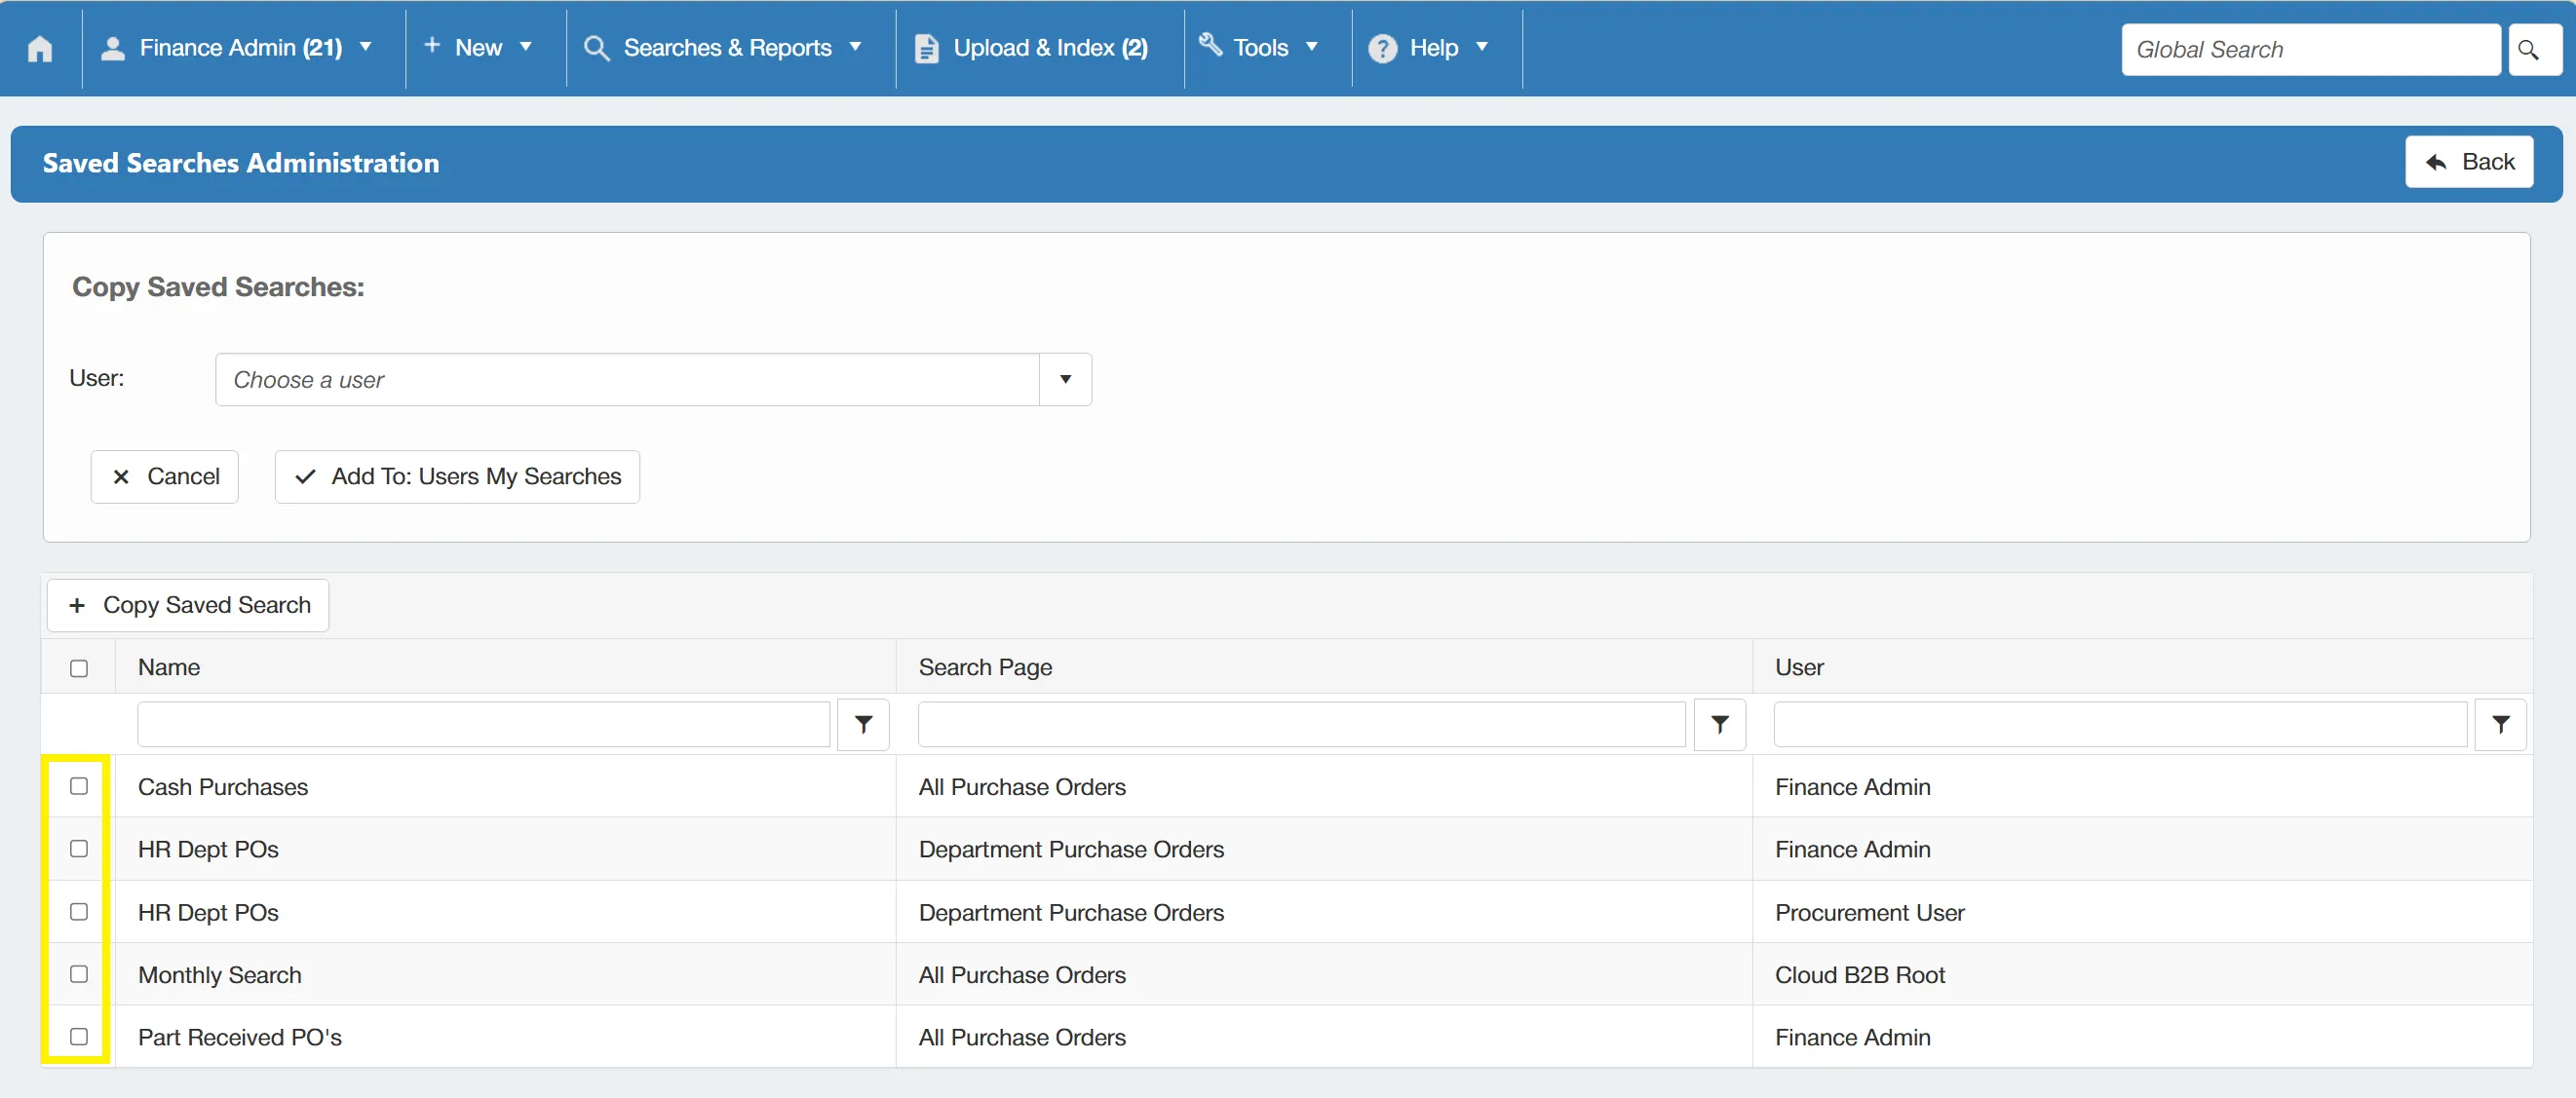
You can copy multiple searches at once.
Once happy with your selection, simply click to complete the copy process.
Email Templates
You can edit the email templates that are being sent from the system. This helps you personalise the emails that are sent to both suppliers and users.
Users must have the System Admin permission enabled to access this feauture. For information on user permissions, click here.
To access the email templates, select the Email Templates from the Administration Tools Section.
This brings you to the Email Template Administration grid. This grid includes key information such as the name of each template and its type.
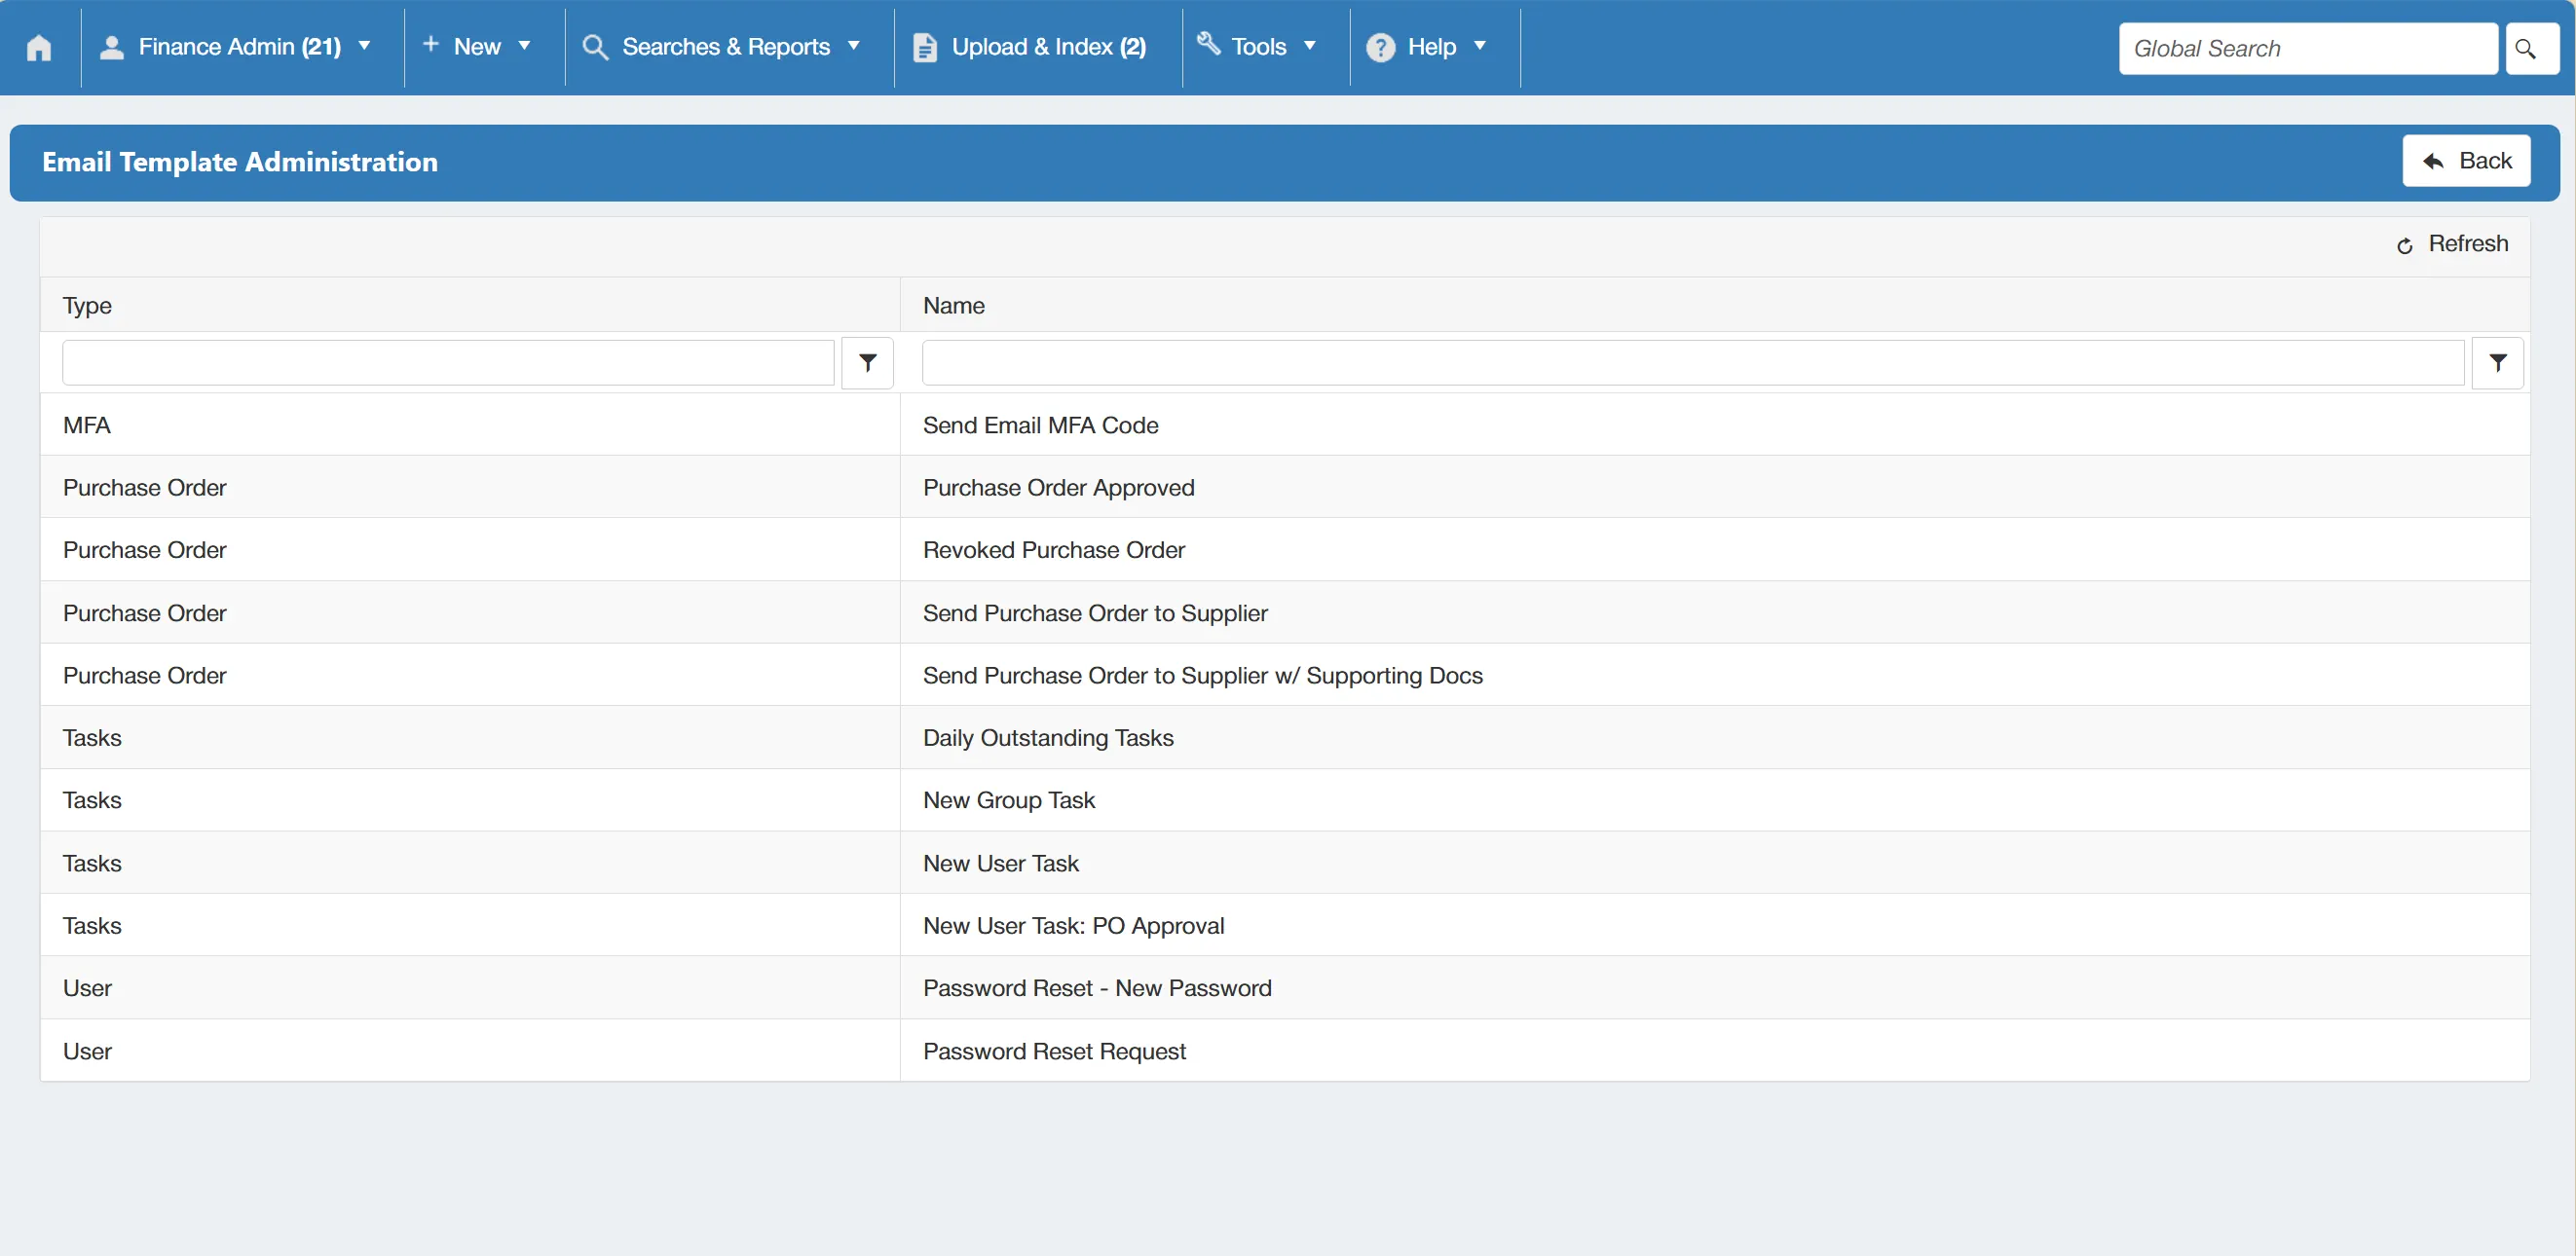
From this grid, you can select the email template you wish to edit. This opens a new window displaying the content of the email template.
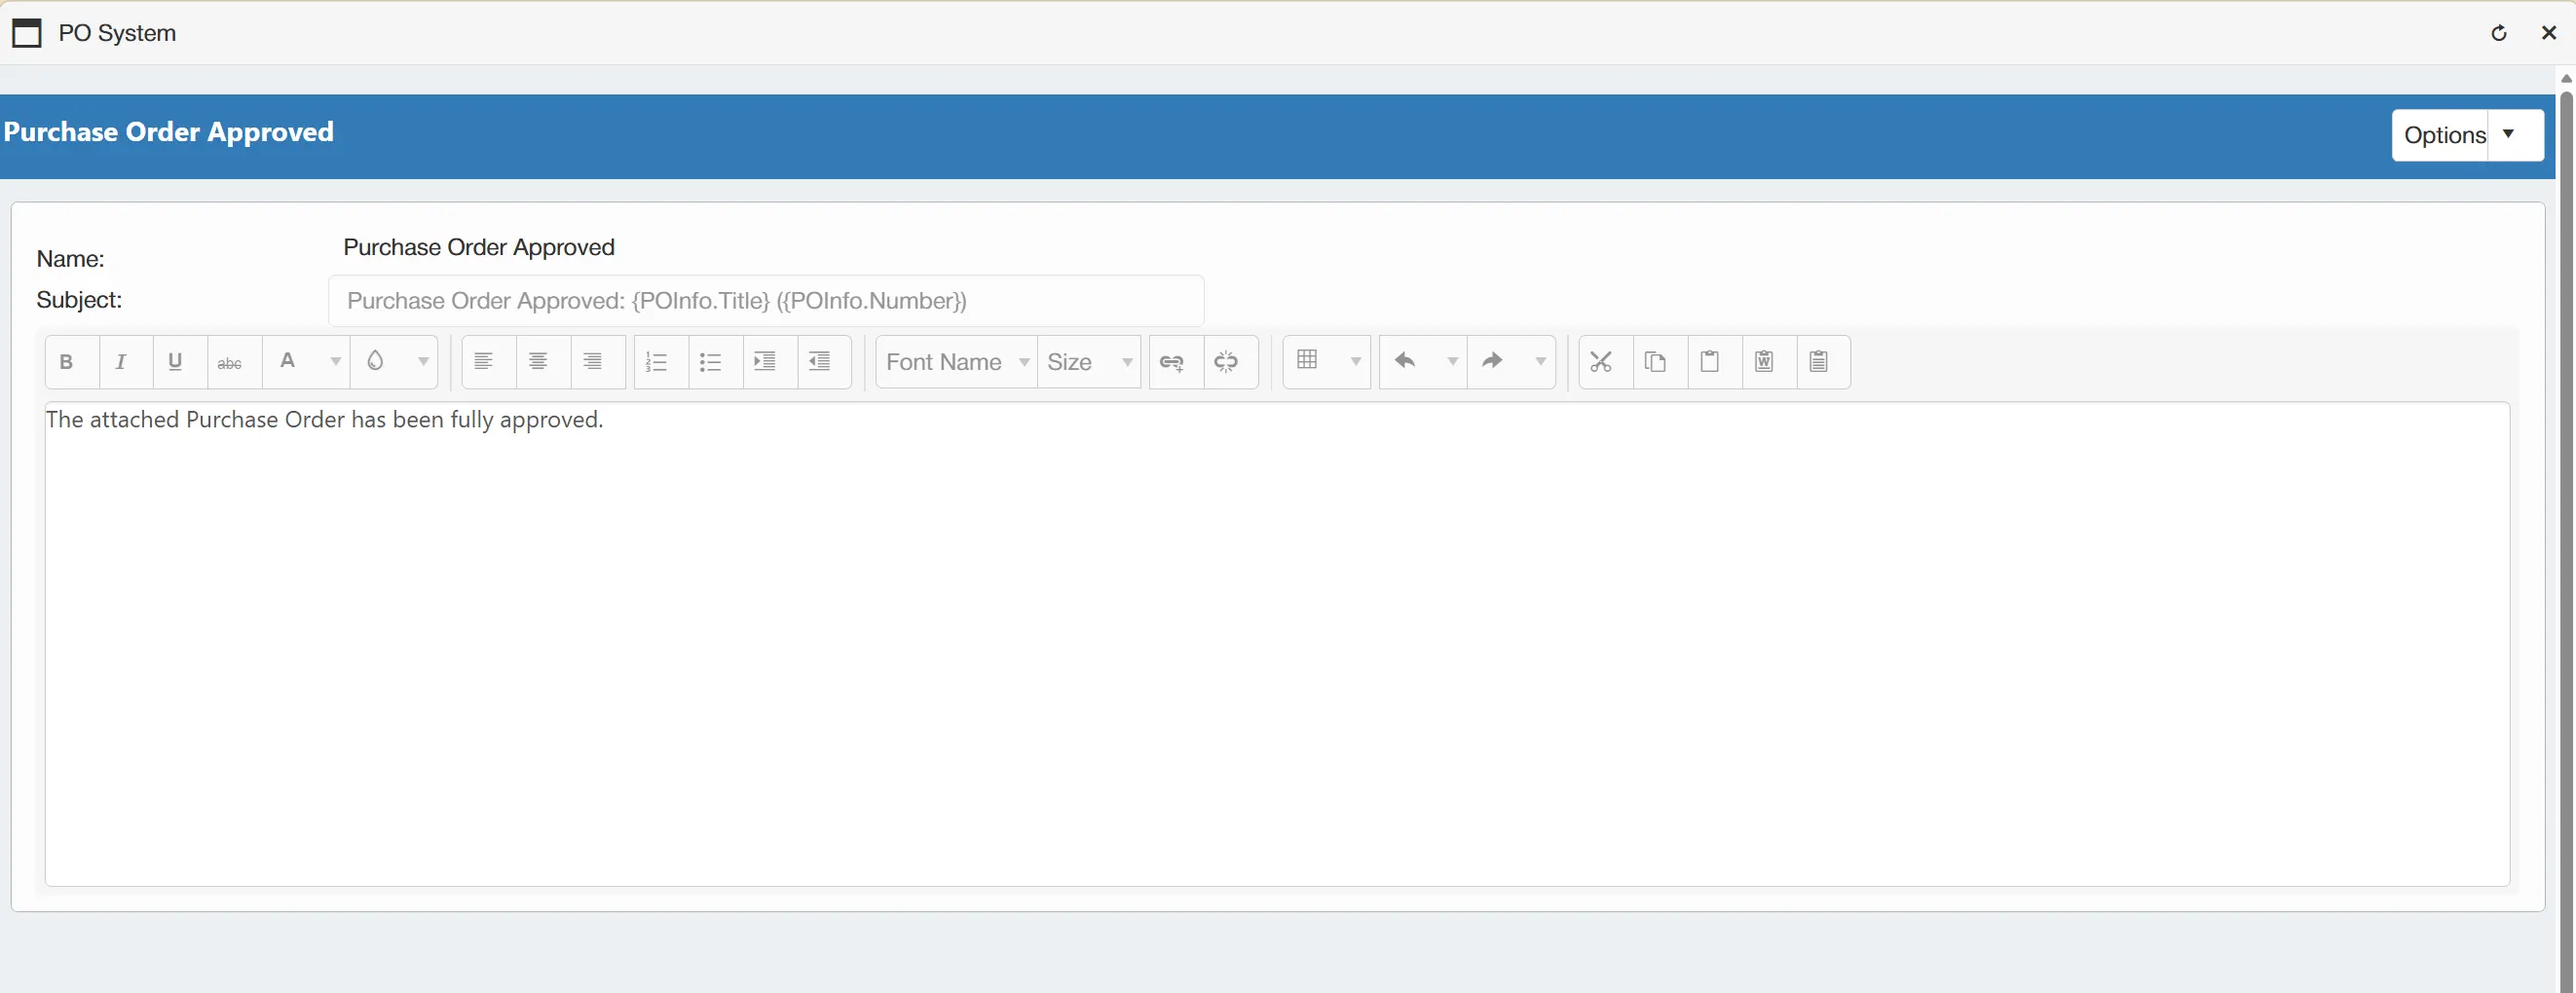
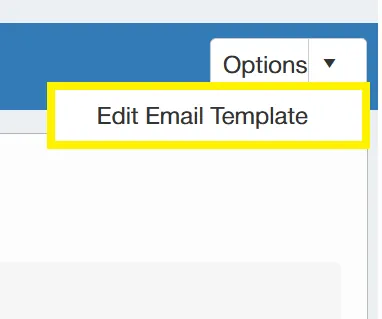
The content is currently displayed in a read-only state, however you can begin editing by selecting from the drop down menu.
You are now able to edit the text within the template by simply typing within the text box.
However, users also have the ability to utilise merge fields within the template.
Merge fields are used to tell the system to add specific detail to the email template. For example, the below image includes "{POInfo.Title}" which tells the system to include the purchase order title in the email.
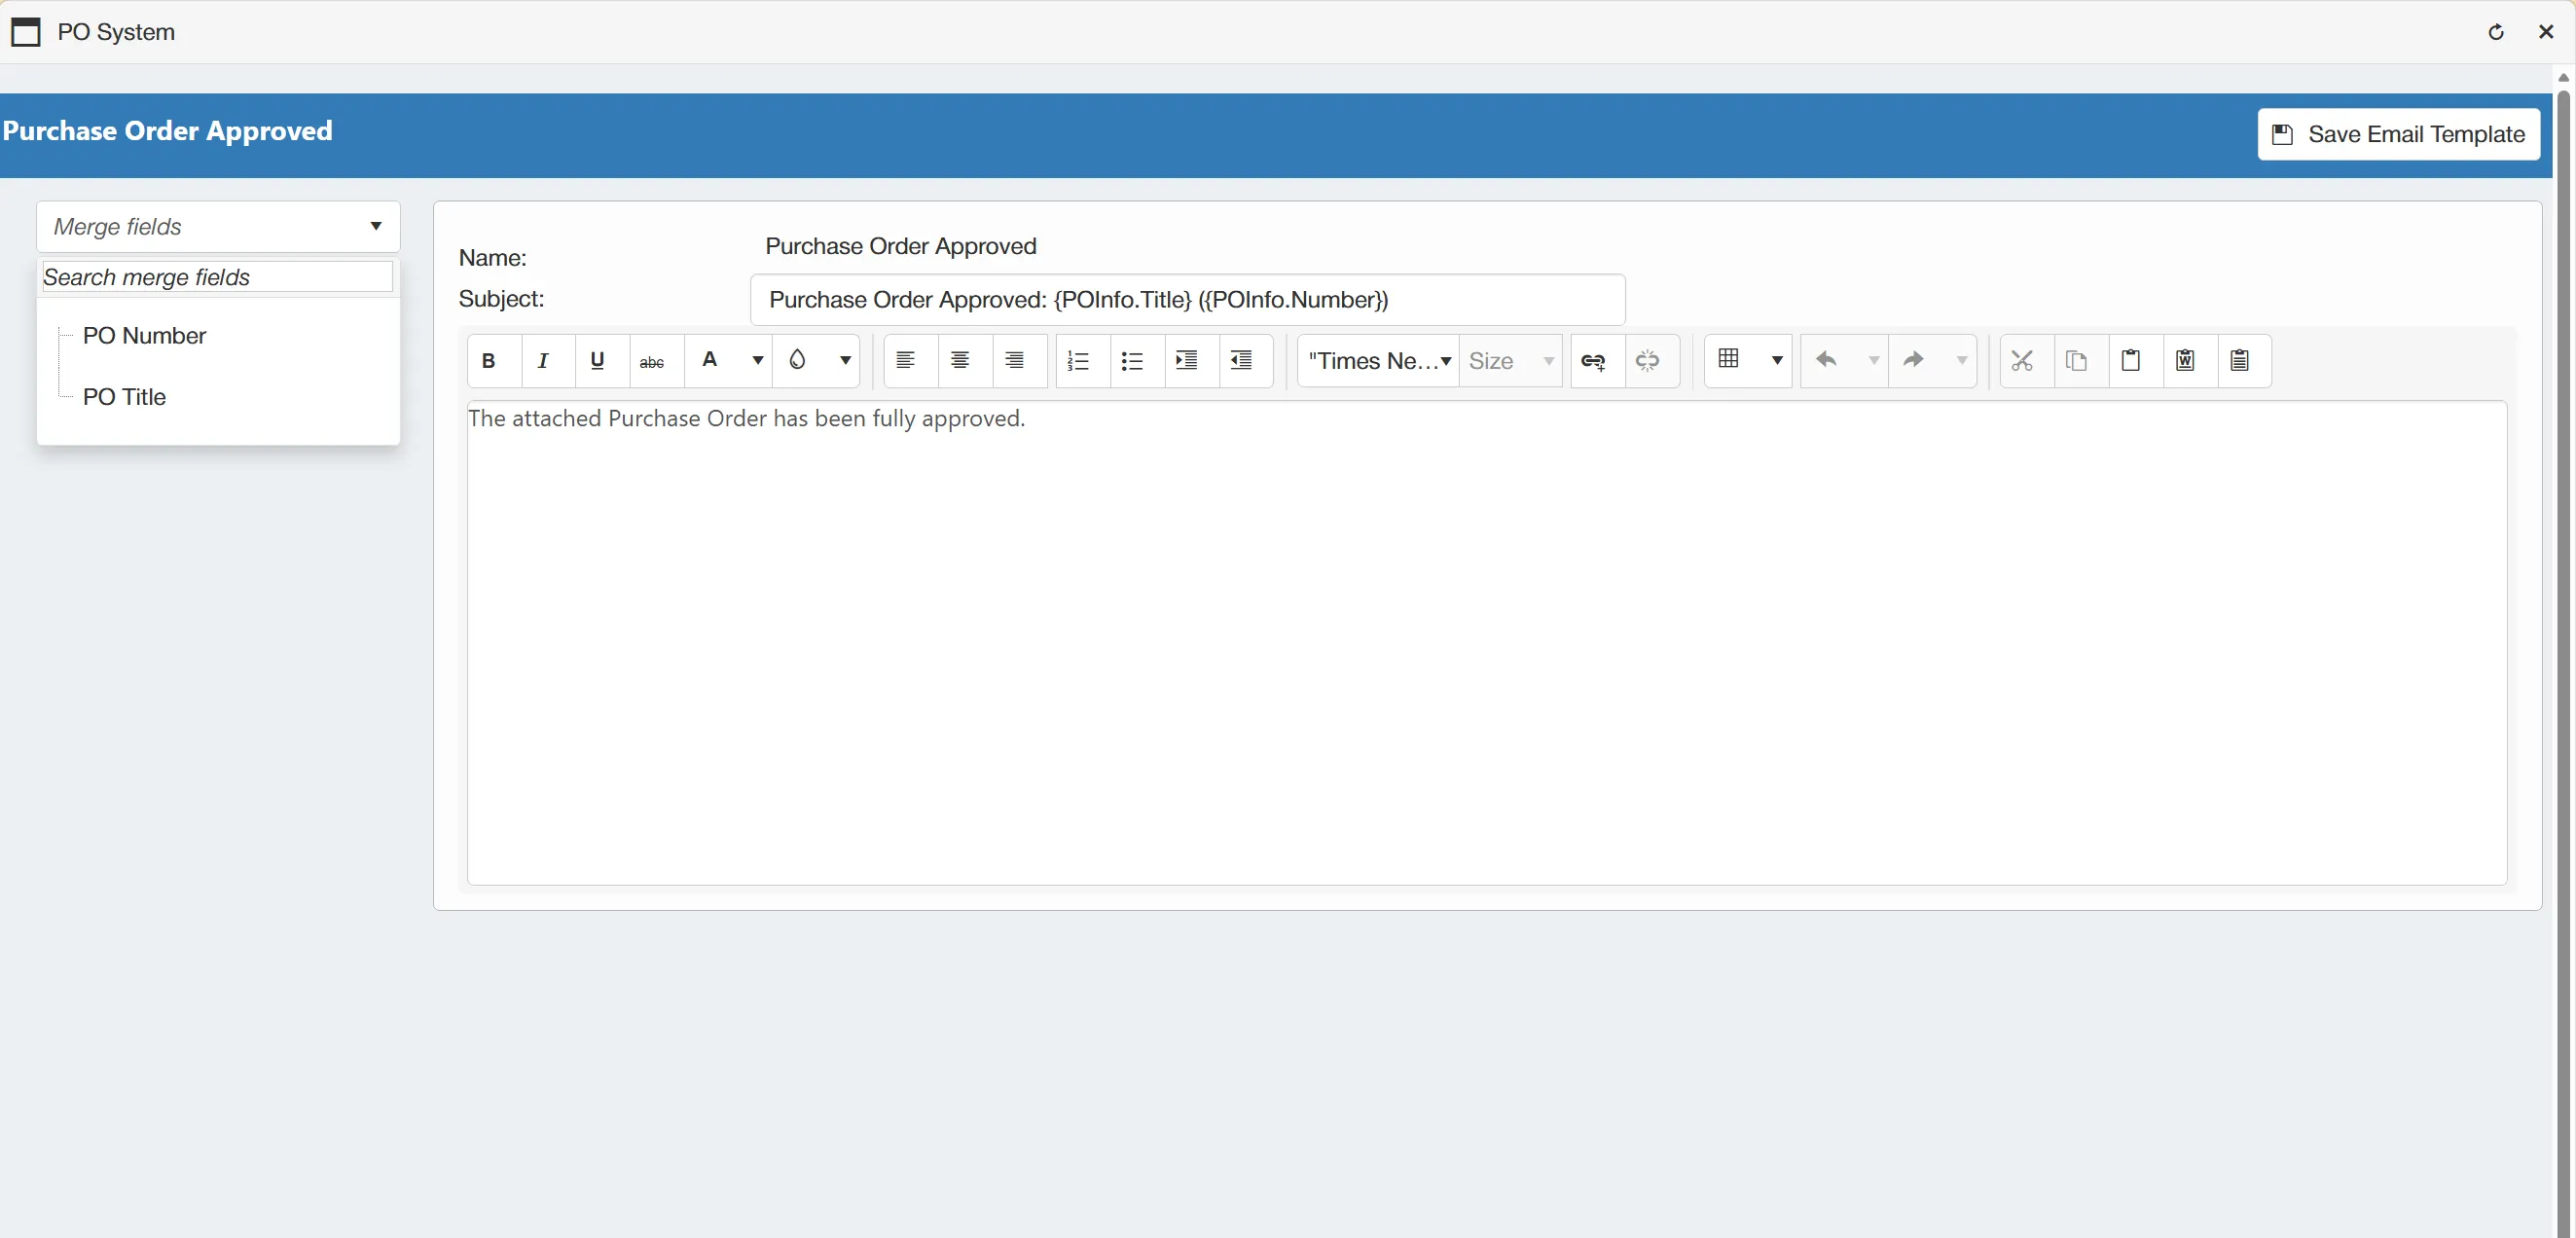
Available merge fields are displayed in the left-hand column. To add these to the template, simply click on the desired merge field and it will appear within the text box.
Only relevant merge fields will be displayed within the left-hand column. This saves time navigating through merge fields that are not linked to the specific email template you are editing.
Once you are happy with the changes, simply select the to commit the changes.
Email Logs
The system retains a log of any emails sent to external suppliers or internal users. Admin users have the ability to view these logs. This is useful if you need to verify that an email has been sent from the system.
Users must have the System Admin permission enabled to access this feauture. For information on user permissions, click here.
To access the Email Logs, select Email Logs from the Administration Tools Section.
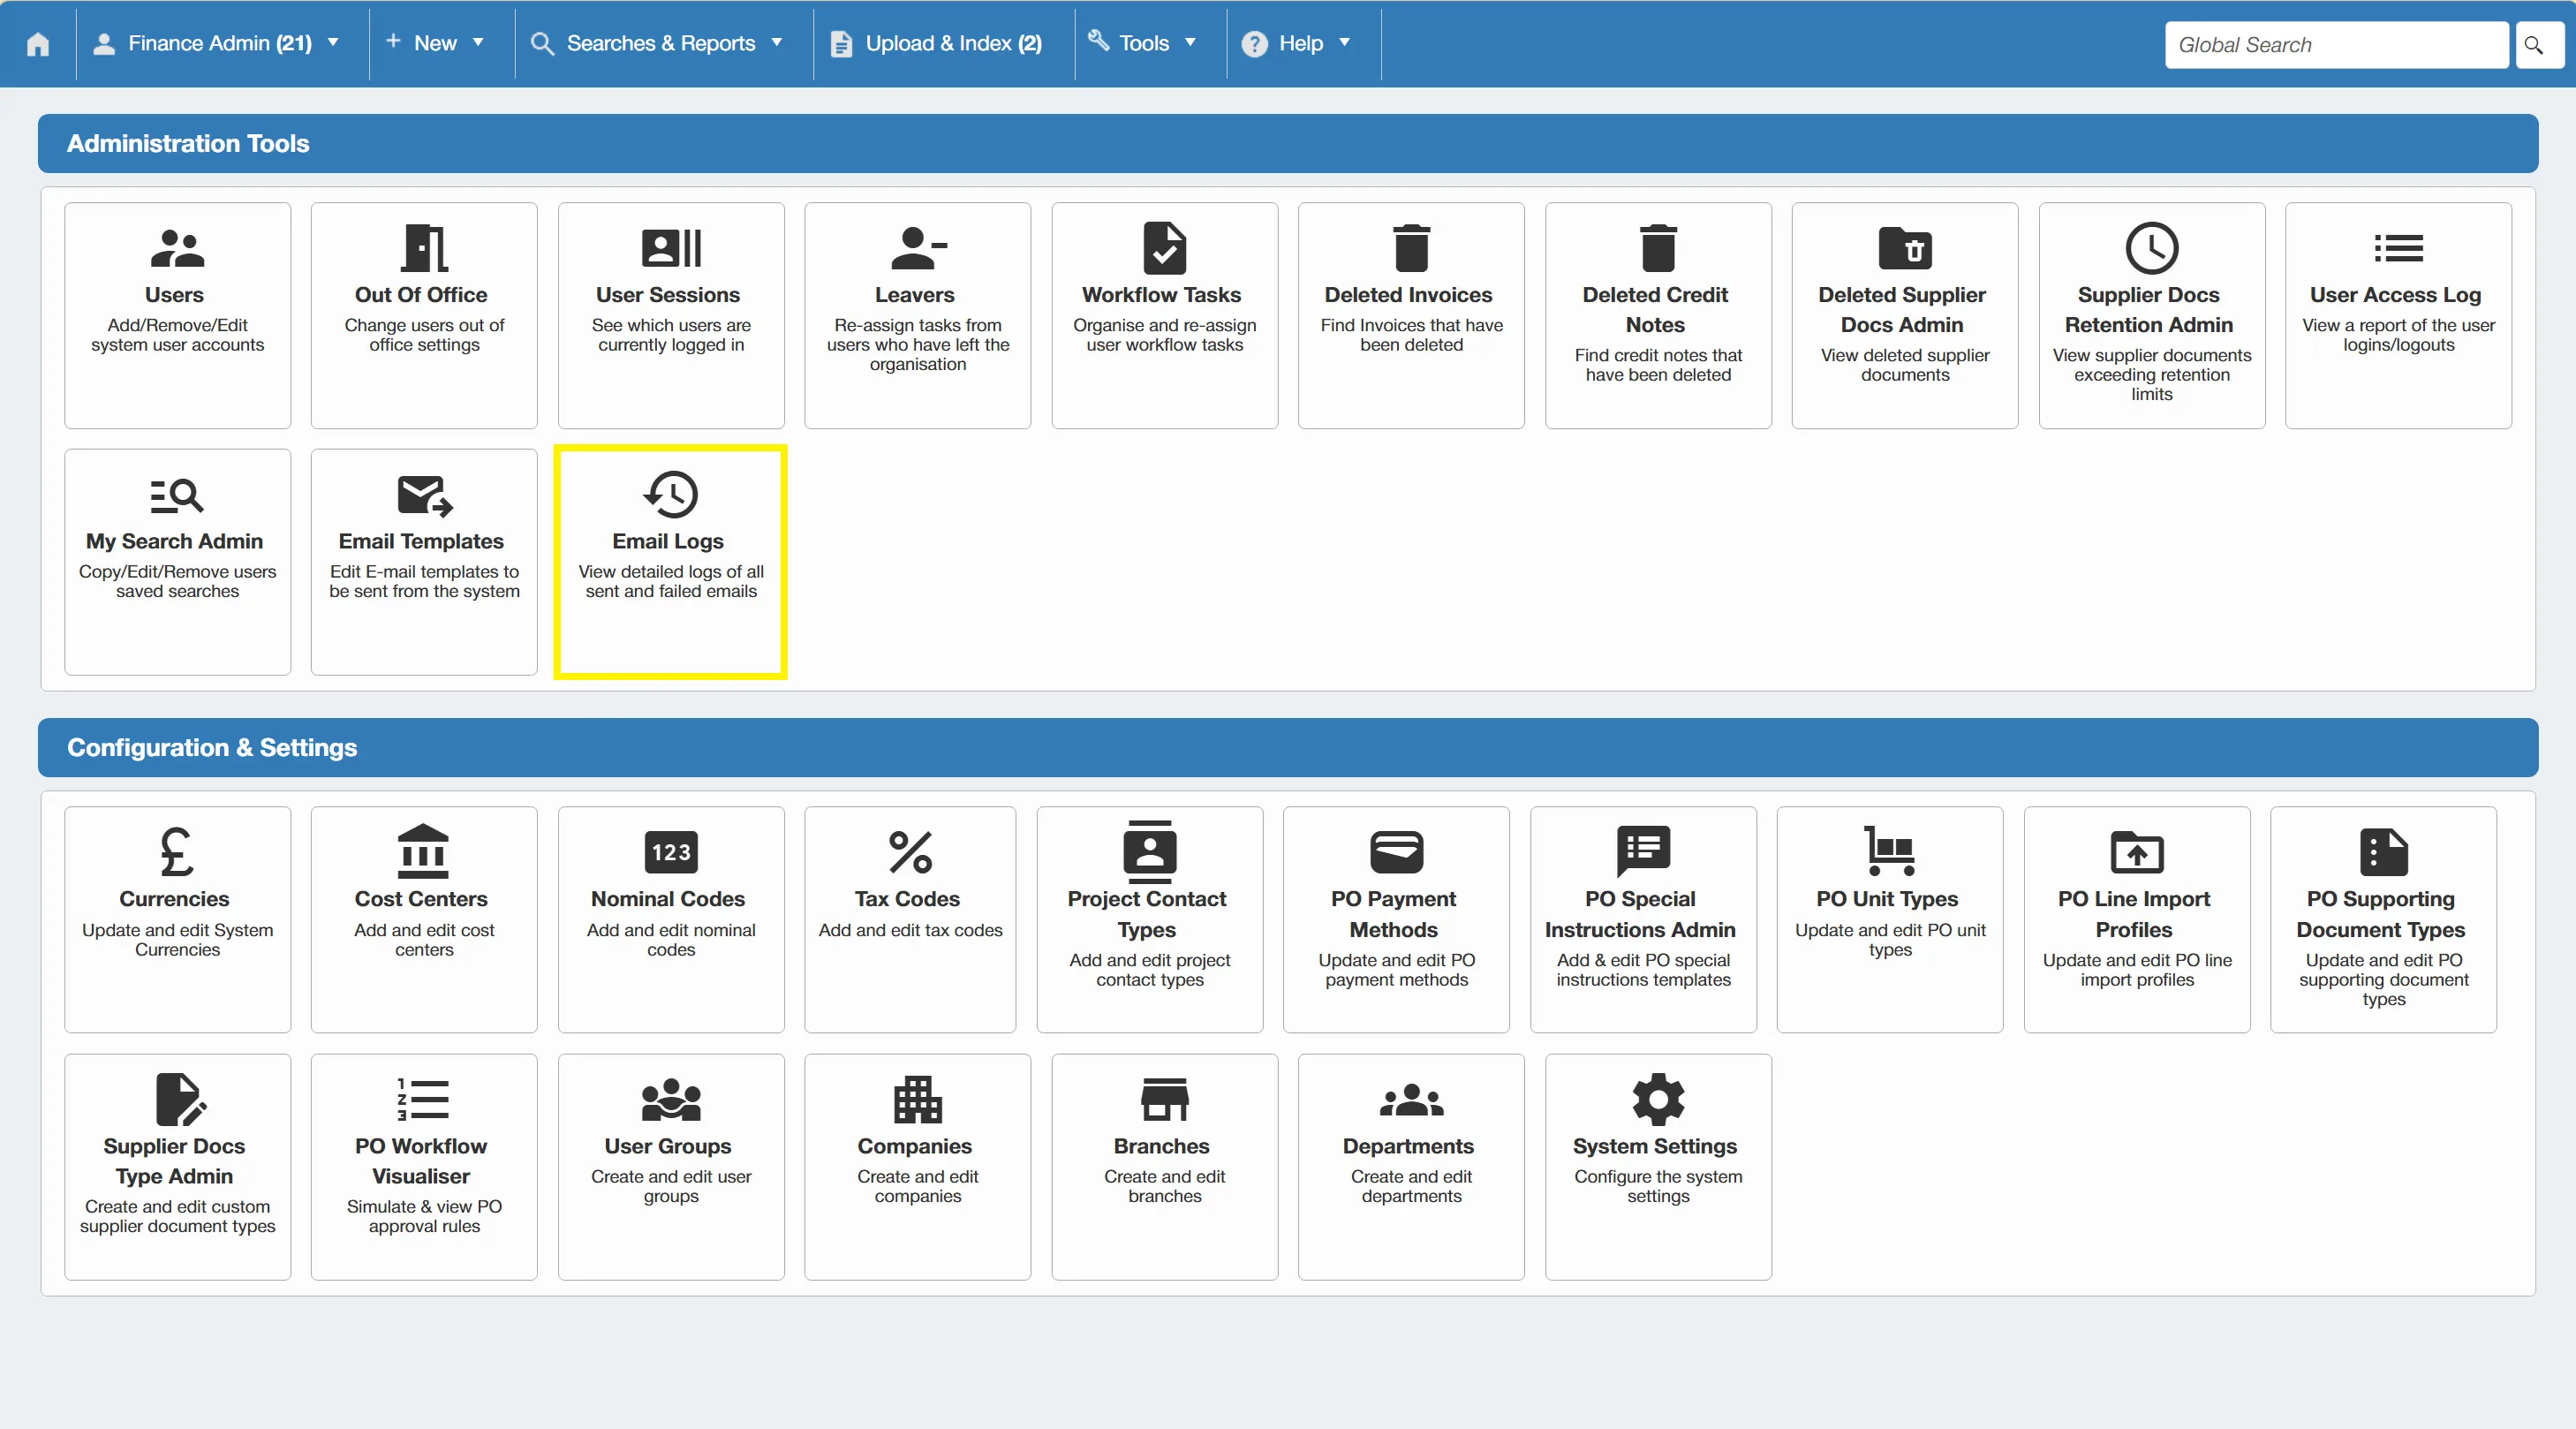
This displays the Email Logs Grid containing key information around each email sent from the system. There are also two tabs at the top of the grid, allowing you to switch between User Email Logs and Supplier Email Logs.
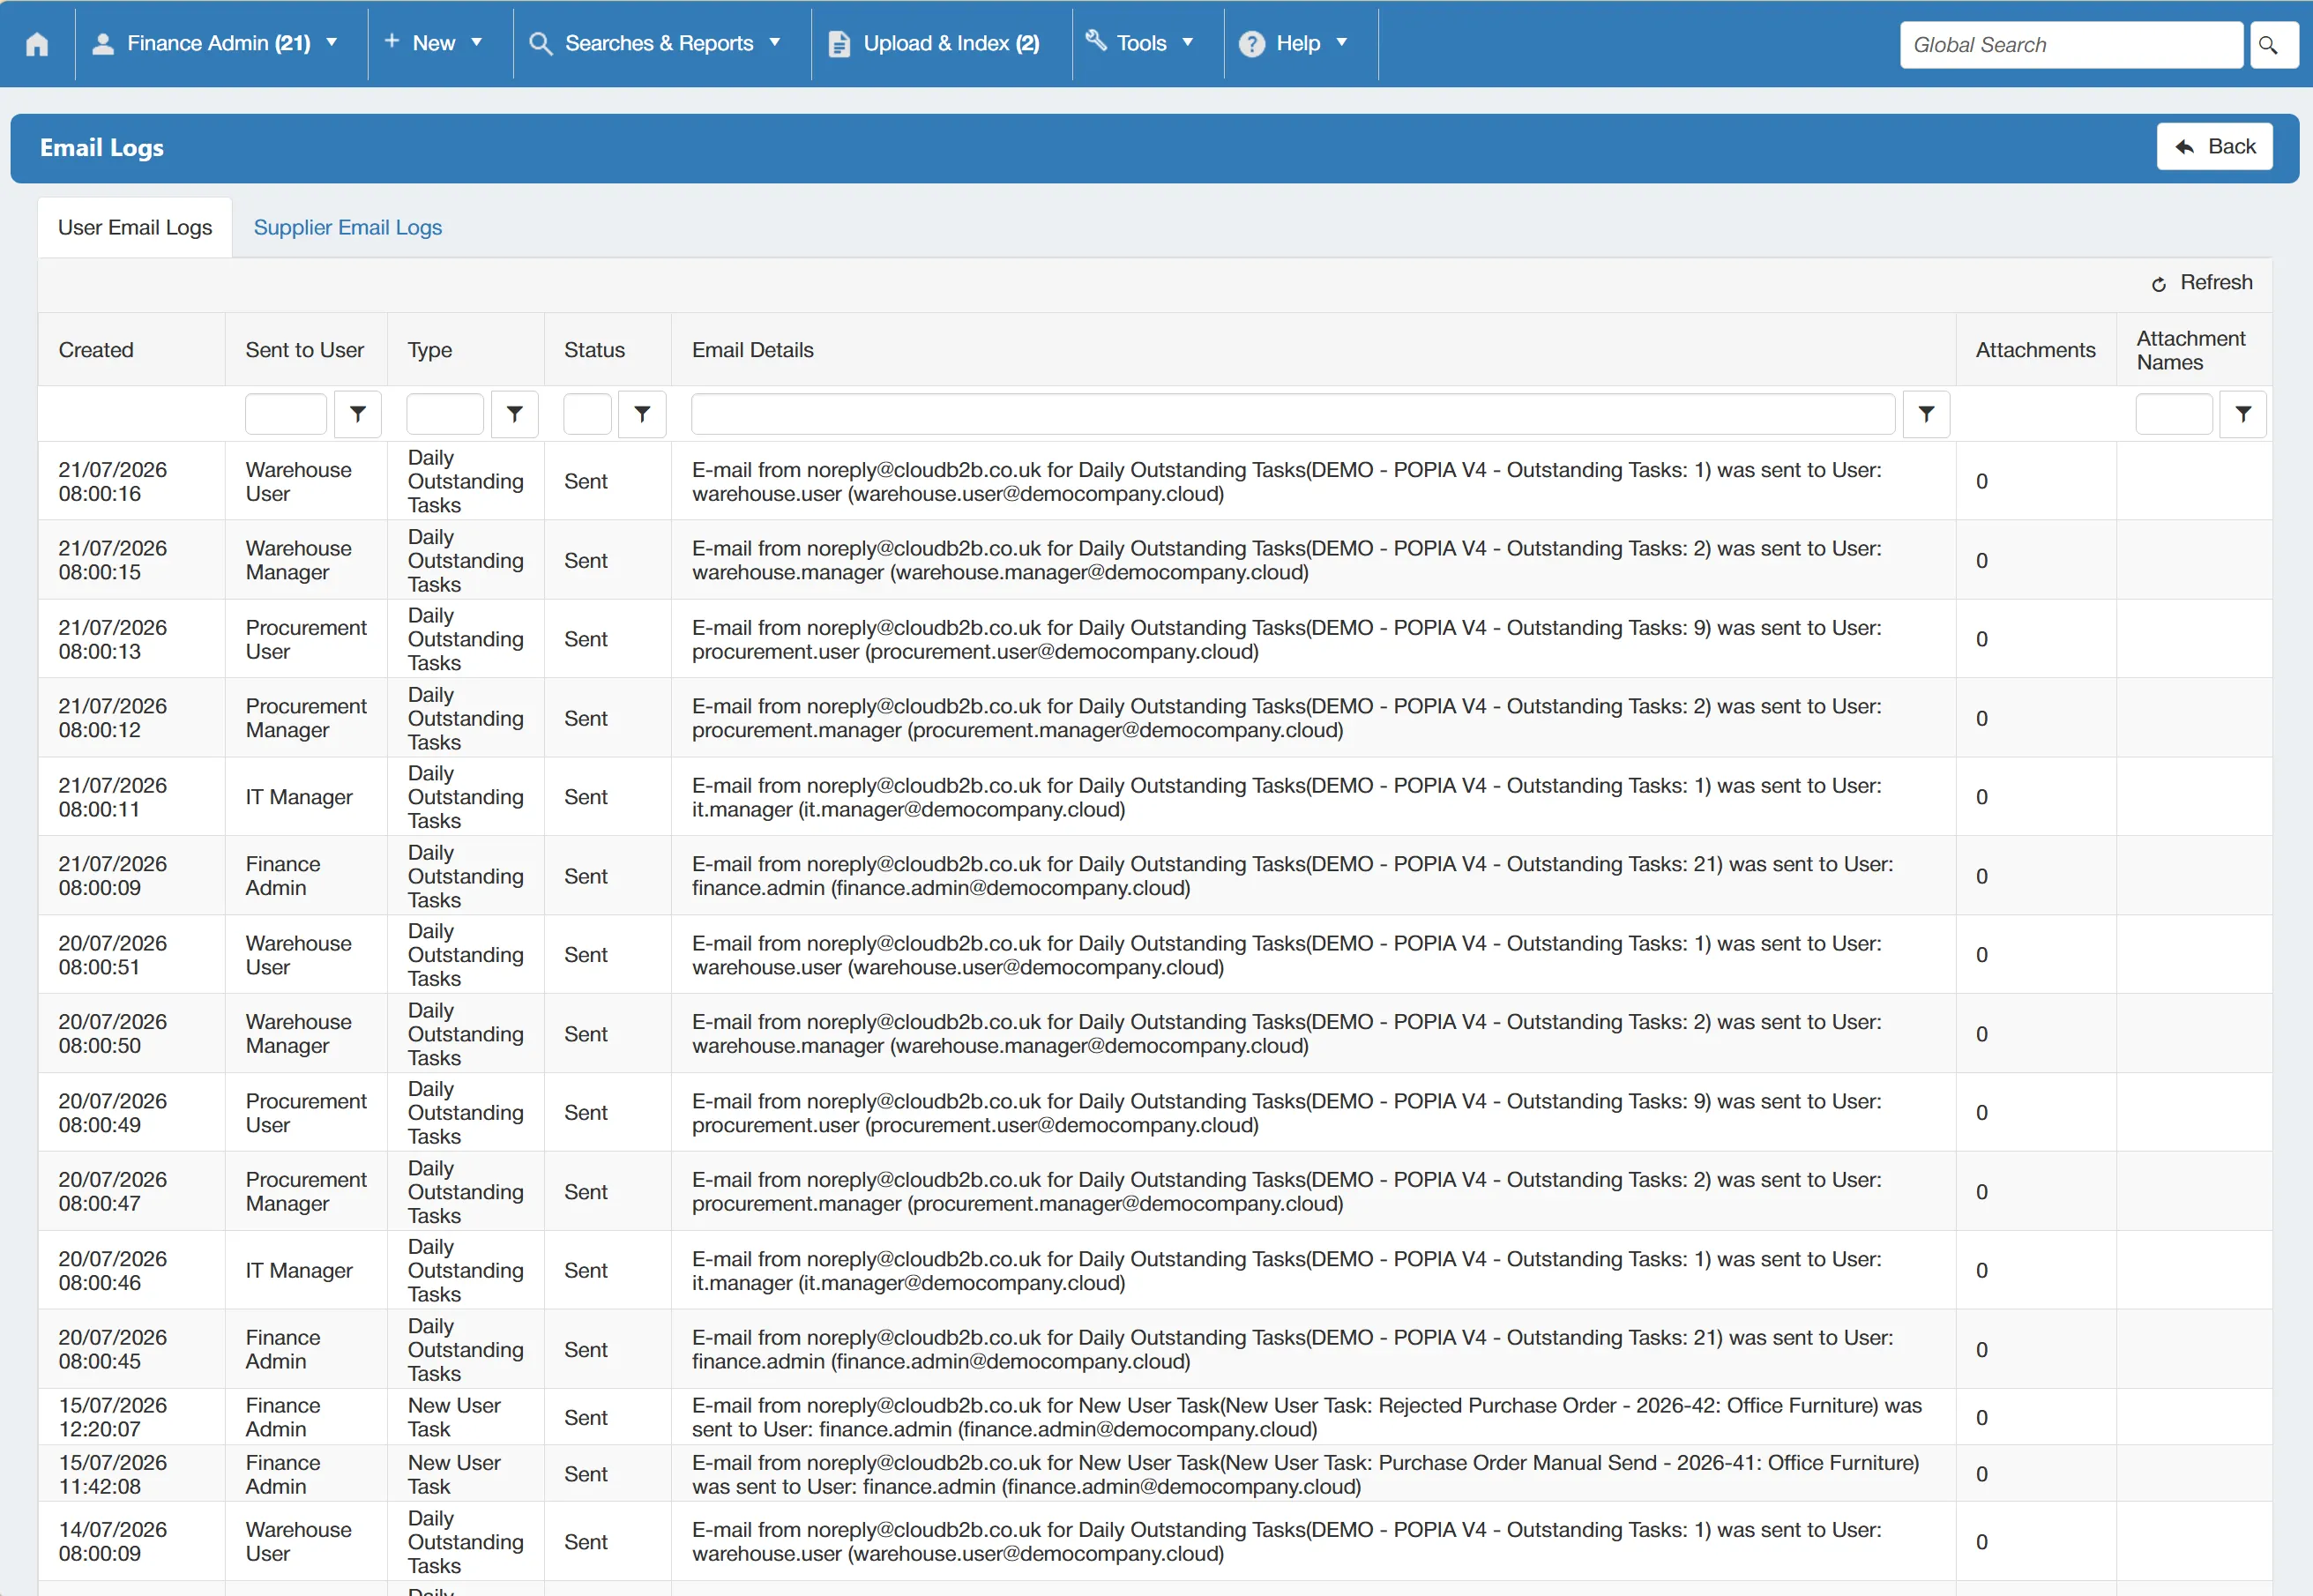
User Email Logs relate to emails that were sent to internal users, such as task reminders. Supplier Email Logs relate to emails that were sent to external suppliers, for example, issued purchase orders.
The grid displays the following information:
User Email Logs
- Created=The date and time that the email was sent.
- Sent to User=The user who received the email.
- Type=The type of of email - these are groups of email types such as New User Task
- Status=The status of the email.
- Email Details=A brief description of the email.
- Attachments=The number of attachments to the email.
- Attachment Names=The file names of the attachments.
- Error Details=Details of any errors encountered when trying to send the email.
Supplier Email Logs
- Created=The date and time that the email was sent.
- Company=The name of the company within the system.
- Supplier Name=The name of the supplier who received the email.
- Type=The type of of email - these are groups of email types such as Send Purchase Order to Supplier
- Status=The status of the email.
- Email Details=A brief description of the email.
- Attachments=The number of attachments to the email.
- Attachment Names=The file names of the attachments.
- Error Details=Details of any errors encountered when trying to send the email.
From the grid, you can open any of the emails to display more detail such as the email content. The information is displayed in a read-only state.
The Email Logs feature is useful for checking that emails have been sent to suppliers or users as intended.