Config & Settings | Purchase Order System
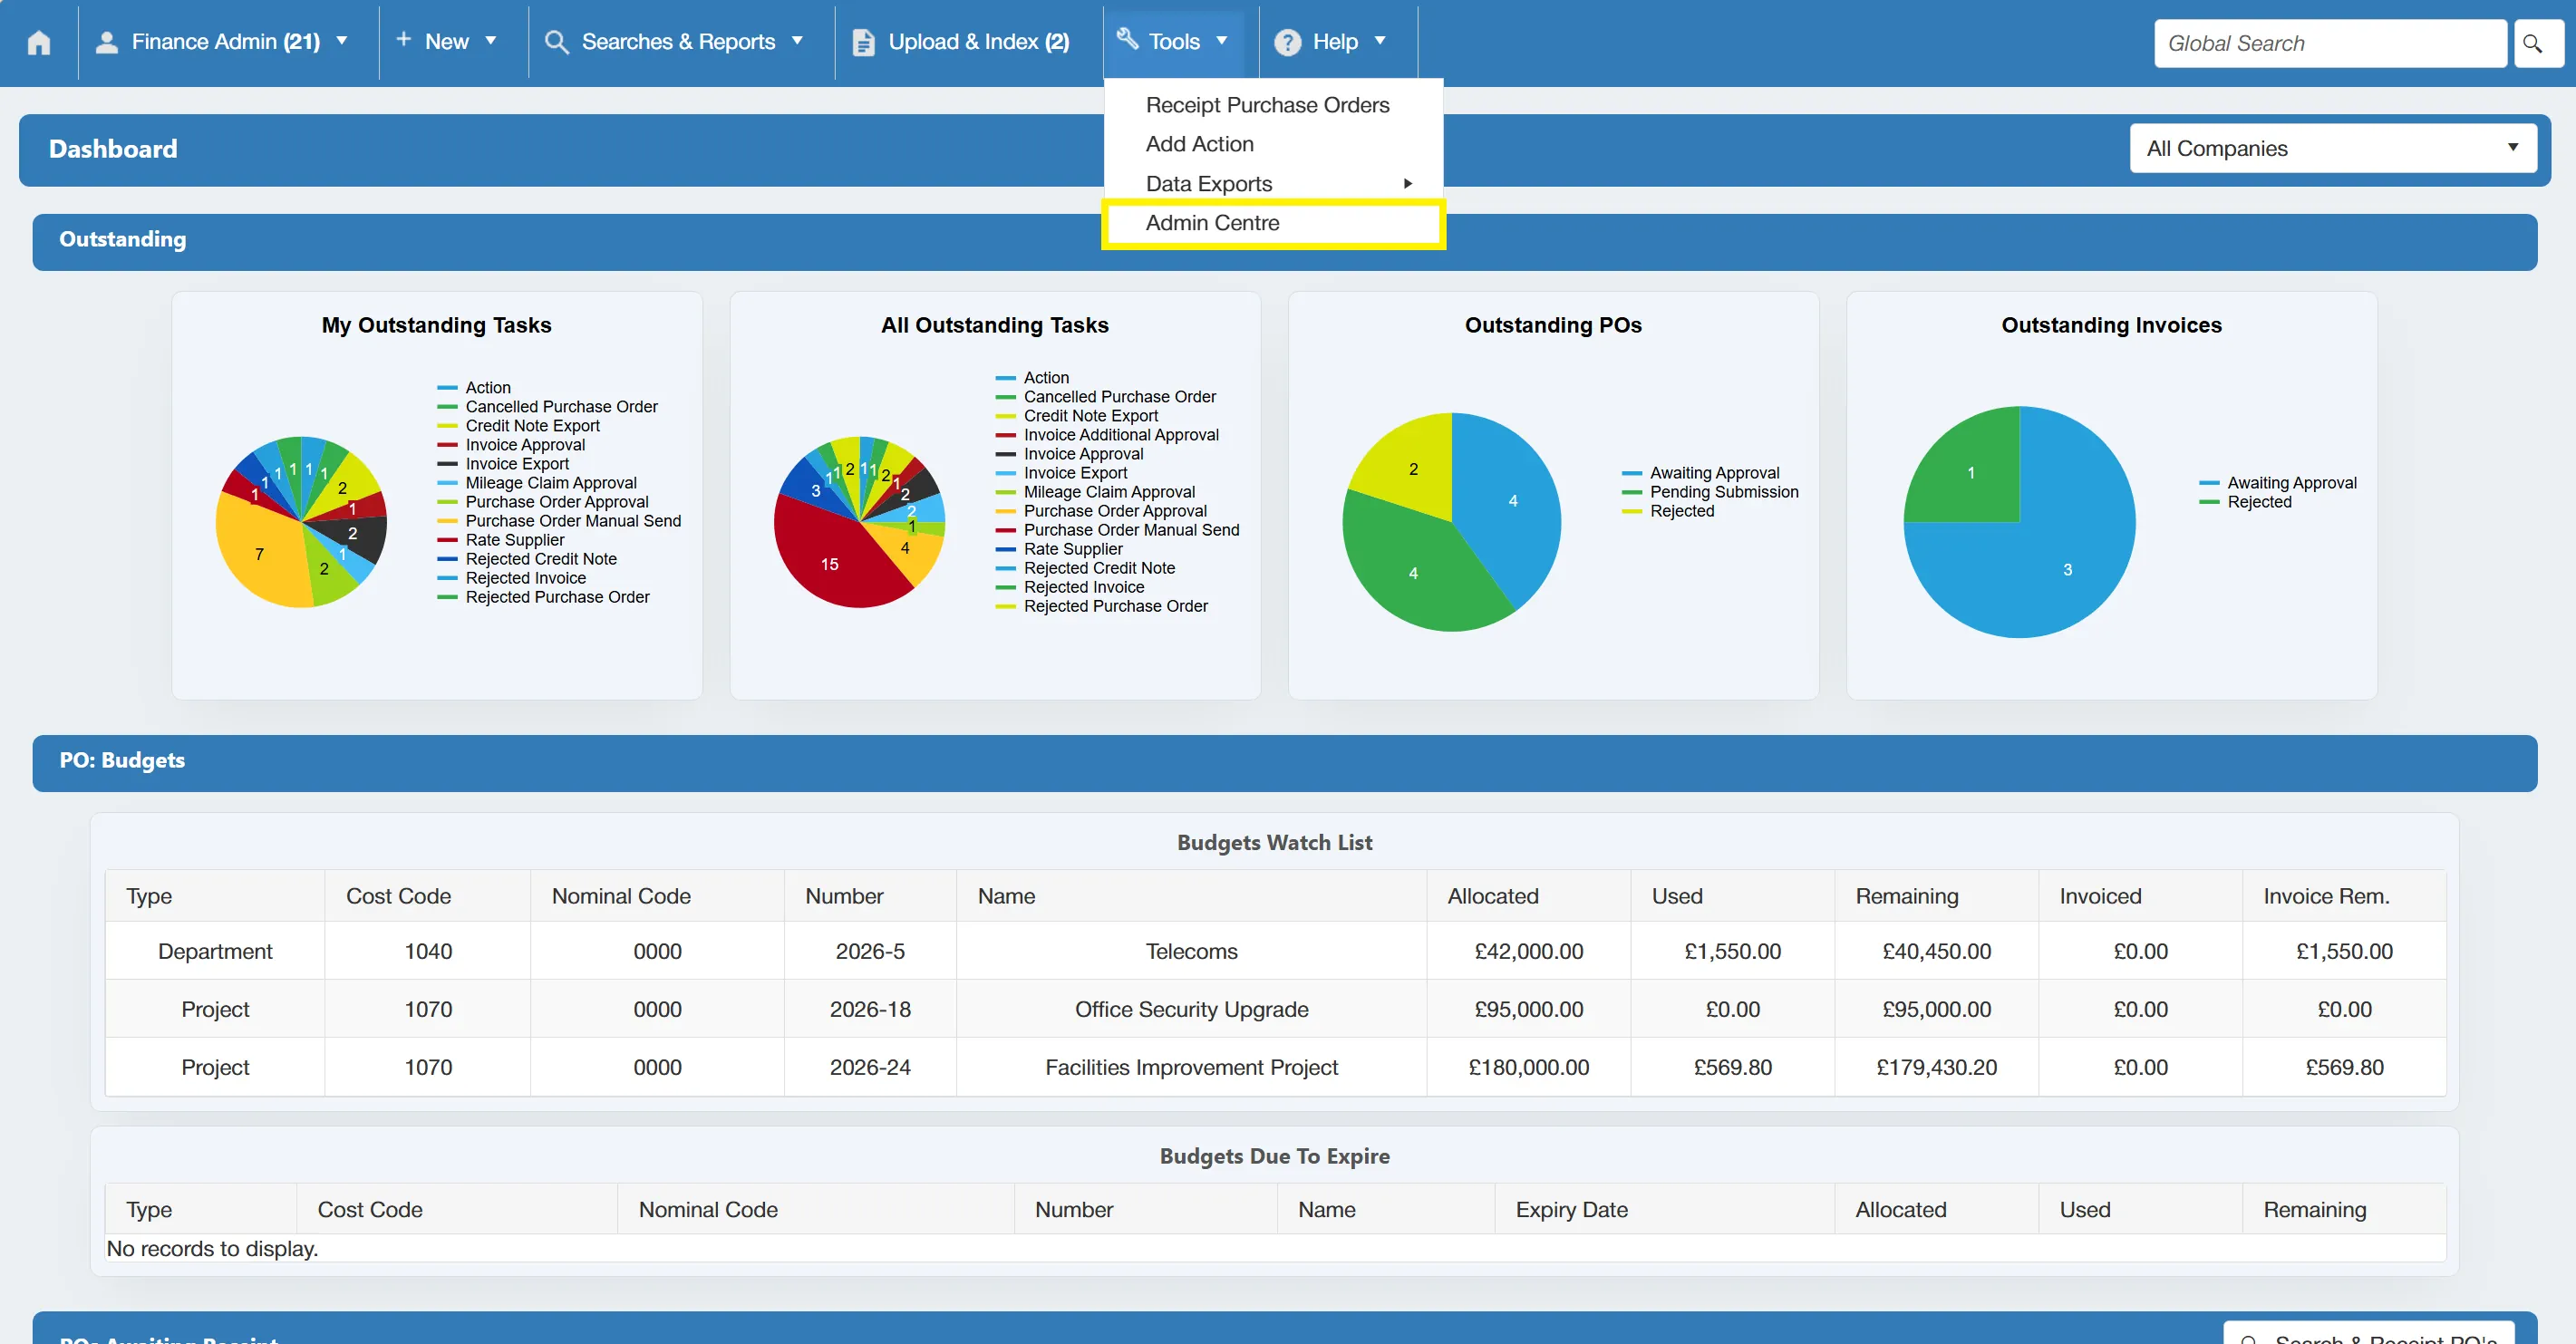
In addition to administration tools, power users can also access a variety of system configuration settings. To view these, look at the Configuration & Settings section in the Tools > Admin Centre.
To access Configuration & Settings, simply hover over at the top toolbar, and click on .
Currencies
Currency configuration allows you to refresh currency rates, edit individual rates and view exchange rate history
Users must have the Currency Admin permission enabled to access this feauture. For information on user permissions, click here.
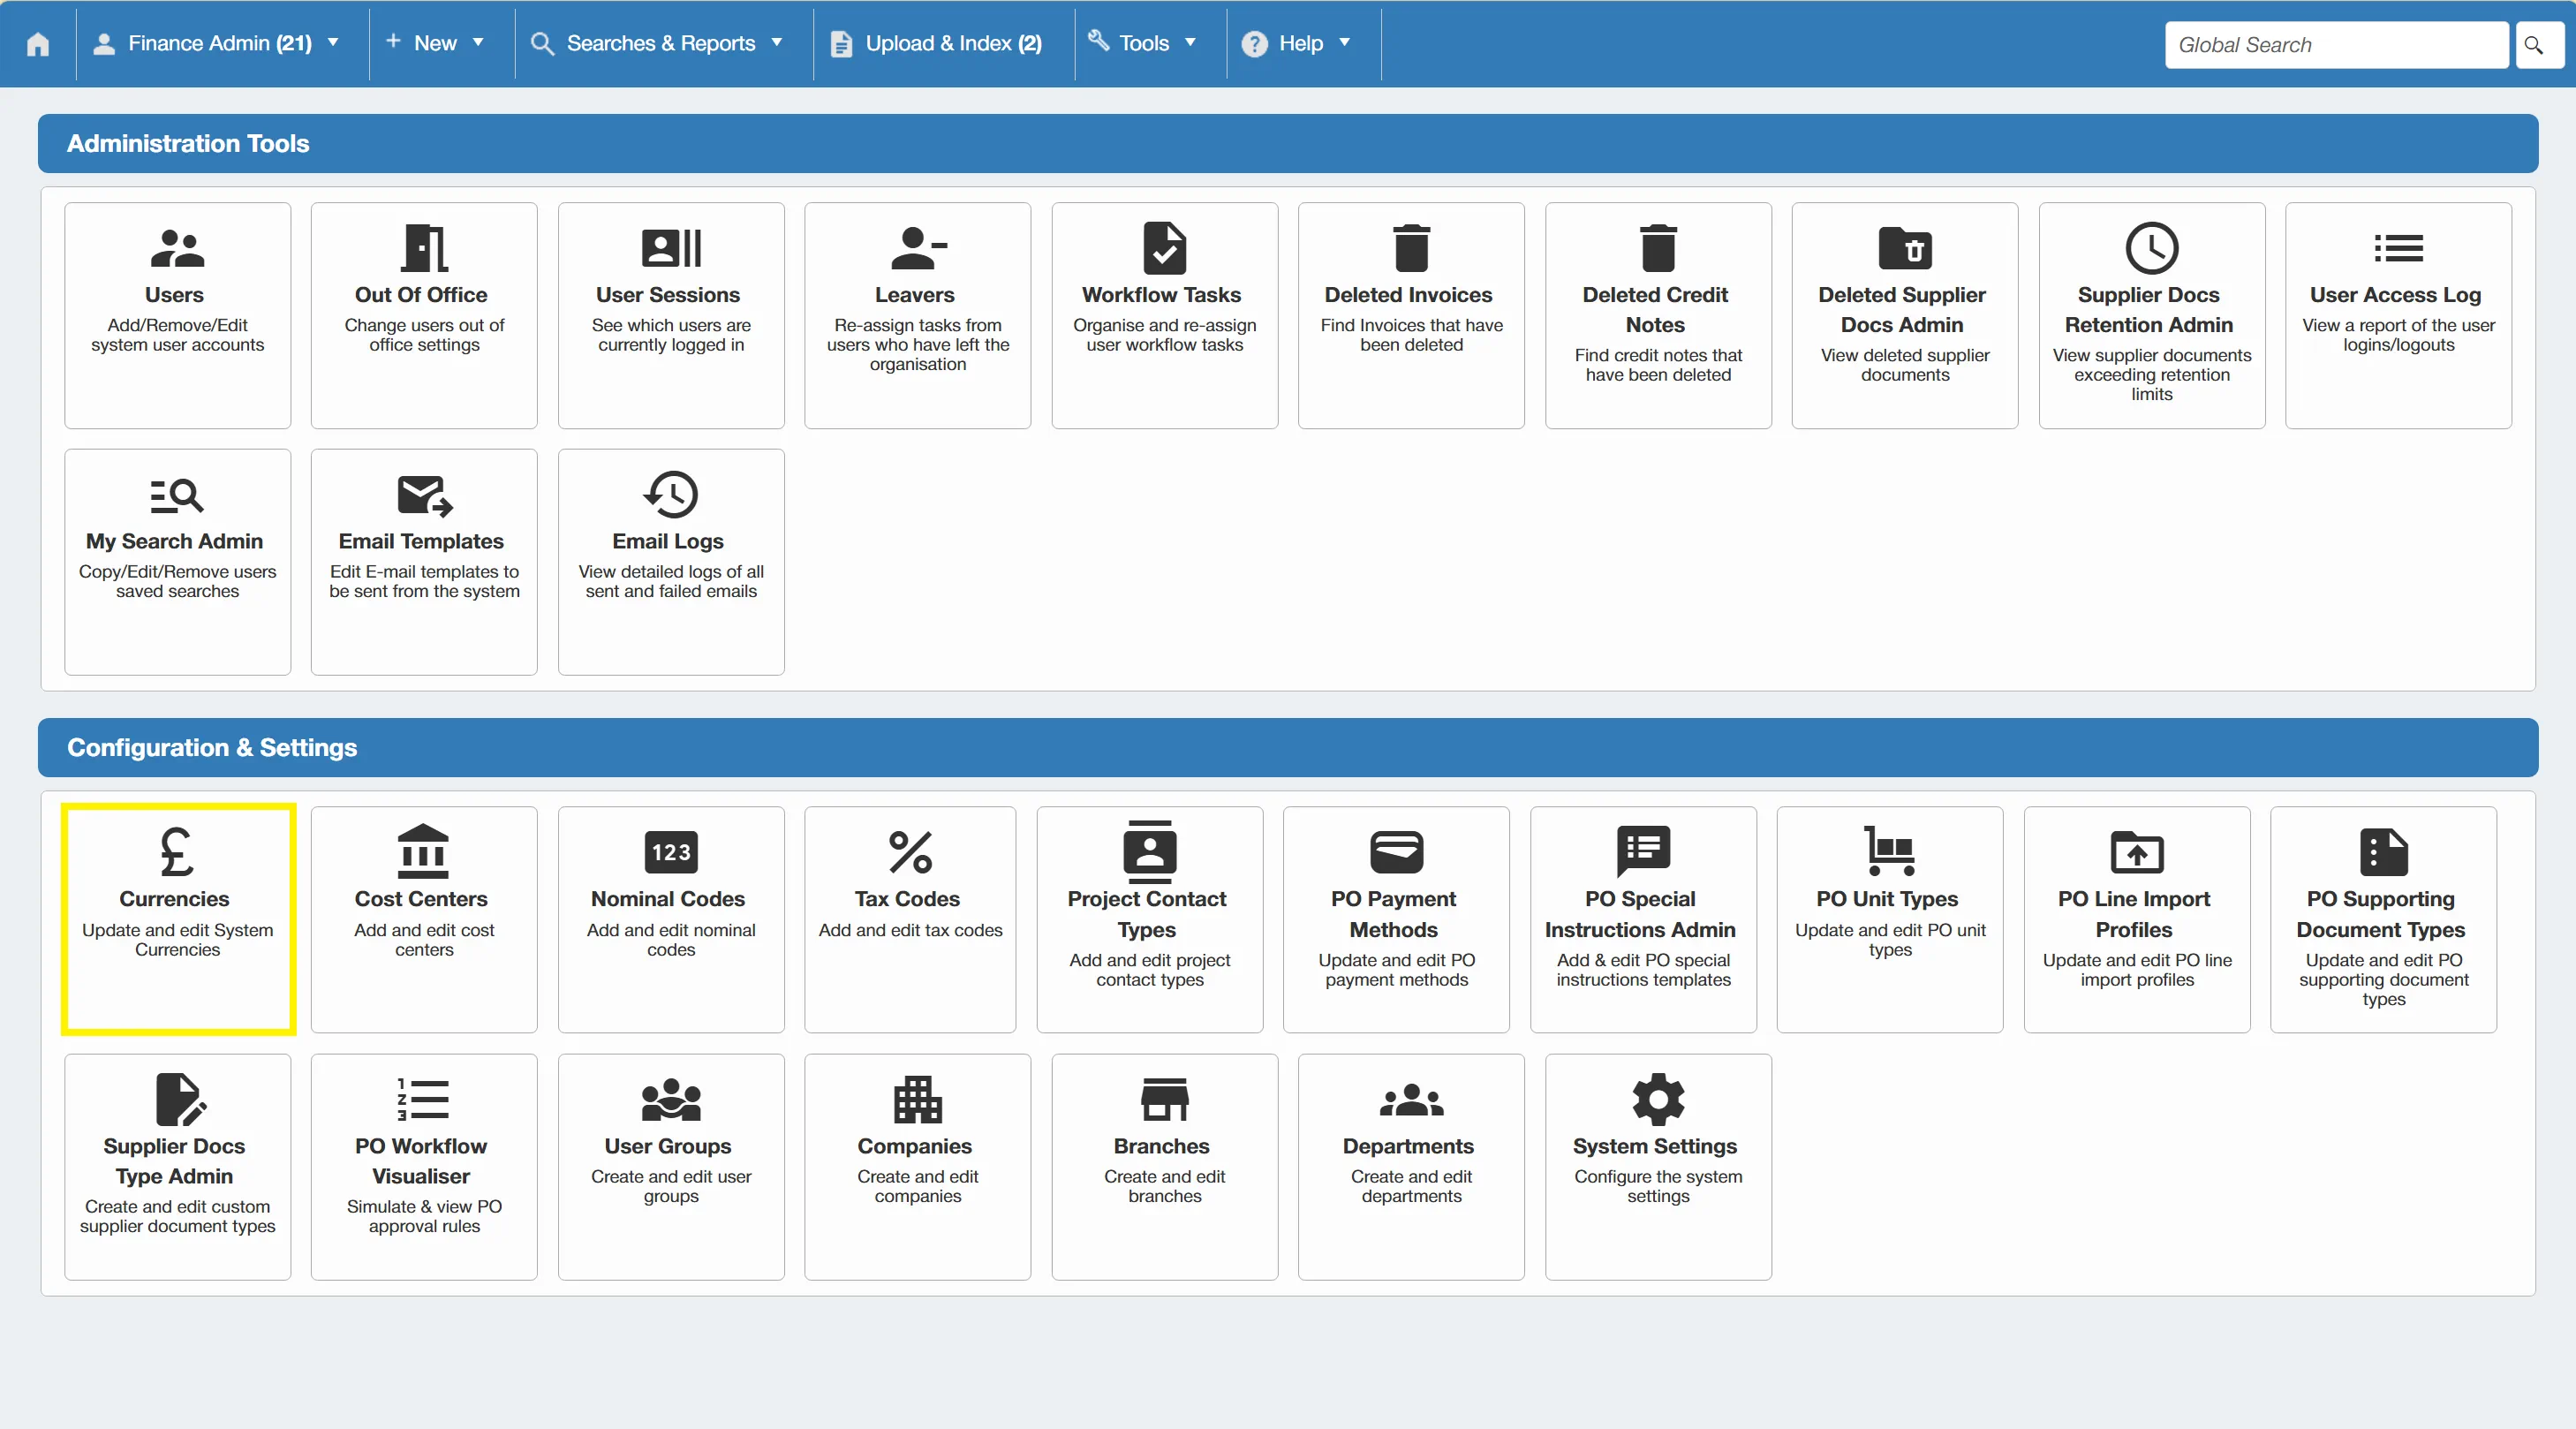
You can update and edit currencies by clicking on the Currencies icon under Configuration & Settings.
This brings up the currency grid showing all currencies within the system. From this page you can update the exchange rates, toggle automatic updates, view individual currency history and edit individual currencies on a line level.
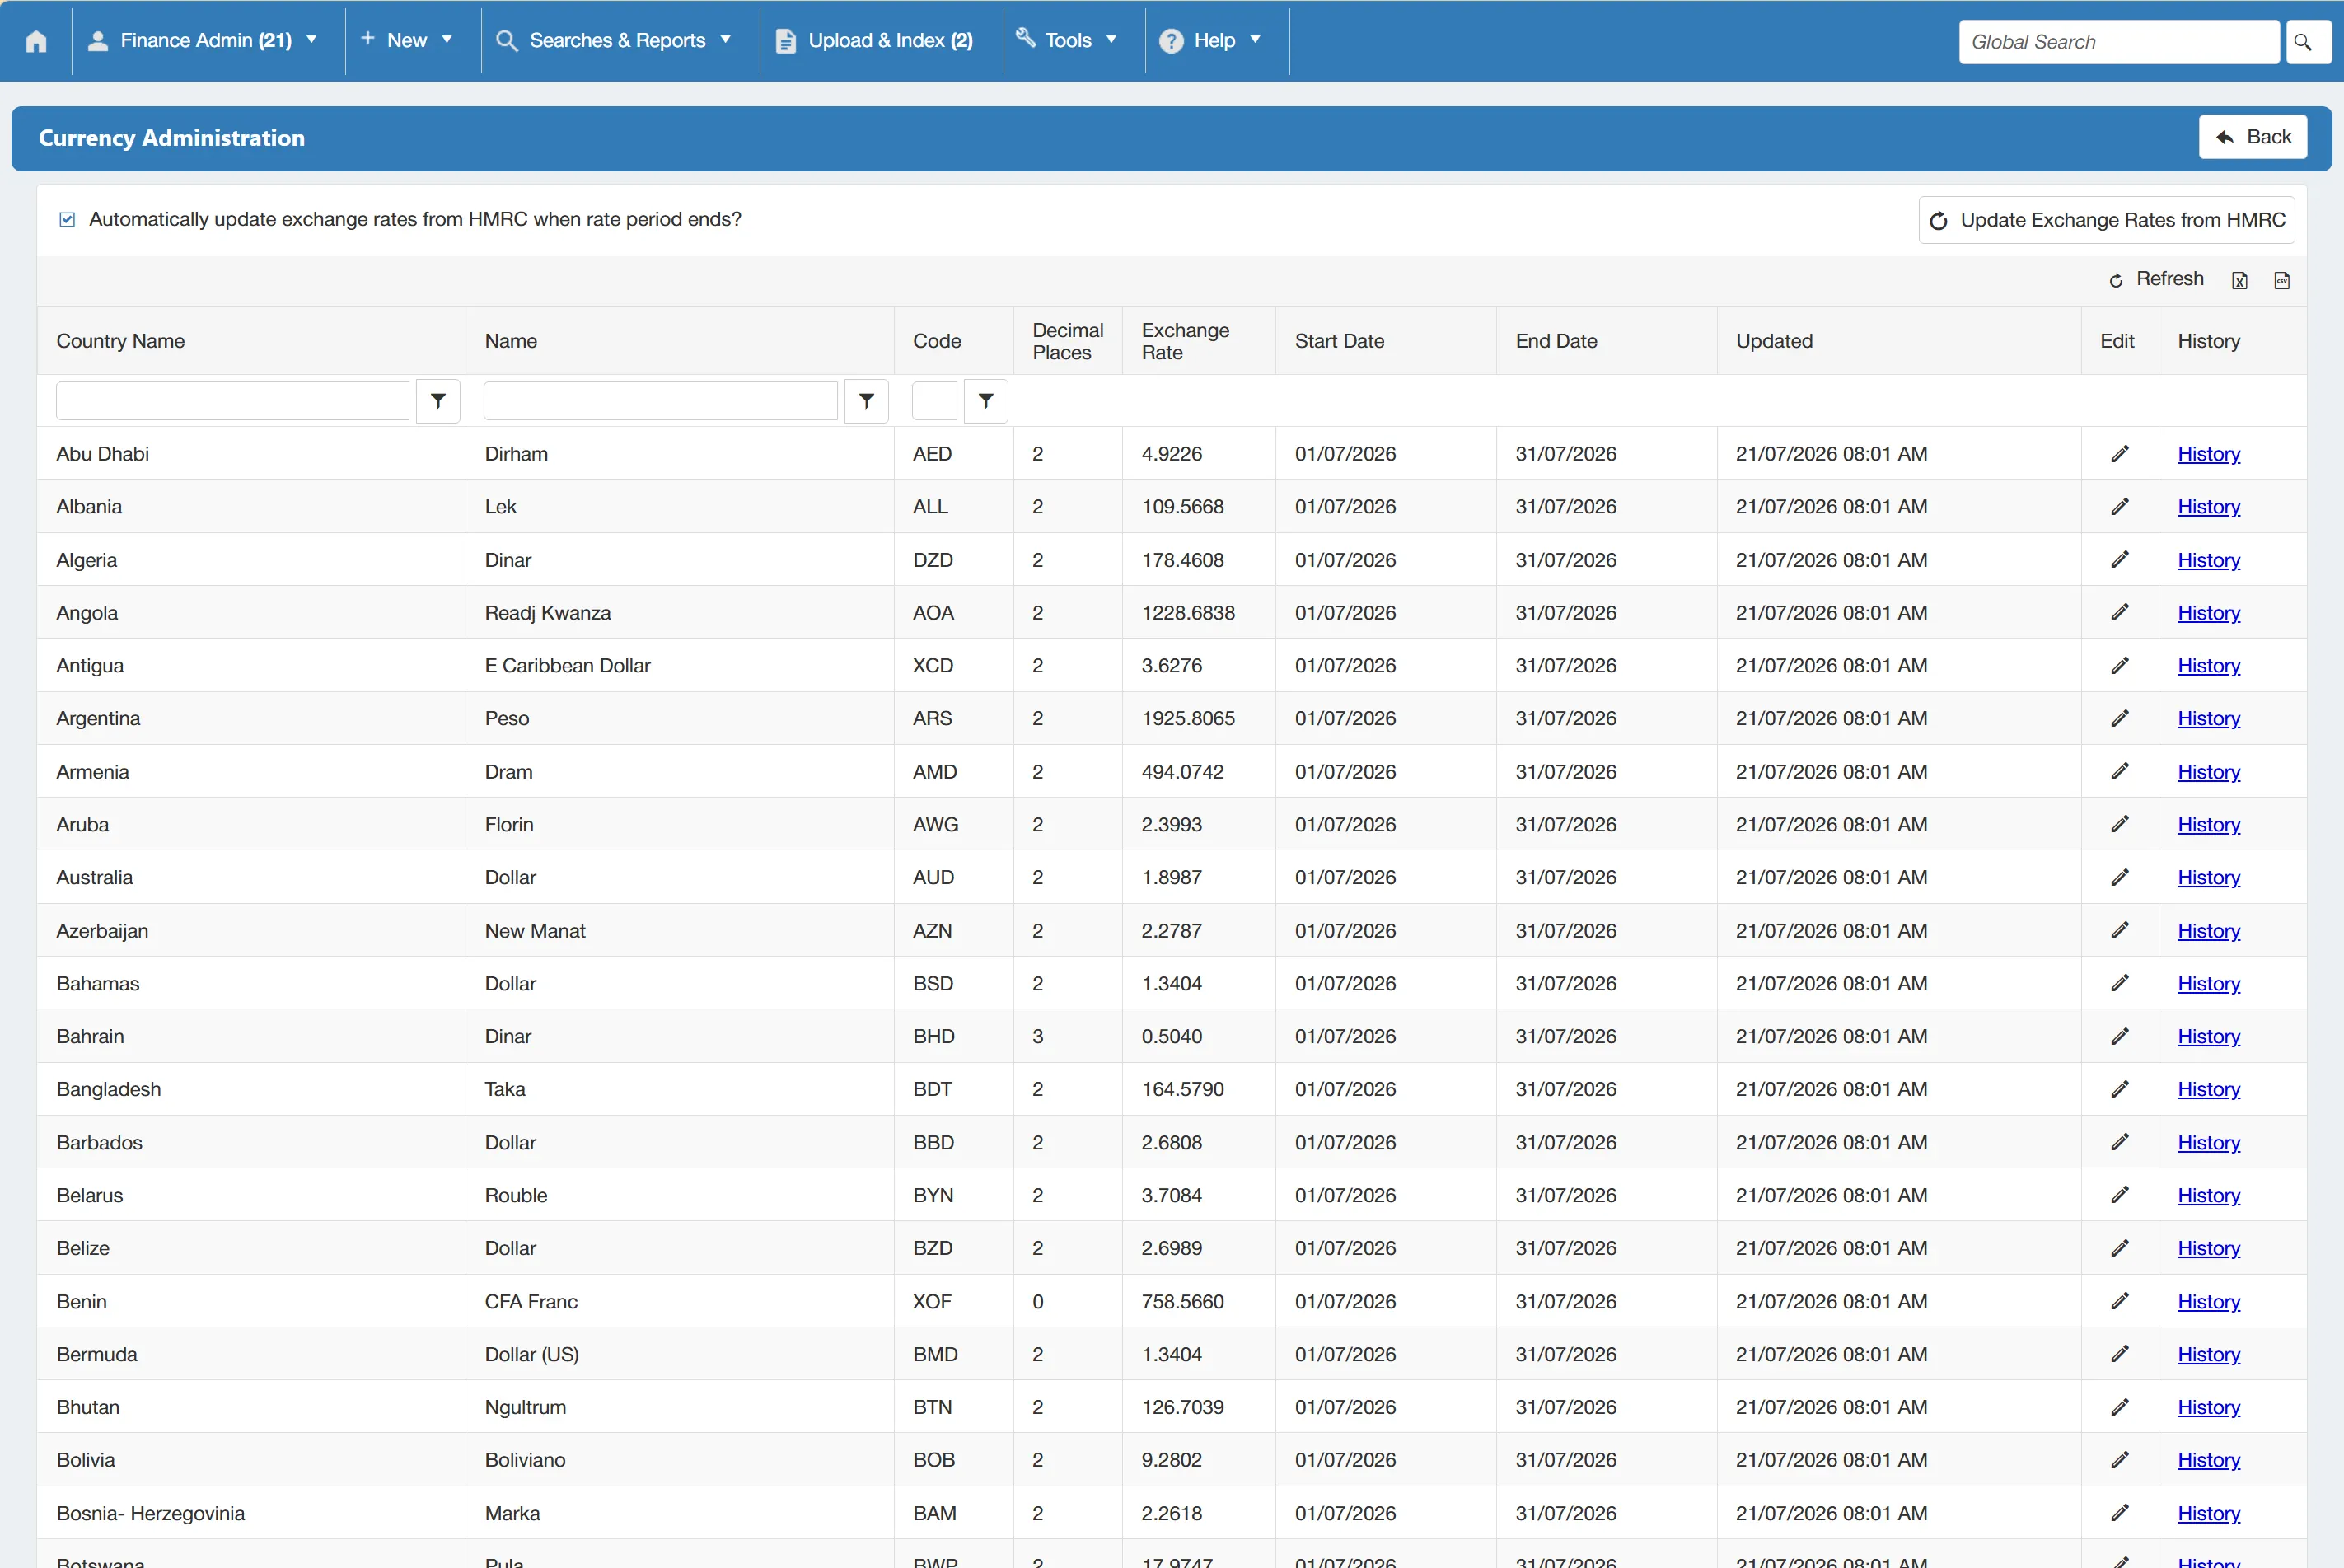
As with any grid in the system, the information can be exported in csv or excel format.
Updating Exchange Rates
To update all currency exchange rates from the HMRC, simply click on the button.
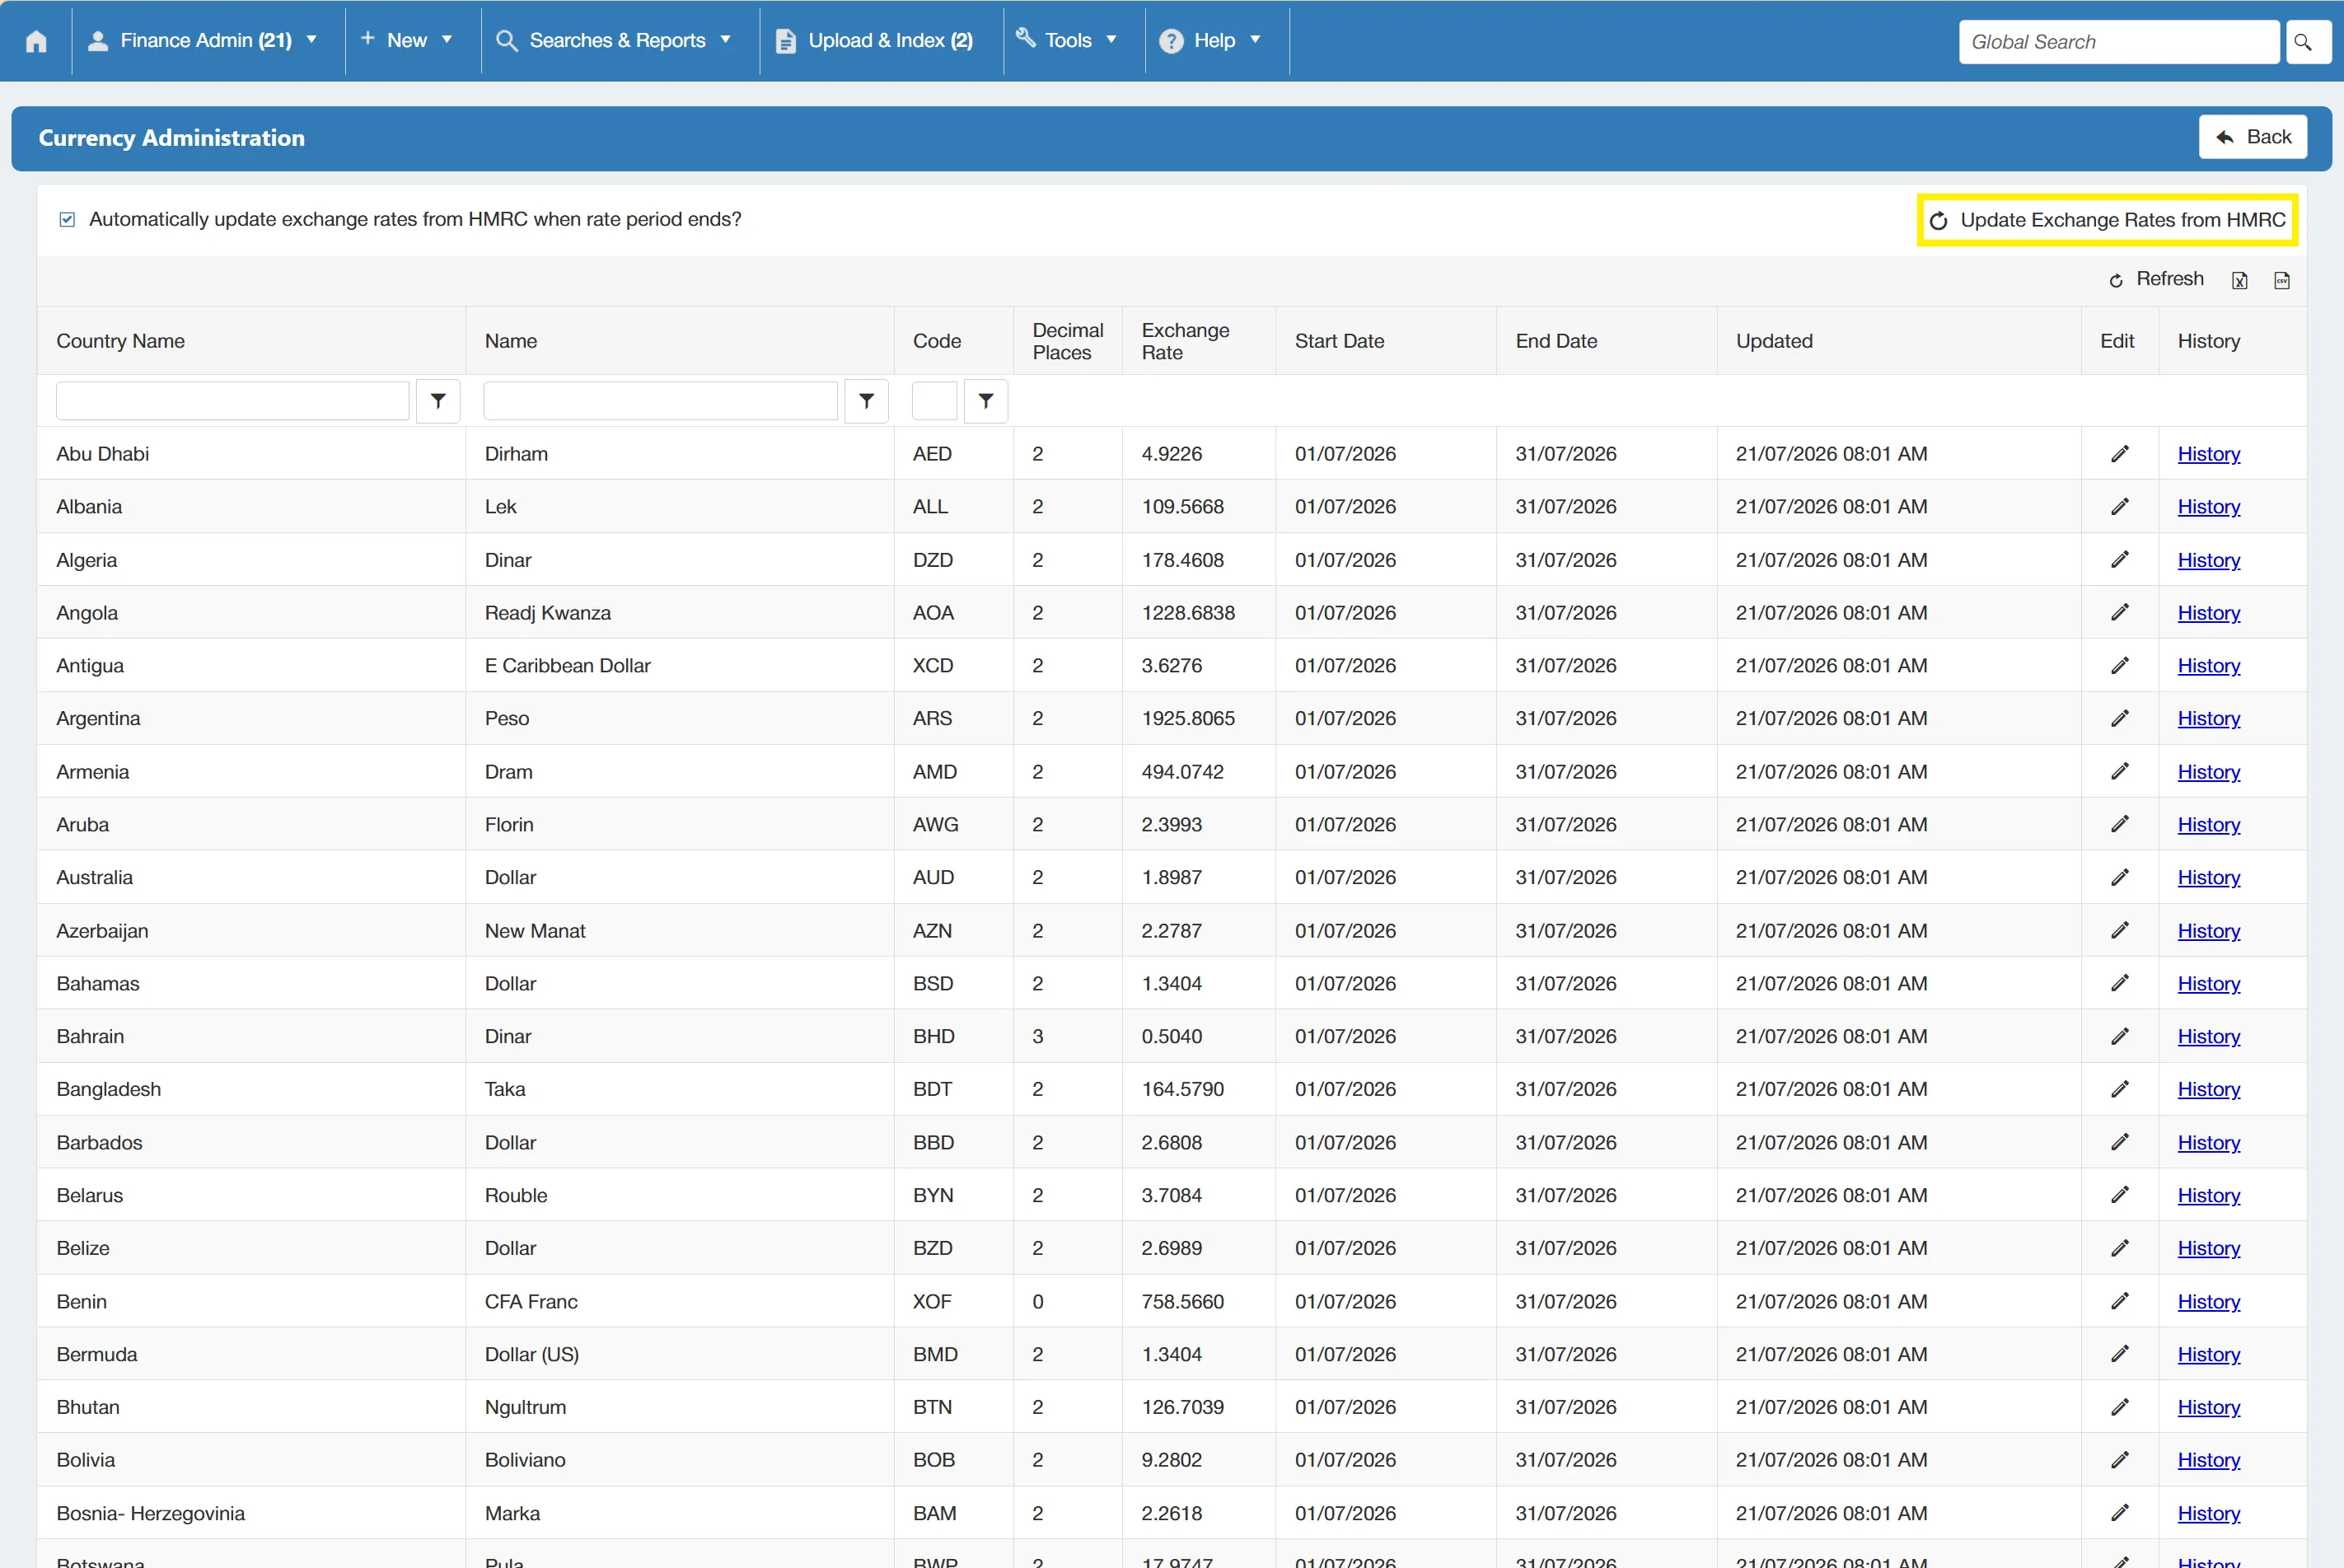
You can also set the system to automatically update the currencies at the end of the rate period. To do this, ensure that ☐ Automatically update exchange rates from HMRC when rate period ends is ticked.
Editing individual Exchange Rates
To edit an individual exchange rate line, click on the edit icon on the desired line.
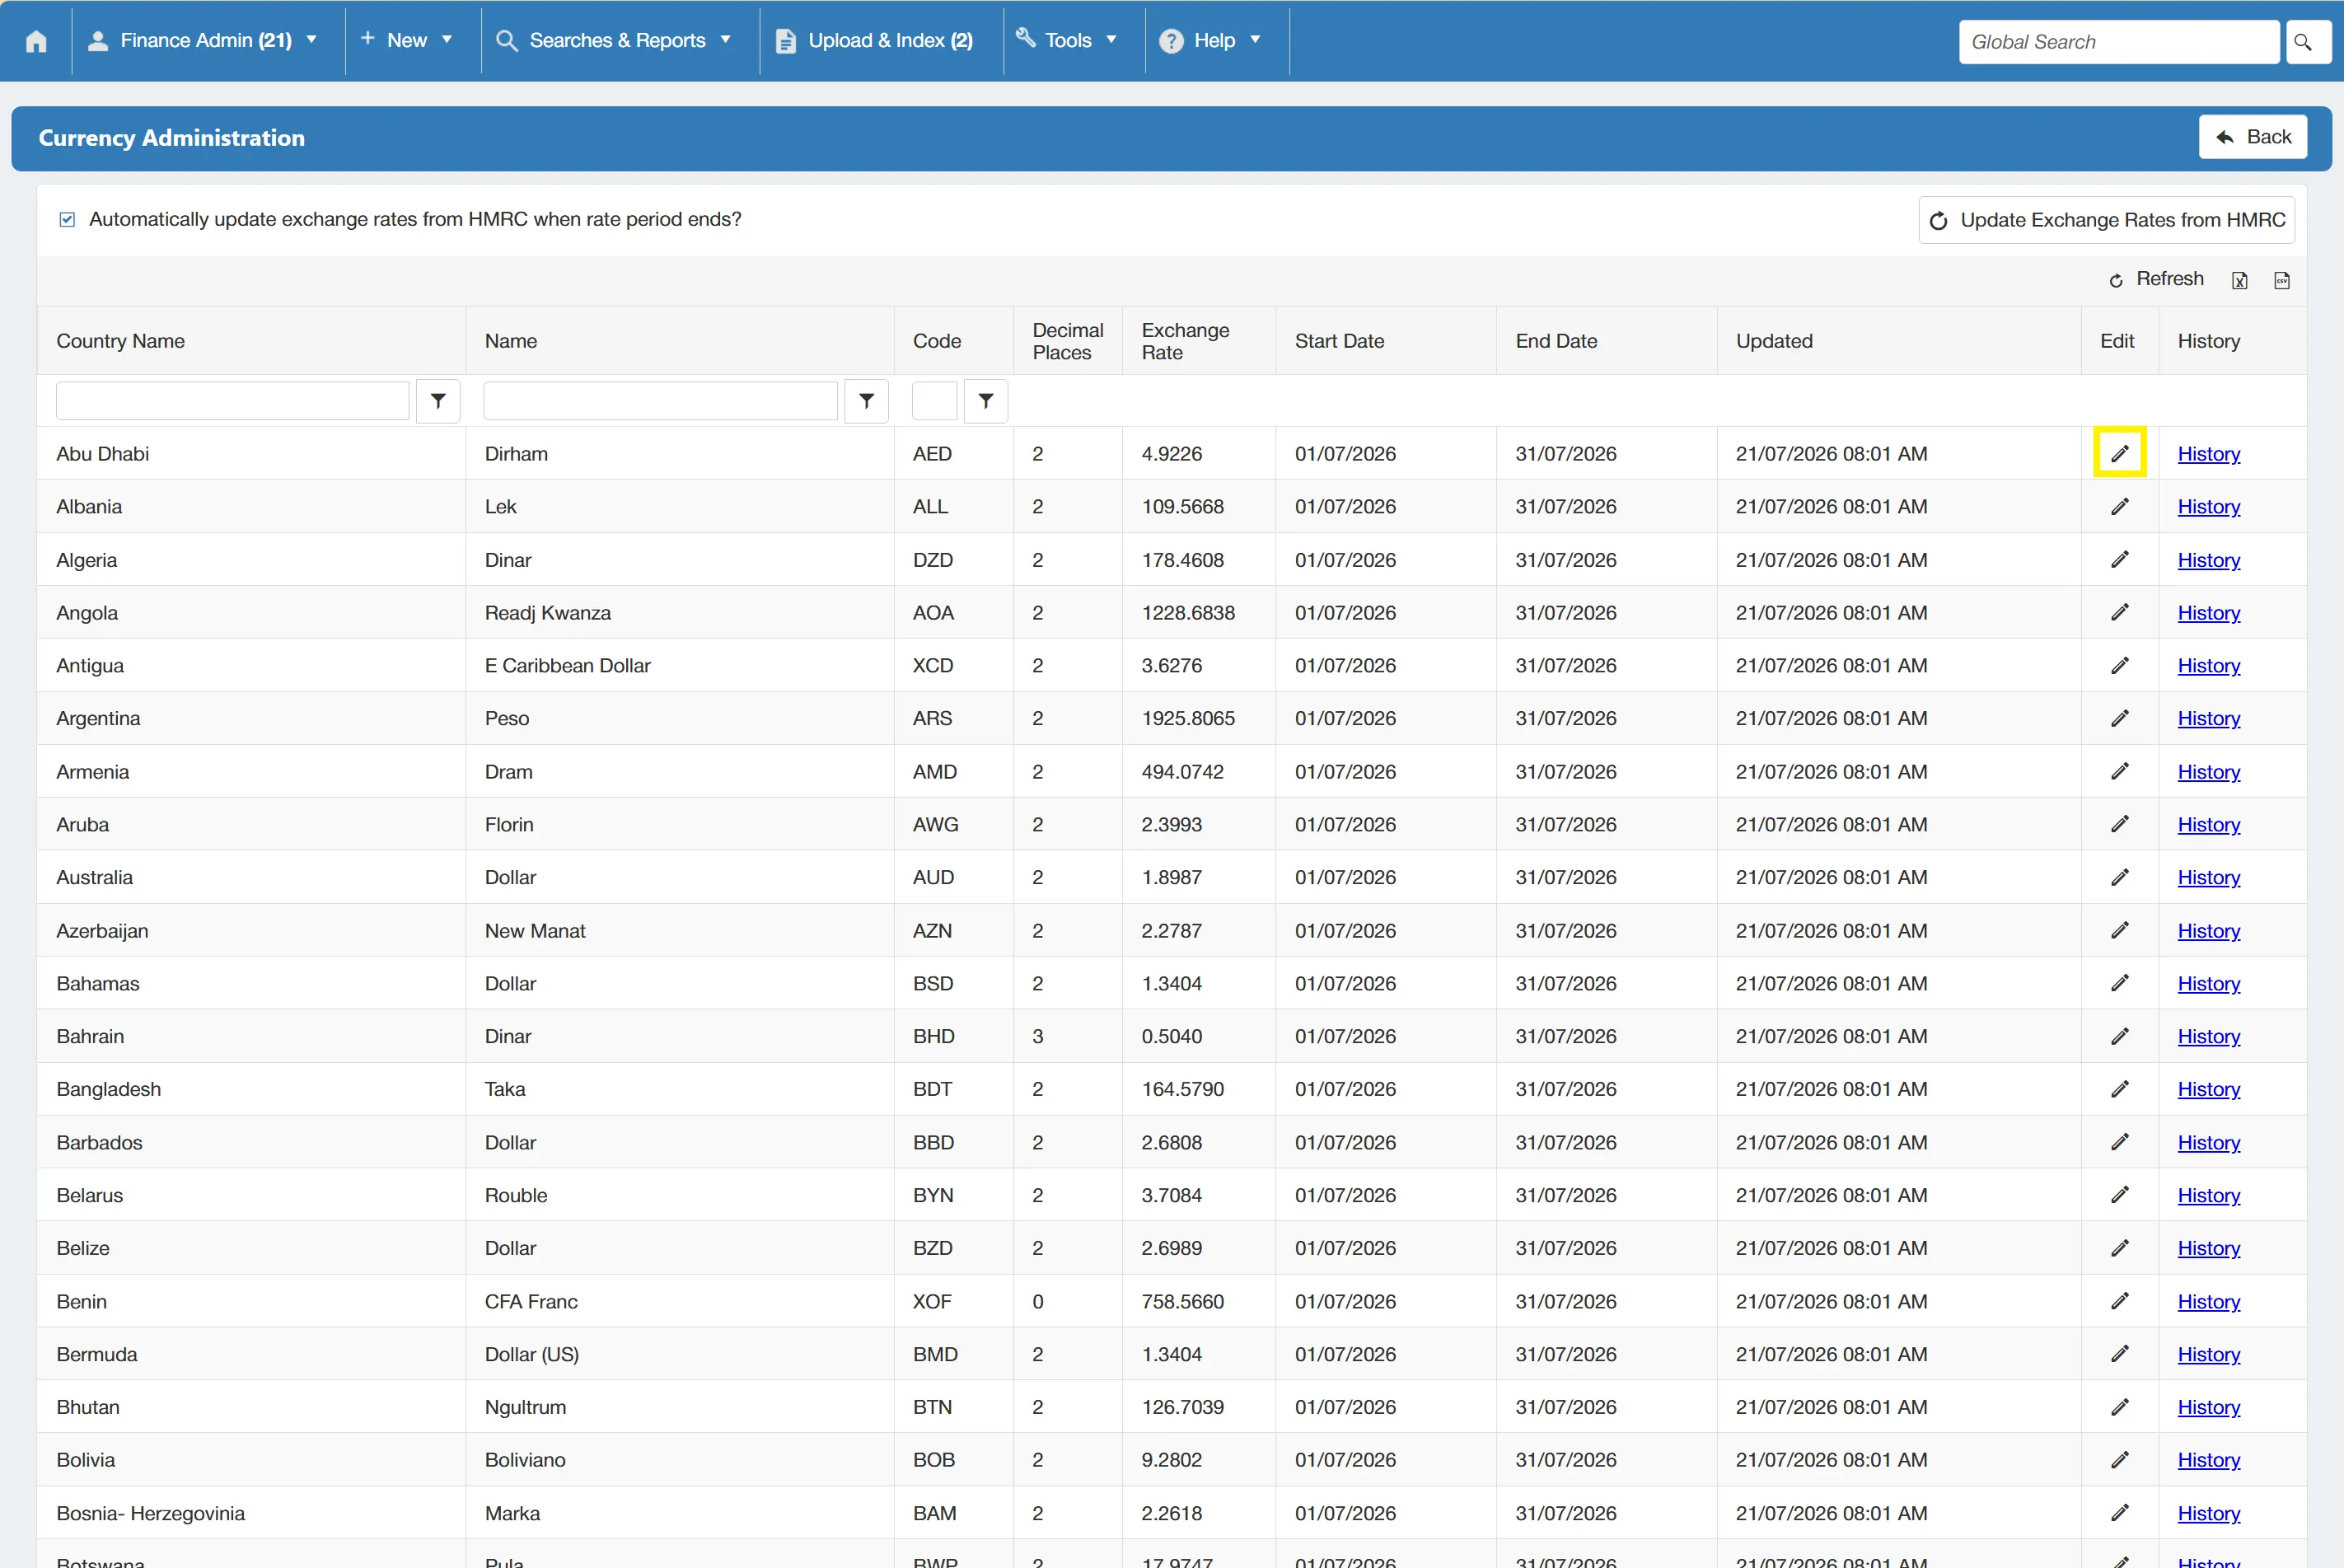
This allows you to manually amend the Exchange Rate, Start Date and End Date. Once you are happy with the changes, simply click on the tick icon to save them.
Viewing Exchange Rate History
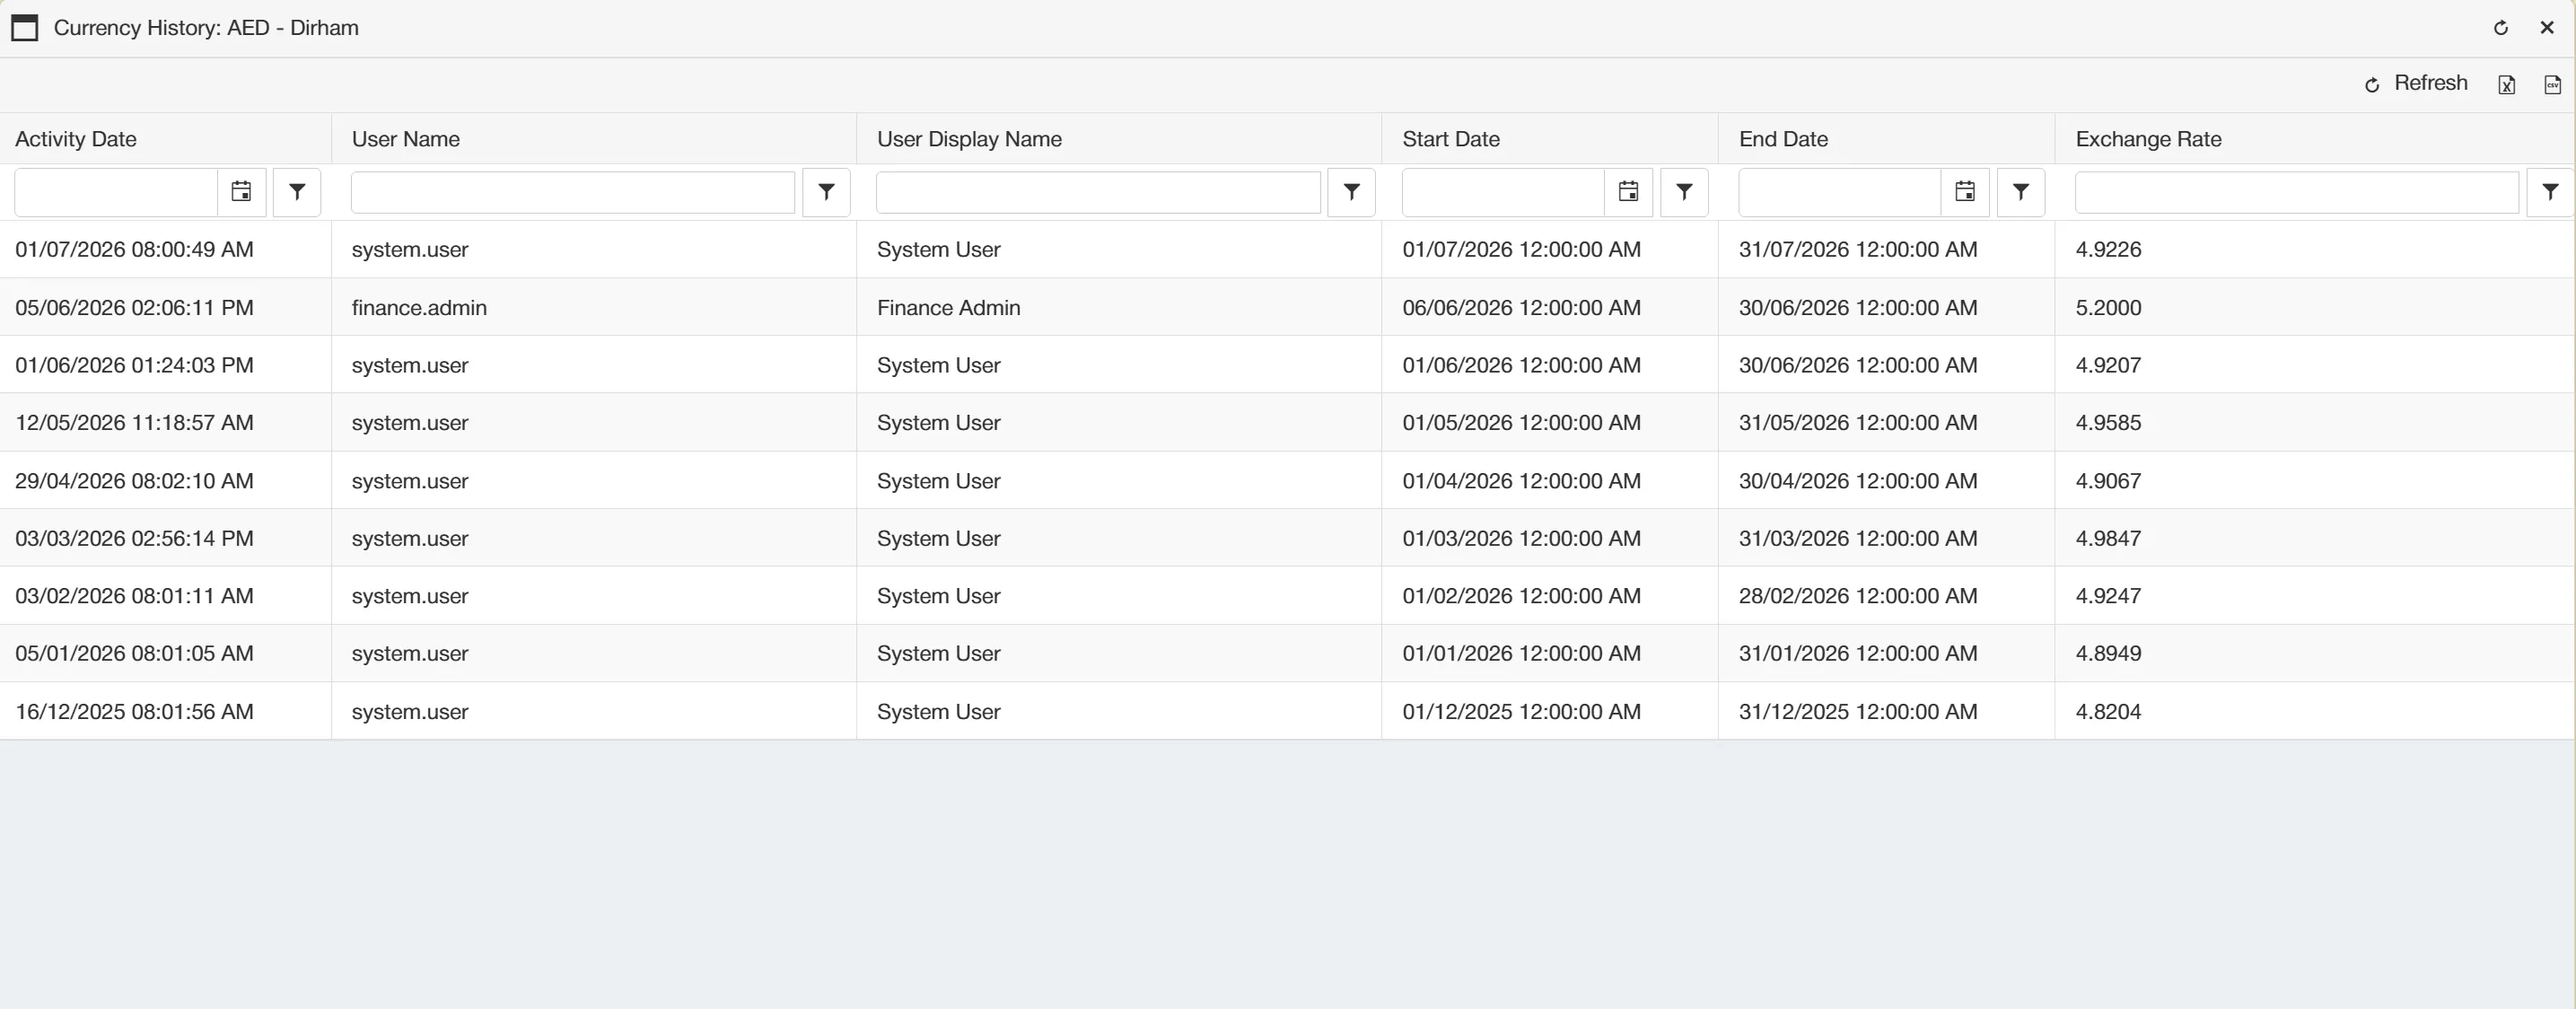
From the Currency Grid, you can view the history of an individual exchange rate by clicking on the relevant exchange rate line.
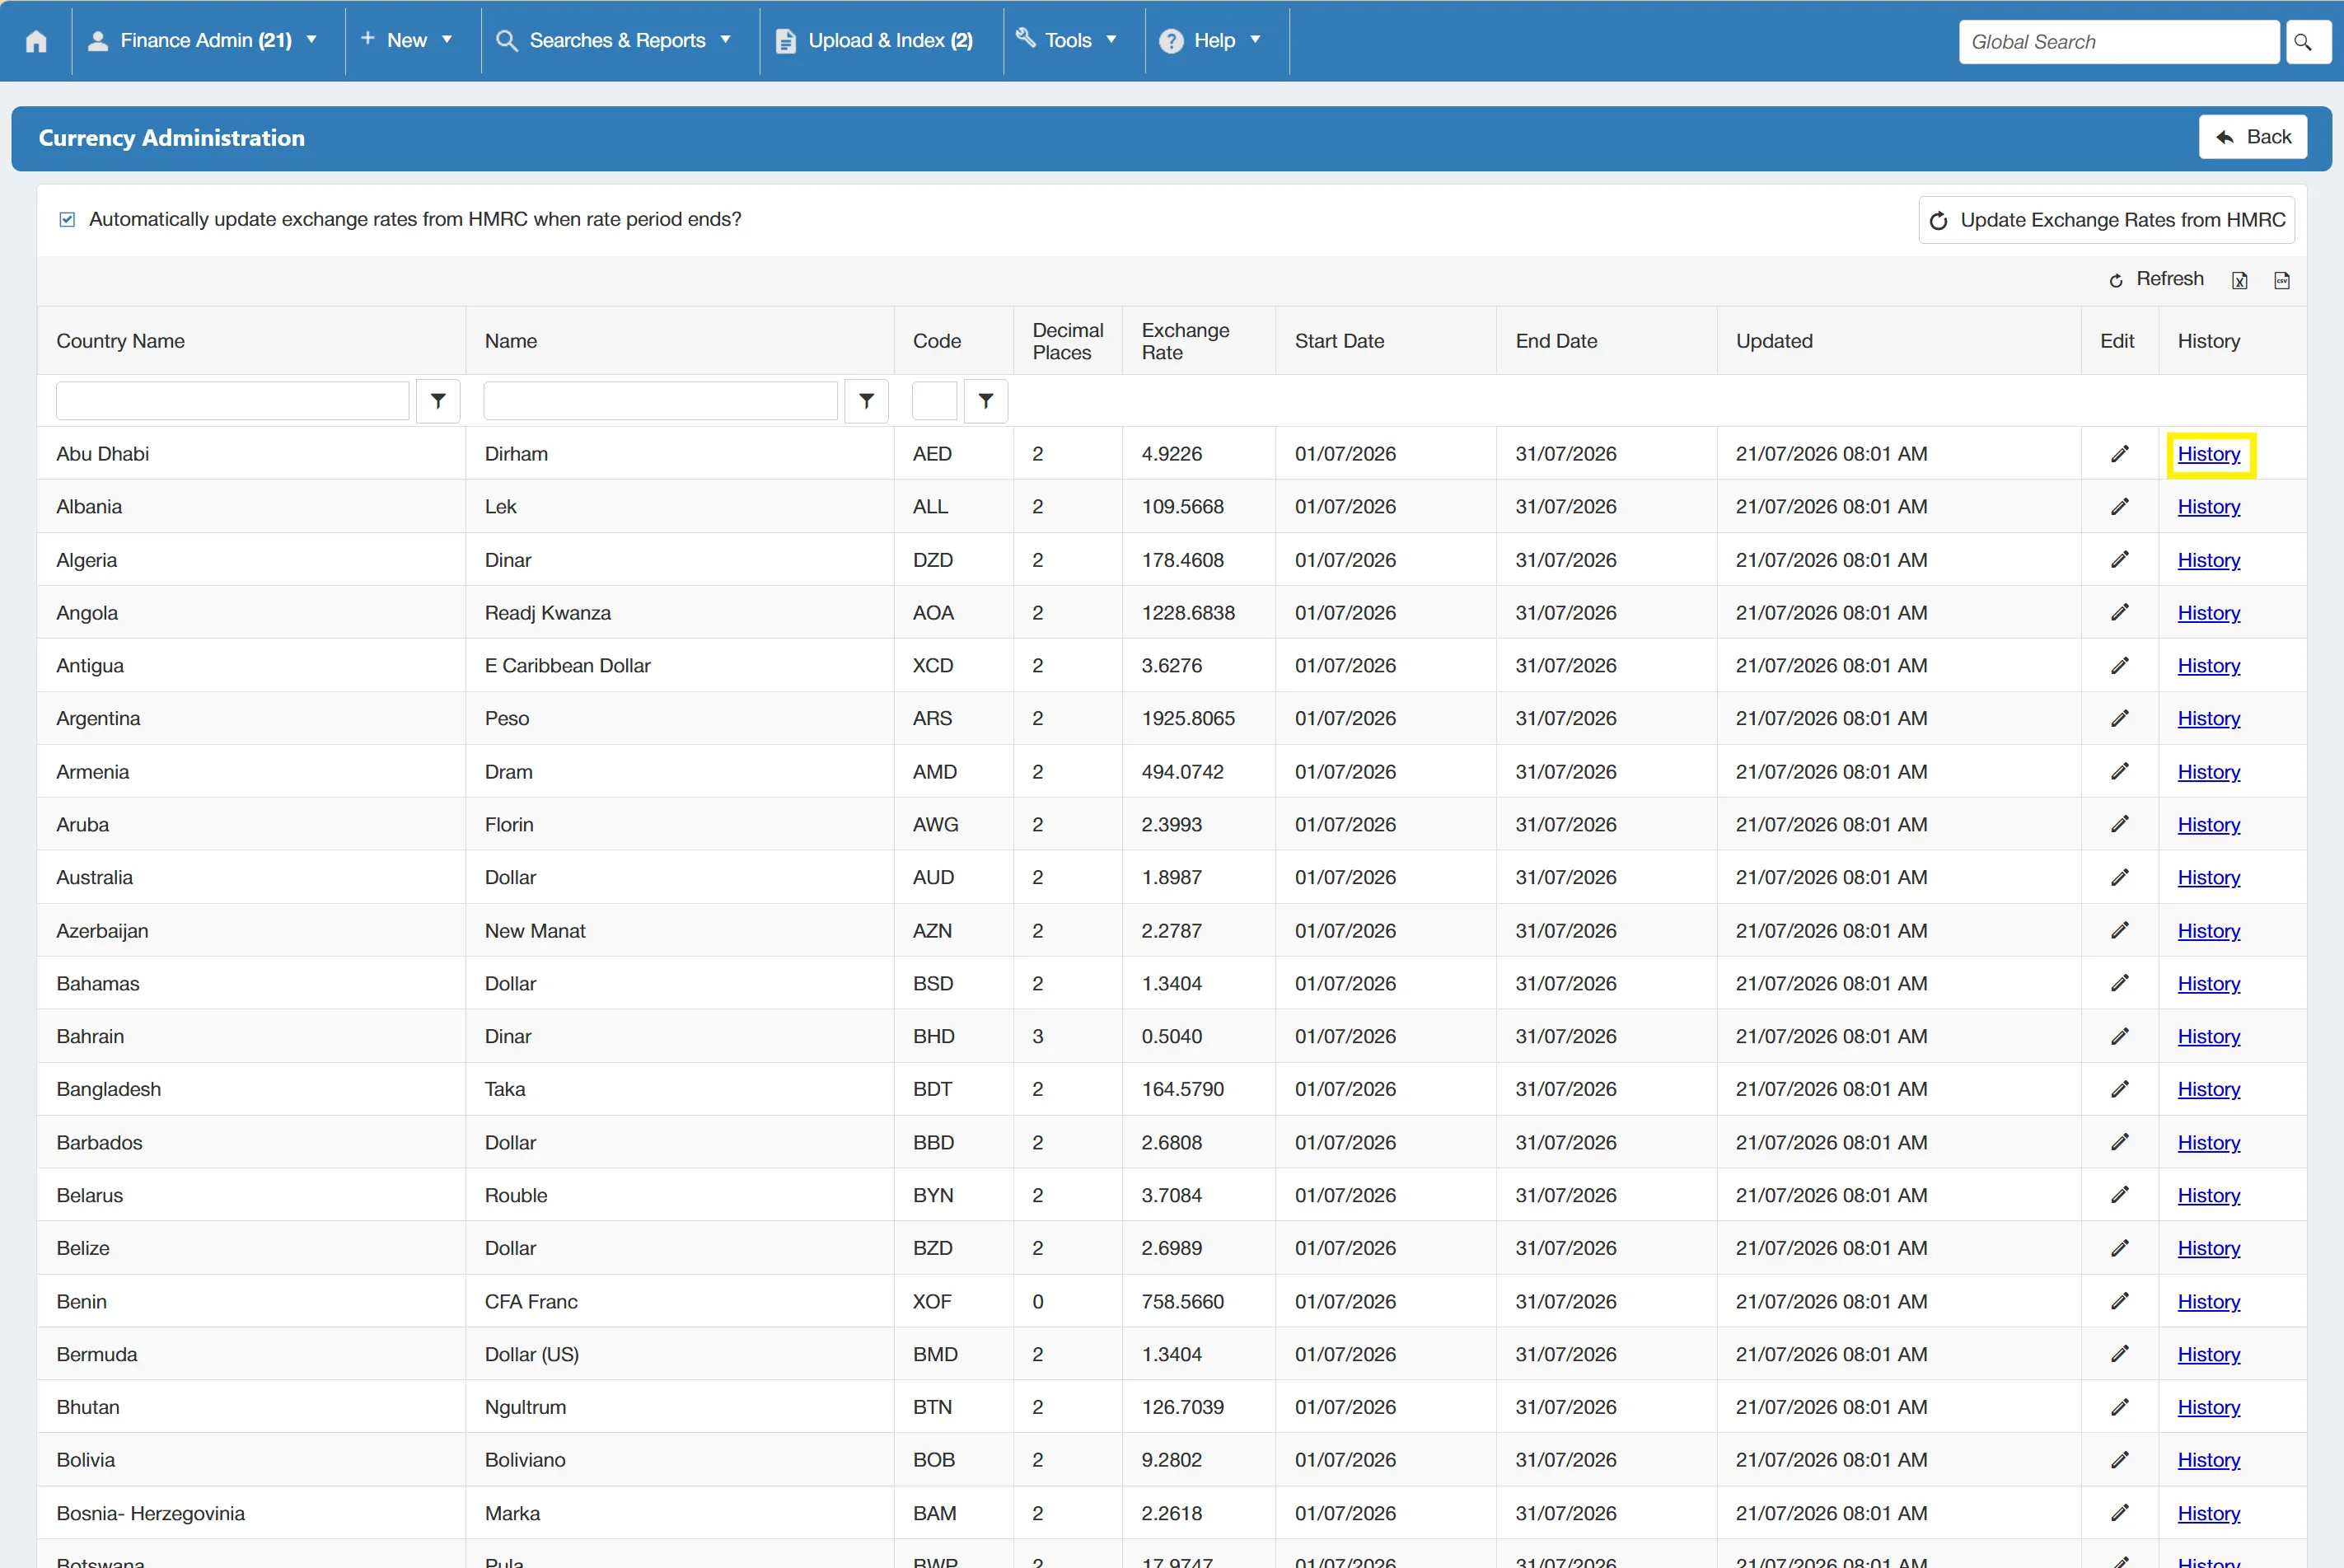
This displays a new window showing the detailed history of the chosen exchange rate.
Cost Centers
Cost center settings allow you to add new cost center codes, edit existing ones and disable any un-required codes.
Users must have the Cost Center Admin permission enabled to access this feauture. For information on user permissions, click here.
To configure cost centers, select the Cost Centers icon on the Configuration & Settings section.
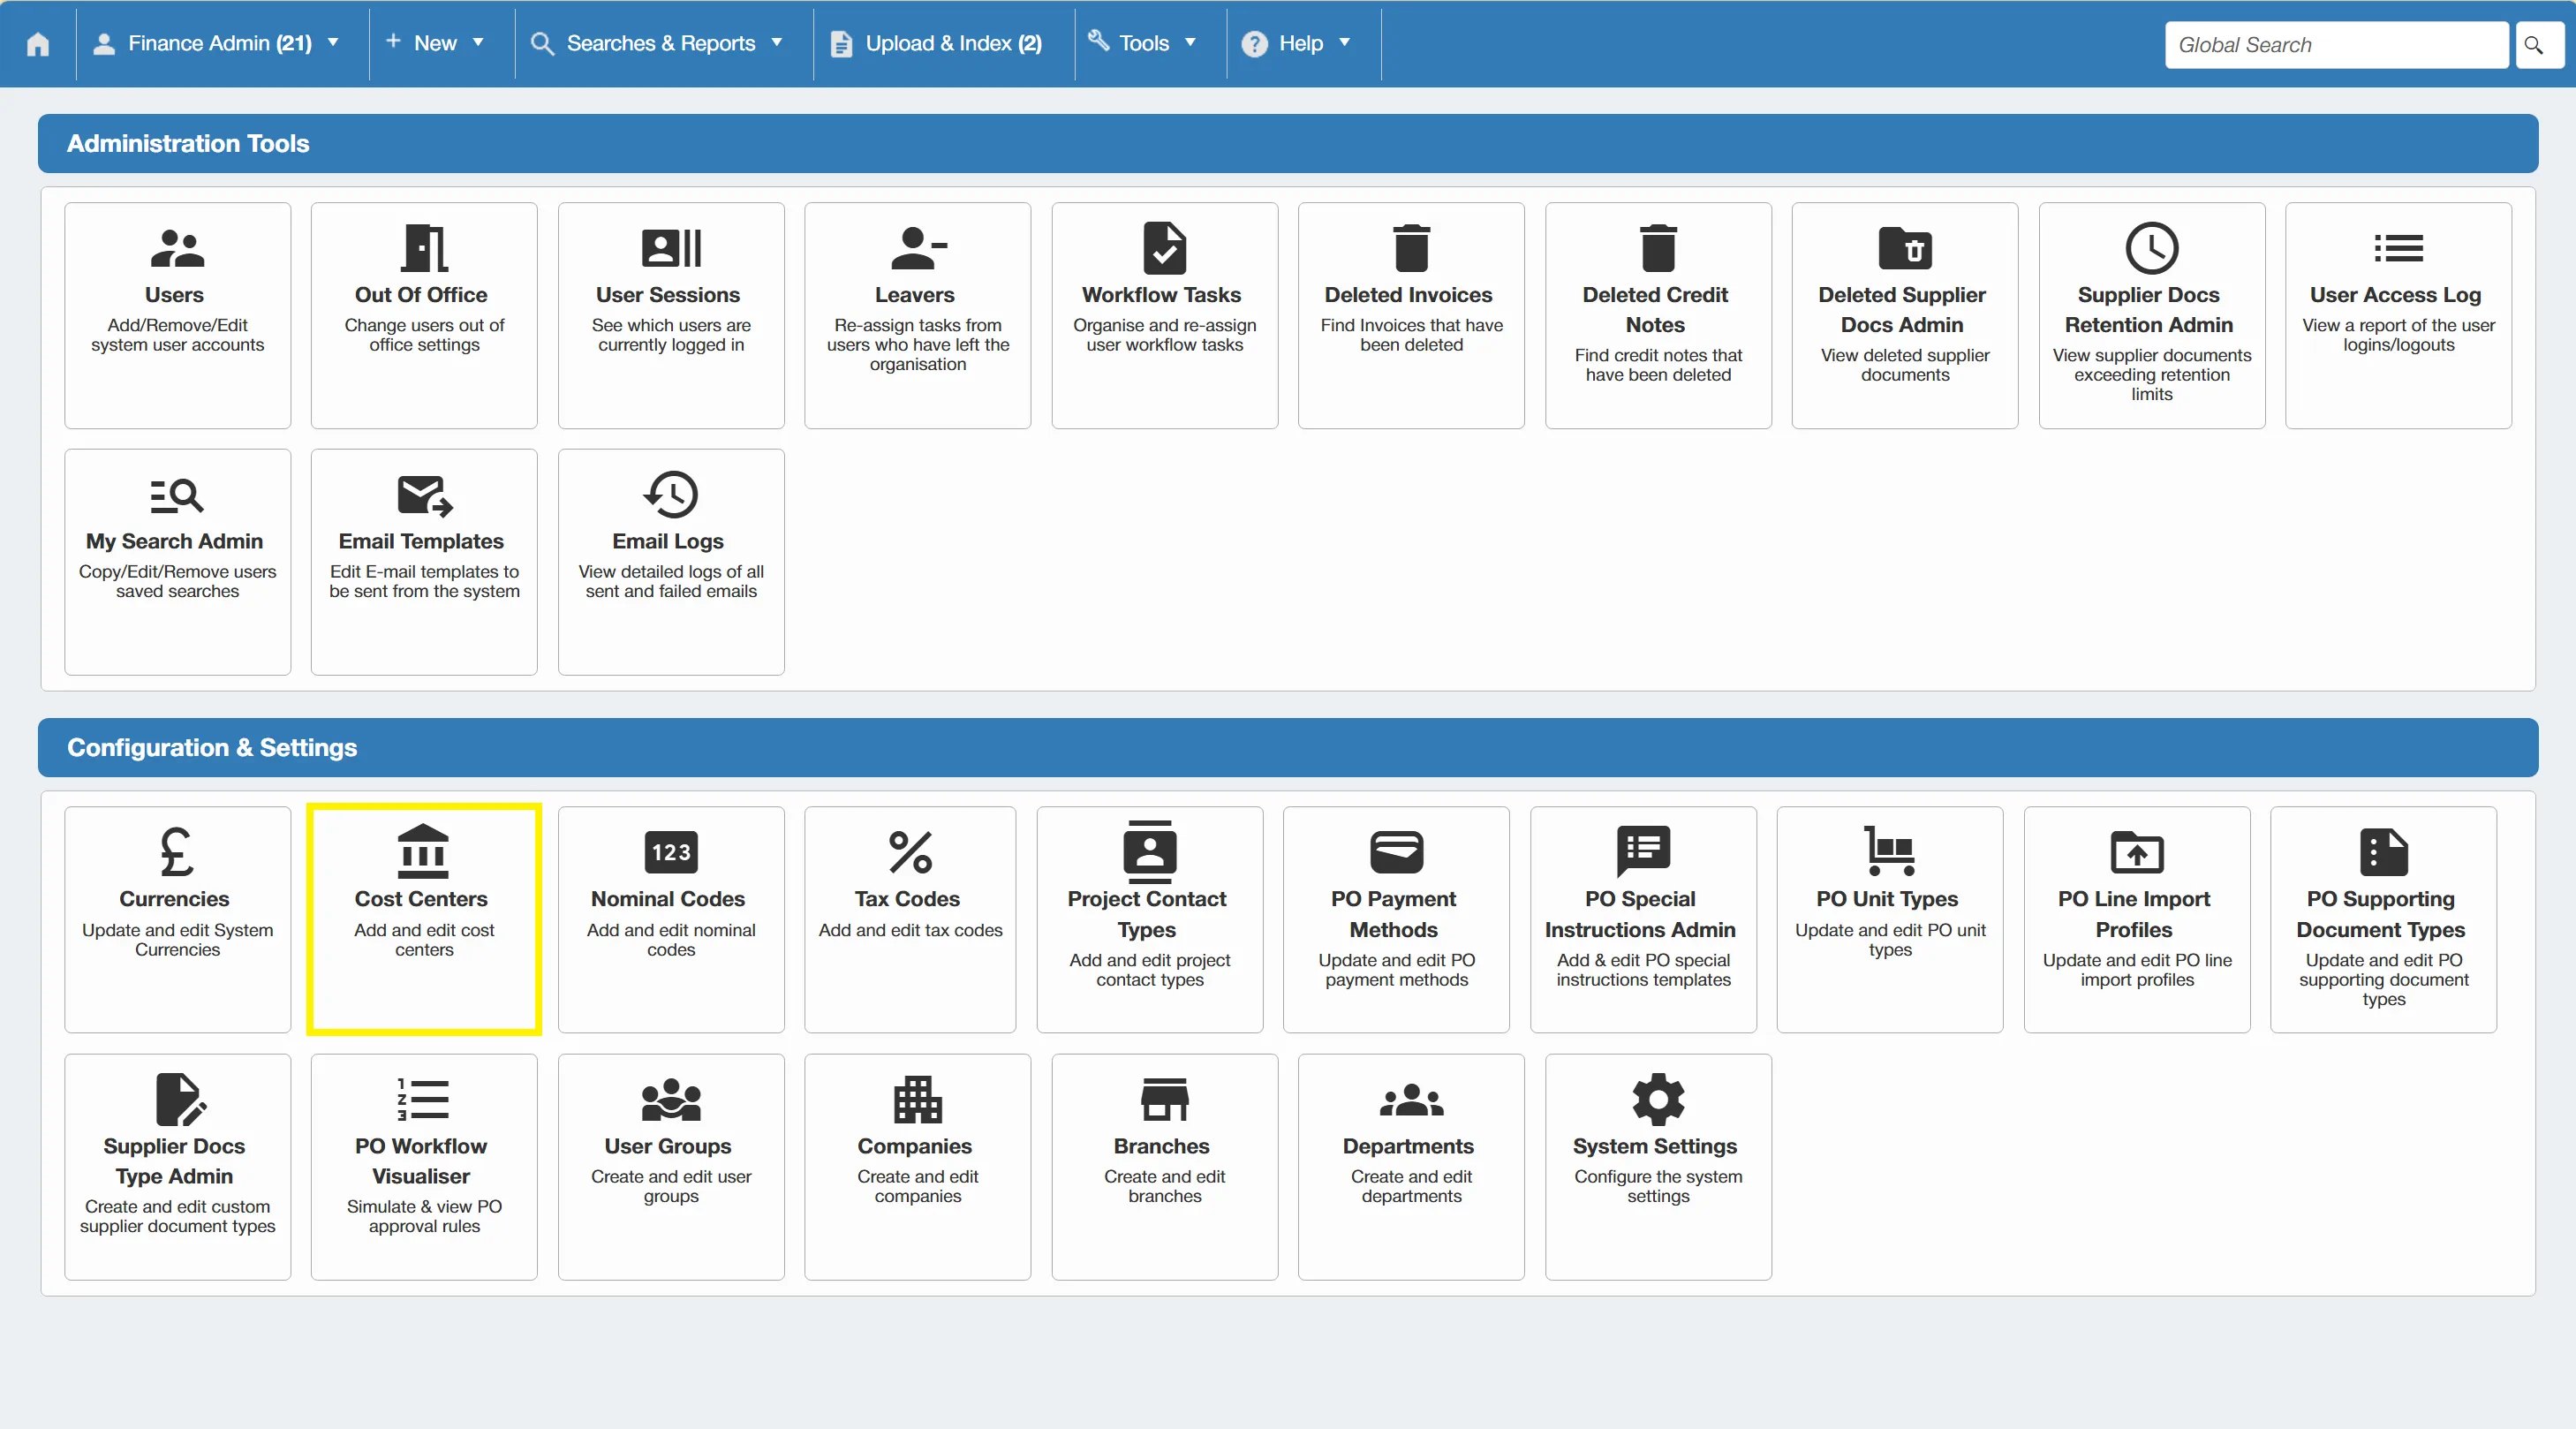
Clicking on the Cost Centers icon brings you to the Cost Center Administration grid. from here you can add, edit and disable cost centers.
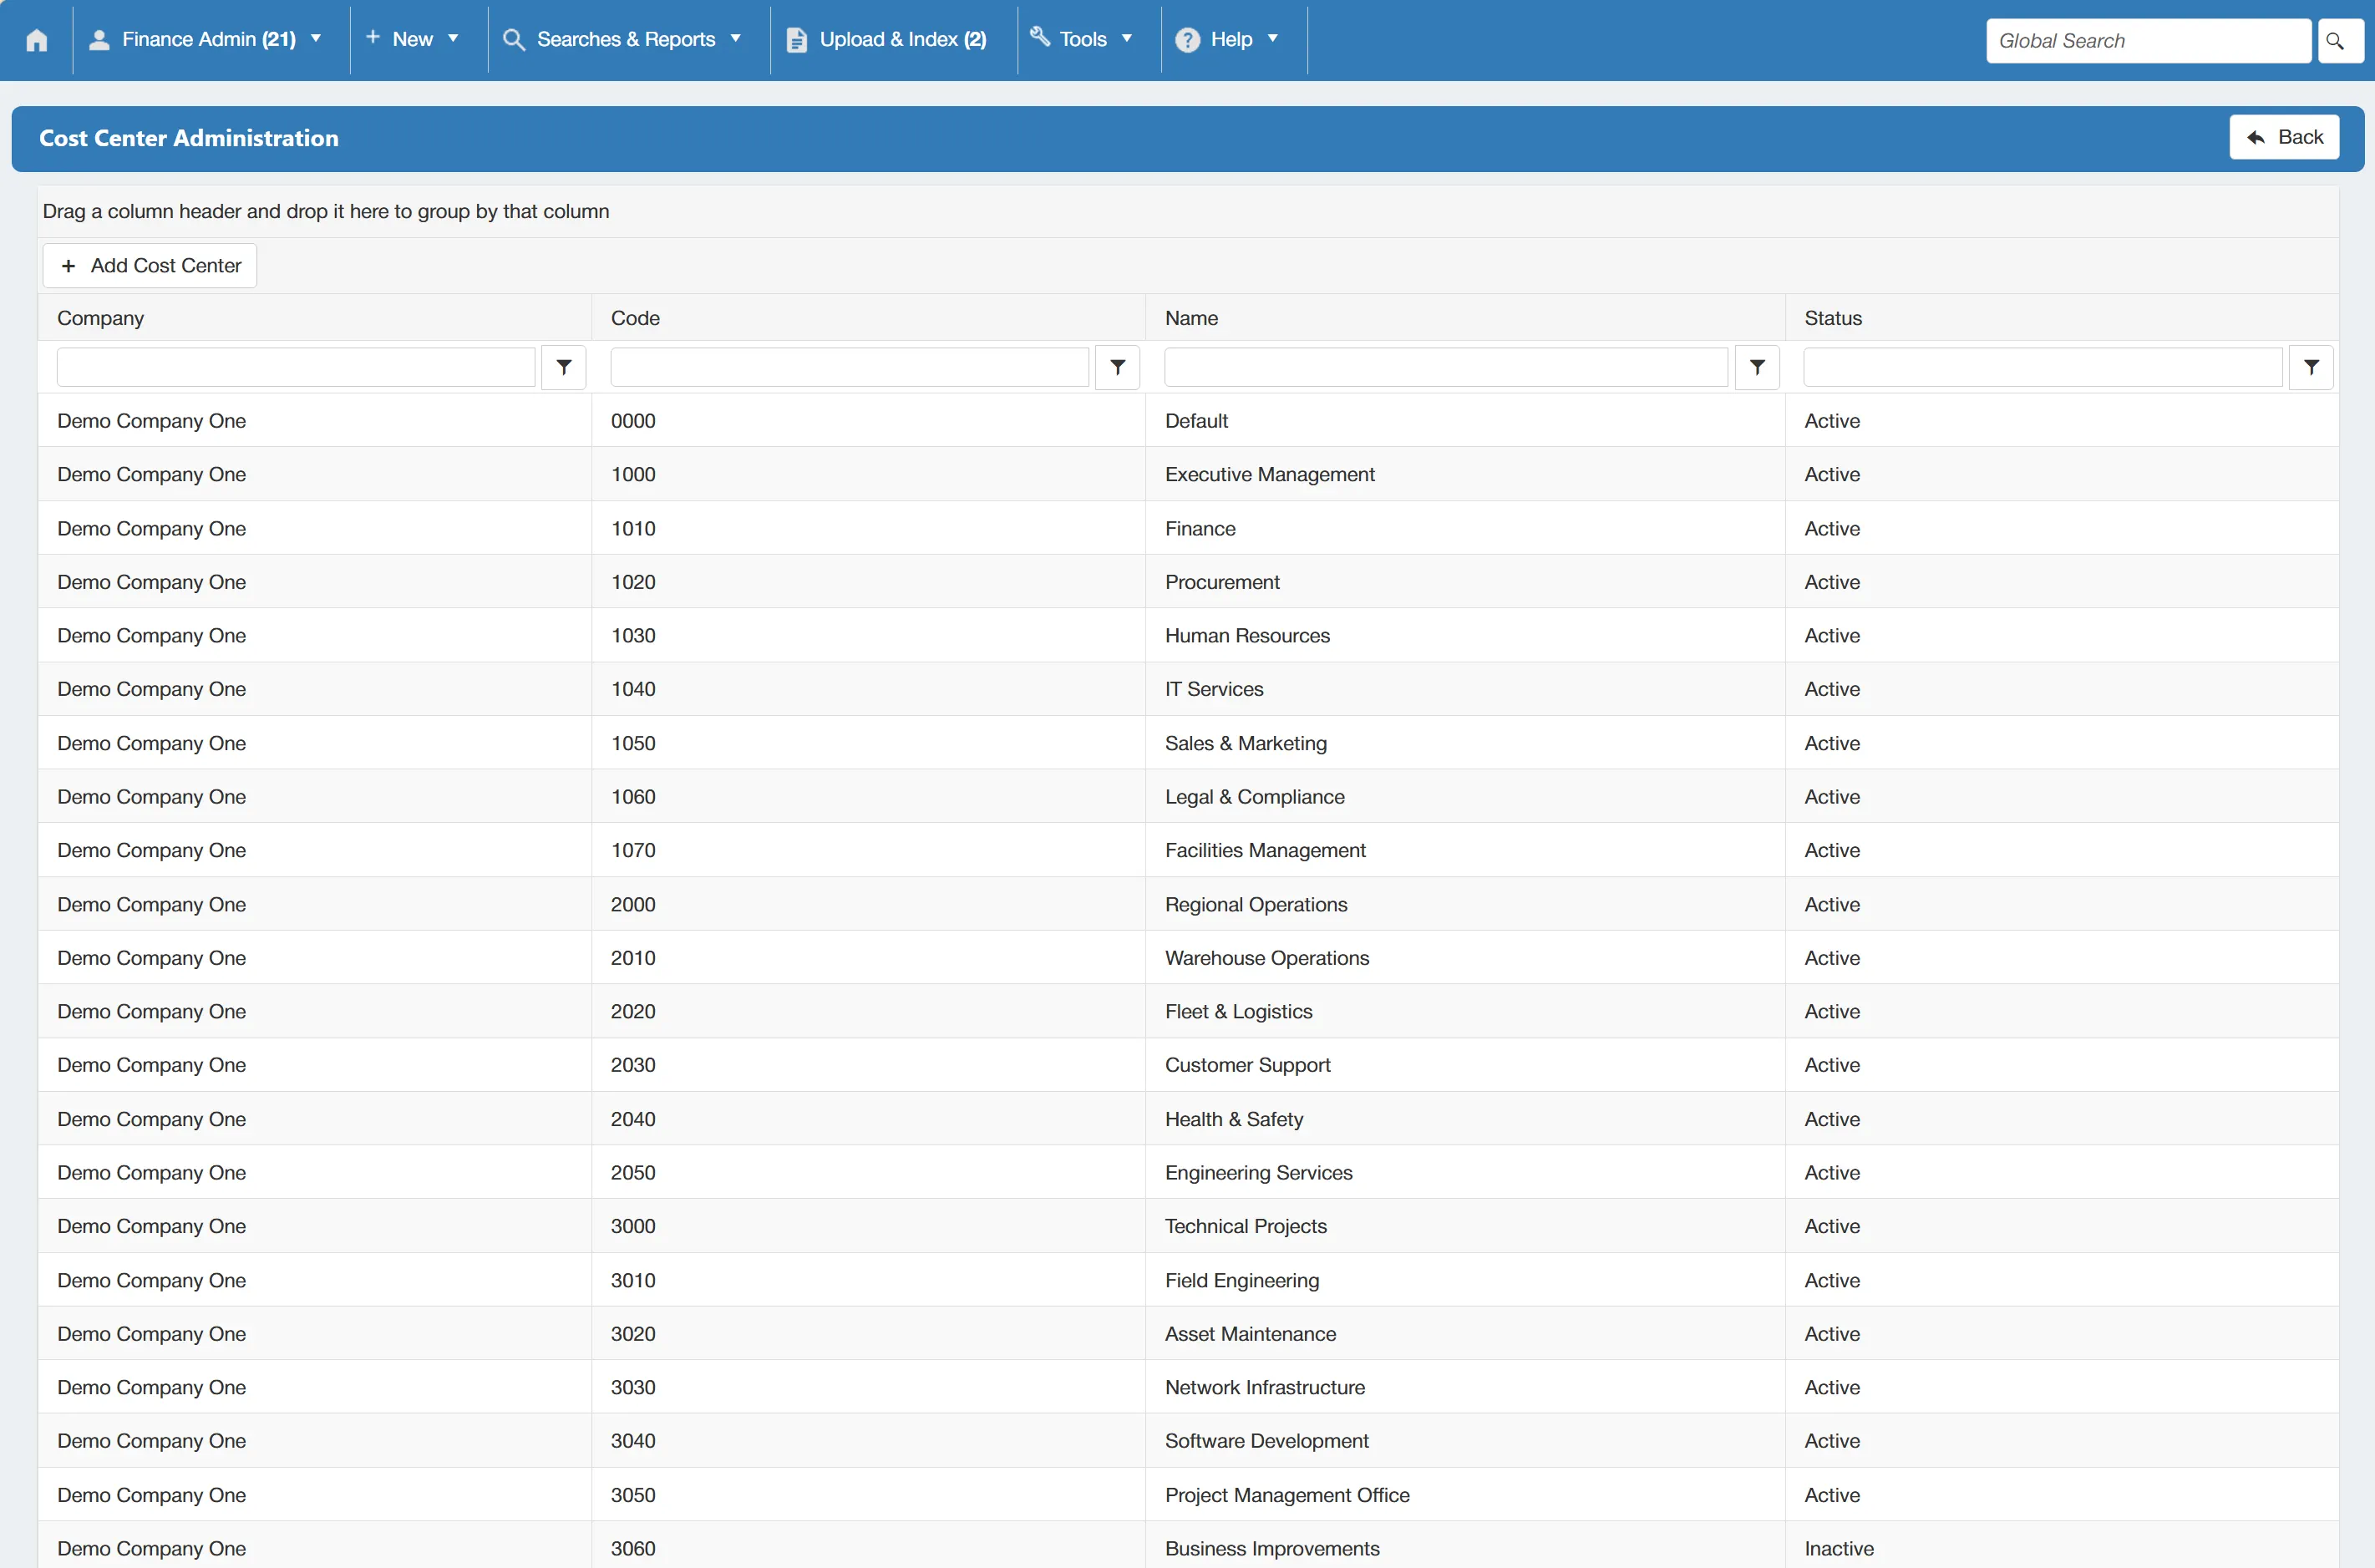
The information on the Cost Center Administration grid can be exported in csv and excel format.
Add a New Cost Center
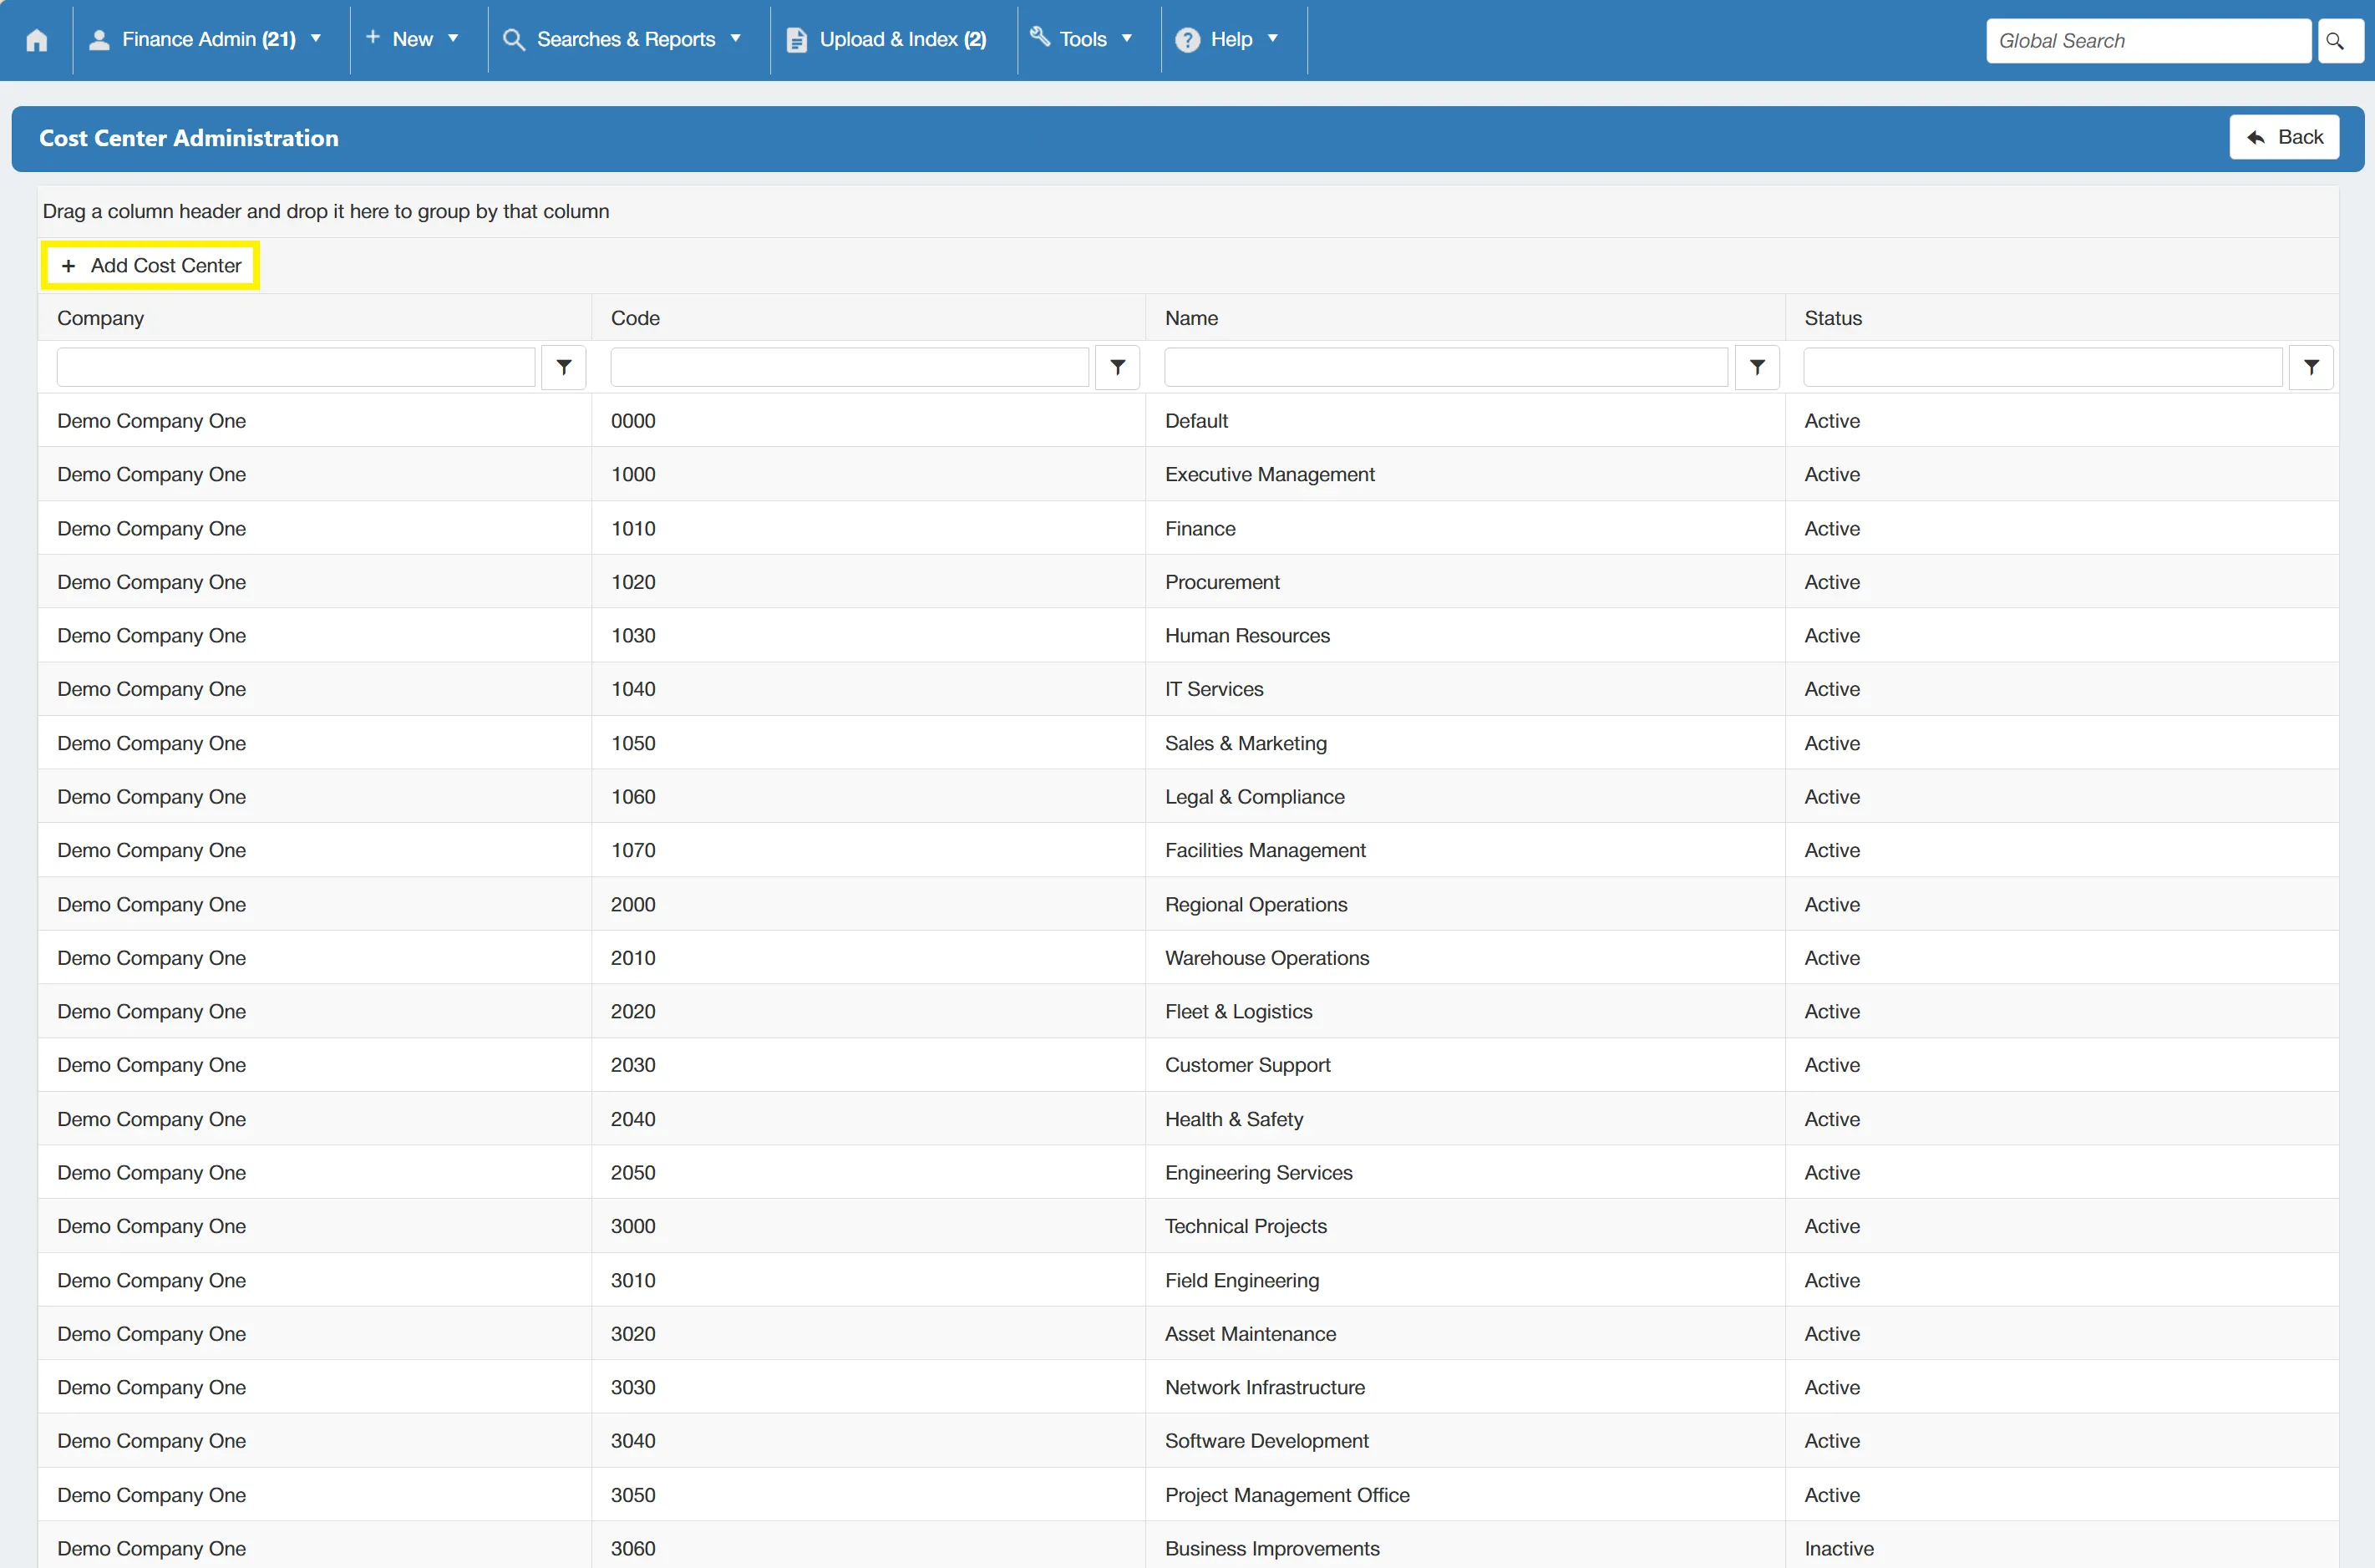
To add a new cost center, click on the button.
This displays a new window where you can input the new cost center details such as code and name.
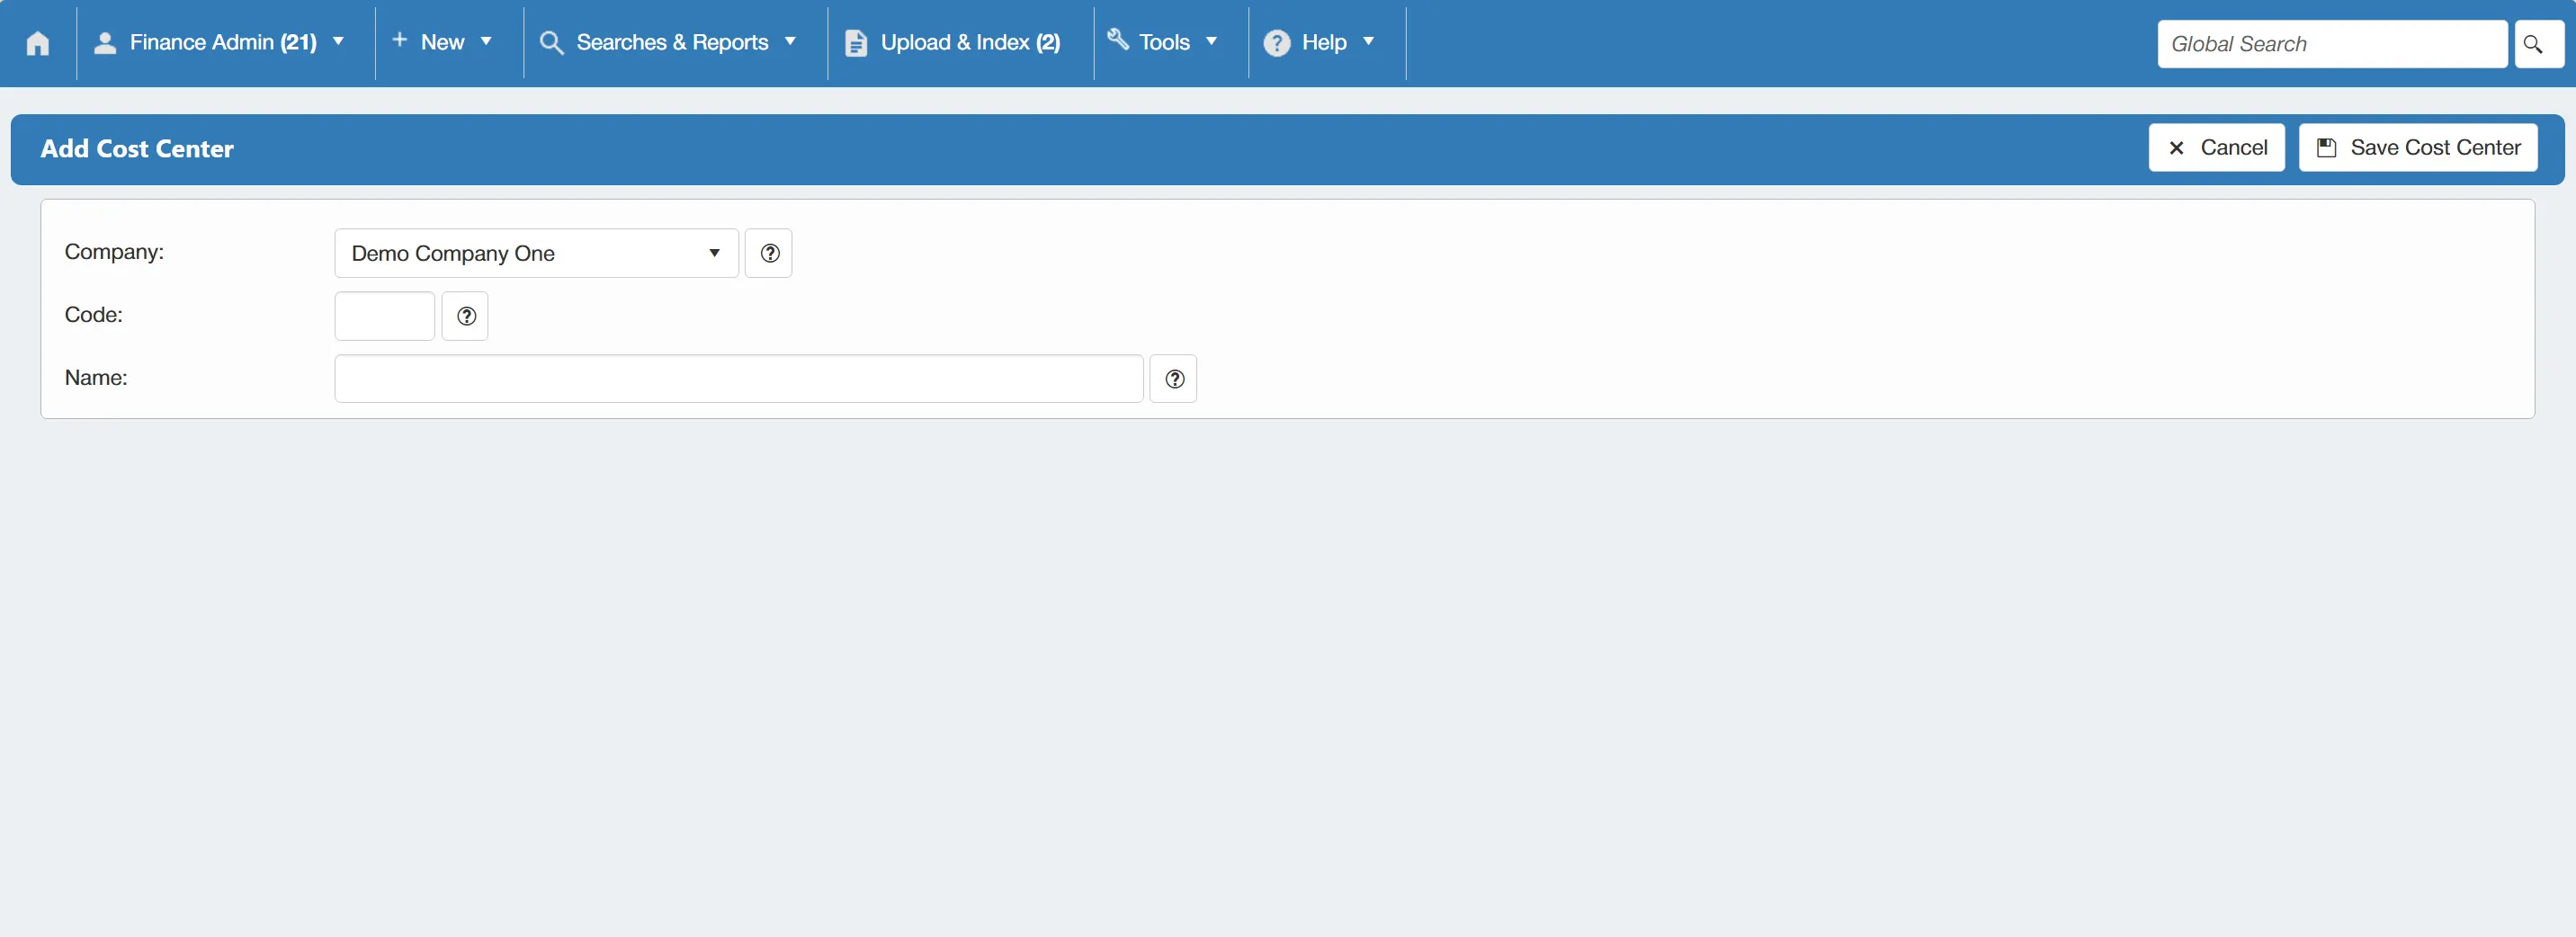
Once you are happy with the details, click to finalise this.
Edit an Existing Cost Center
You can also edit existing cost centers. To do this, select the desired cost center from the cost center administration grid. You can then select from the drop down menu.
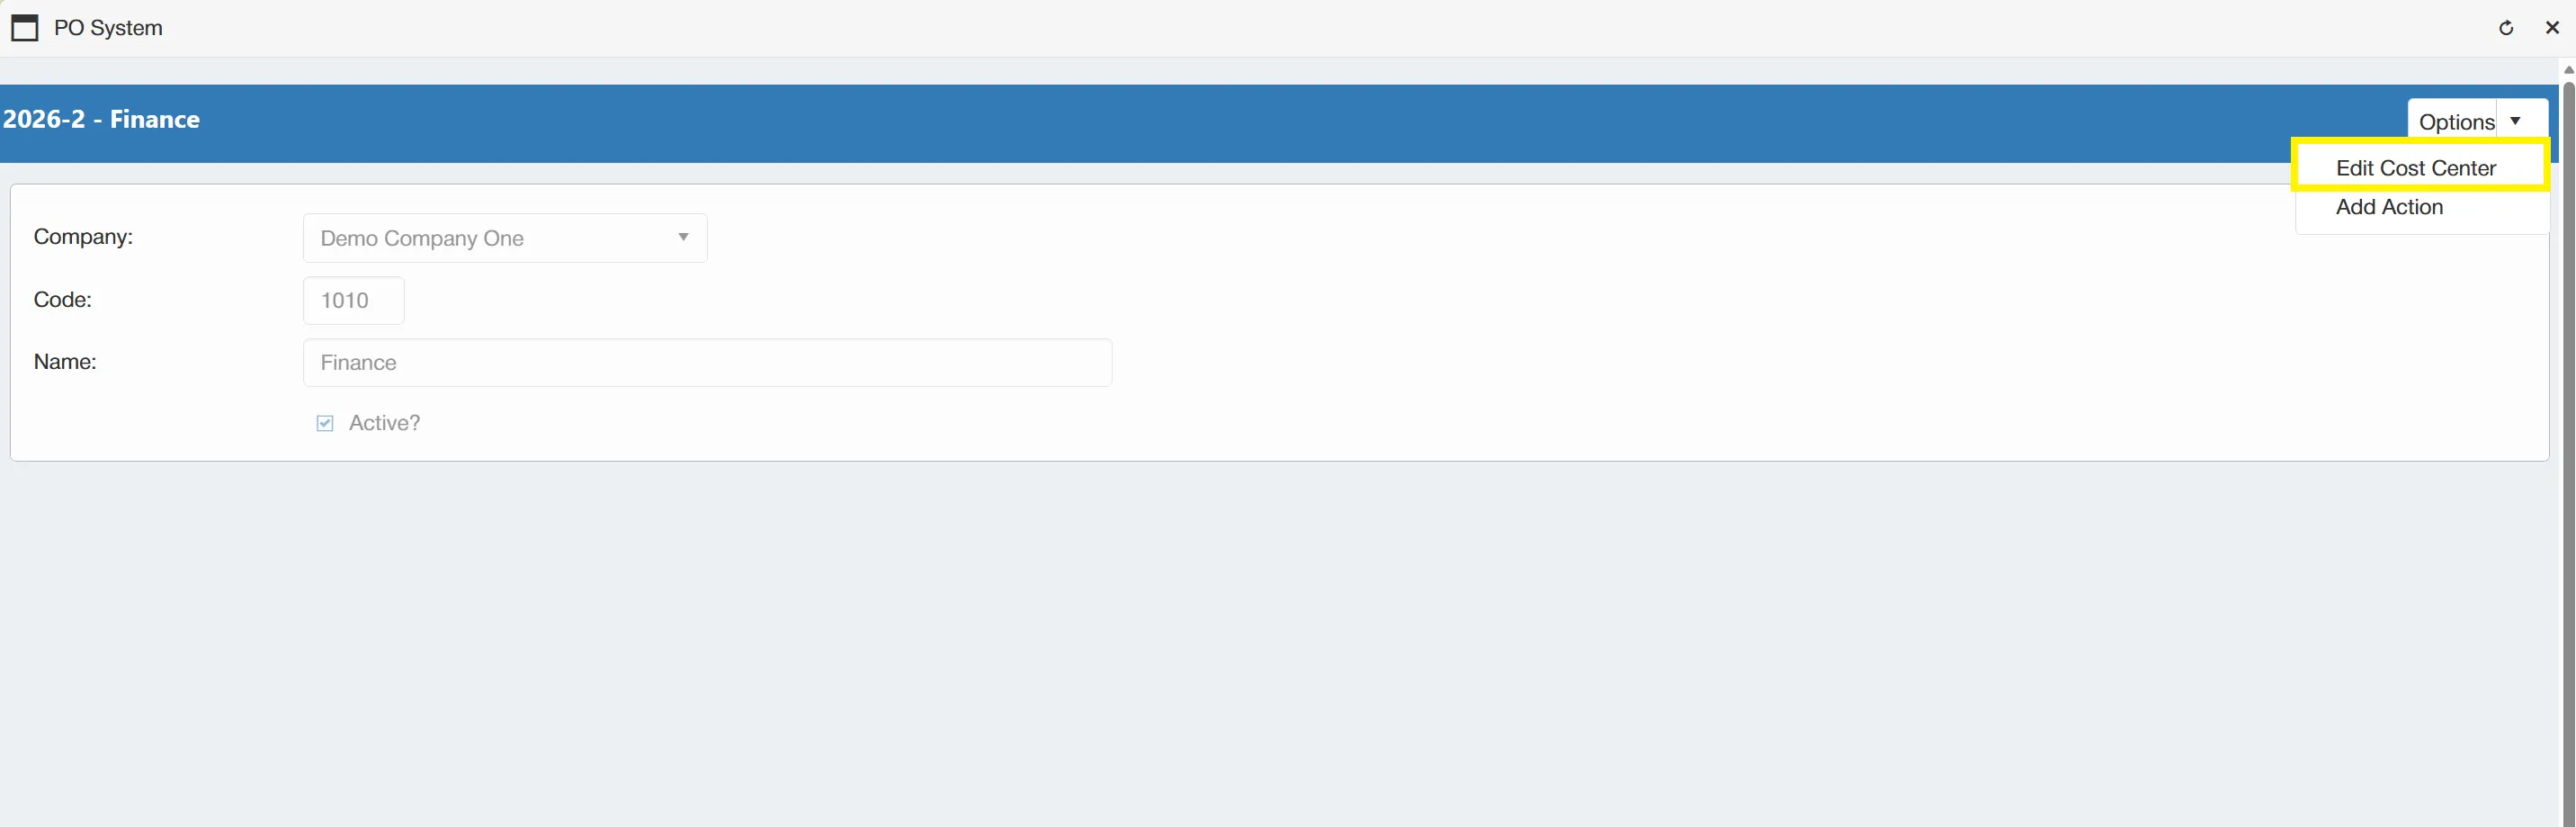
From this window you can edit the name and code of the cost center.
You cannot edit the cost center code if it has been used within the system.
Disabling a Cost Center
If a cost center is no longer required, you can disable it within the system. To do this, select the relevant cost center from the Cost Center Administration grid. Then, select as before. You can then un-tick the ☐ Active? box to disable the cost center.
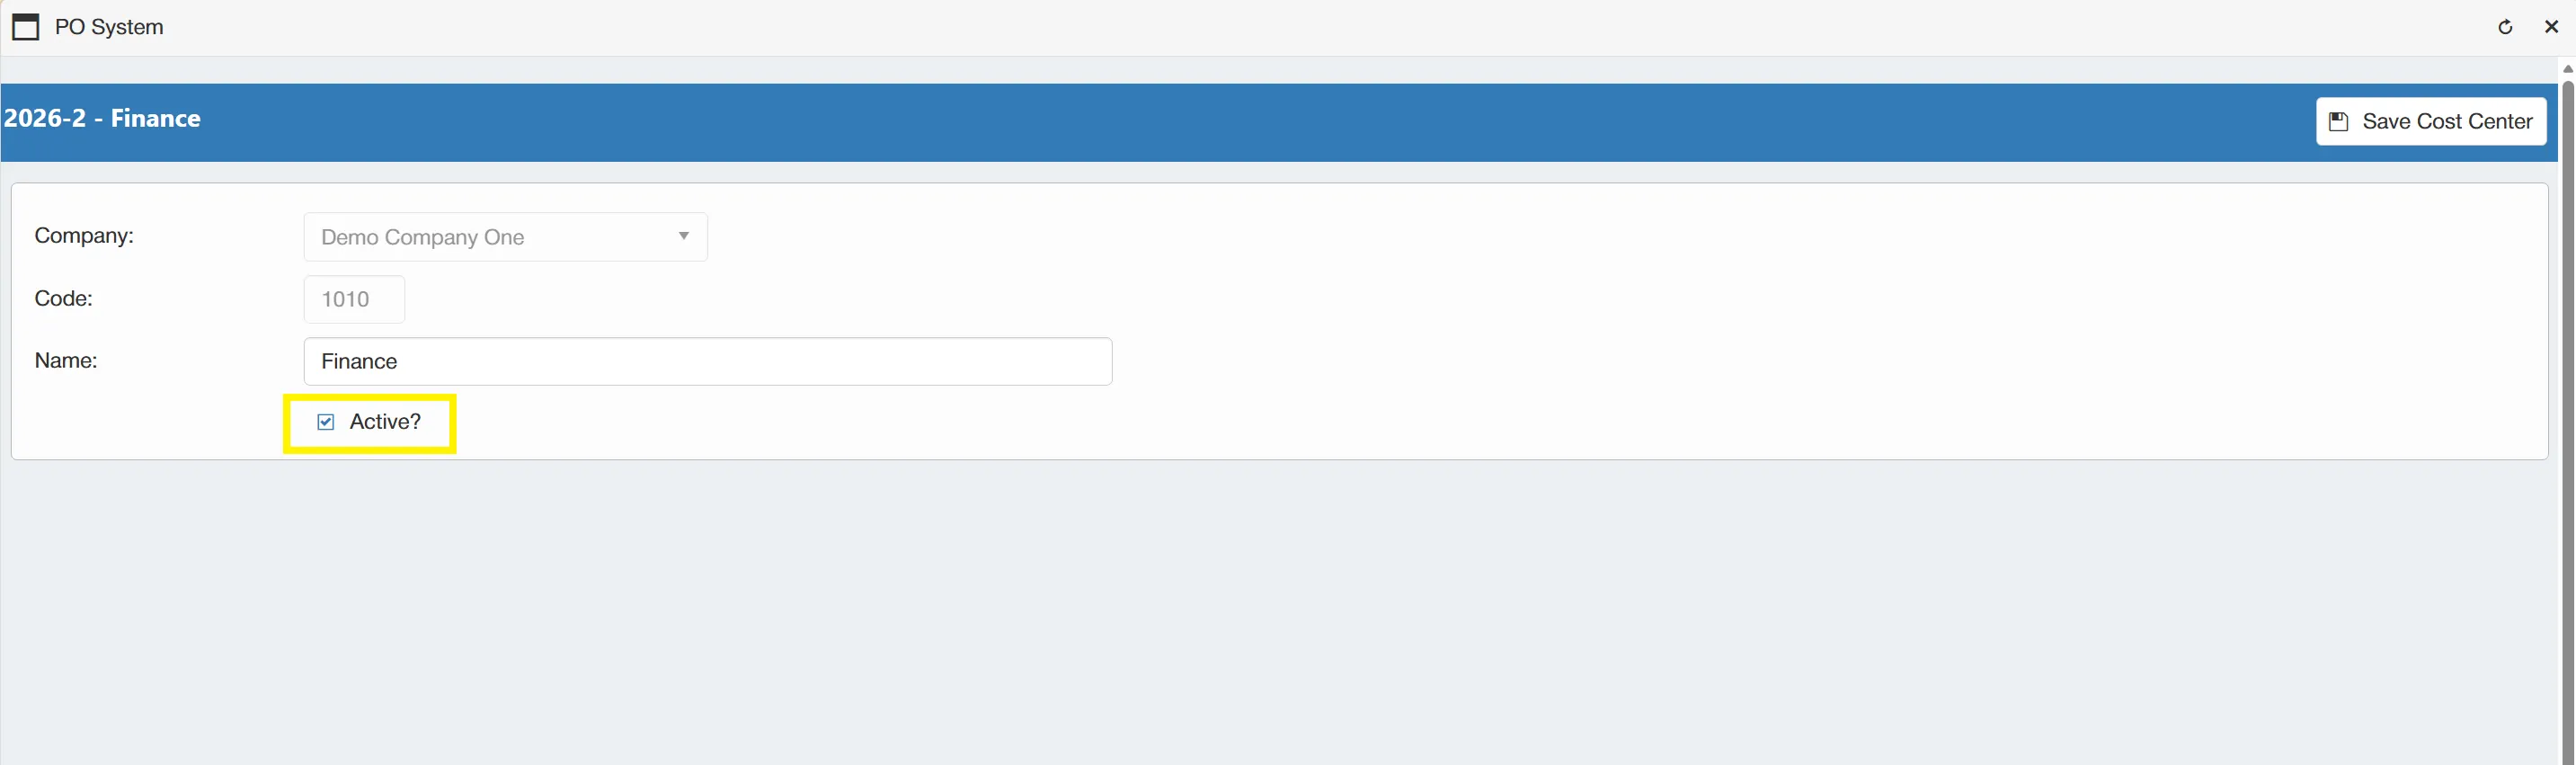
You are not able to completely delete a cost center if it has already been used against a PO. You would instead need to disable the cost center instead as this ensures that the cost center cannot be used again whilst retaining details within the system for audit purposes.
Nominal Codes
Nominal code settings allow you to create new nominal codes, edit existing ones and disable any un-required codes.
Users must have the Nominal Admin permission enabled to access this feauture. For information on user permissions, click here.
You can configure nominal codes by selecting the Nominal Codes icon from the Configuration & Settings section.
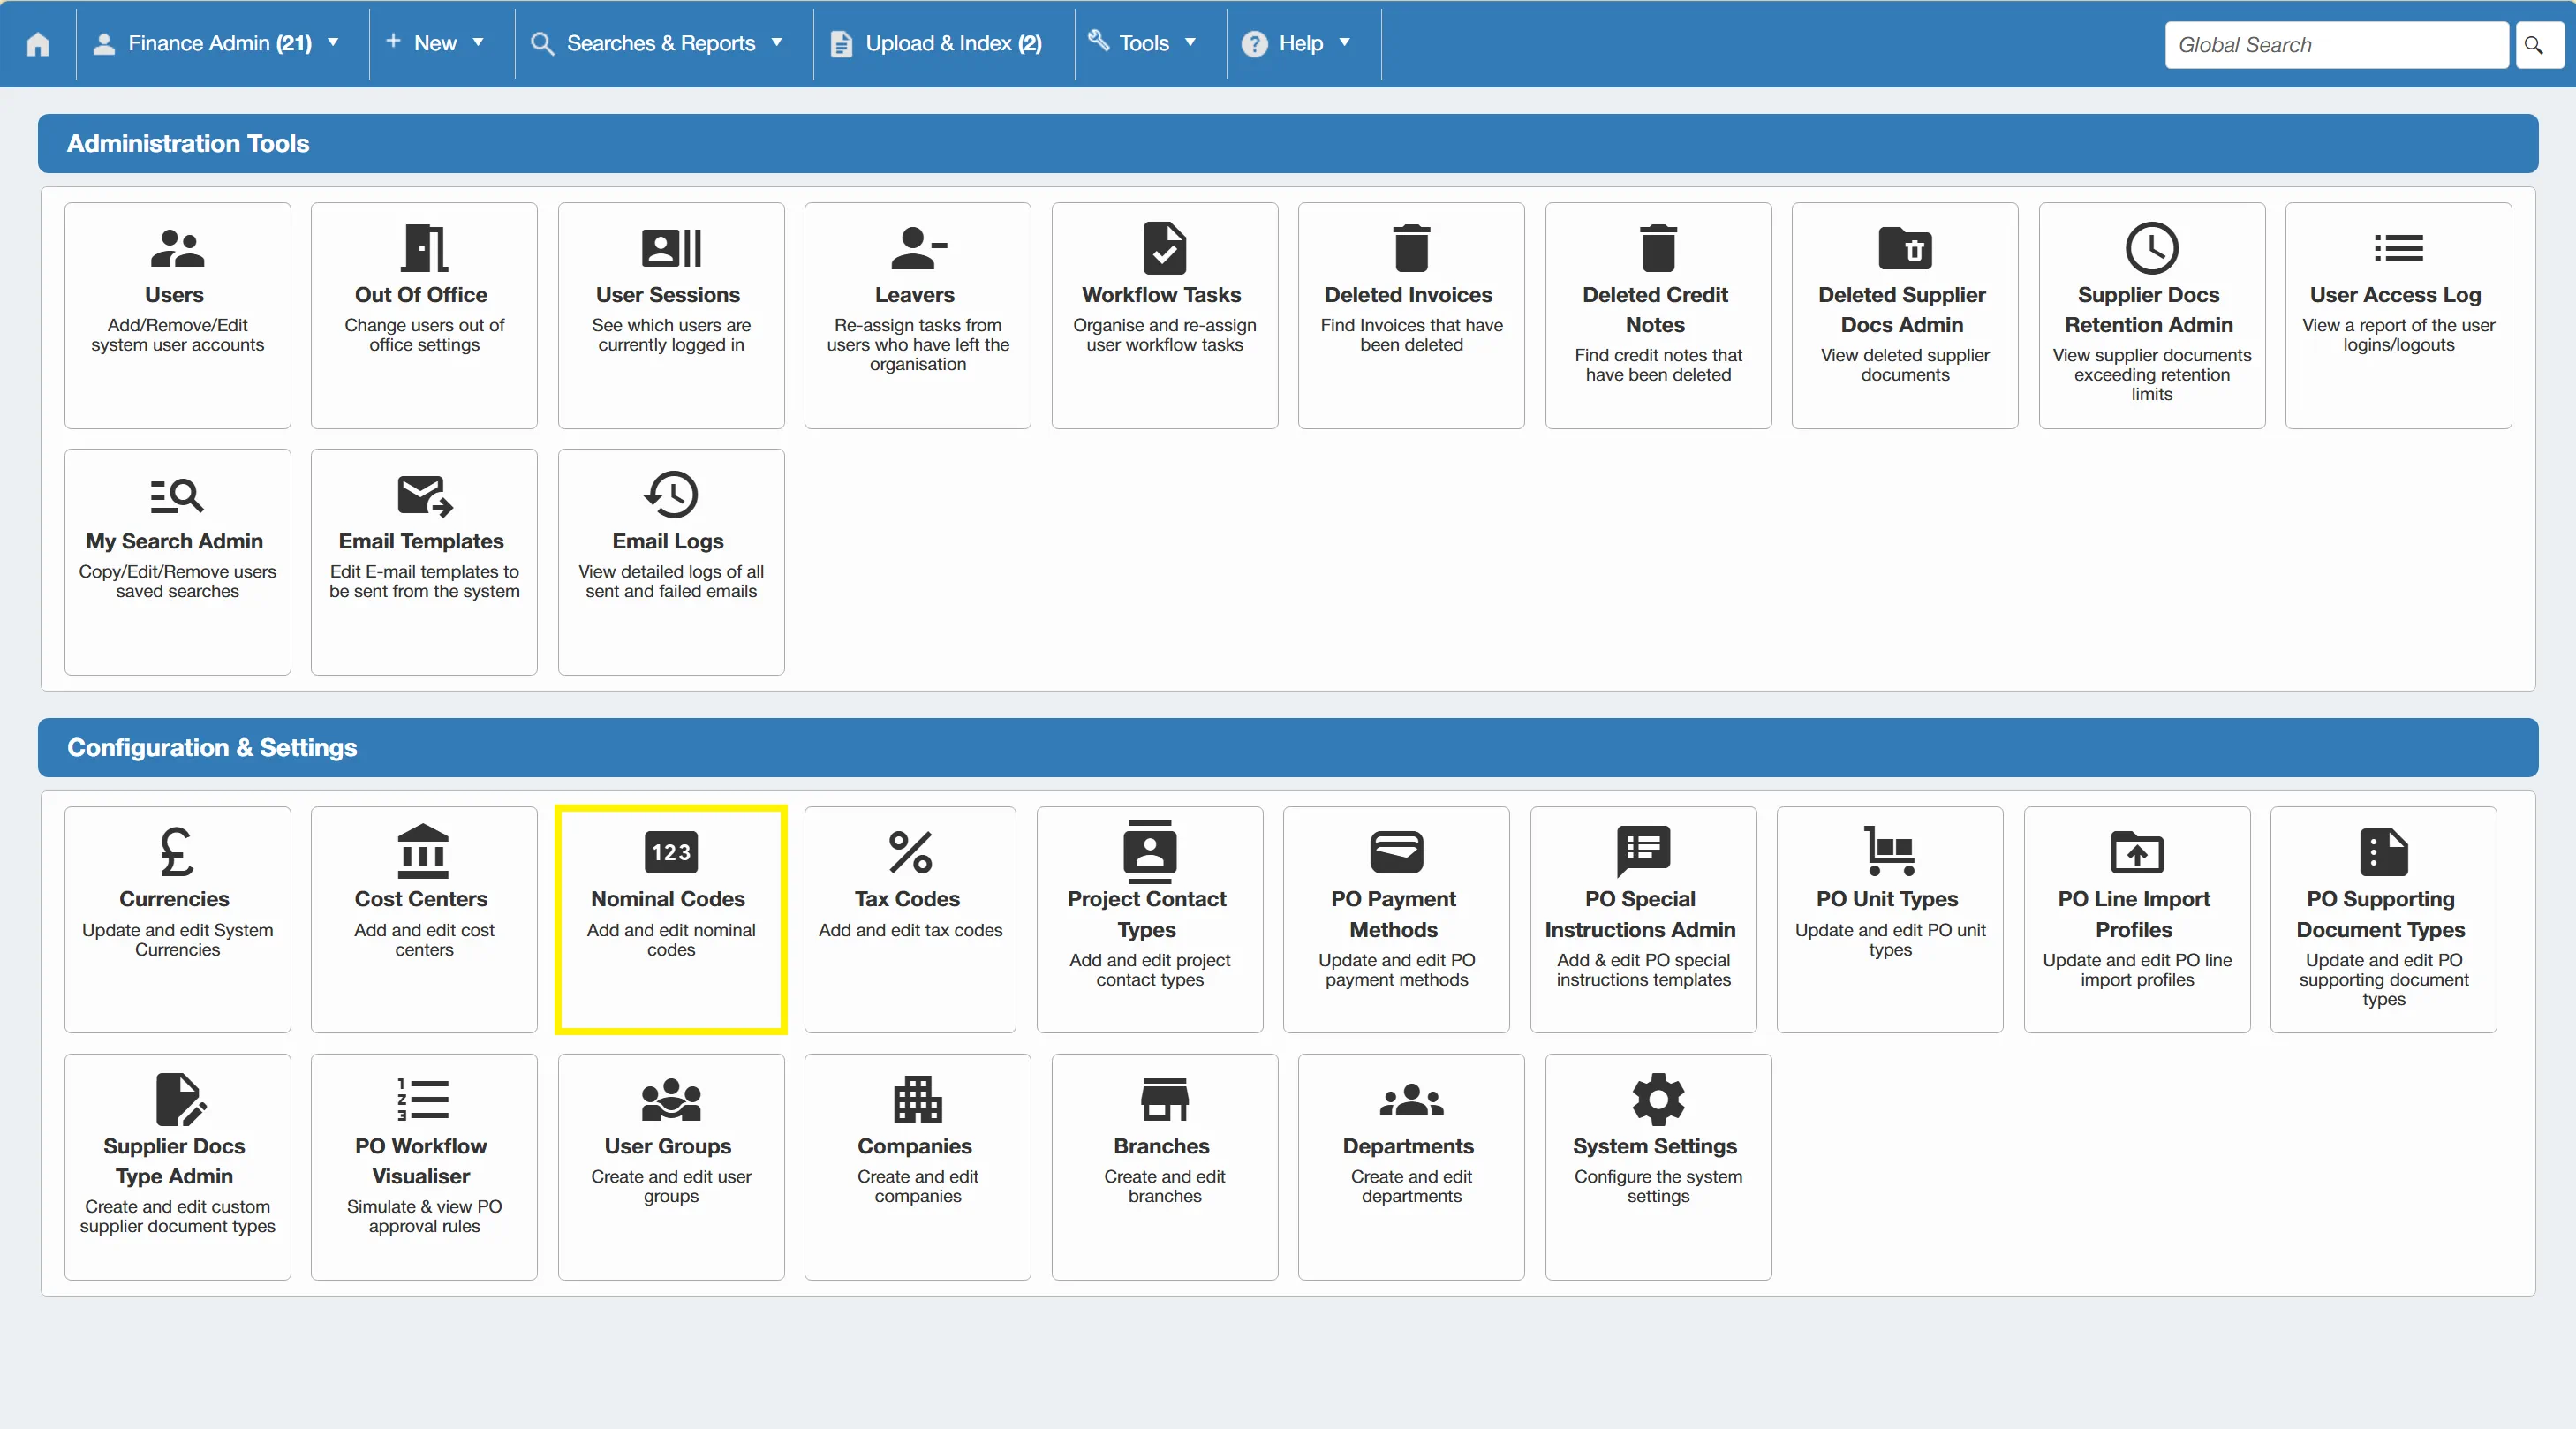
This brings you to the Nominal Code Administration grid. From here you can add new nominal codes, edit existing codes and disable them if required.
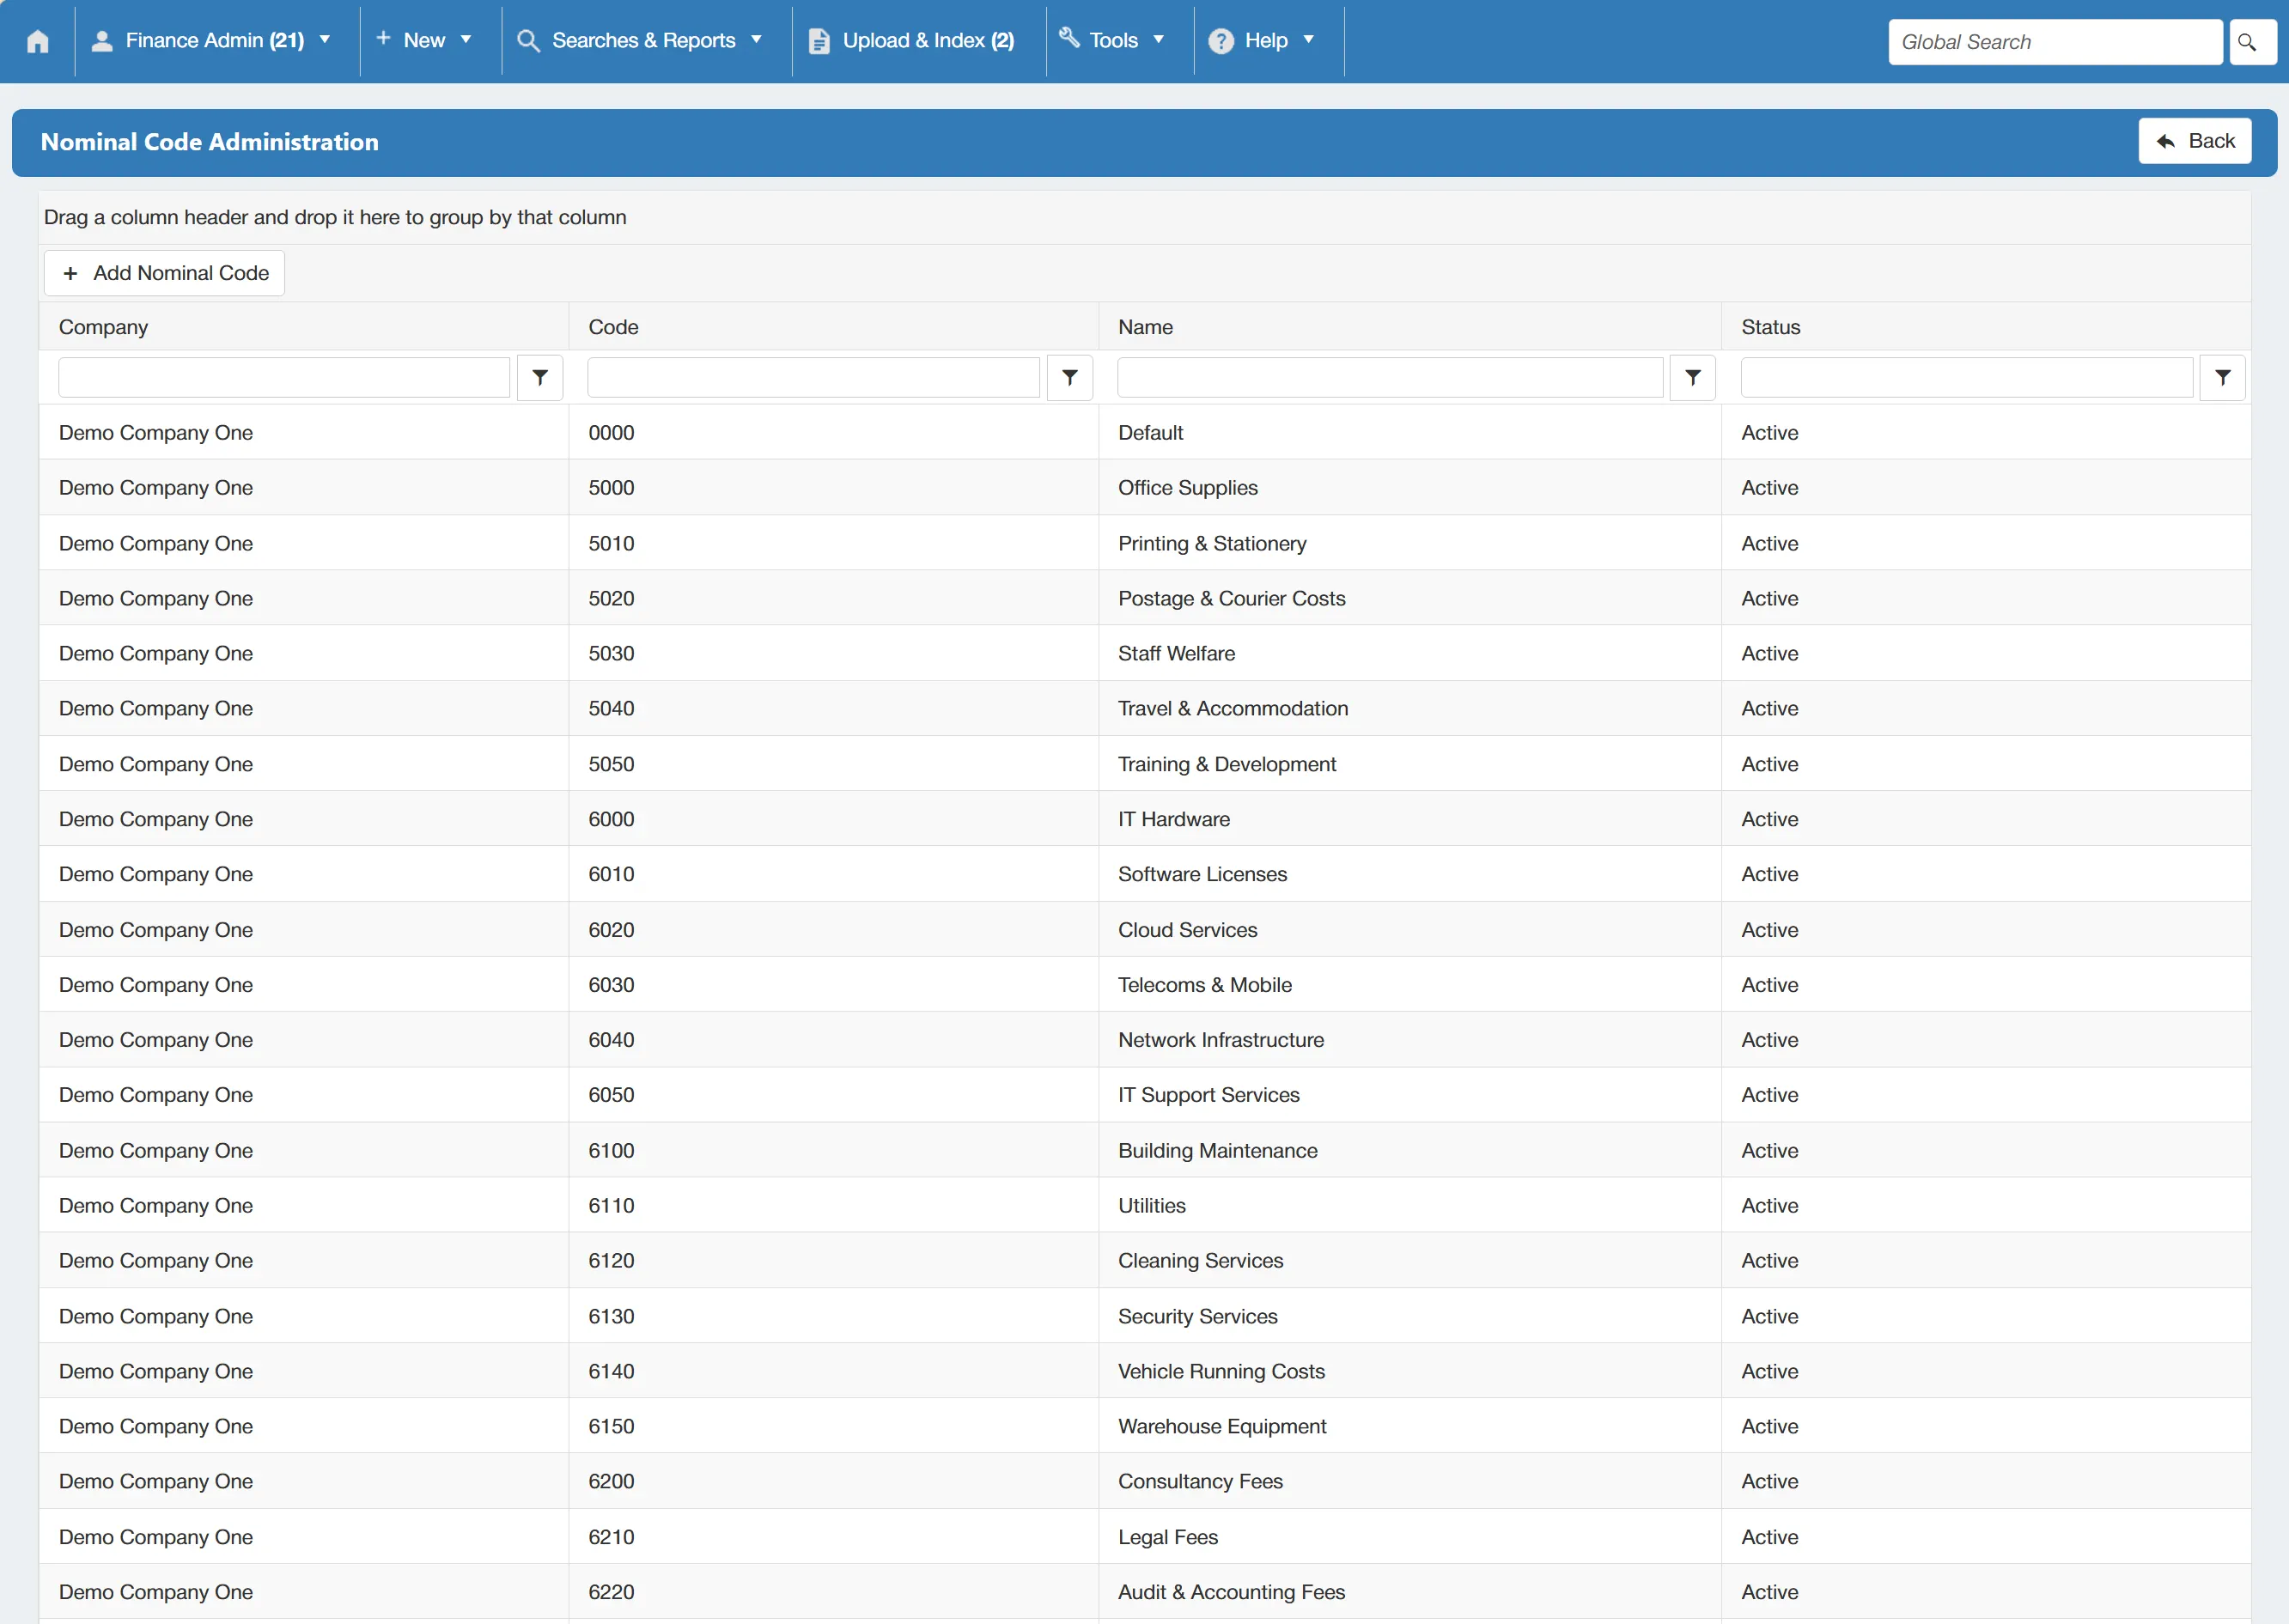
The information in the Nominal Code Administration grid can be exported in csv or excel format if required.
Adding a New Nominal Code
To add a new nominal code, simply click the button on the Nominal Code Administration grid.
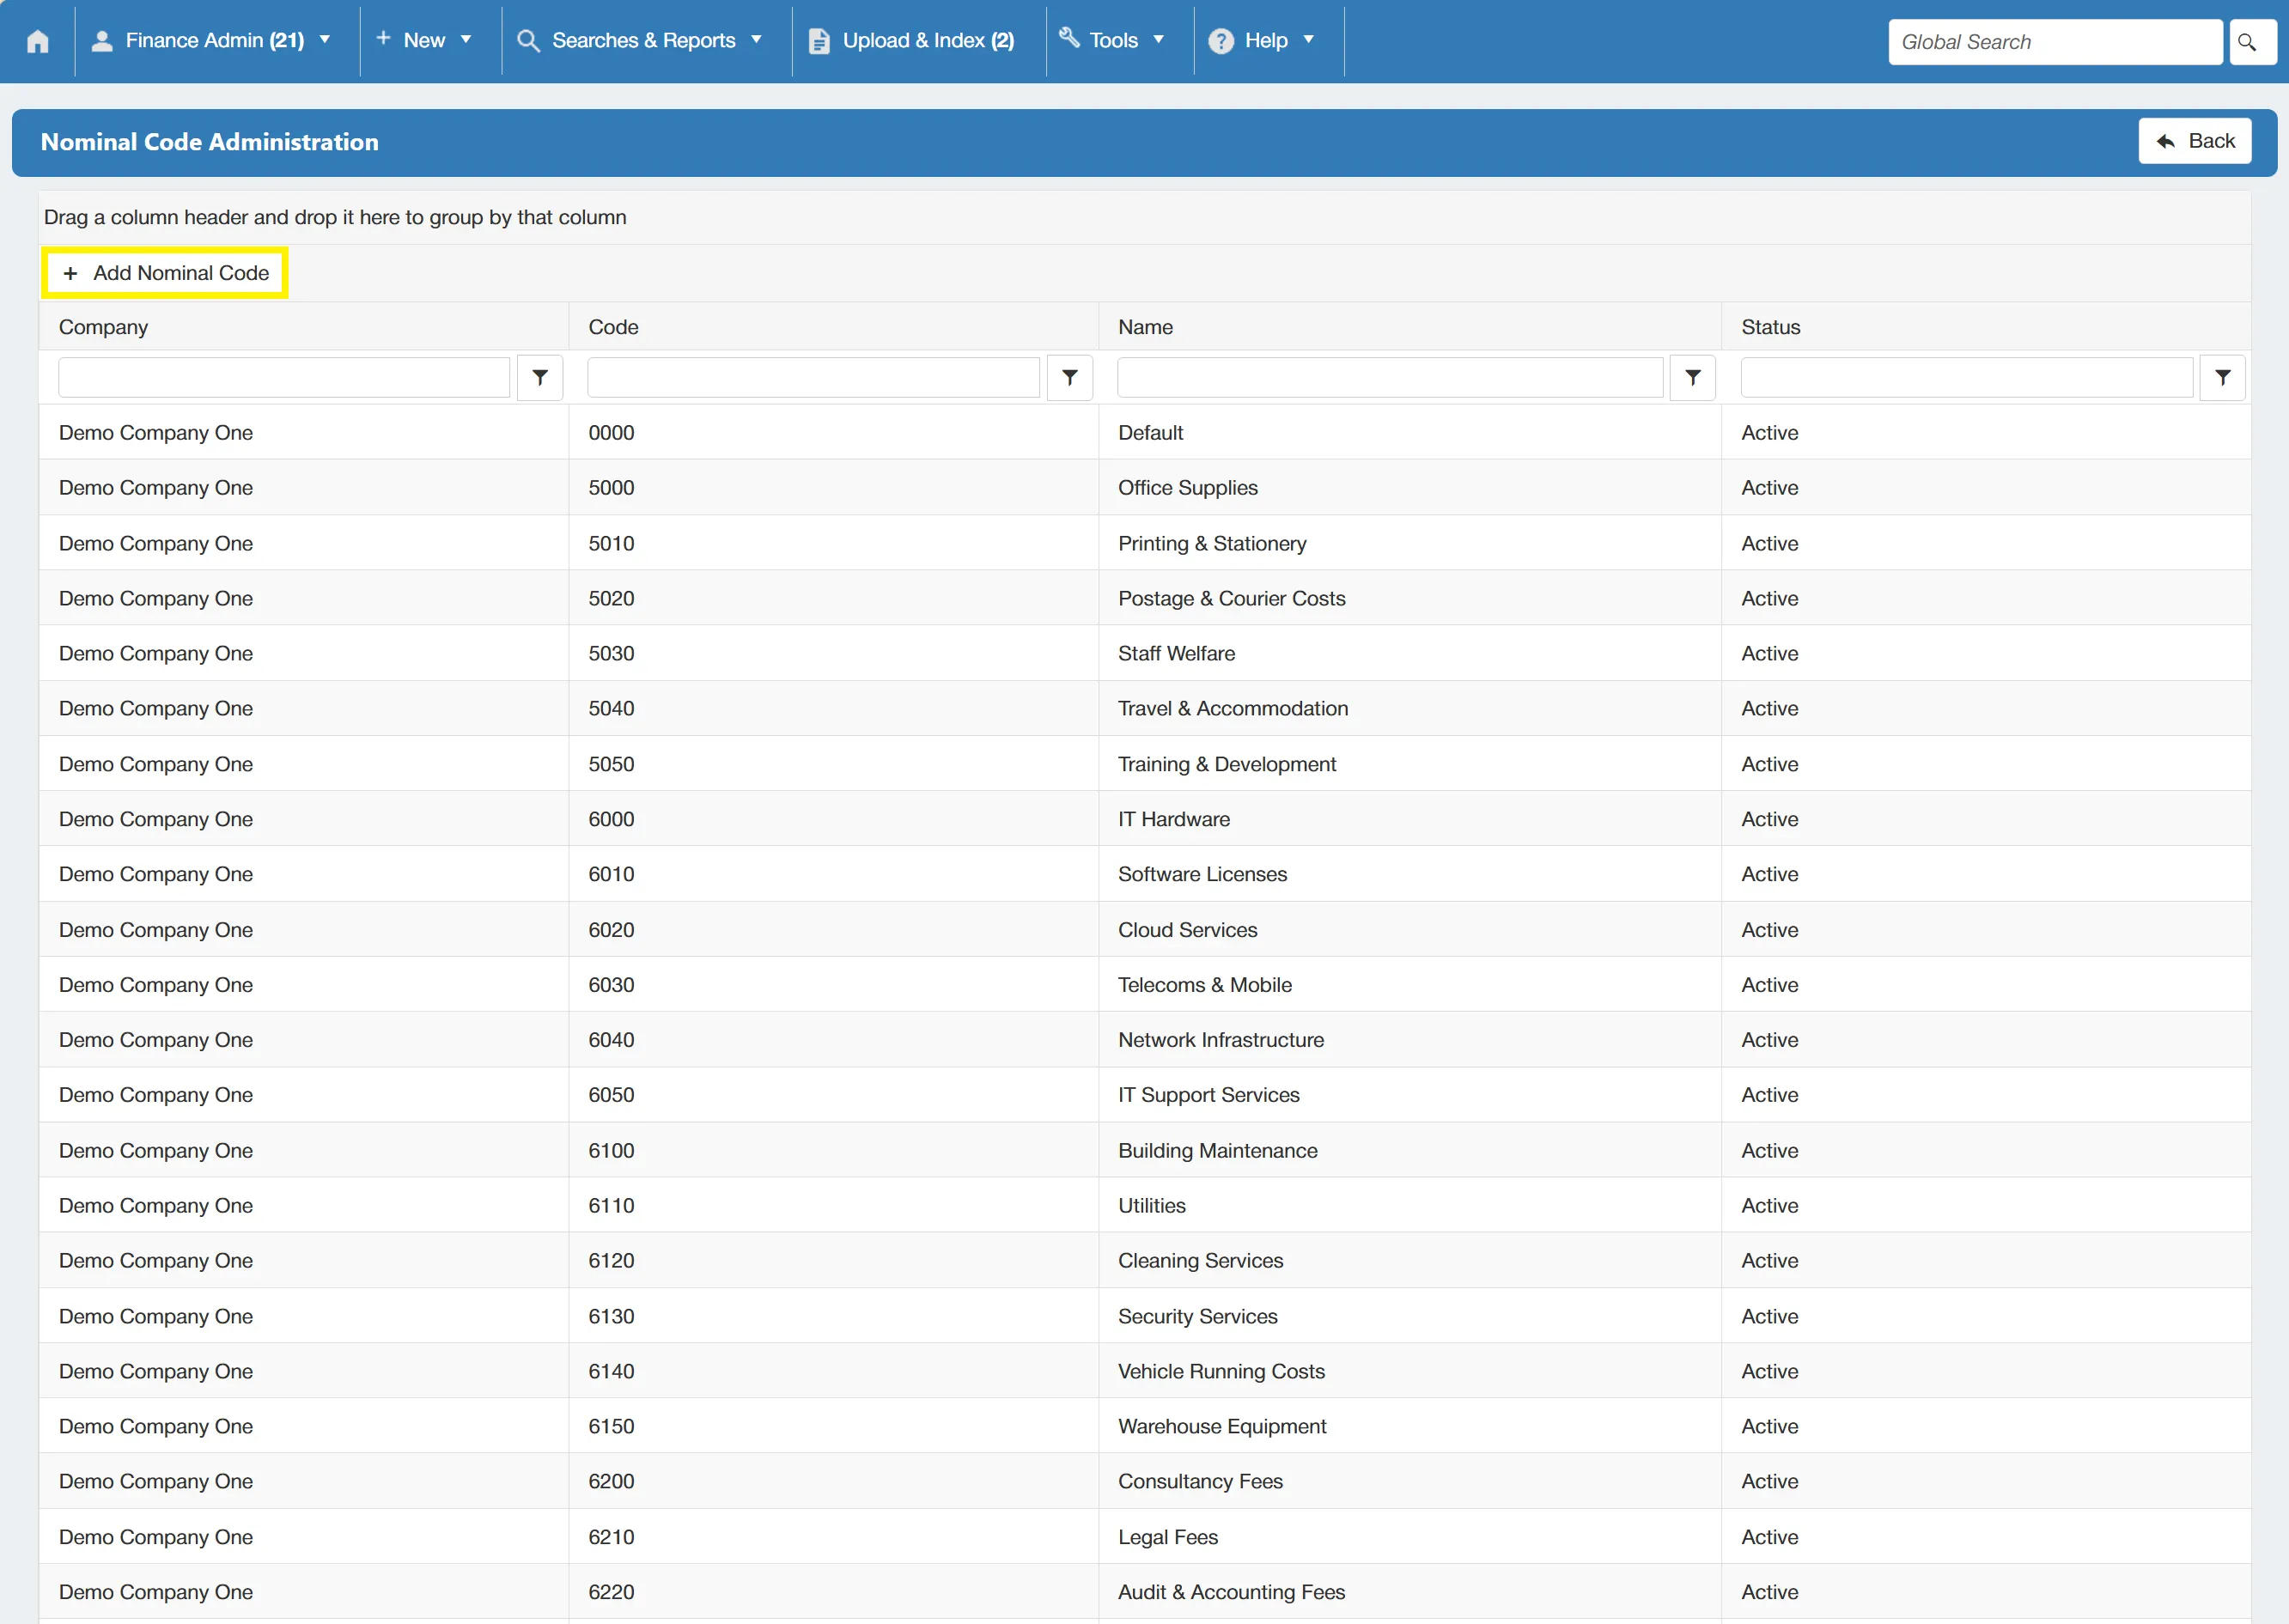
This opens a new window in which you can add the desired code and name details.
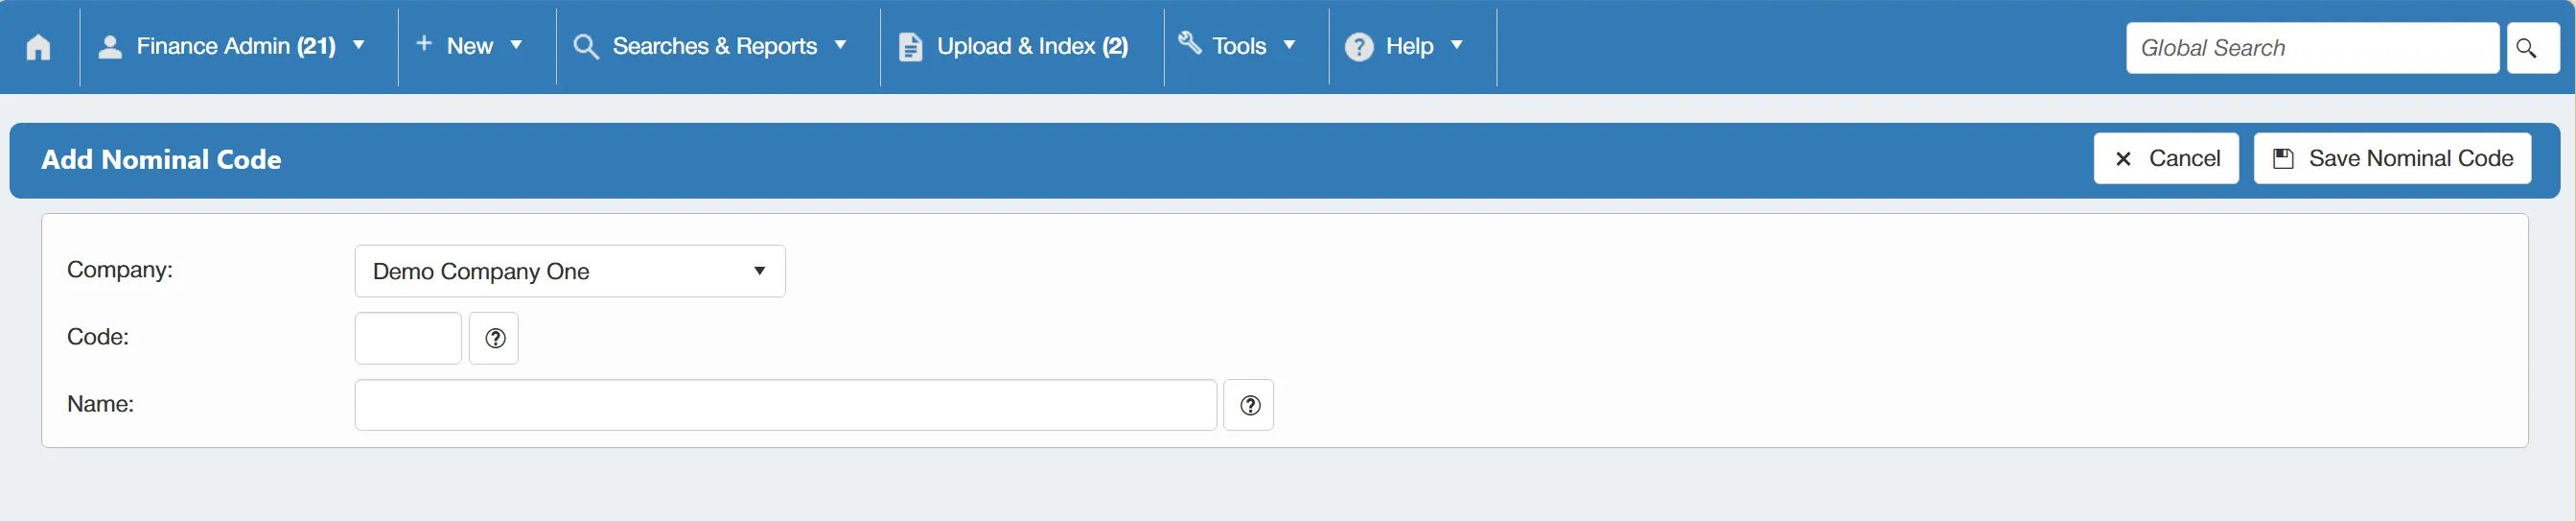
Once you have filled in the details, click to commit this to the system.
Editing an Existing Nominal Code
To edit an existing nominal code, select the relevant code from the Nominal Code Administration grid. This opens up the Nominal Code view window. From here, you can select from the drop down menu.
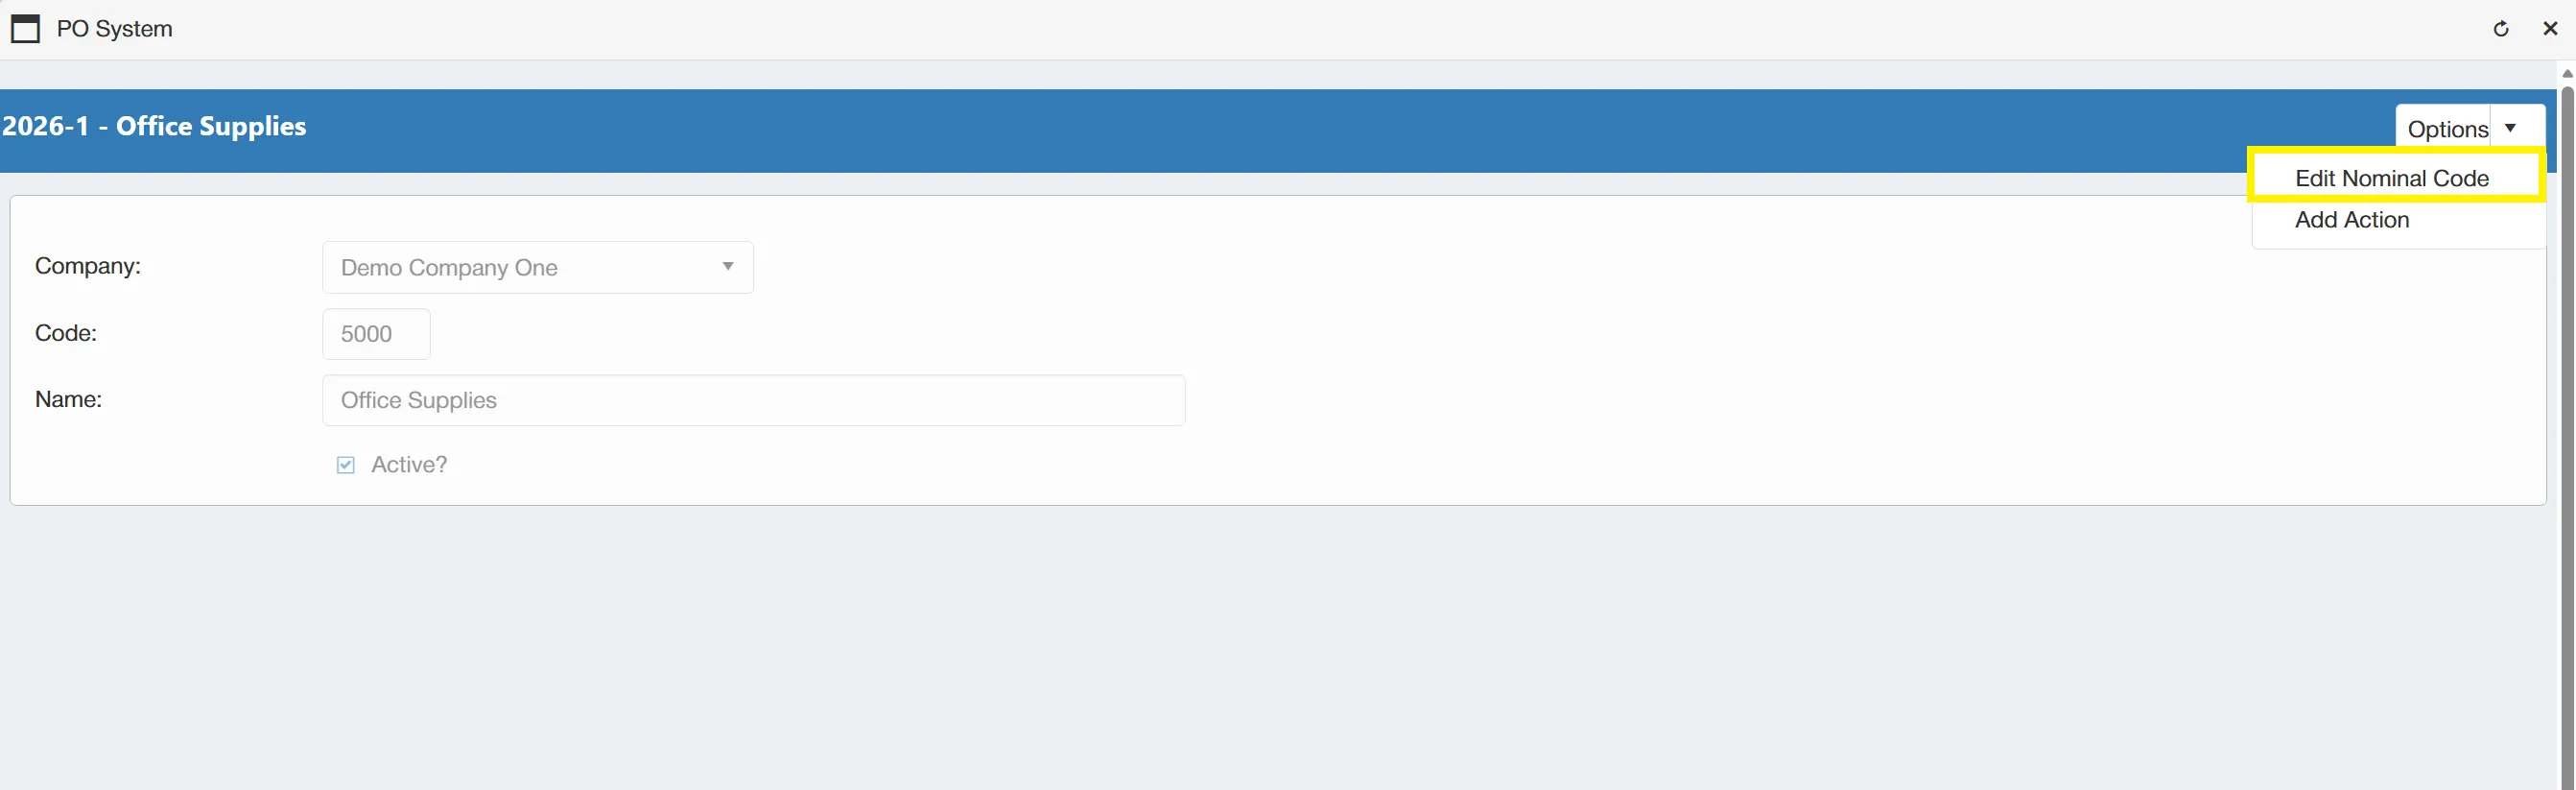
With enabled, you can now change the nominal code name and code.
You cannot edit the code itself if it has already been used within the system.
You also cannot delete the nominal code if it has been previously used. You can instead disable the code to prevent it being used. For more information please see the Disabling a Nominal Code section.
Once you are happy with the changes, click to commit the changes.
Disabling a Nominal Code
If a nominal code is no longer required, you can disable it within the system. To do this, select the relevant cost center from the Nominal Code Administration grid. Then, select as before. You can then un-tick the ☐ Active? box to disable the nominal code.
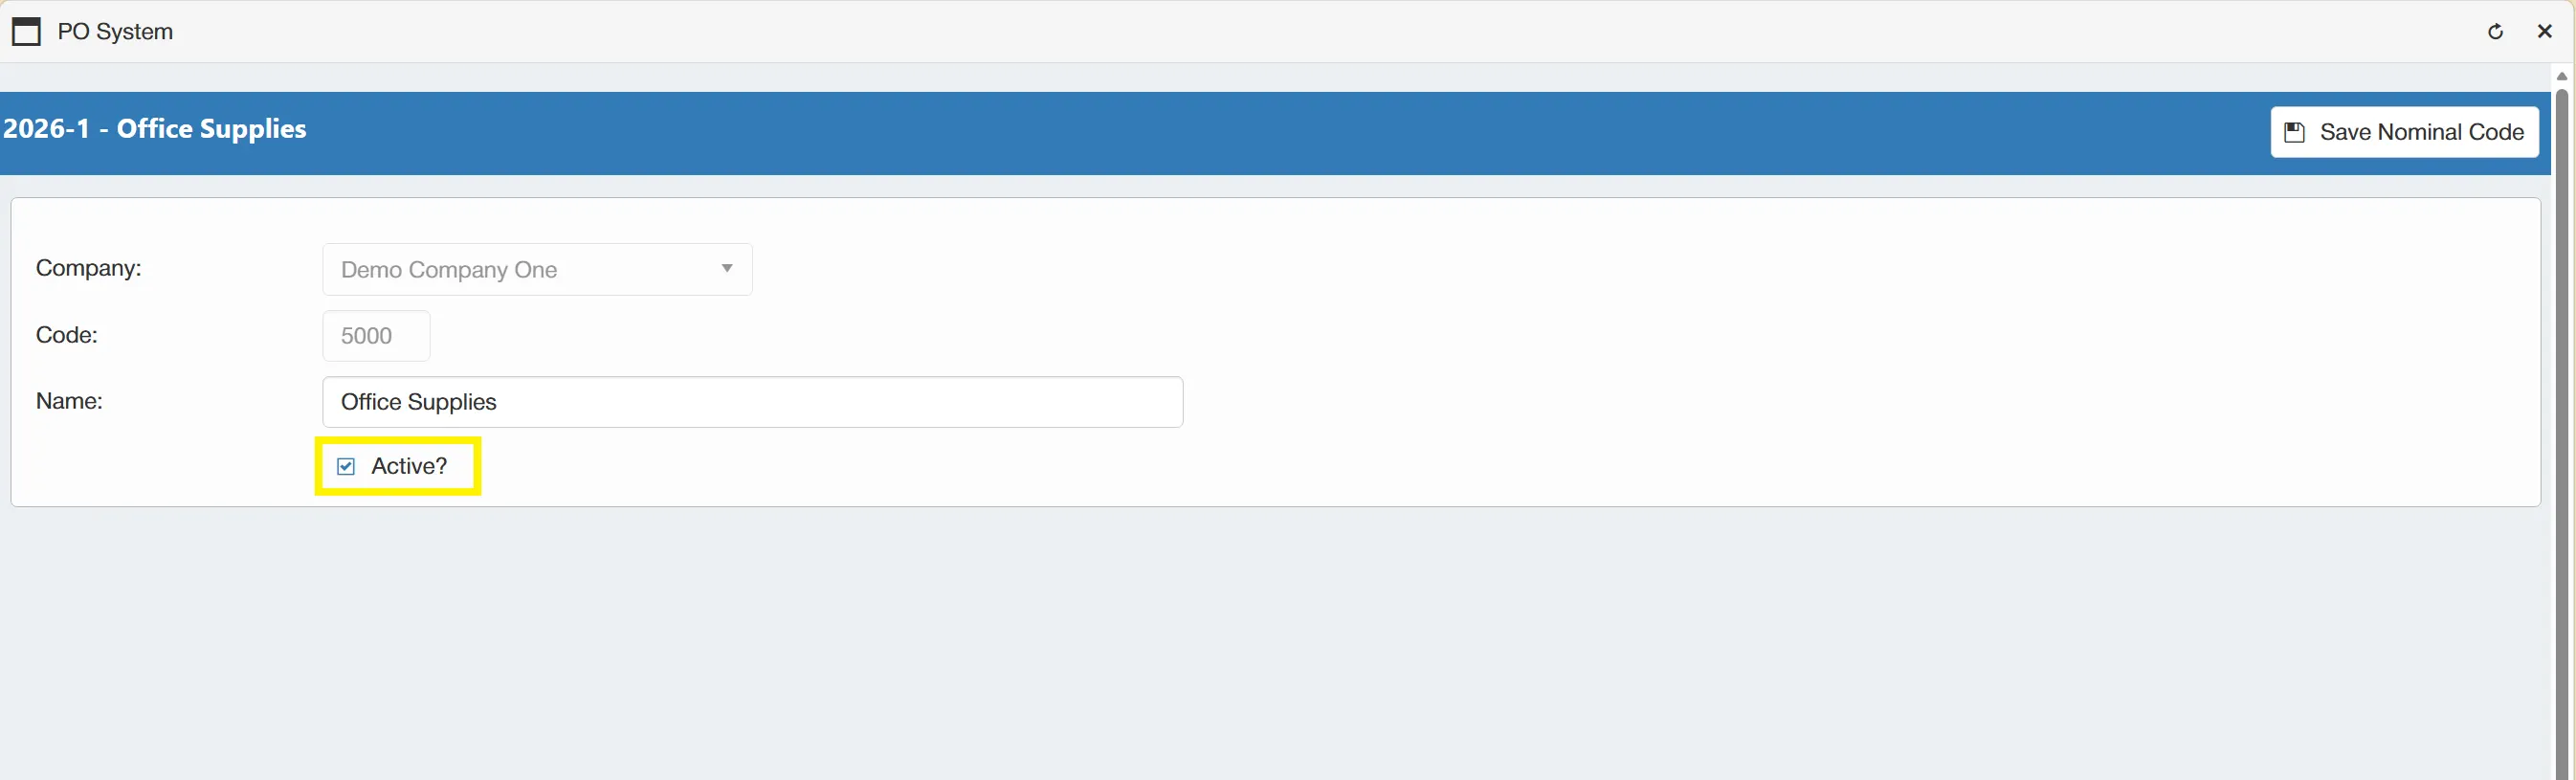
You are not able to completely delete a nominal code if it has already been used against a PO. You would instead need to disable the nominal code instead as this ensures that it cannot be used again whilst retaining details within the system for audit purposes.
Tax Codes
Tax code settings allow you to add new tax codes, edit existing ones and disable un-required codes. This allows you to handle a wide variety of tax scenarios with regards to procurement.
Users must have the System Admin permission enabled to access this feauture. For information on user permissions, click here.
You can configure Tax Codes by selecting the Tax Codes icon from the Configuration & Settings section.
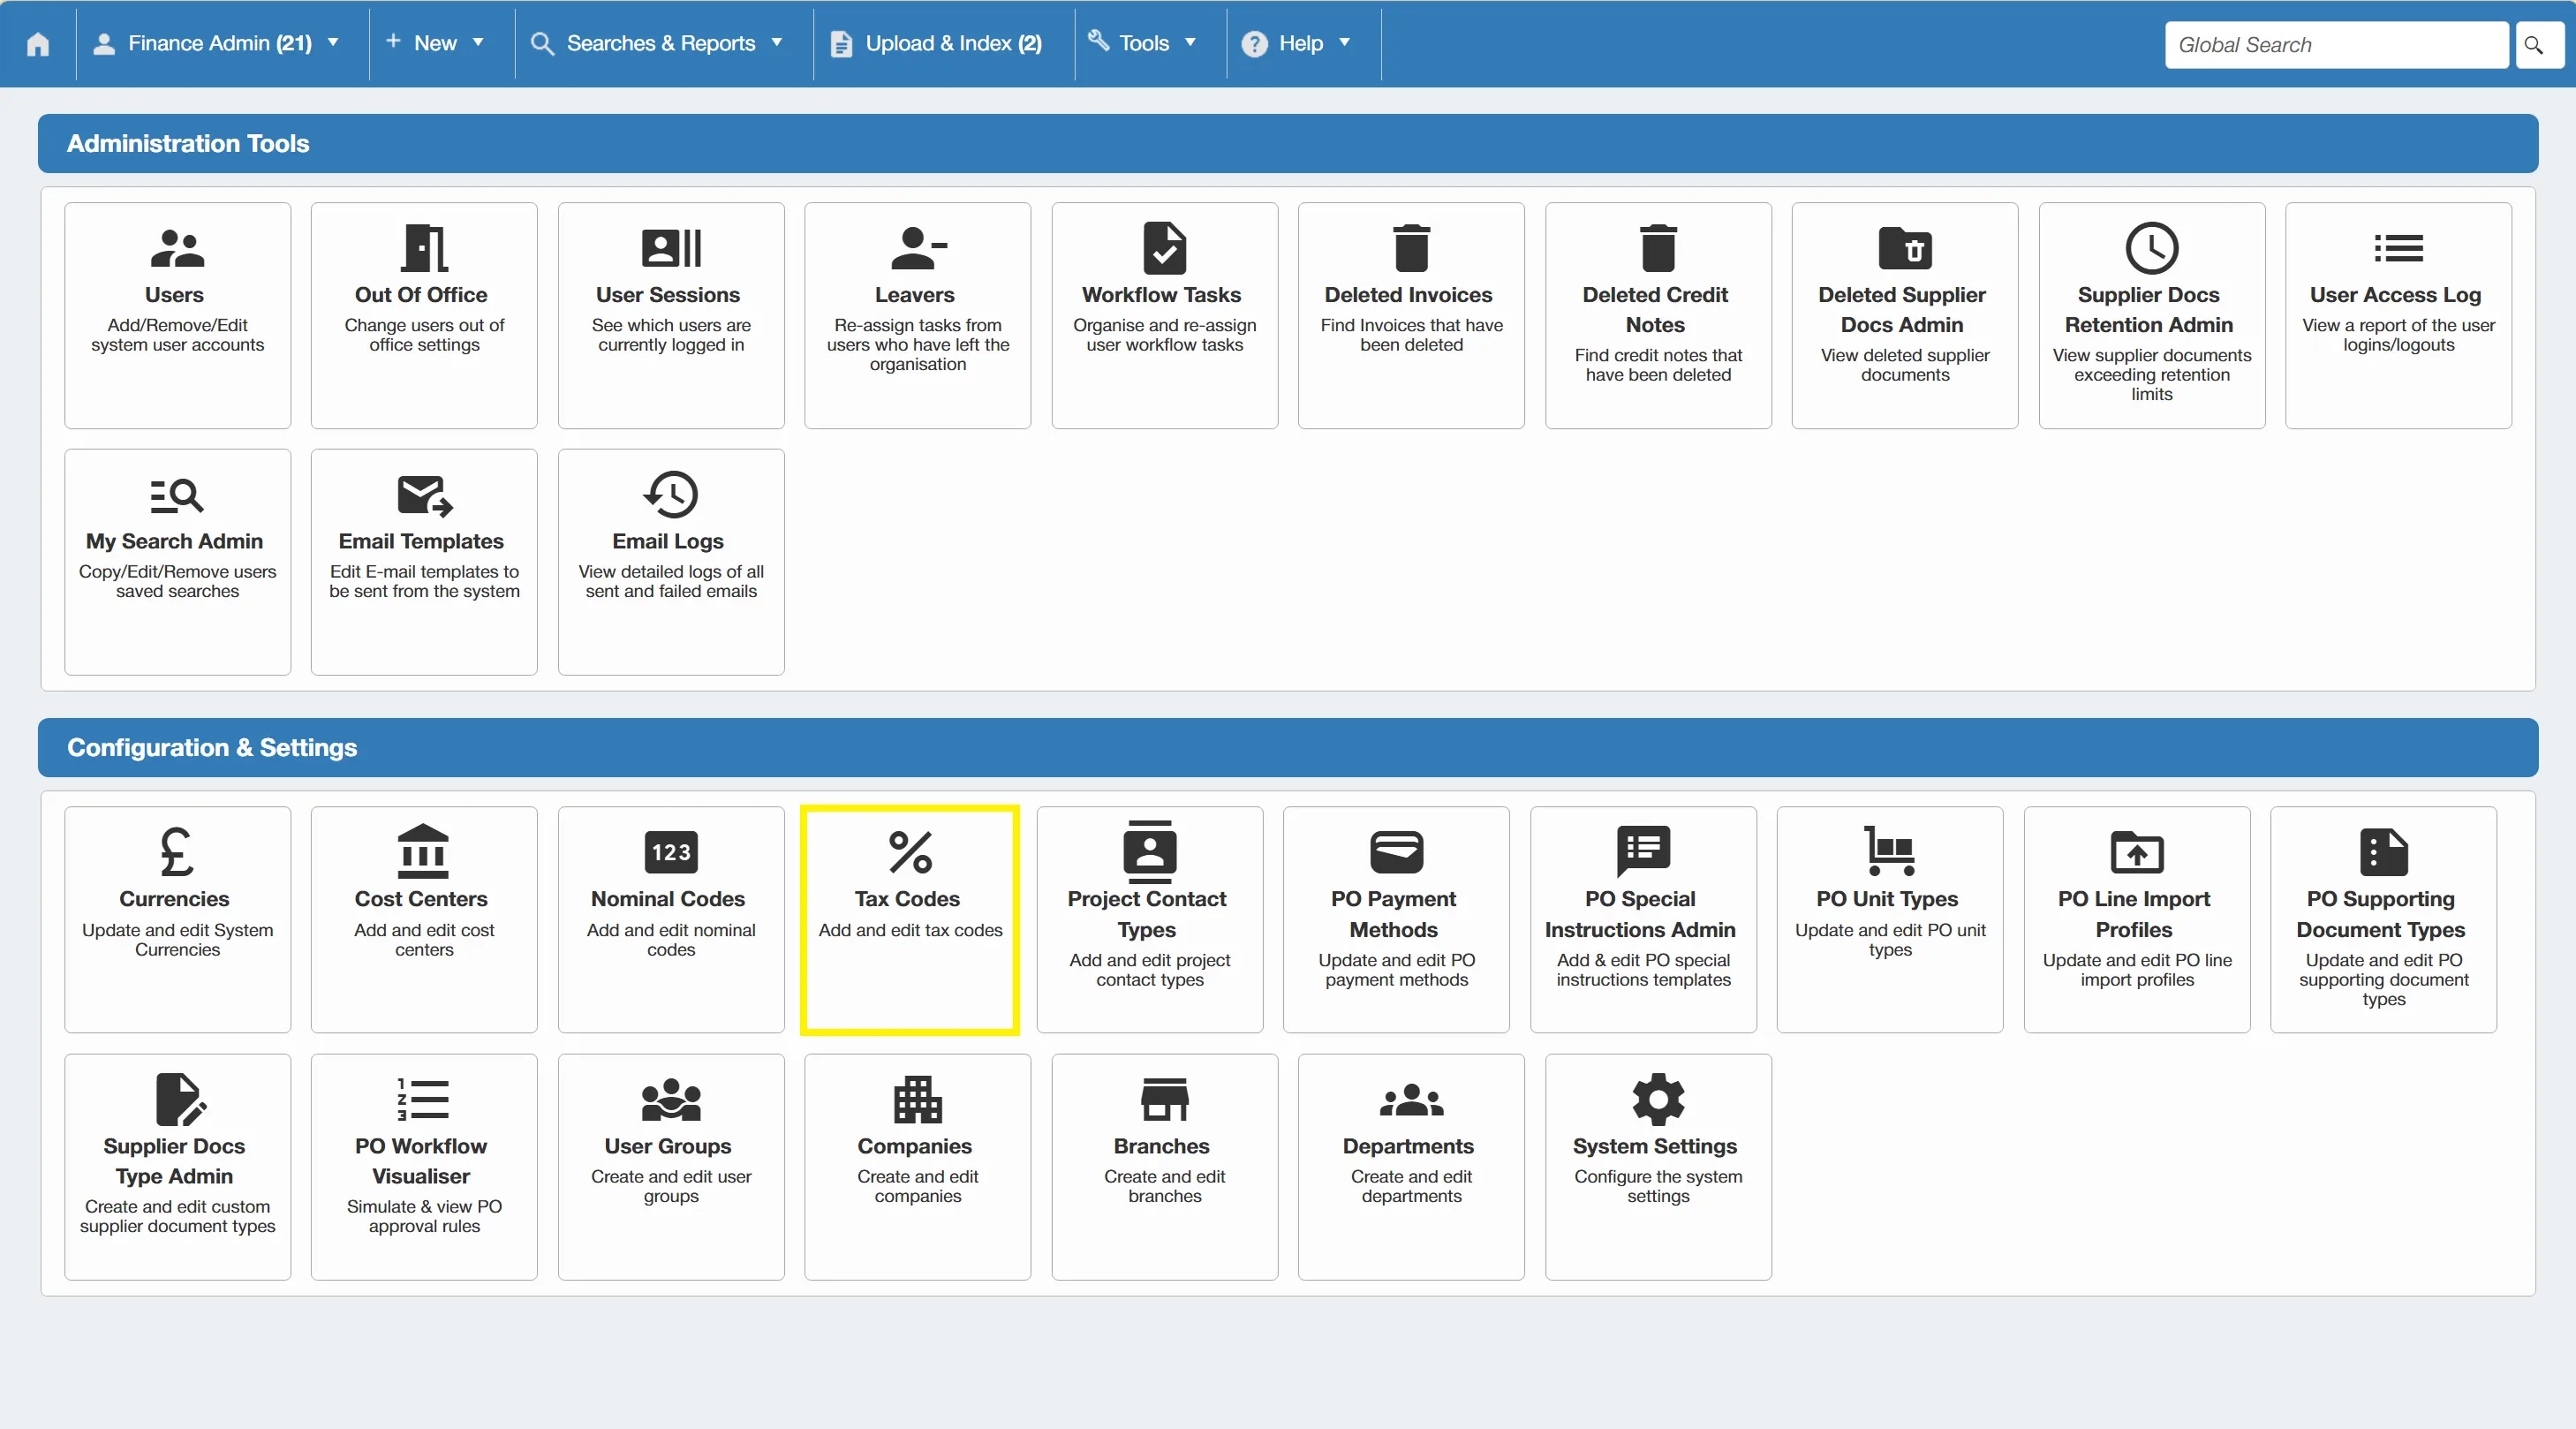
This brings you to the Tax Codes Administration grid. From here you can edit existing Tax Codes and add new ones.
Adding a New Tax Code
To add a new tax code, click the button on the Tax Codes Administration grid.
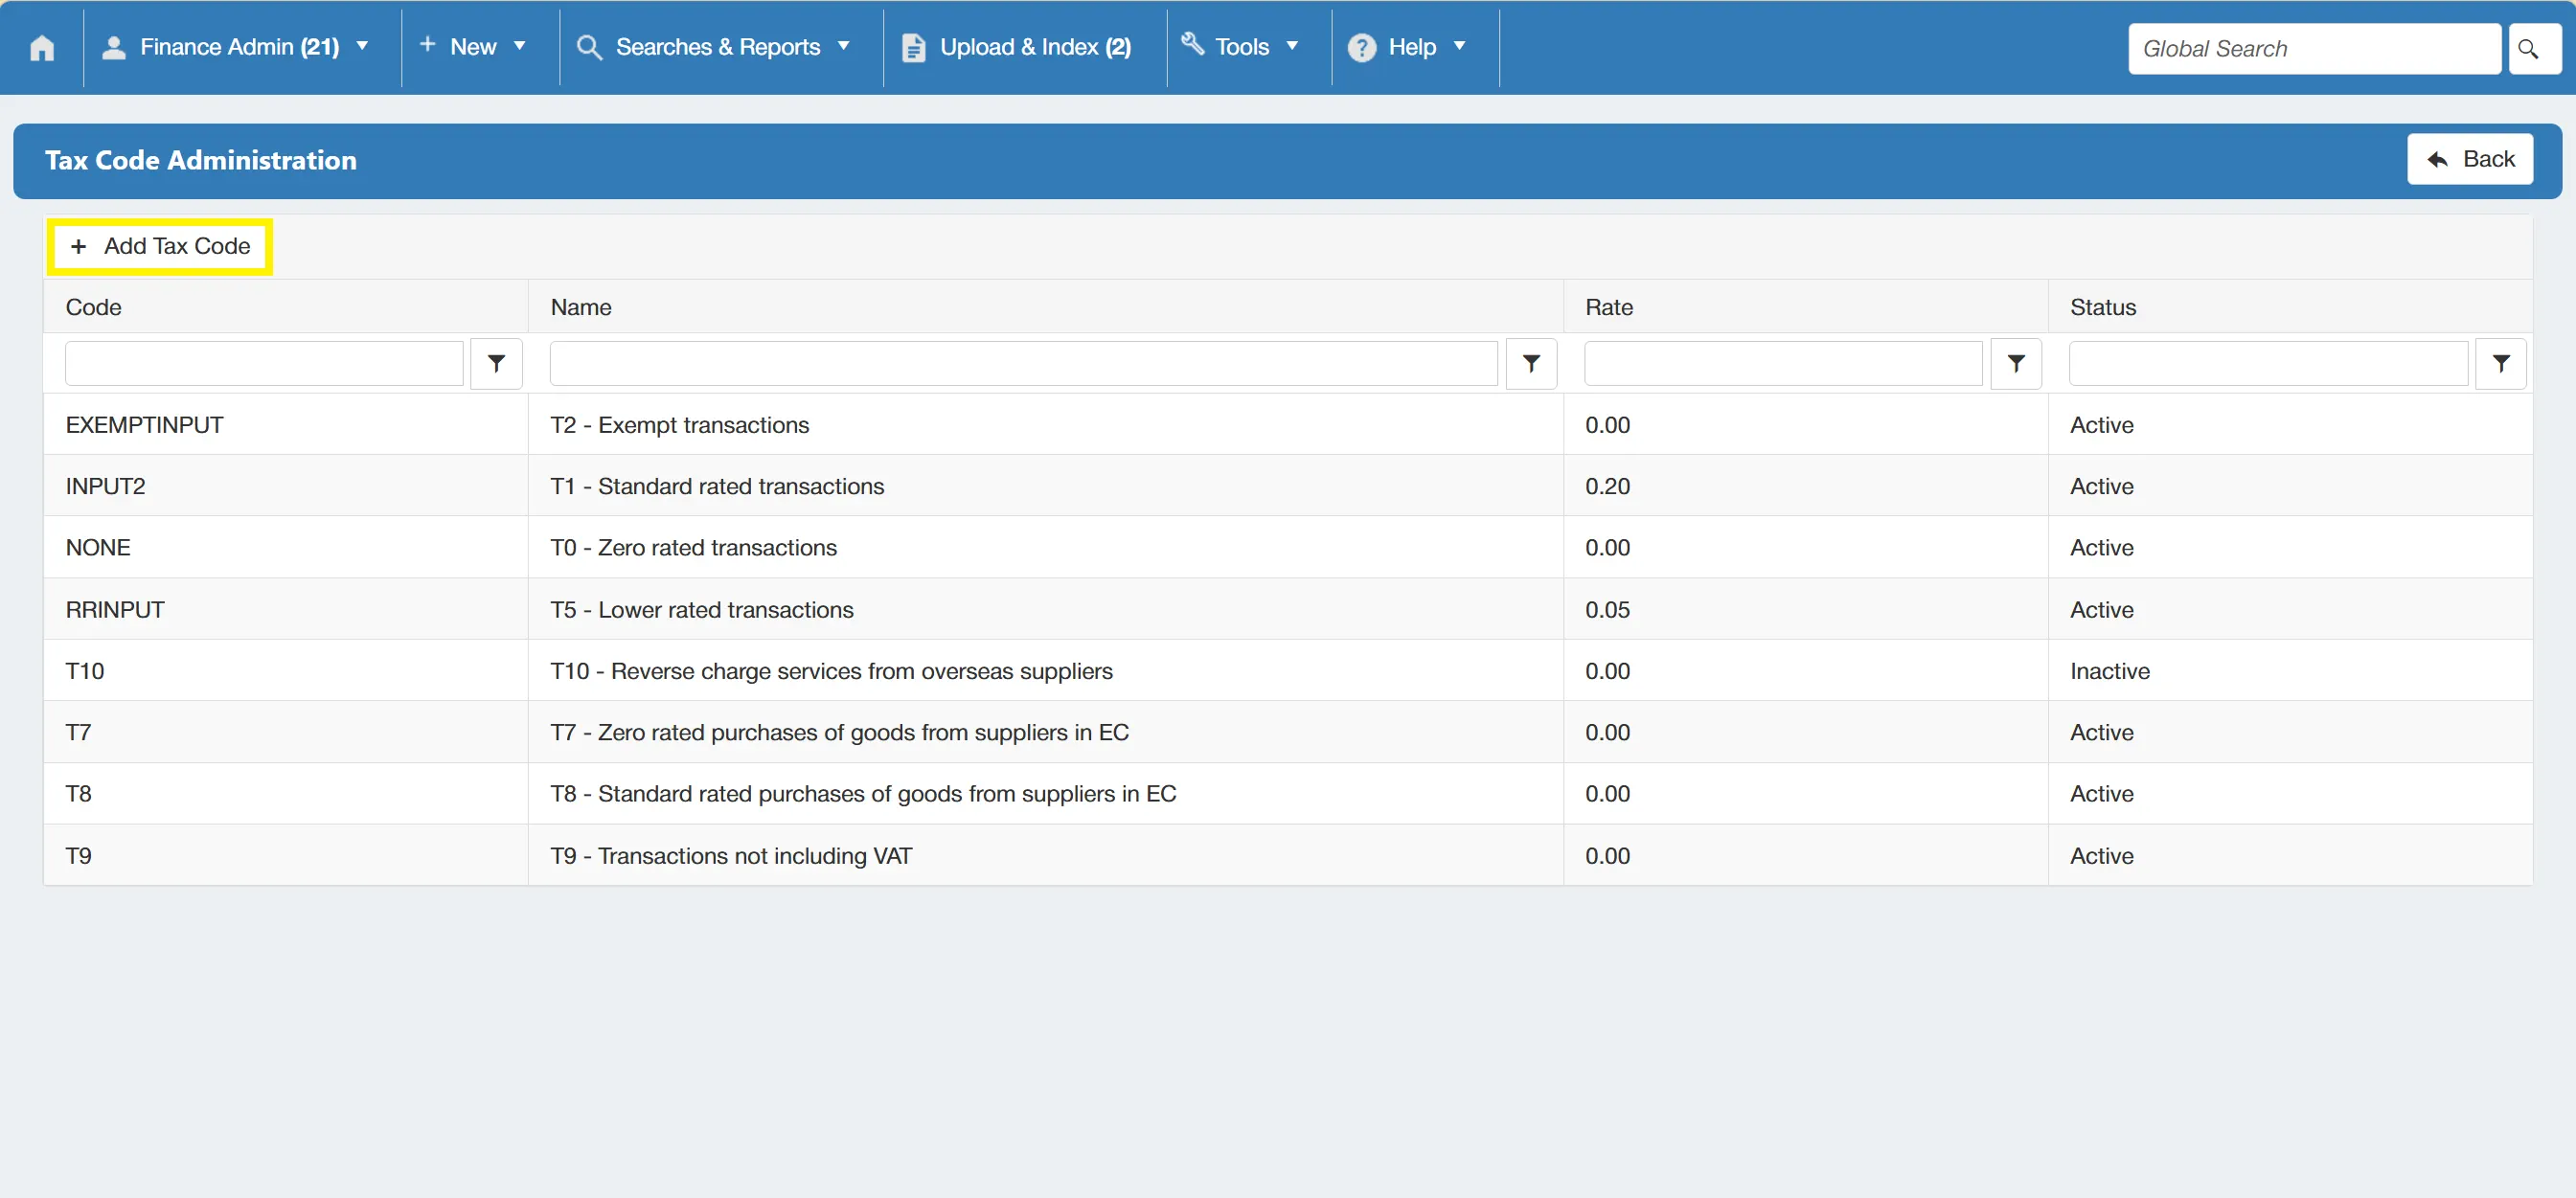
This opens a new window which prompts you to fill out the required details such as Name, Code and Rate.
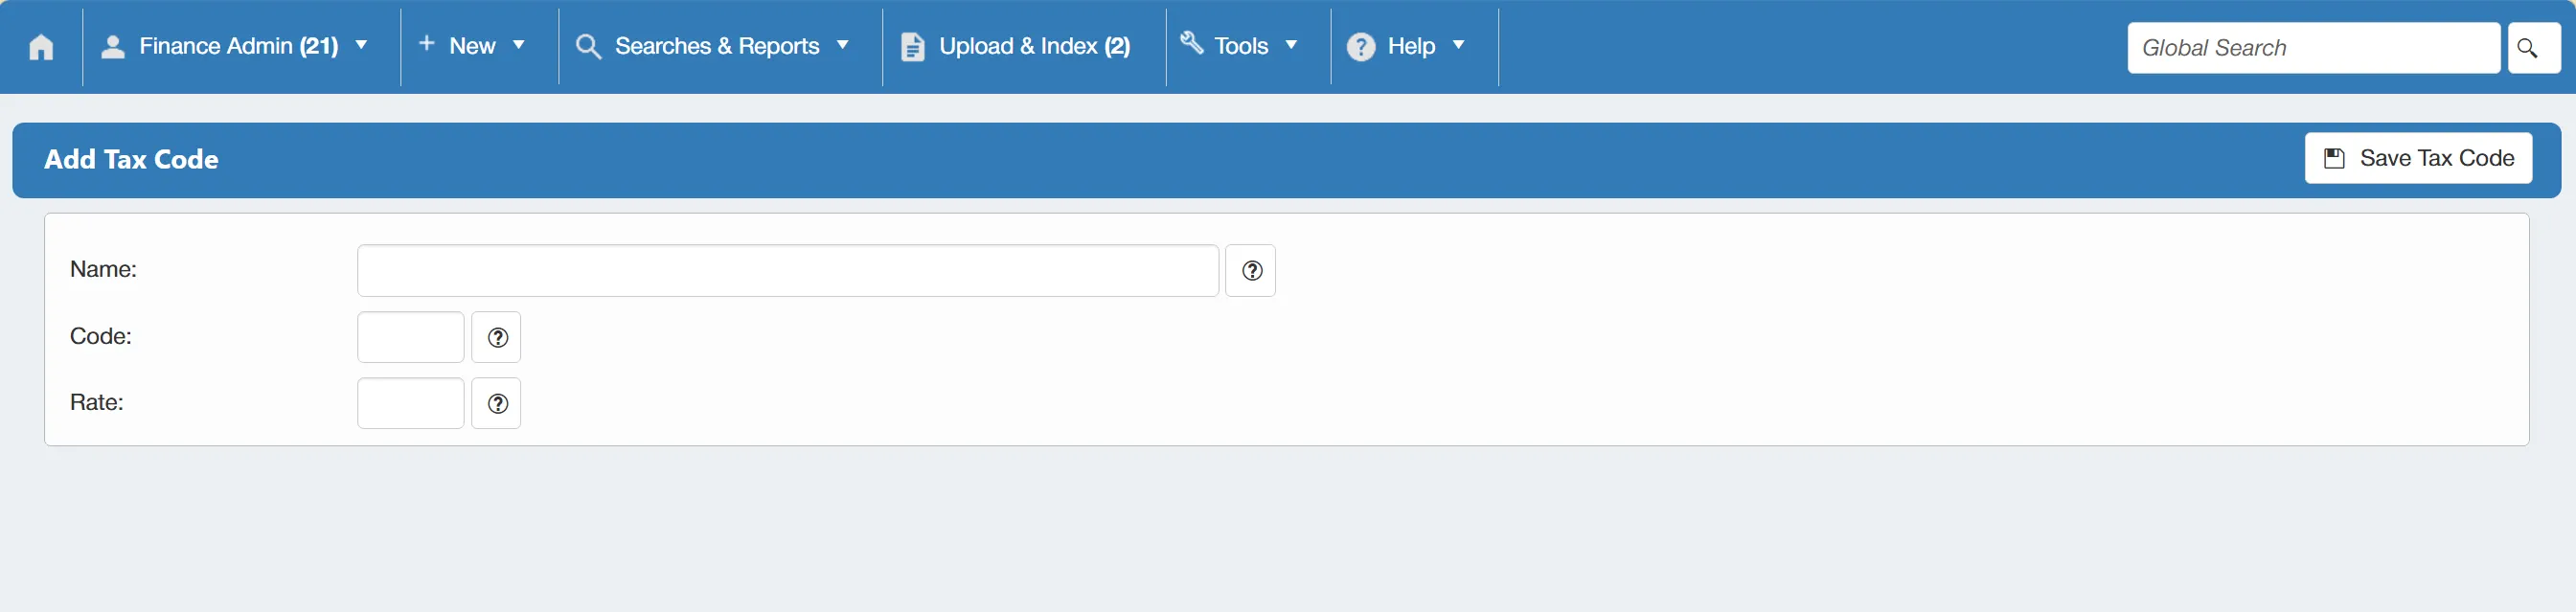
Once you have filled in the details, click to finalise.
Editing an Existing Tax Code
To edit an existing tax code, you must first select it from the Tax Code Administration grid. This opens a new window showing the tax code's details. Next, select from the drop down menu.
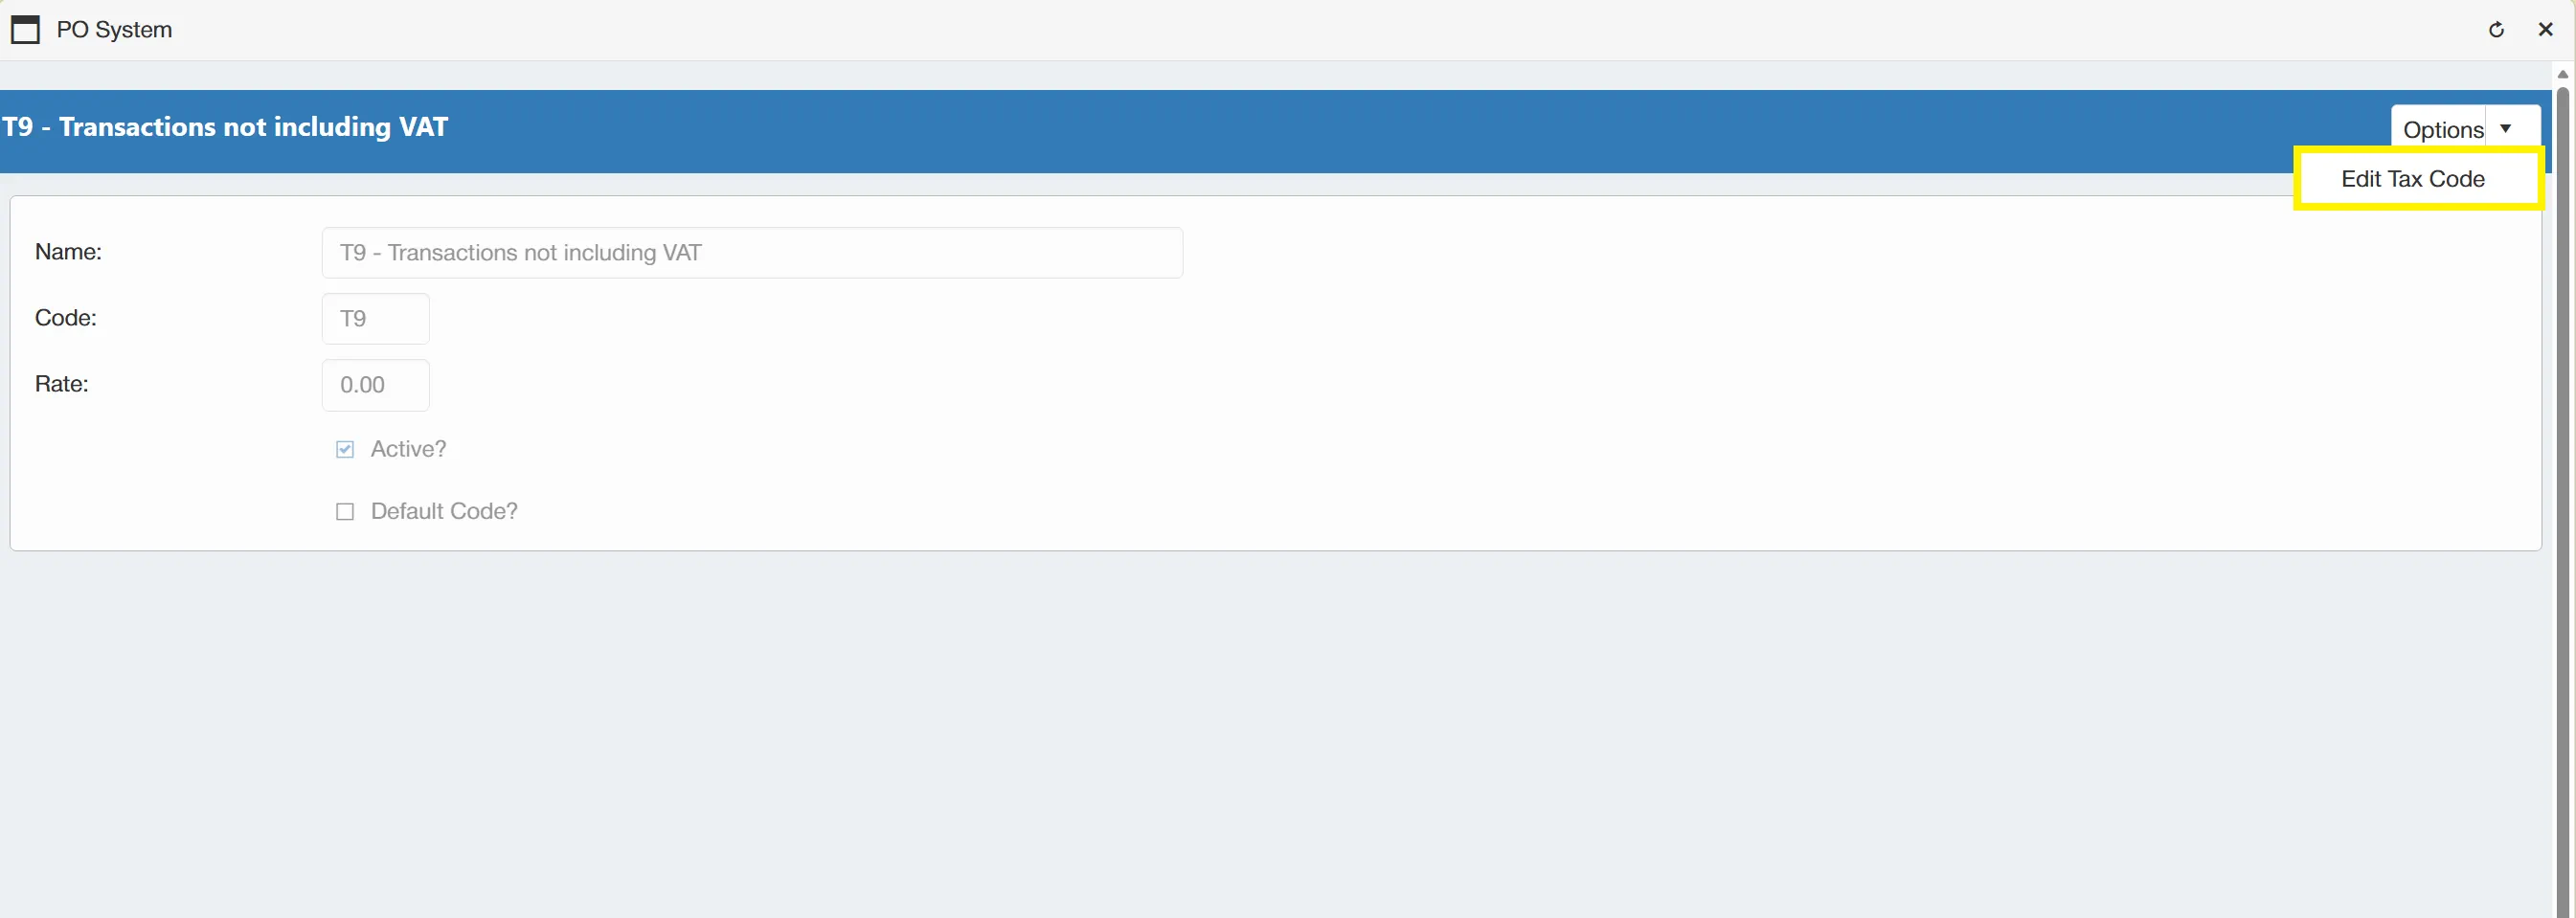
With enabled, you can now change the Name, Code and Rate fields.
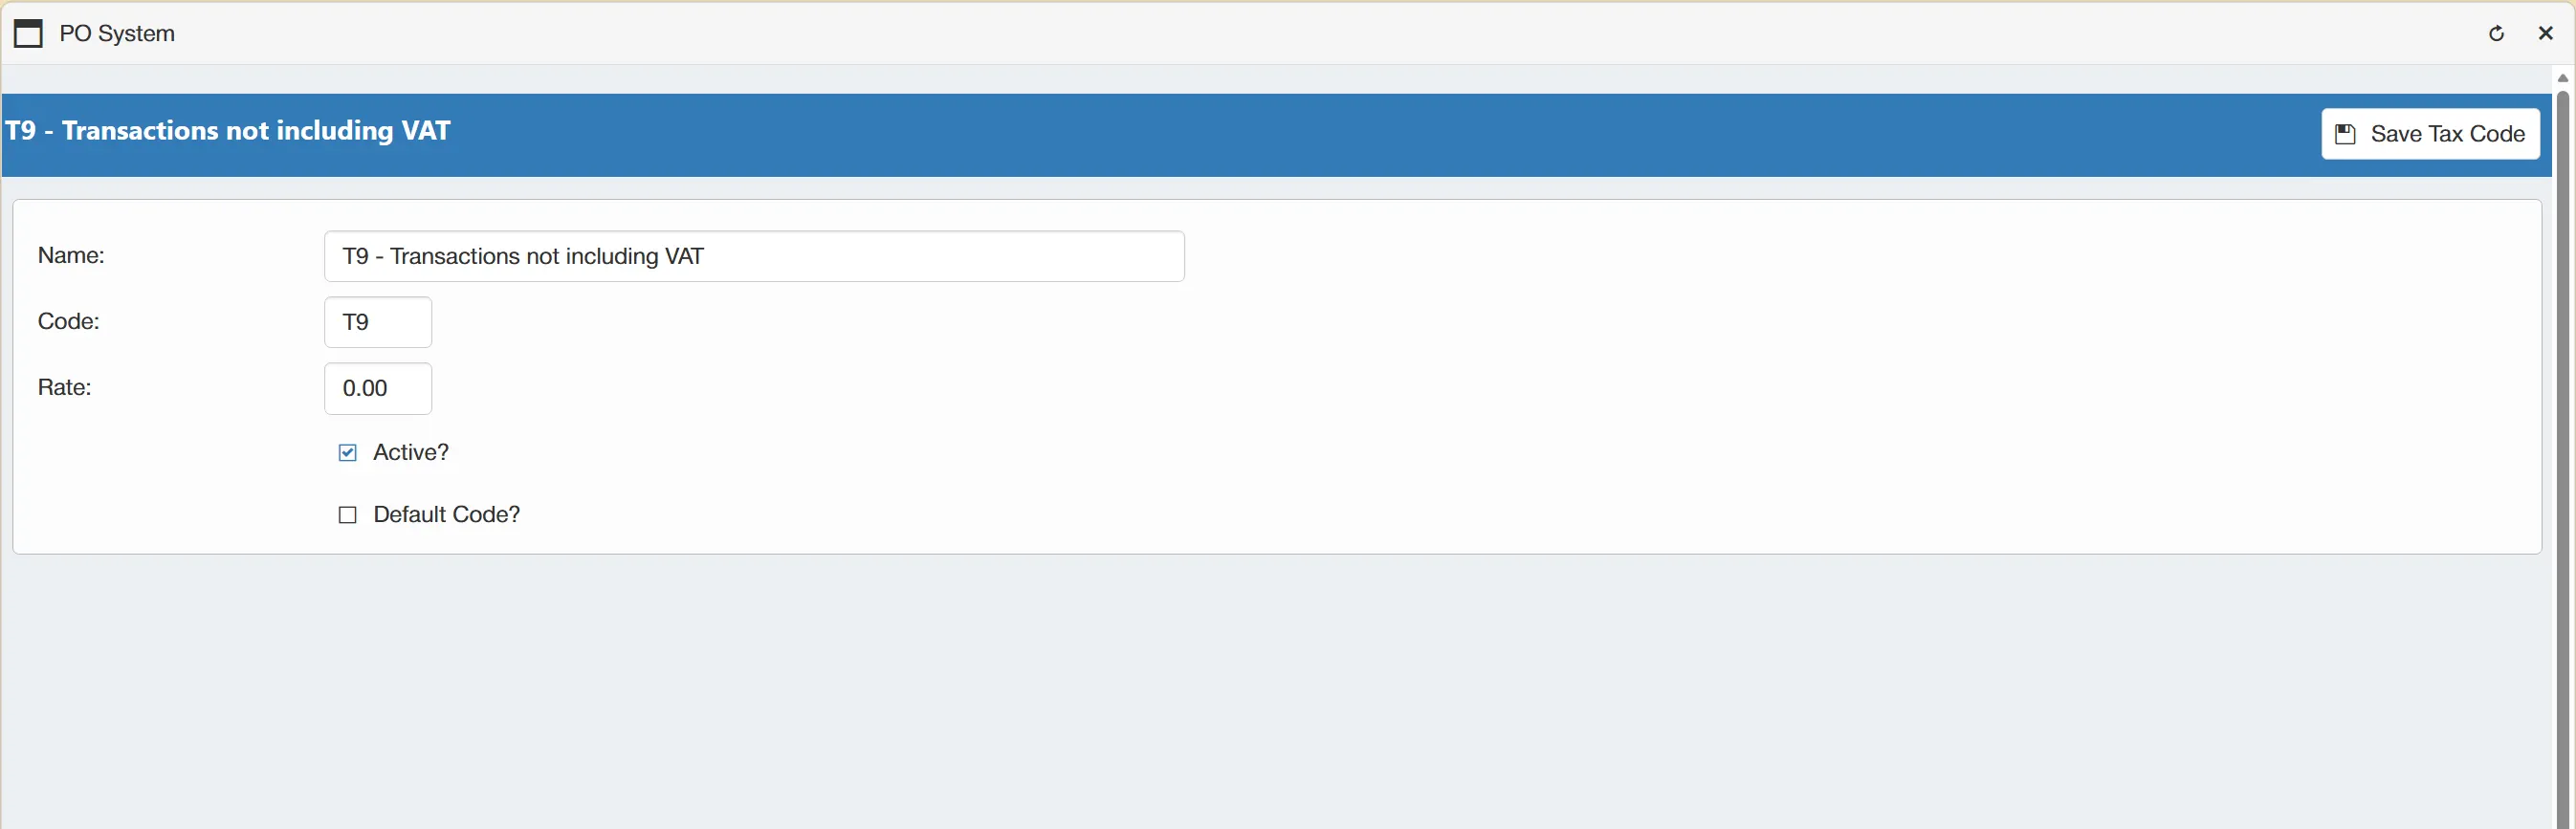
You also have the option of assigning the chosen tax code as default. This means that when you need to select a tax code in the system, it will default to the chosen option. To do this, simply tick ☐ Default Code?.
Disabling a Tax Code
When a tax code is no longer required you can set it as inactive to prevent it being used. To do this, select the chosen tax code and enable editing. You will now be able to un-tick the ☐ Active? box.
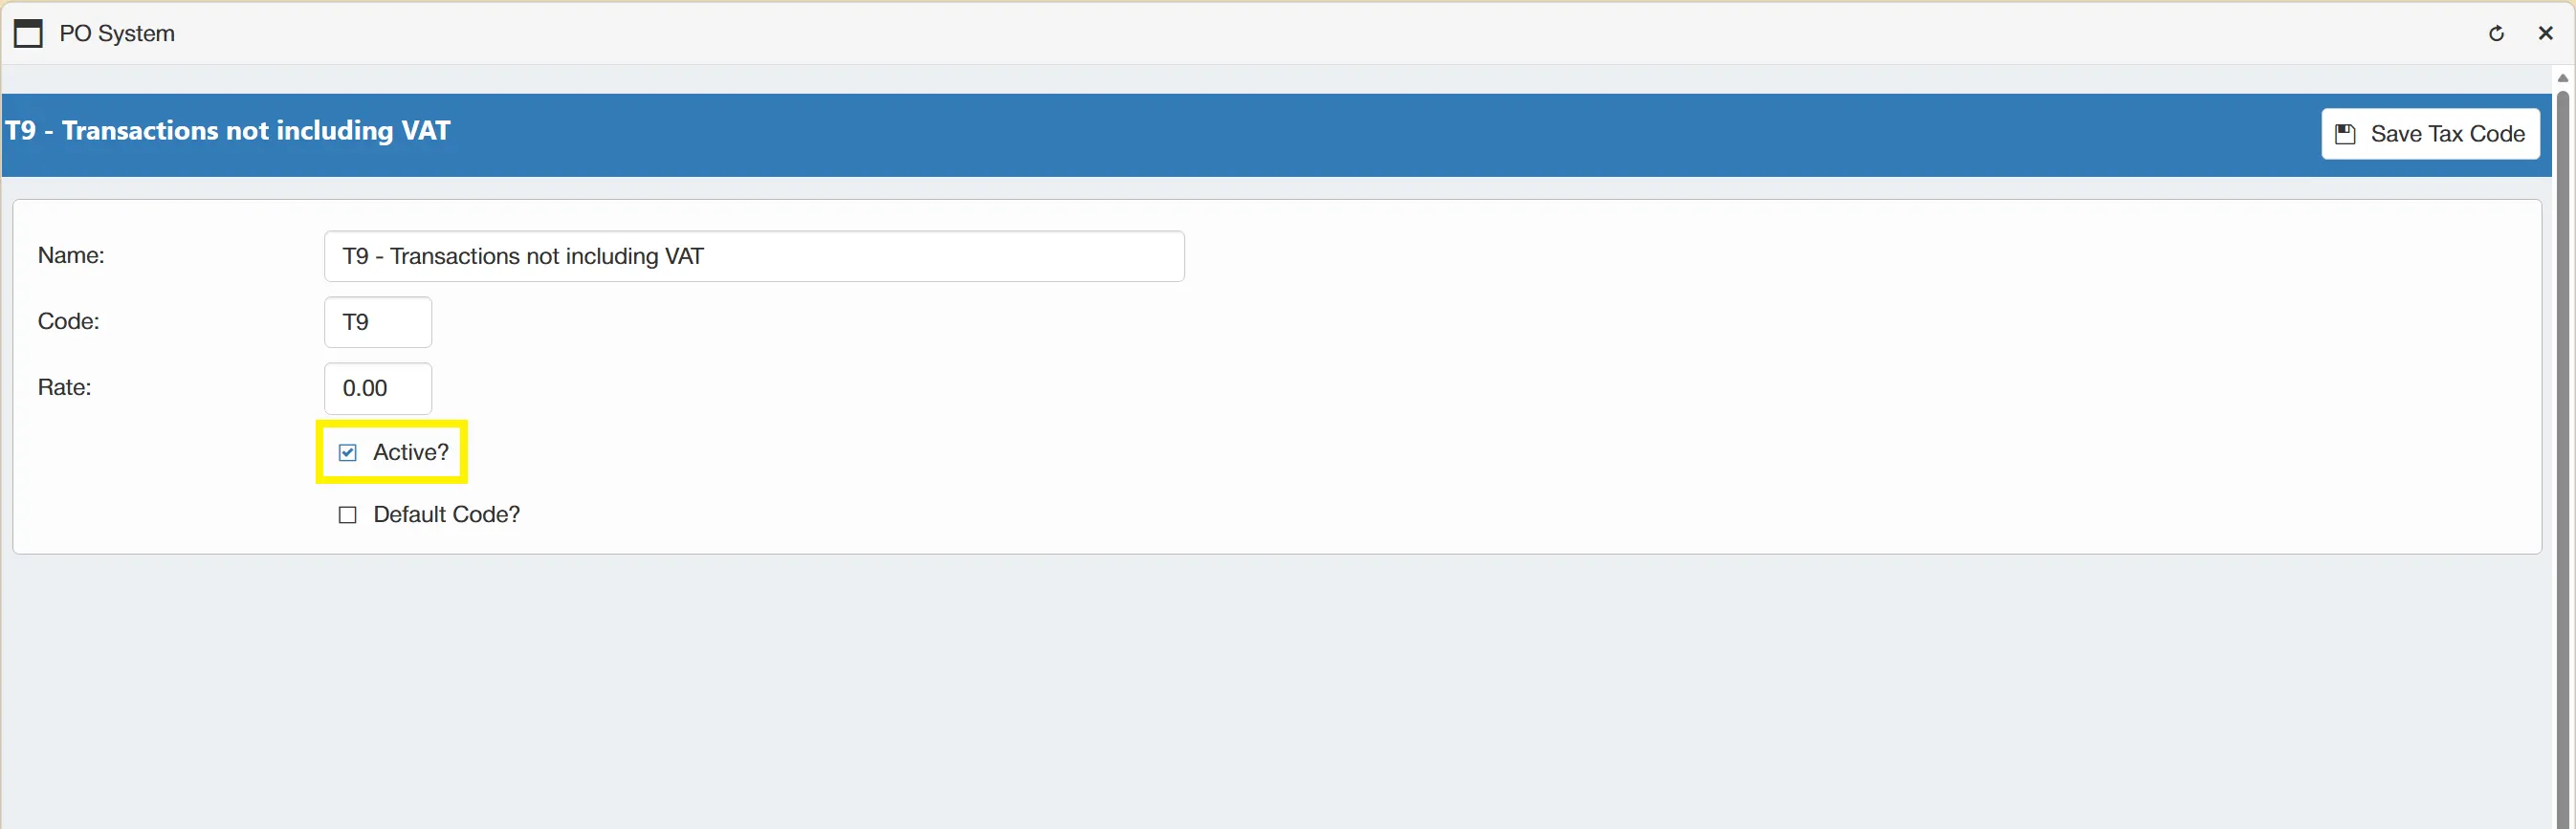
Once the box is un-ticked, click to finalise.
Project Contact Types
Project contact type settings allow you to create and administer your project contact types. Project contact types provide further information on your purchase orders allowing you to specify various roles relating to your projects.
Users must have the System Admin permission enabled to access this feauture. For information on user permissions, click here.
You can add, edit and remove project contact types by clicking on the Project Contact Types icon within the Configuration & Settings section.
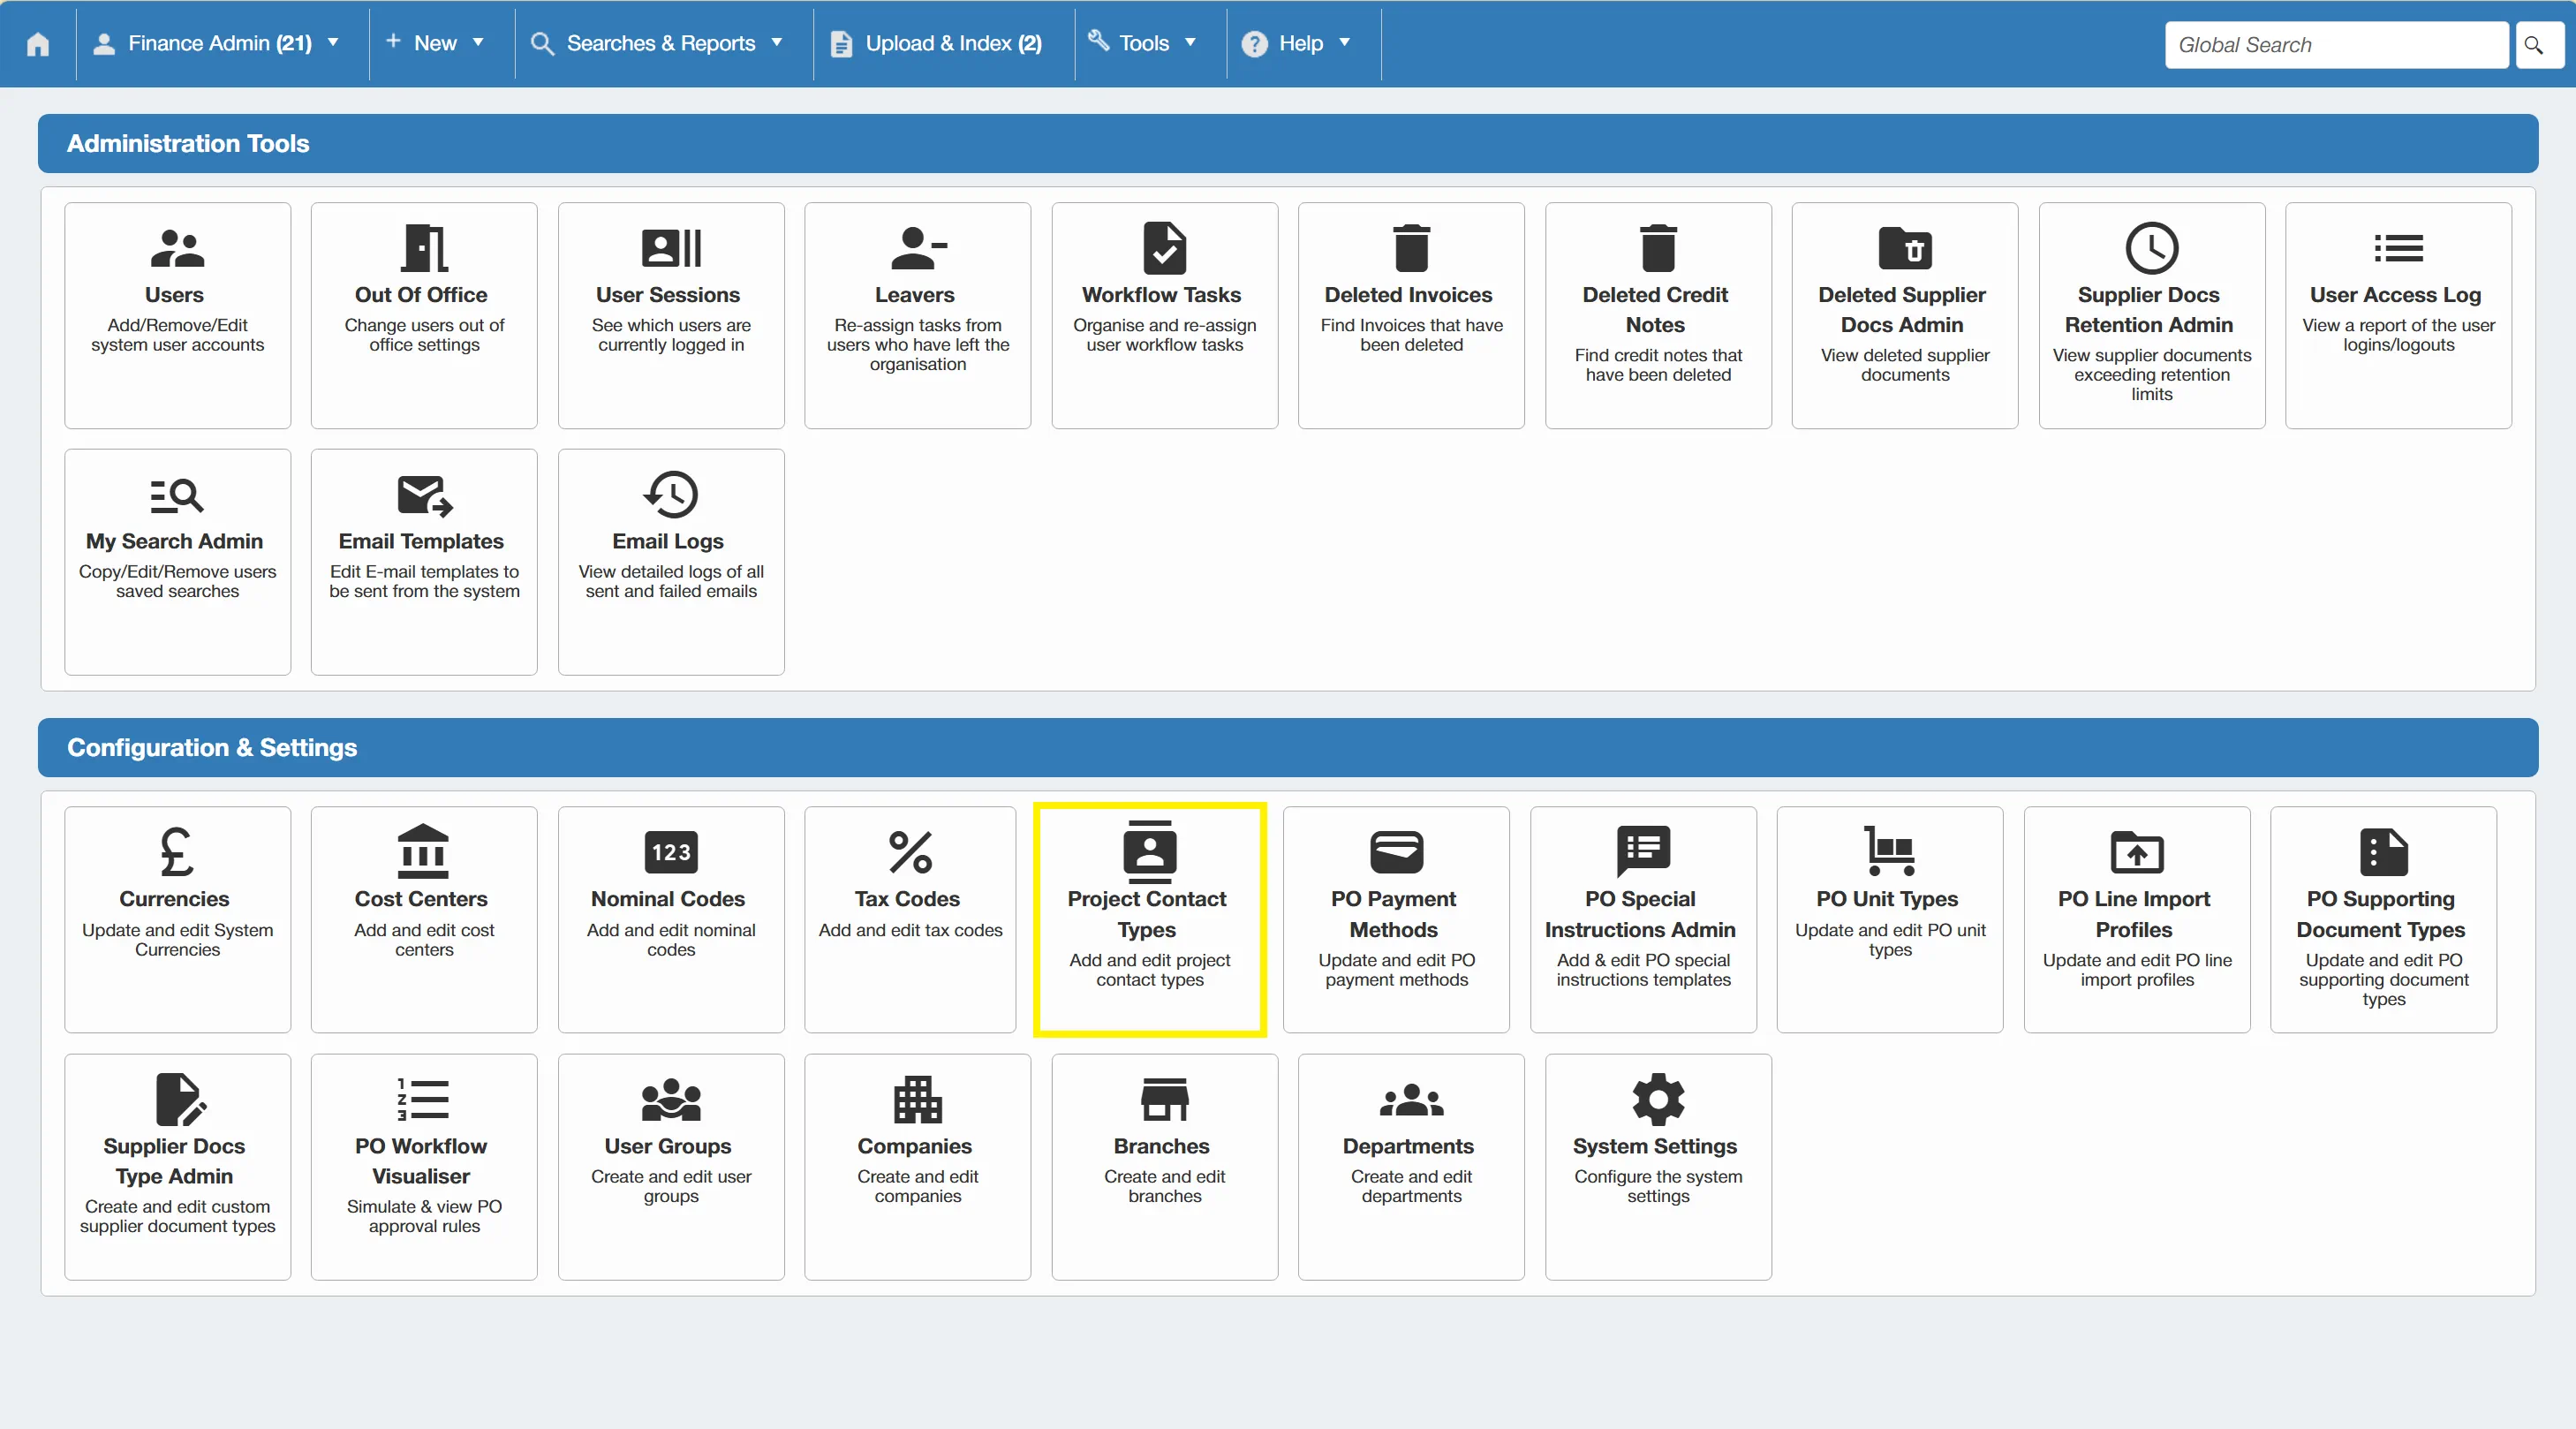
This brings you to the Project Contact Types grid. From here, you can administer the different project contact types.
Adding a New Project Contact Type
To add a new project contact type, click the button.
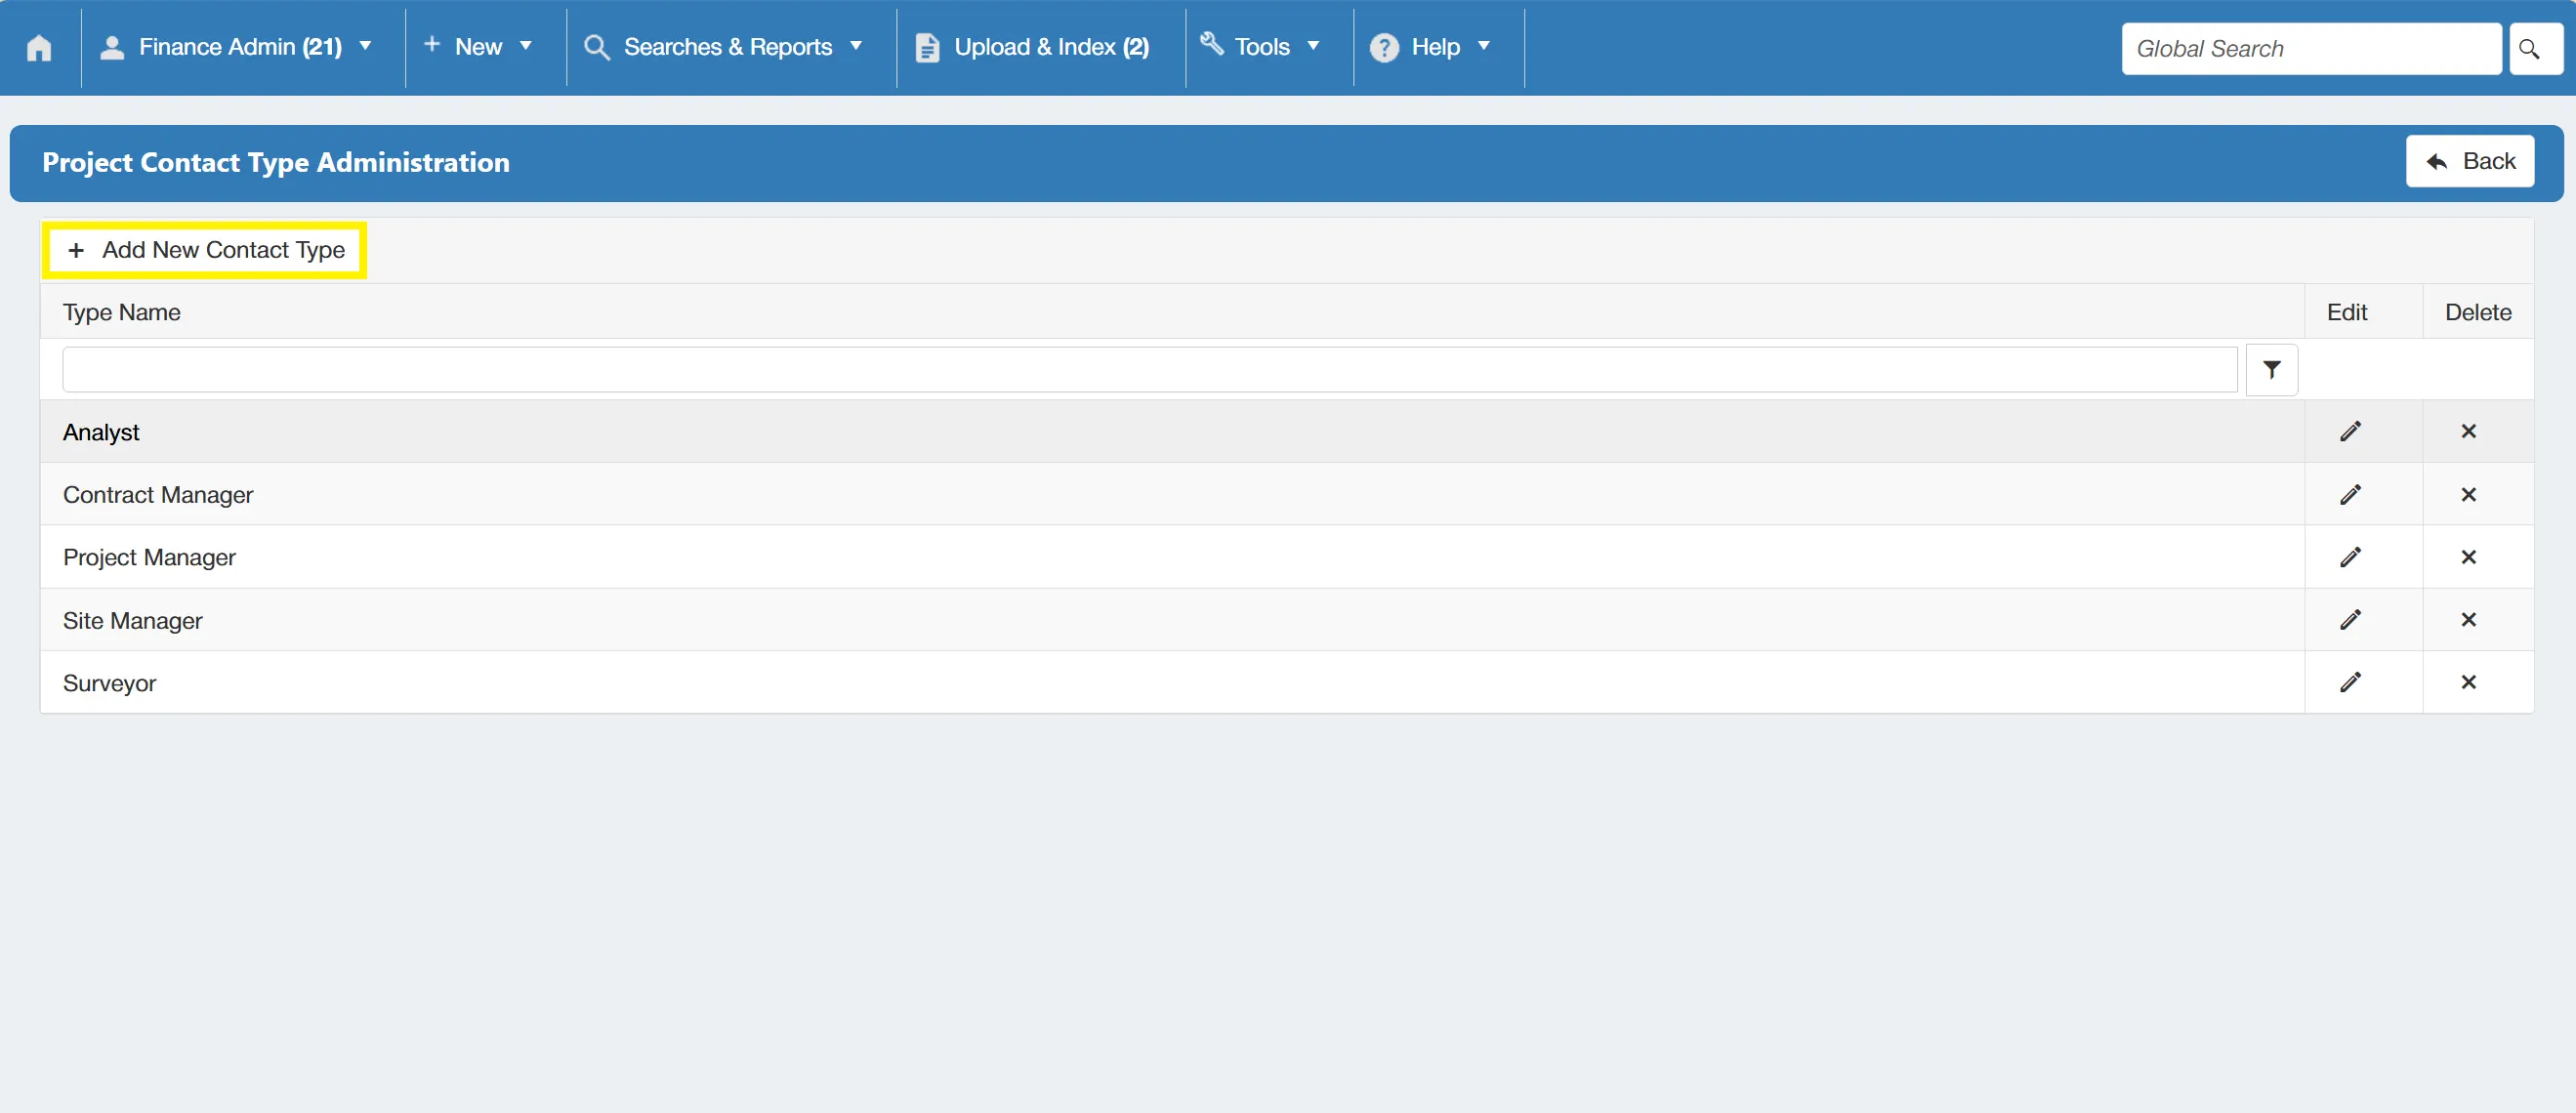
This adds a new line to the grid which allows you to input your new desired contact type. Once happy with the details click on the tick symbol at the end of the line to save this. Alternatively, you can click on the symbol to cancel the new contact.
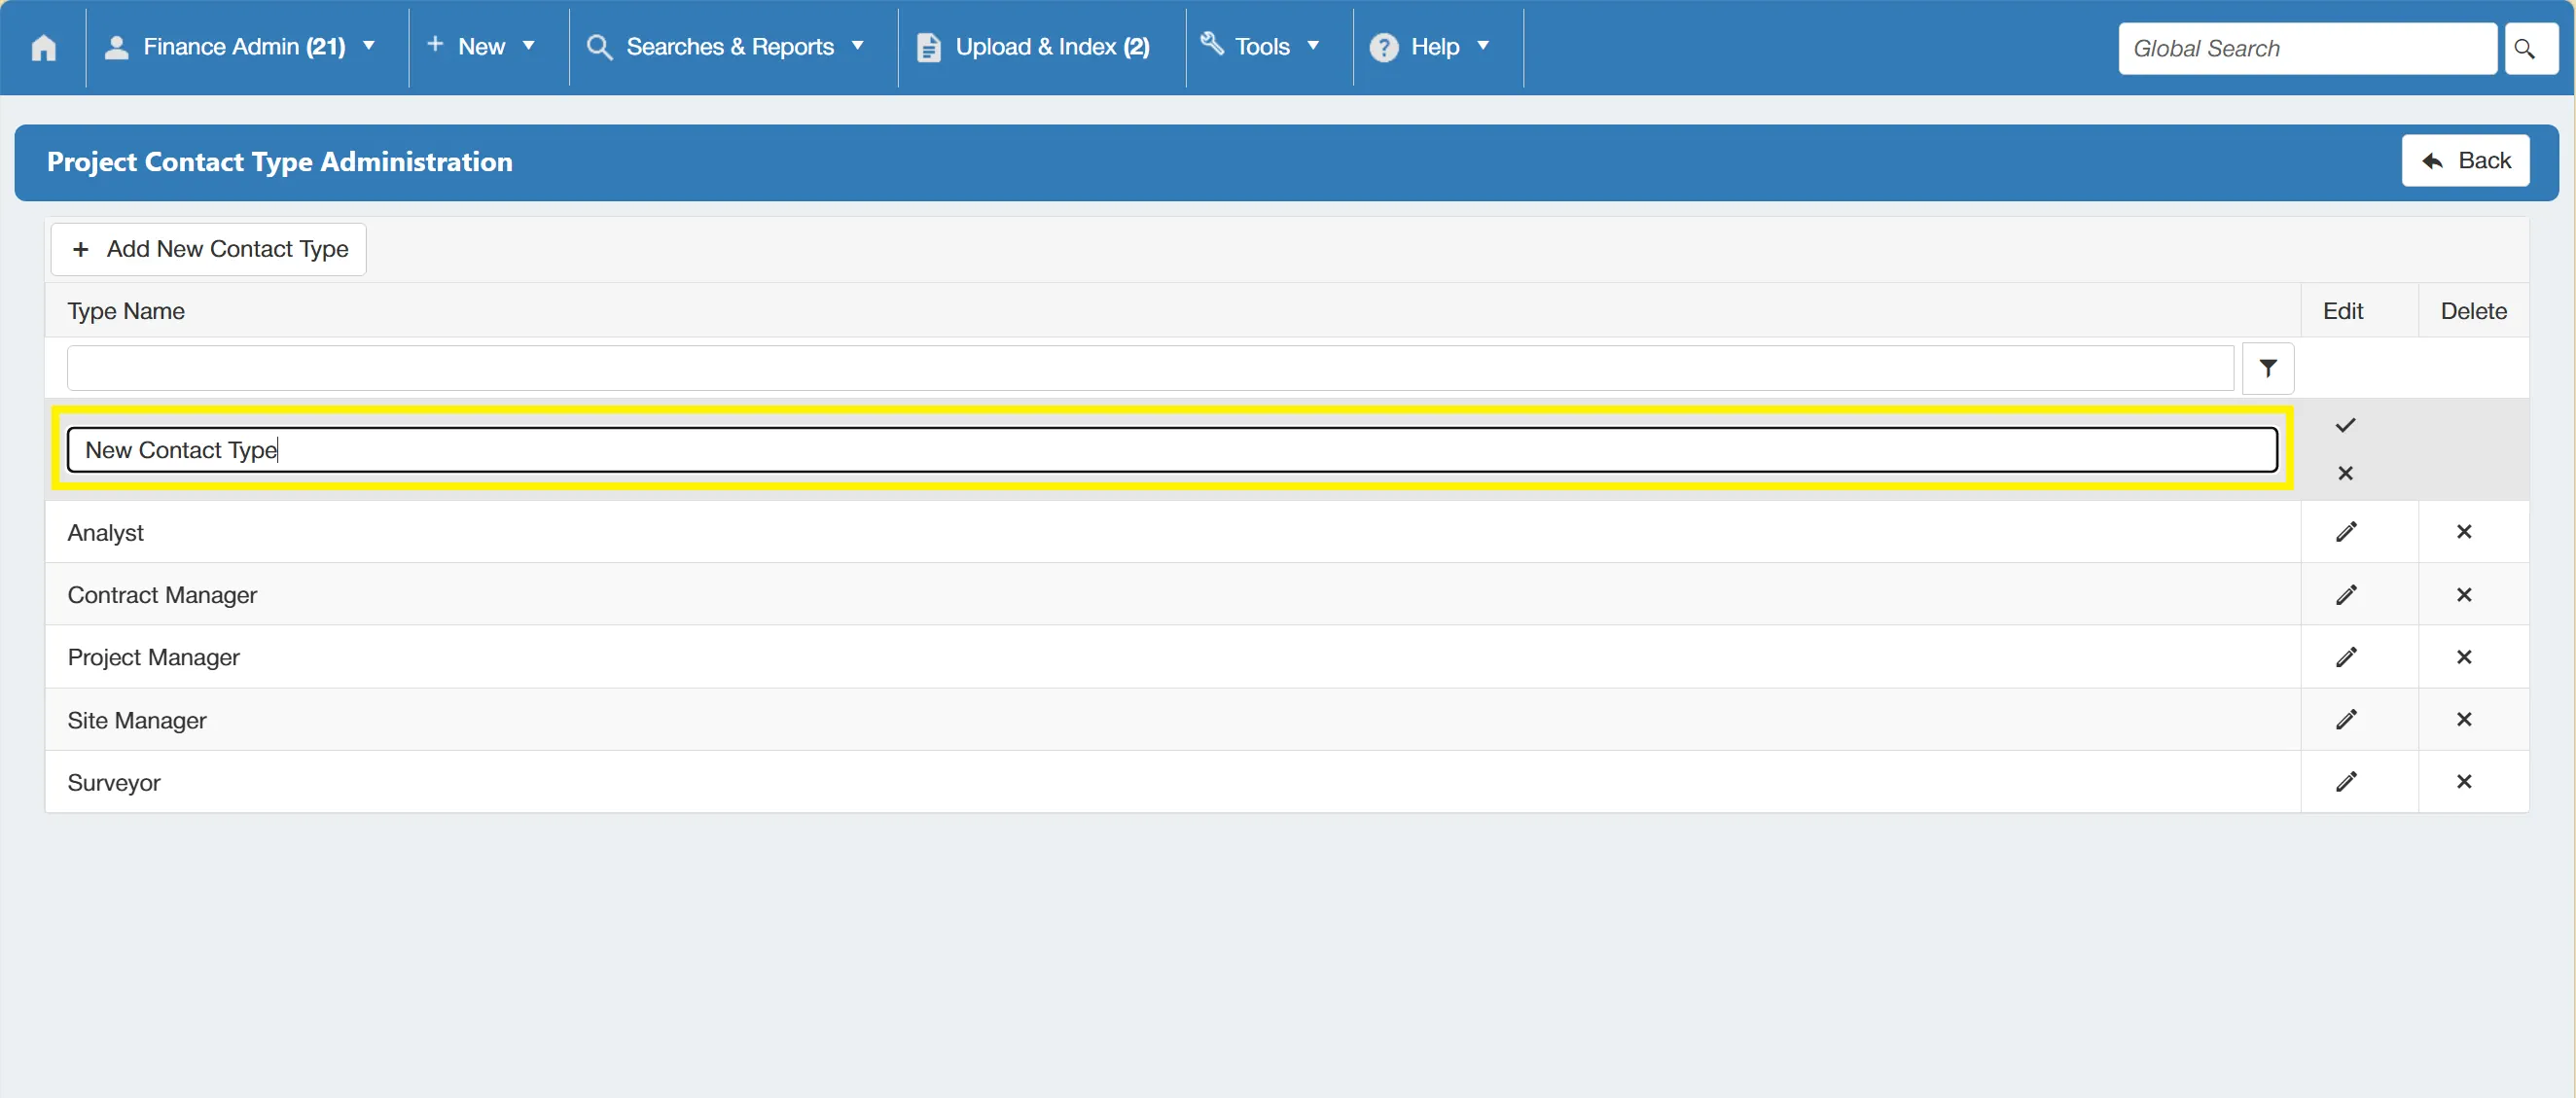
Editing an Existing Contact Type
To edit an existing contact type, simply click on the edit icon on the desired project contact type line.
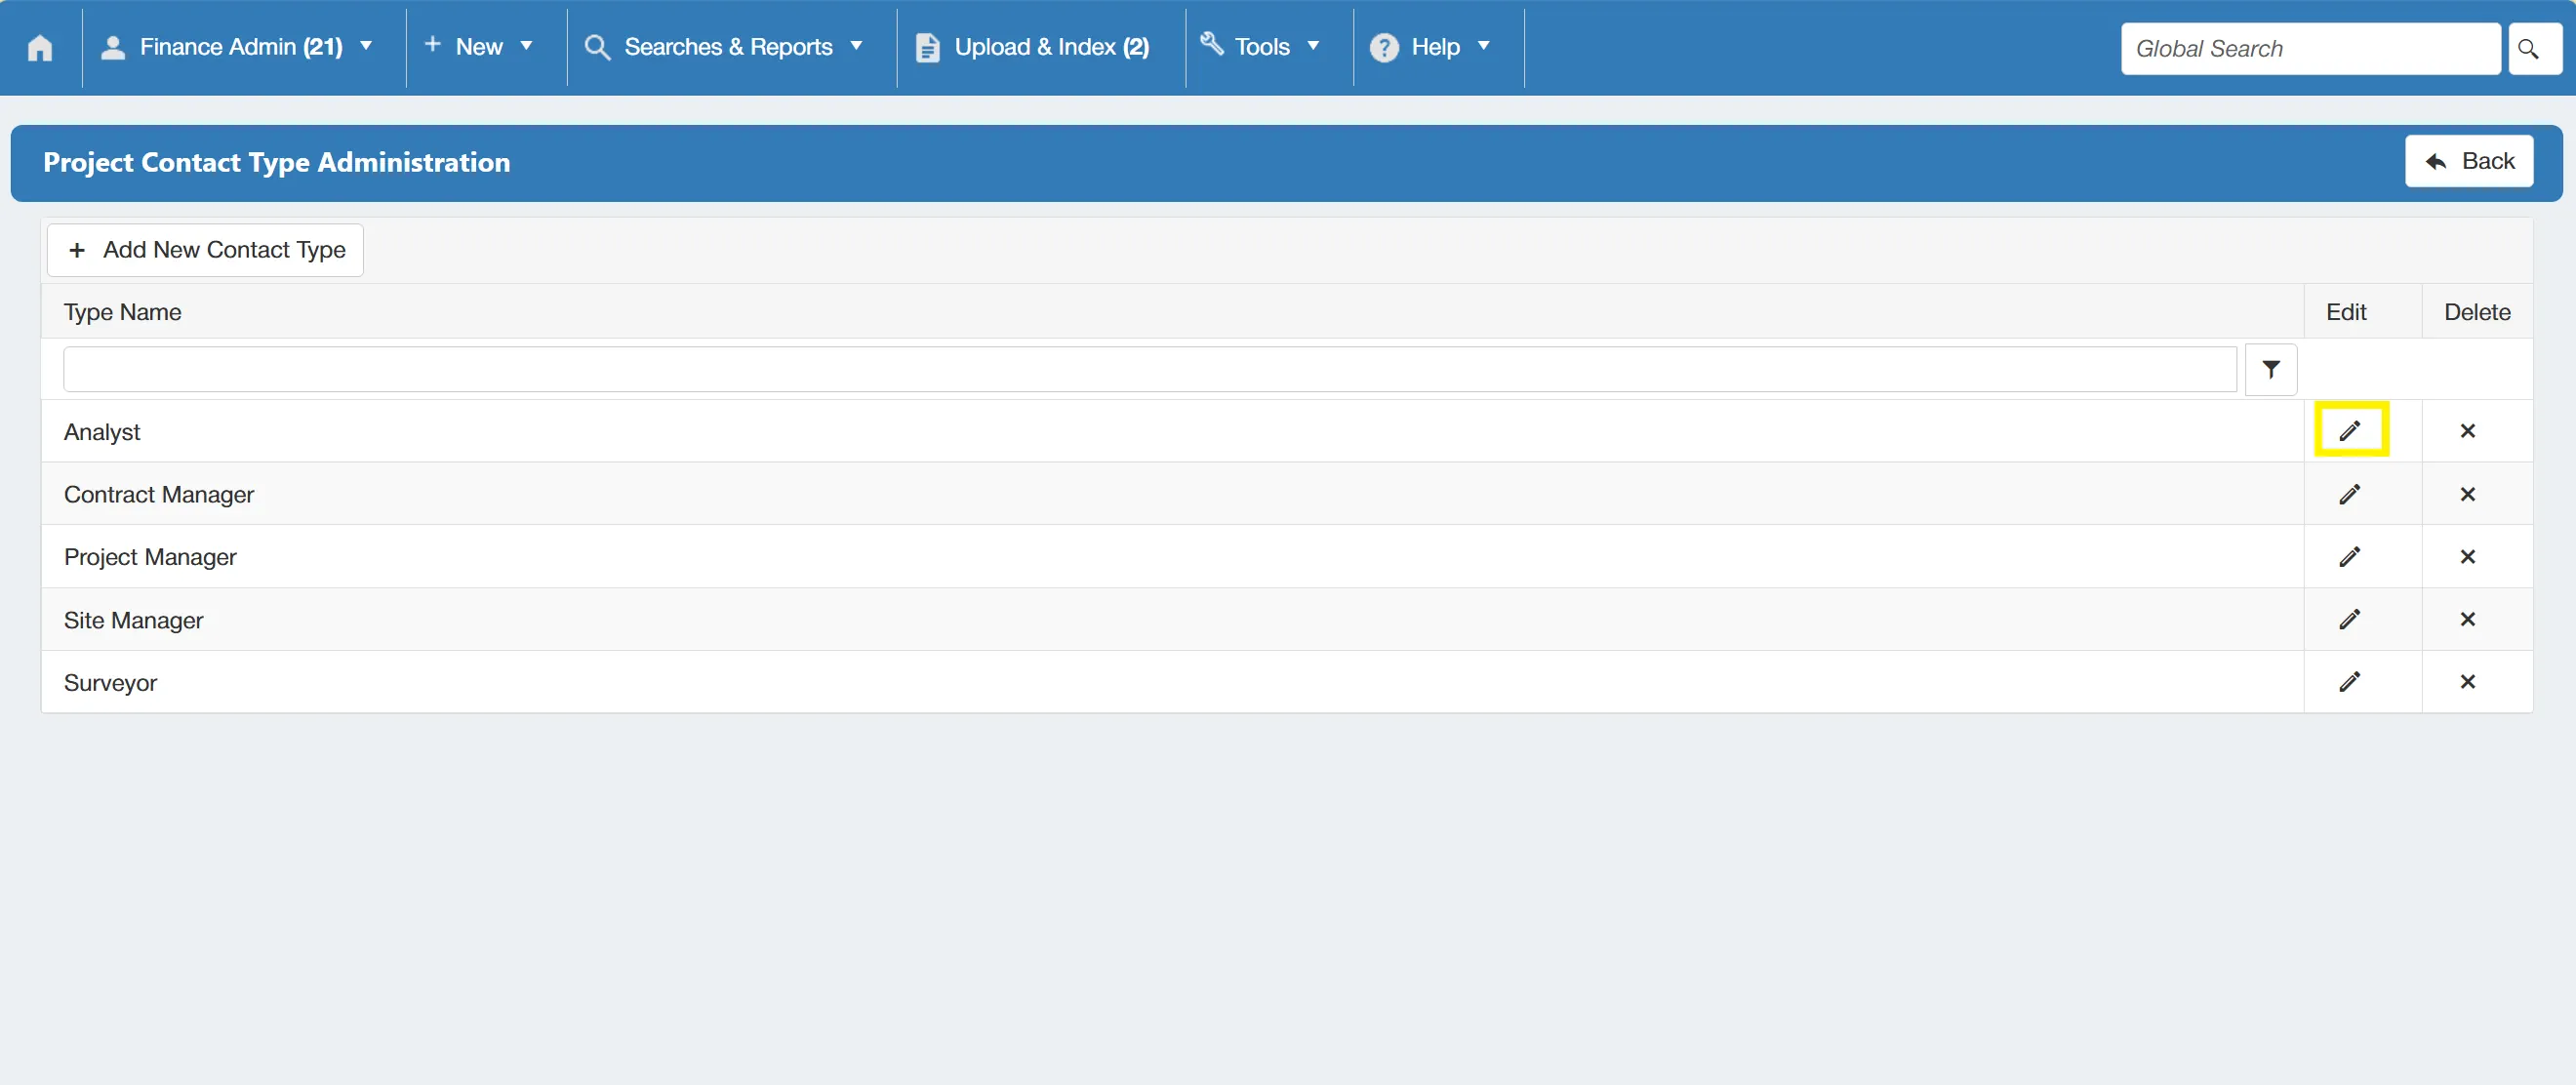
This allows you to edit the contact type field and make changes. Once you are happy with the changes, click on the tick to save them.
Removing an Existing Contact Type
You can also remove existing contact types by clicking on the icon for the desired contact line.
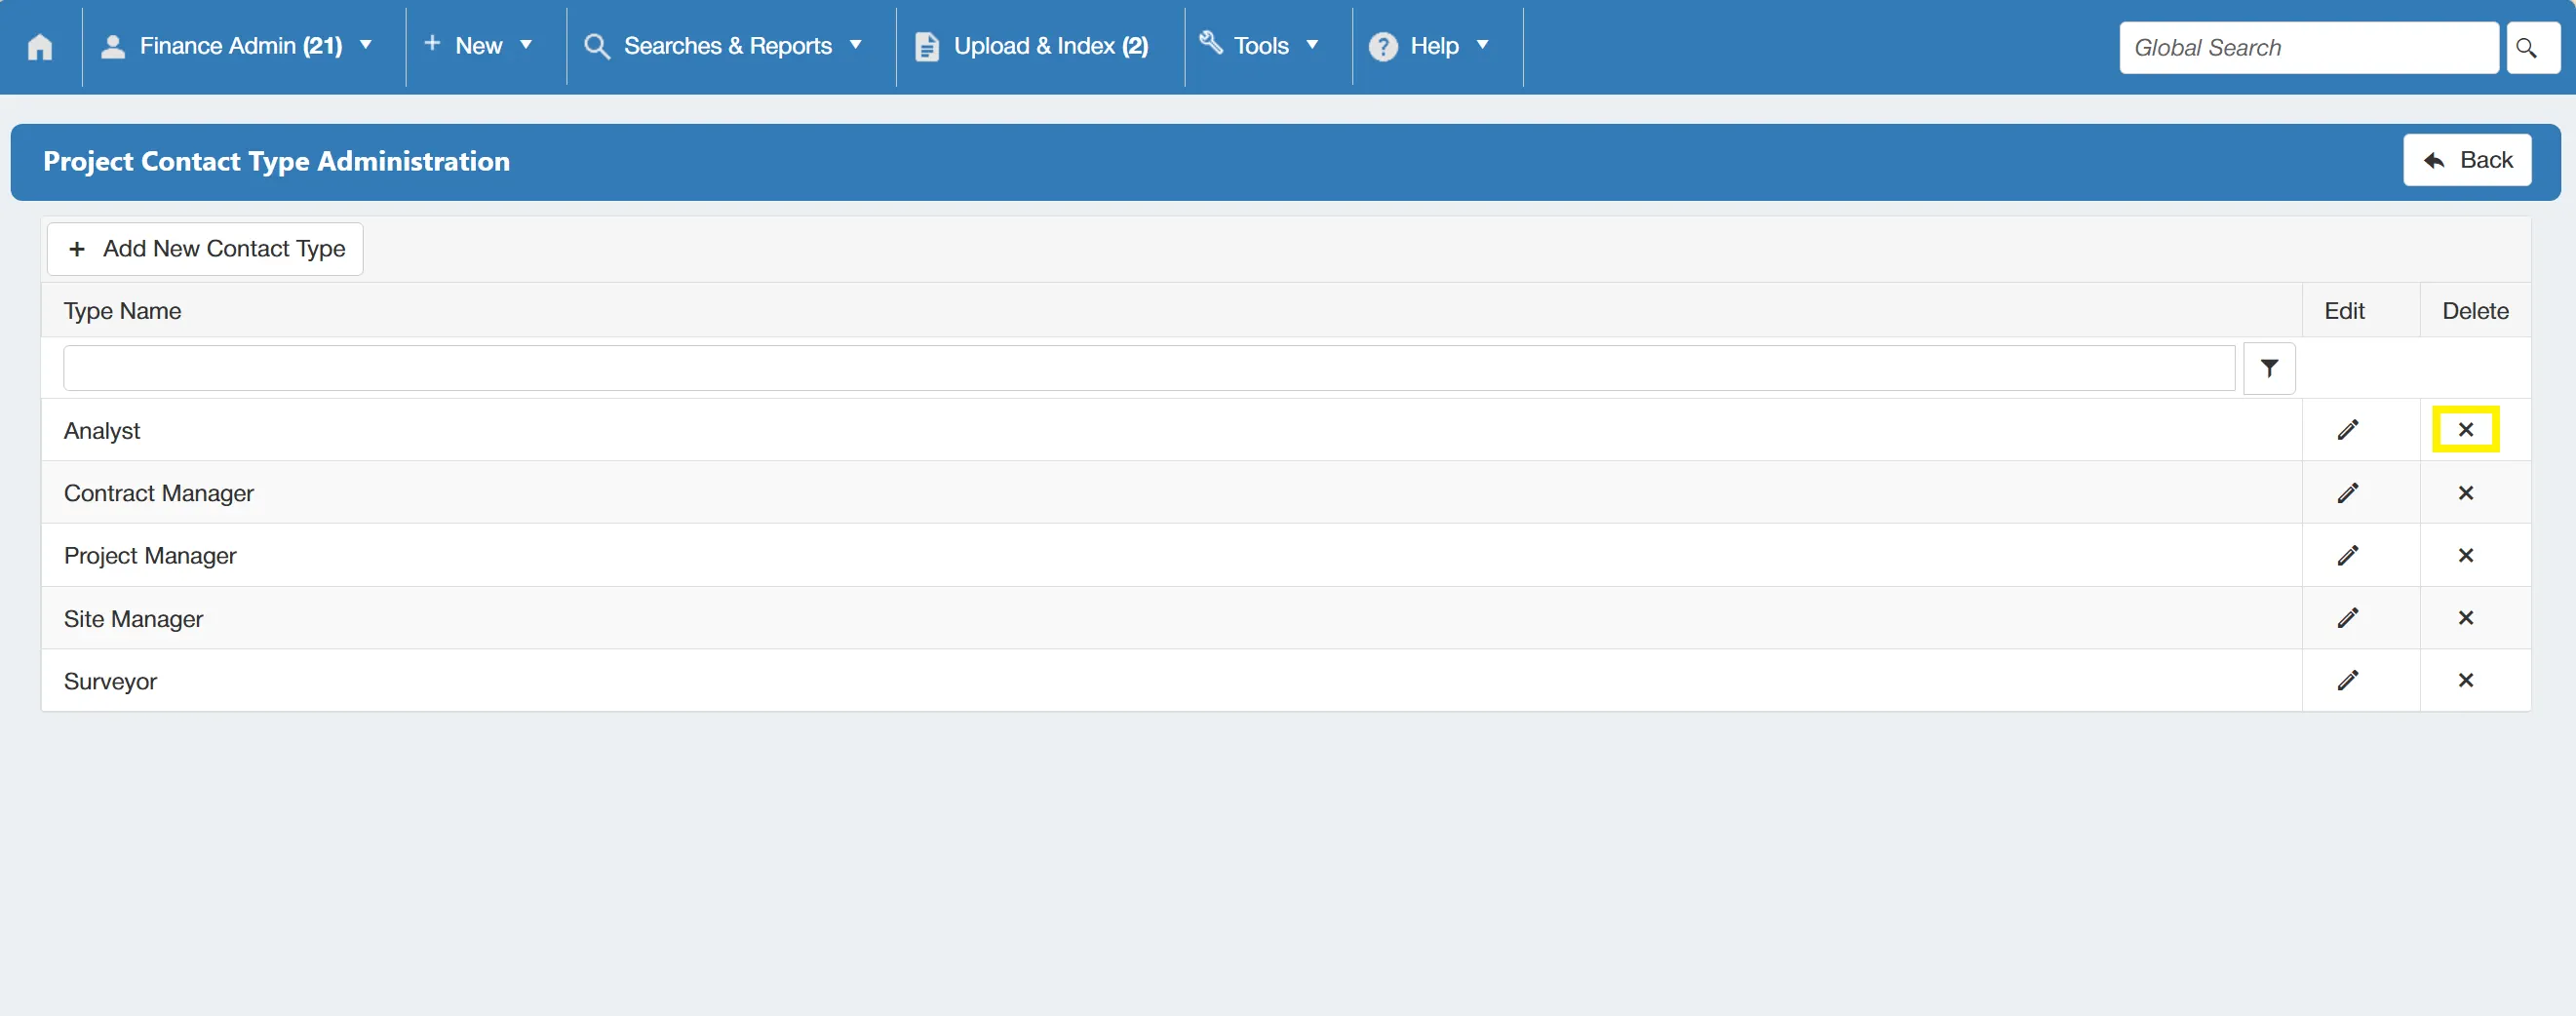
PO Payment Methods
PO payment methods dictate how you would like to pay for the goods/services that you are ordering. From this settings section, you can add new payment methods to the list such as company credit cards, edit existing payment methods and remove unwanted payment methods.
Users must have the System Admin permission enabled to access this feauture. For information on user permissions, click here.
You can add, edit and remove PO Payment Methods from the system by clicking on the PO Payment Methods icon within the Configuration & Settings section.
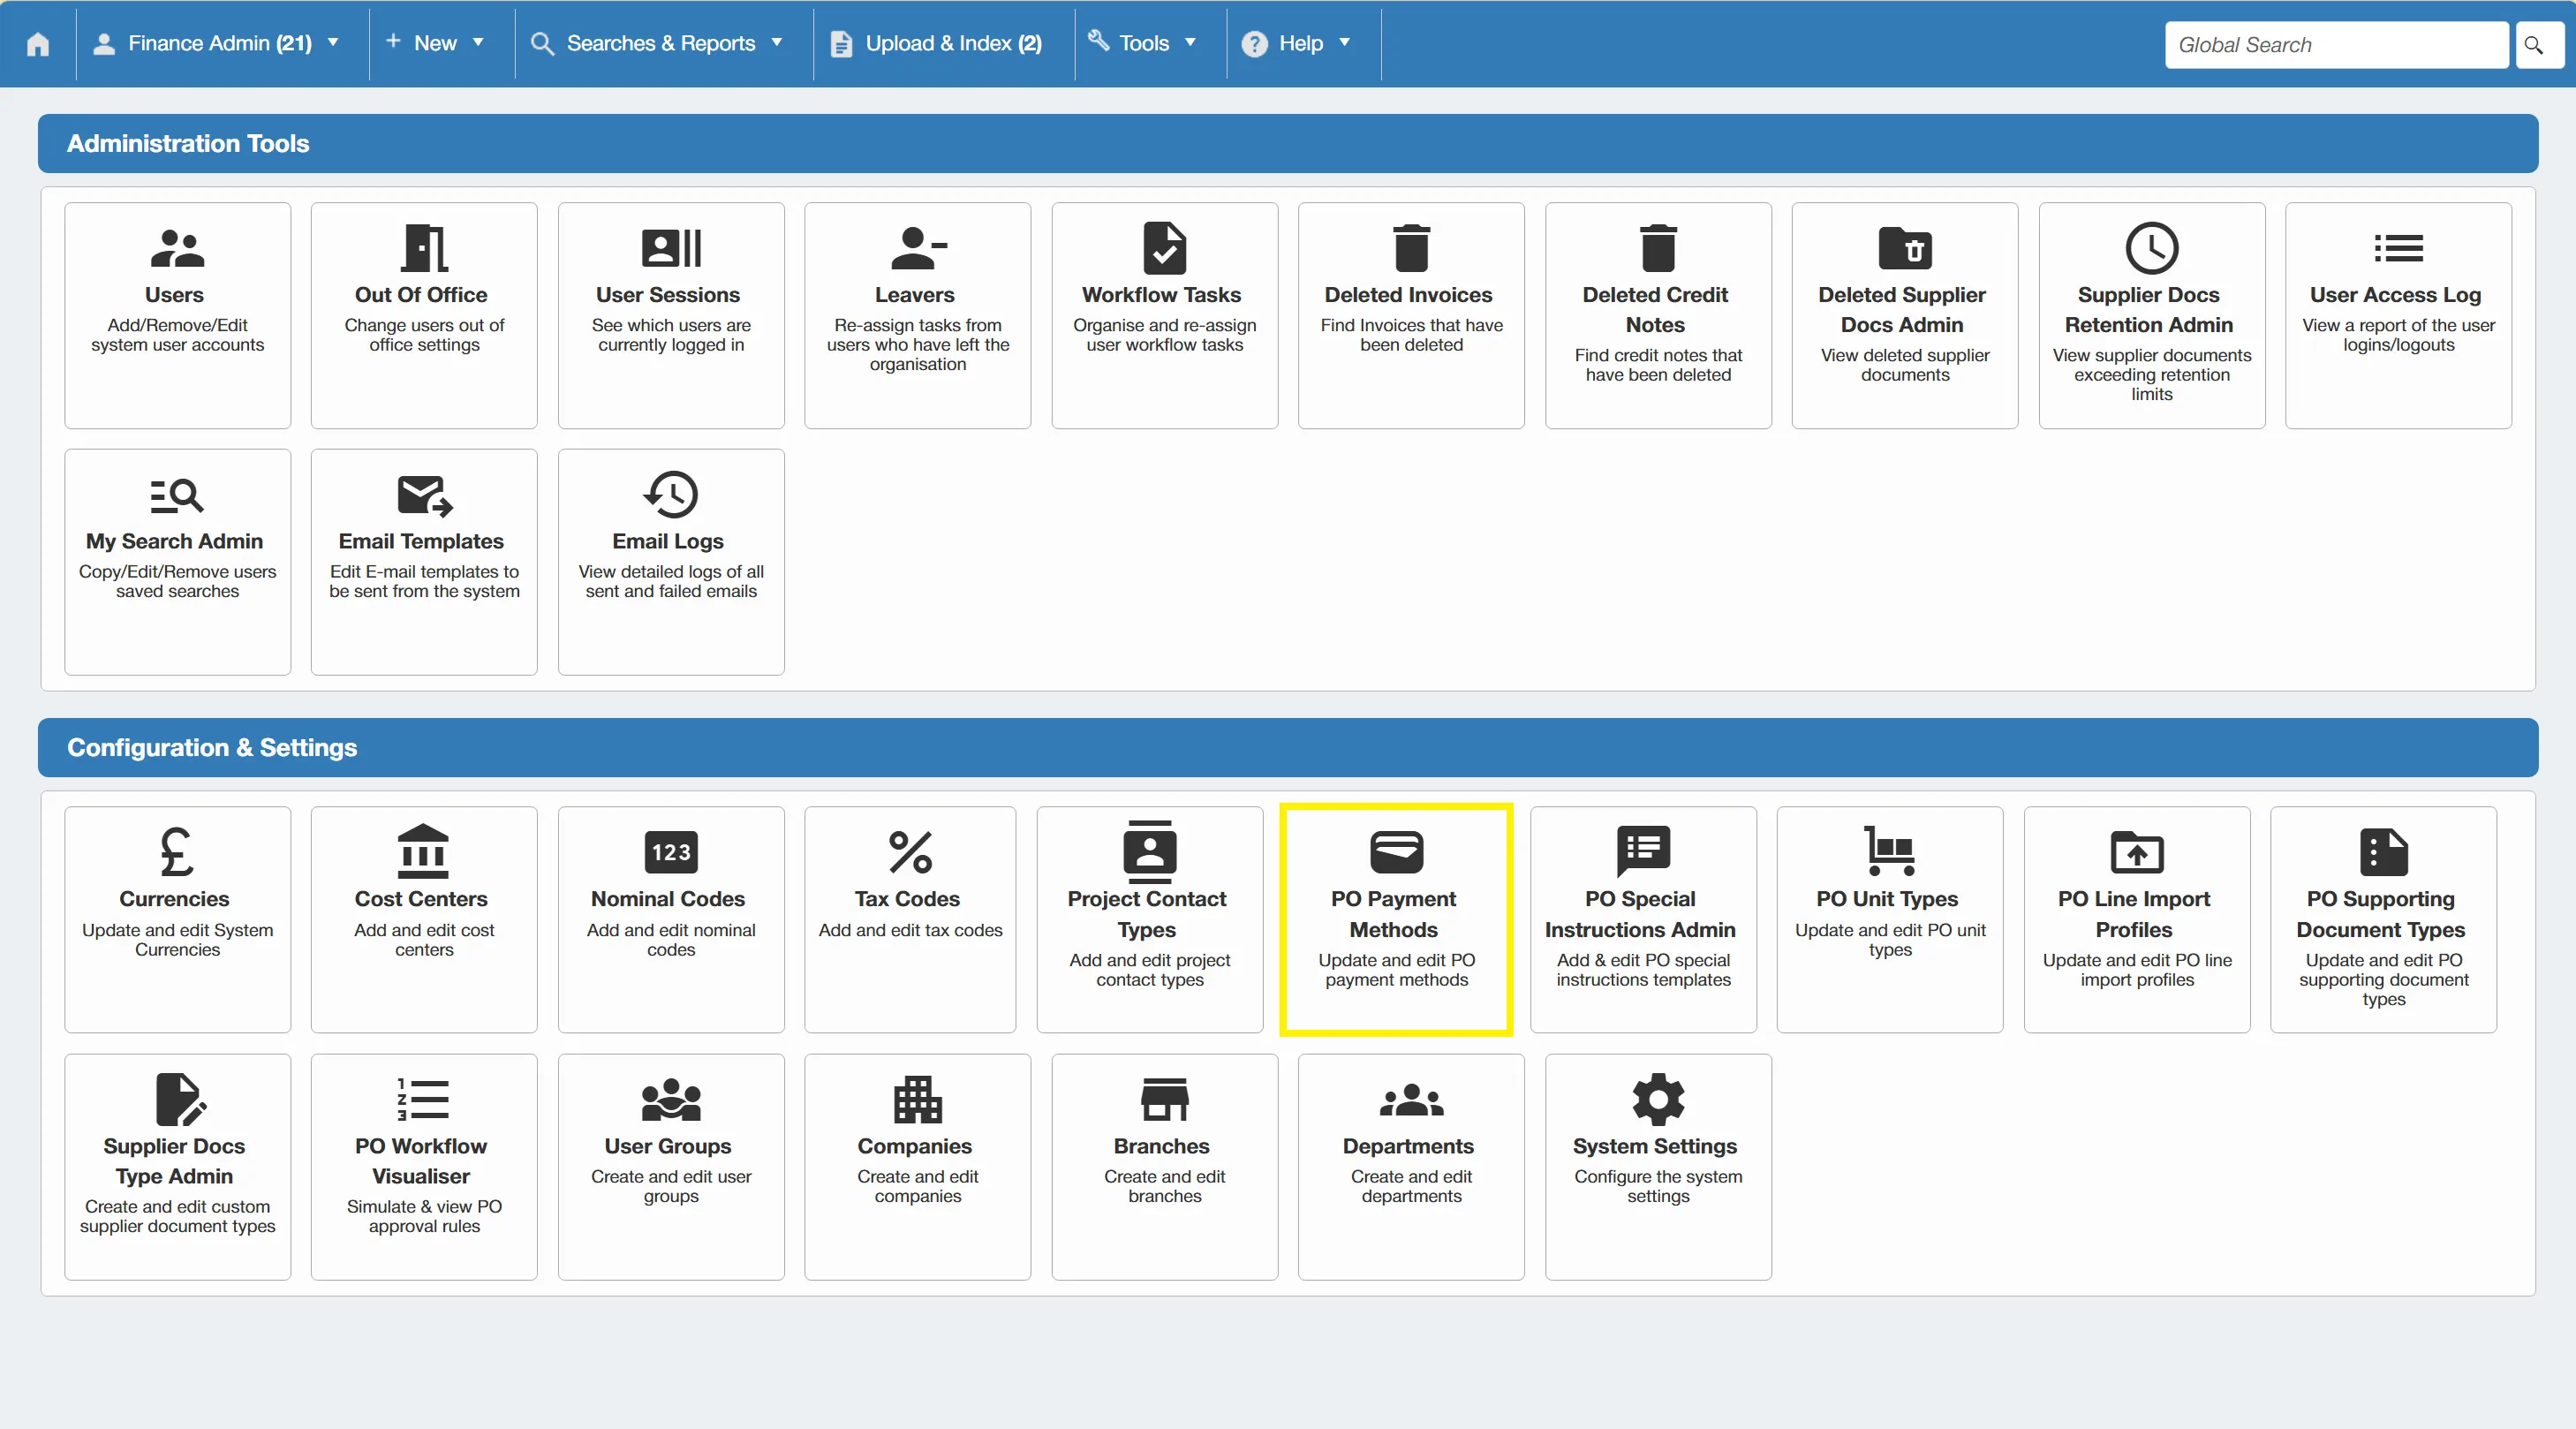
This takes you to the PO Payment Methods Administration grid. From this page, you can administer the various PO payment methods.
Adding a New PO Payment Method
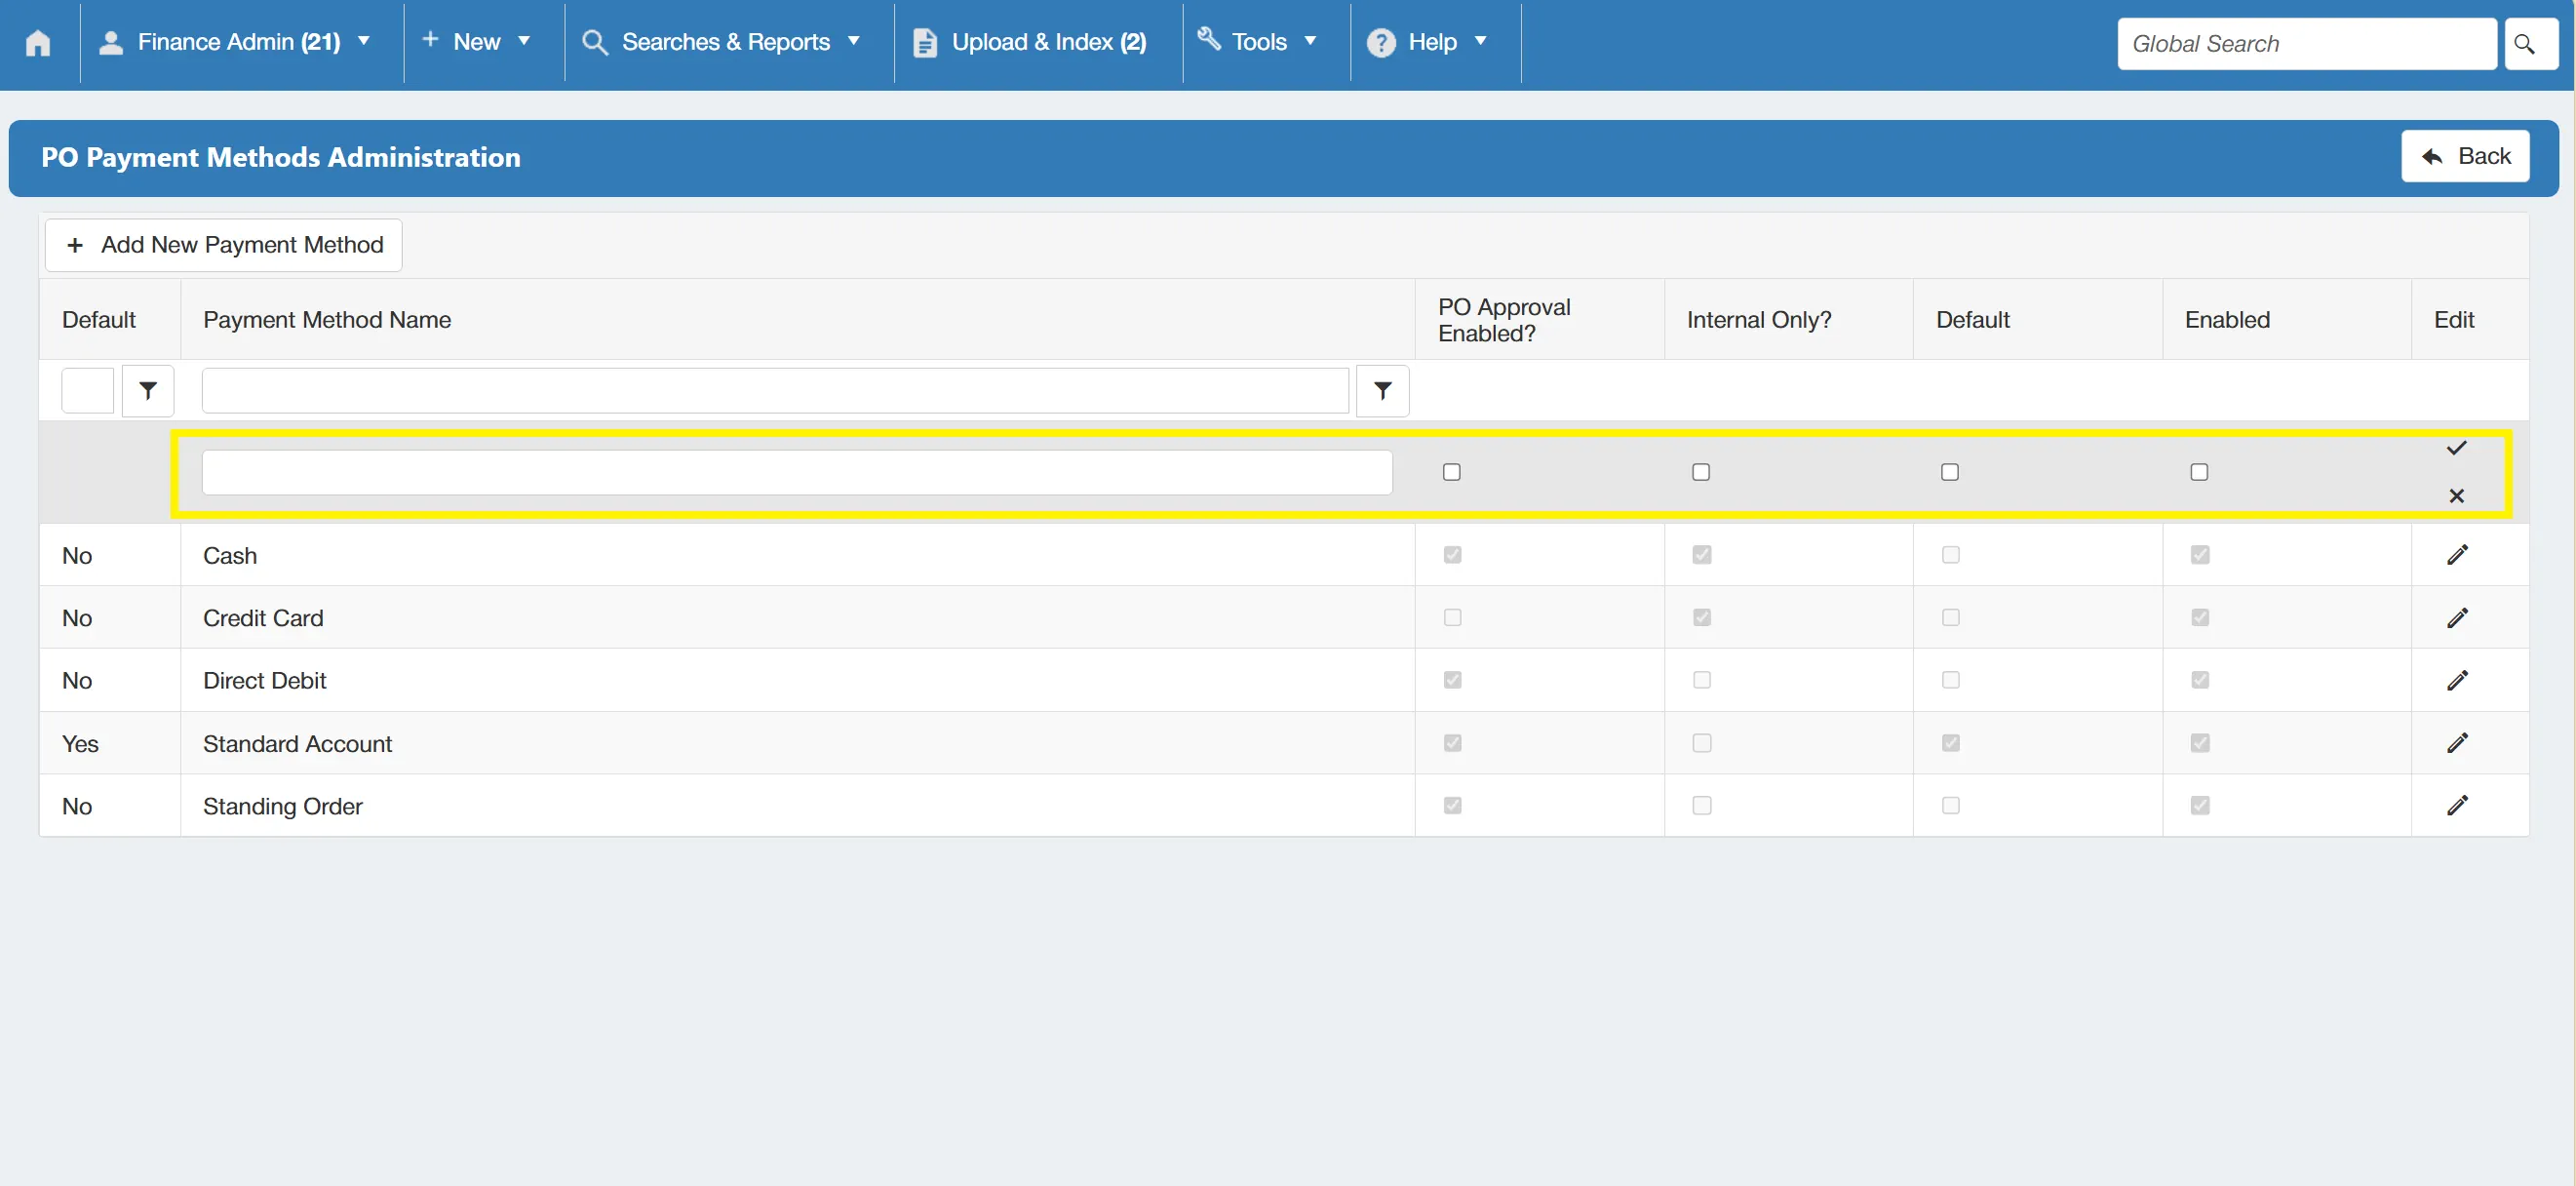
To add a new payment method, simply click the button.
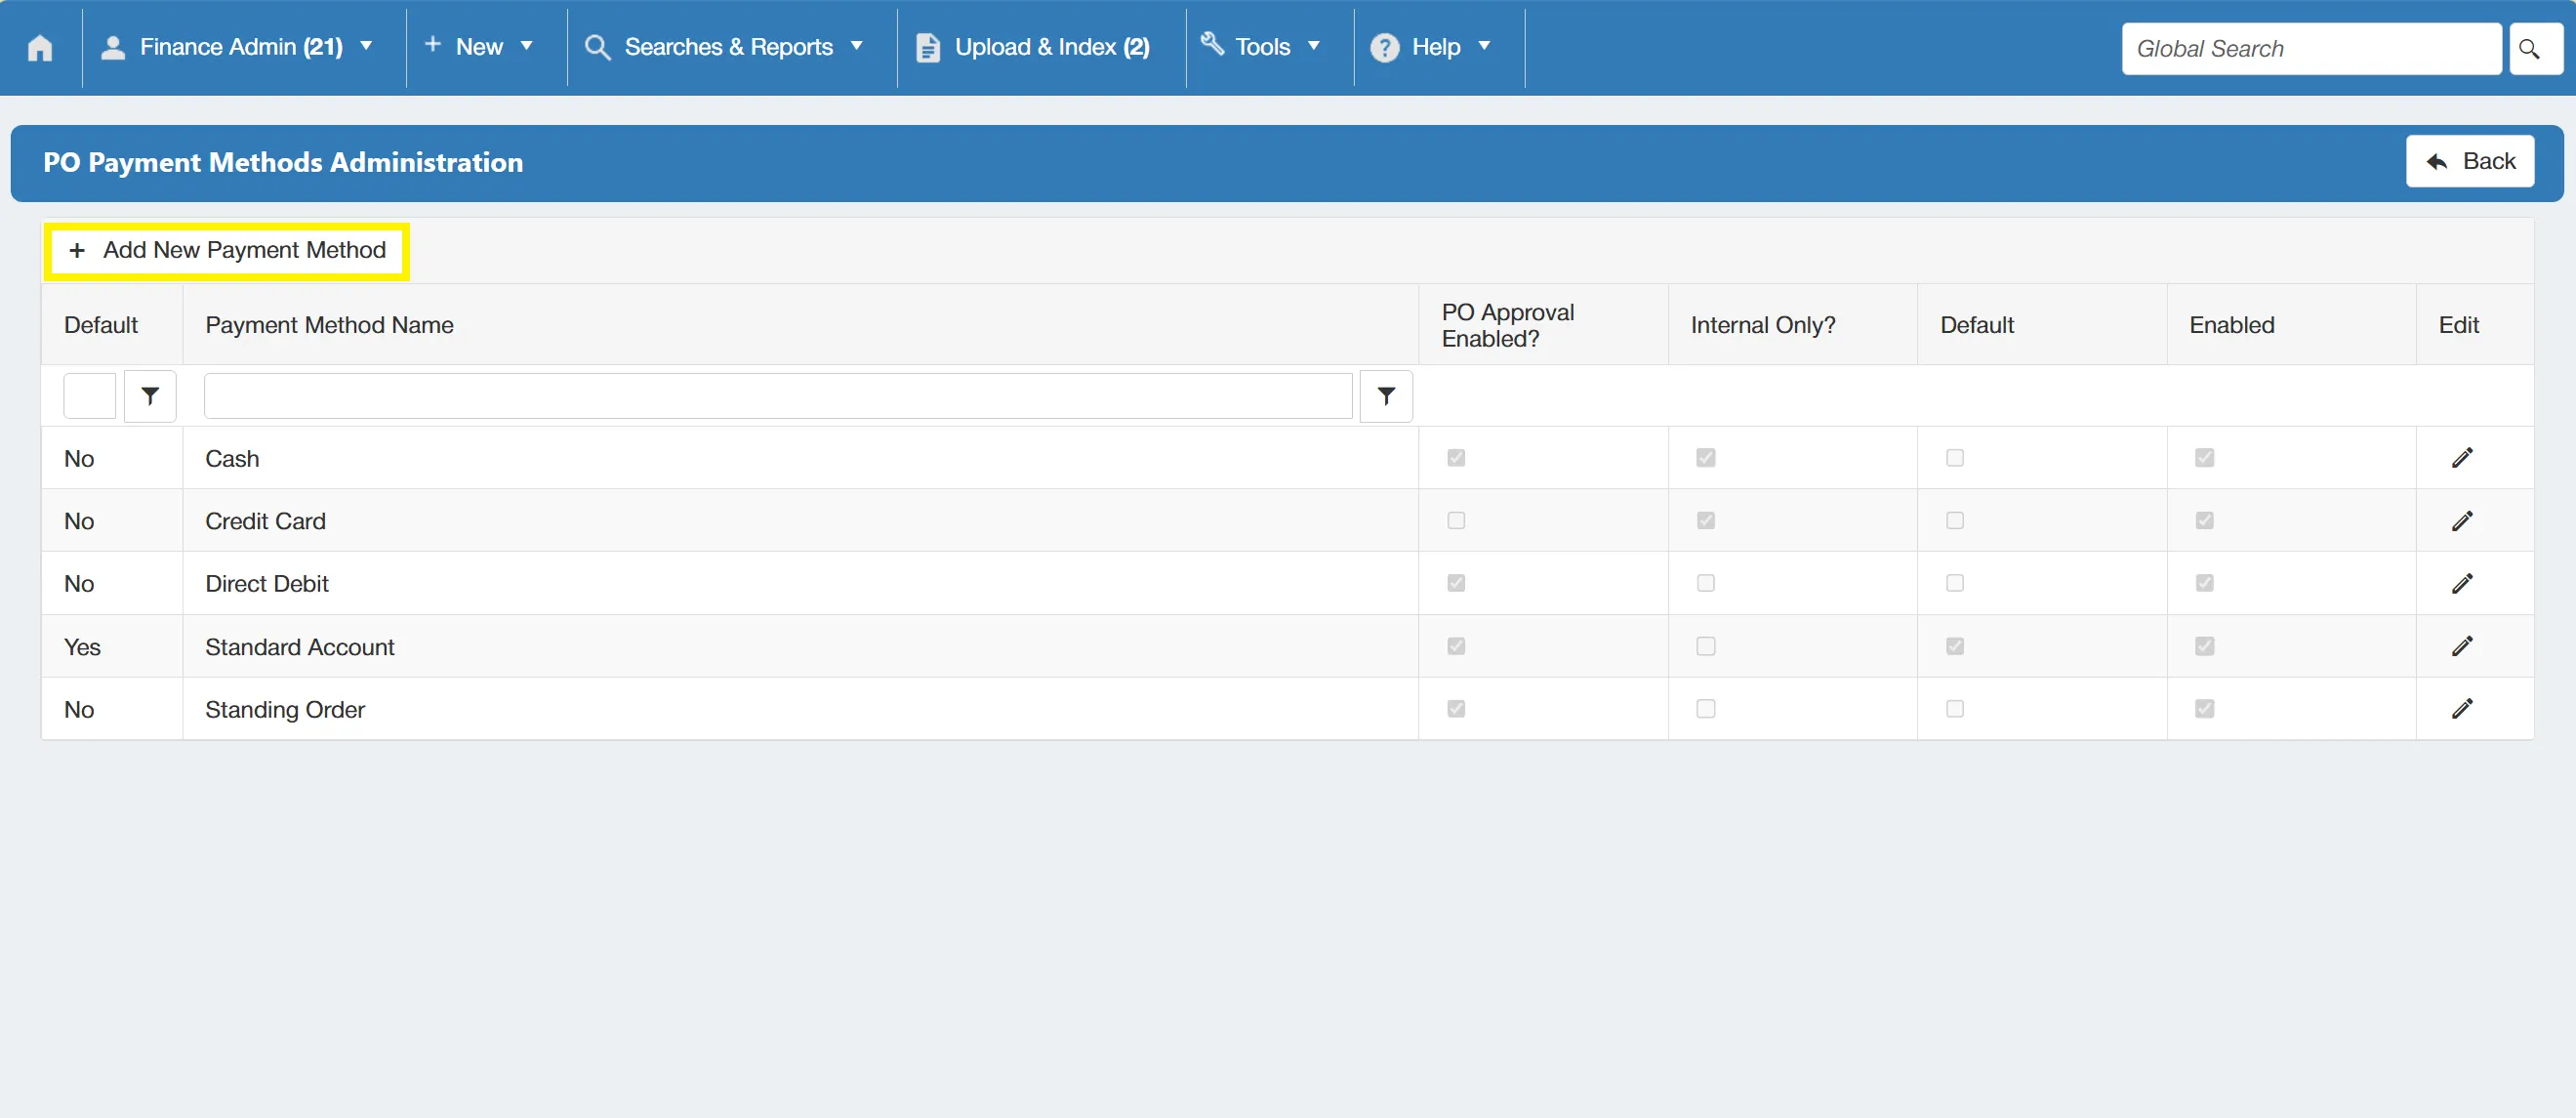
This adds a new line to the grid which allows you to input your new PO payment method. Once happy with the details, click on the tick symbol at the end of the line to save this. Alternatively, you can click on the symbol to cancel.
There are also three tickboxes available when filling out the details of the new payment method, these are:
- PO Approval Enabled?=This is ticked by default, however, if you untick this box, any Purchase Orders raised with this payment method will be automatically approved, ignoring any approval rules set up within the system. This is typically used for credit card purchases as they have already taken place by the time that they are entered into the system.
- Internal Only?=When this is ticked, any Purchase Orders raised with this payment method will be marked as Internal Only (the PO won't be issued to the supplier via email when approved).
- Default=When ticked, this marks the payment method as Default, meaning that the field will already be pre-populated with this option when creating a PO.
Editing an Existing PO Payment Method
To edit an existing PO payment method, simply click on the edit icon on the desired line.
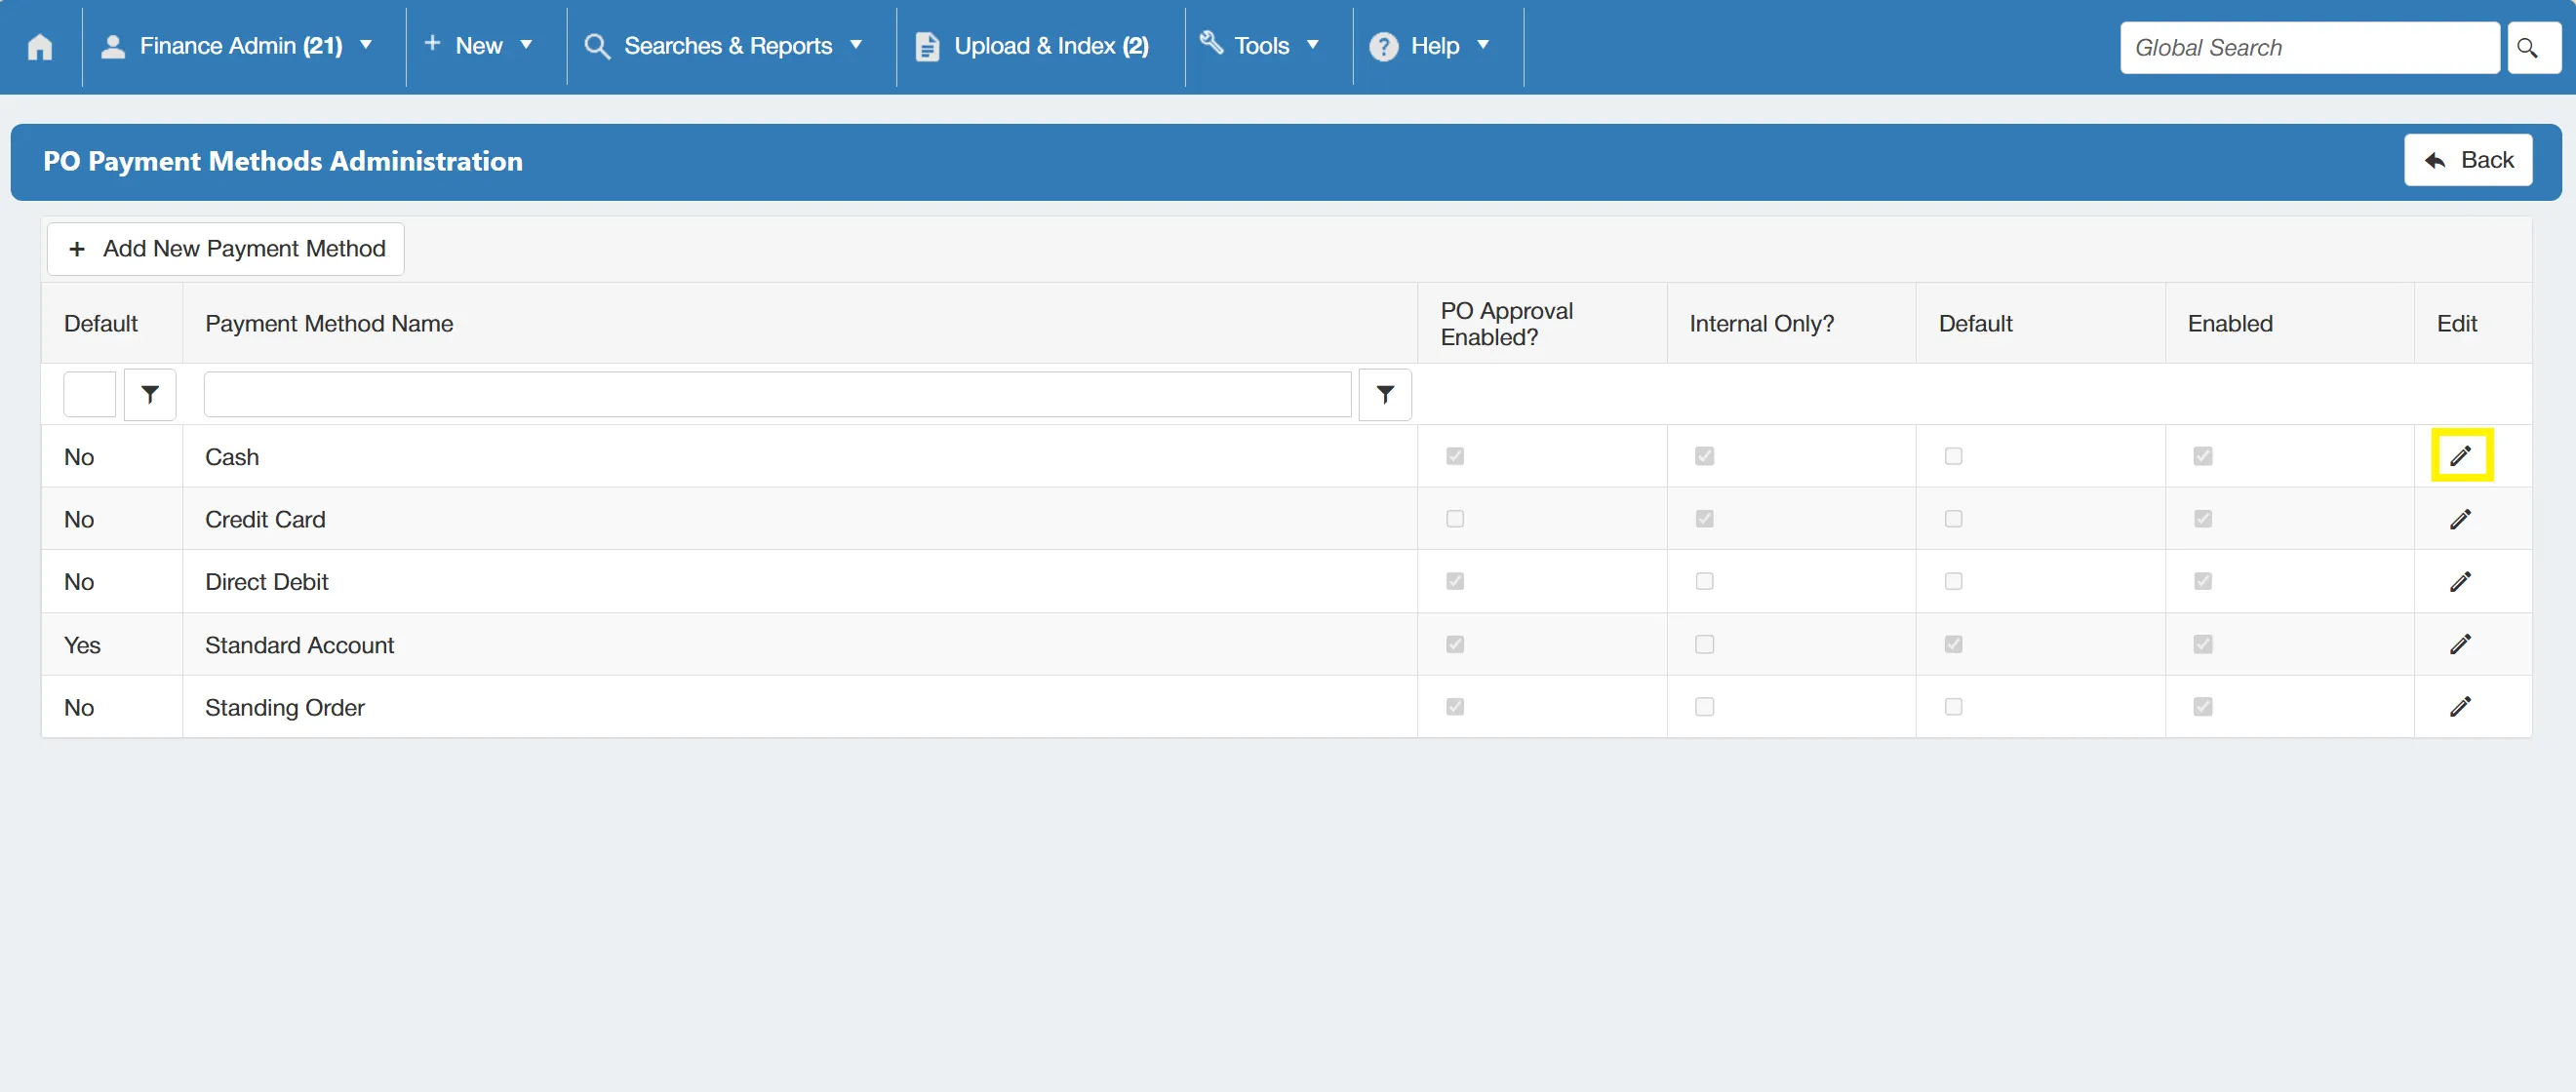
This allows you to edit the fields and make changes. Once you are happy with these changes, click on the to save.
Disabling an Active PO Payment Method
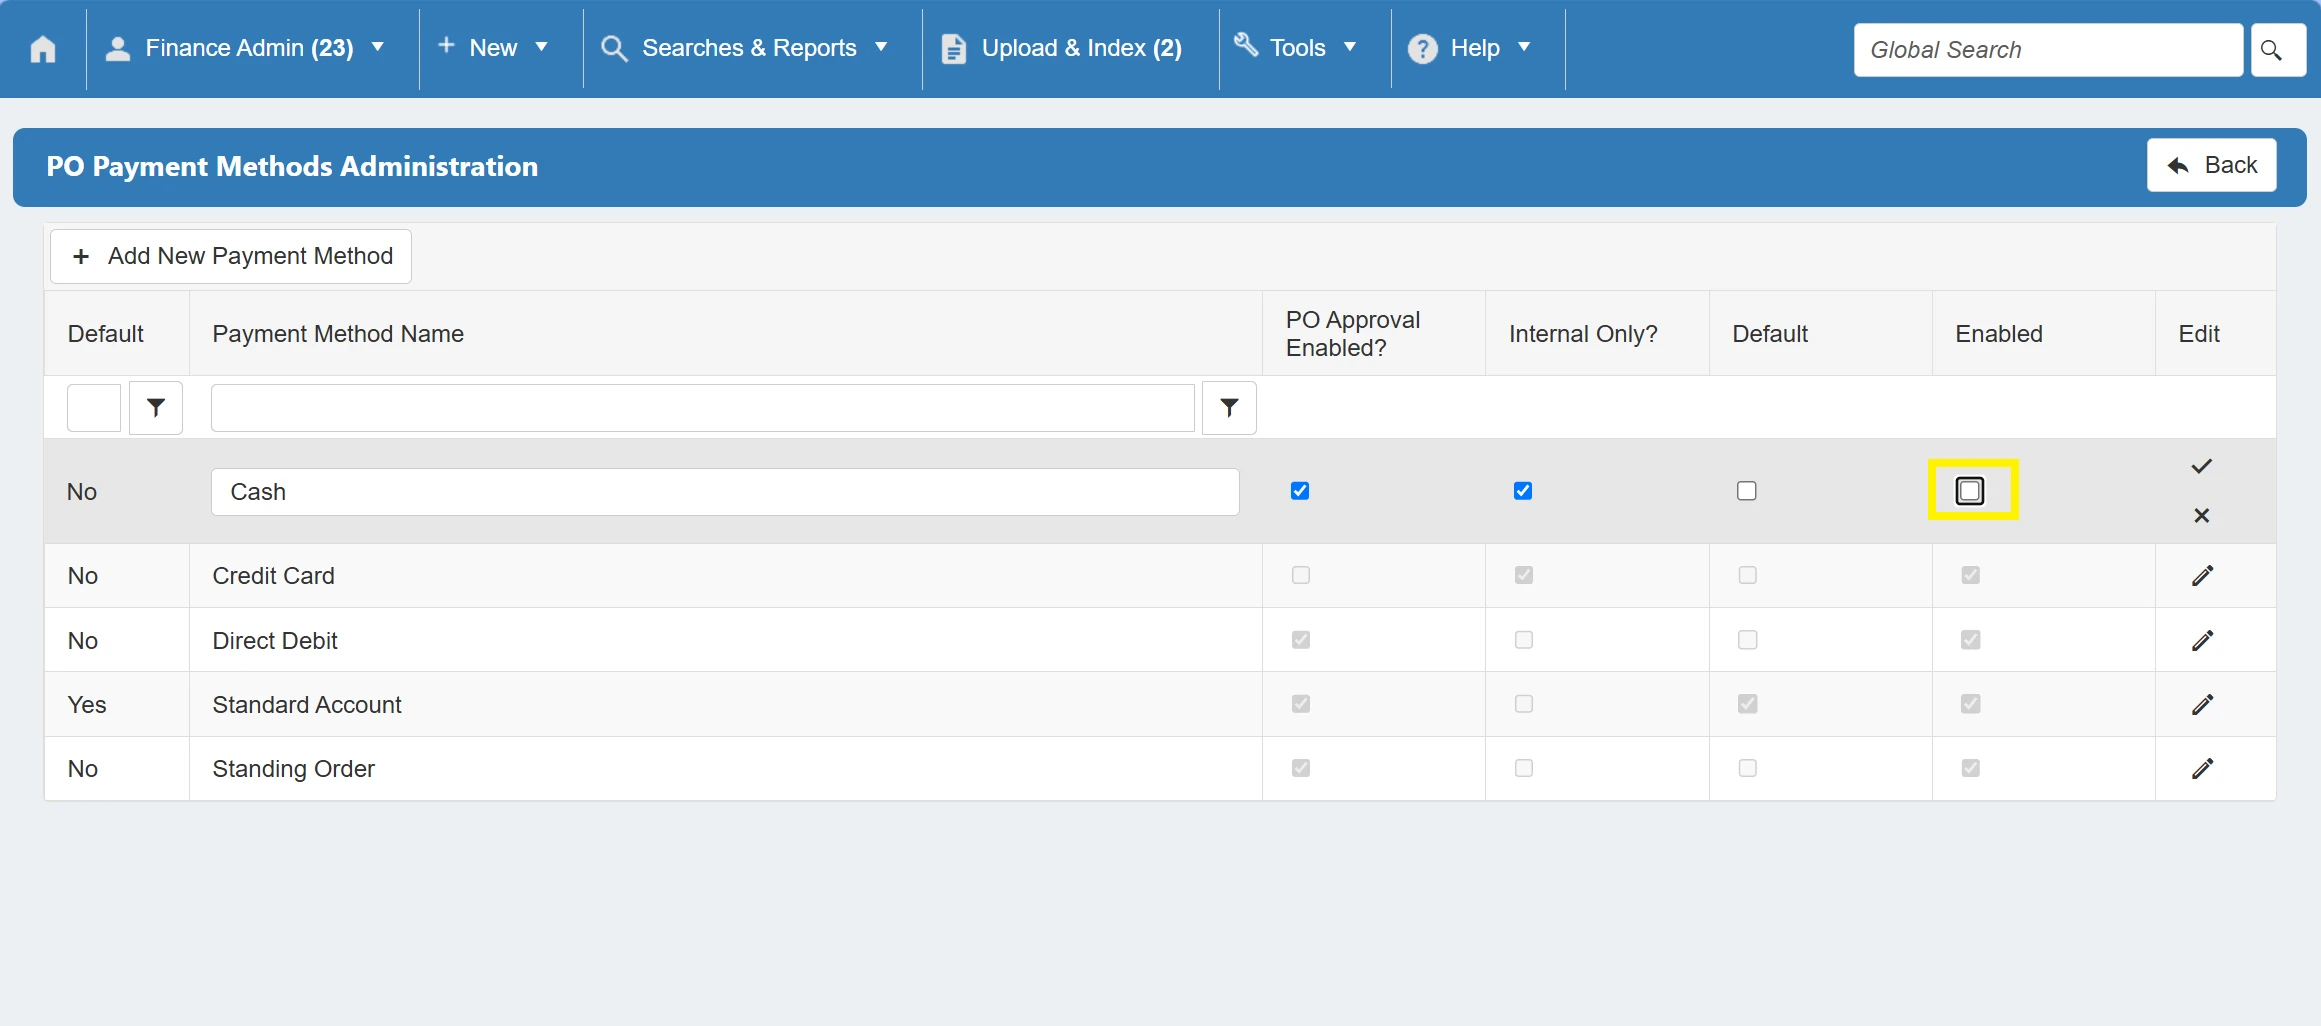
It is not possible to completely remove payment methods from the system as they need to be retained for audit purposes. However, if you would like a payment method to no longer be available for use, it can be disabled by clicking on and then un-ticking the Enabled checkbox.
PO Special Instructions Admin
Special Instructions are presented clearly on the PO document for suppliers to review and act upon. They are typically delivery instructions such as "Please deliver to reception". From this settings section, you can create new Special Instructions templates, and edit or delete existing templates.
Users must have the System Admin permission enabled to access this feauture. For information on user permissions, click here.
Access to this section is linked to the System Admin user permission. For more information on User Permissions, click here.
You can add, edit, and remove PO Special Instruction Templates in the system by clicking on the PO Special Instructions Admin icon within the Configuration & Settings section.
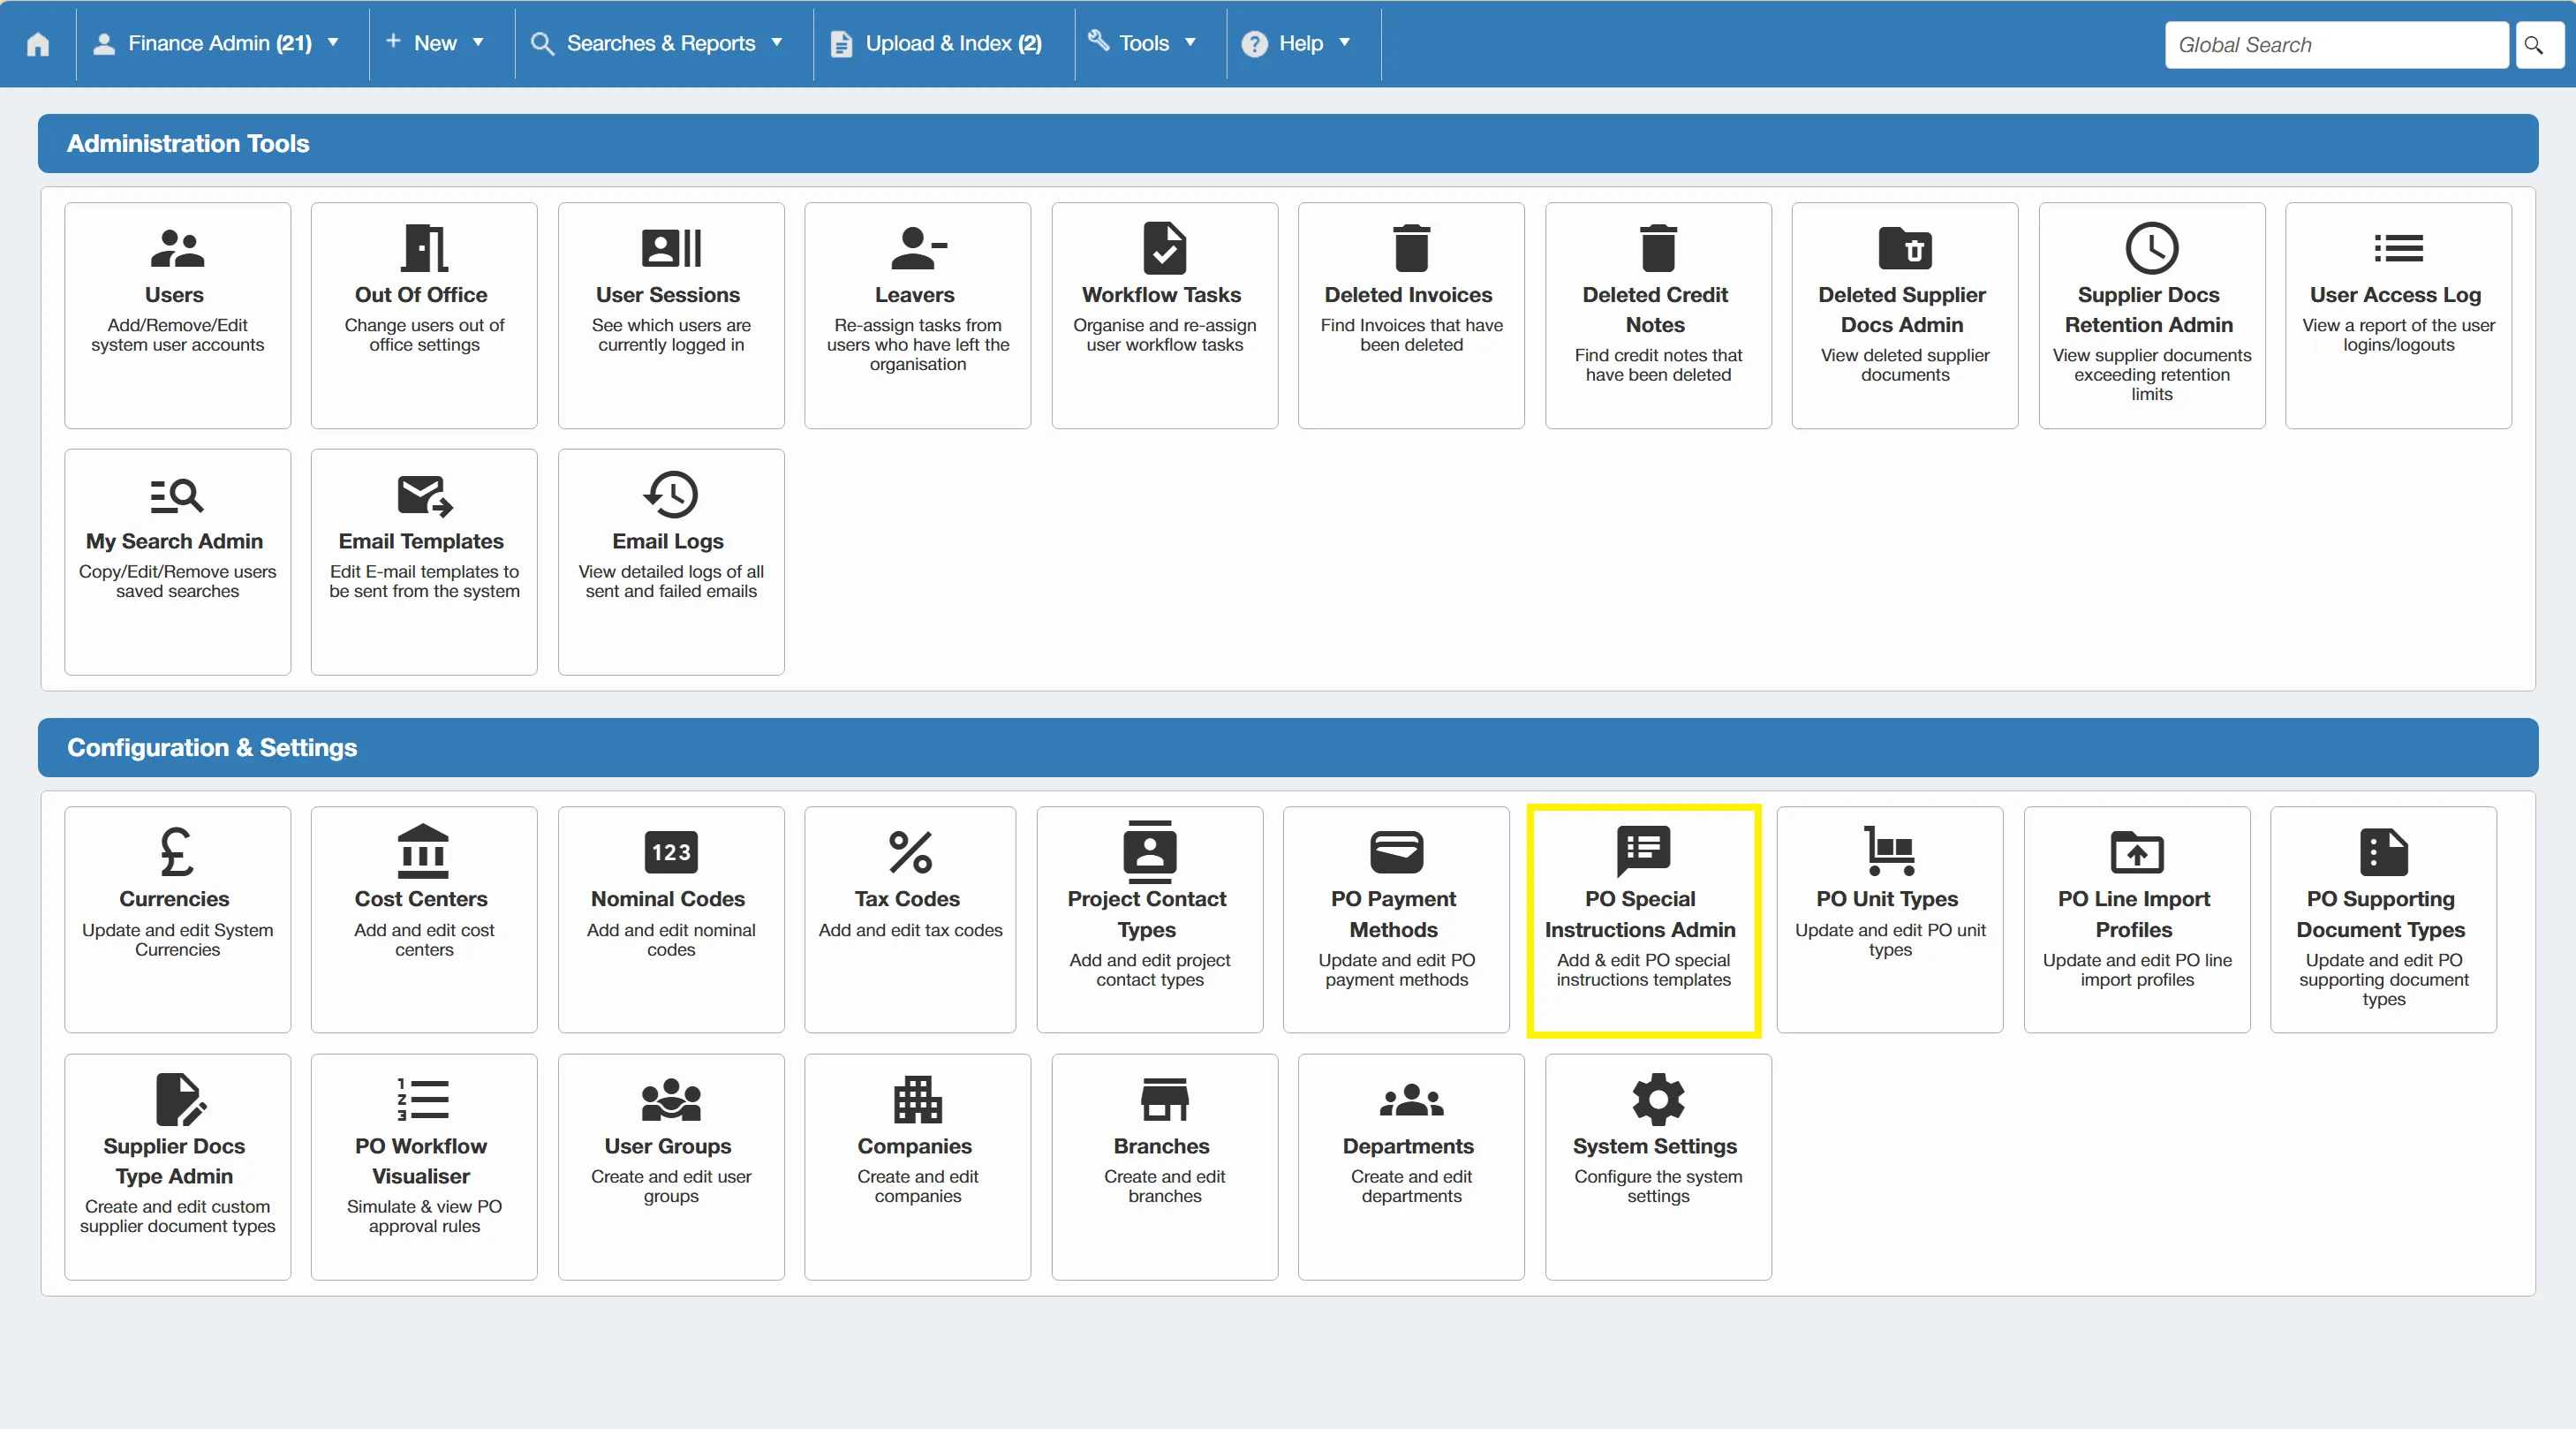
This takes you to the PO Special Instructions Template Admin grid. From this page, you can administer the various PO Special Instruction Templates.
Adding a New Special Instruction Template
To add a new template, simply click the button.
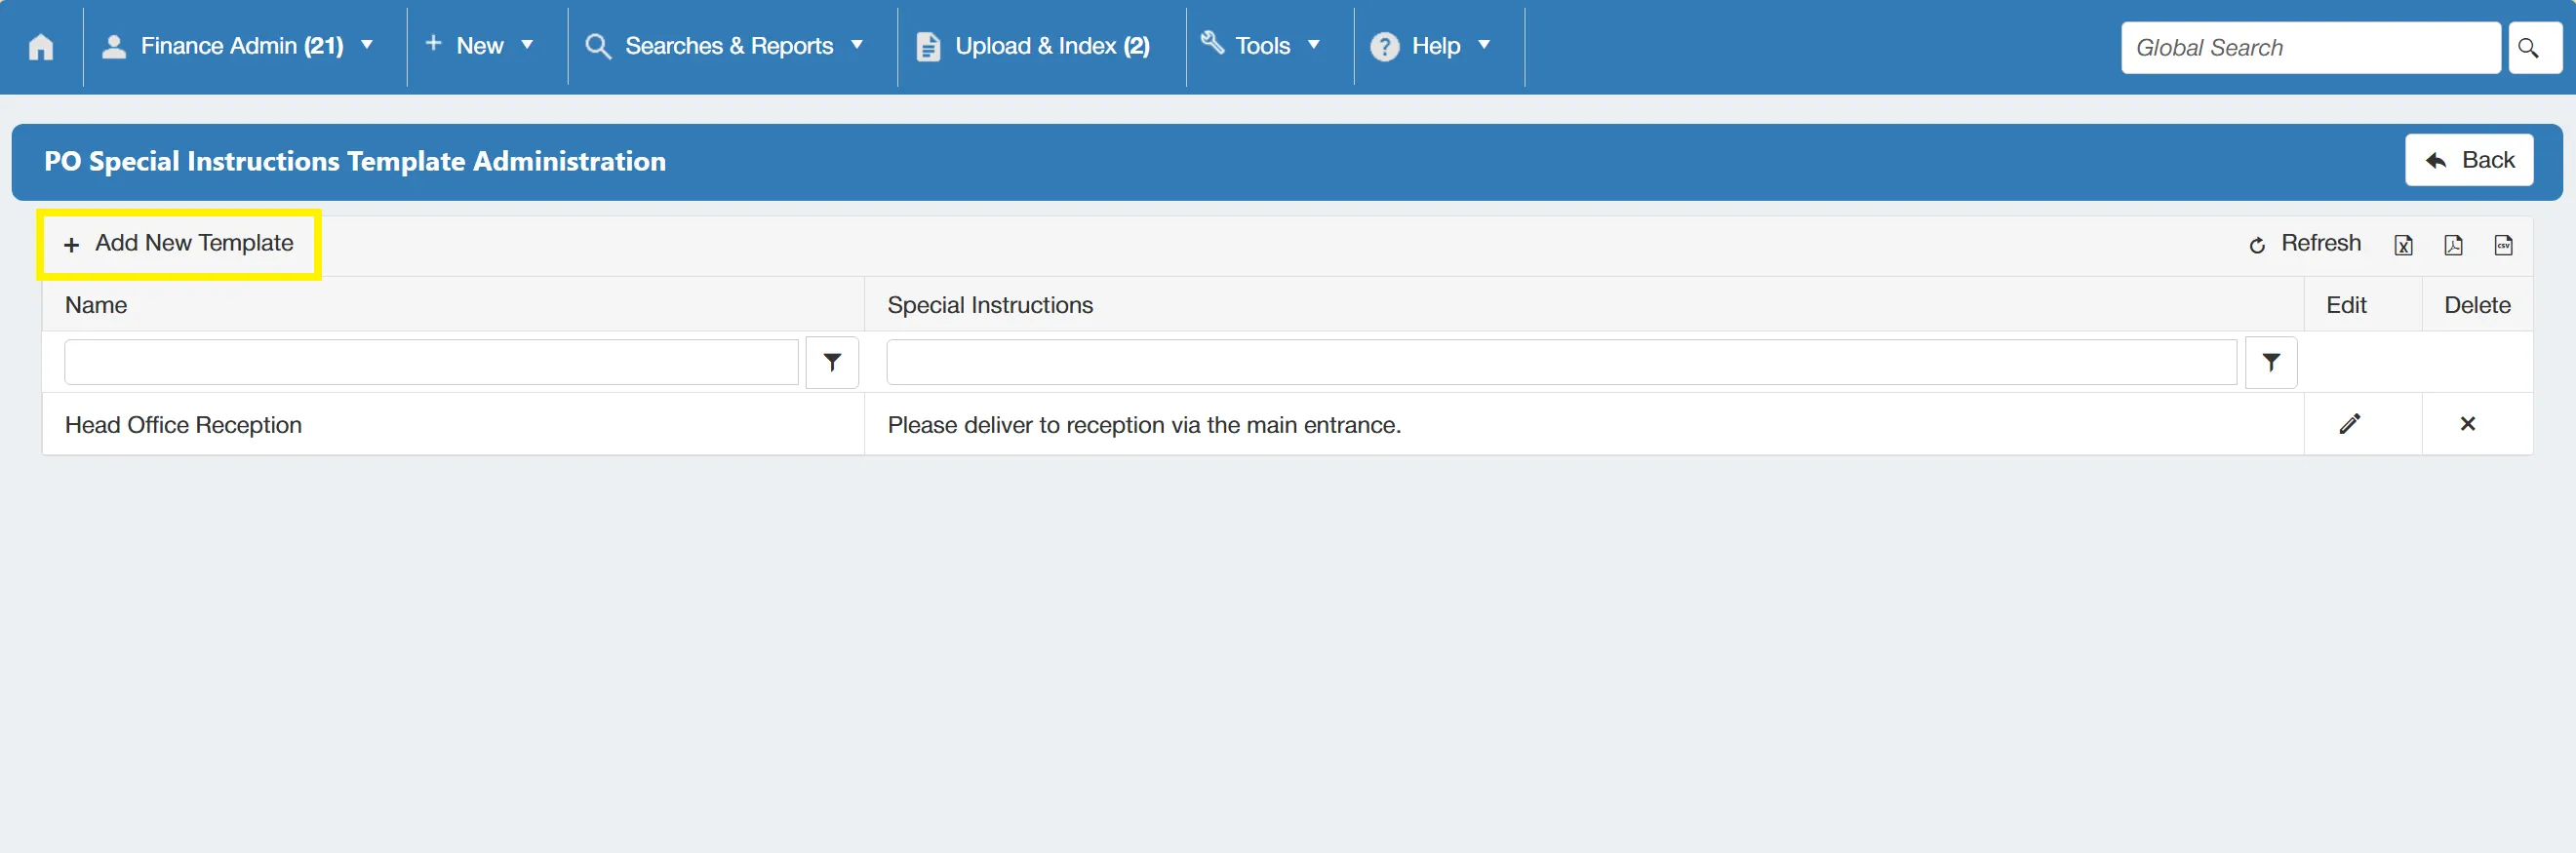
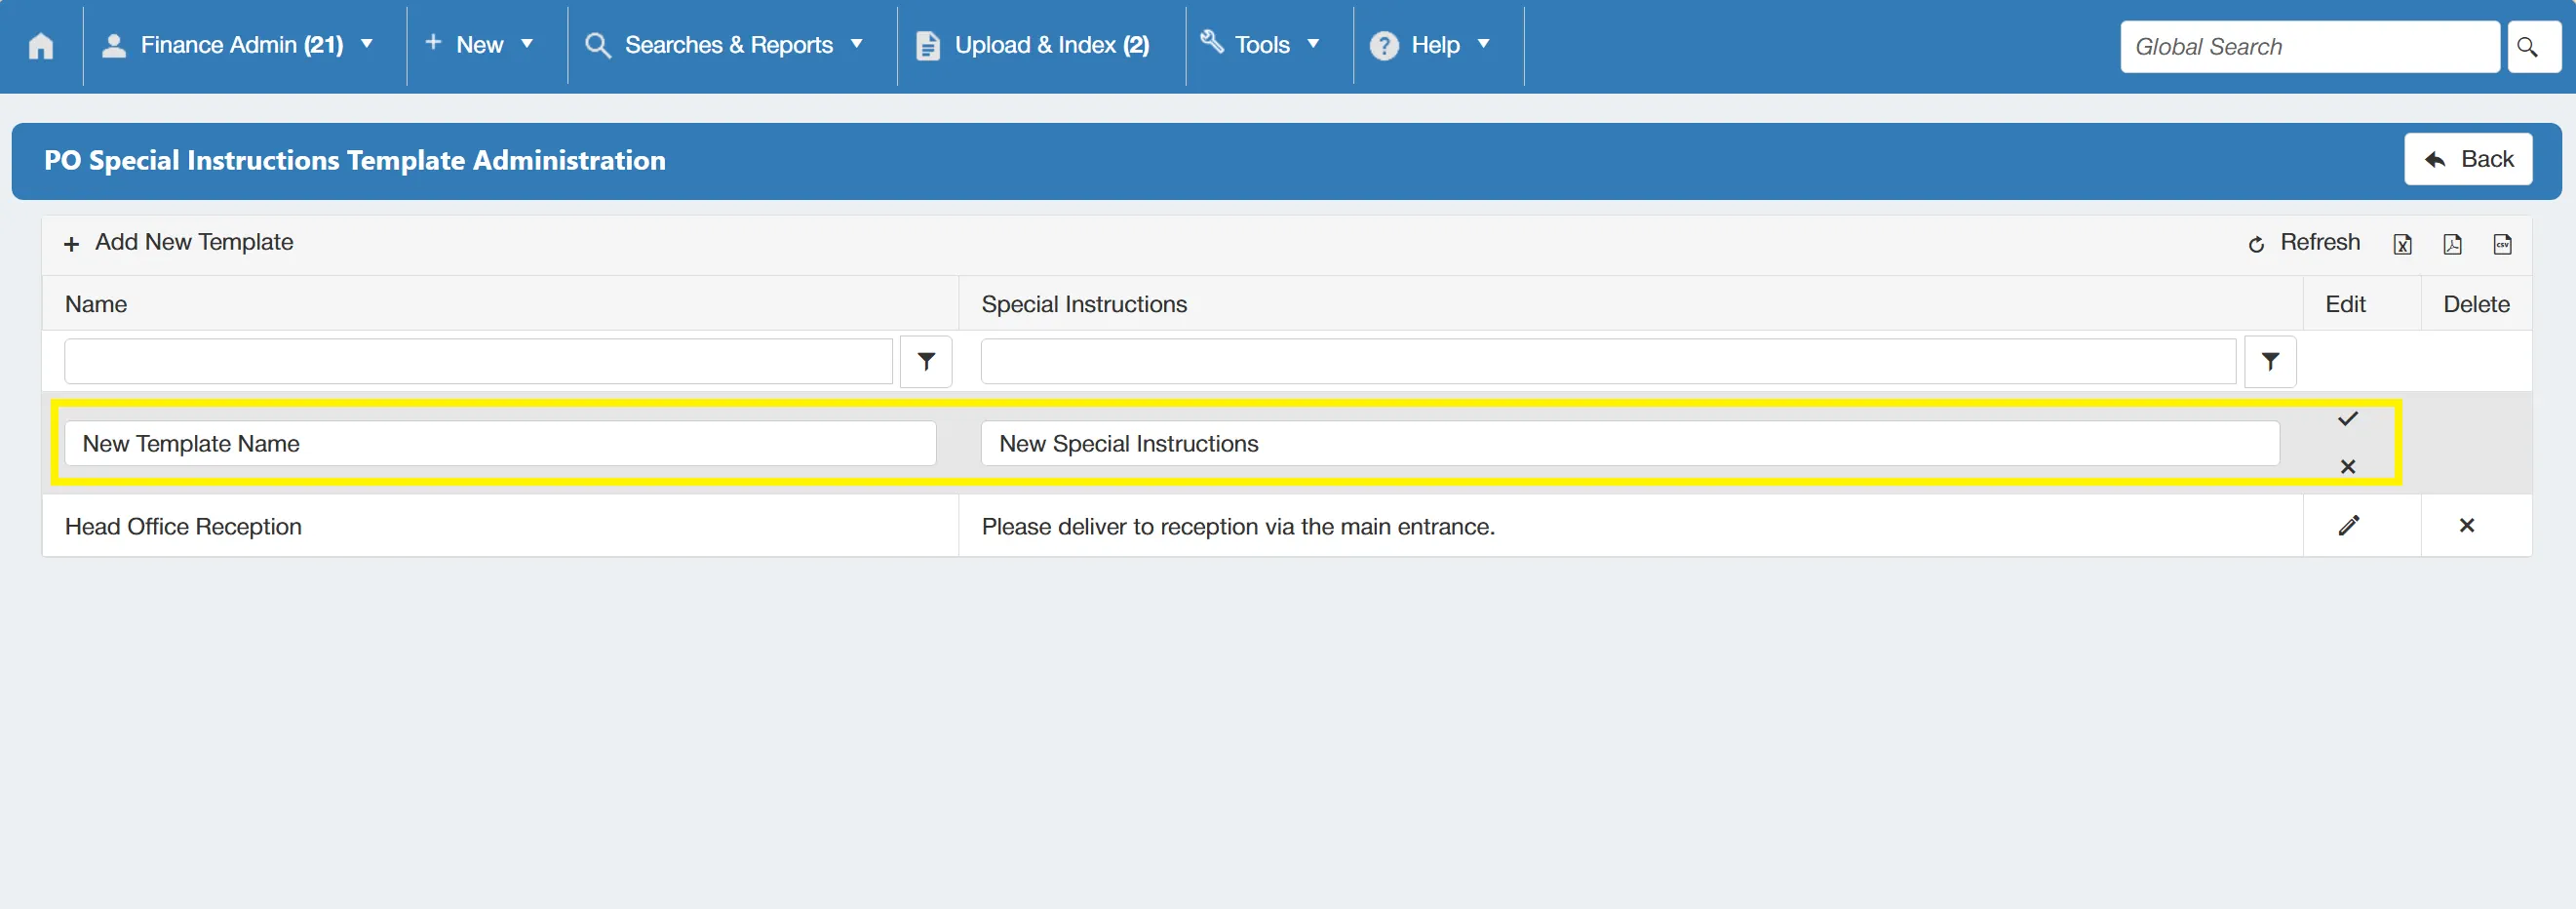
This adds a new line to the grid which allows you to input your new Special Instruction Template. Once happy with the details, click on the tick symbol at the end of the line to save this. Alternatively, you can click on the symbol to cancel.
Editing an Existing Special Instruction Template
To edit an existing PO Special Instruction Template, simply click on the edit icon on the desired line.
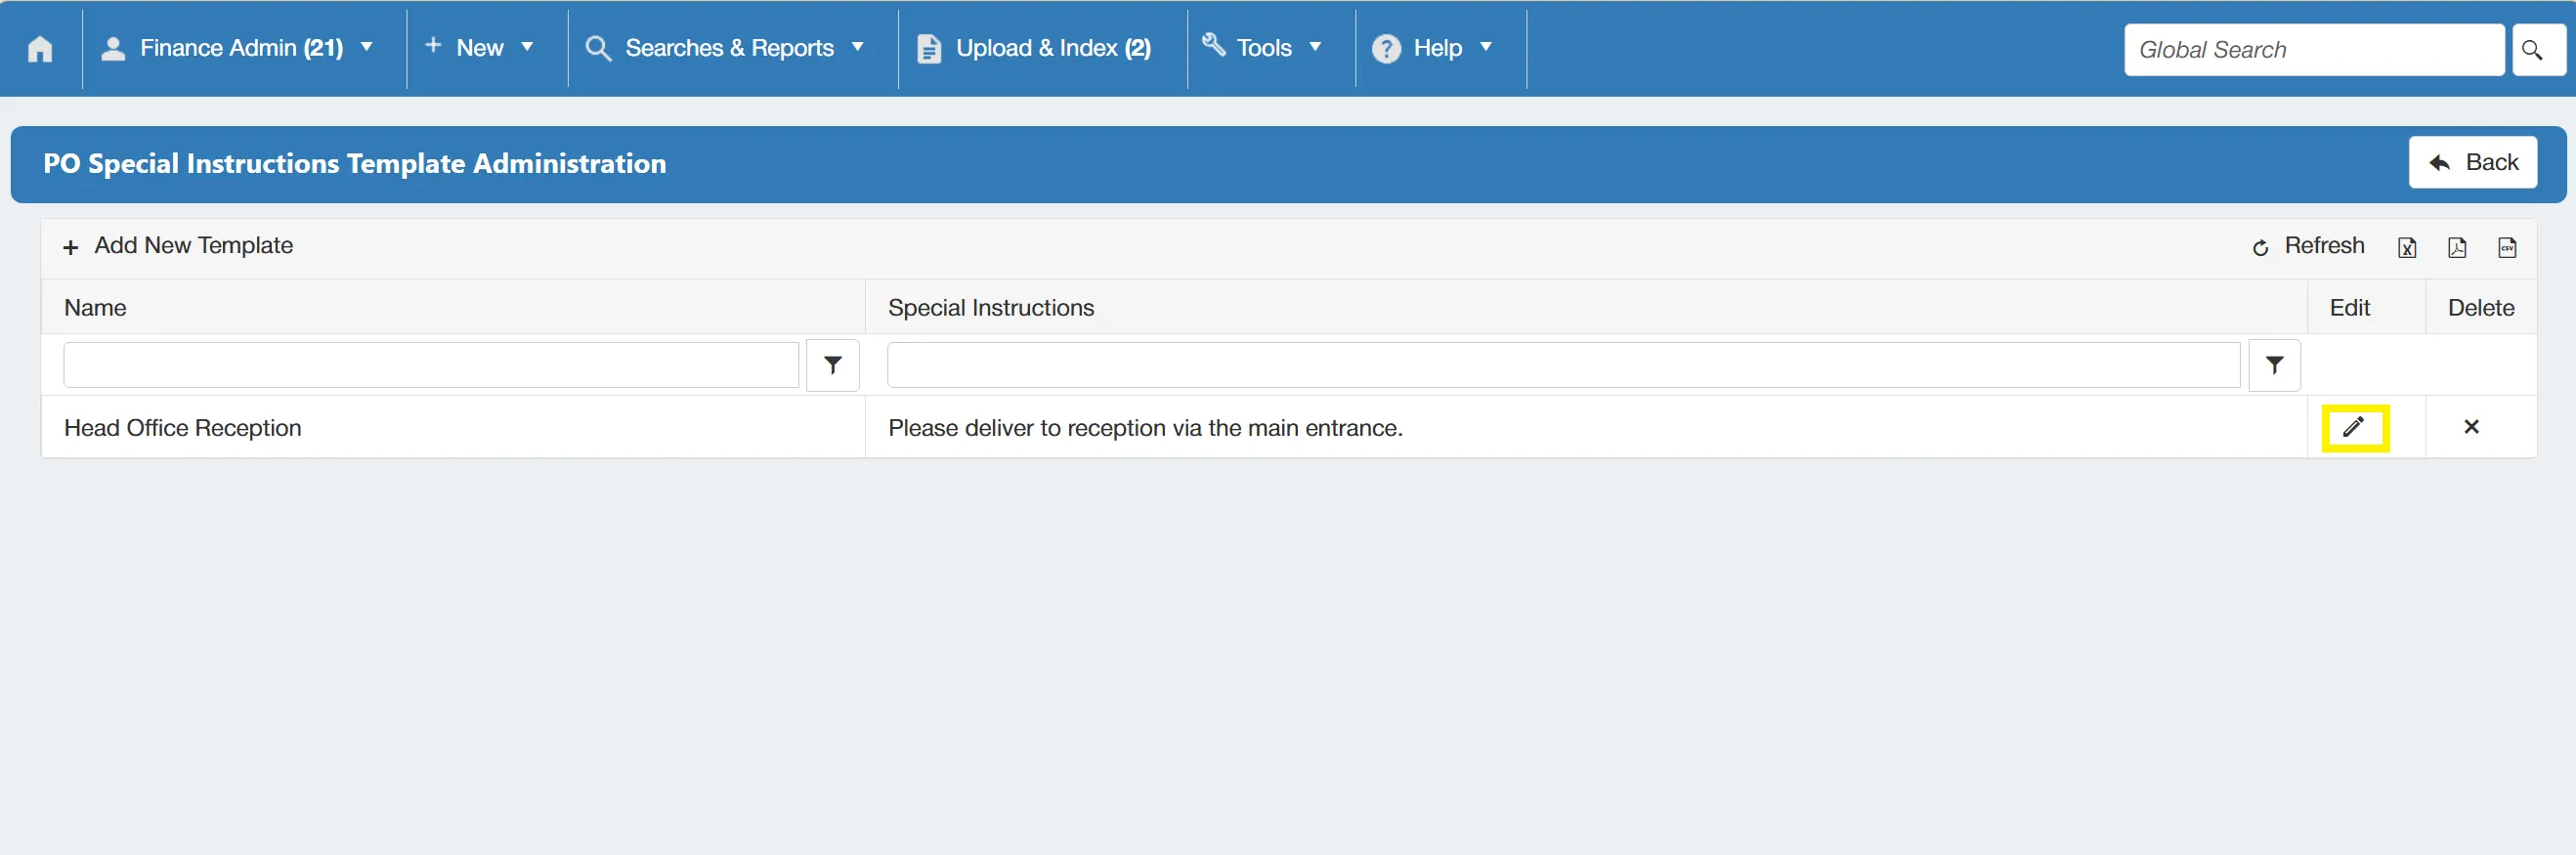
This allows you to edit the fields and make changes. Once you are happy with these changes, click on the to save.
Removing a Special Instruction Template
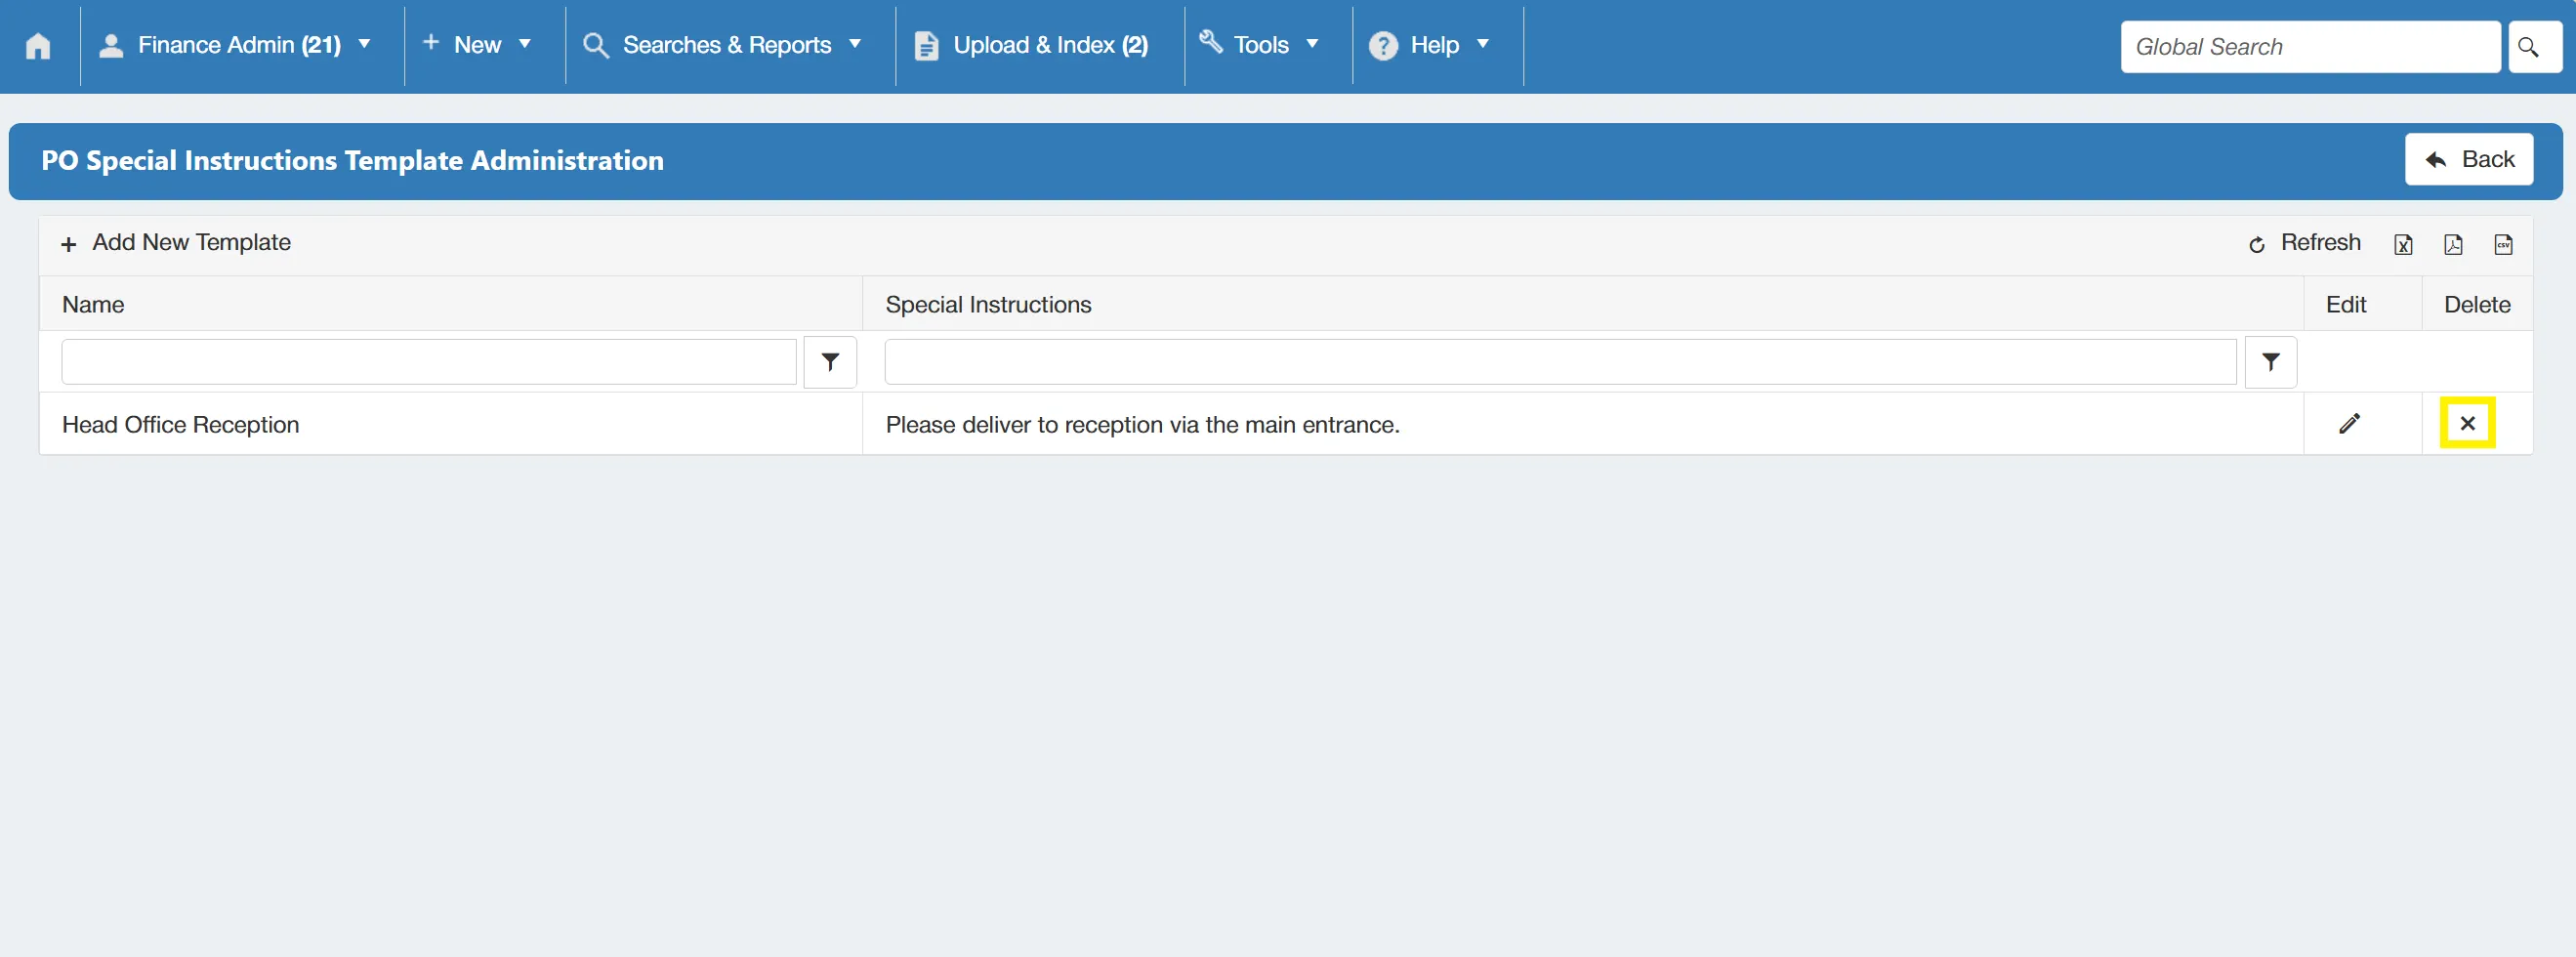
You can remove existing PO Special Instruction Templates by simply clicking the icon on the desired line. This will remove the item from the grid.
PO Unit Types
PO Unit Types are the various unit descriptions available when adding items to a PO. From the settings section you can add new types, remove unwanted types and edit existing types.
Users must have the System Admin permission enabled to access this feauture. For information on user permissions, click here.
You can add, edit and remove PO Unit Types in the system by clicking on the PO Unit Types icon within the Configuration & Settings section.
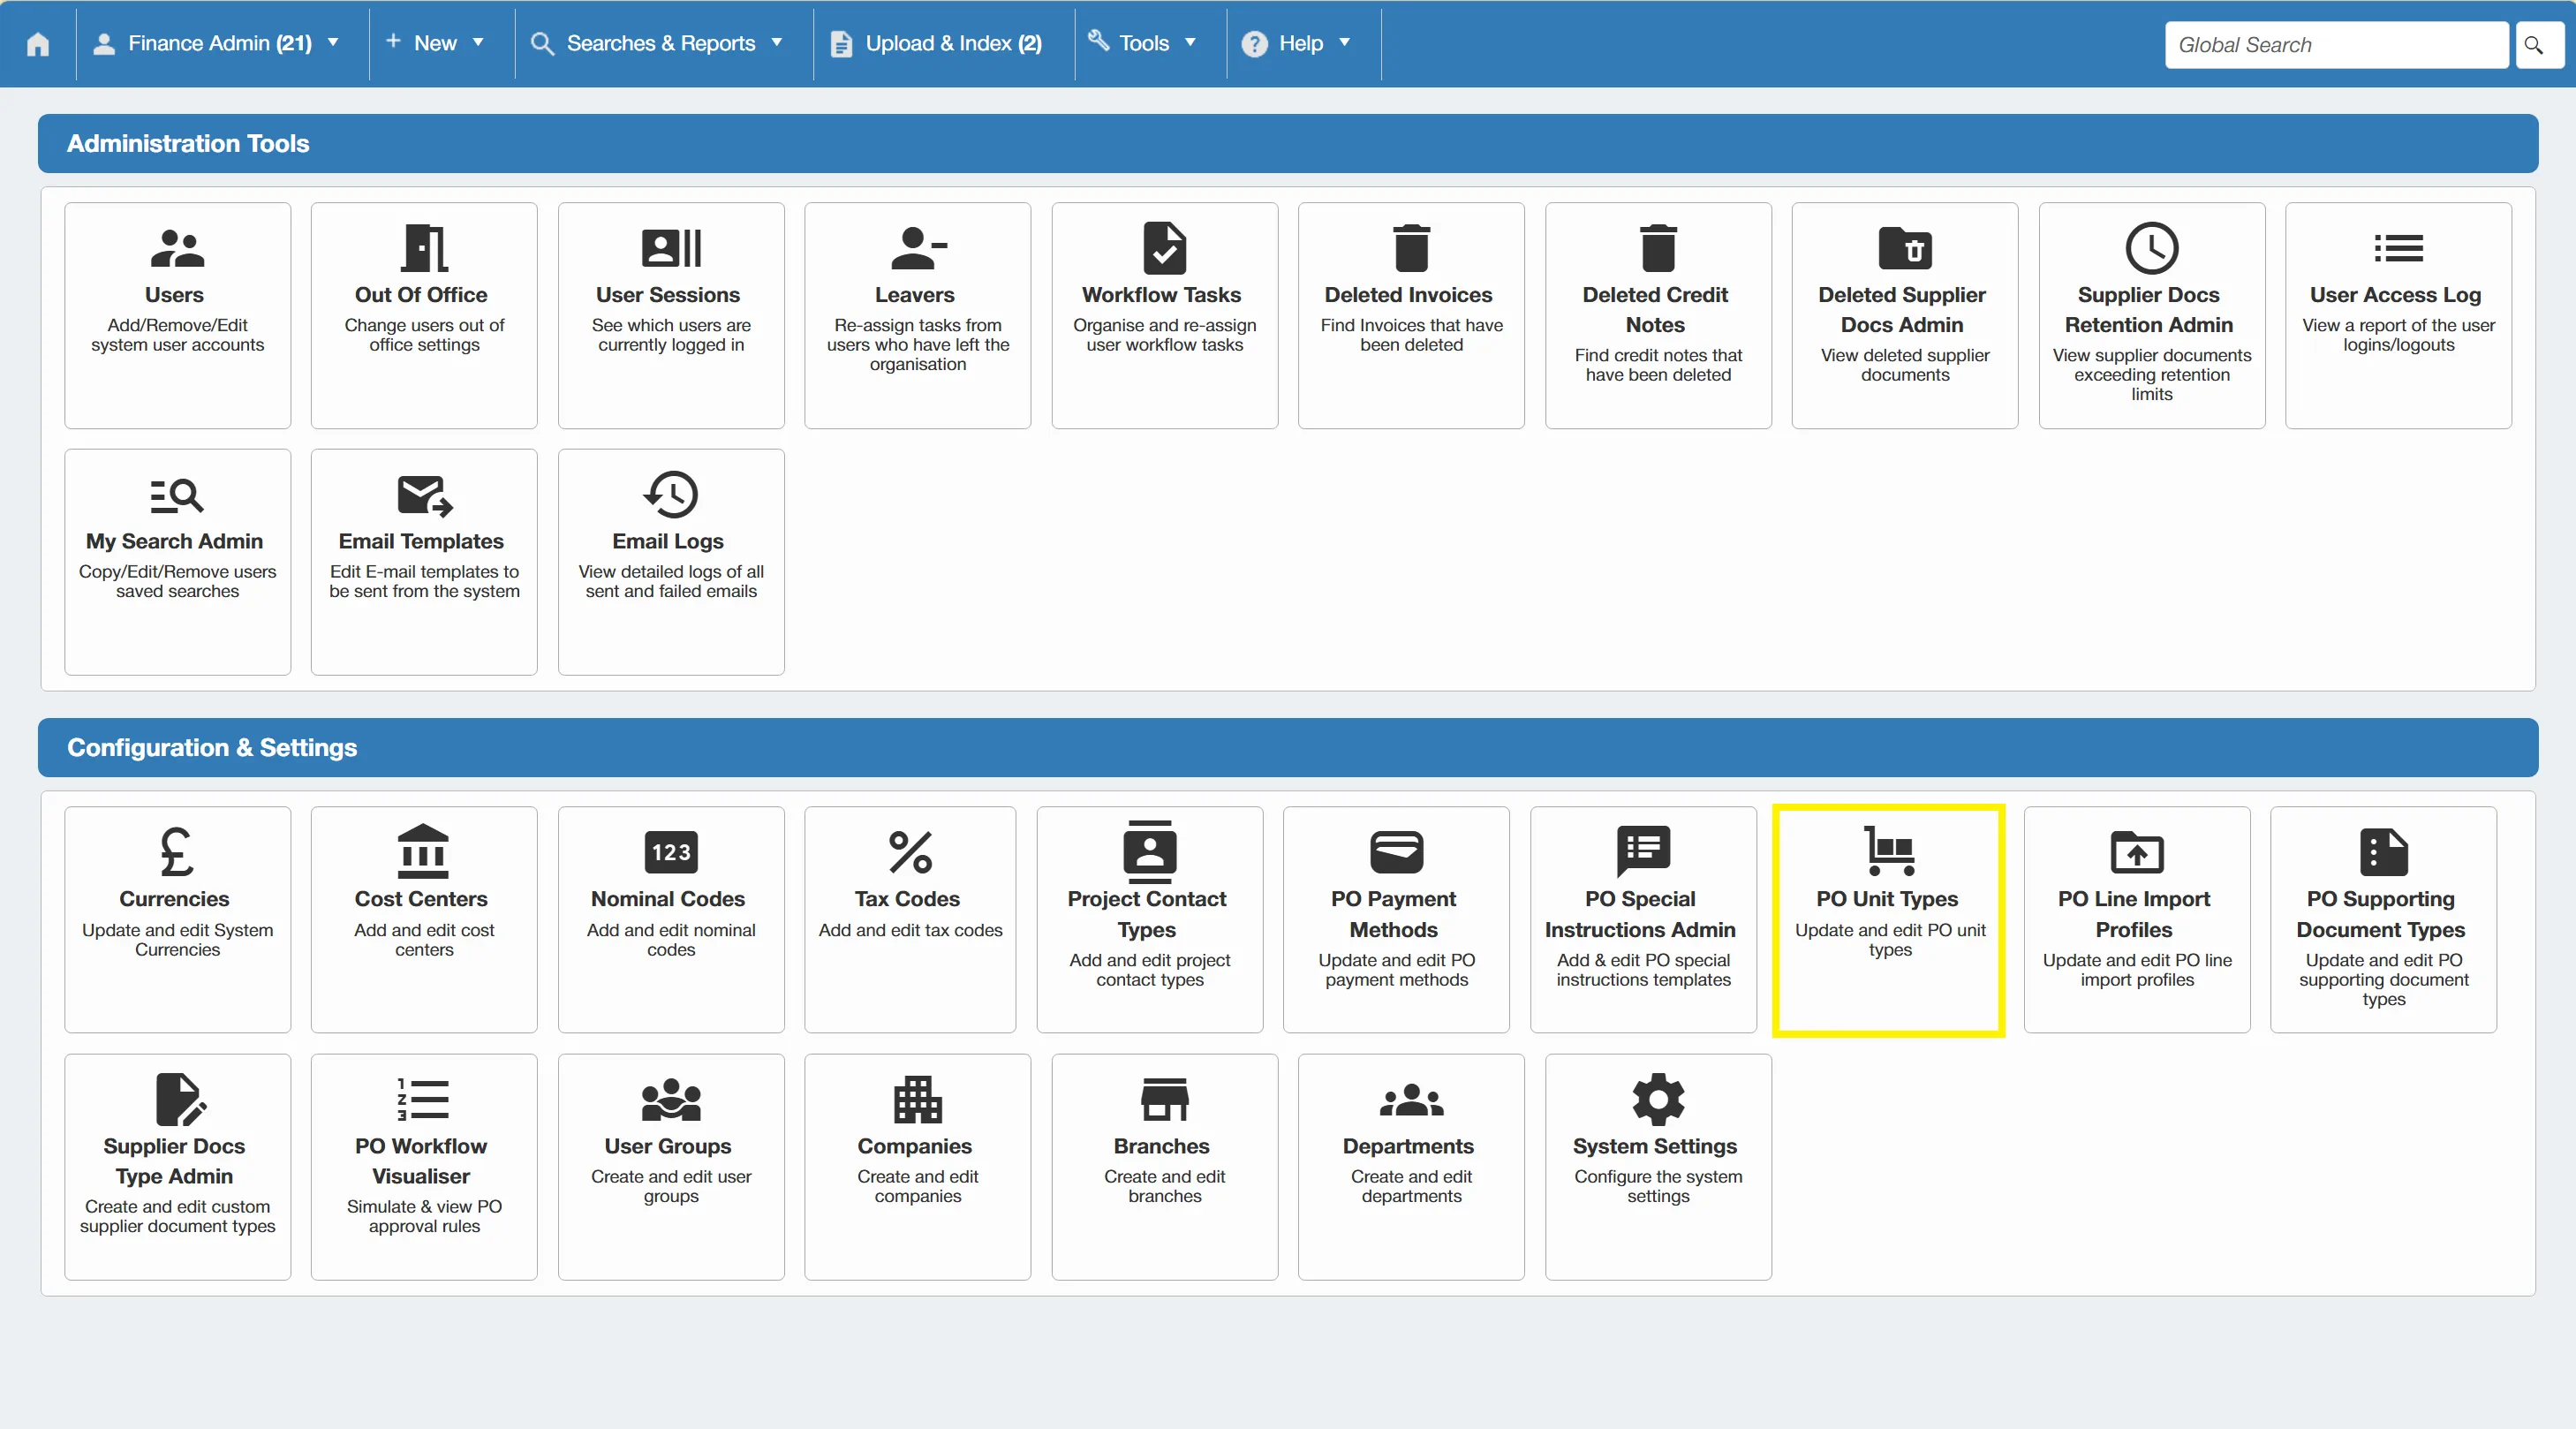
This takes you to the PO Unit Types Administration grid. From here, you can administer the PO unit types.
Adding a New PO Unit Type
To add a new PO unit type, simply click on the button.
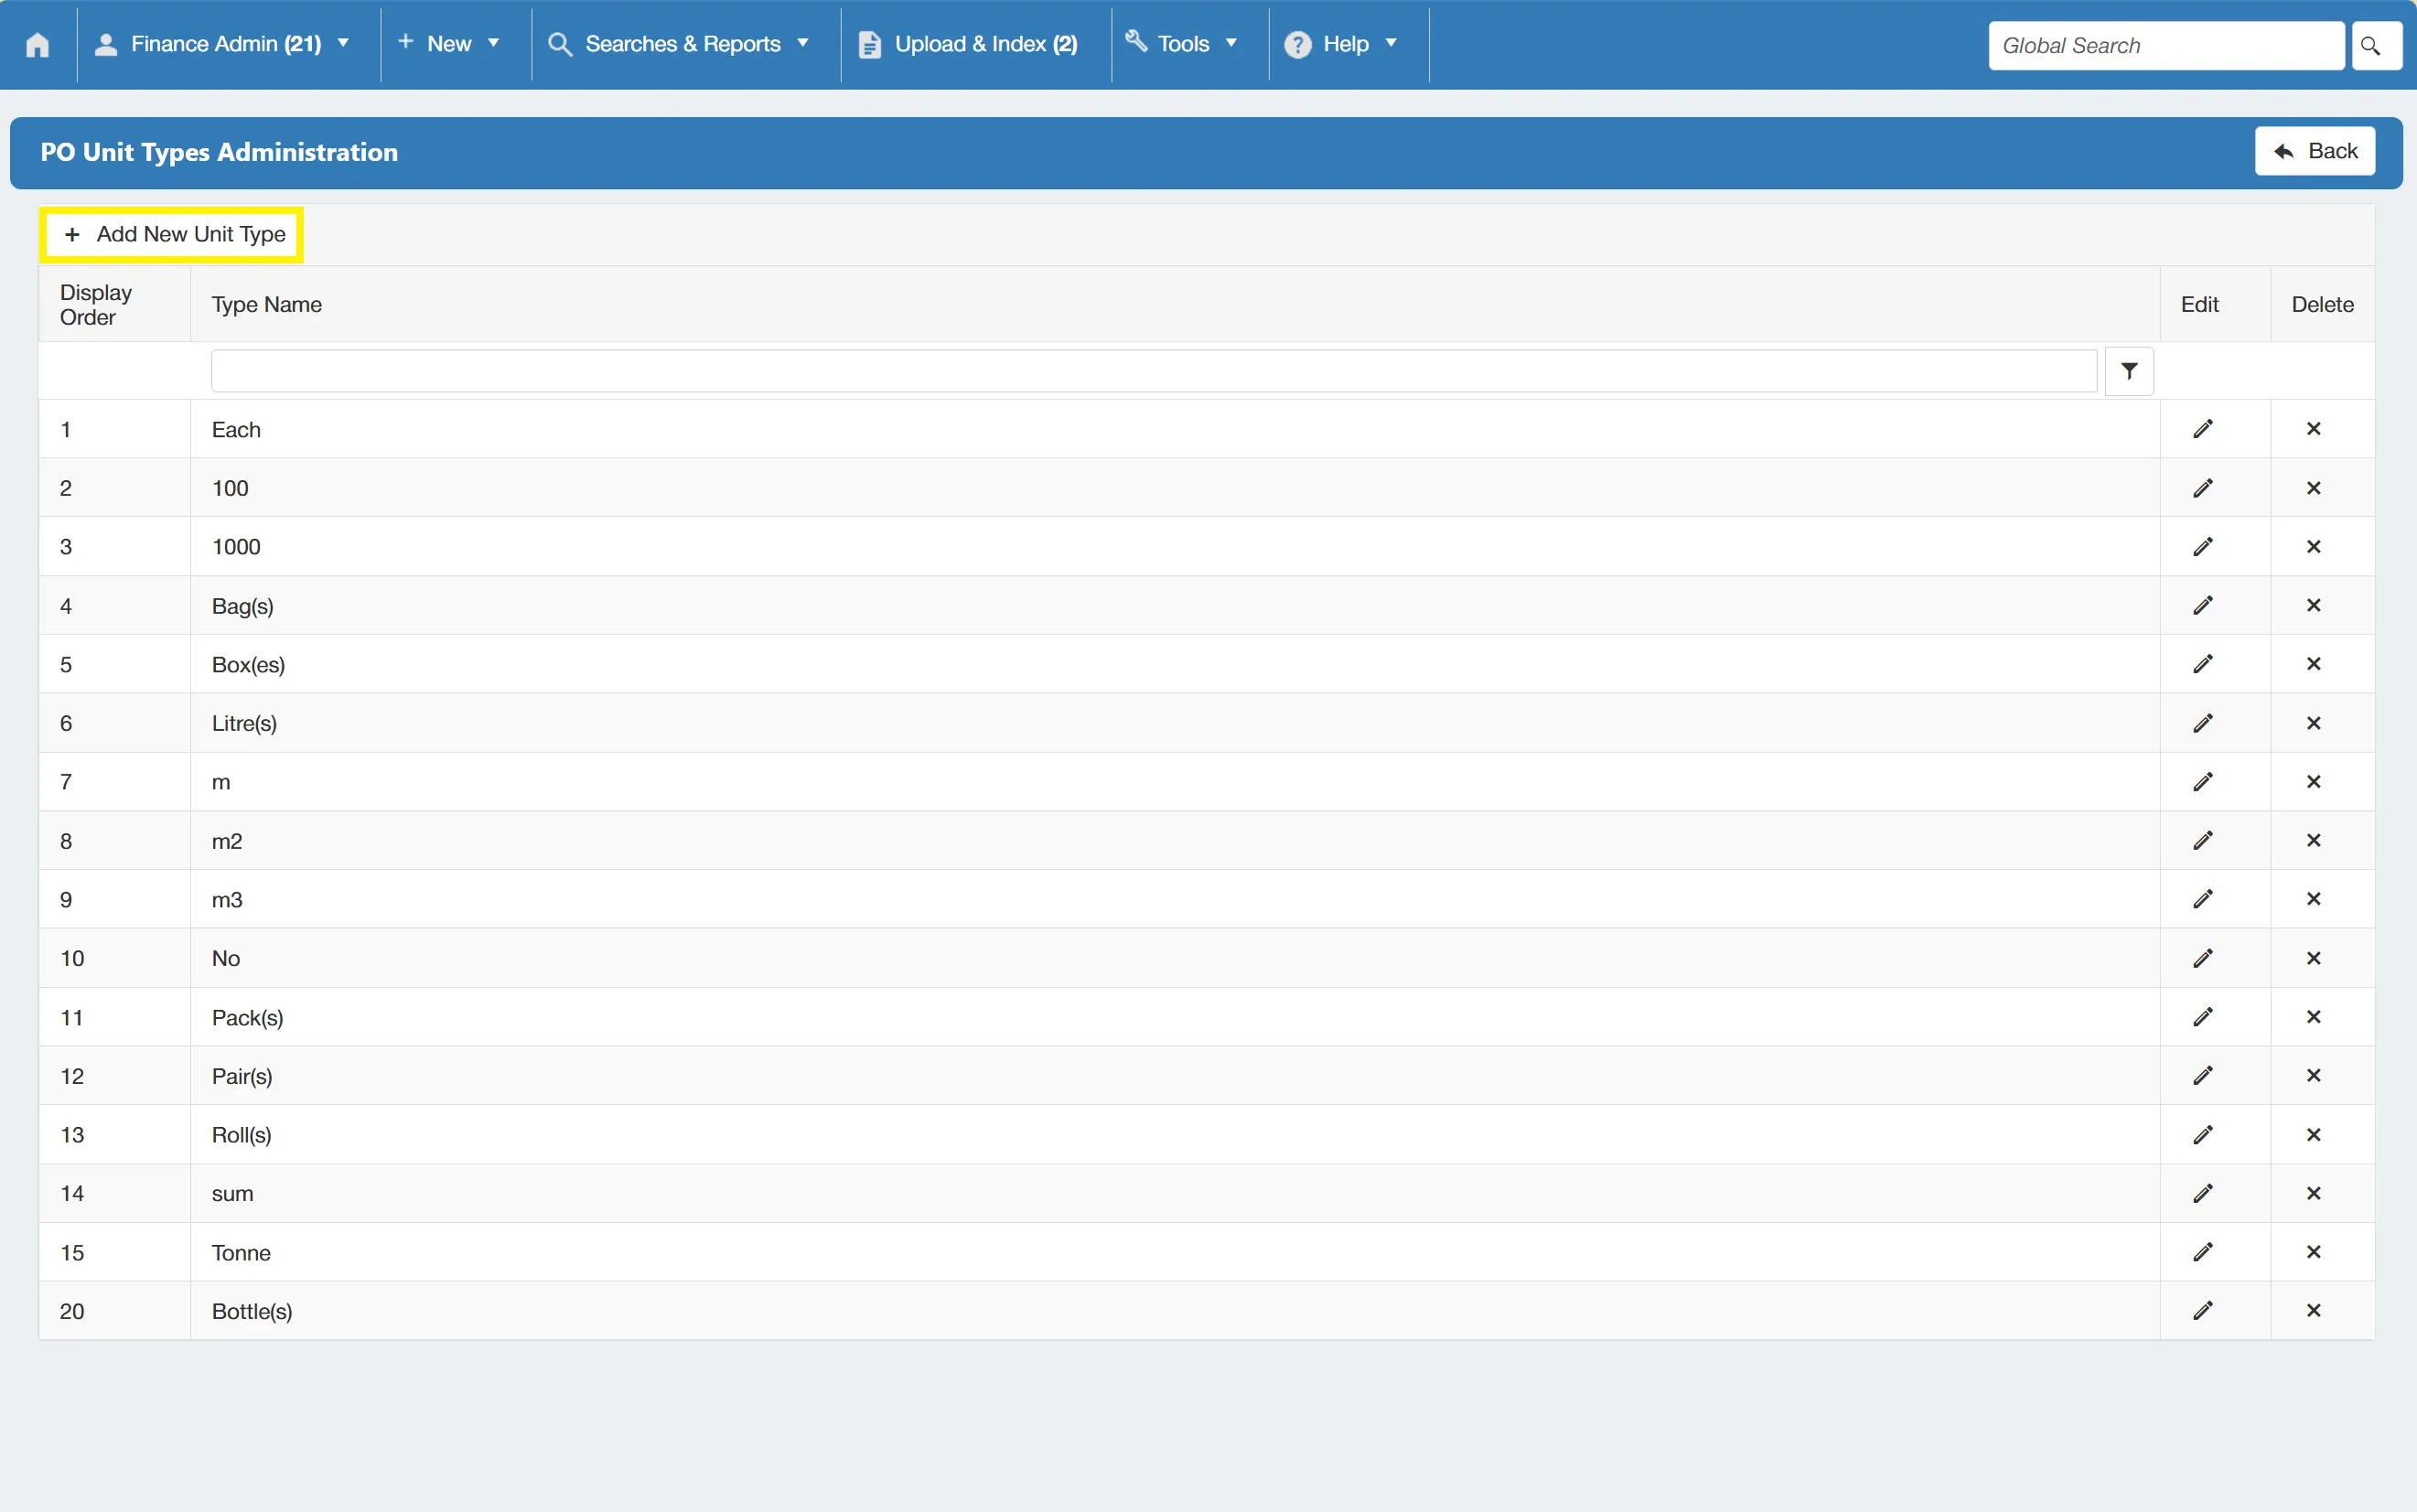
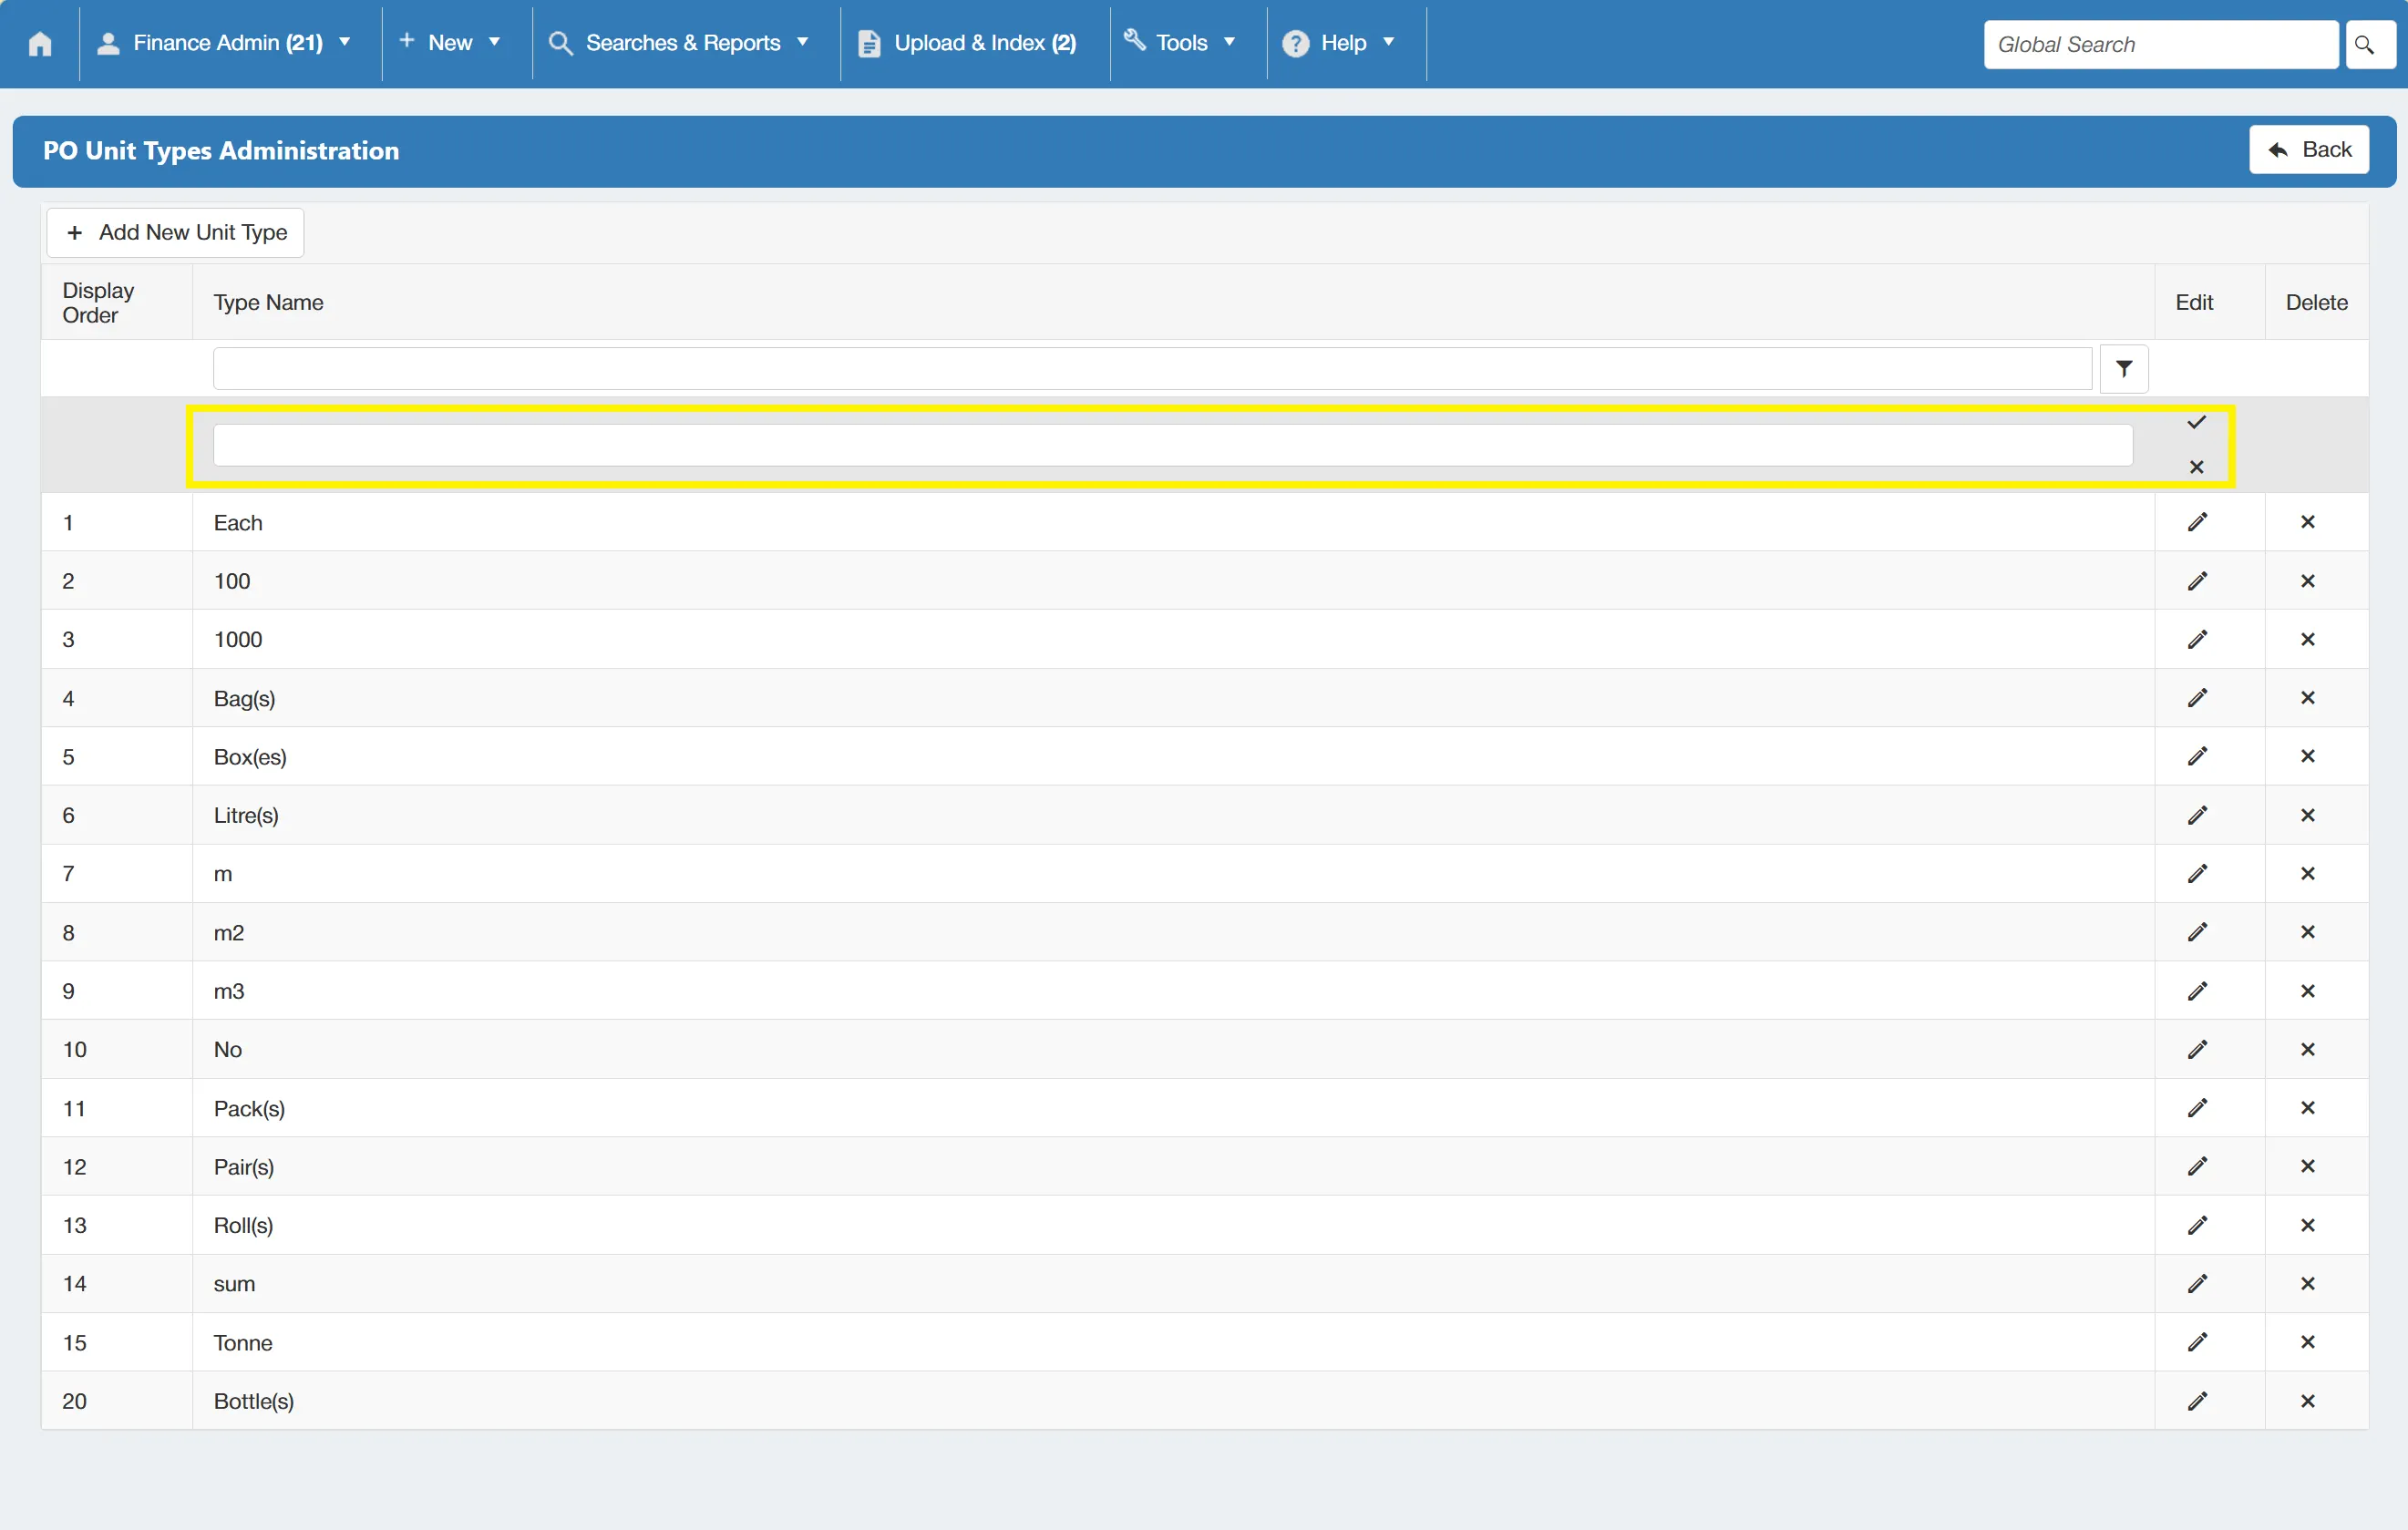
This adds a new line to the grid which allows you to input the new PO unit type. Once you're happy with the details, click on the tick symbol at the end of the line to save. Alternatively, you can cancel by clicking on the symbol.
Editing an Existing PO Unit Type
To edit an existing PO unit type, simply click on the edit icon on the desired line.
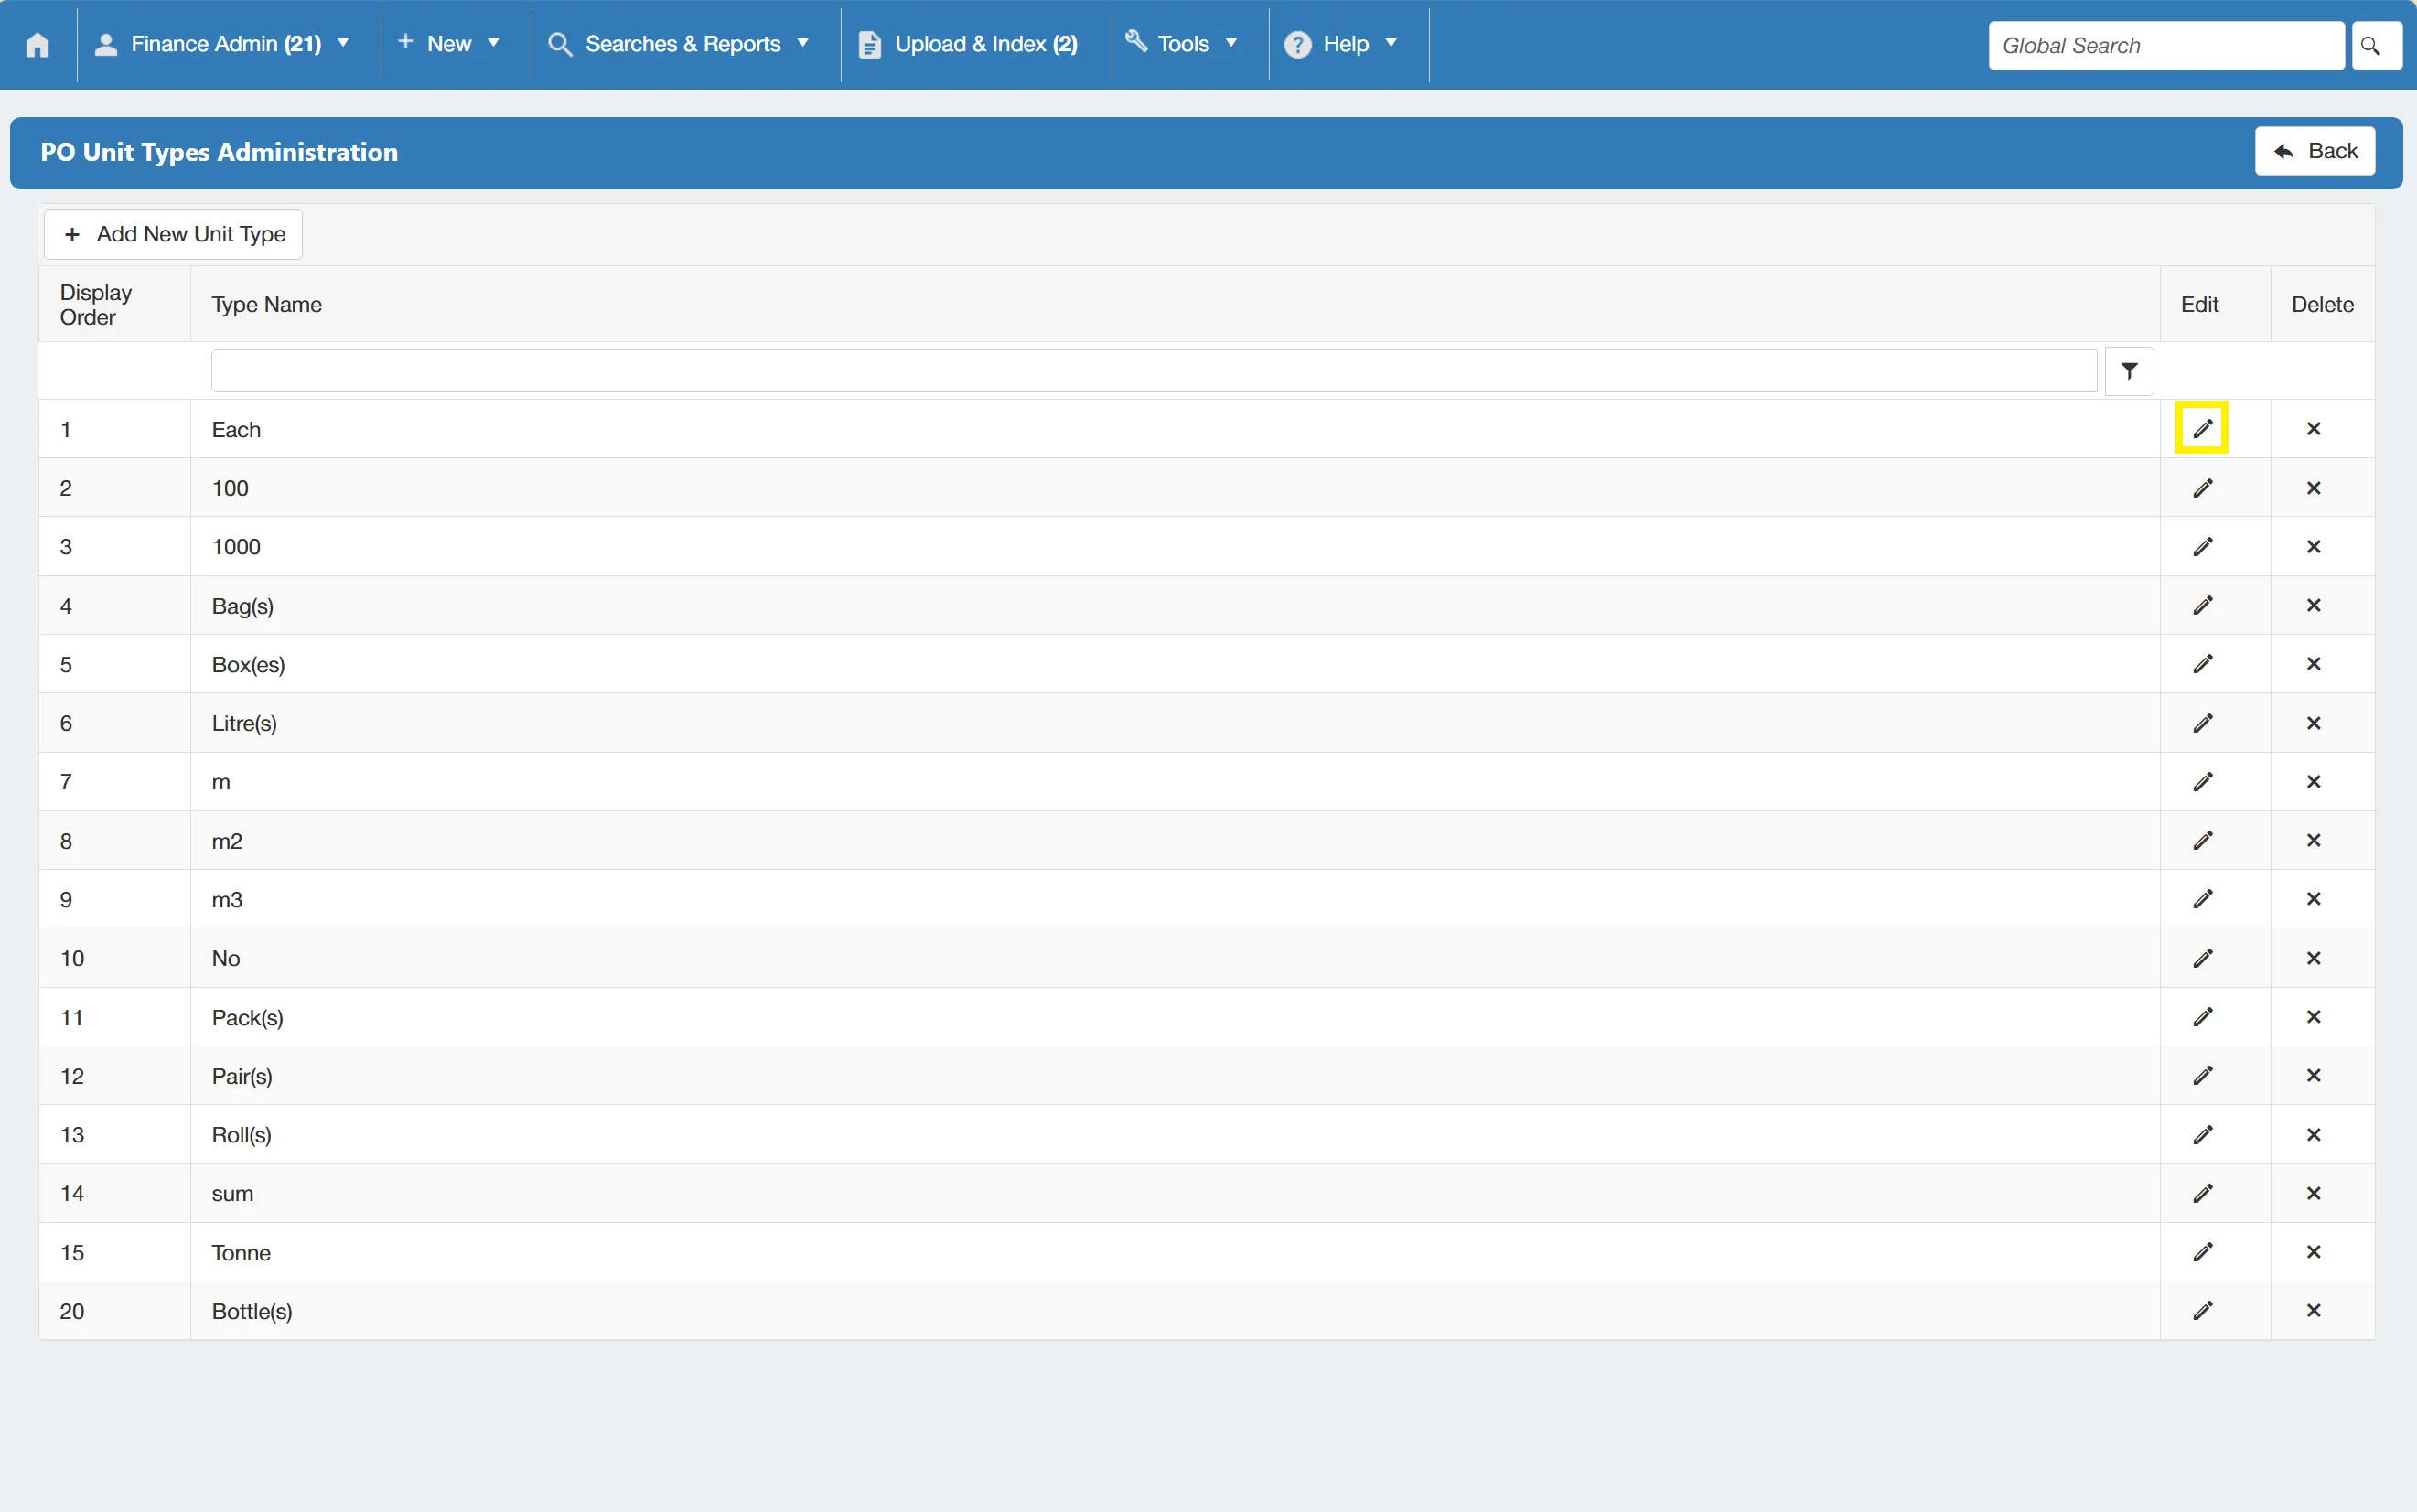
This allows you to edit the fields and make changes. Once you are happy with the changes, click on the tick to save.
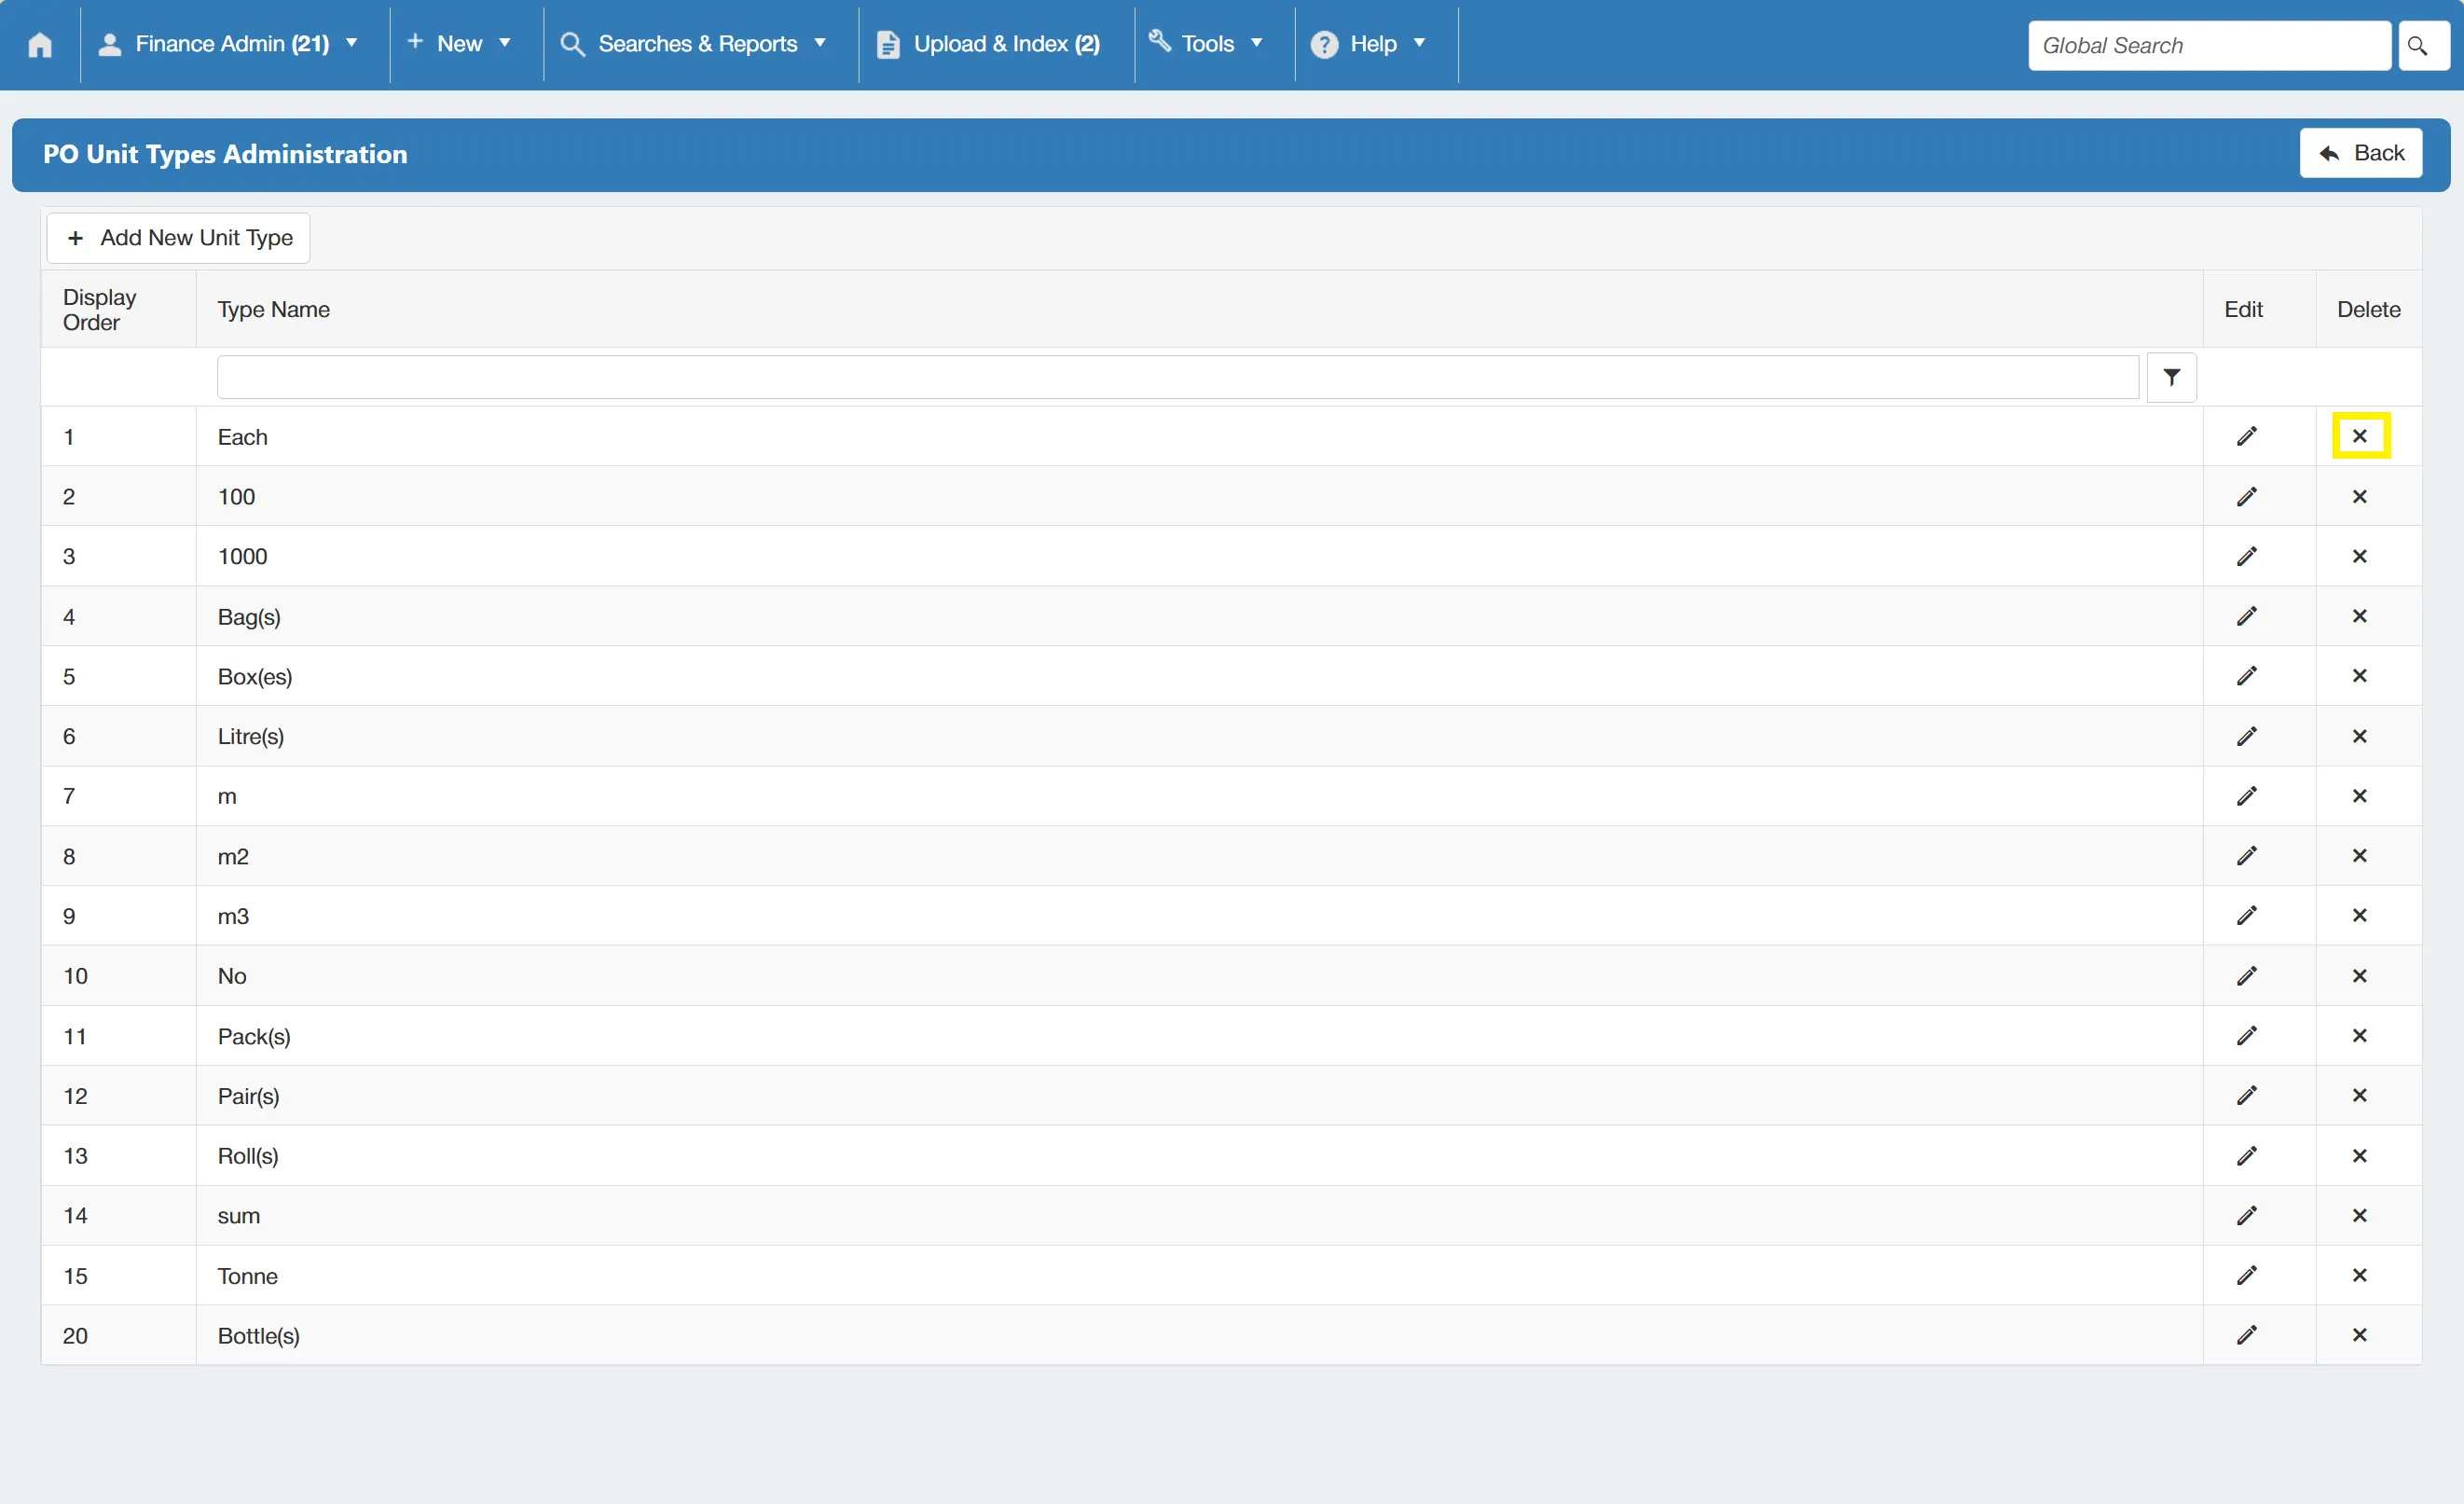
Removing an Existing PO Unit Types
You can remove existing PO unit types by clicking on the icon on the desired line. This will remove the item from the grid.
PO Line Import Profiles
PO Line Import Profiles are used to import a number of PO Lines into the system in bulk when creating a PO. This saves time when creating large purchase orders. From this section you can add new profiles, and edit existing ones.
Users must have the PO Line Import Profiles Admin permission enabled to access this feauture. For information on user permissions, click here.
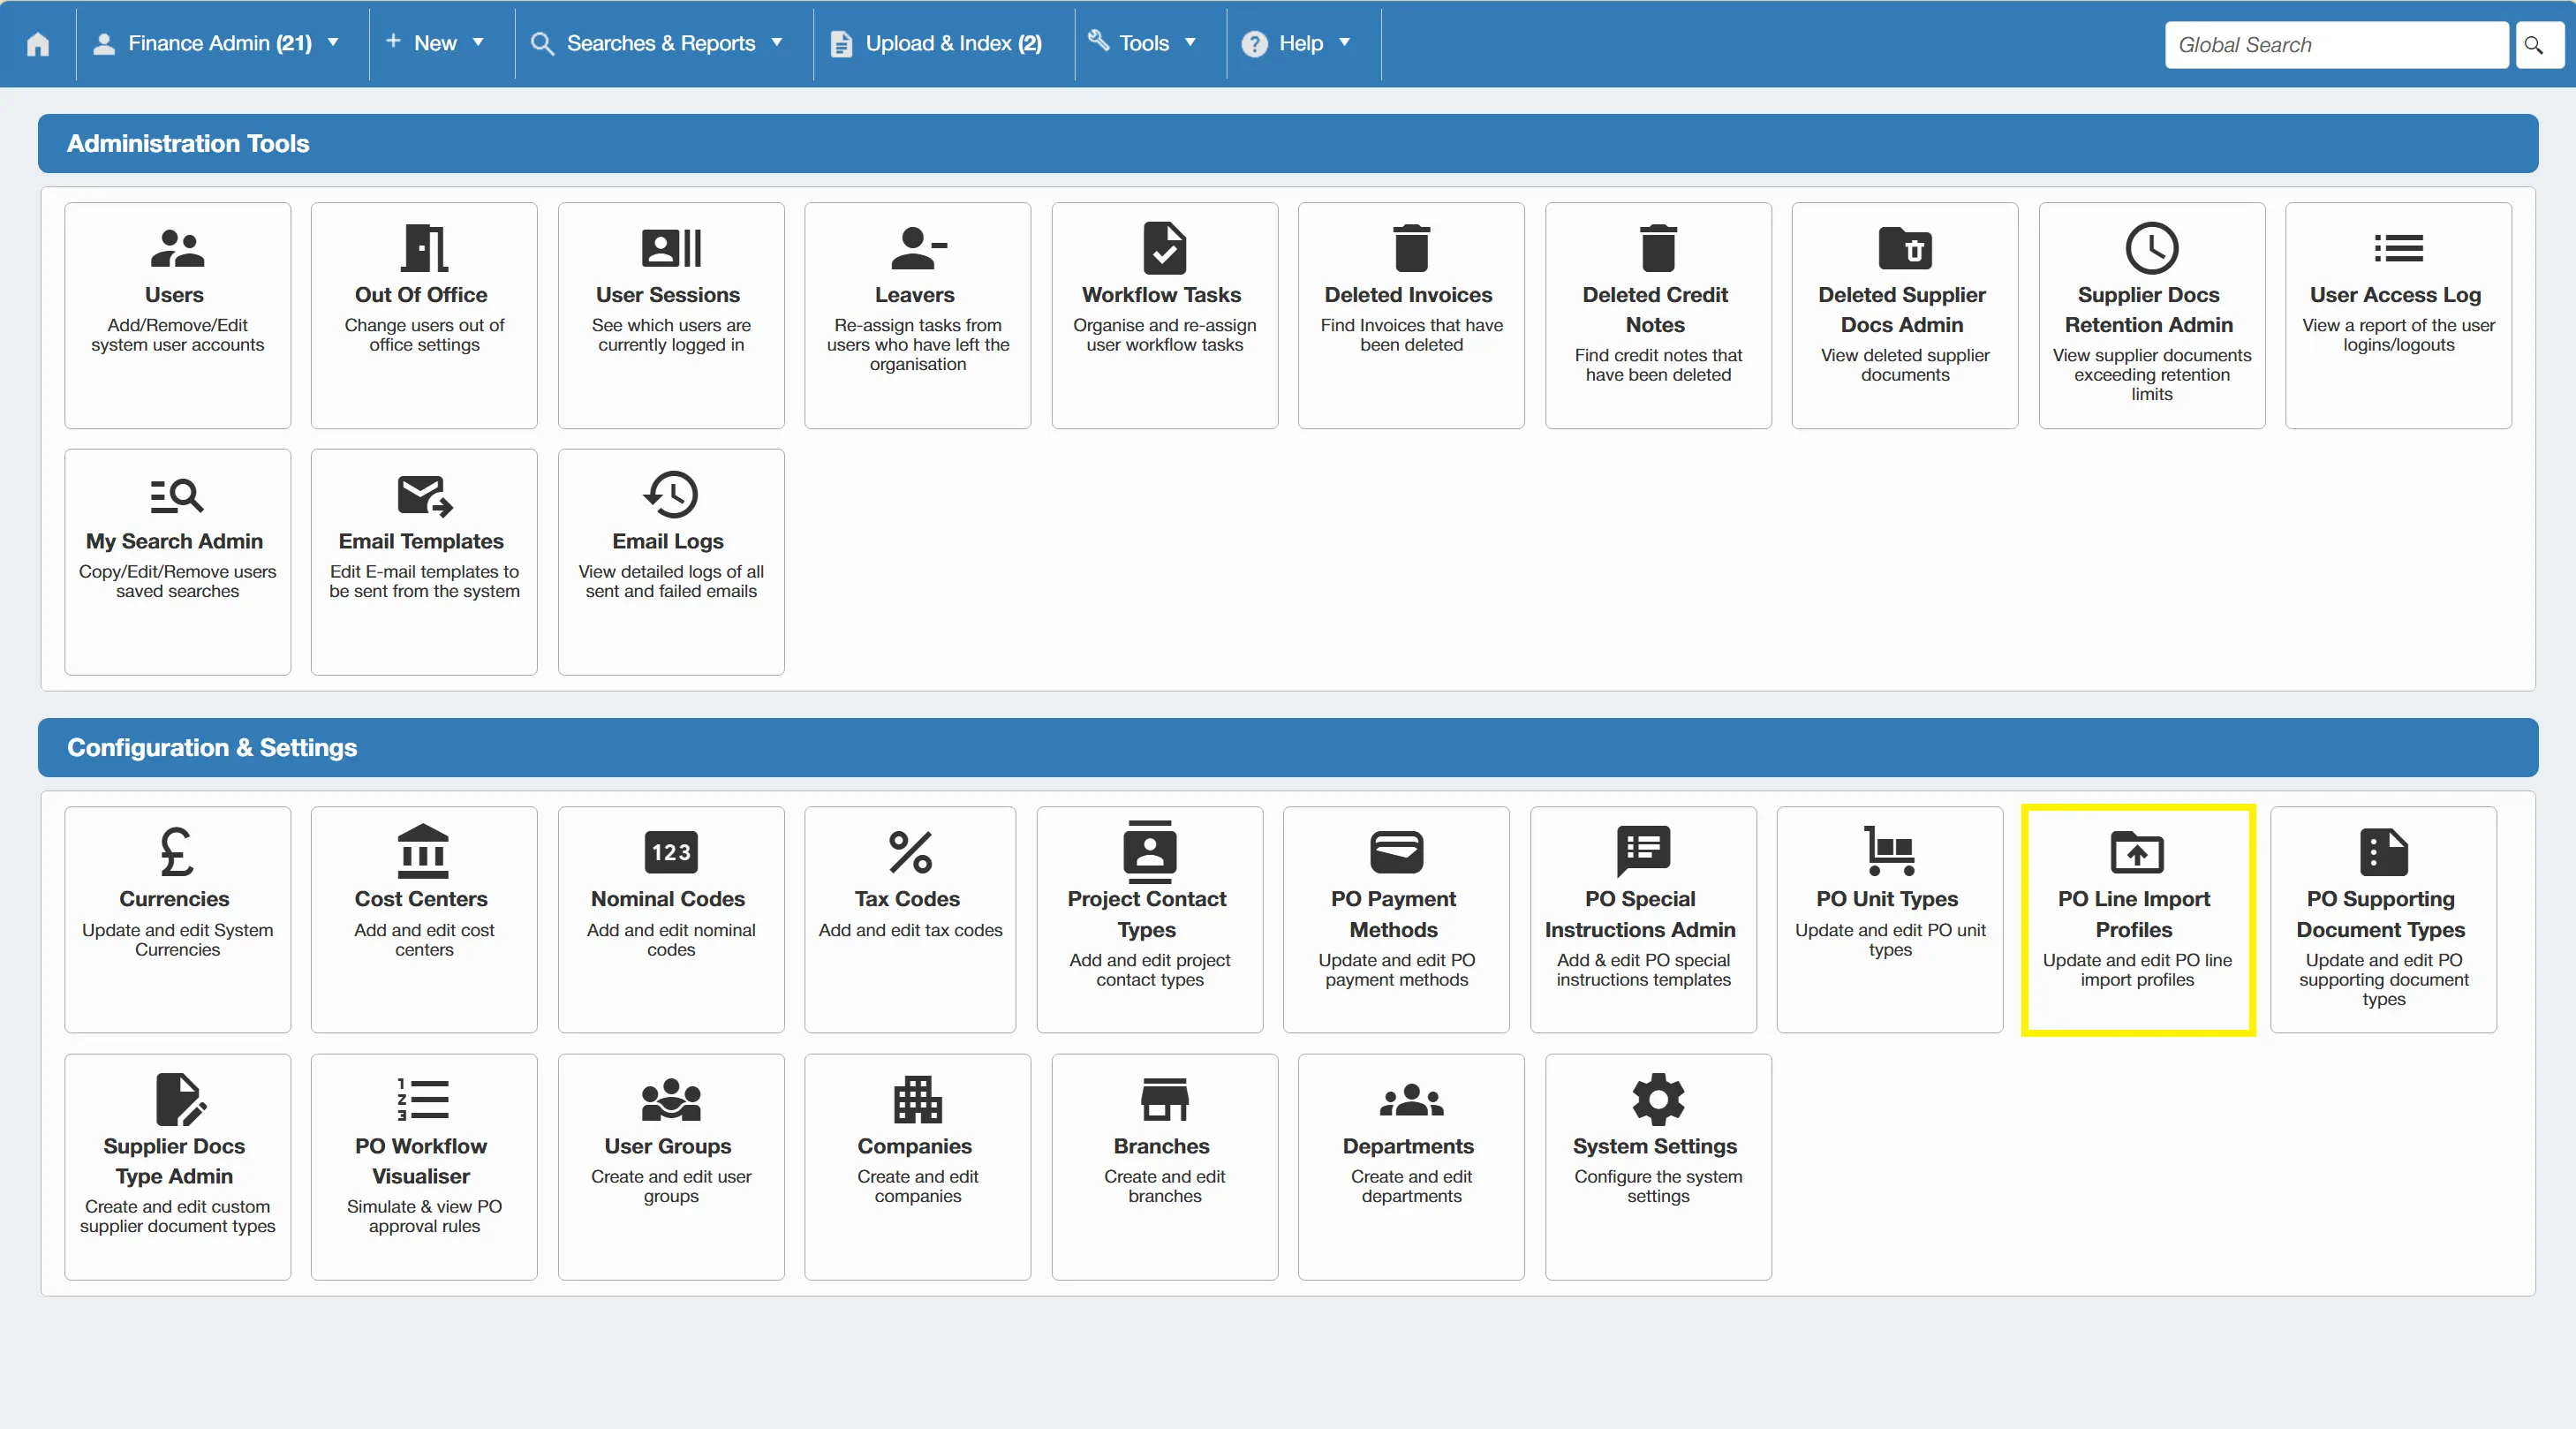
To administer PO Line Import Profiles, click on the PO Line Import Profiles icon within the Configuration & Settings section.
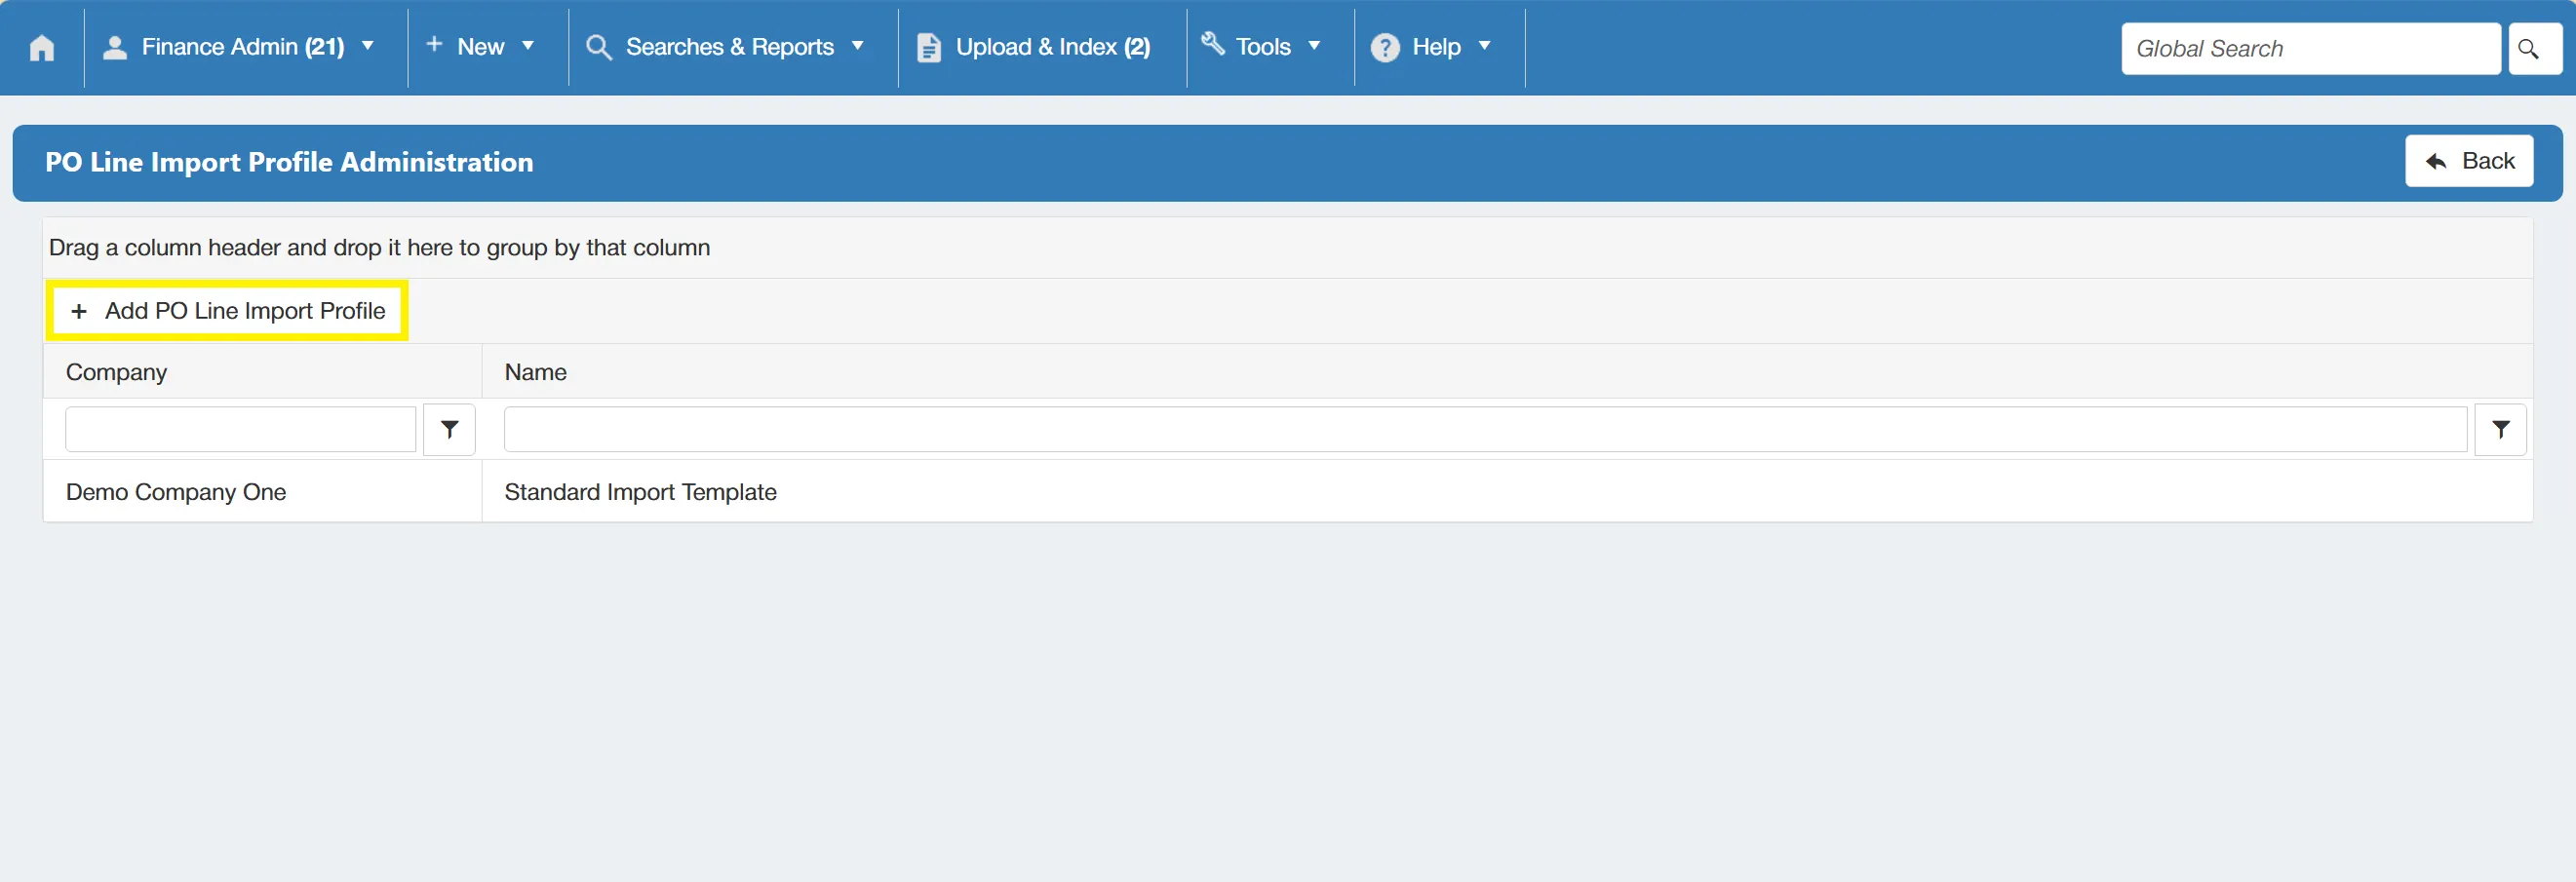
This takes you to the PO Line Import Profiles Administration grid. From here you can add new profiles and edit existing ones.
Adding a New PO Line Import Profile
To create a new PO Line Import Profile, simply click on the button.
This takes you to a new screen with a number of fields to fill out, including; the Profile Name, column designations and source drop down.
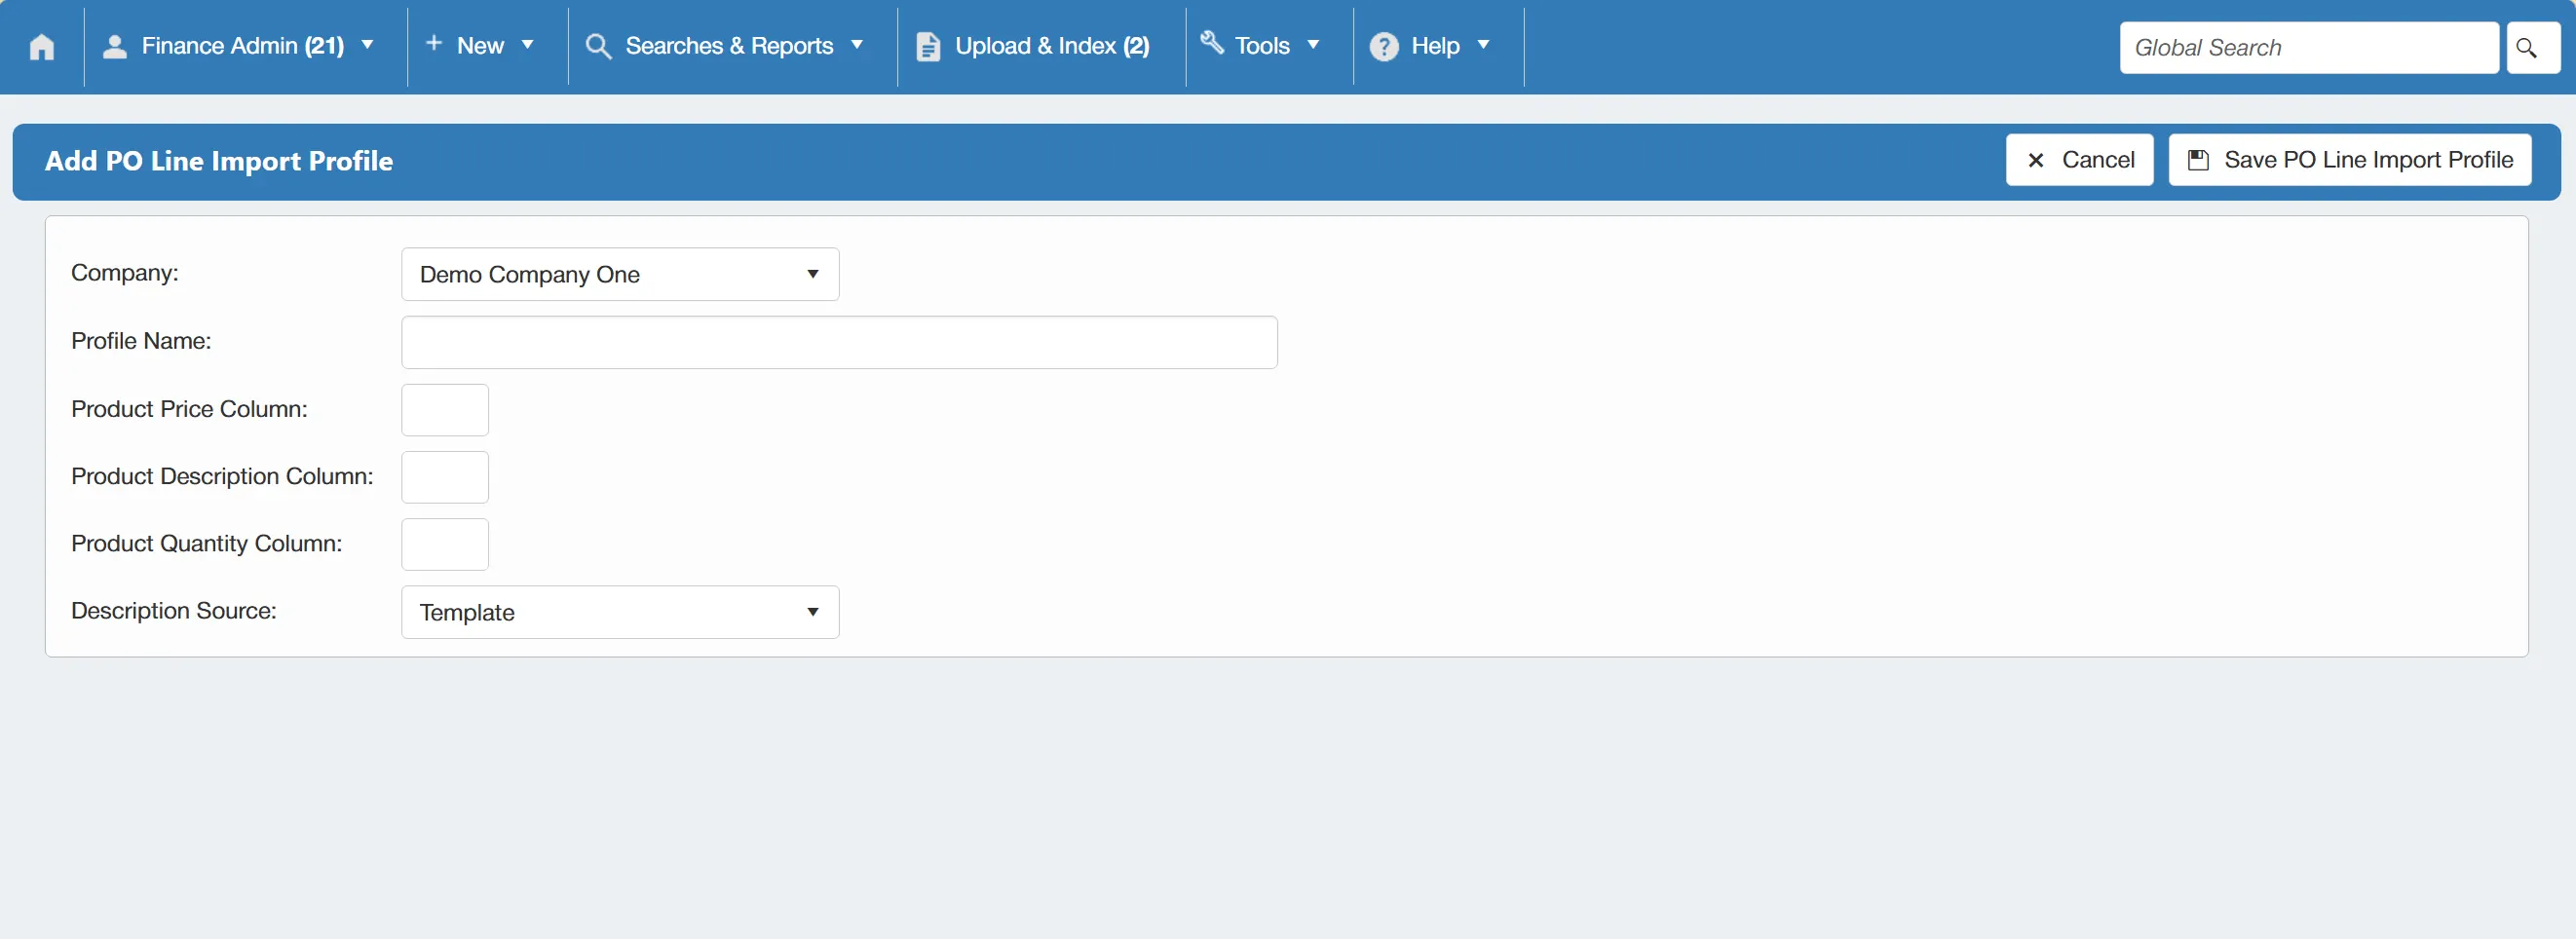
It is important to ensure that the column designations are set correctly. i.e. if you assign Product Price Column to column A, this needs to match the layout of your import spreadsheet. For example, if you set this to column A, but your spreadsheet has the product prices in column B, the import will fail.
Once you have filled in the details, click to finalise this. The new import profile will be displayed as a new line on the PO Line Import Profiles Administration grid.
PO Supporting Document Types
PO supporting documents are documents that can be imported into the system to accompany a purchase order. Each document has a type associated to it (e.g. quotation or service report). From here, you can add new types, edit existing types and remove unwanted ones.
Users must have the System Admin permission enabled to access this feauture. For information on user permissions, click here.
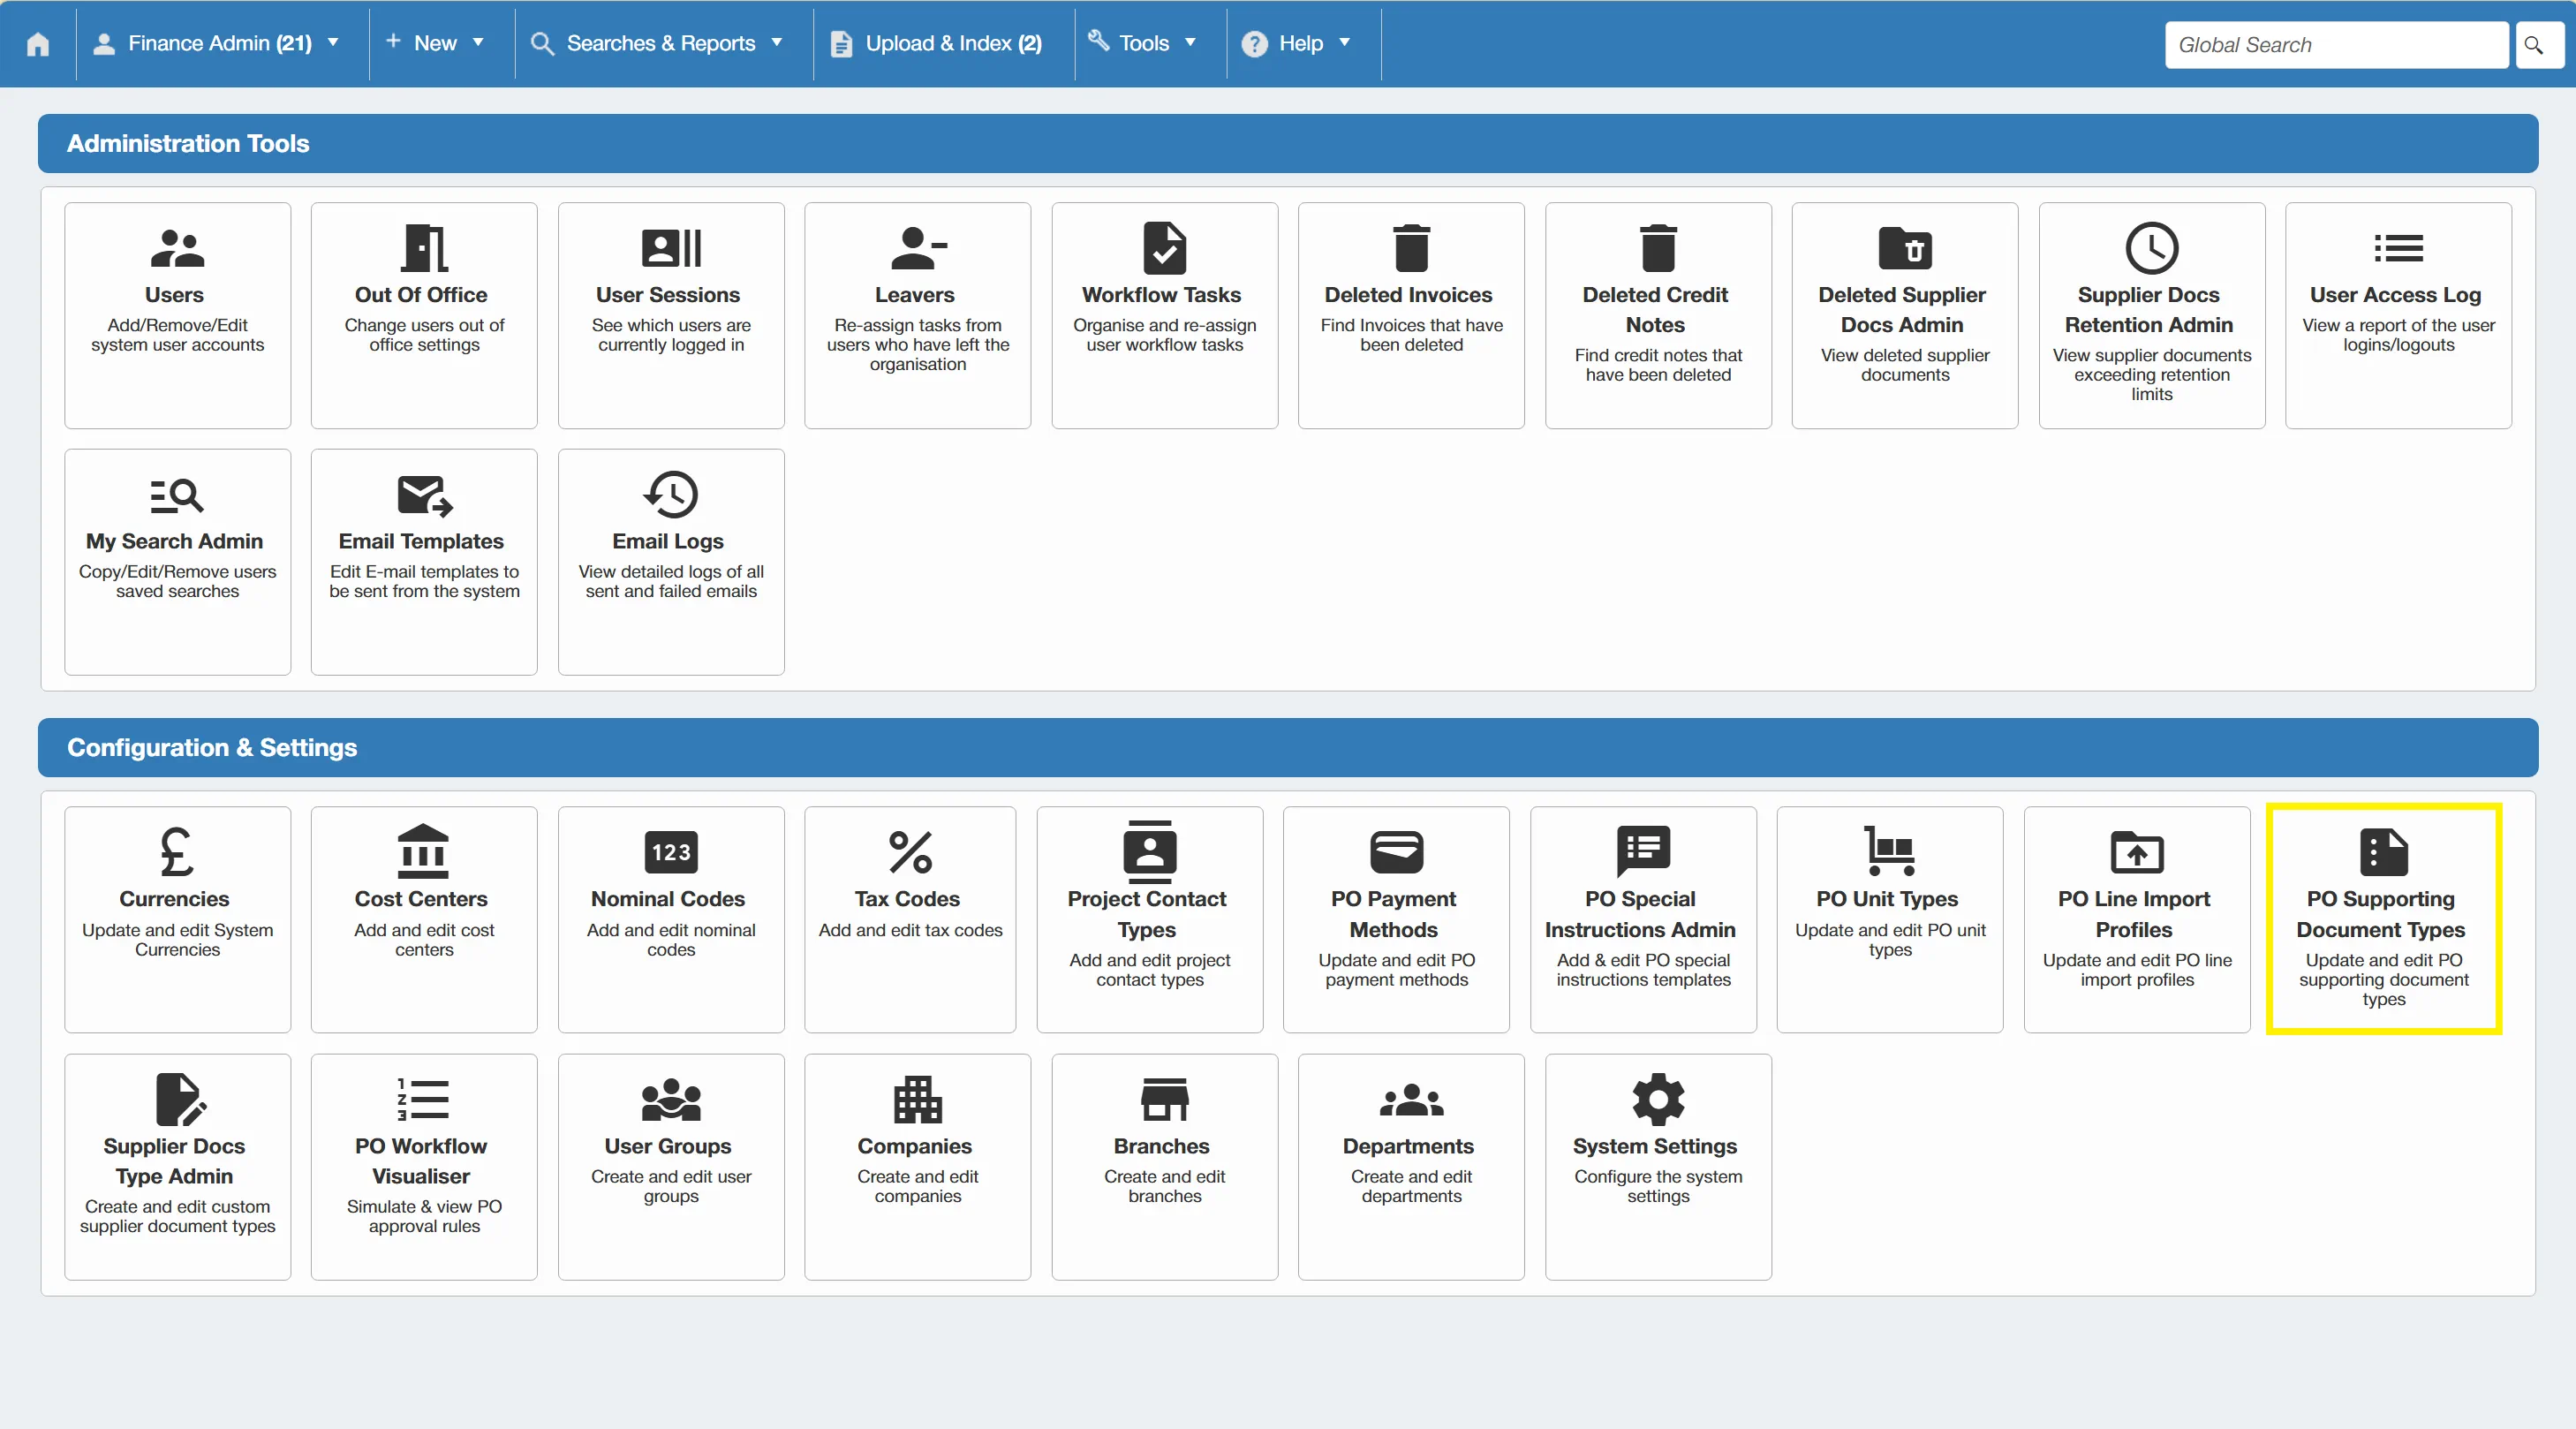
To administer PO supporting document types, click on the PO Supporting Document Types icon within the Configuration & Settings section.
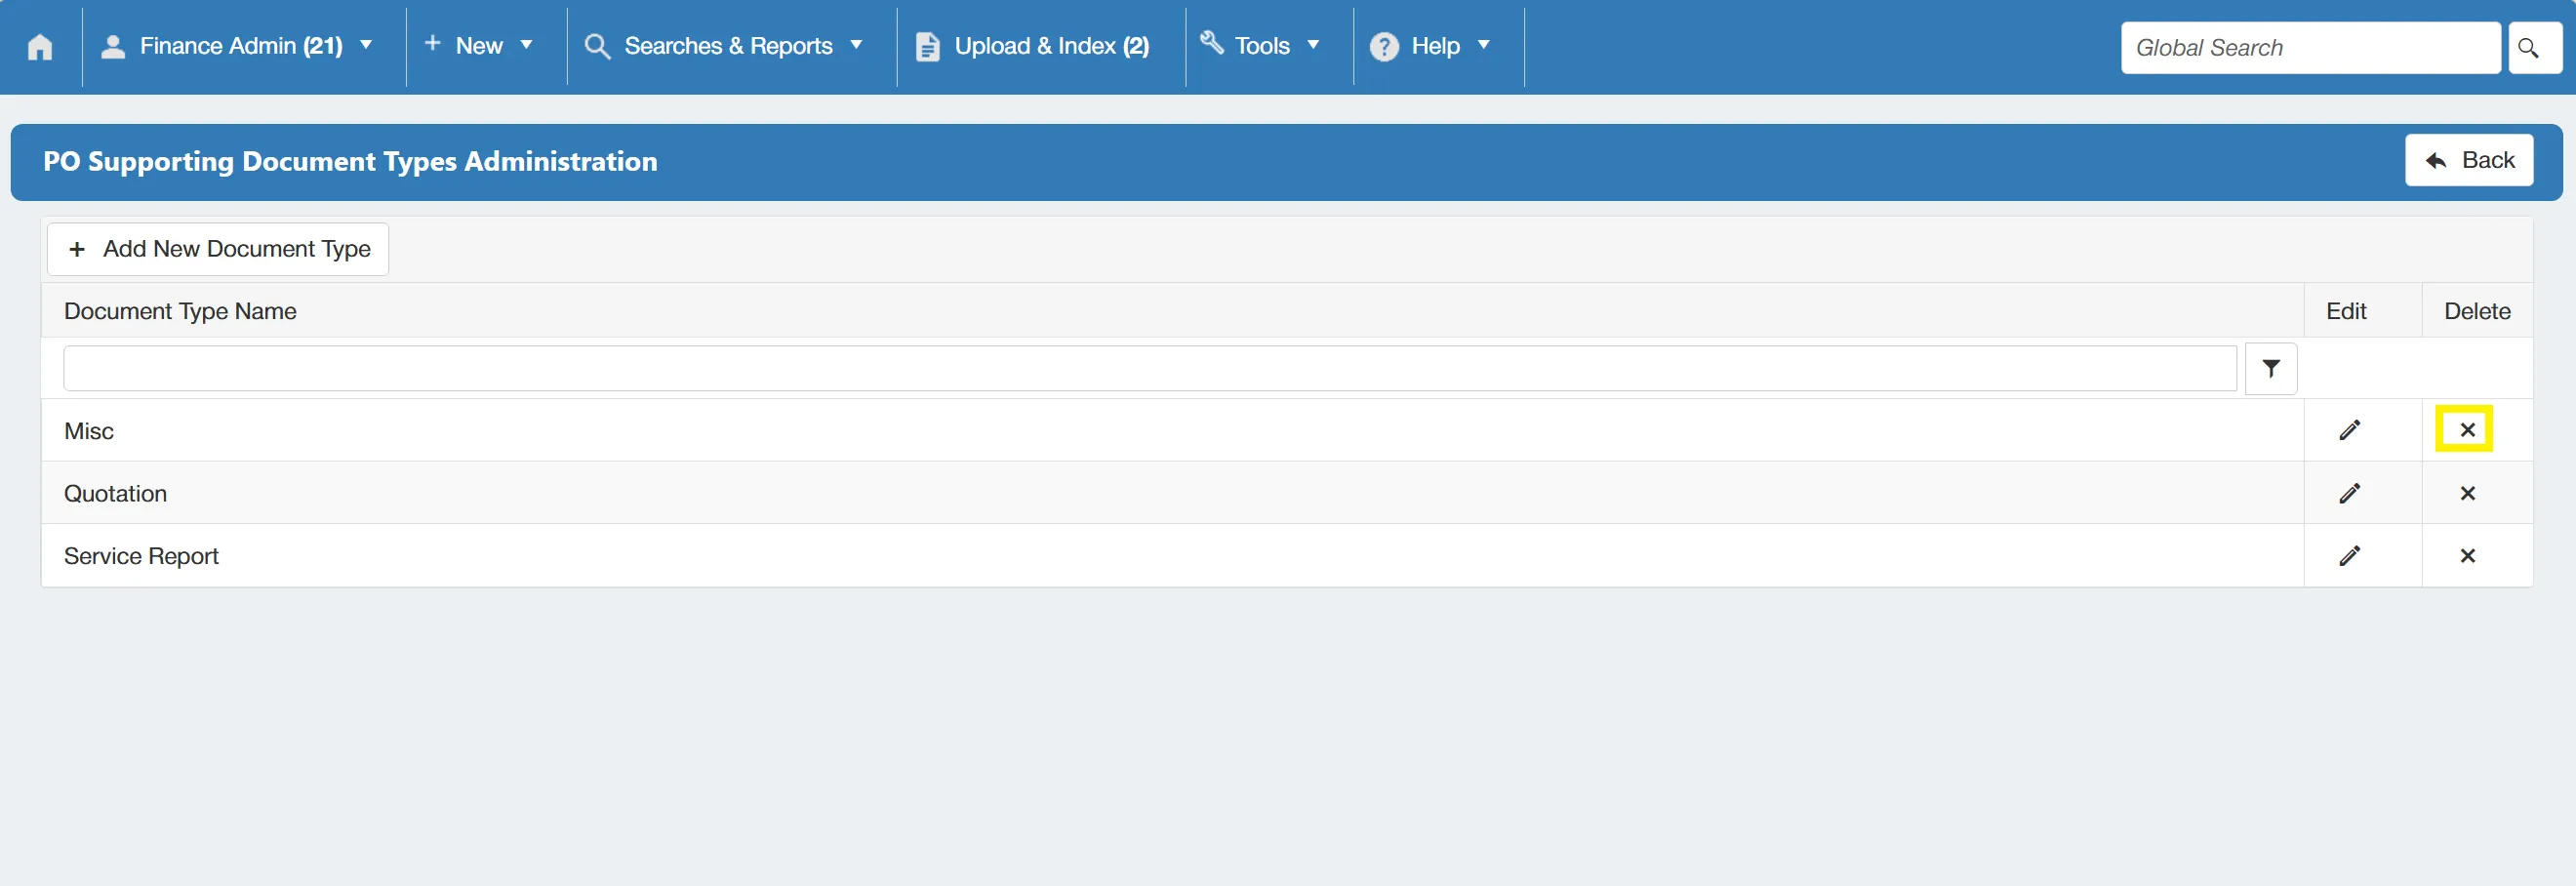
This takes you to the PO Supporting Document Types Administration grid. From here, you can add new types, edit existing ones and remove unwanted ones.
Adding a New PO Supporting Document Type
To add a new supporting document type, click on the button.
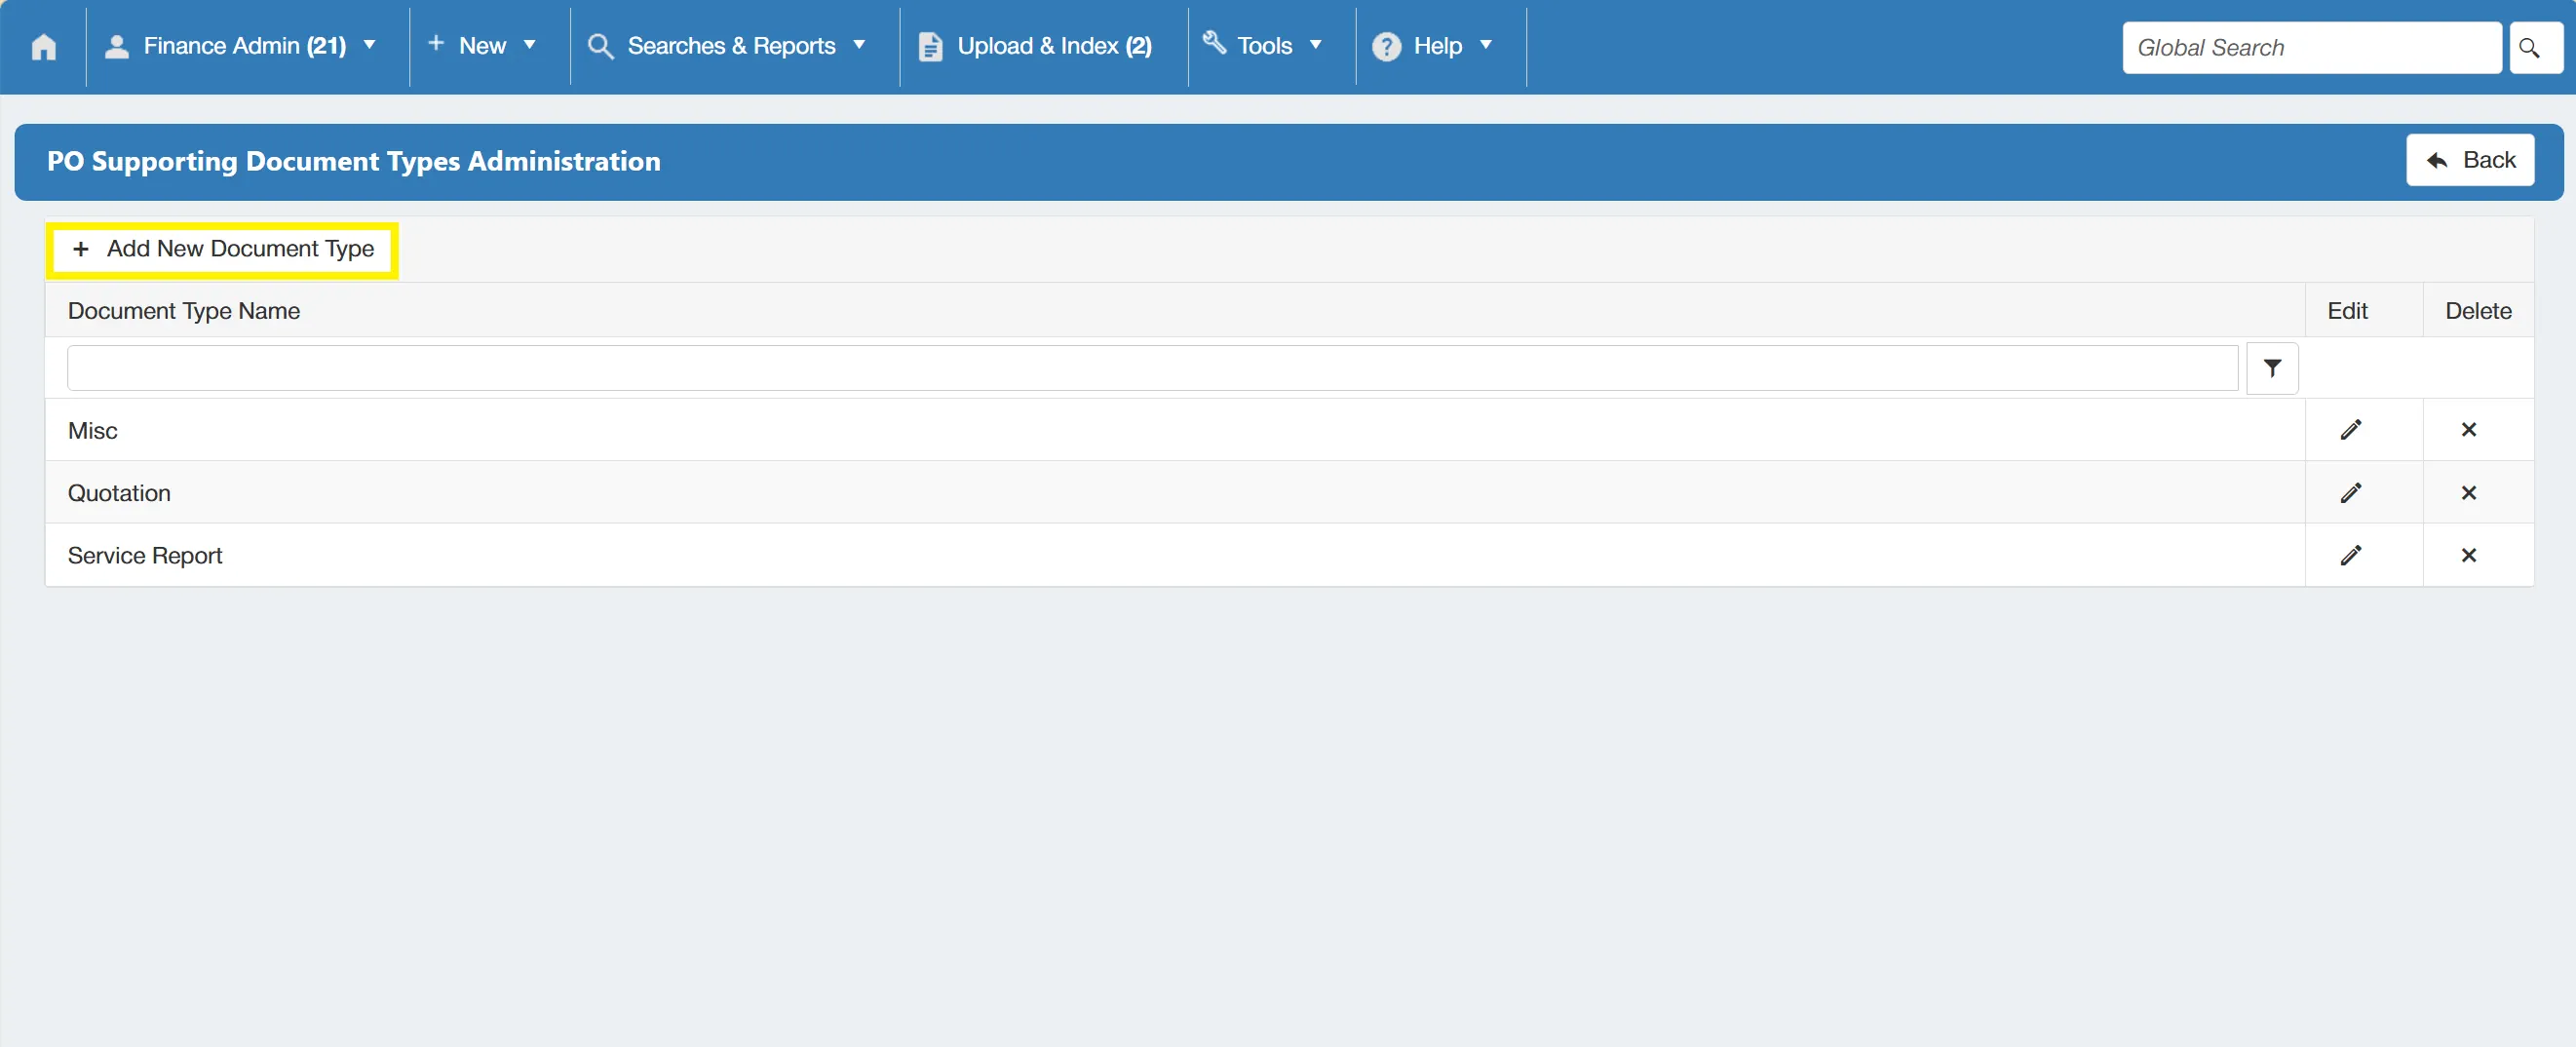
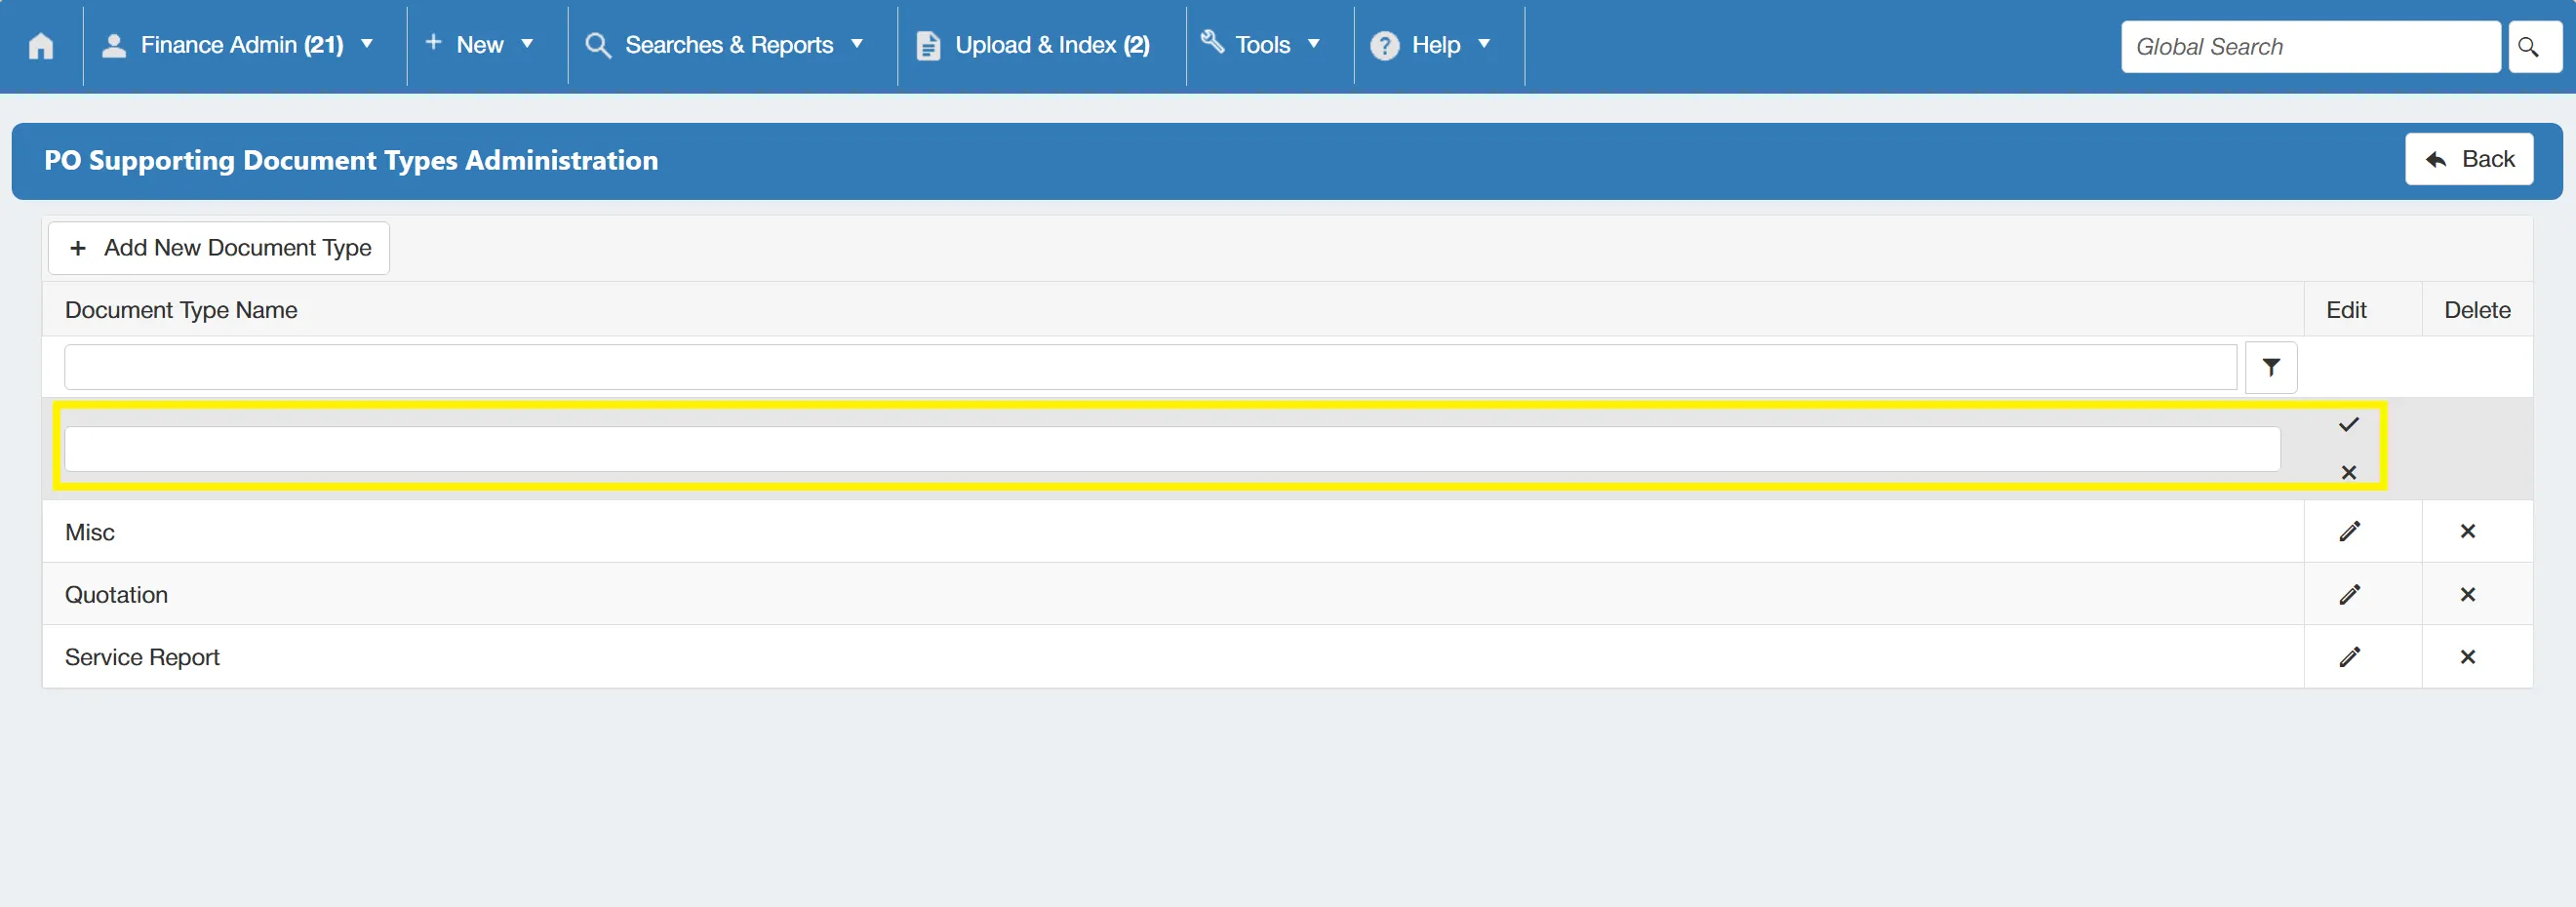
This brings up a new field which allows you to type in the required document type name. Once you are happy with the new document type, simply click on the tick icon to save this. Alternatively, you can click on the icon to cancel.
Editing an Existing PO Supporting Document Type
To edit an existing supporting document type, click on the edit icon within the desired line.
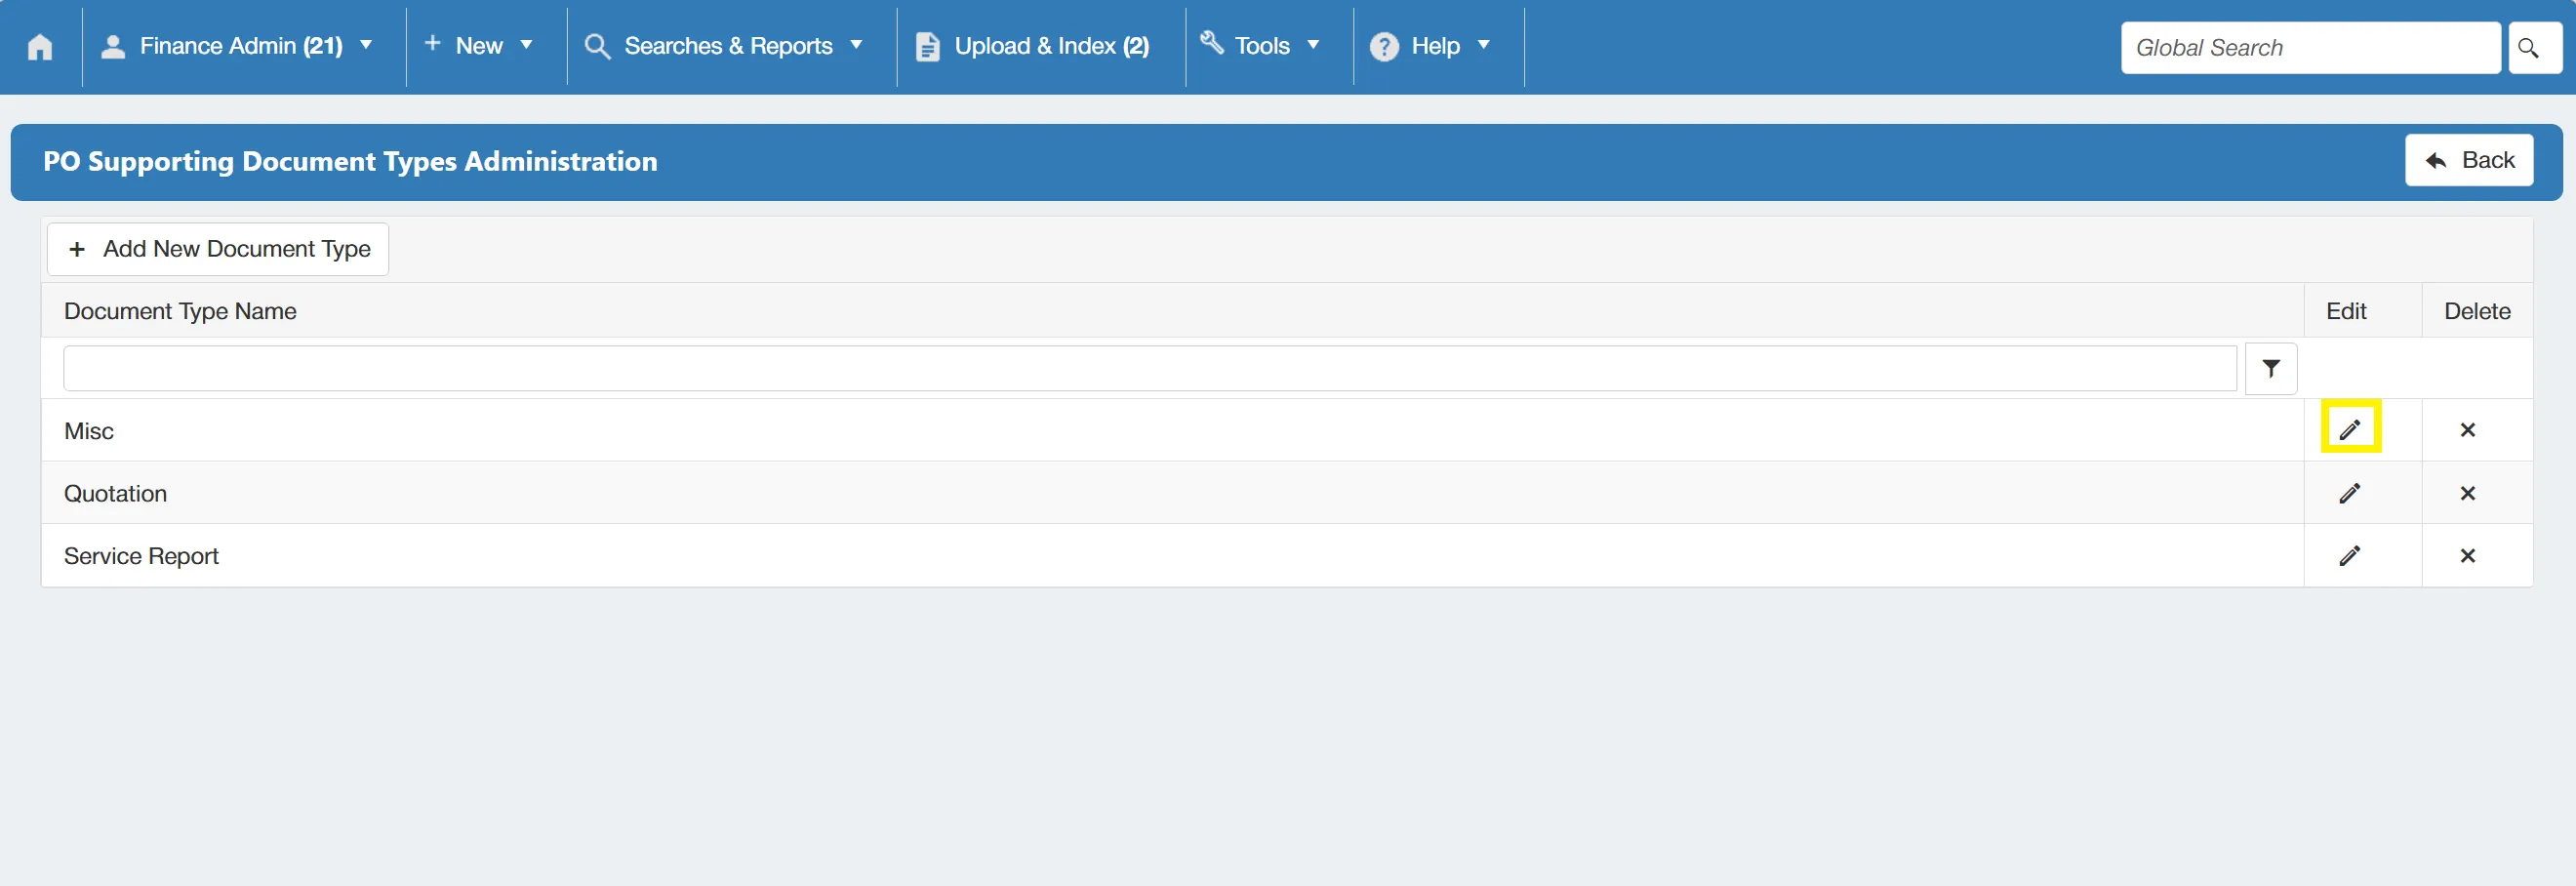
This changes the line from read-only to editable allowing you to change the name as you wish.
Removing a PO Supporting Document Type
To remove a supporting document type, simply click on the icon on the unwanted line. This removes the type from the system.
Supplier Docs Type Admin
Supplier document types are classes of document that can be assigned to suppliers. These are typically compliance documents such as Insurance, Incorporation, VAT or Compliance Certificates. From this tool, you can create new types and edit existing types.
Users must have the Supplier Documents: Type Admin permission enabled to access this feauture. For information on user permissions, click here.
To administer Supplier Doc Types, click on the Supplier Docs Type Admin icon within the Configuration & Settings section.
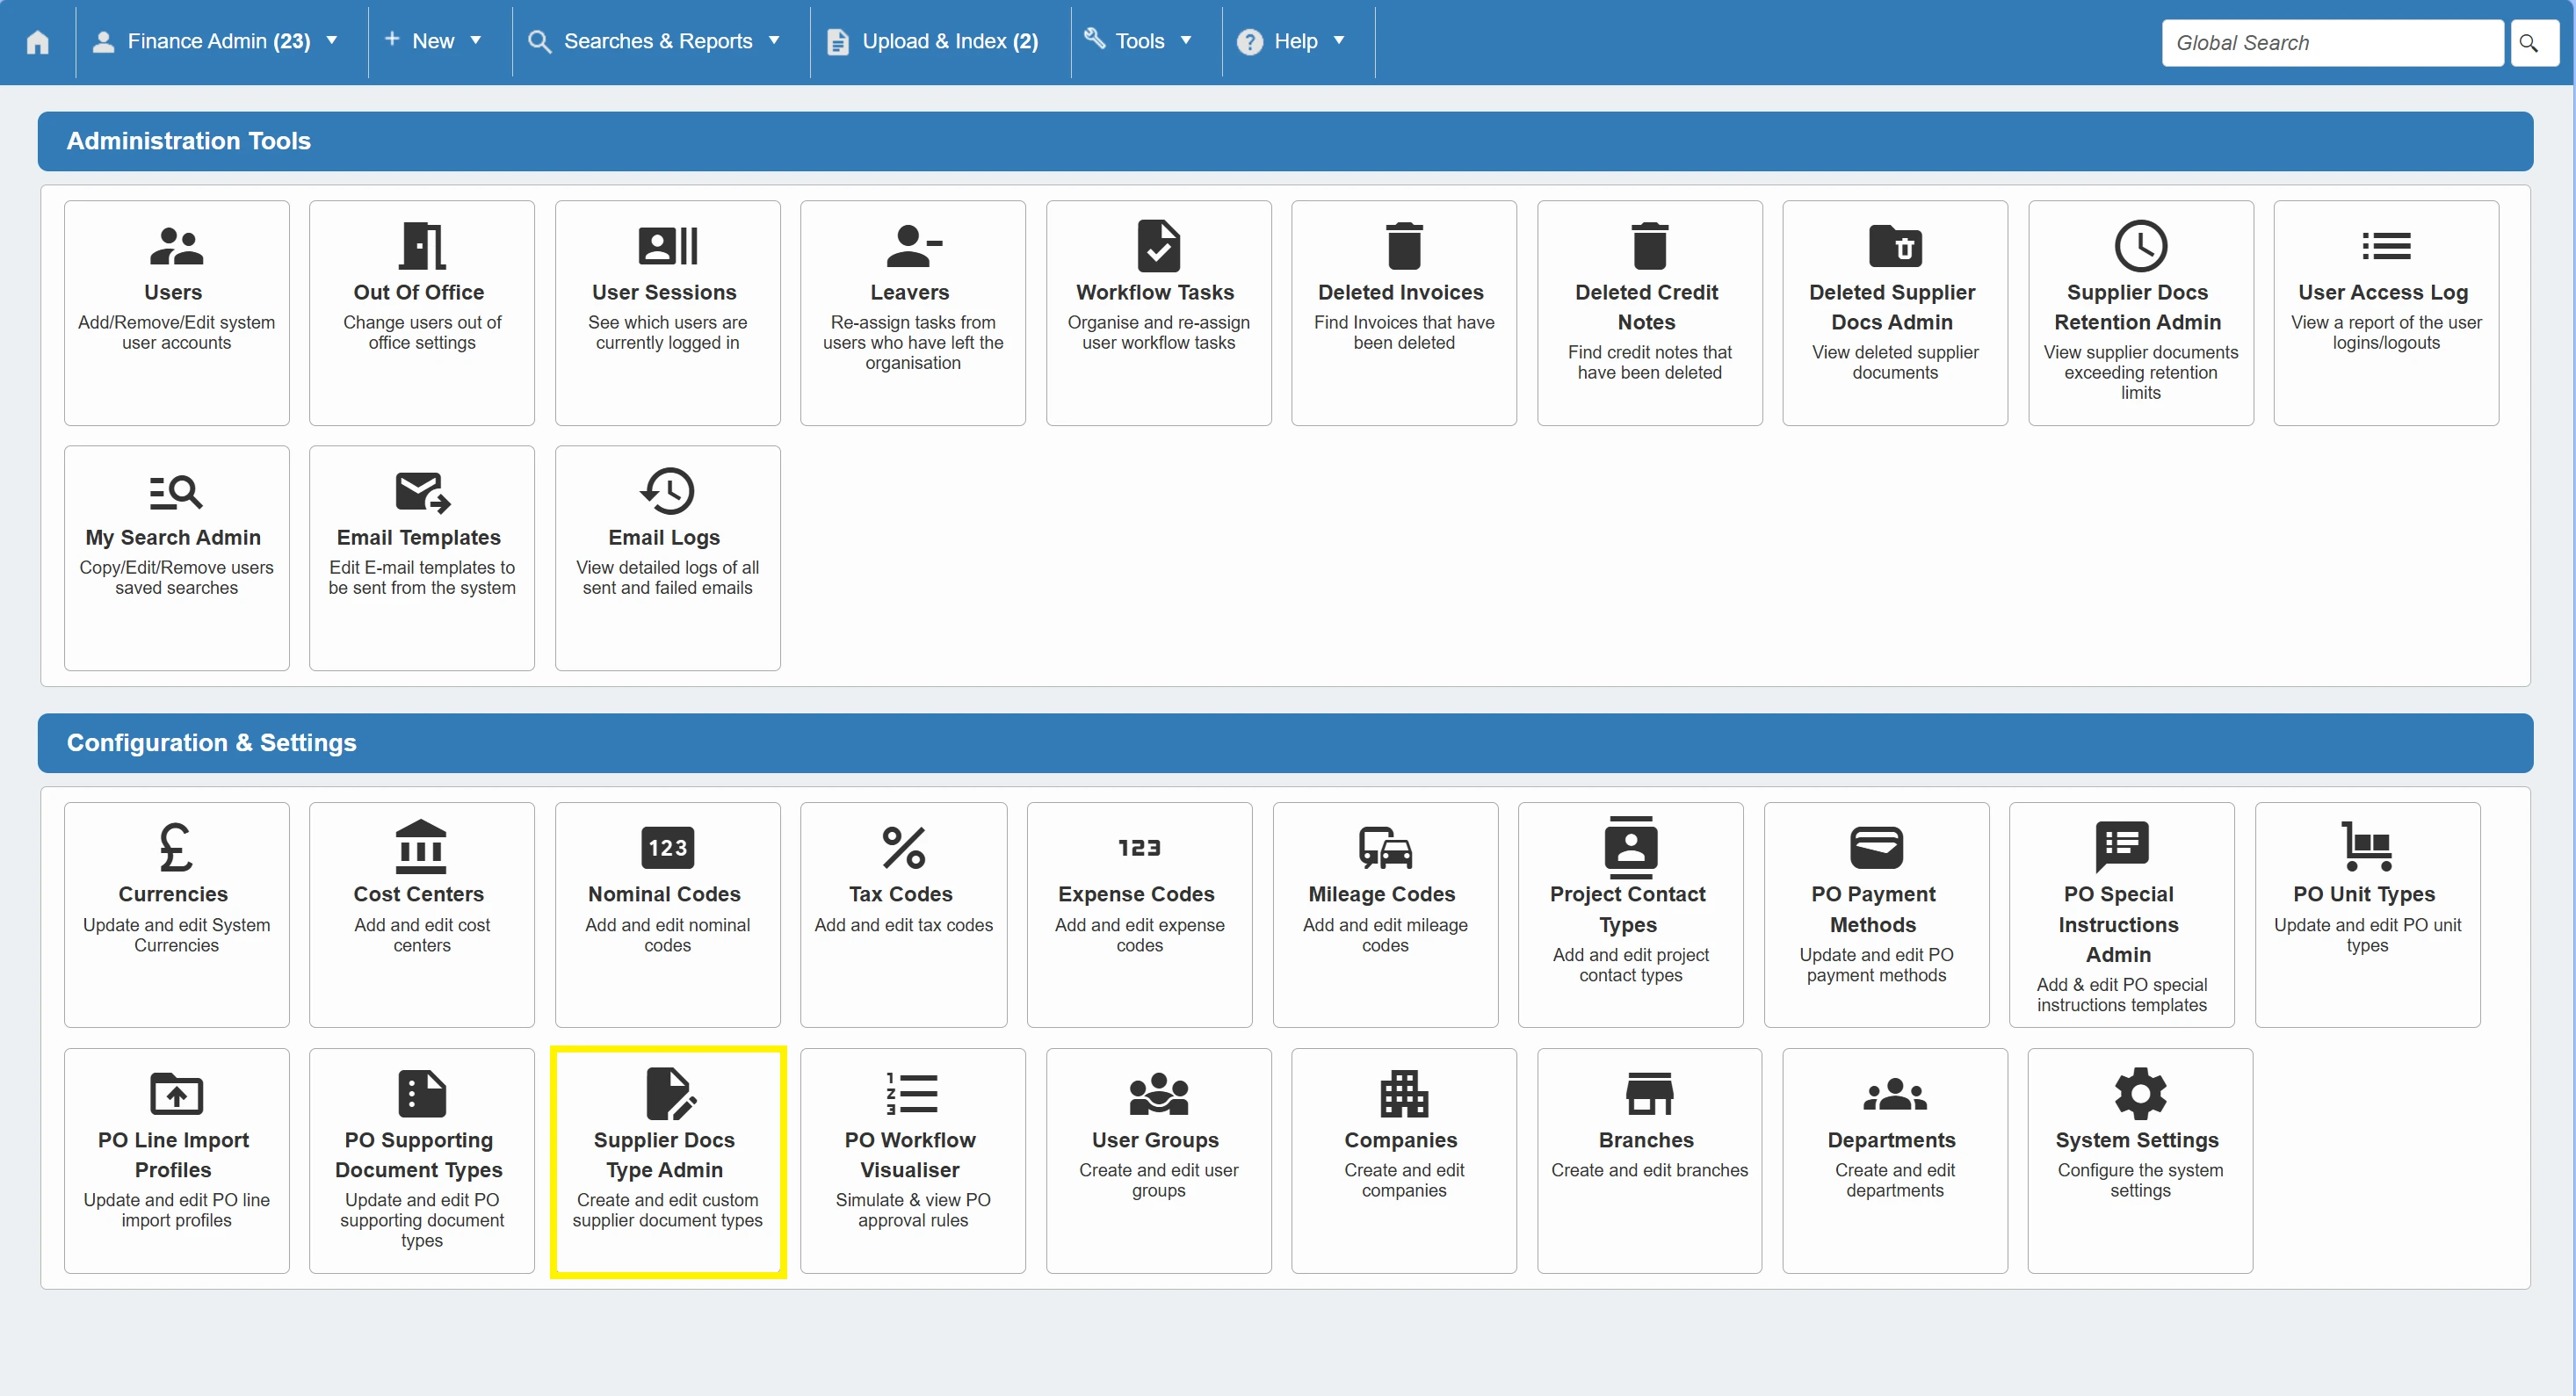
This takes you to the Supplier Document Type Administration grid. From here, you can add new types, and edit existing ones.
Adding a New Supplier Document Type
To add a new document type, click on the button.
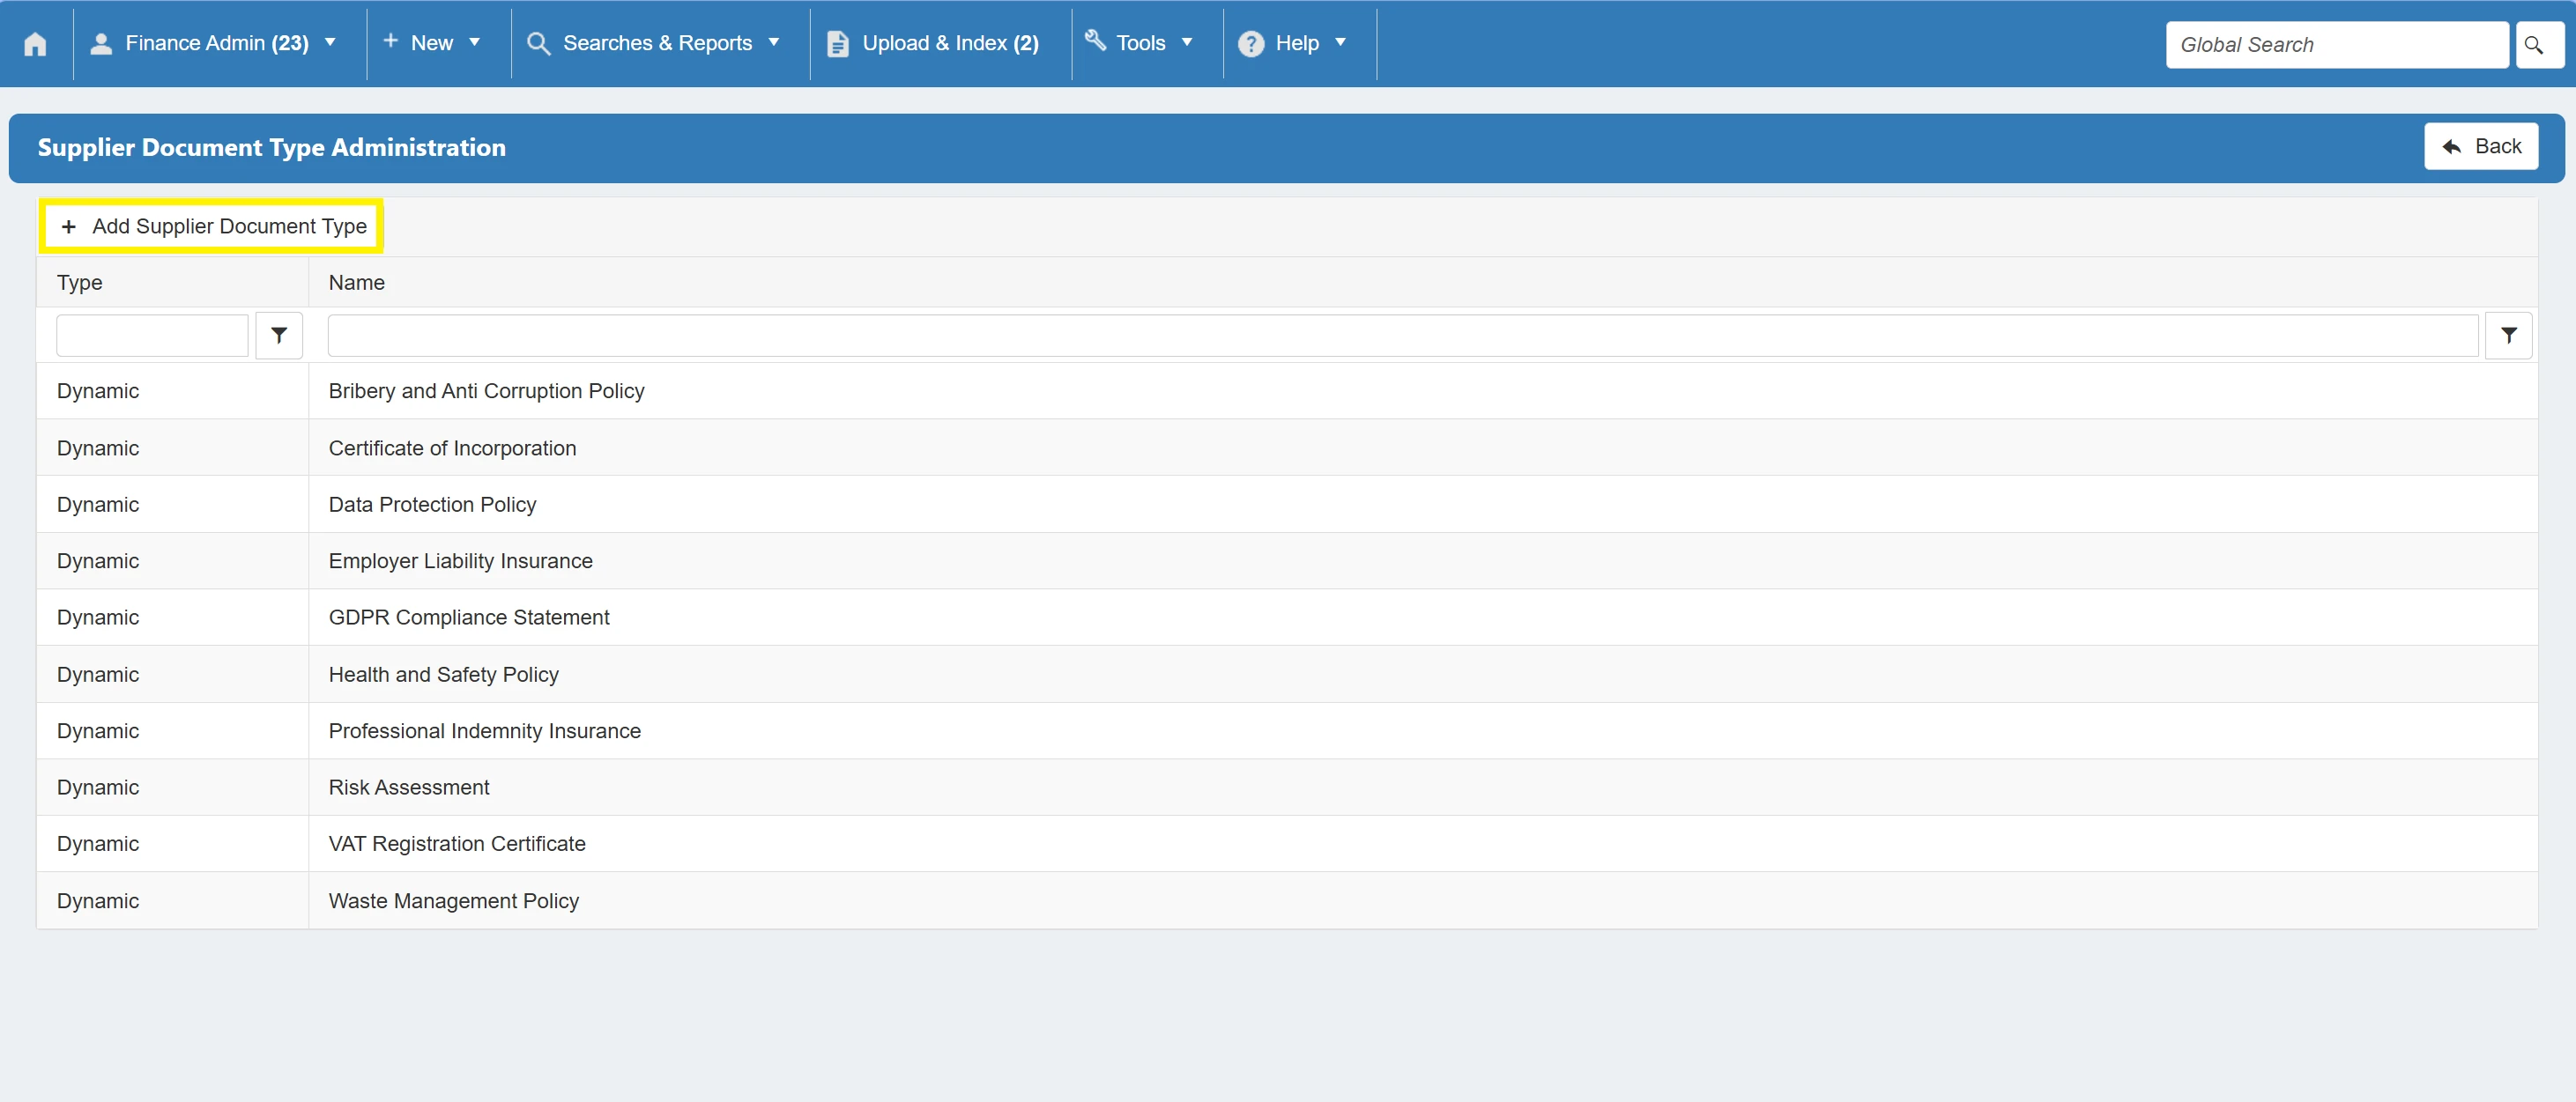
This takes you to a new window displaying a Name field which allows you to provide the new document type with a name.
There is also a Linked Record Type drop down field which allows you to specify the type of record to which this new document type will be linked (e.g. Suppliers).
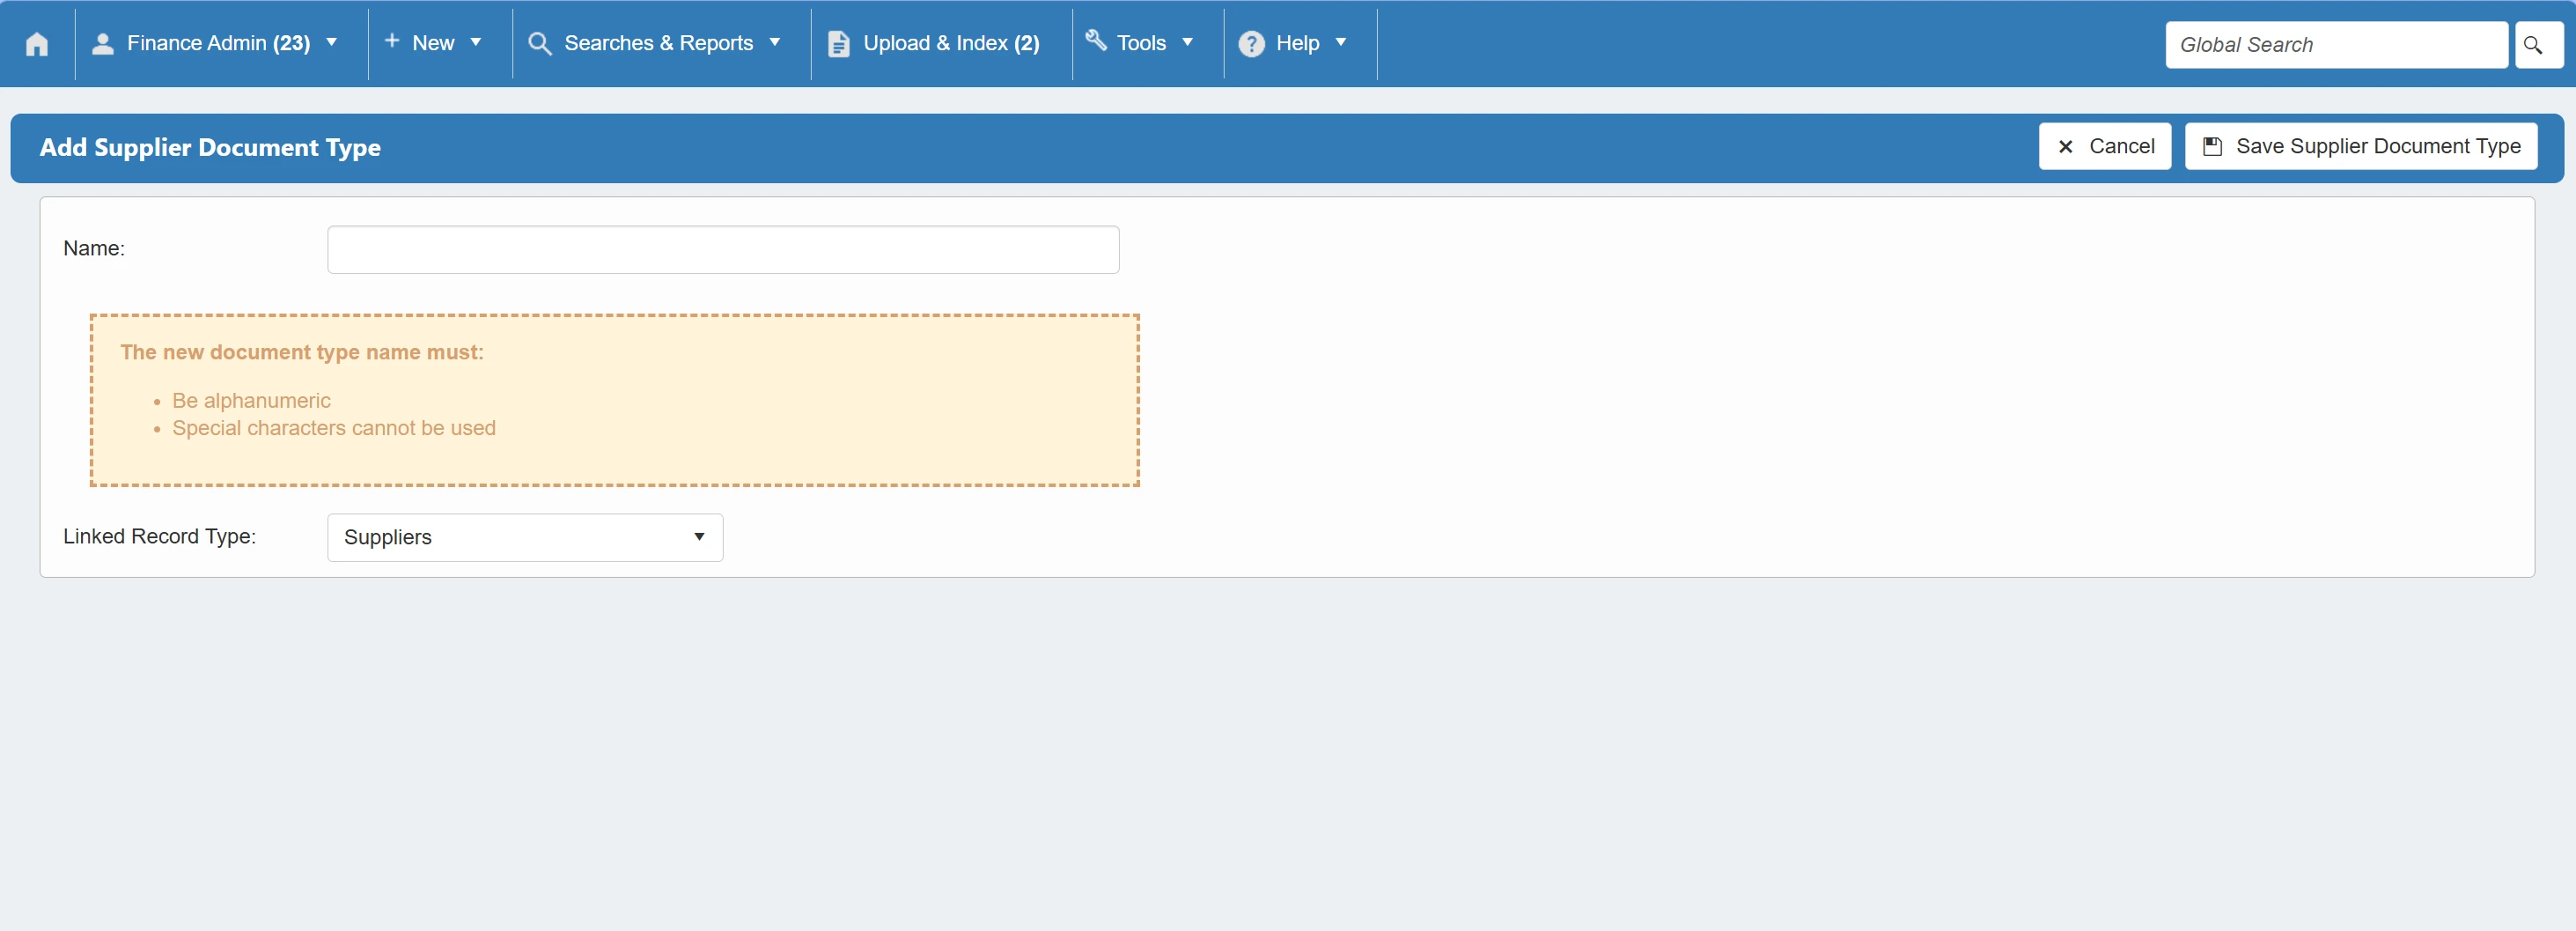
Once you have input the the name and selected the linked record type, simply click to commit these details.
After clicking , further fields appear, allowing you to set various parameters for the new Supplier Document Type.
These parameters and settings are split into three categories; Settings, Properties, and Property Settings.
Supplier Document Type Settings

The Settings section contains the following parameters:
- Name: Set the required name for the supplier document type.
- Linked Record Type: Specify the type of record to which this document type will be linked.
- Can Index?: This checkbox dictates whether the document type can have new documents indexed against it. Essentially allowing you to determine whether this type is active or inactive.
Supplier Document Type Properties
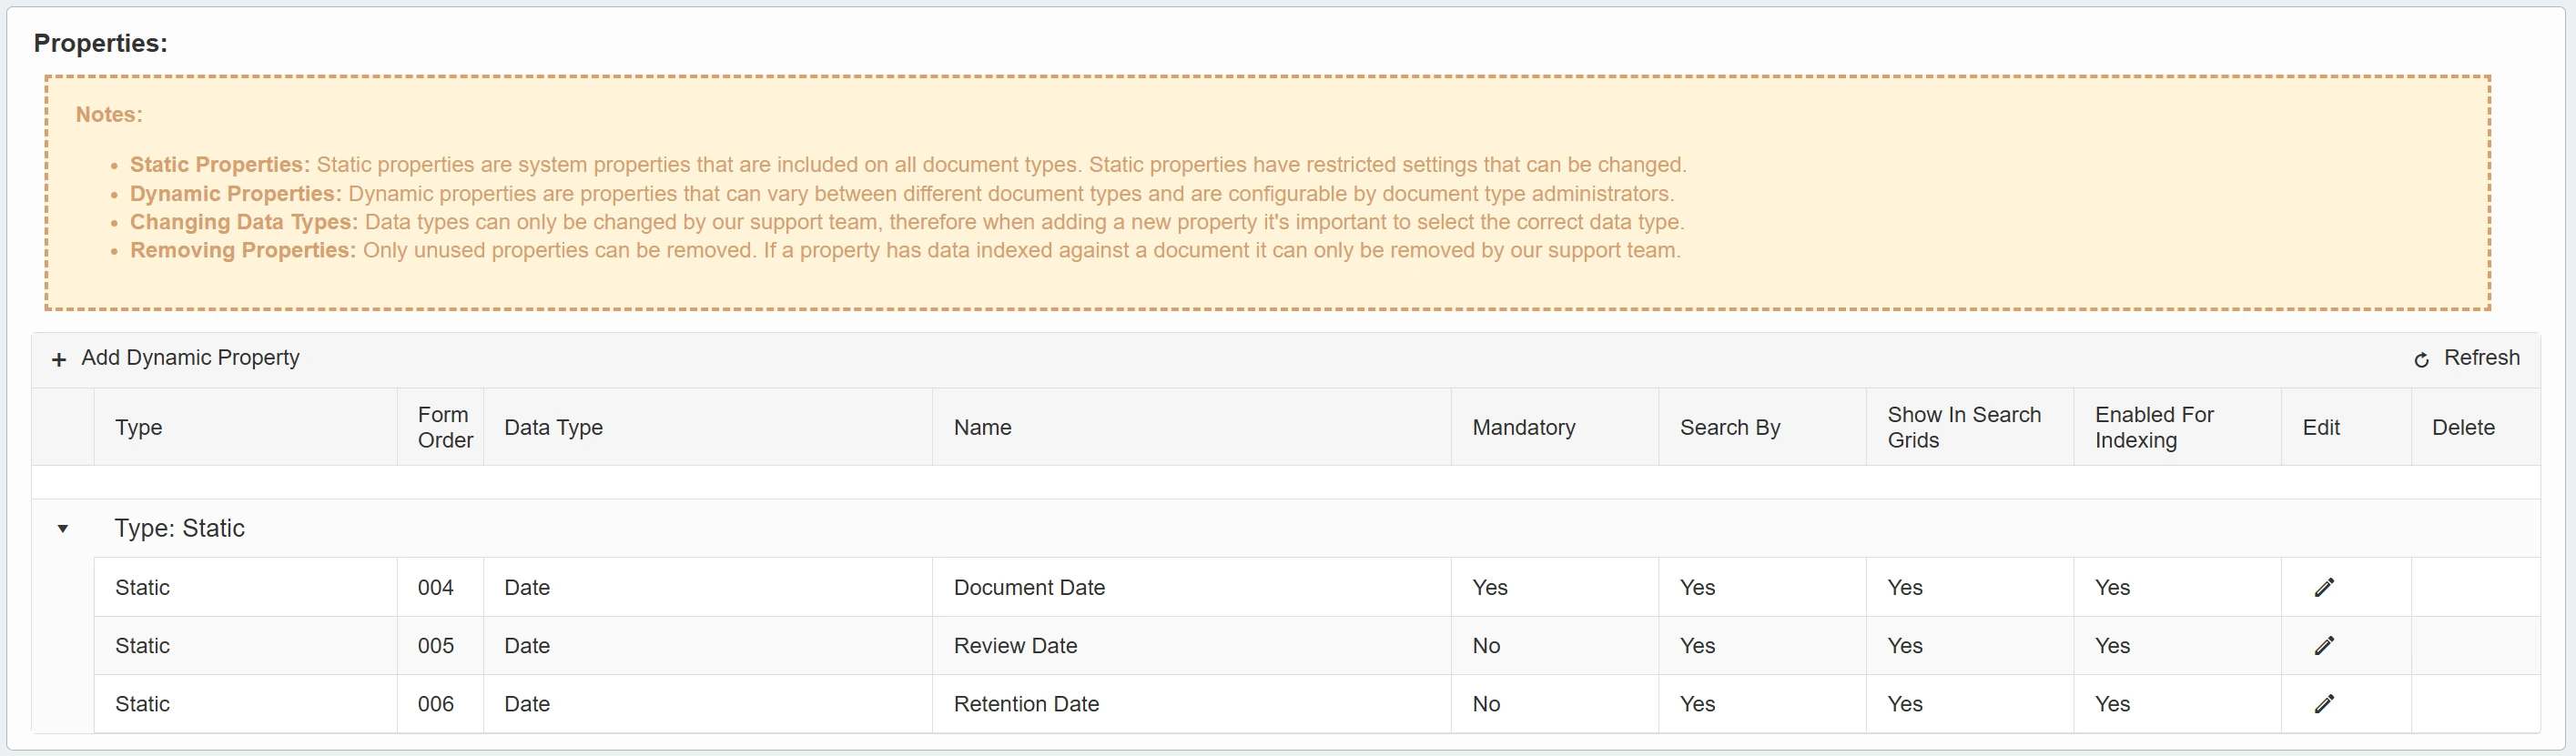
The Properties section contains a grid which allows you to add new properties and edit existing ones against the supplier document type. Properties dictate the columns and fields that appear when indexing or reviewing supplier documents. It is important to note the following information regarding properties:
- Static Properties: Static properties are system properties that are included on all document types. Static properties have restricted settings that can be changed.
- Dynamic Properties: Dynamic properties are properties that can vary between different document types and are configurable by document type administrators.
- Changing Data Types: Data types can only be changed by our support team, therefore when adding a new property it's important to select the correct data type.
- Removing Properties: Only unused properties can be removed. If a property has data indexed against a document it can only be removed by our support team.
To add a new Dynamic Property, click .
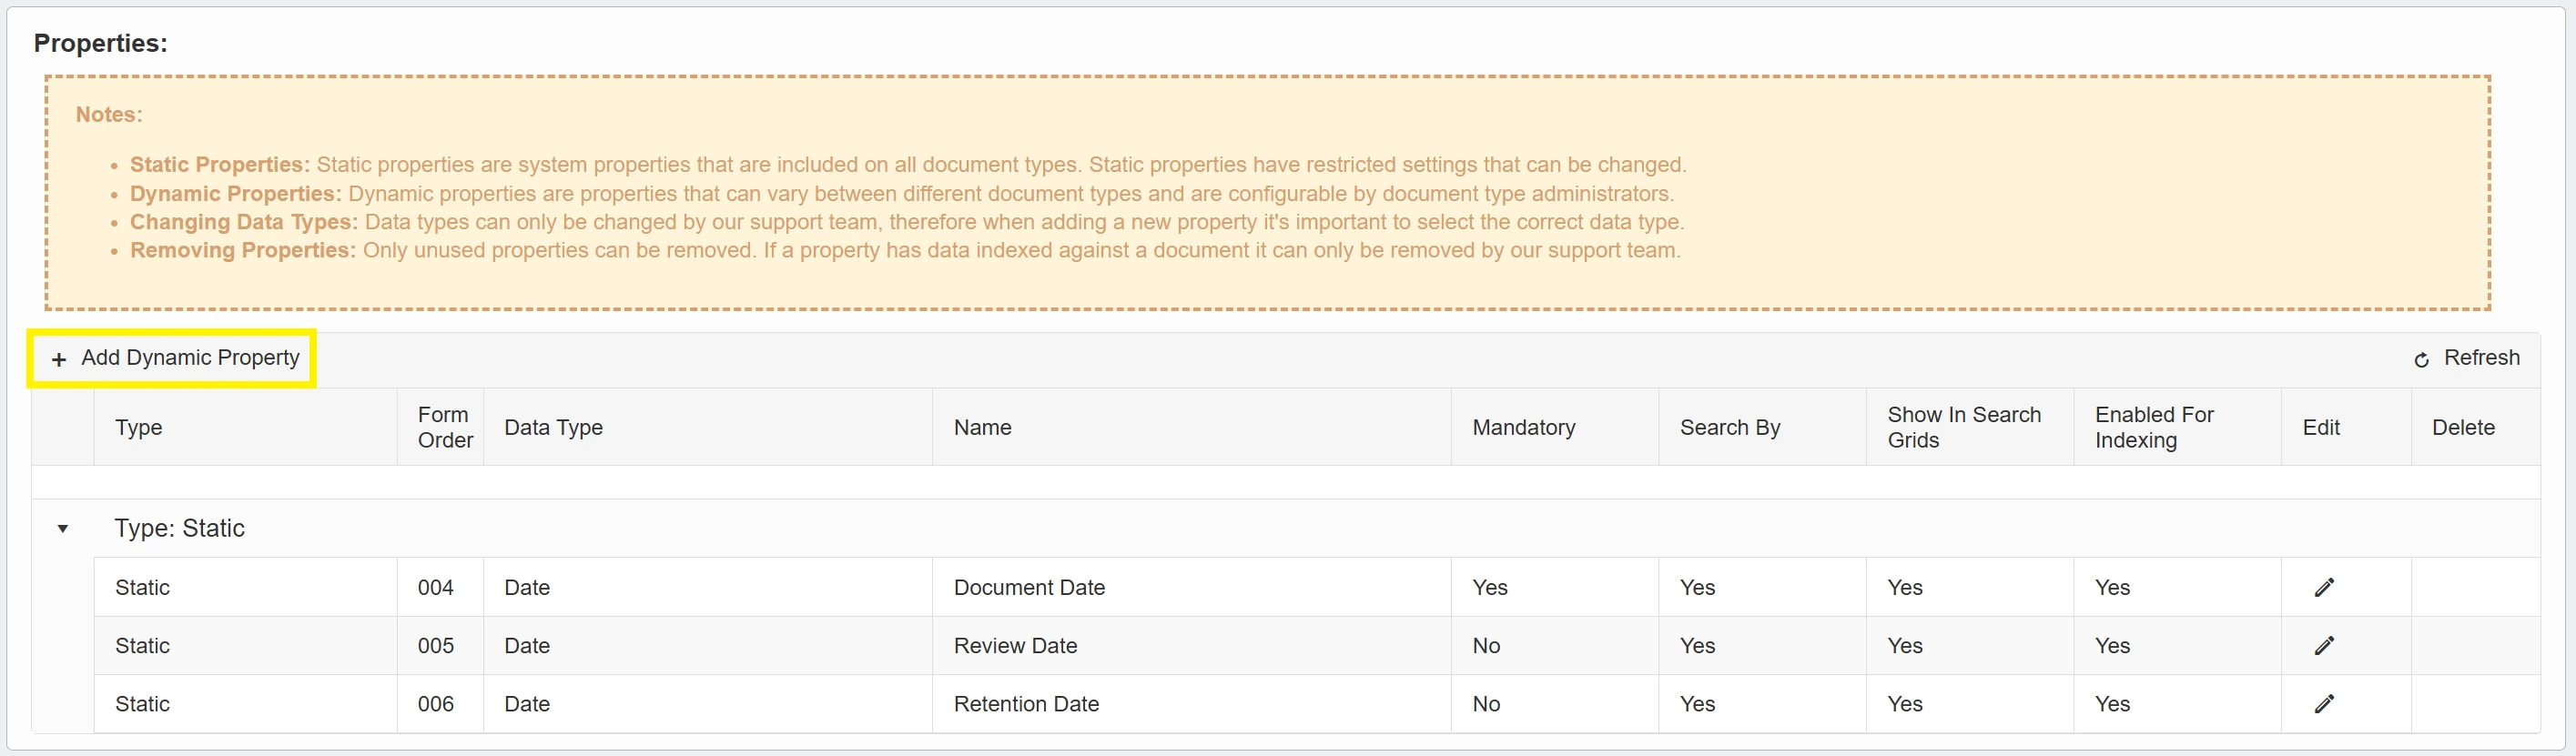
Clicking shows further fields and checkboxes allowing you to specify various settings for the new property.
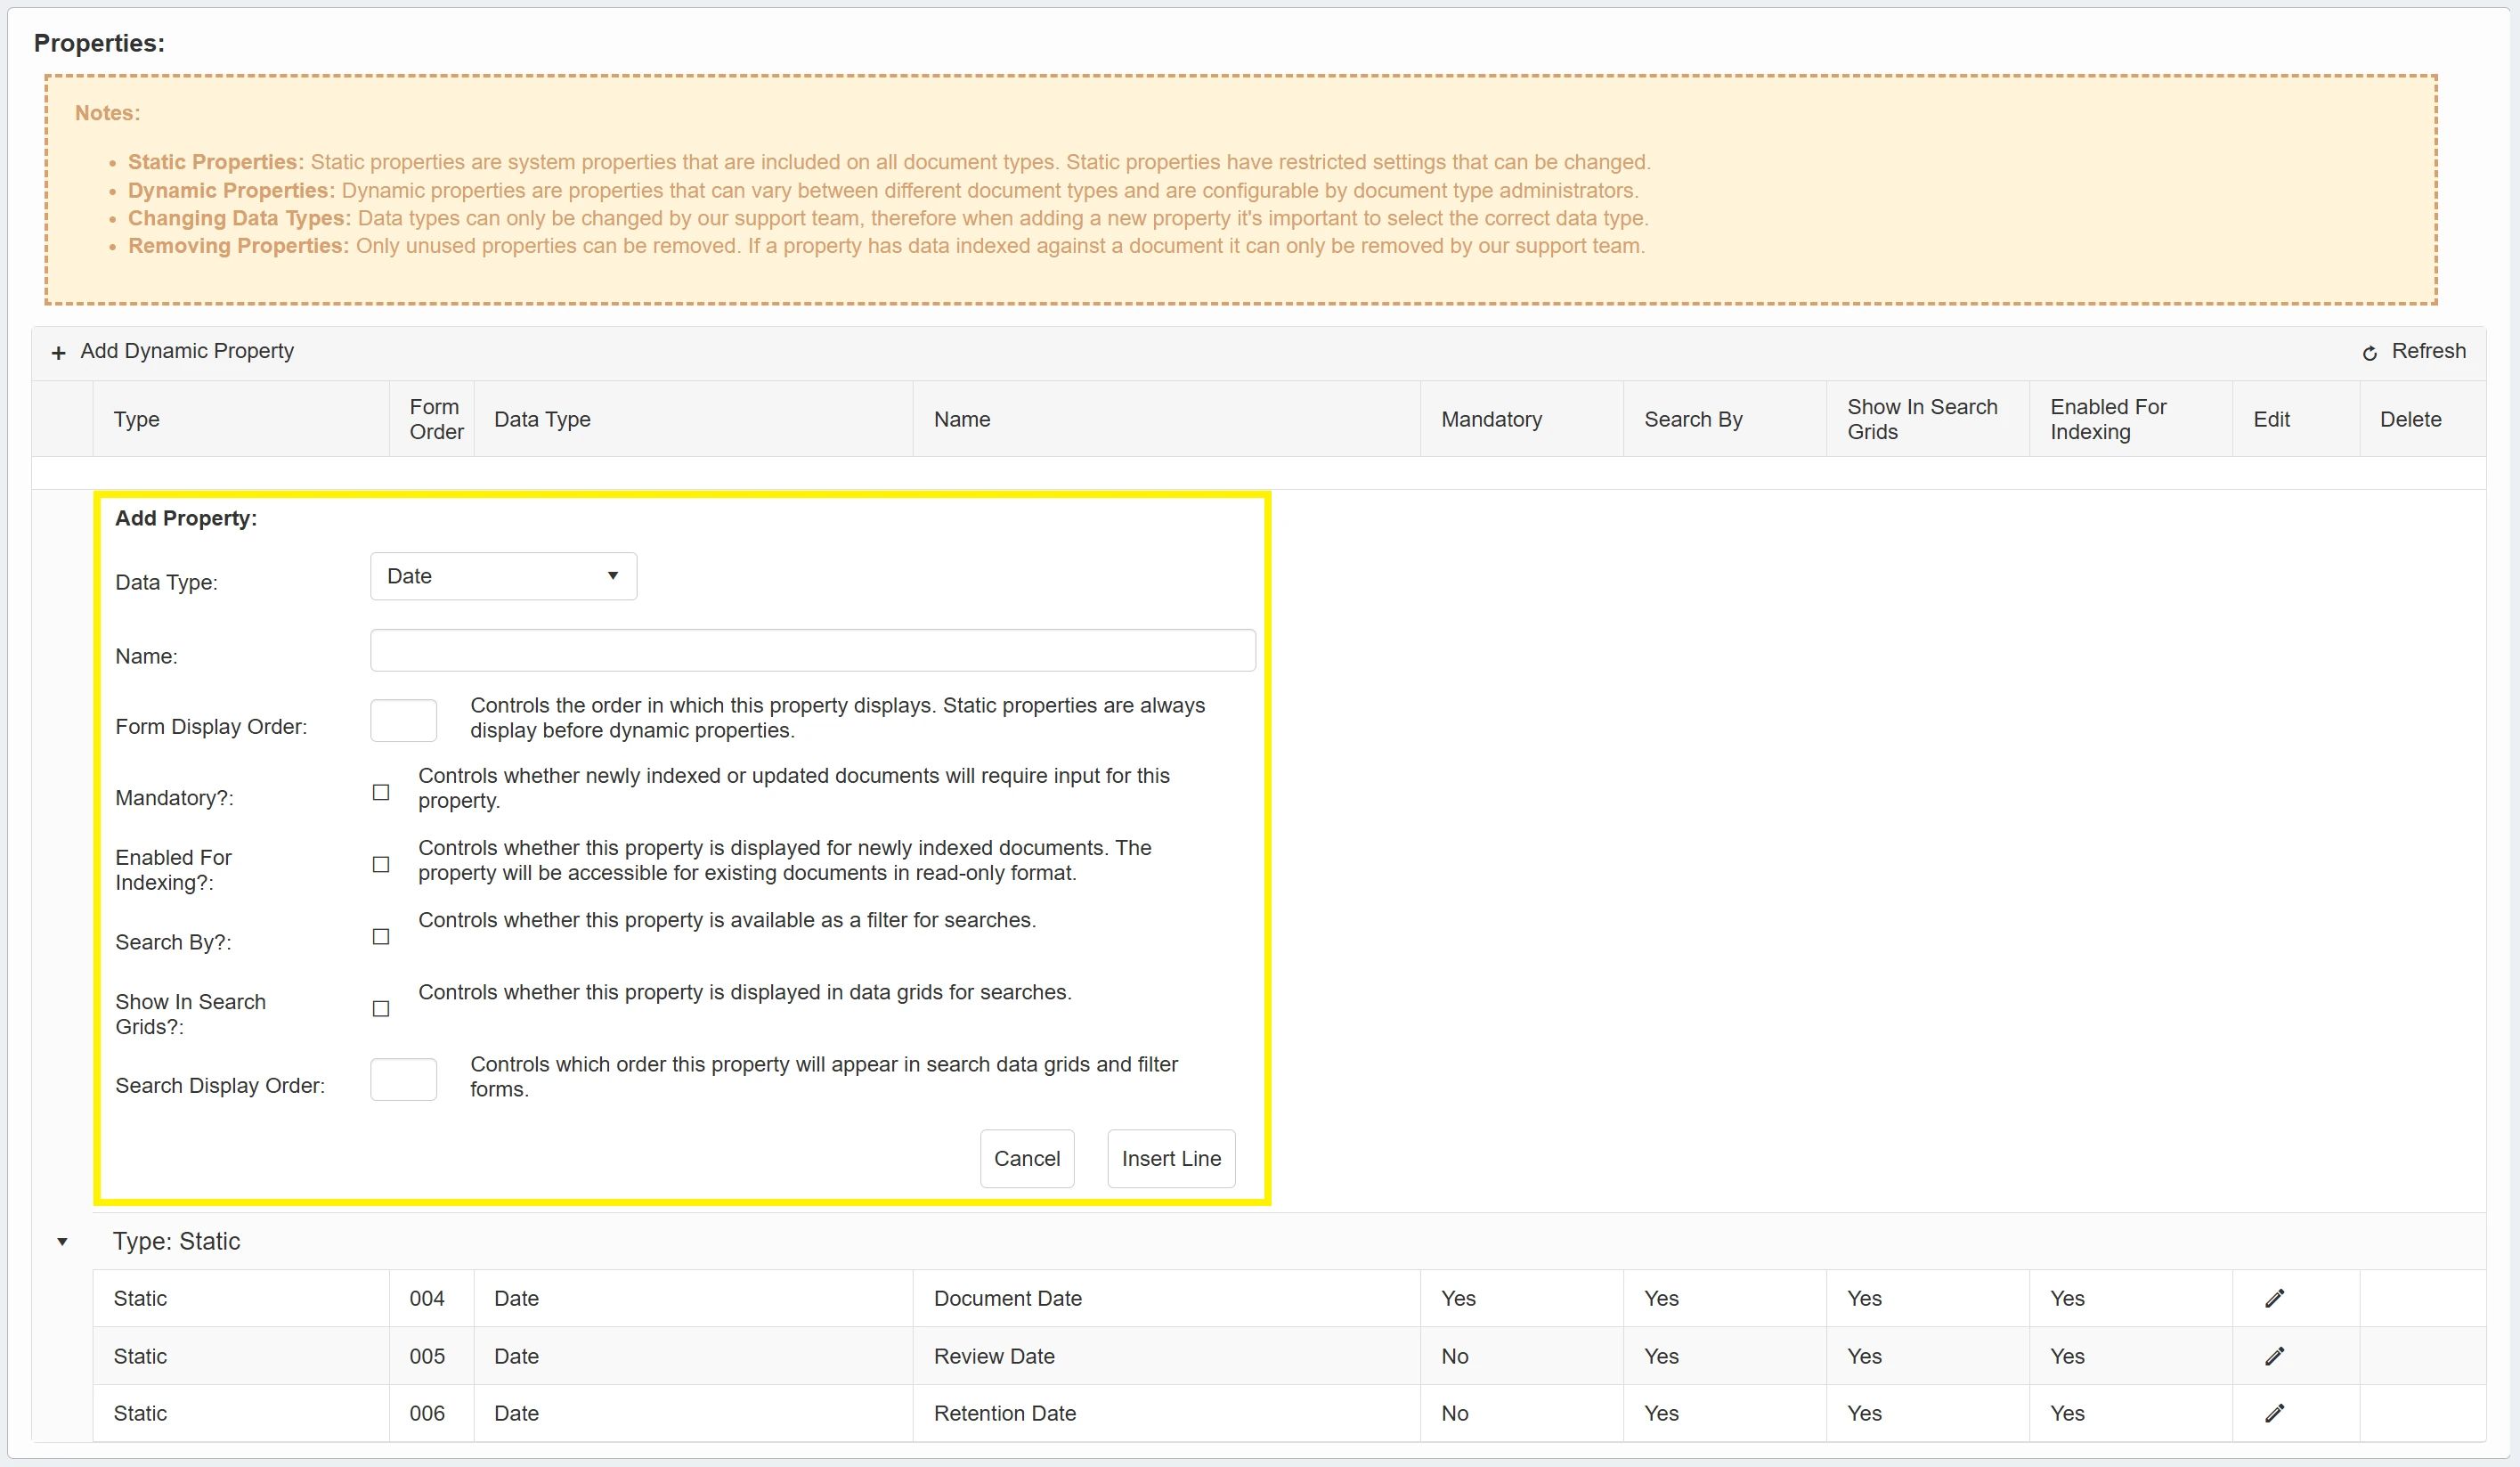
These new fields are as follows:
- Data Type: Specify the type of data that this property will accept (e.g. Date or Alphanumeric characters).
- Name: Give the new property a name.
- Form Display Order: Controls the position of this property in relation to other properties.
- Mandatory?: Dictates whether the newly indexed or updated documents will require information within this property.
- Enabled For Indexing?: Determines whether the property is displayed for newly indexed documents.
- Search By?: This controls whether the property is available as a filter when conducting searches.
- Show In Search Grids?: Specifies whether the property is displayed in search grids.
- Search Display Order: Controls the position in which this property appears on search grids.
Once you have populated the fields, simply click to finalise this property.
You can also edit existing properties by clicking the edit icon in the desired line.
Supplier Document Type Property Settings

The Property Settings section contains two fields which allow you to set Forced Review & Retention dates for the Document Type. Documents are given a Document Date when indexed, and the Review & Retention dates can be determined by toggling the parameters within the following two fields:
Forced Review Date:
Setting a forced review date will apply to newly indexed documents only. All newly indexed documents will be automatically marked for review at the target date. Users indexing the document will not be able to override the review date.
Forced Retention Date:
Setting a forced retention date will apply to newly indexed documents only. All newly indexed documents will be automatically marked for retention review at the target date. Users indexing the document will not be able to override the retention date. At the retention date, documents will be automatically soft deleted and marked for review by users with the 'Document Retention Admin' role.
Existing documents indexed prior to setting a Forced Review or Retention date will respect their original retention dates (if applicable). The Forced date will only apply to newly indexed documents.
PO Workflow Visualiser
The PO Workflow Visualiser allows you to test and verify how a purchase order will be treated by your existing approval rules. This is particularly useful if you have just implemented a new approval rule and would like to test it without actually raising a live Purchase Order.
To begin testing approval rules,, click on the PO Workflow Visualiser icon within the Configuration & Settings section.
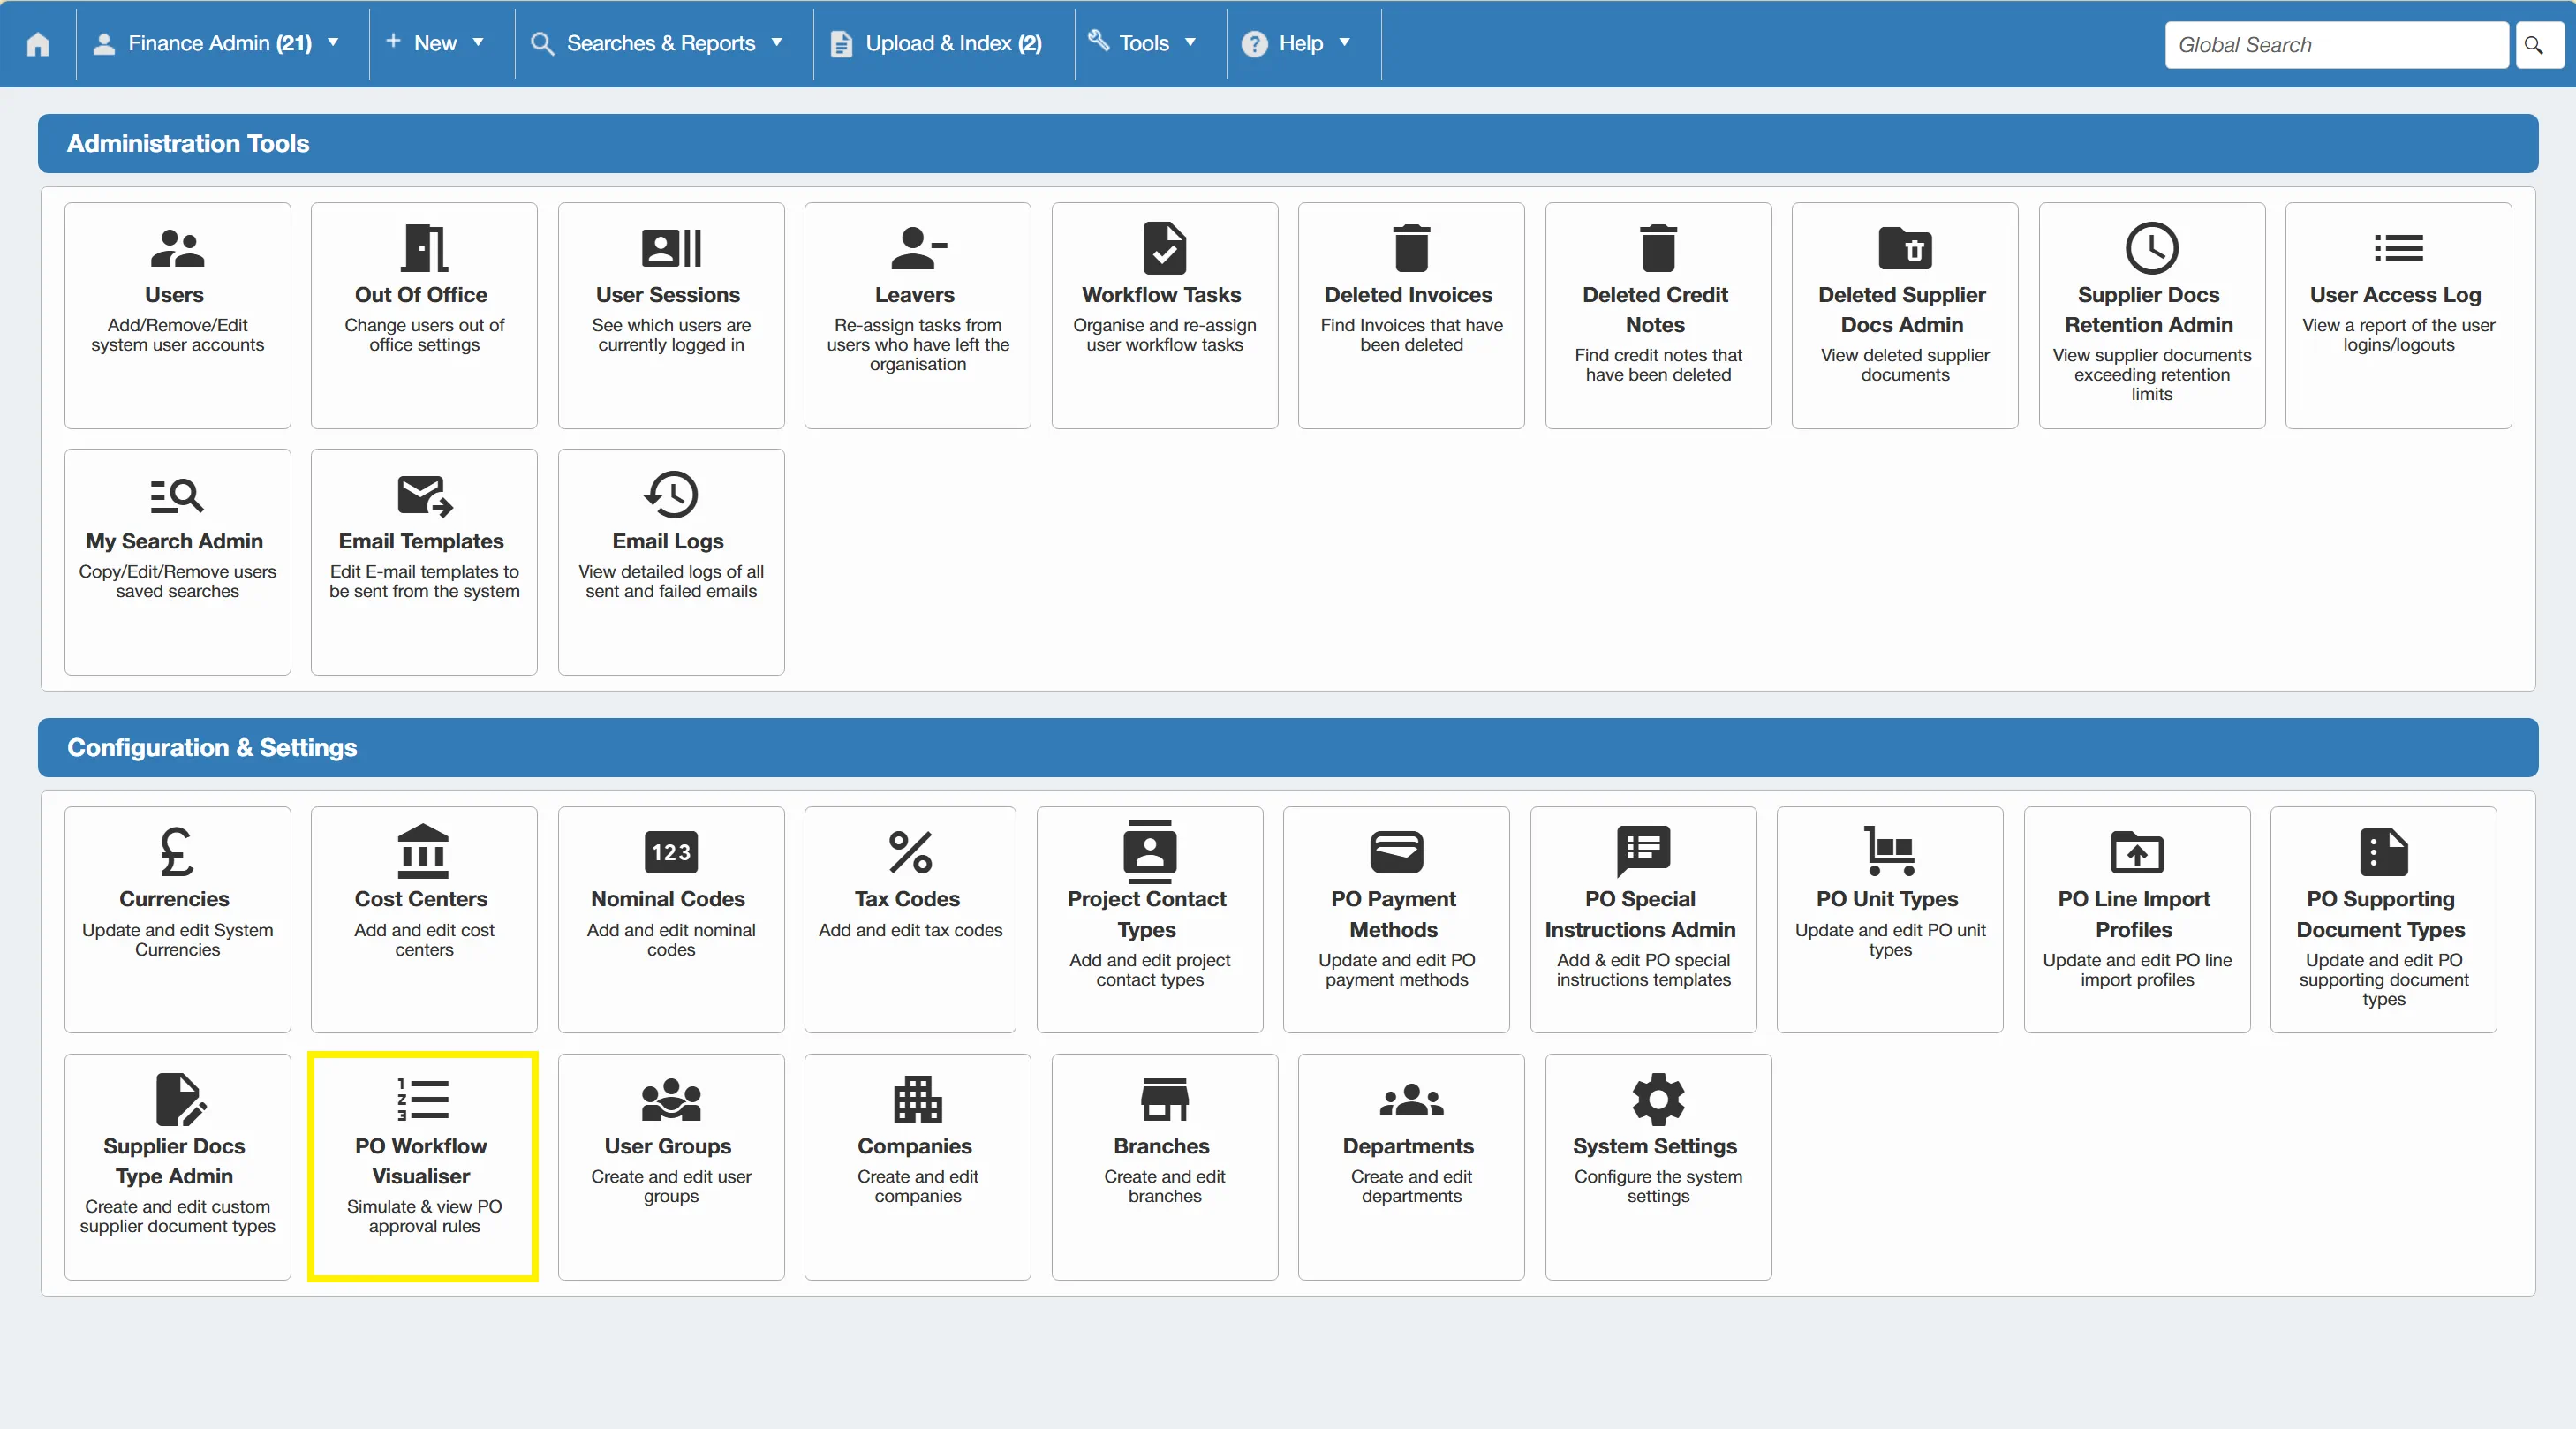
This takes you to the PO Workflow Visualiser window. From here you can input tailored parameters to simulate purchase order approval.
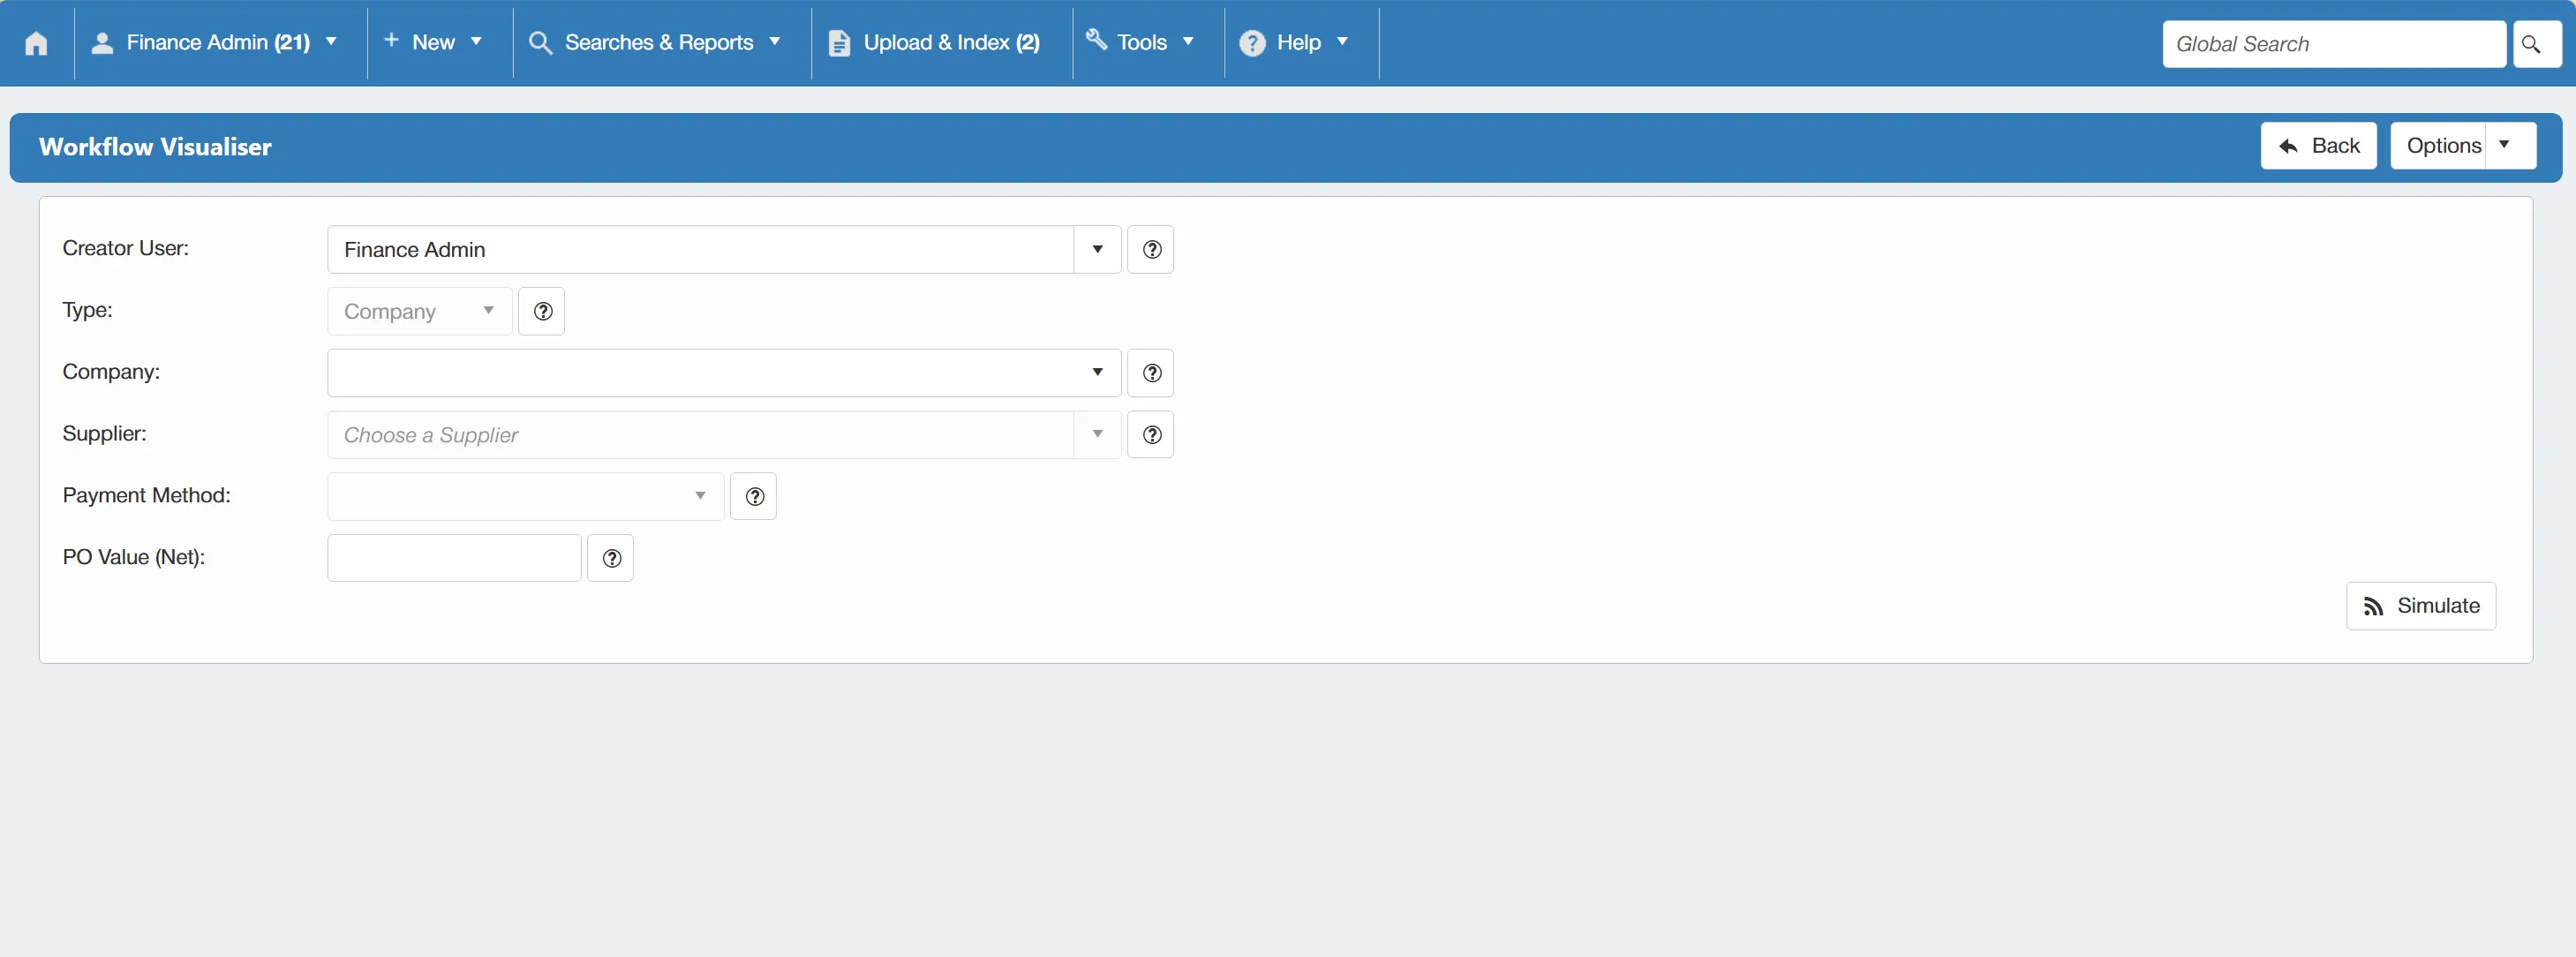
The available parameters are as follows:
- Creator User=The user who created the PO in this simulation.
- Type=The type of PO in this simulation (e.g. Company, Department, or Project).
- Company=The Company from which the the PO is being raised (applicable in systems with multiple companies).
- Supplier=The Supplier against whom the PO is being raised.
- Payment Method=The PO's payment method.
- PO Value (Net)=The net value of the purchase order.
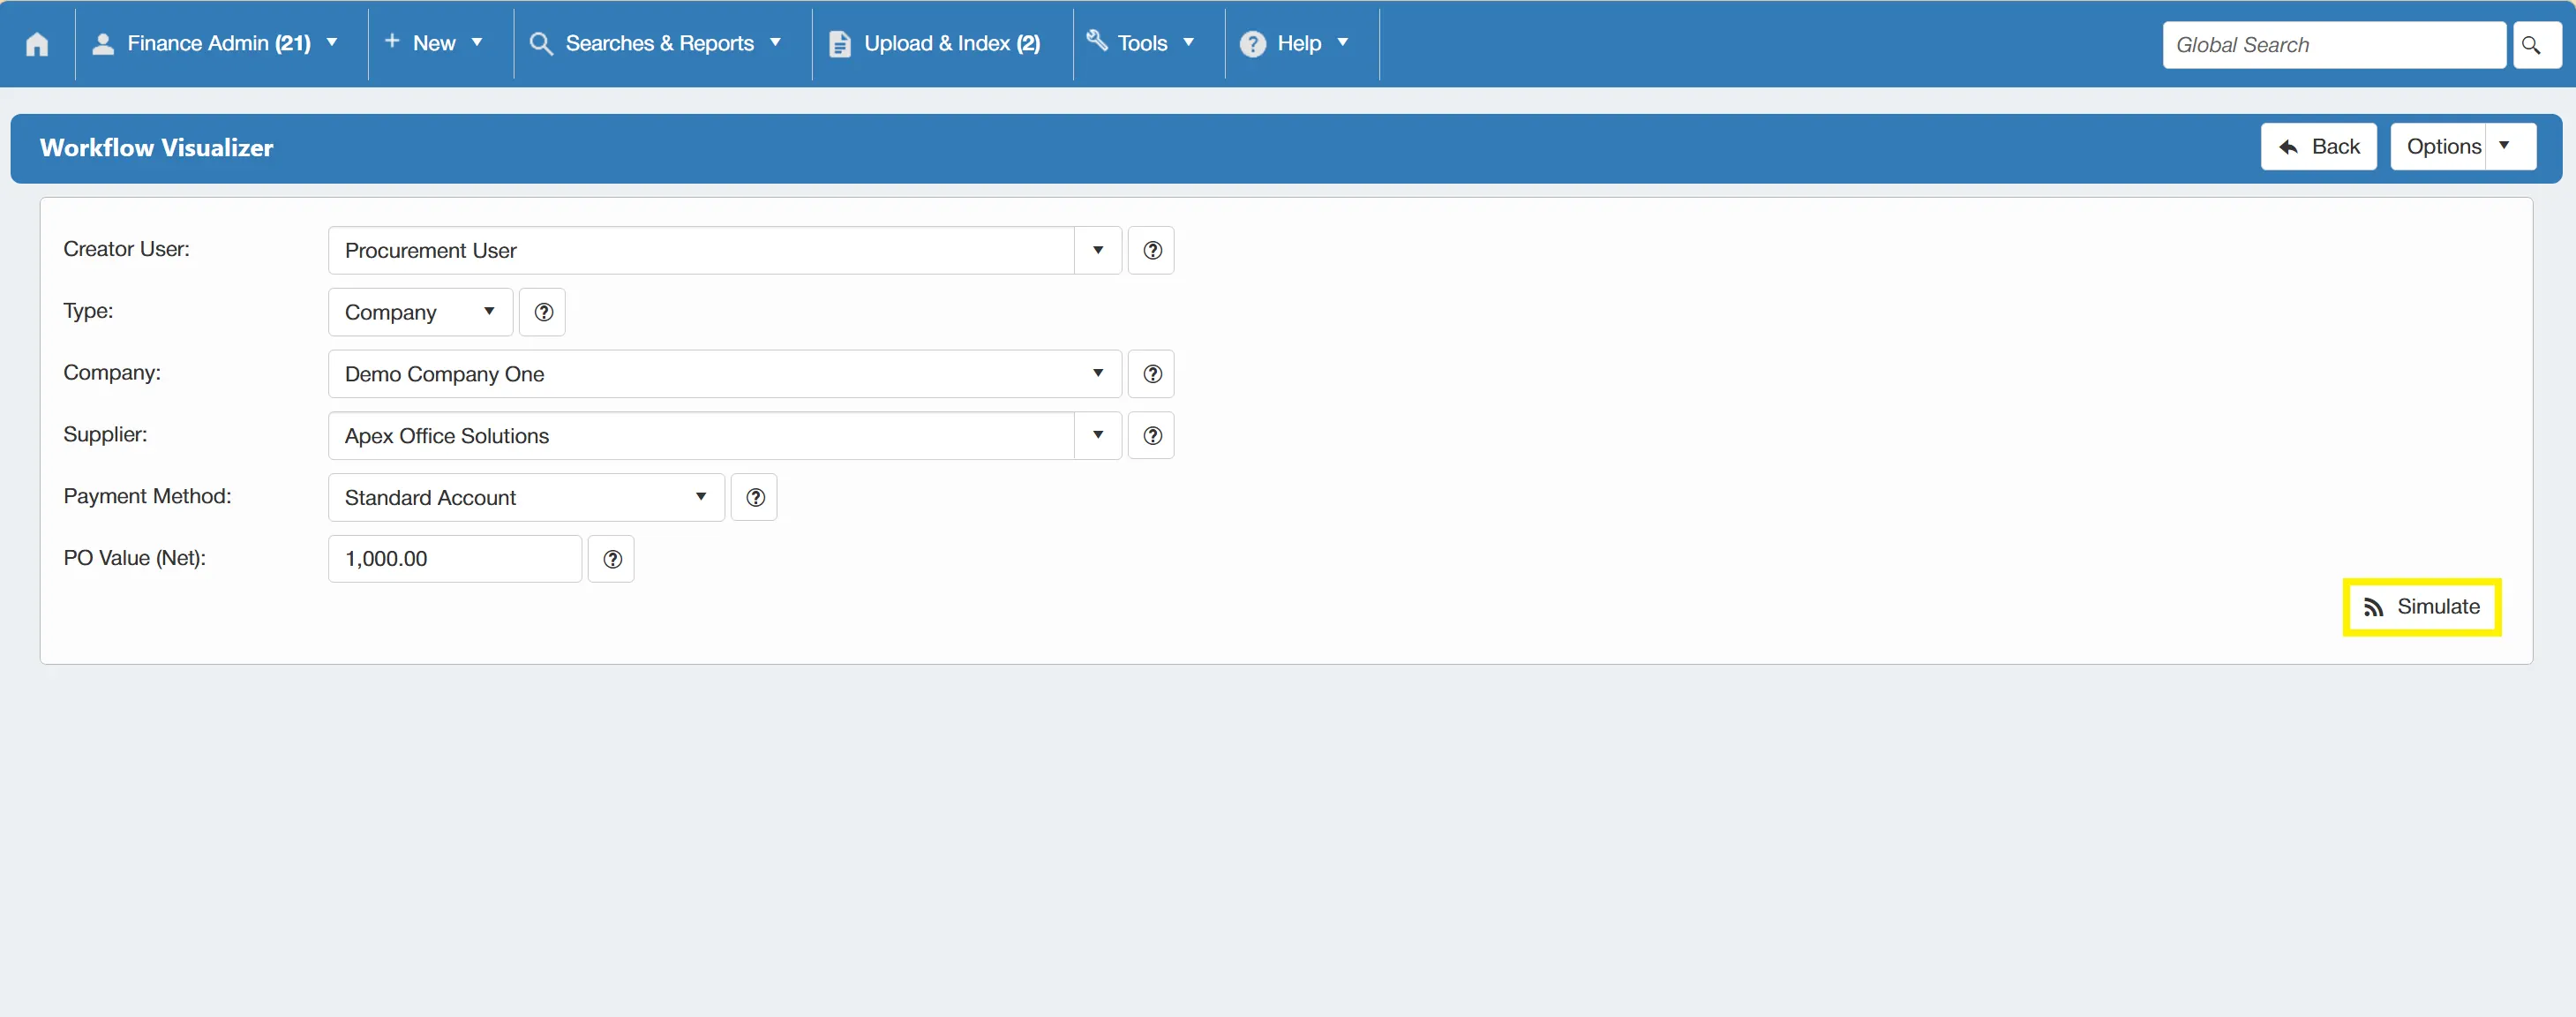
Once the parameters are filled in, you just need to click the button to carry out the simulation.
A new grid will then appear containing key information from the simulated PO approval process.
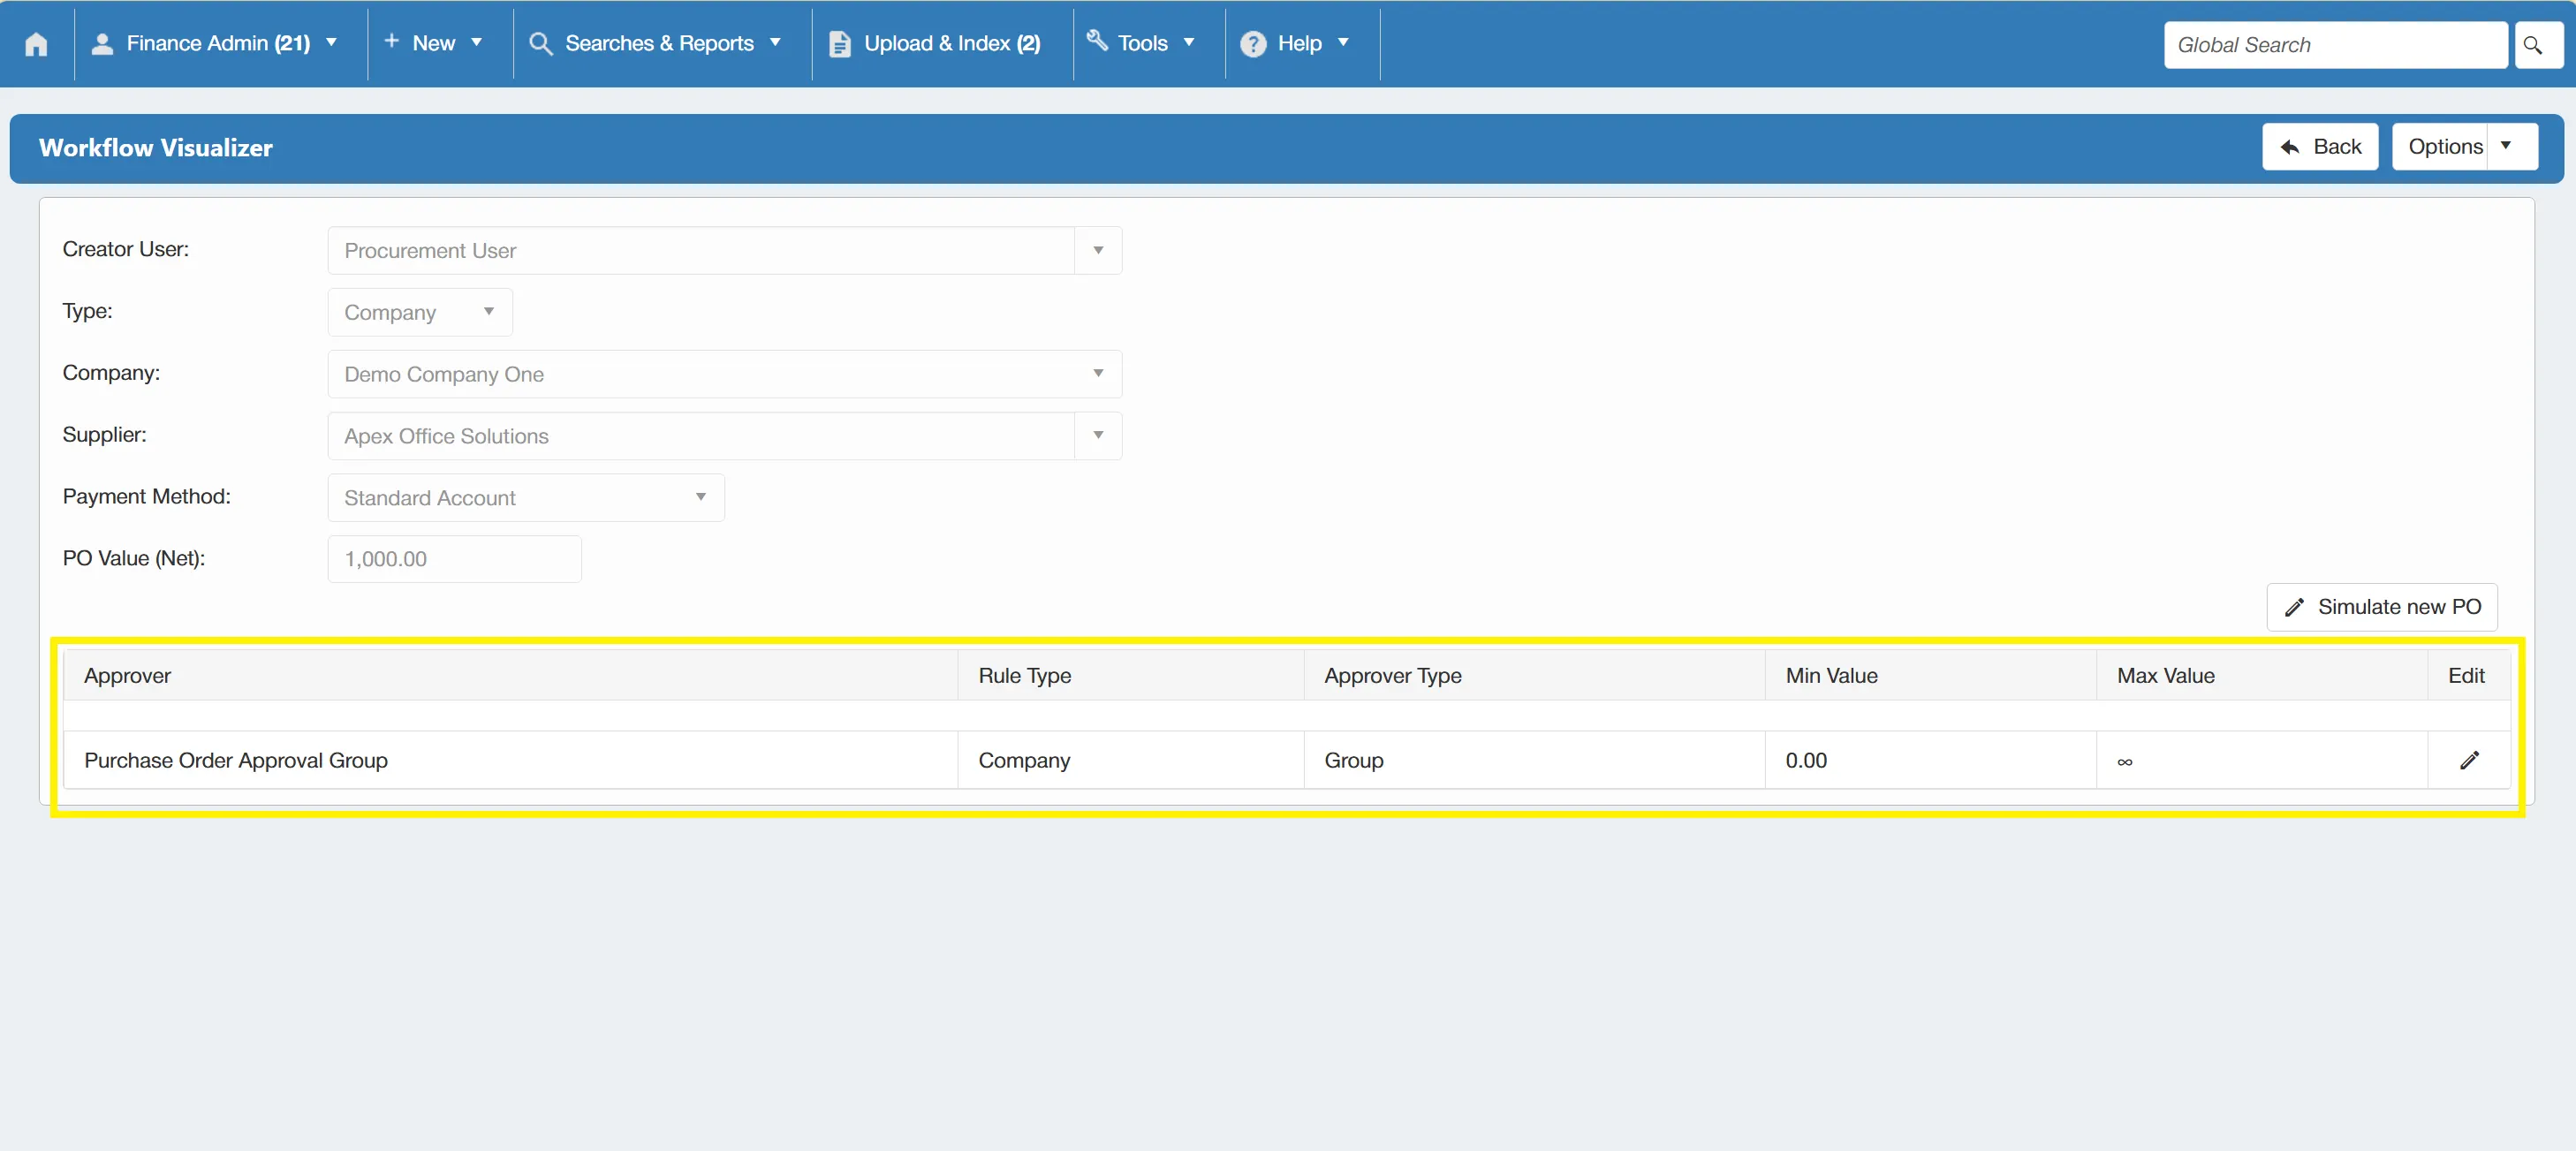
The grid contains the following information:
- Approver=The approving user who will recieve the PO approval task.
- Rule Type=The applcable type of rule applied to the PO approval (e.g. Company, Department, or User).
- Approver Type=The type of approver (e.g. group or user).
- Min value=The relevant approval rule's minimum value.
- Max Value=The relevant approval rule's maximum value.
- Edit Icon=The edit icon takes you to the relevant approval in order to edit it if required.
If you wish to carry out another simulation, simply click the button.
Existing PO Approvals
Users can also view information related to the approval of existing, real purchase orders that have been raised through the system.
To access this information, click the button, under the drop down menu.
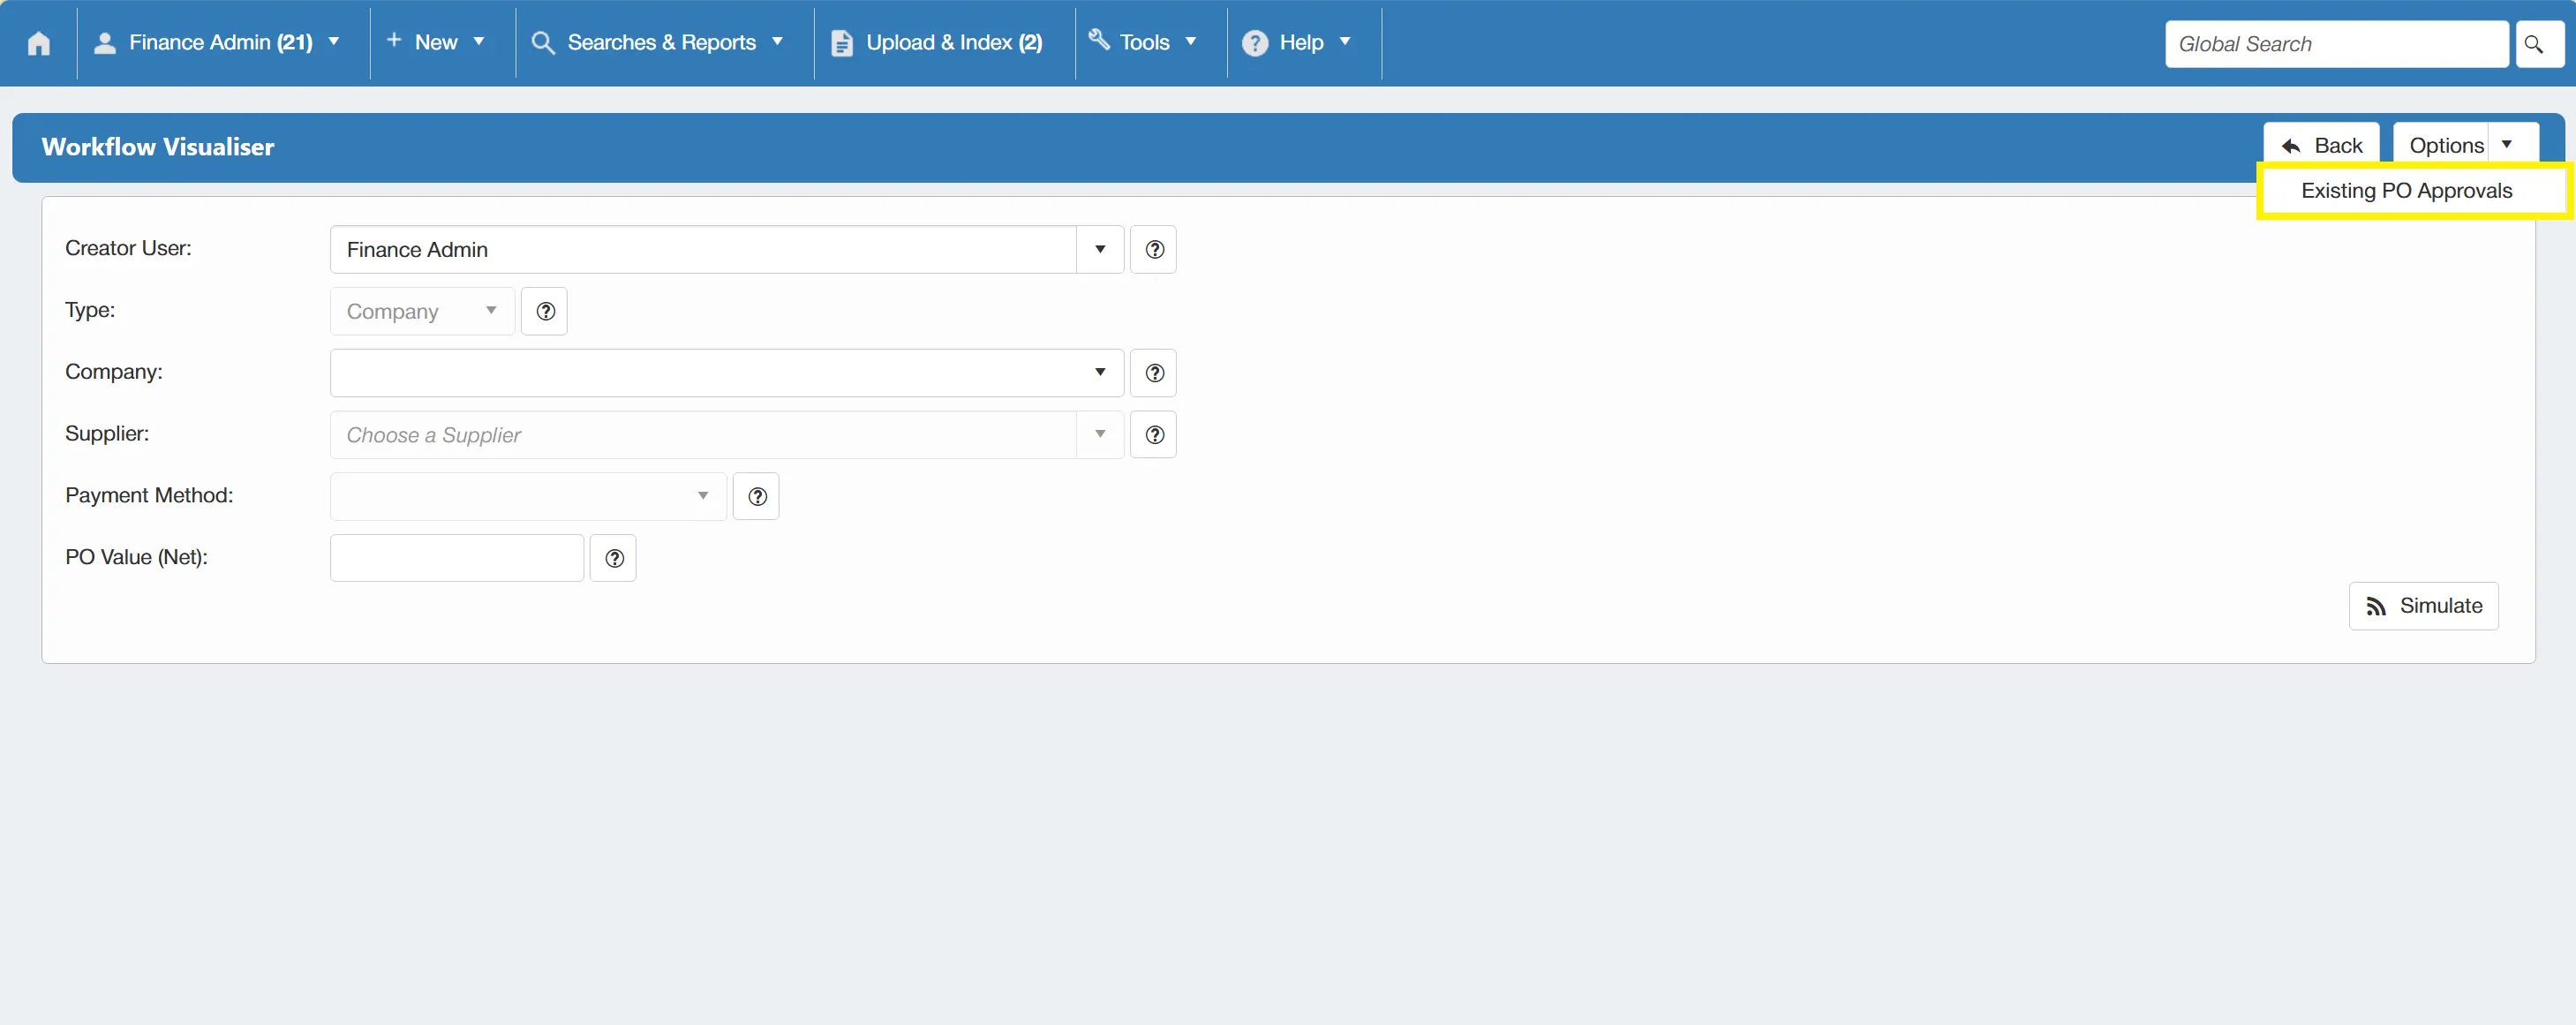
This takes you to a new window where you can select a previous PO from the drop down menu.
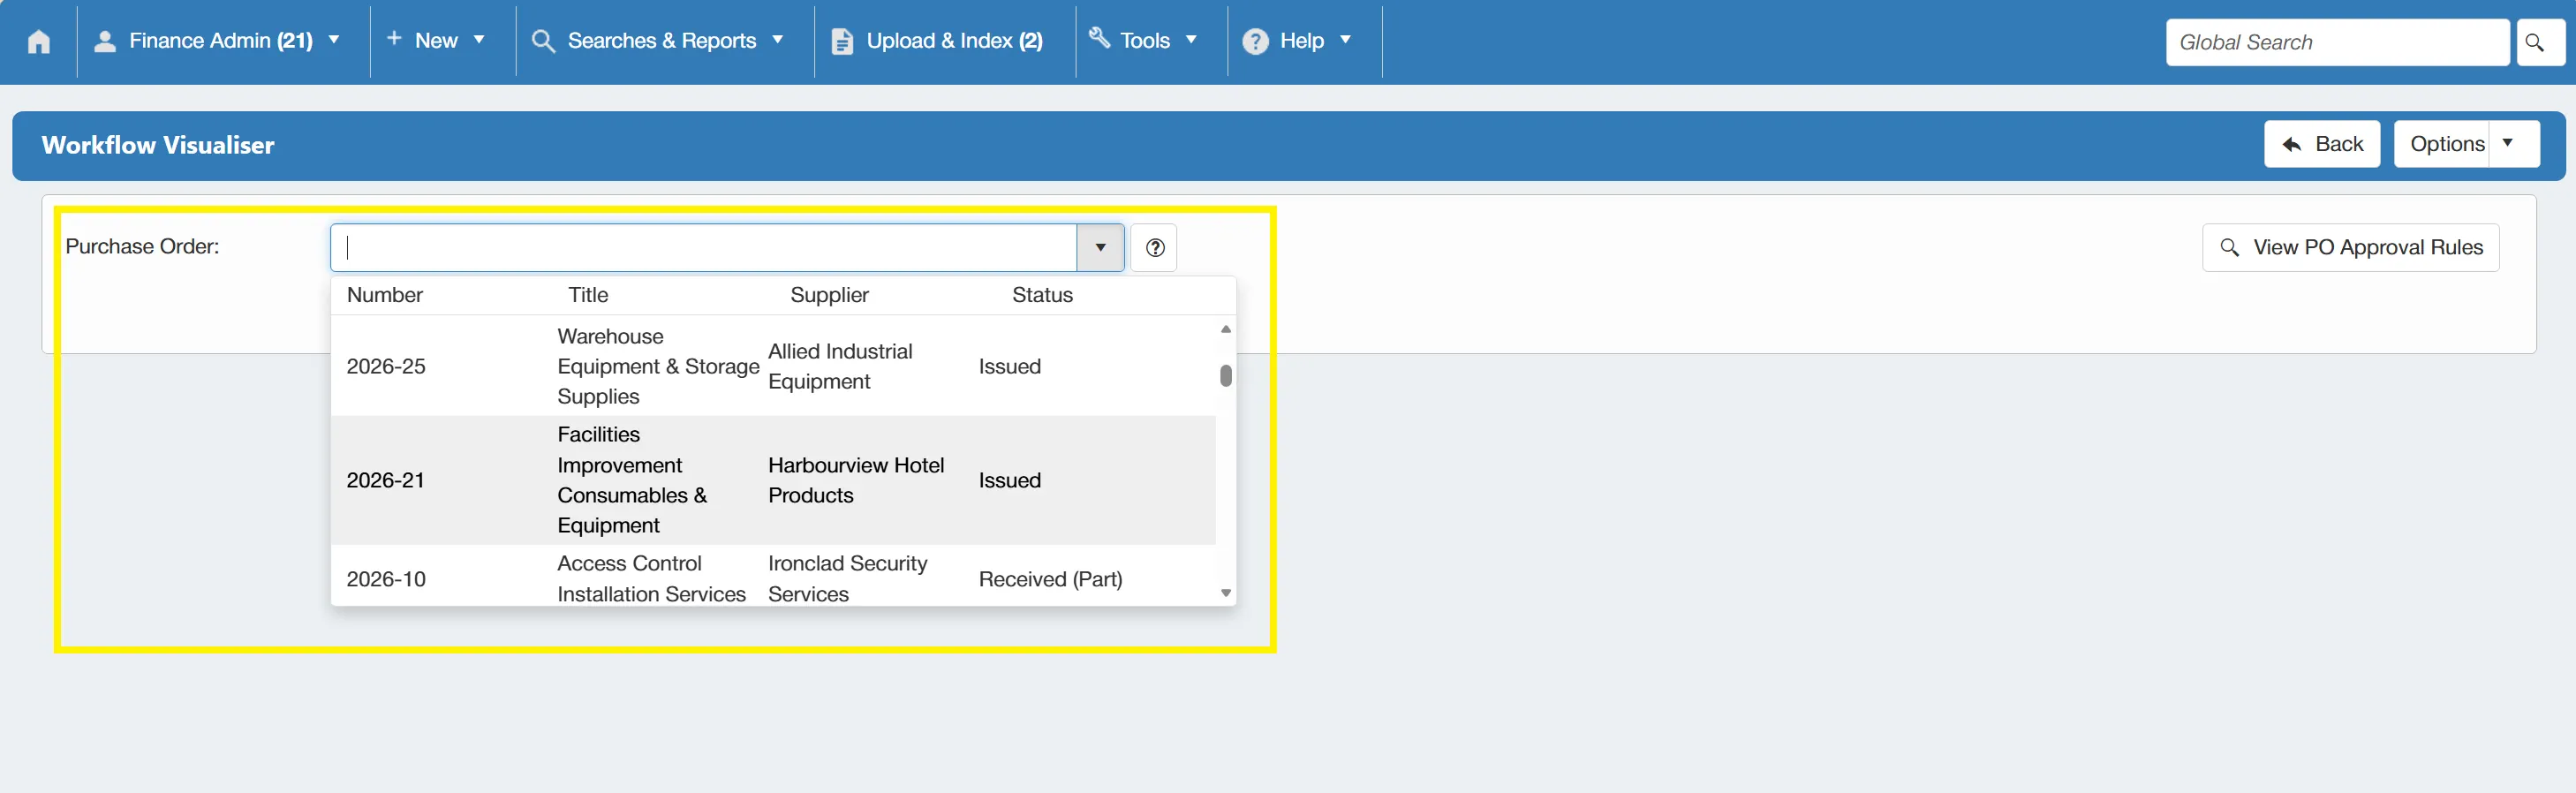
Once you have selected a PO, simply click to bring up the approval details.
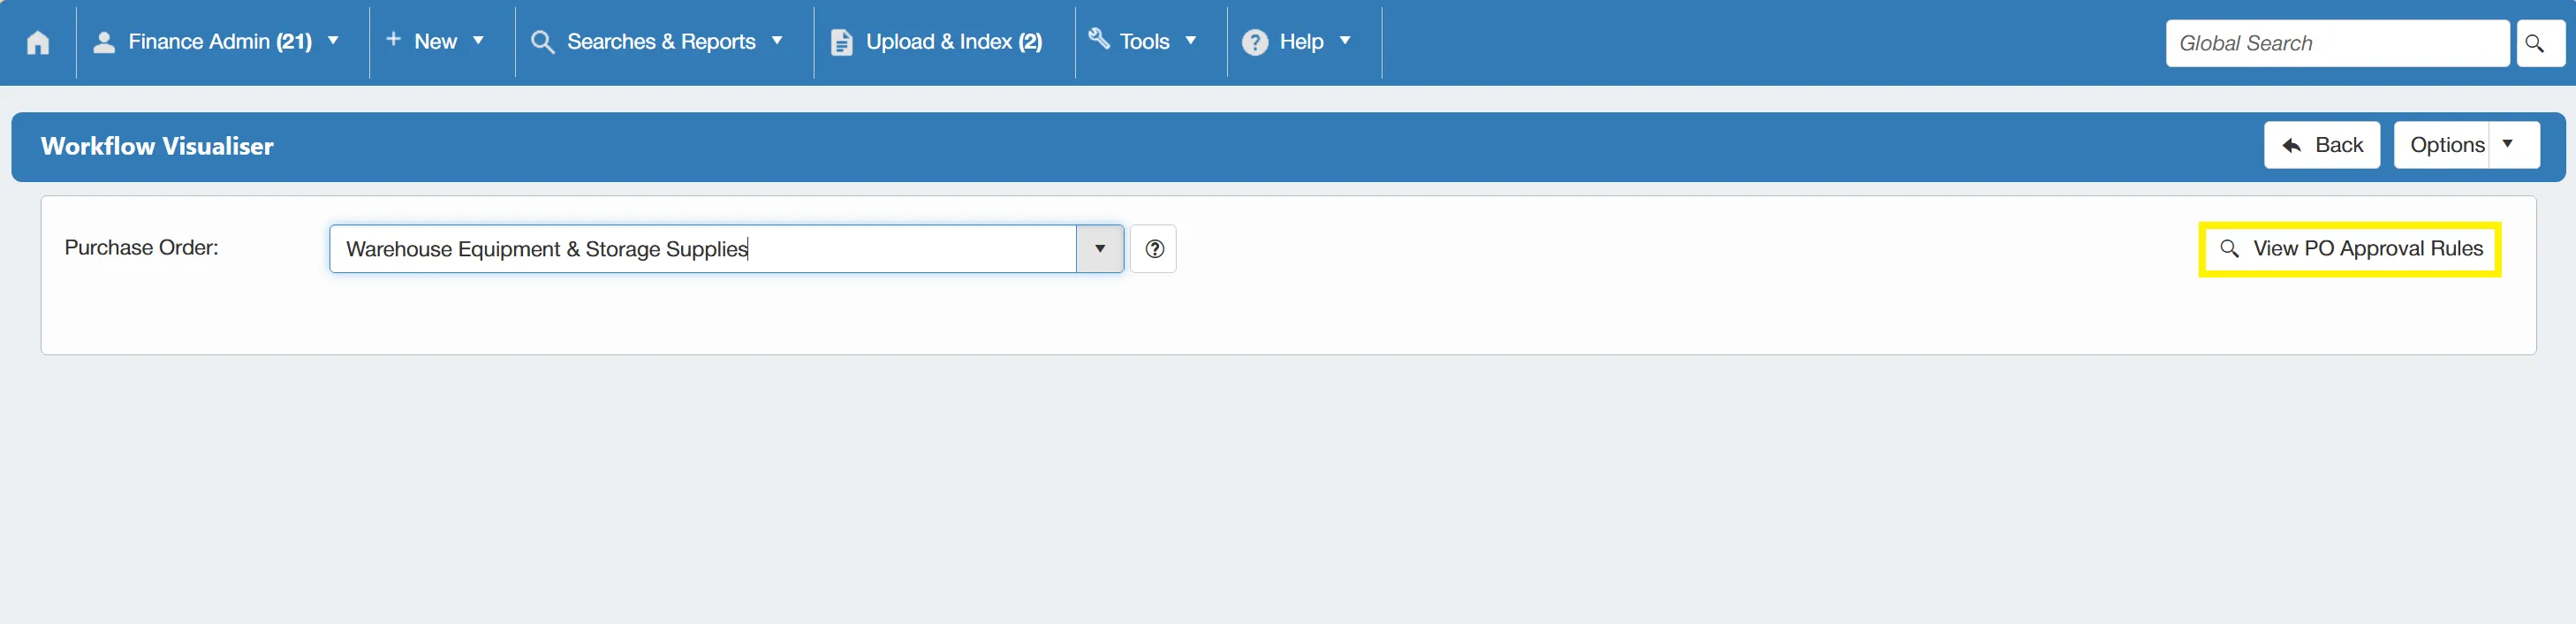
As before, this brings up the new grid showing the approval details.
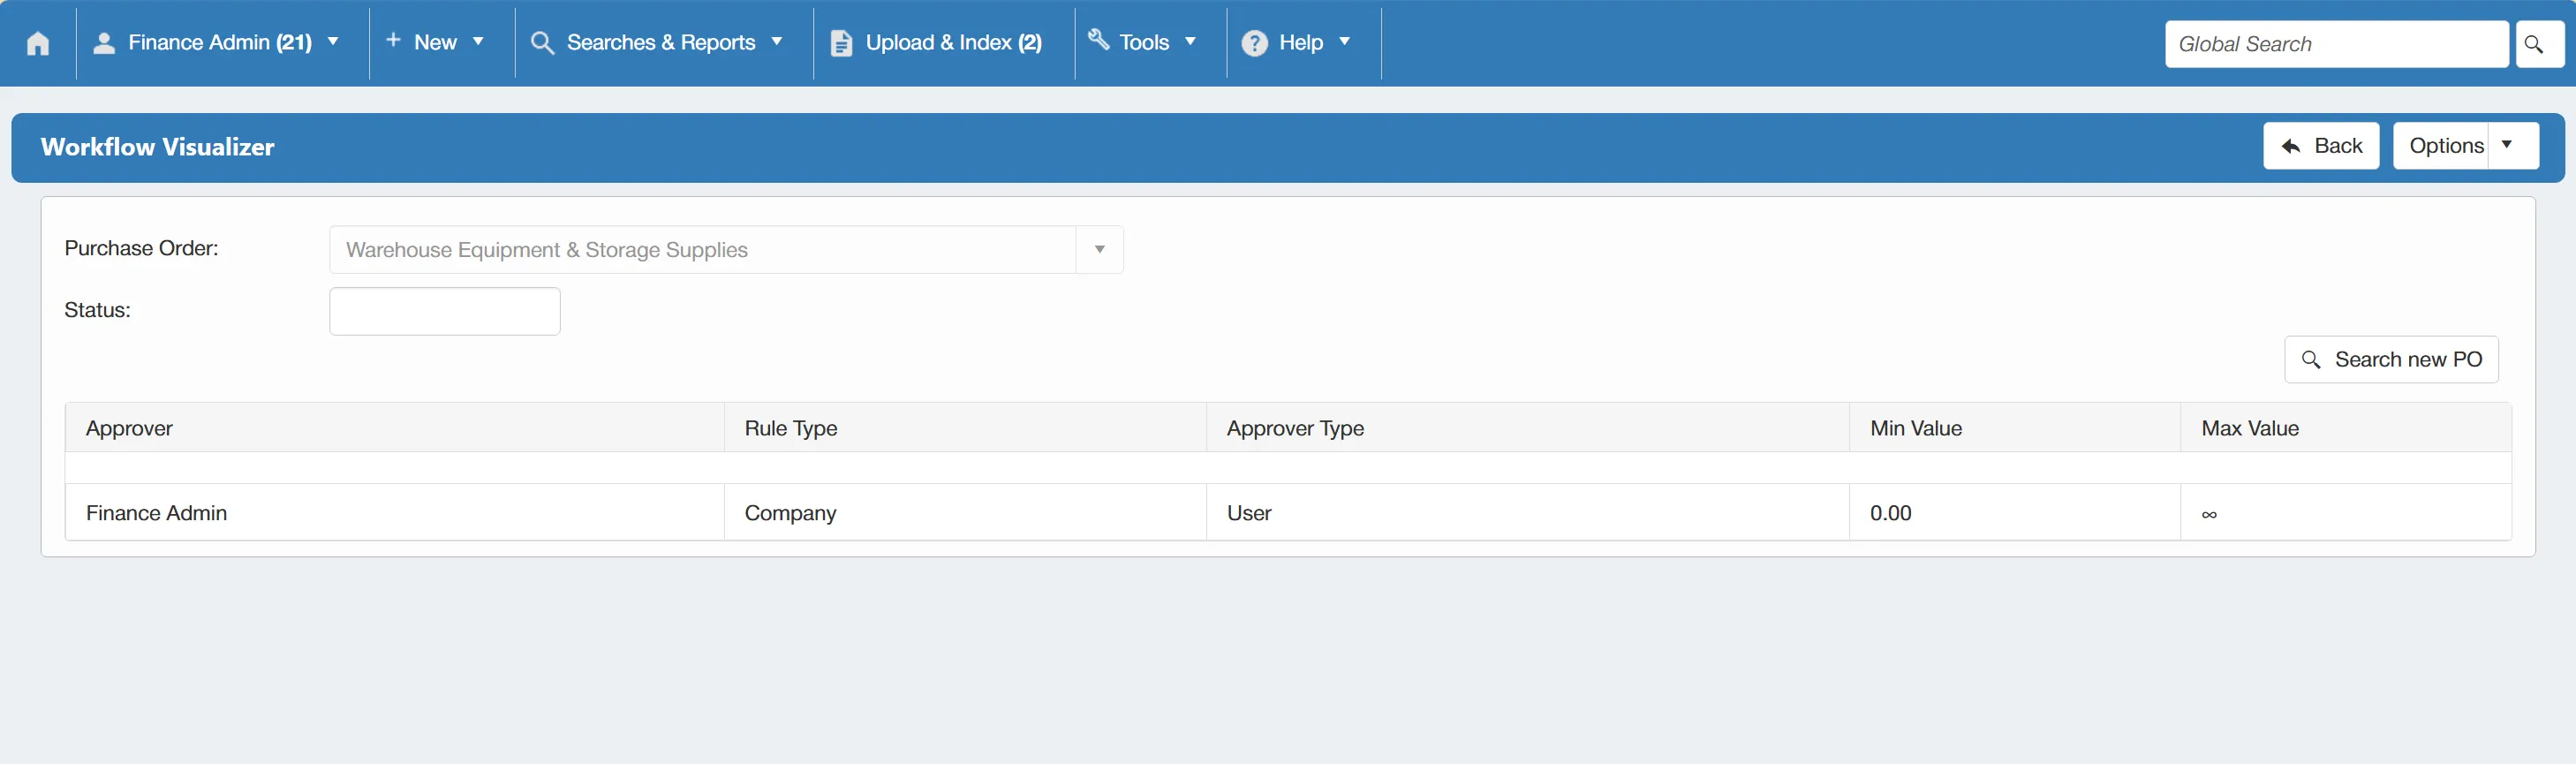
If you wish to view approval details of other purchase orders, then simply click to begin the process again.
User Groups
You can set up user groups to improve efficiency in your workflow approval process. This is particularly helpful if you have a group of upper management staff who can approve purchase orders, or invoices but you don't require all of them to approve it.
Users must have the Group Admin permission enabled to access this feauture. For information on user permissions, click here.
To administer User Groups, click on the User Groups icon within the Configuration & Settings section.
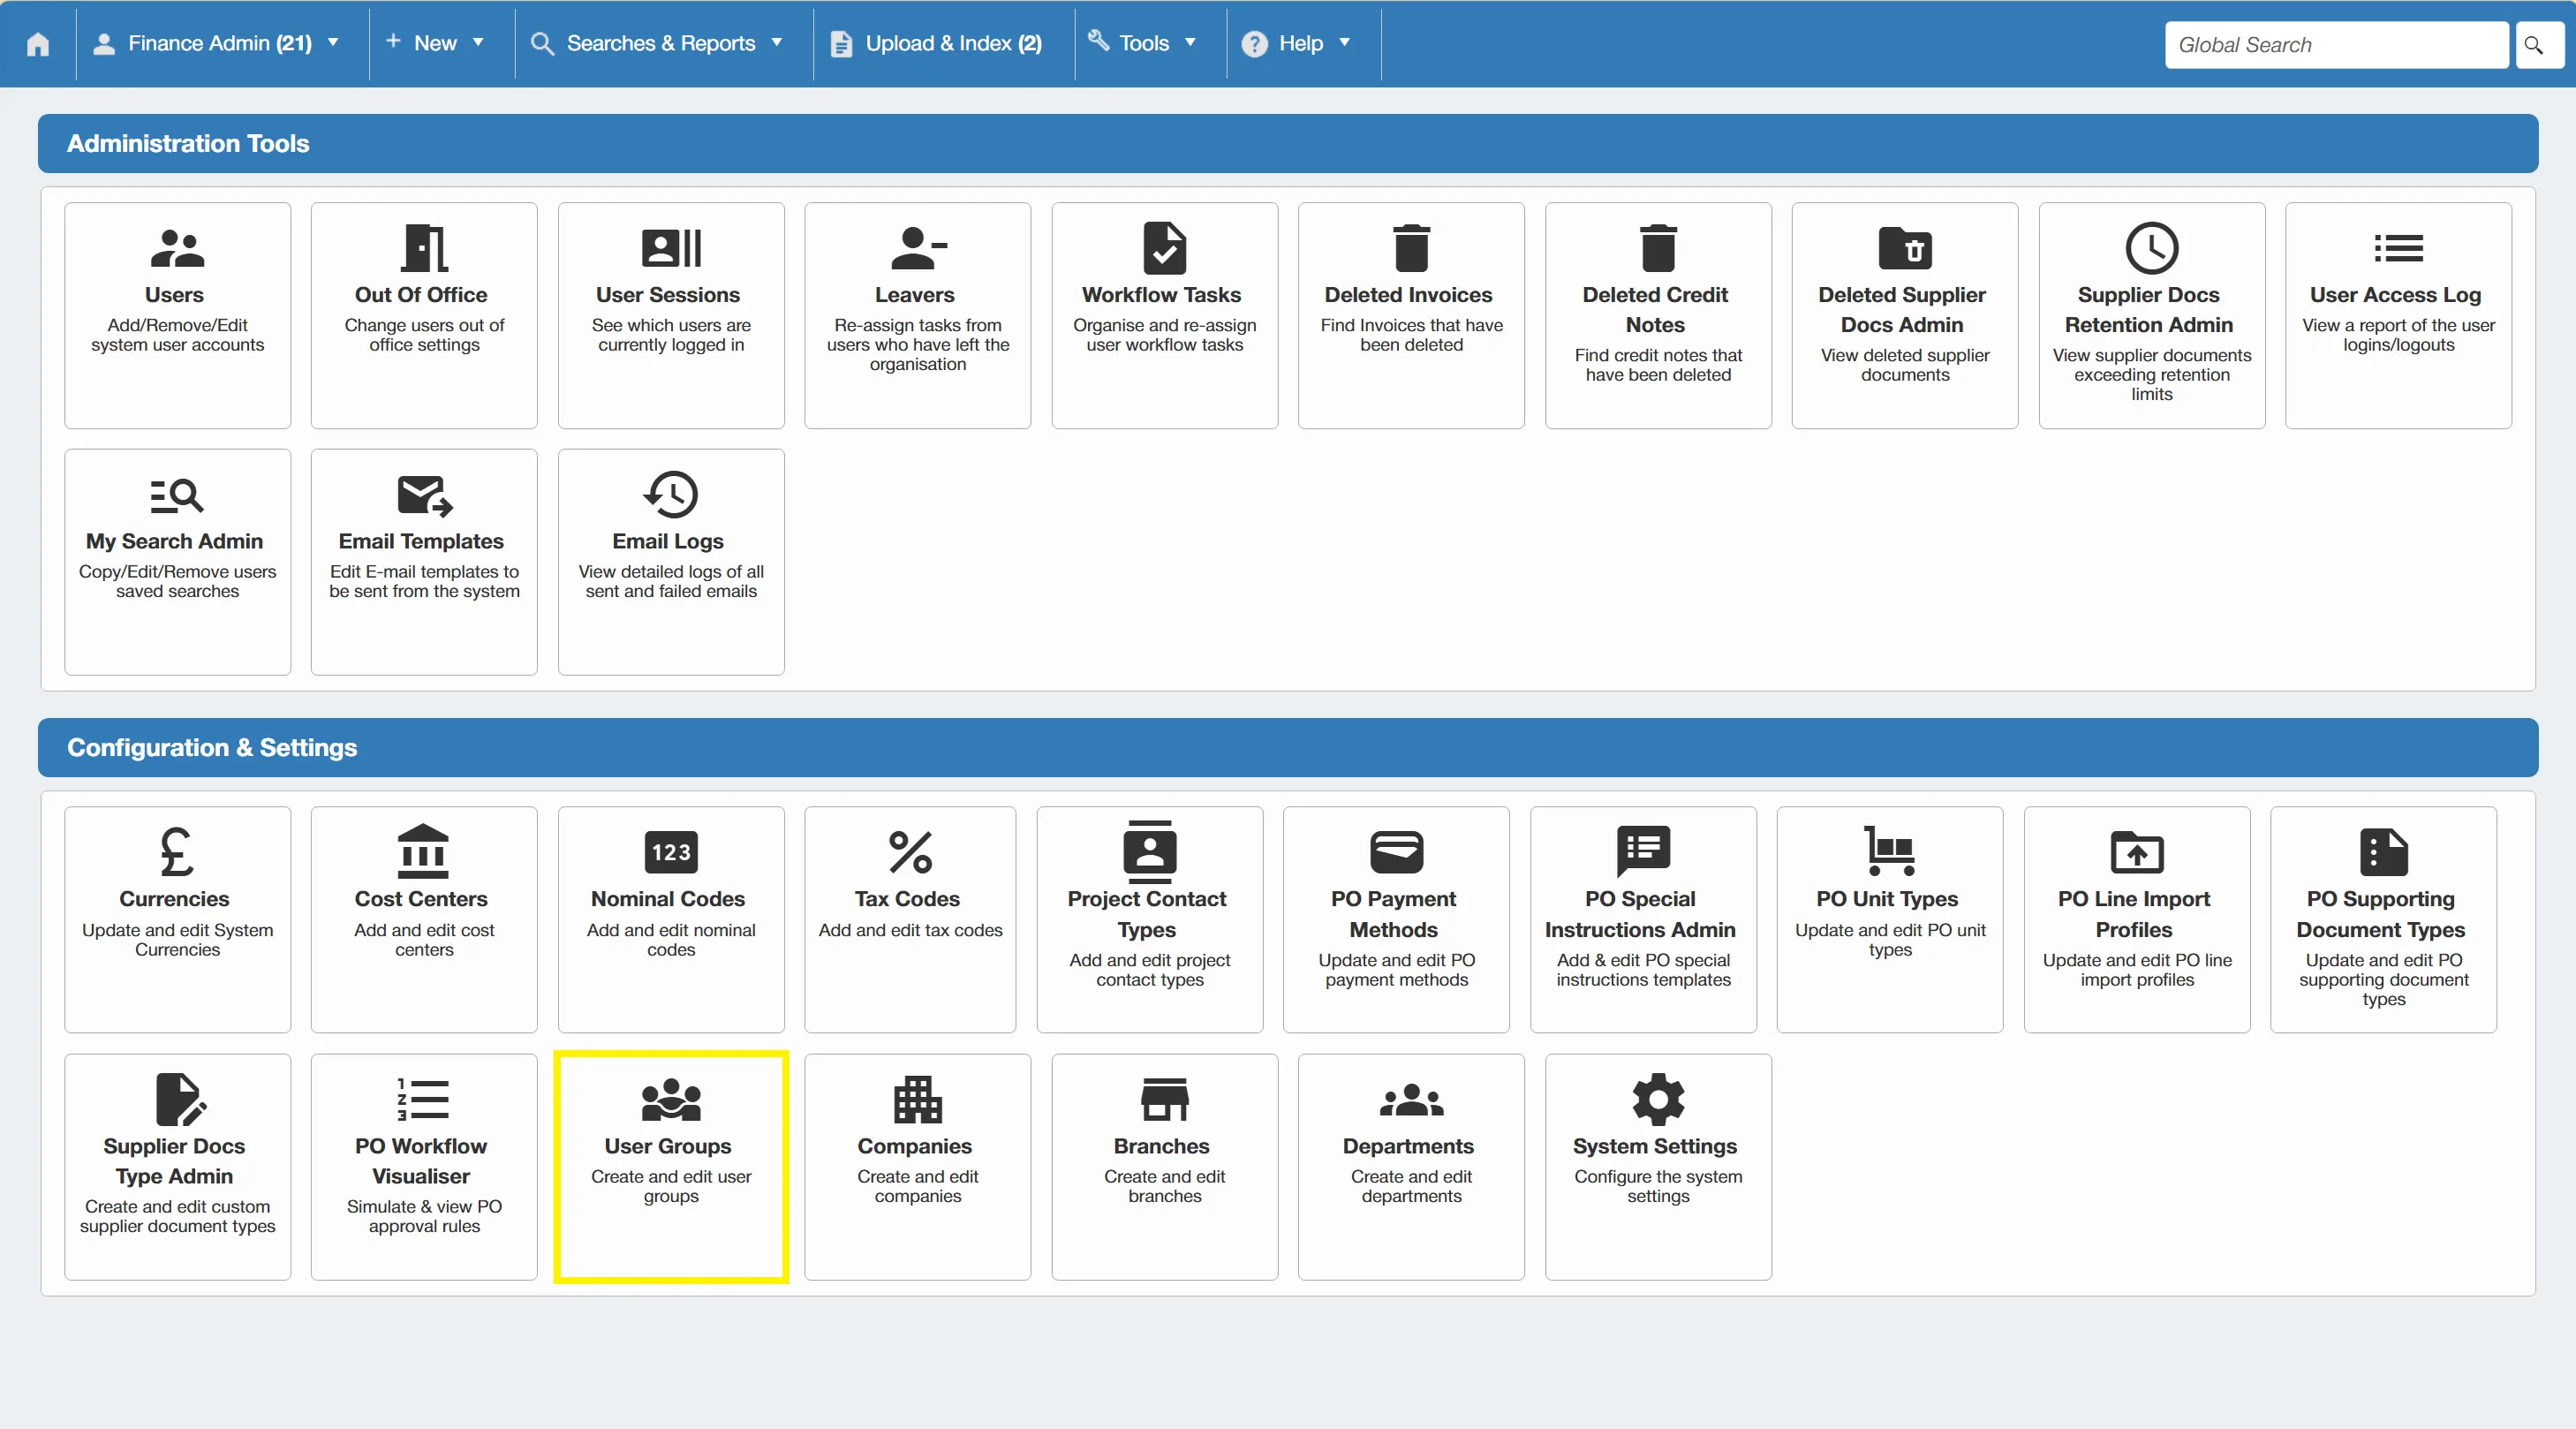
This takes you to the Group Administration grid. From here, you can create new user groups, edit existing groups and remove unwanted ones.
The system allows you to create the following group types:
- Purchase Order Approval= Users within a Purchase Order Approval group will all receive the same PO approval task, and the first user within the group to view the task will take ownership of it.
- Invoice Approval= Users within an Invoice Approval group will all receive the same Invoice approval task, and the first user within the group to view the task will take ownership of it.
- Shared Access= Users within a Shared Access group will be able to view the same Draft Purchase Orders and uploaded Documents. This is useful for team collaboration.
- Supplier Document Access= Users within a Supplier Document Access group will have access to the same Supplier Documents. This is useful for groups that require collaboration for Supplier Compliance.
Invoice Approval groups can only be created within systems that include Invoice Processing features.
Supplier Document Access groups can only be created within systems that include the Supplier Document module.
Creating a New User Approval Group
To create a new user group, click on the button.
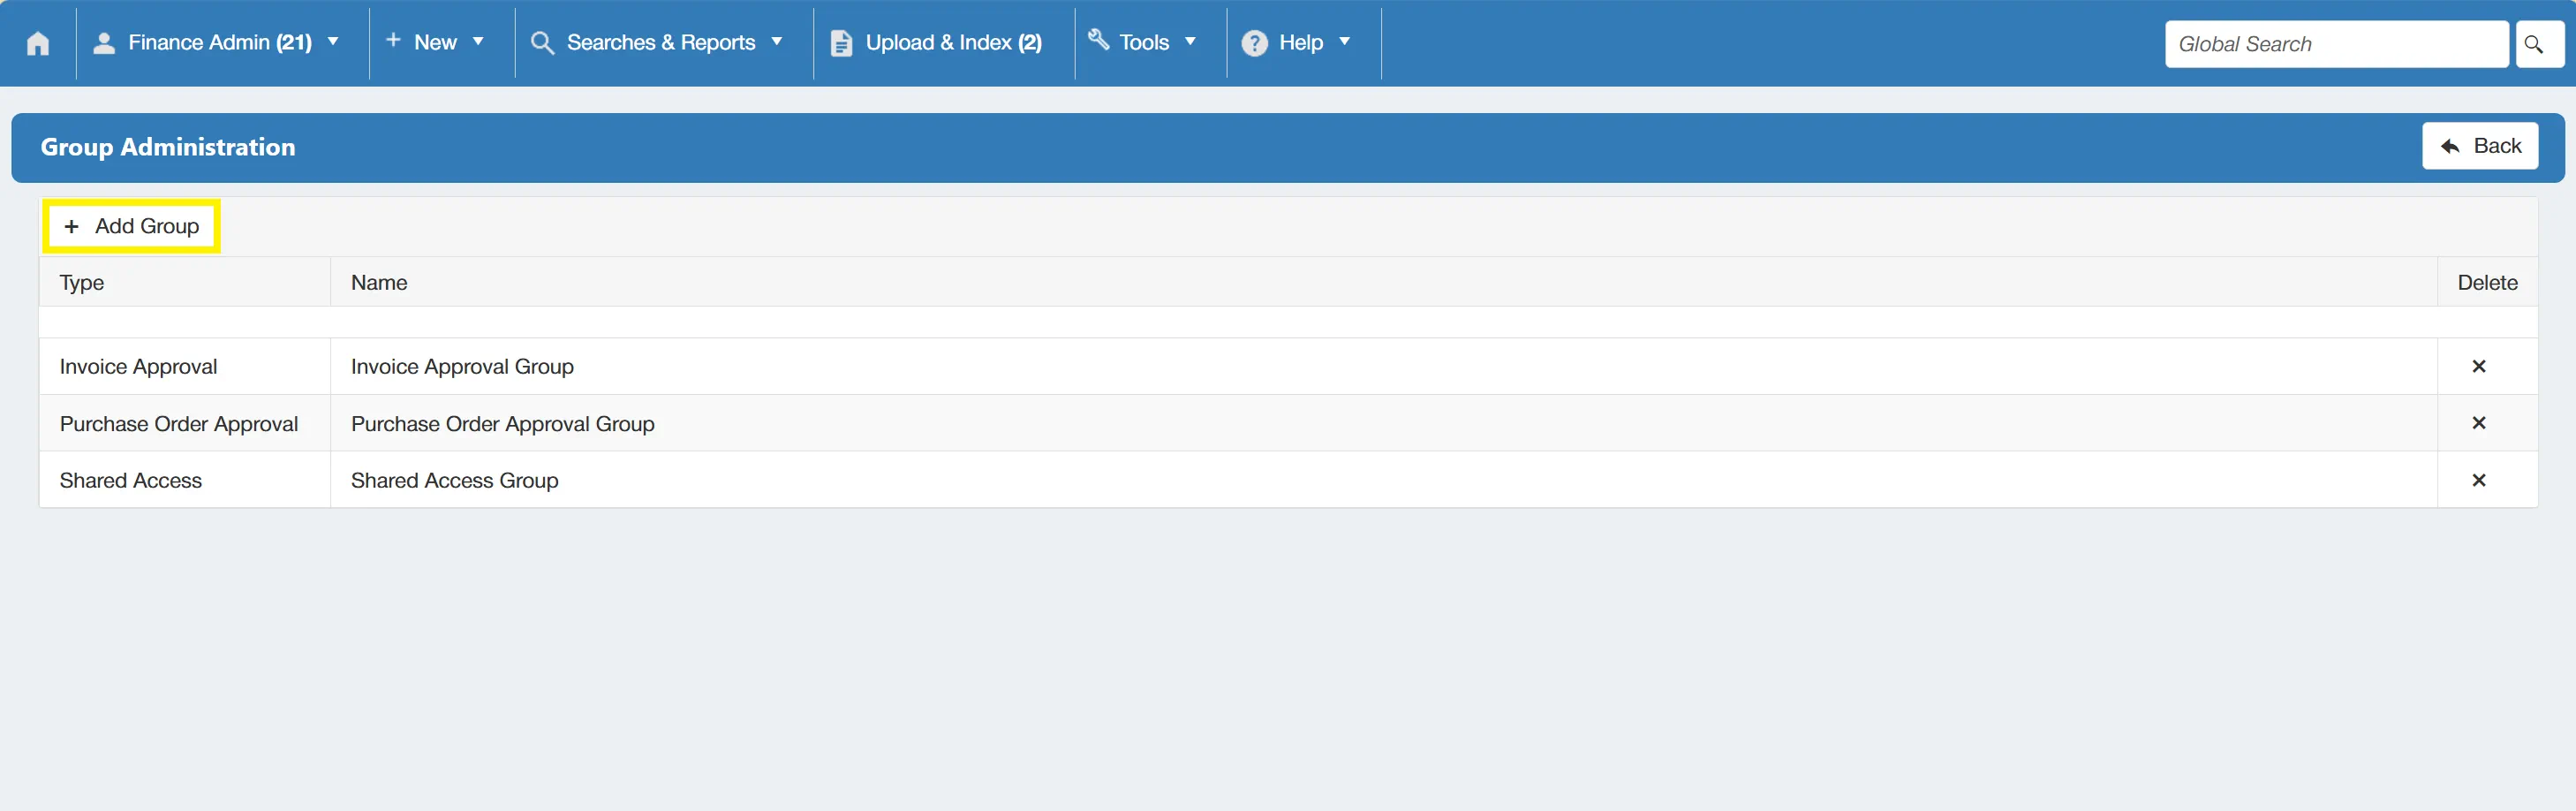
This brings you to a new window where you can select the type of user group from the drop down box and add a title for your new group. You can also specify whether you want the system to send a new task notification to group members when new tasks are assigned to the group.
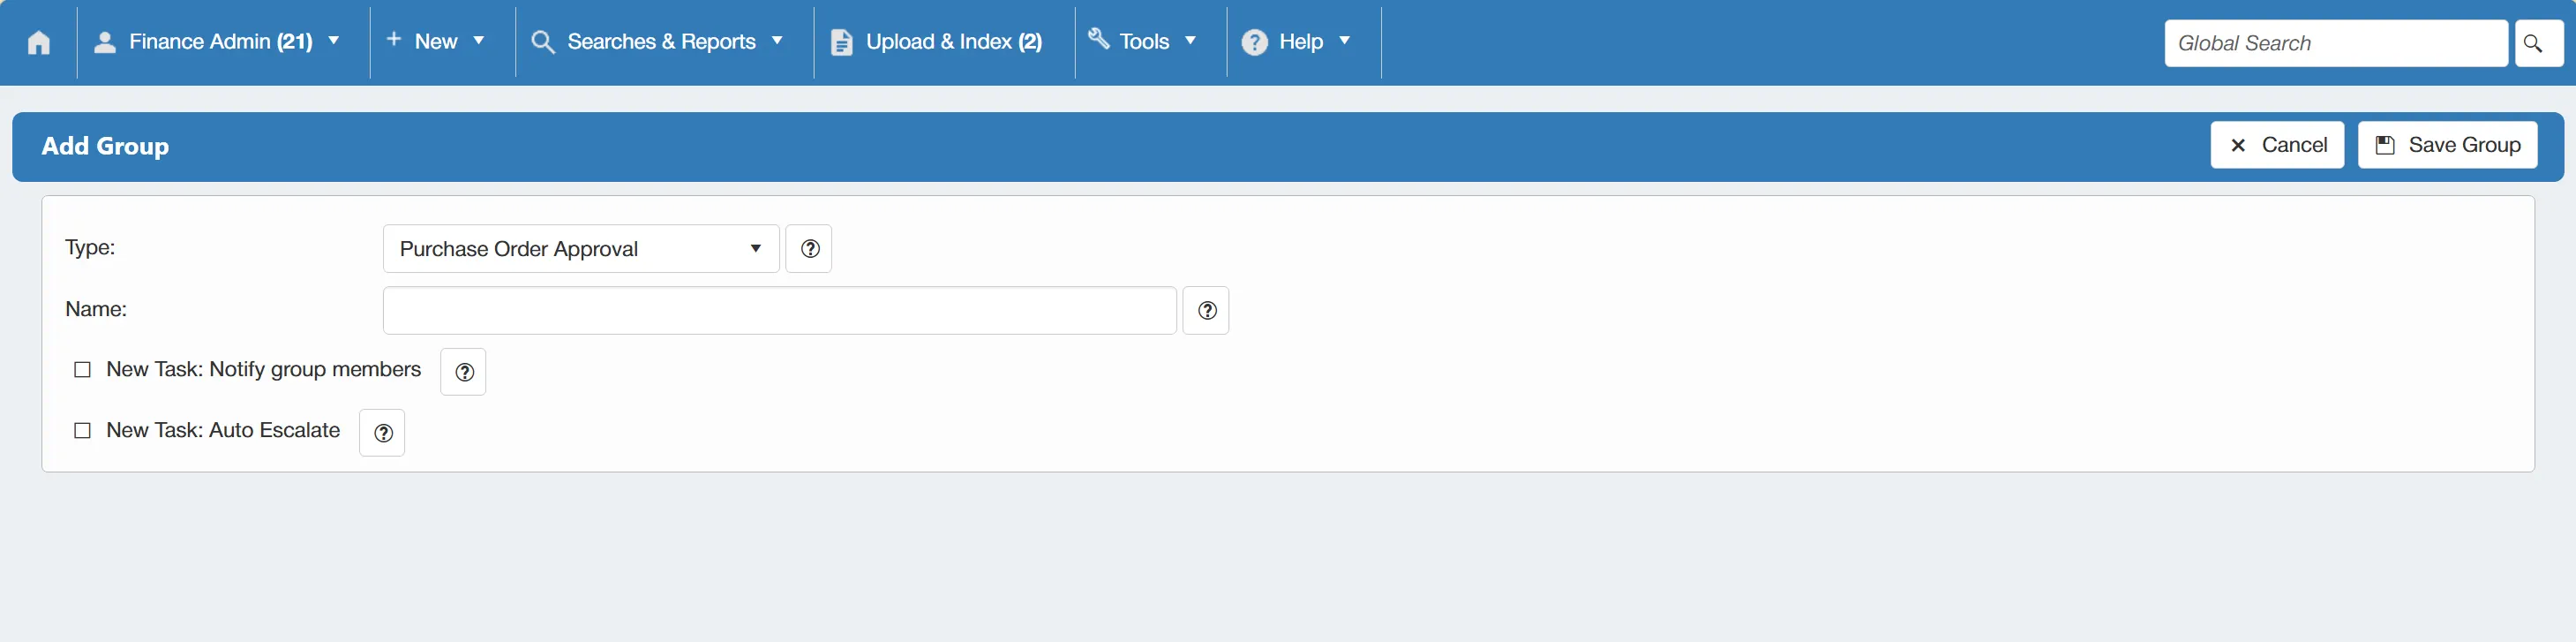
Once you are happy with the details, simply click to finalise the details.
Creating a New User Access Group
To create a new user access group, click on the button.
This brings you to a new window where you can select the type of user group from the drop down box and add a title for your new group. When selecting the Shared Access group type, you can also specify whether you would like members of the group to share Documents to Index, Draft Purchase Orders, or both.
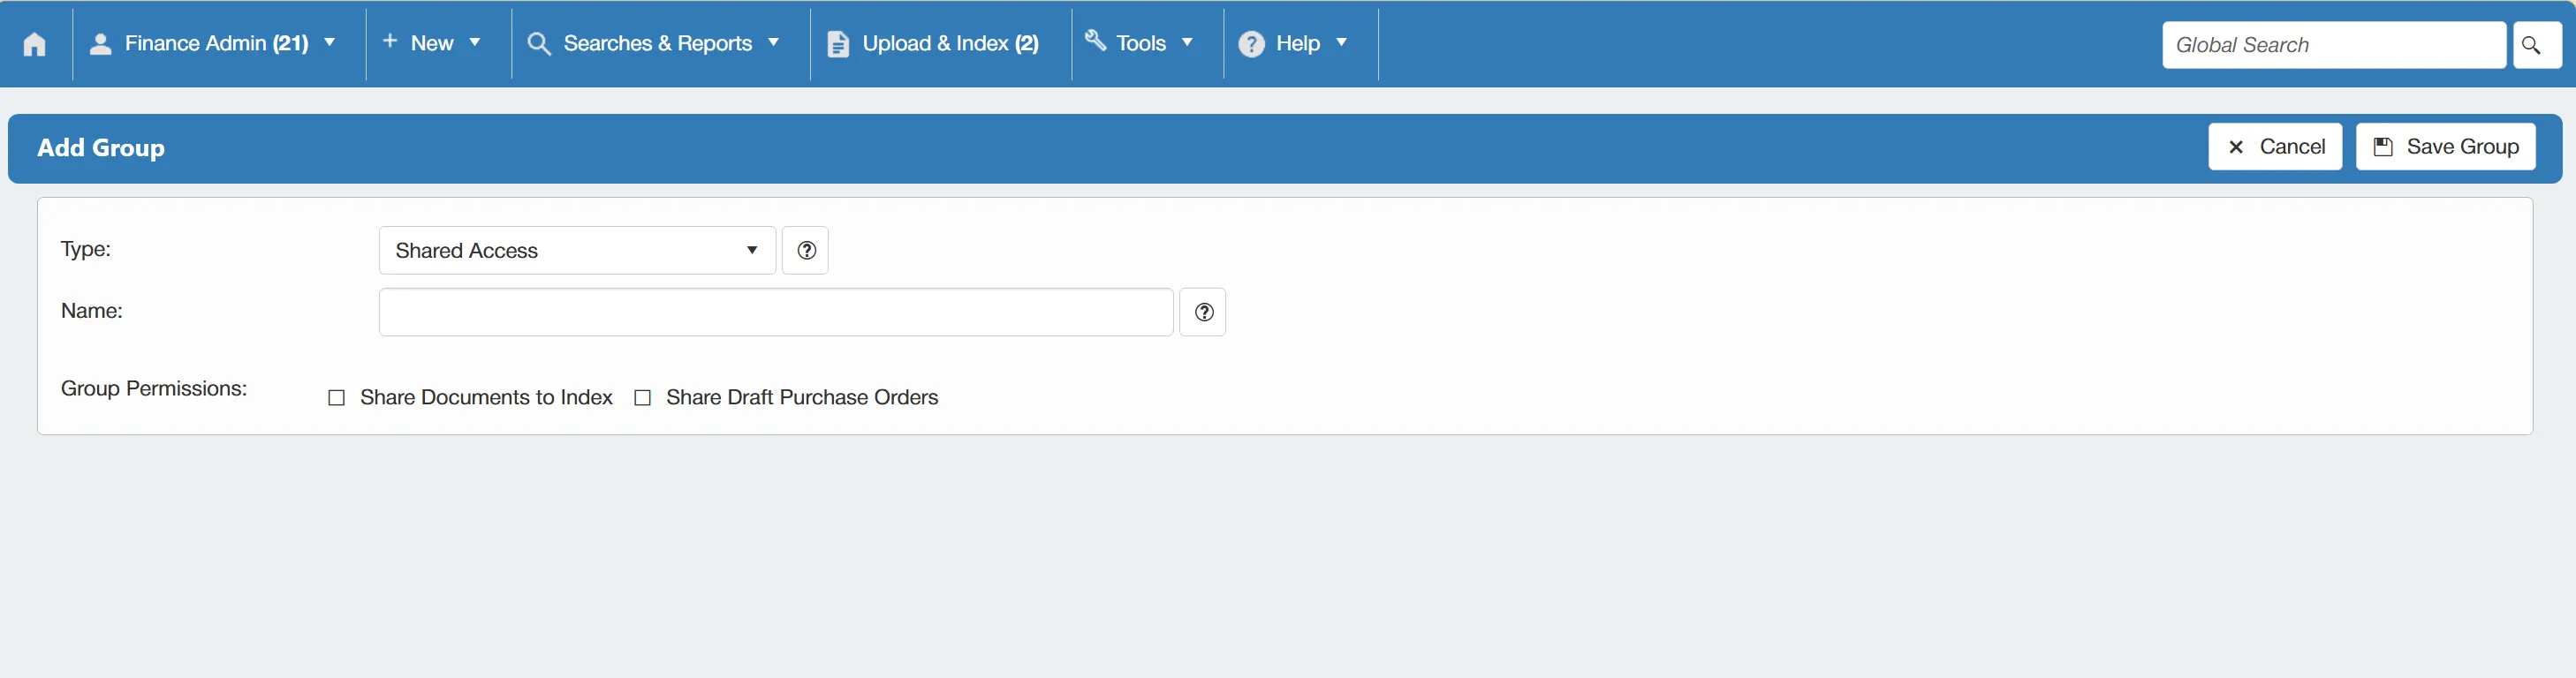
Once you are happy with the details, simply click to finalise the details.
Editing an Existing User Group
To edit an existing user group, click on the line within the Group Administration grid that you would like to edit.
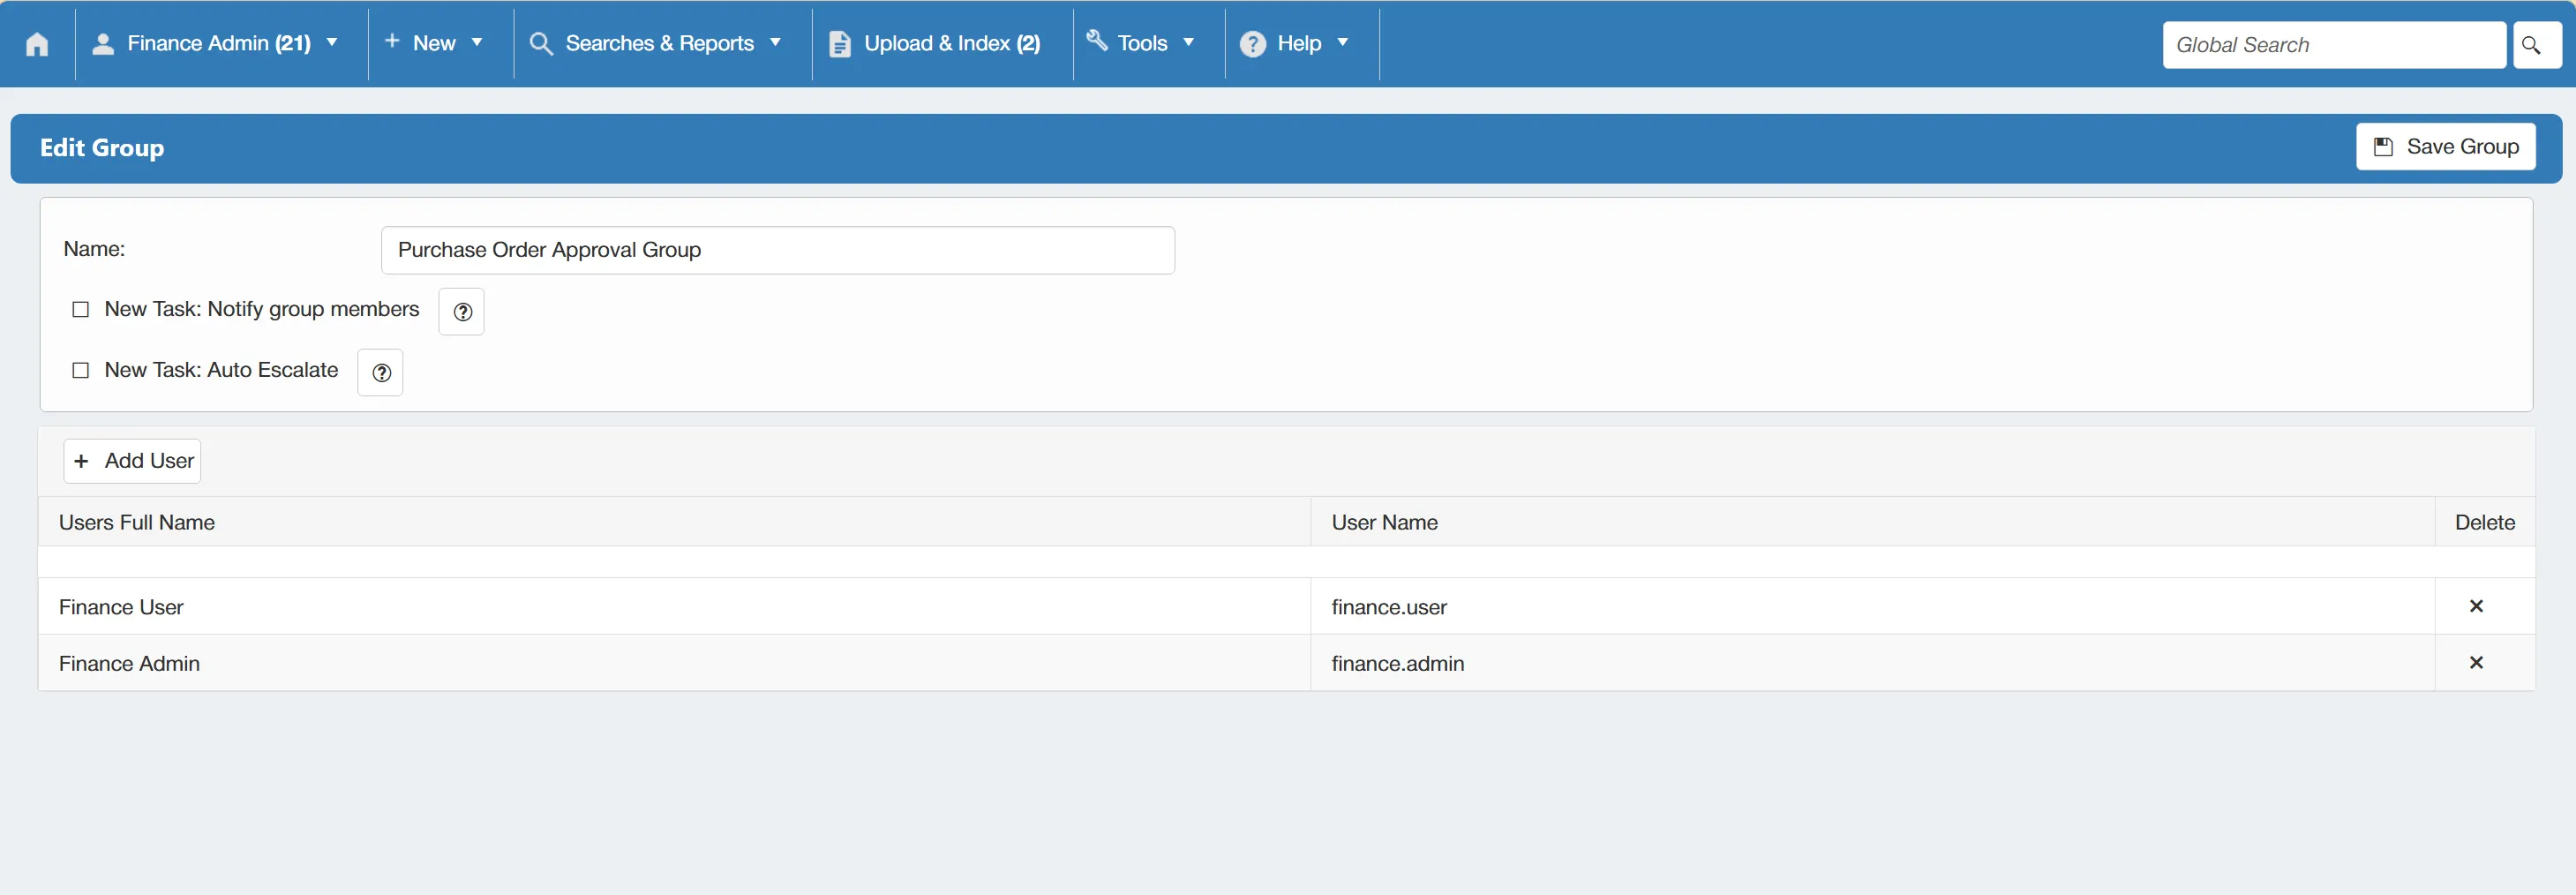
This opens the Edit Group window. From here you can change the group name, add or remove users and determine whether you would like the system to send a new task notification to group members when new tasks are assigned to the group.
Adding New Users to an Existing User Group
Whilst on the Edit Group window, you can add new users to your existing group. To do this, simply click on the button.
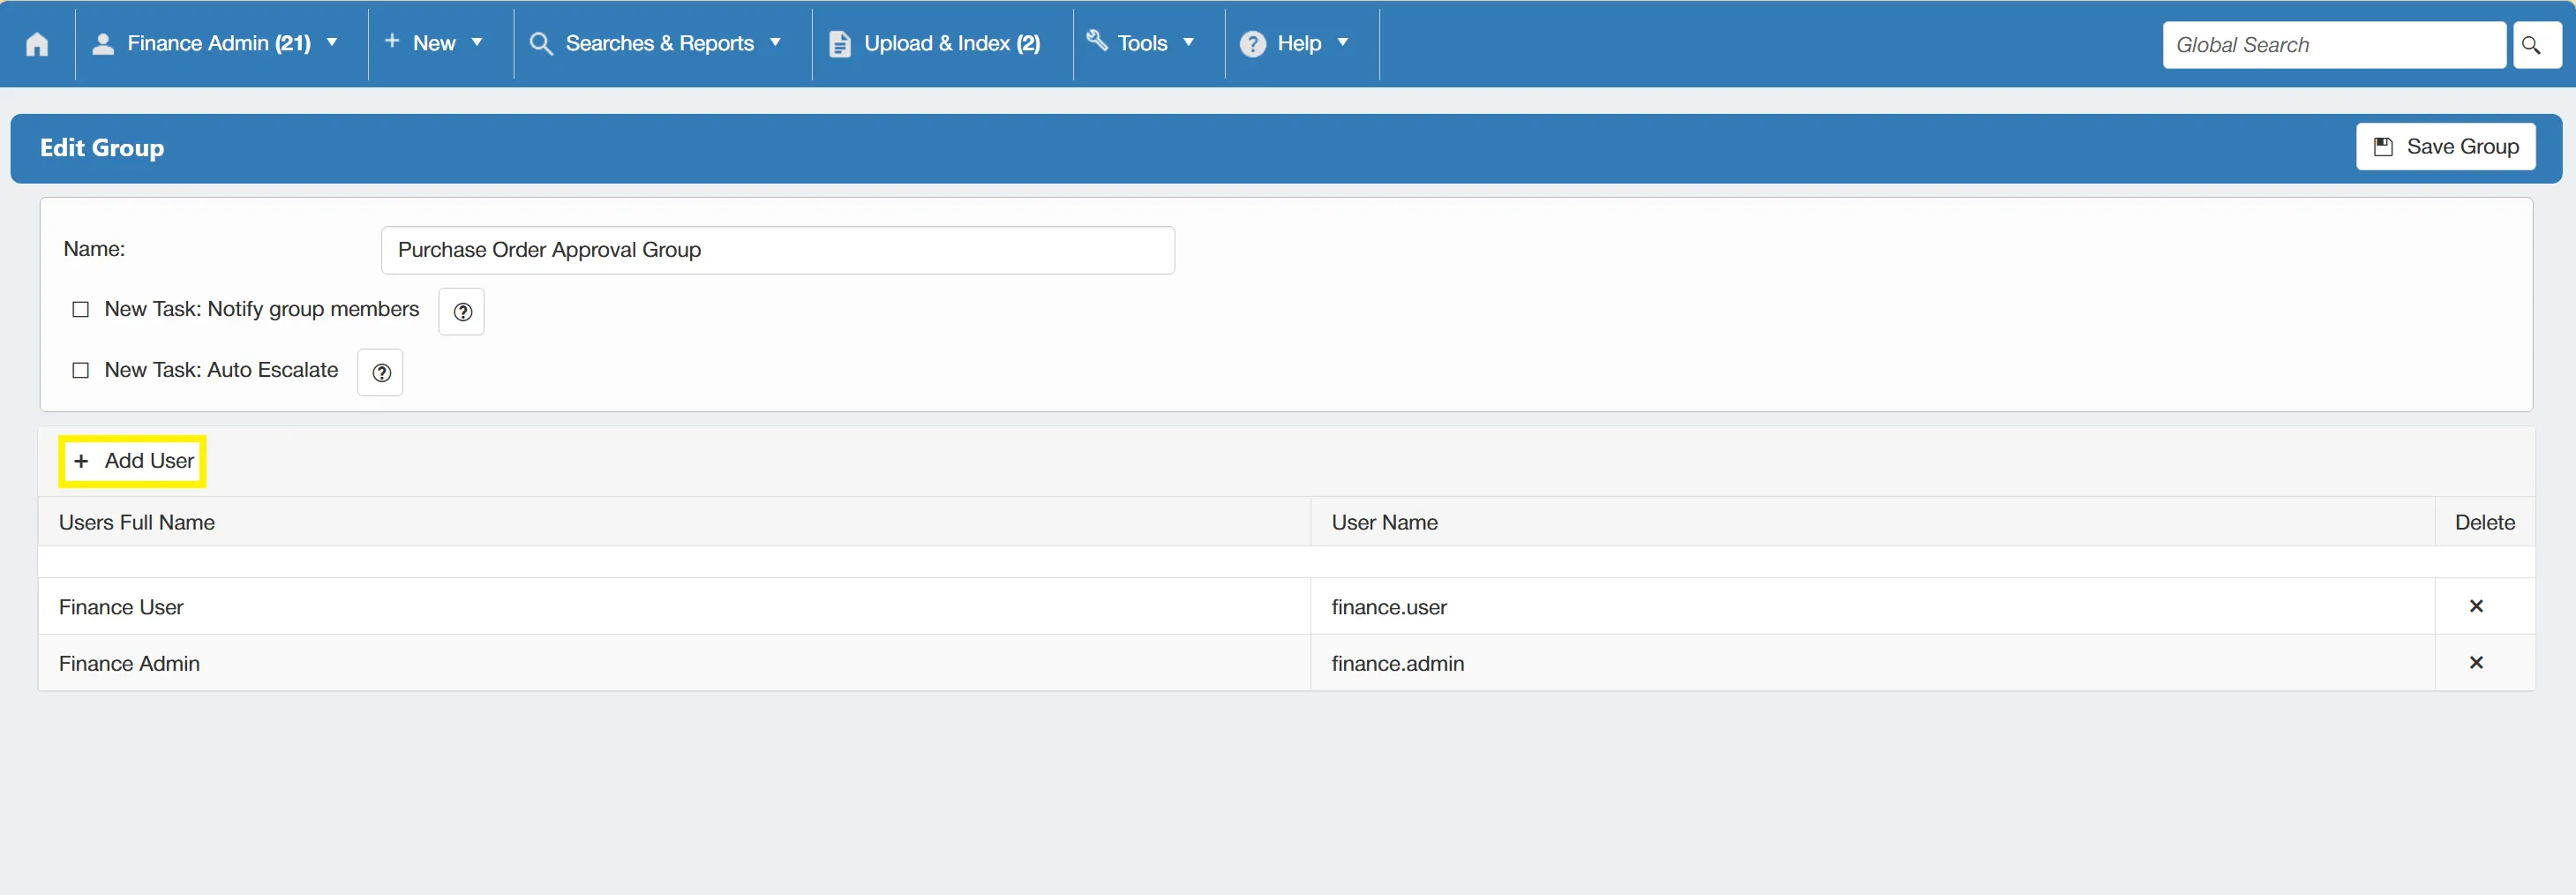
When you are done, click to finalise the changes.
Removing Users from a User Group
From the Edit Group window, you can also remove users from the group. To do this, click on the icon at the end of the user's line.
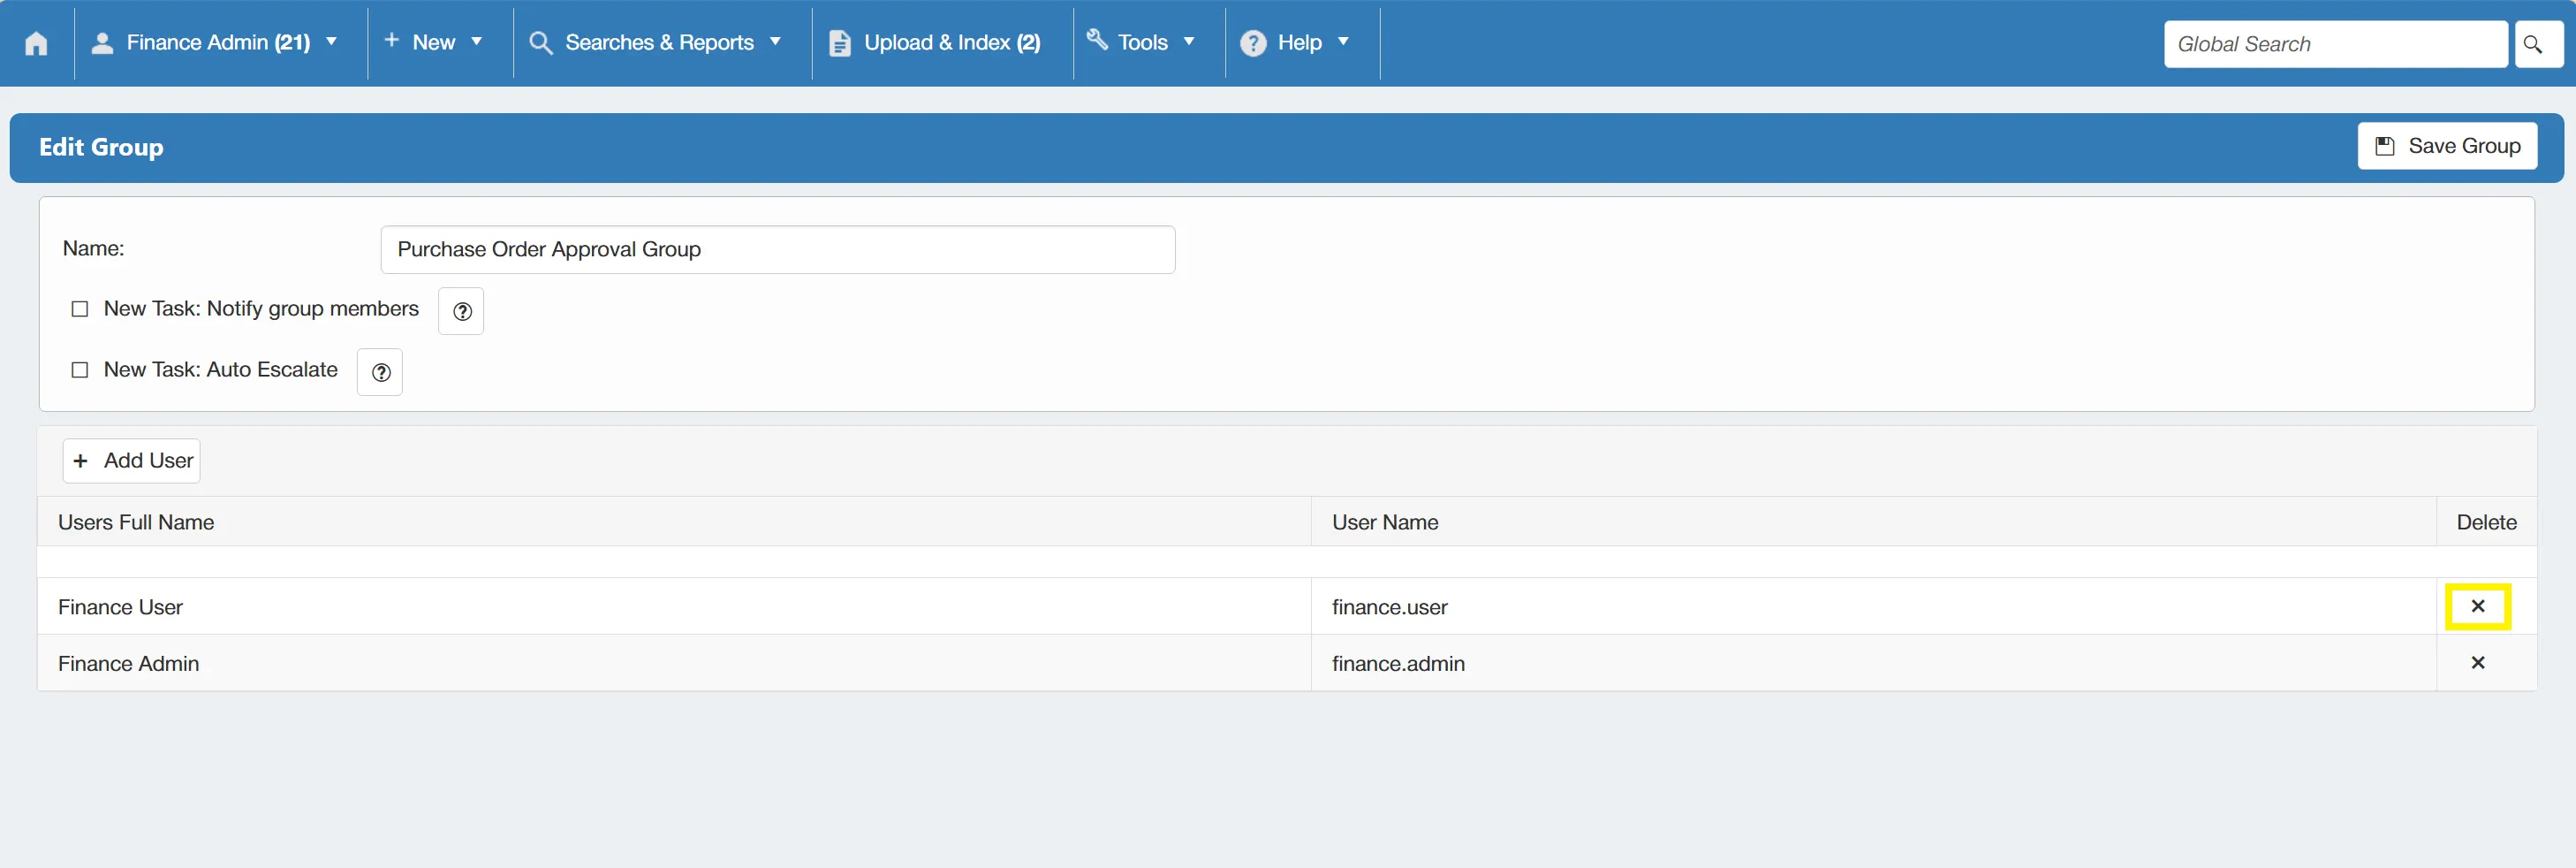
When you are done, click to finalise the changes.
Removing a user from the group means that they will no longer have access to approval tasks or items that are assigned to this group.
Companies
You can create and edit companies to ensure that your PO system grows along with your organisation.
Users must have the Entity Admin permission enabled to access this feauture. For information on user permissions, click here.
To administer Companies, click on the Companies icon within the Configuration & Settings section.
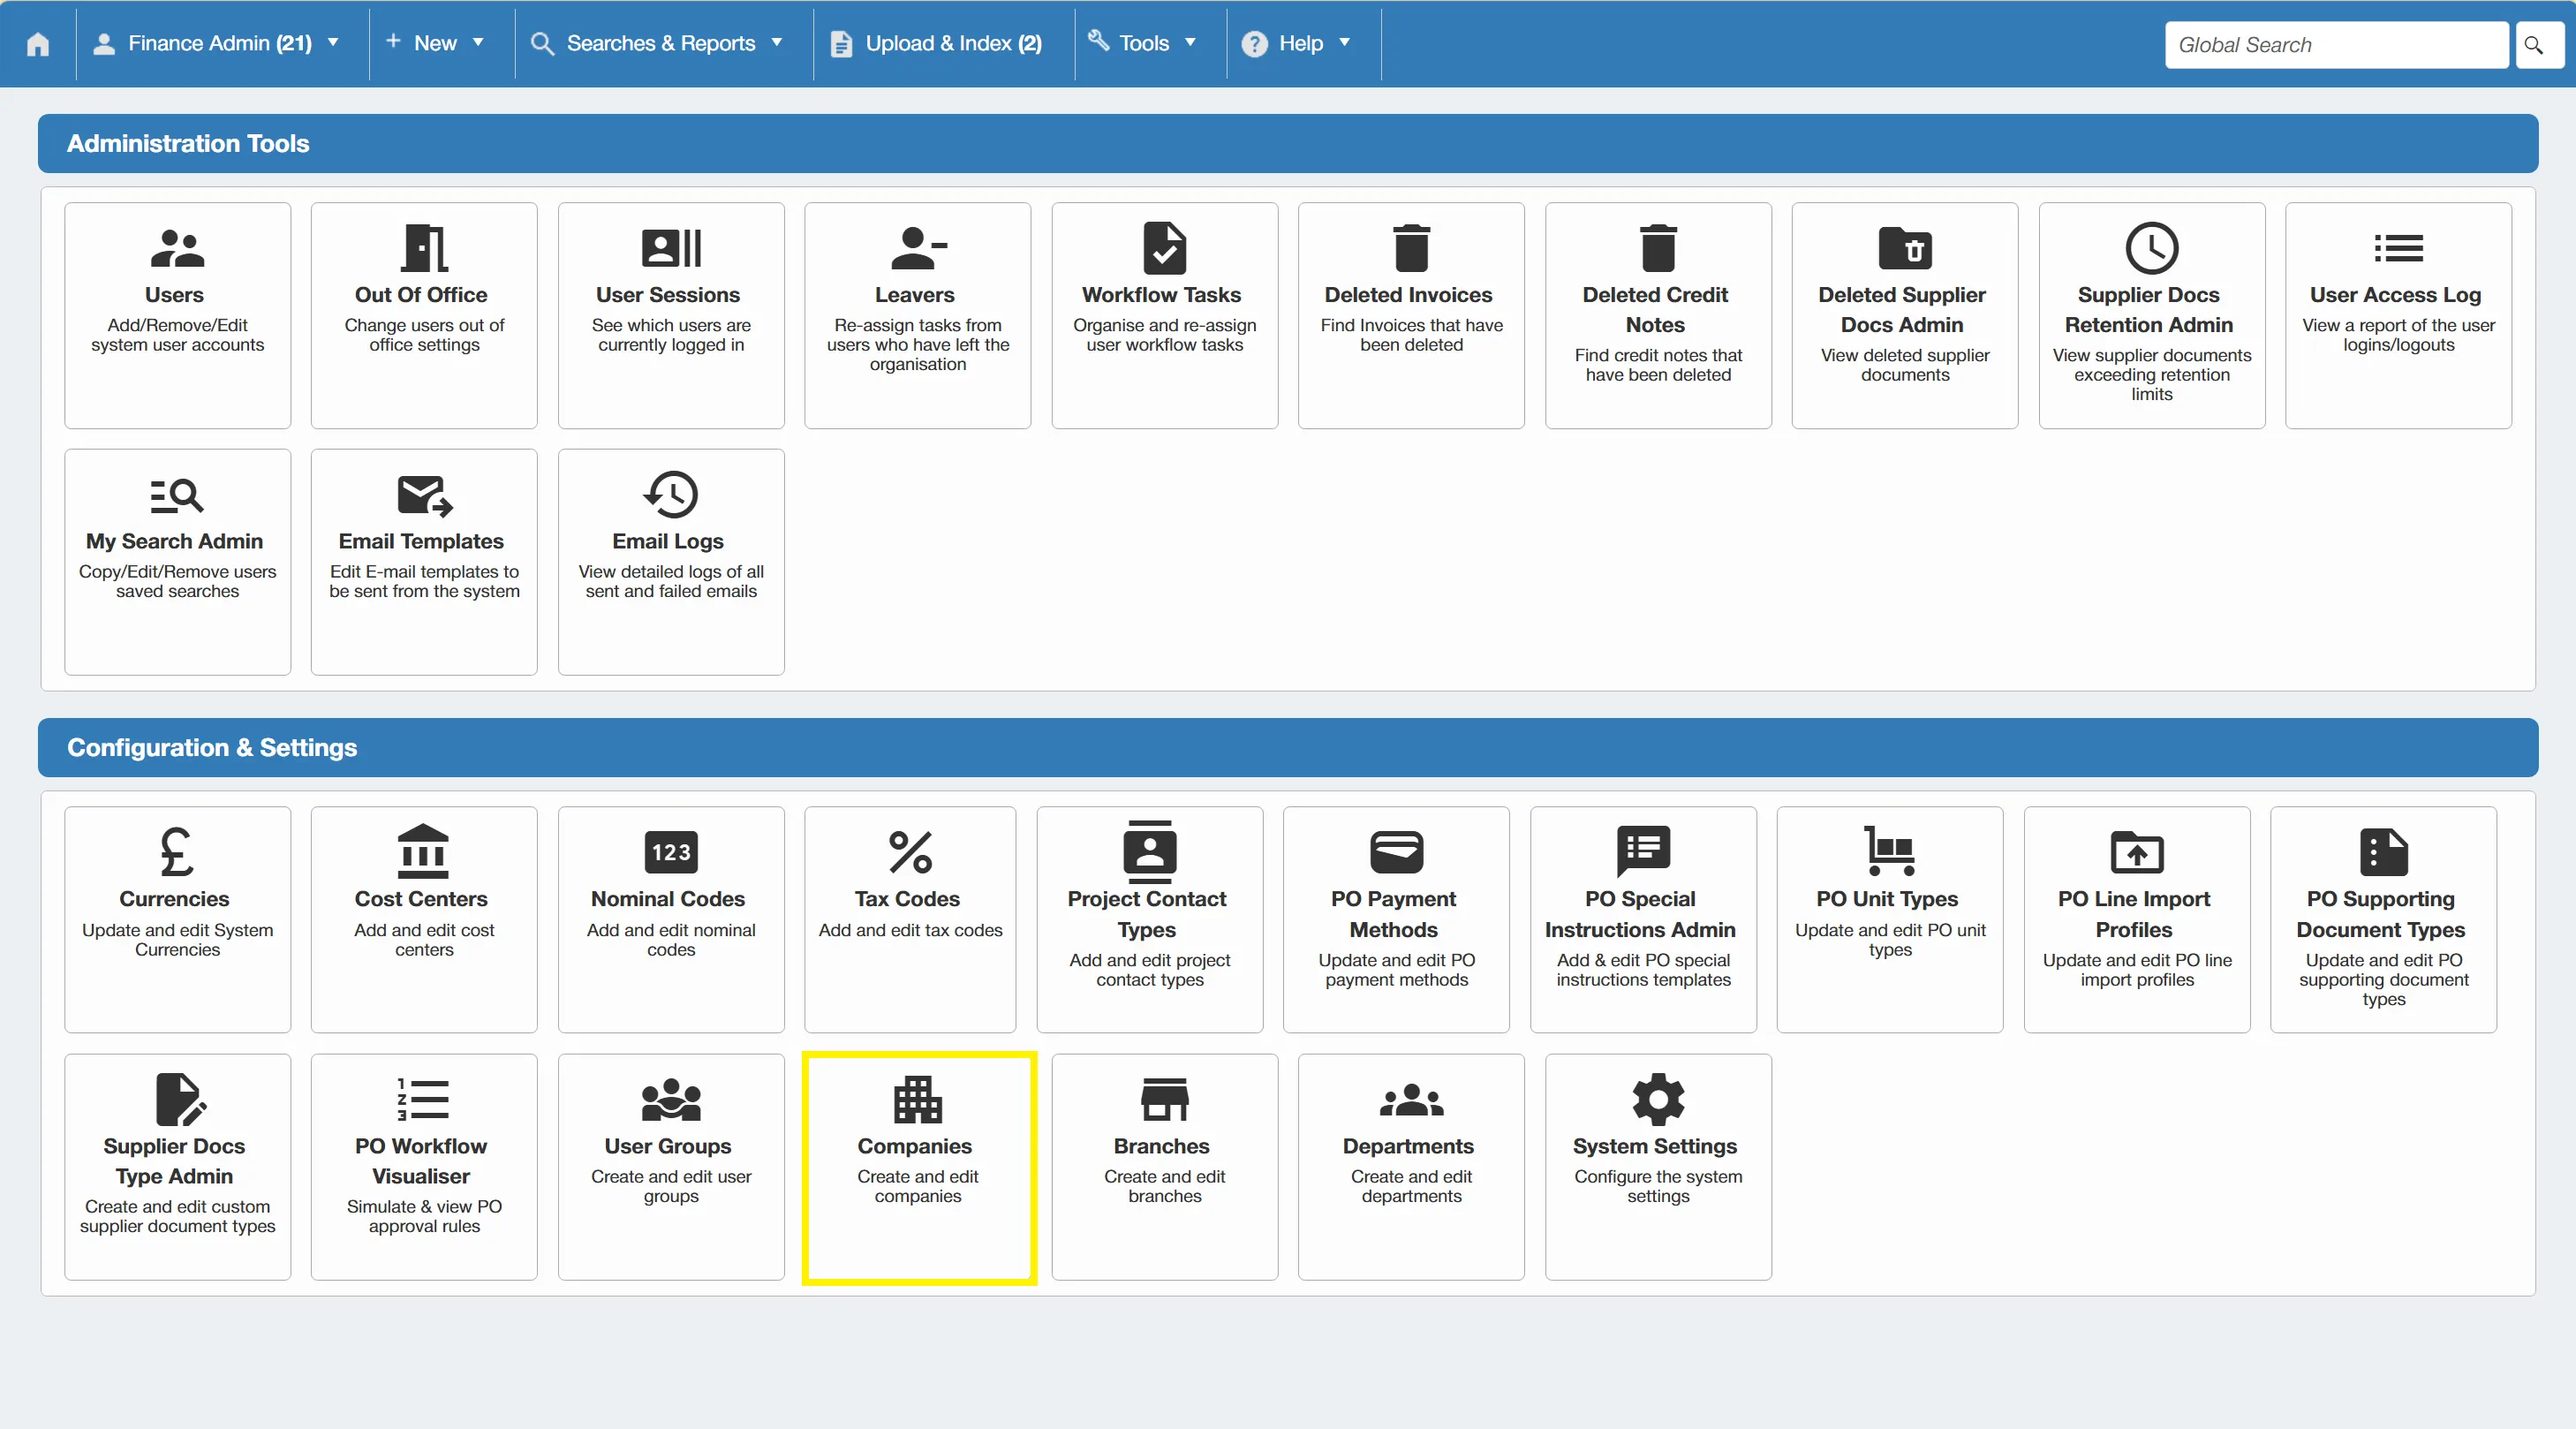
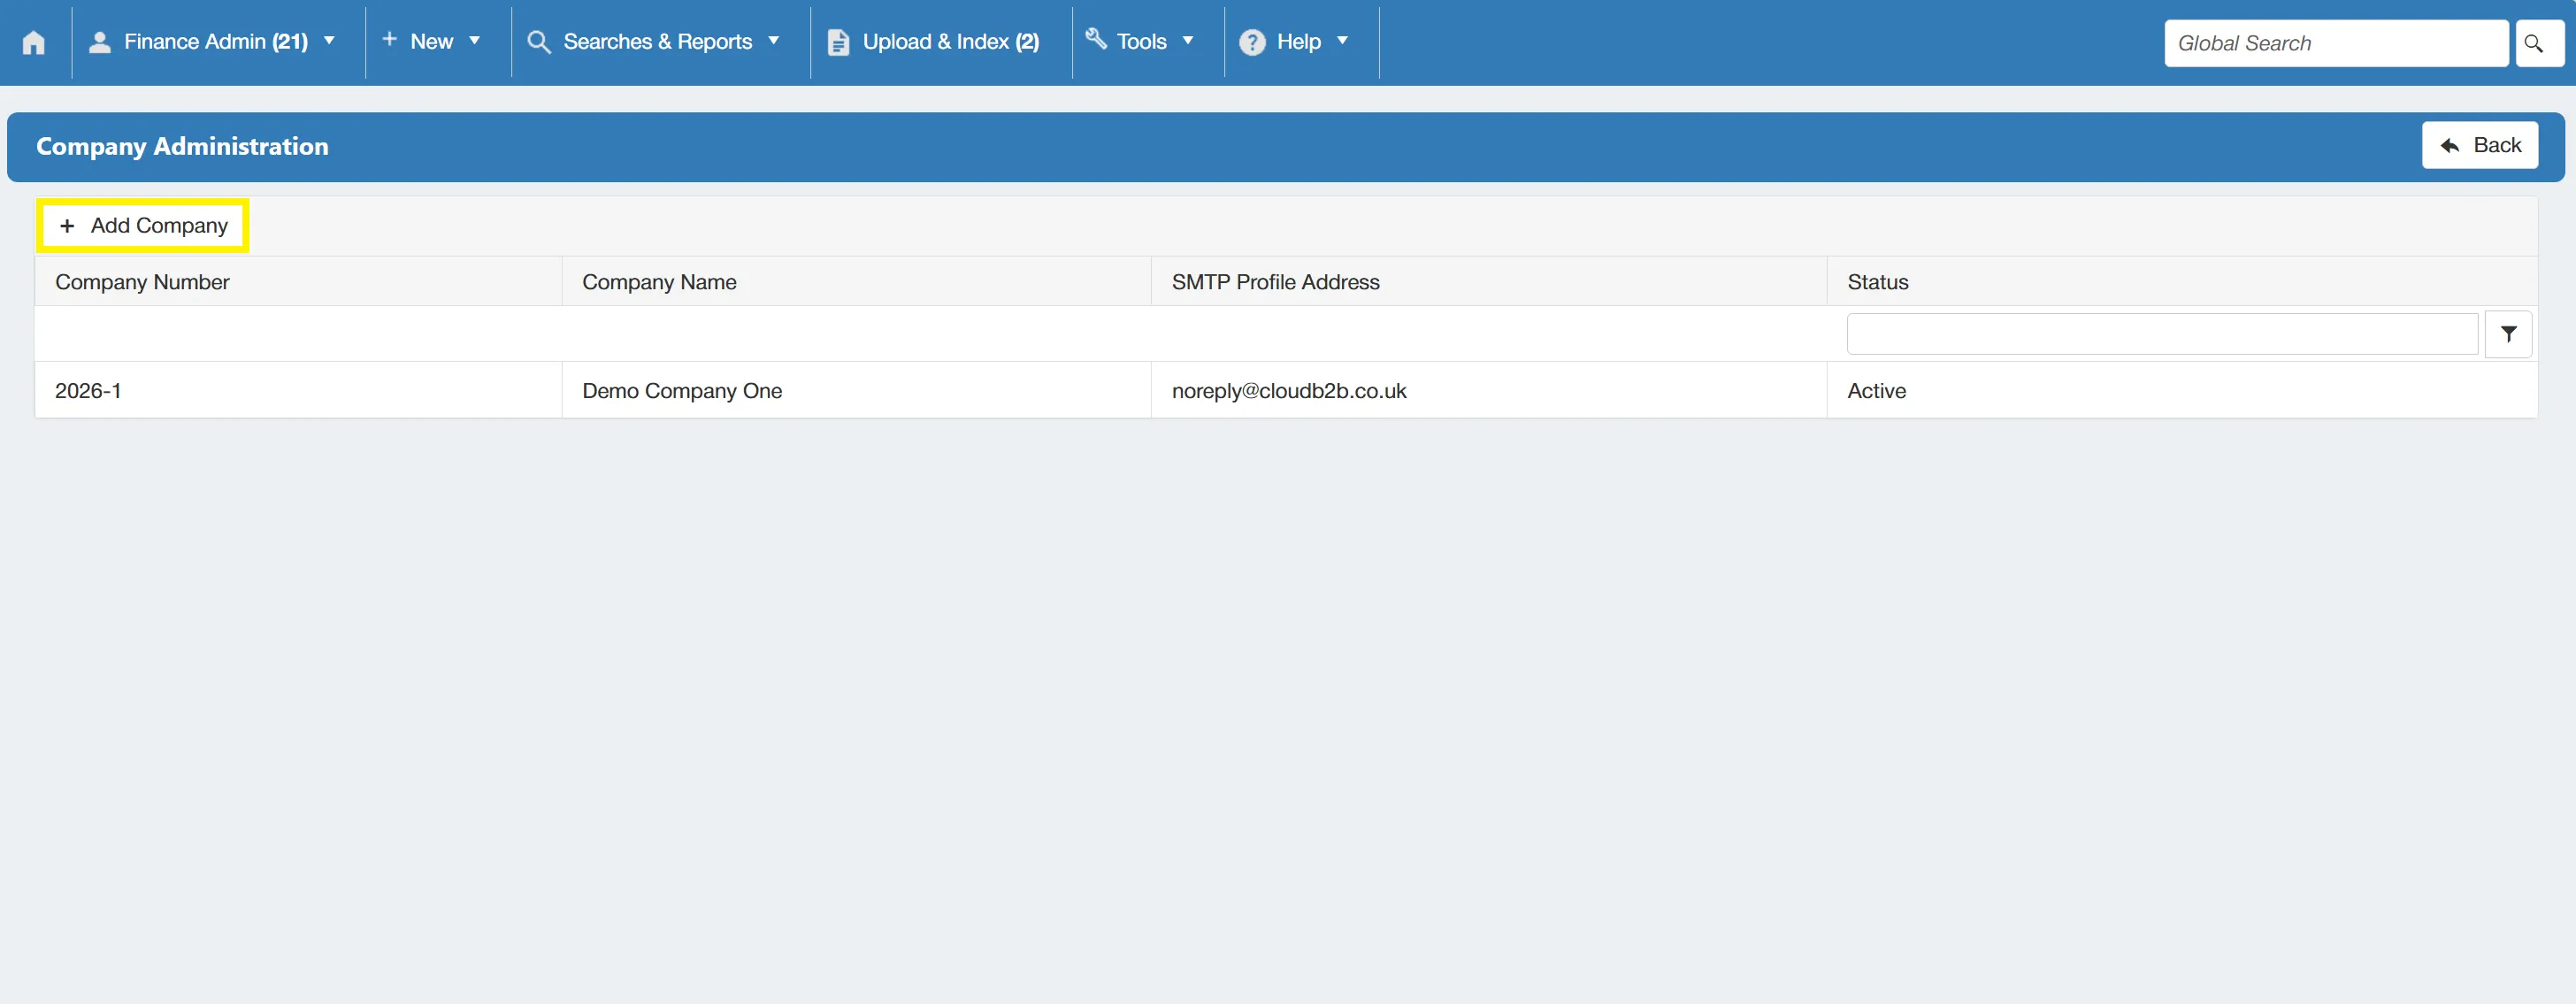
This takes you to the Company Administration grid. From here, you can add new companies and administer existing ones.
Adding a New Company
To add a new company to the system, click on the button.
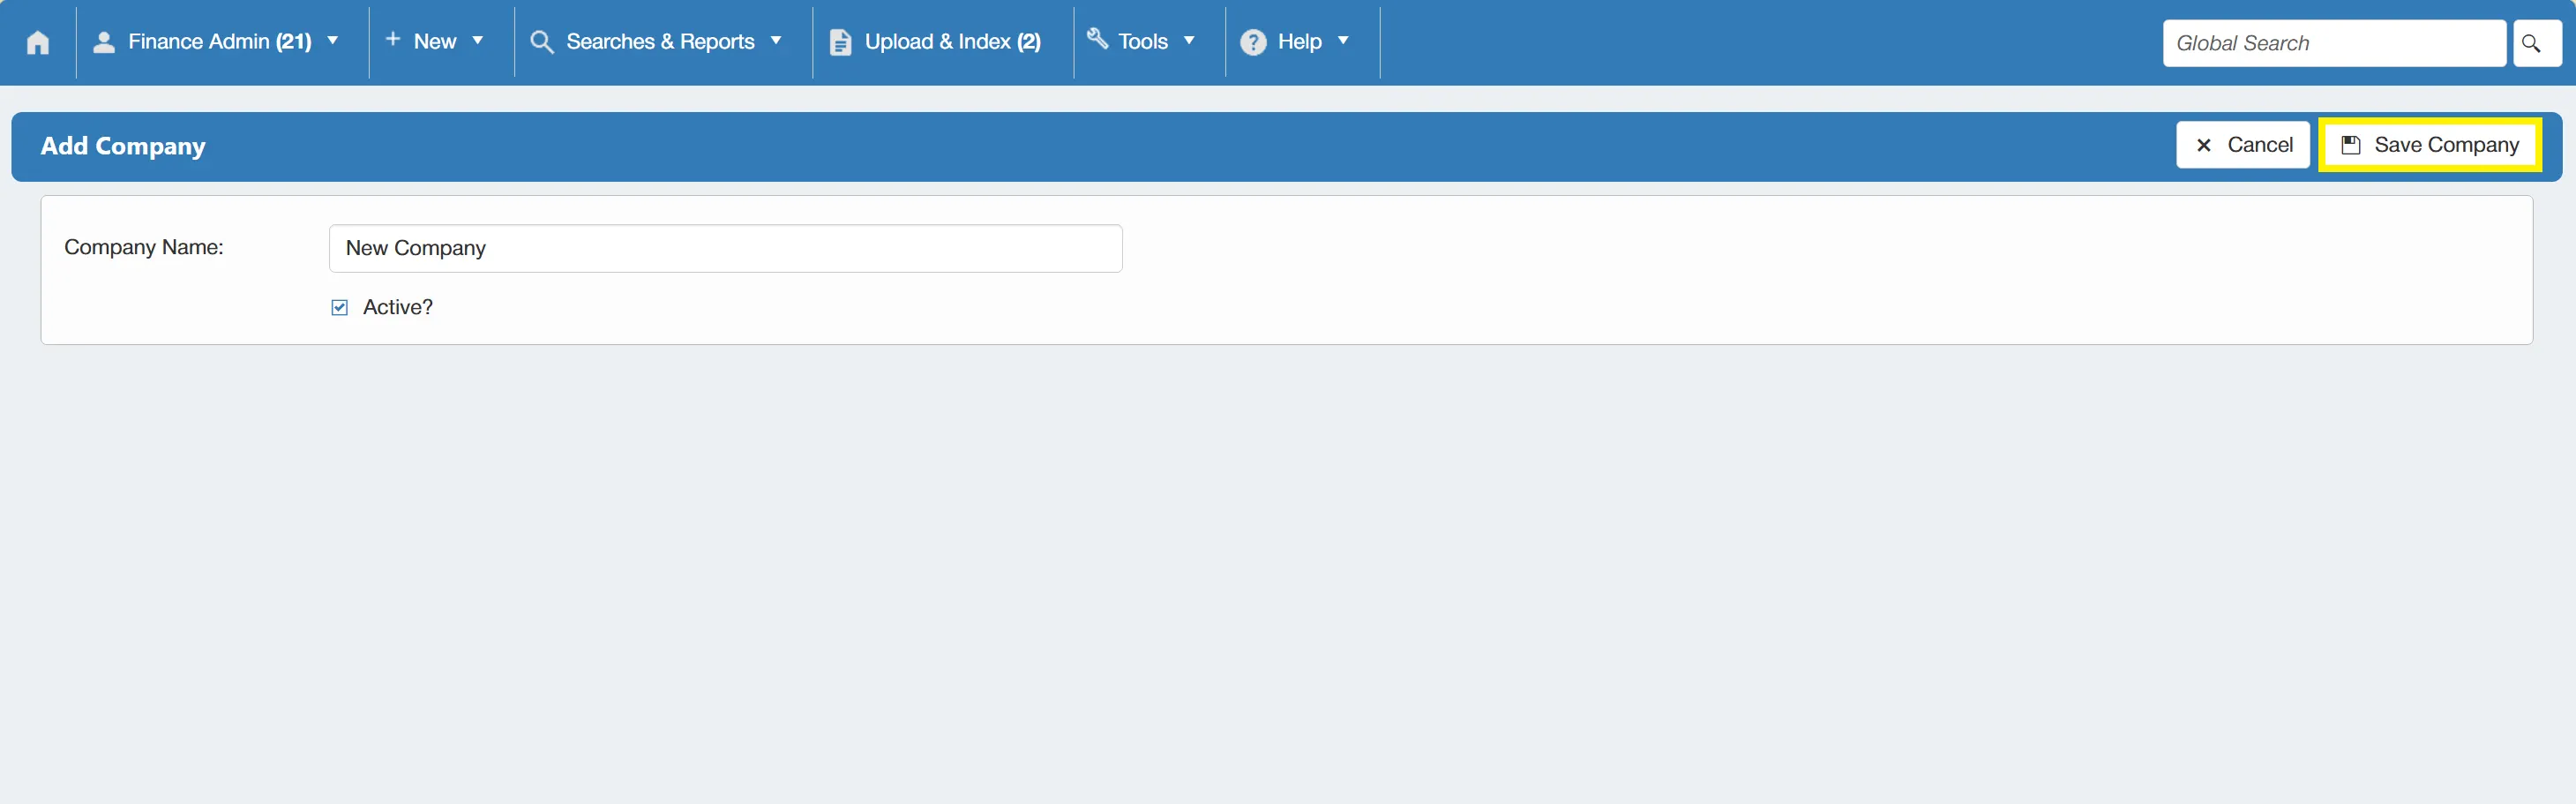
This brings you to a new window where you can add the new company's name and specify whether or not it is active. Once the details are completed, simply click on the button to commit this to the system.
This opens the Edit Company window in which you can specify the more detailed settings for your new company. For more information on editing a company, please see the following section: Editing a Company
Editing a Company
To edit an existing company, simply click on the relevant company within the Company Administration Grid.
This opens the Edit Company window.
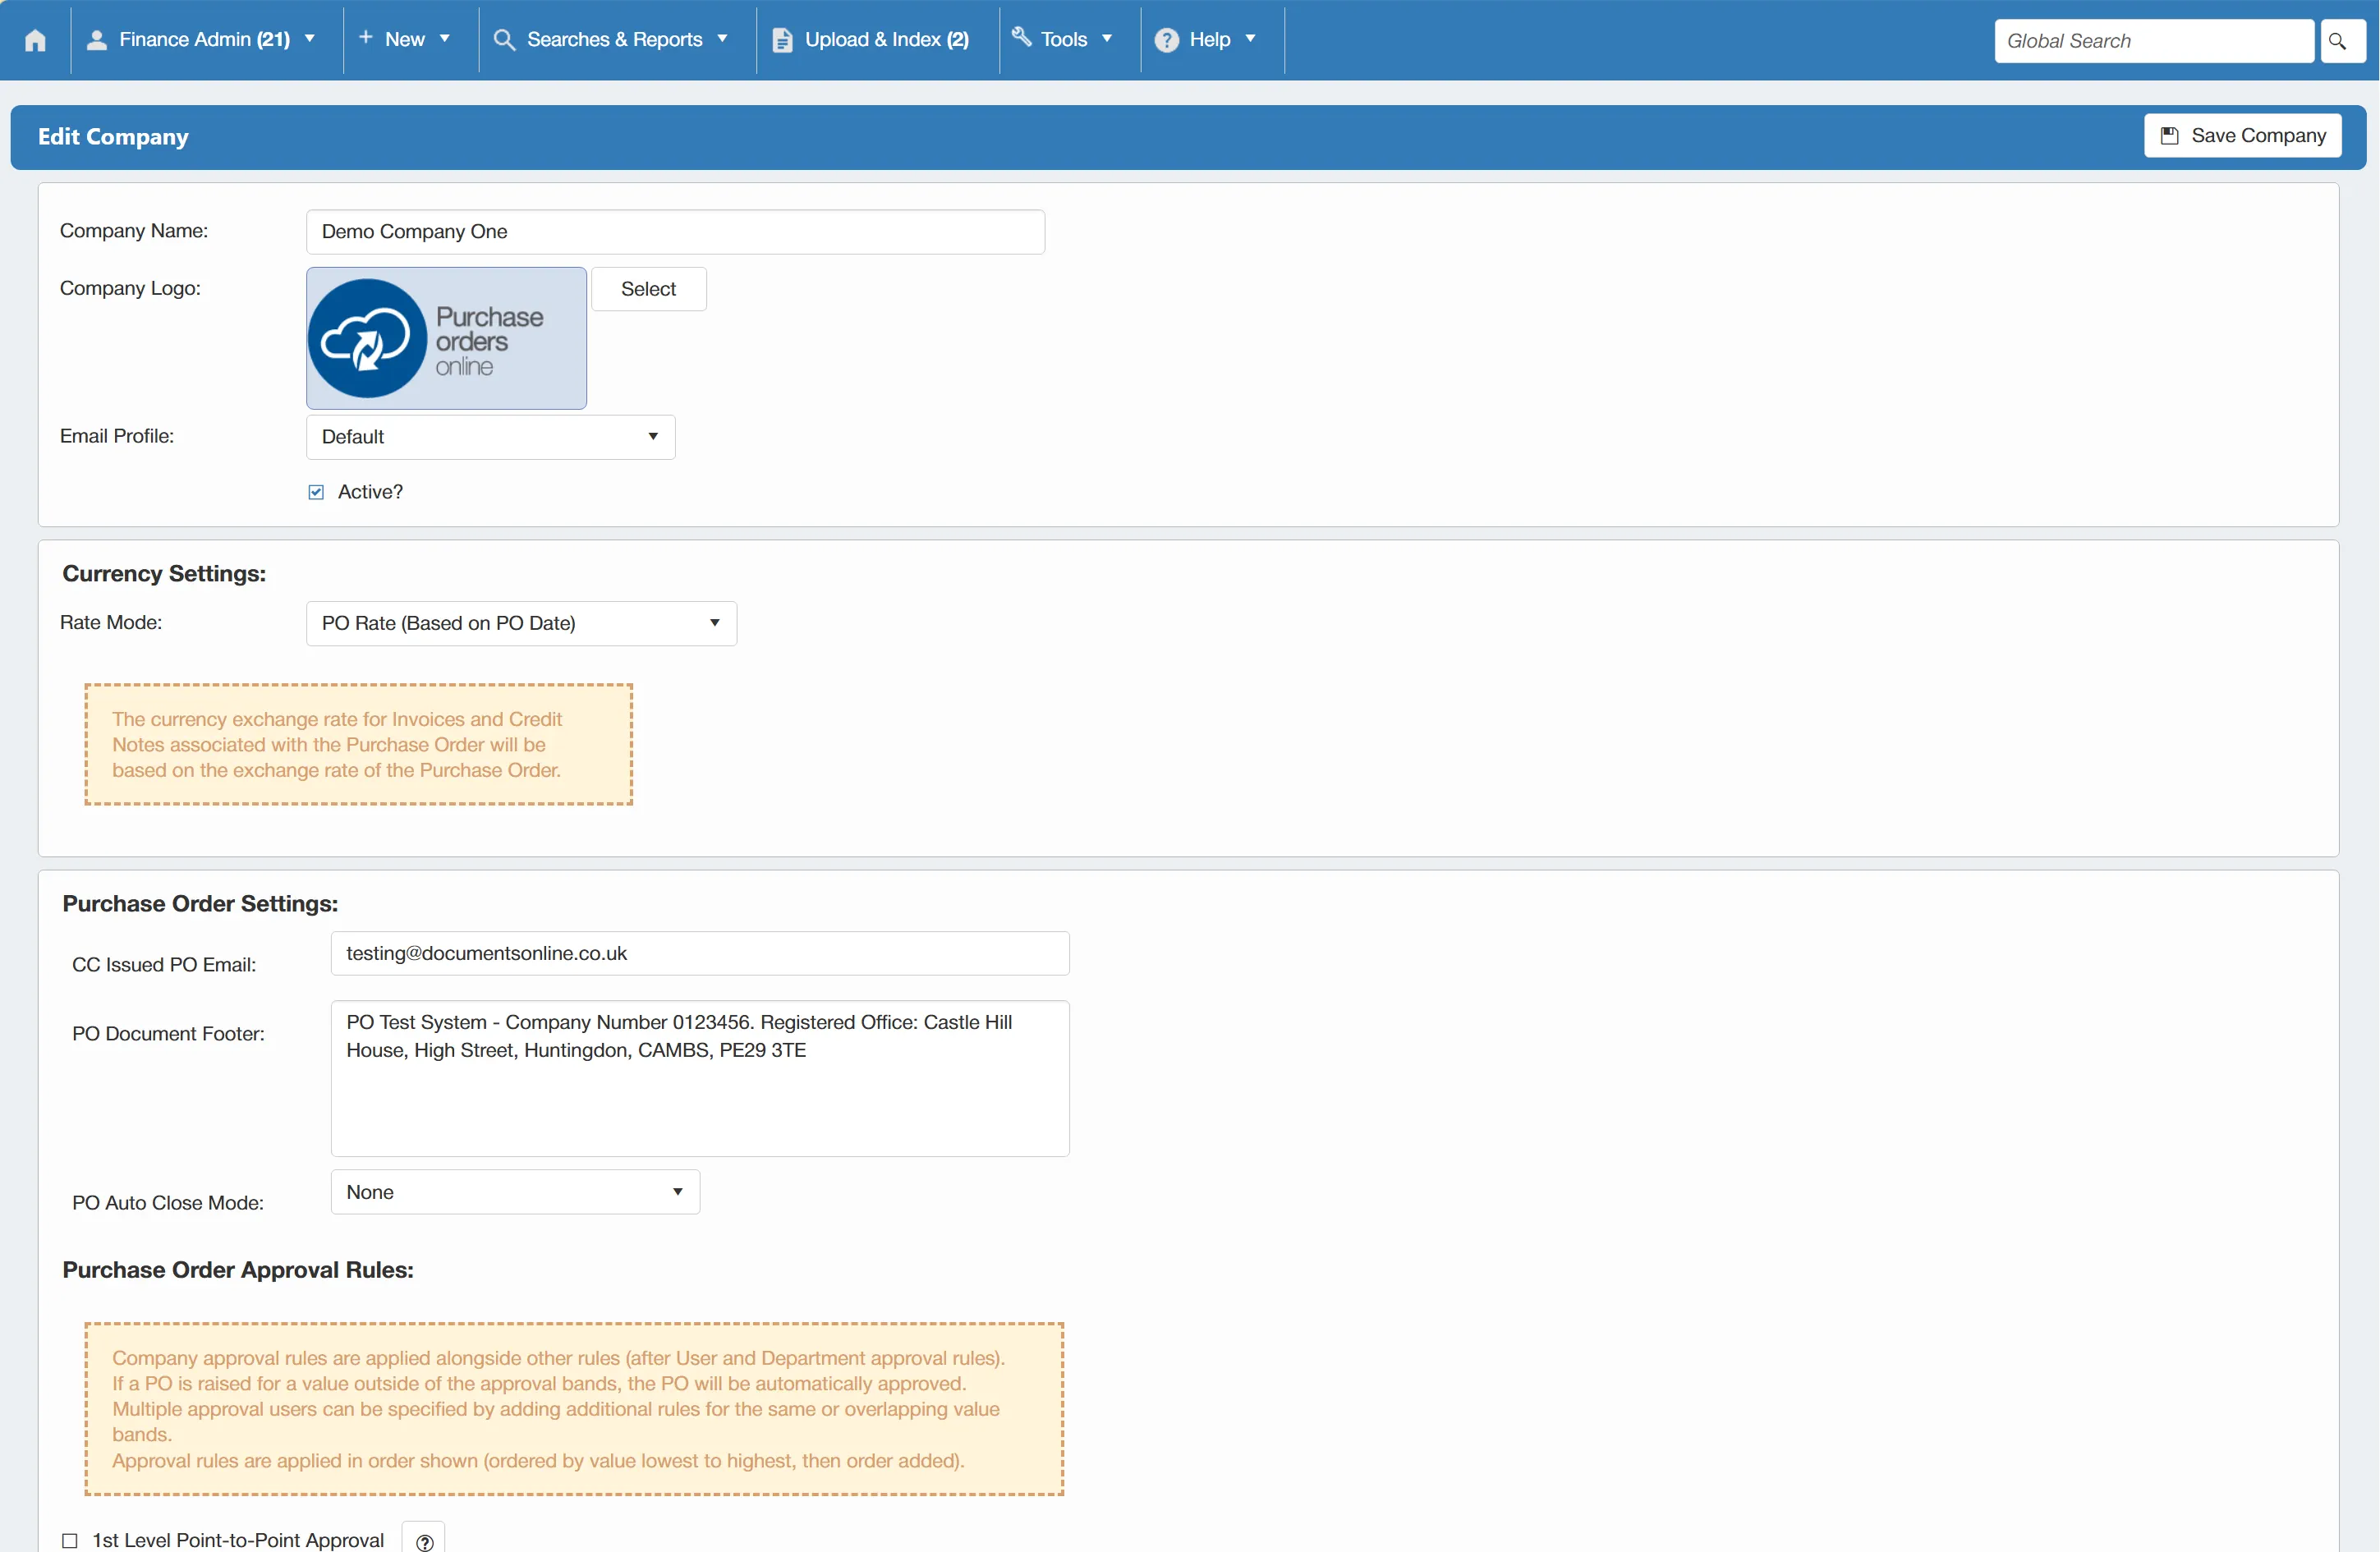
From this window you can change the company name and logo, dictate the SMTP profile, amend currency settings, configure PO settings, set up approval rules and dictate indexing parameters.
Changing a Company Name or Logo
To change a company's name or logo, first access the Edit Company window.
The Company Name field is editable. Once you have amended the text, simply click to finalise.
When changing the company logo, you can upload any image in a .webp format that does not exceed 700 pixels in width.
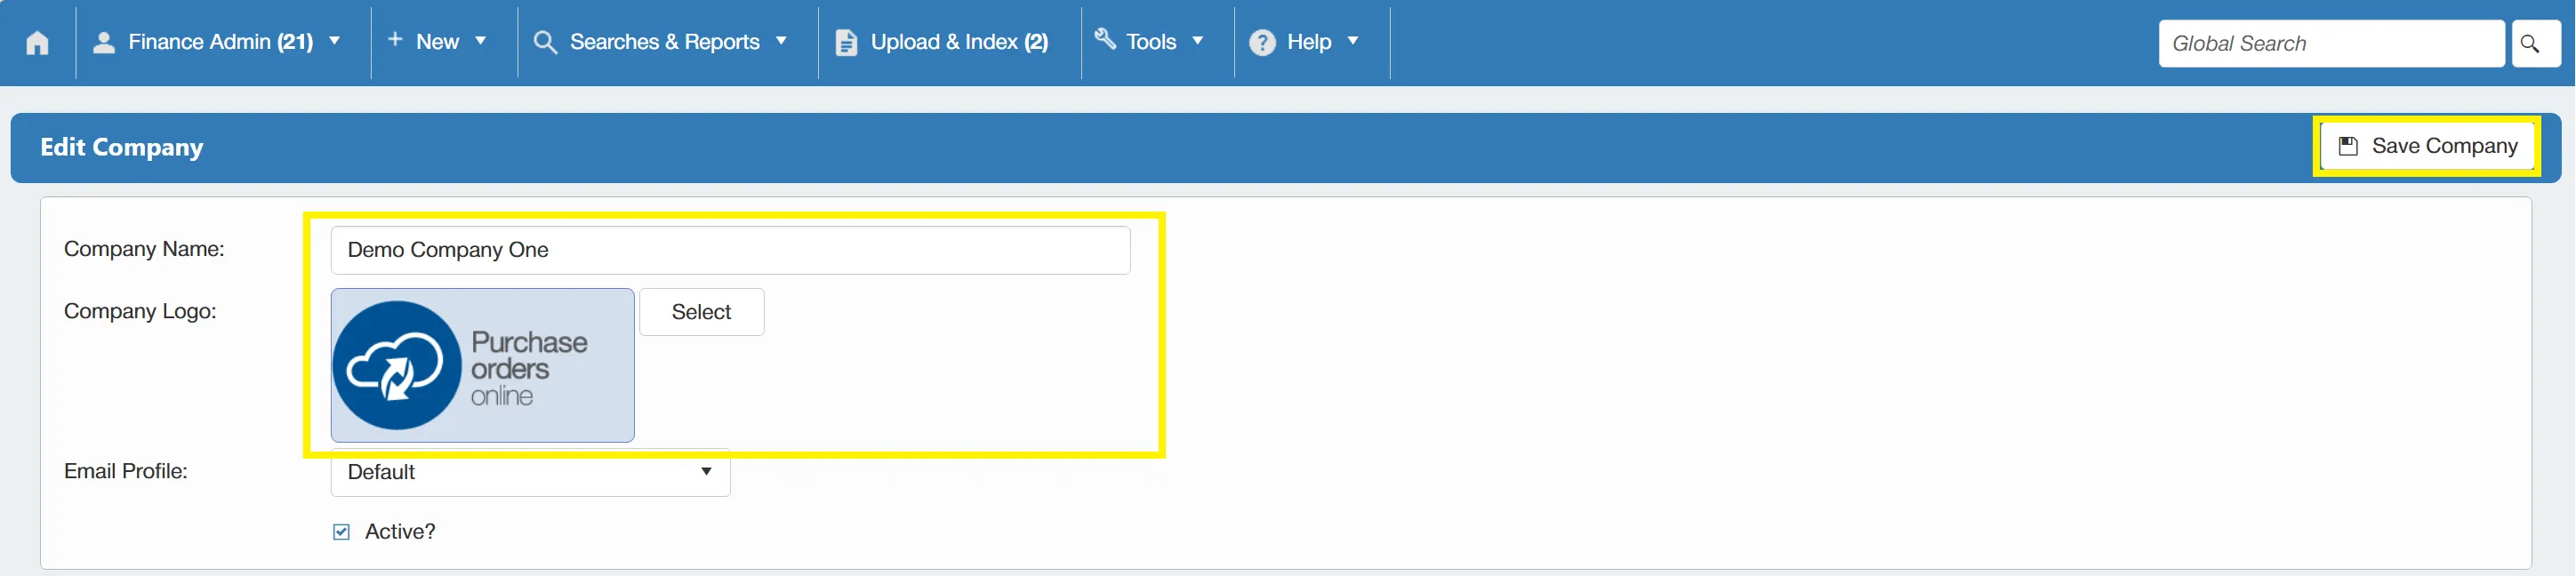
To change the company logo, click , this will enable you to choose a different file for the logo. Once changed, click to finalise.
The company logo appears on the log-in window and on any purchase orders generated by the system.
Selecting the SMTP Profile
To select an SMTP profile, first access the Edit Company window.
The SMTP Profile can be changed by clicking on the drop down box.
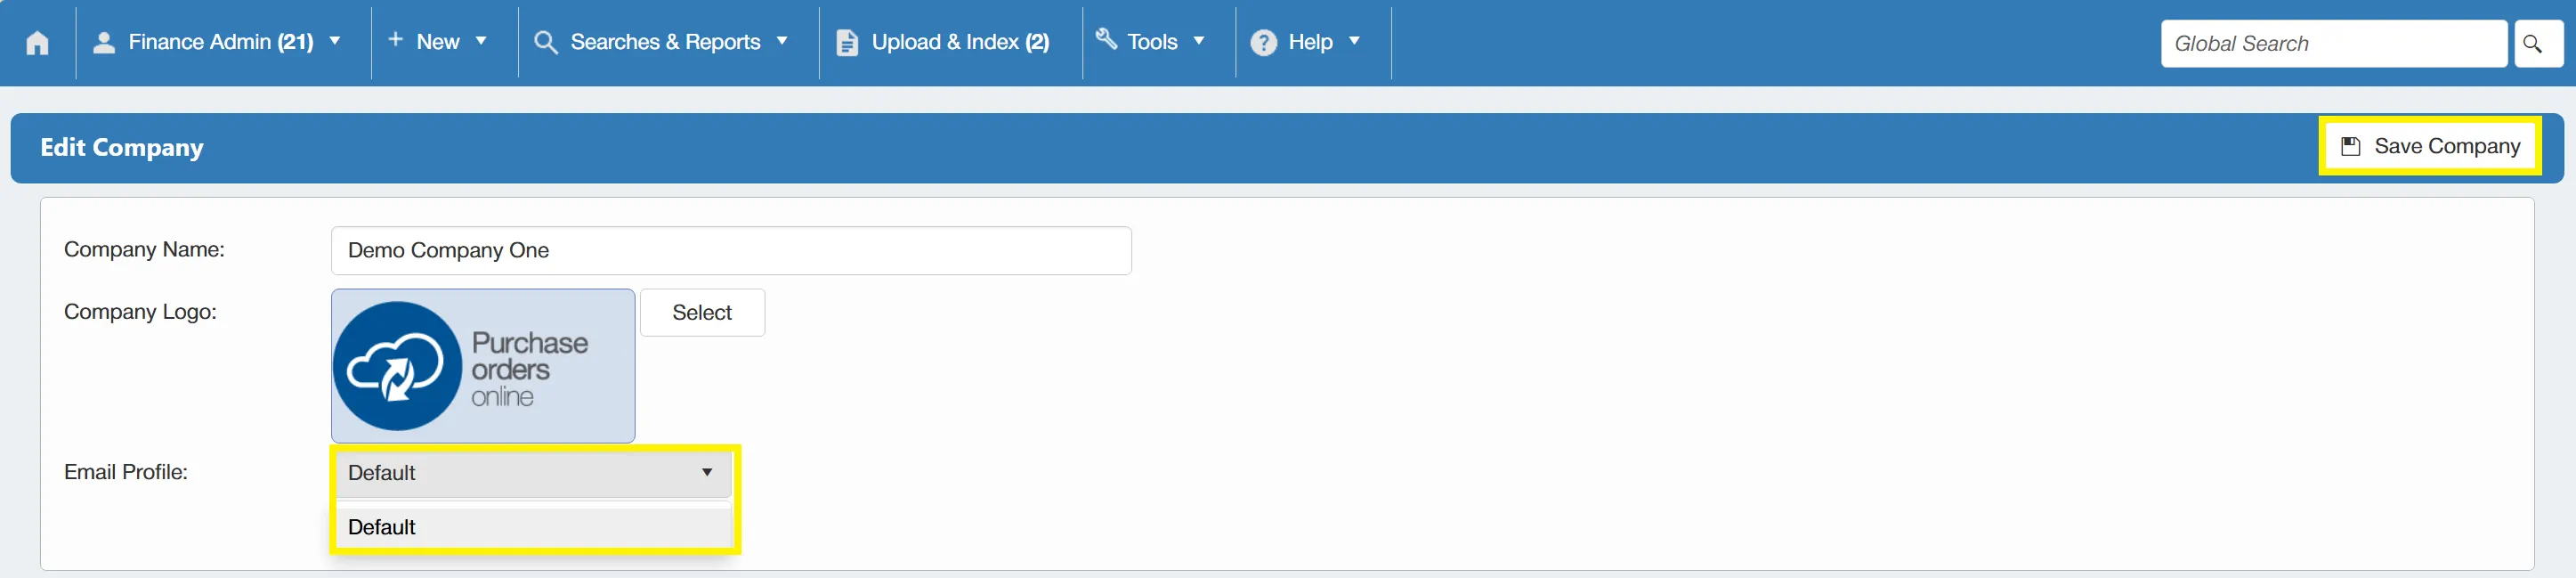
Once you are happy with the selection, click to finalise.
Deactivating a Company
When you no longer require a company you can simply deactivate it from the Edit Company window.
To deactivate the company, un-tick the ☐ Active? box. Then click to finalise.
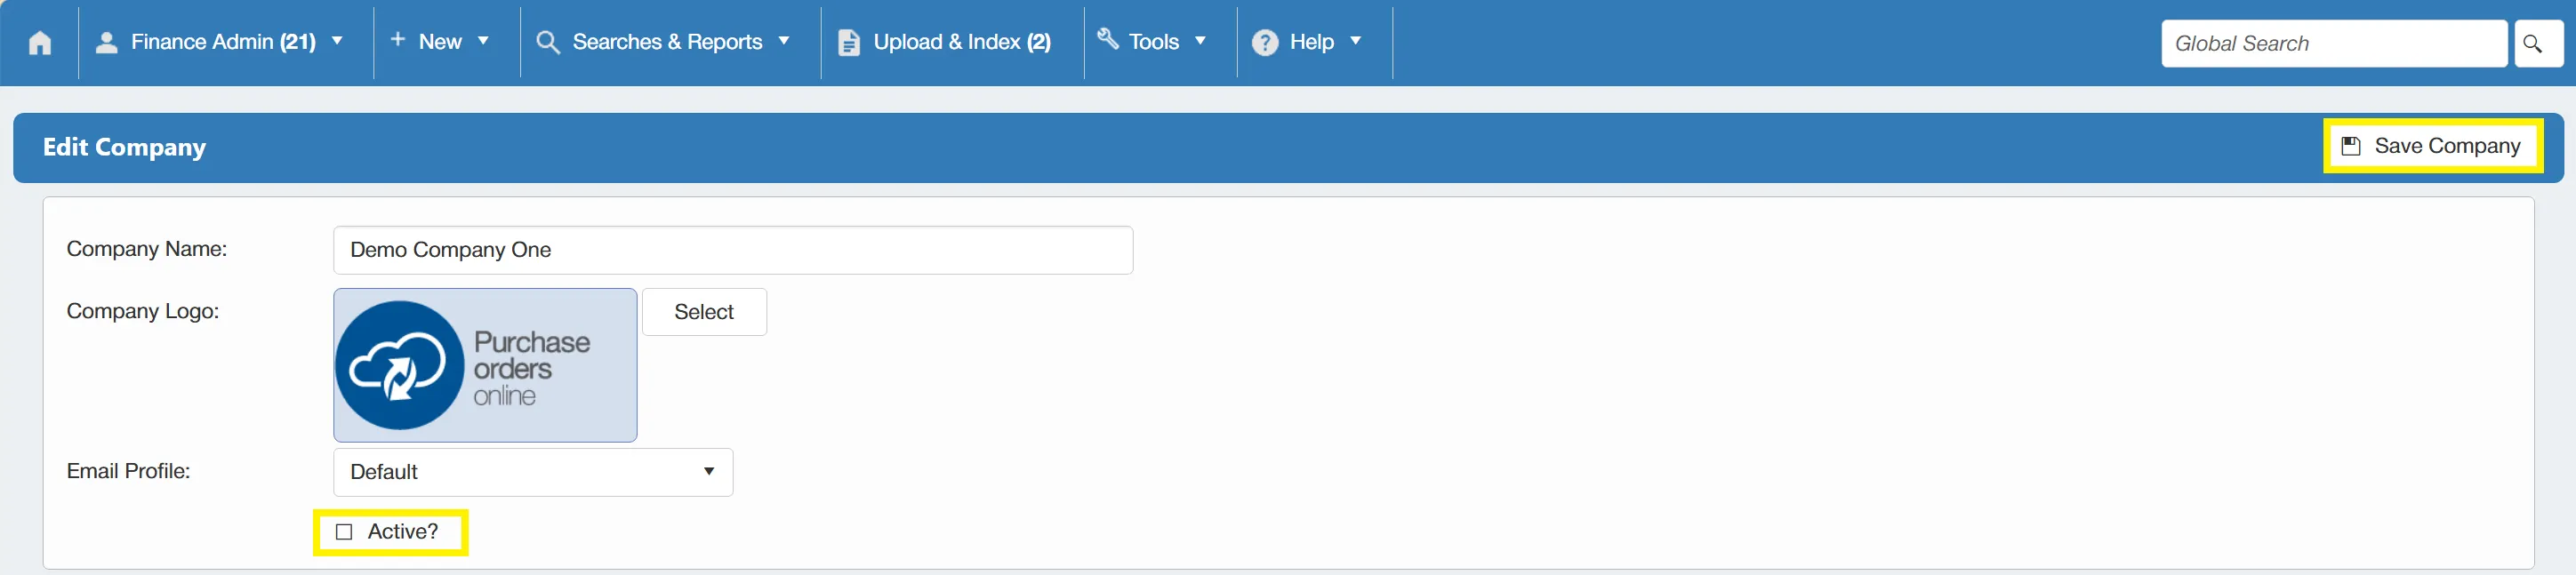
This will not completely remove the company from the system as a history of the company and its data is required for audit trail purposes.
You can re-activate a deactivated company by simply ticking the ☐ Active? box.
Editing Purchase Order Settings
Within the Edit Company window you can edit the purchase order settings at a company level. These settings include; the email address that is CC'd when a PO is issued, the PO document footer, PO Auto Close mode and company level Purchase Order Approval Rules.
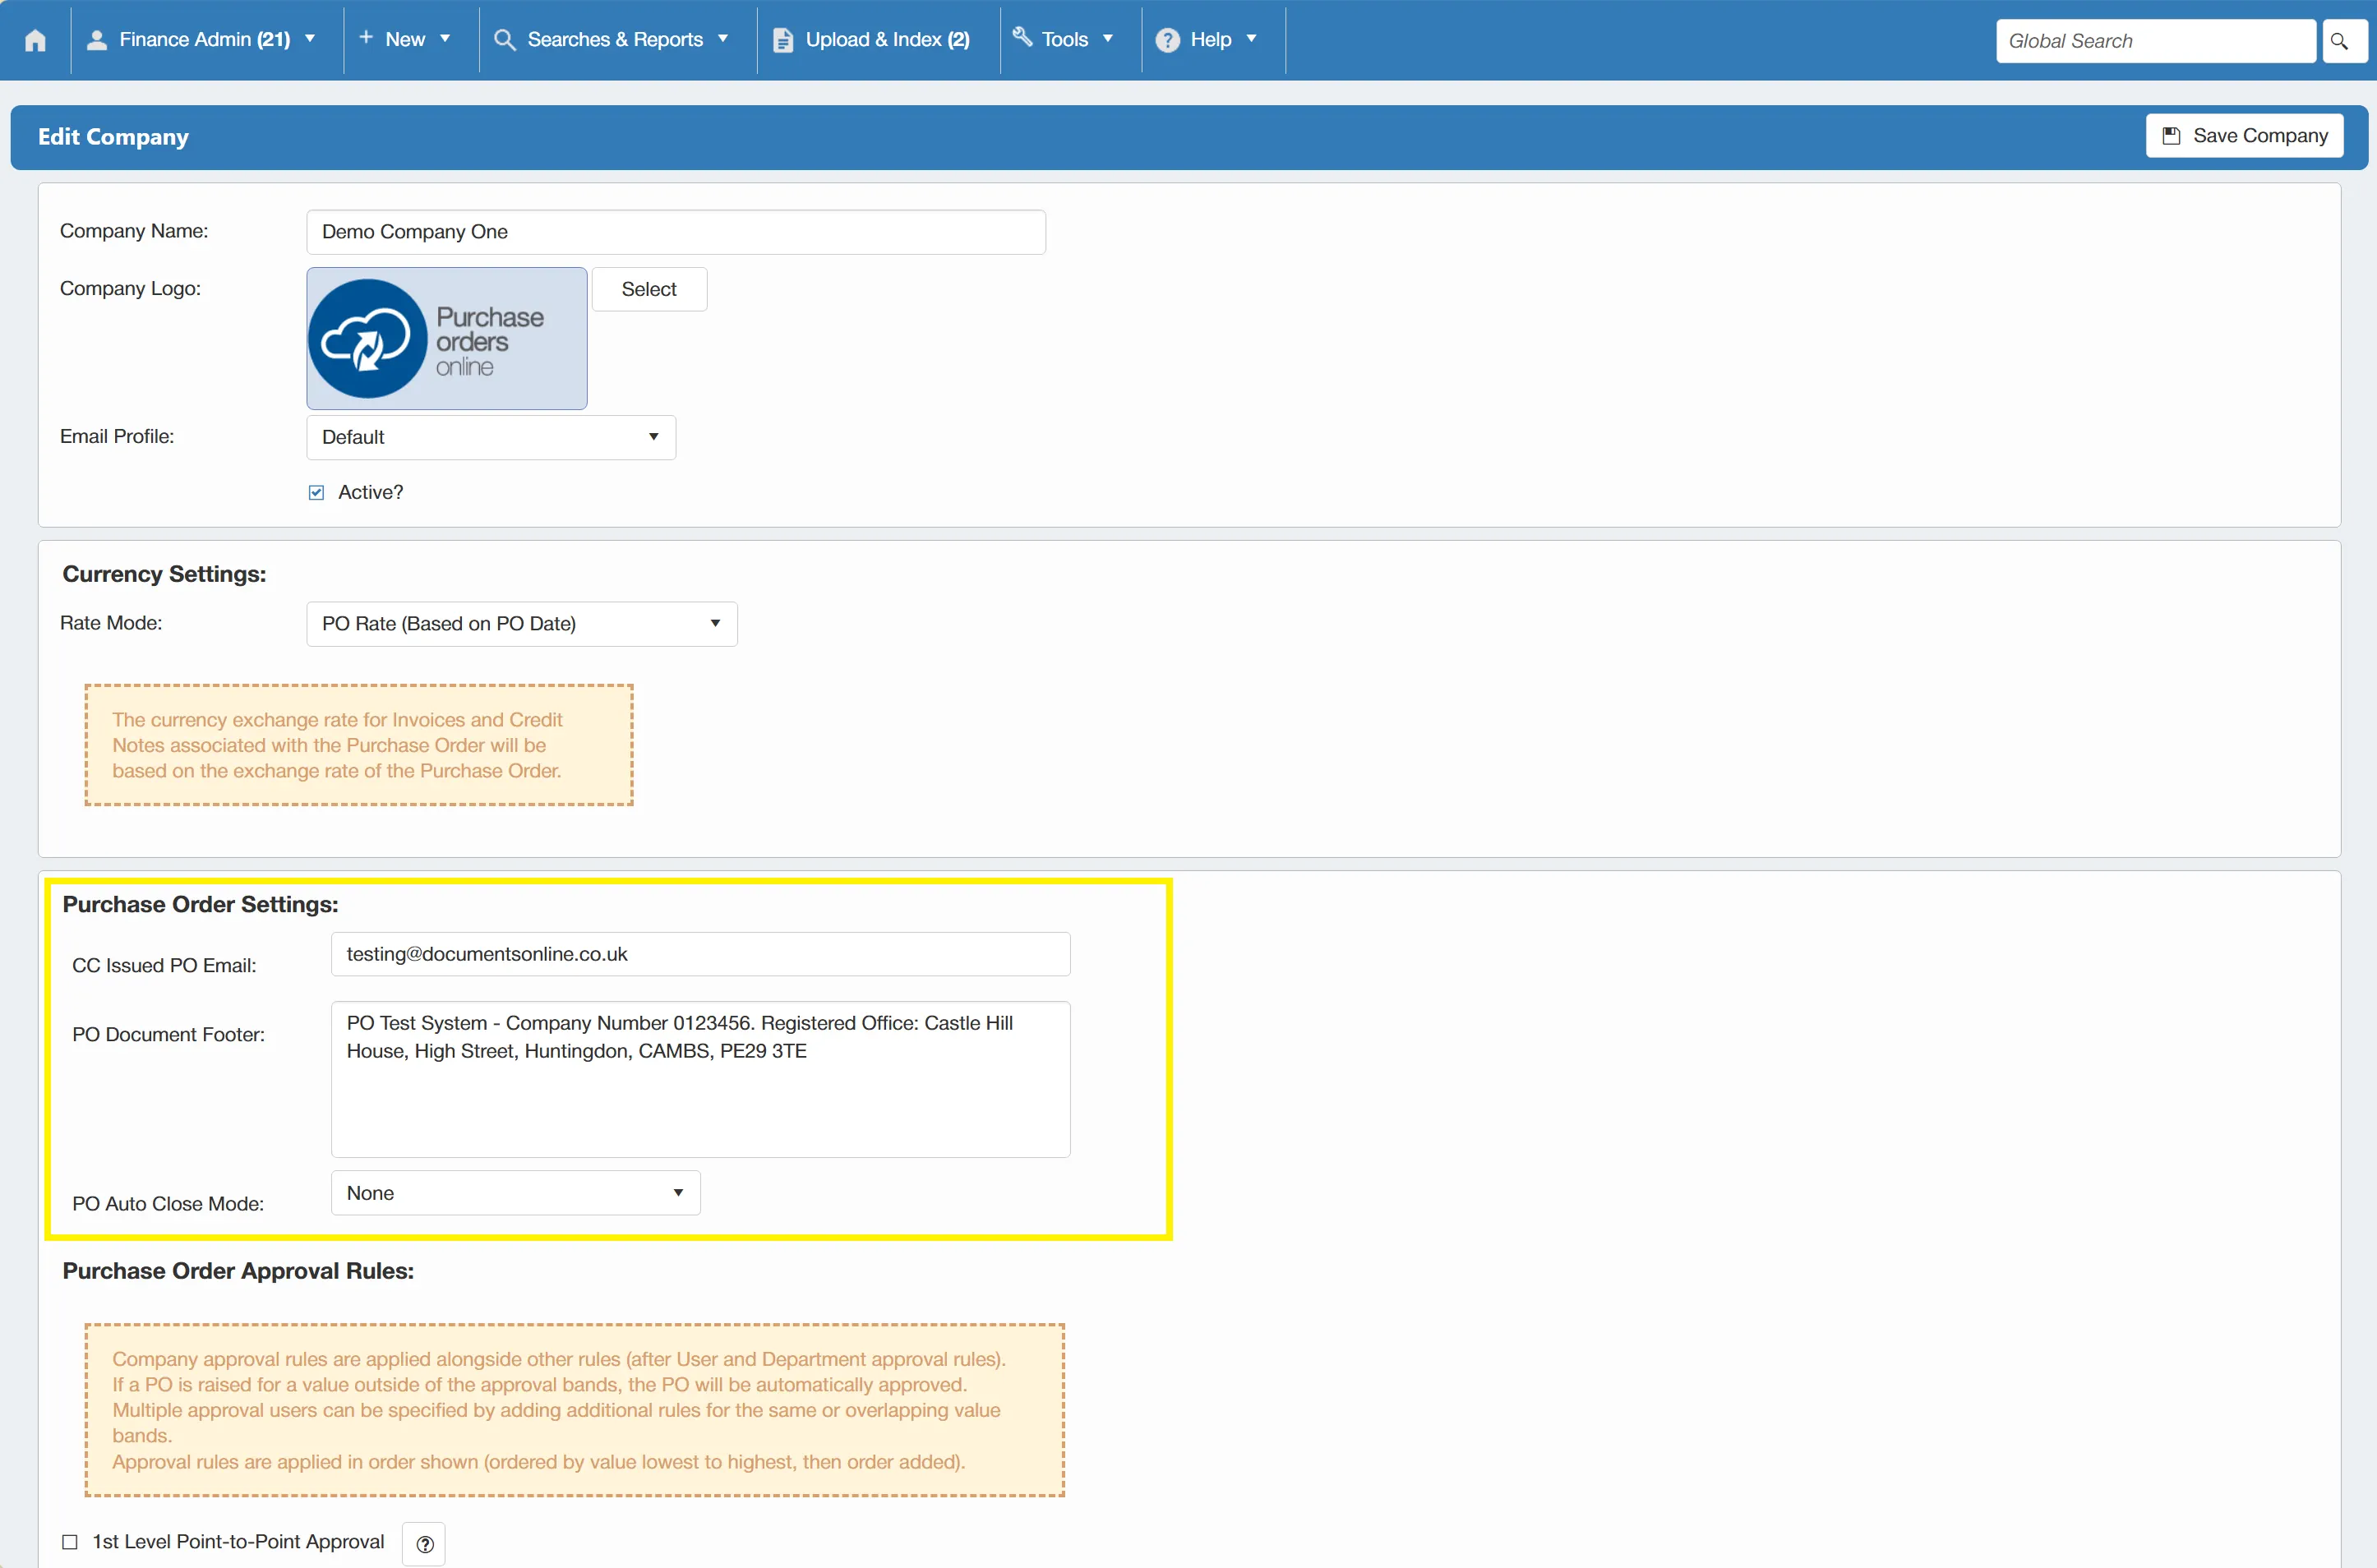
Once happy with your settings, click to commit them to the system.
Setting the CC Issued PO Email Address
When a PO is issued, the system can automatically CC an email address of your choice to ensure that you always get a copy of Issued PO's. This allows you to track outgoing purchase orders.
To set a CC Issued PO Email address, navigate to the Edit Company window and simply fill in the CC Issued PO Email: field.
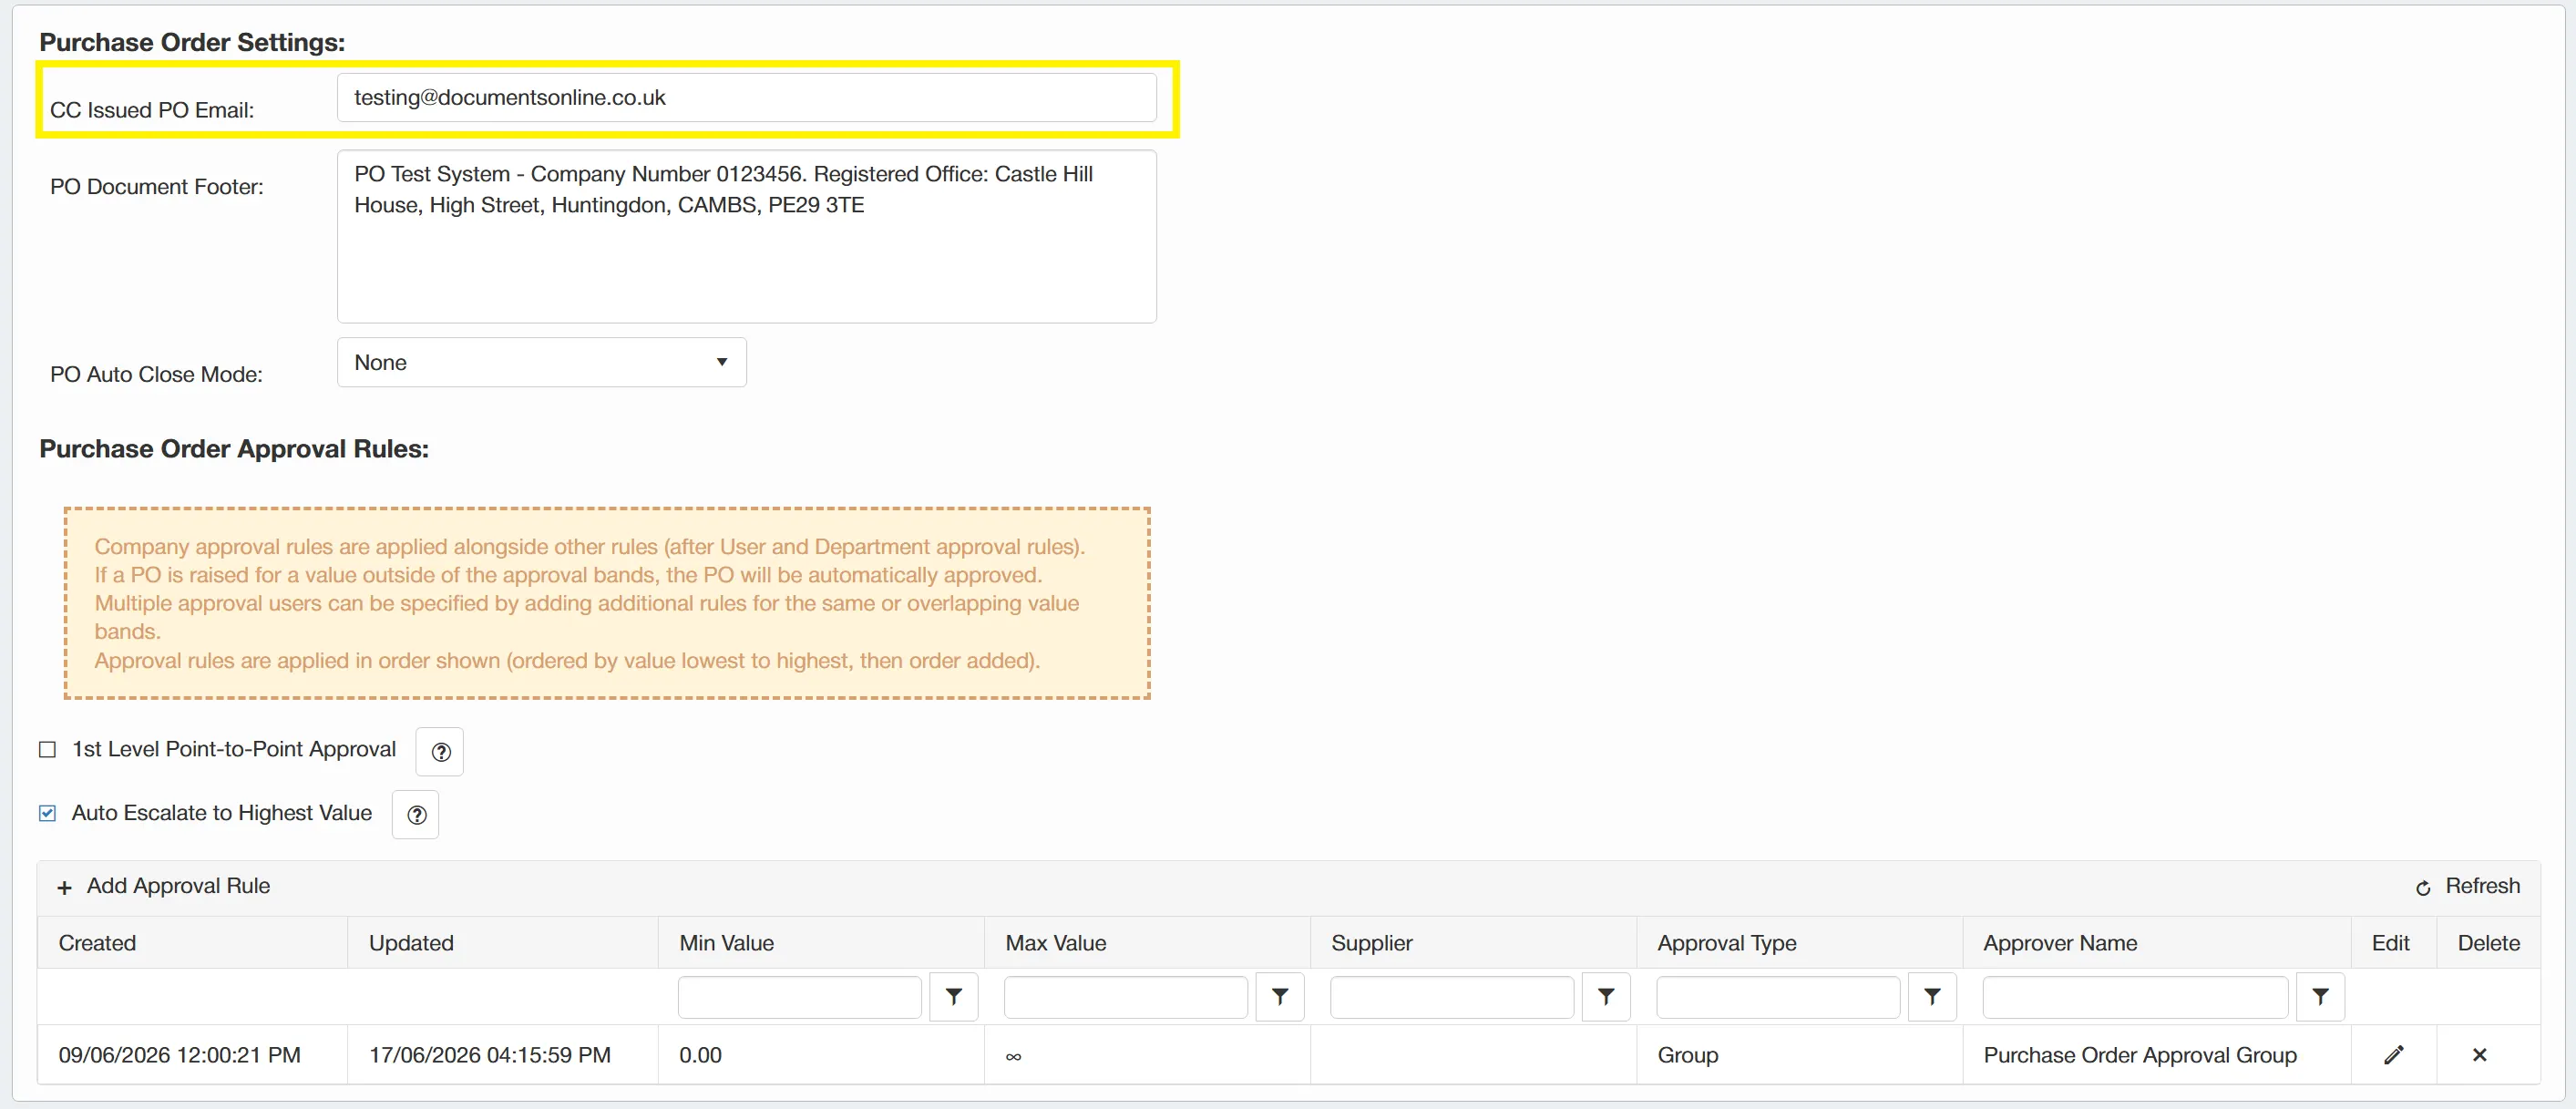
Once you are happy with the details, click to finalise.
Setting the PO Document Footer
The PO document footer appears at the bottom of your purchase order document and is typically your address and company information.
To set this, go to the Edit Company window and fill in the PO Document Footer field.
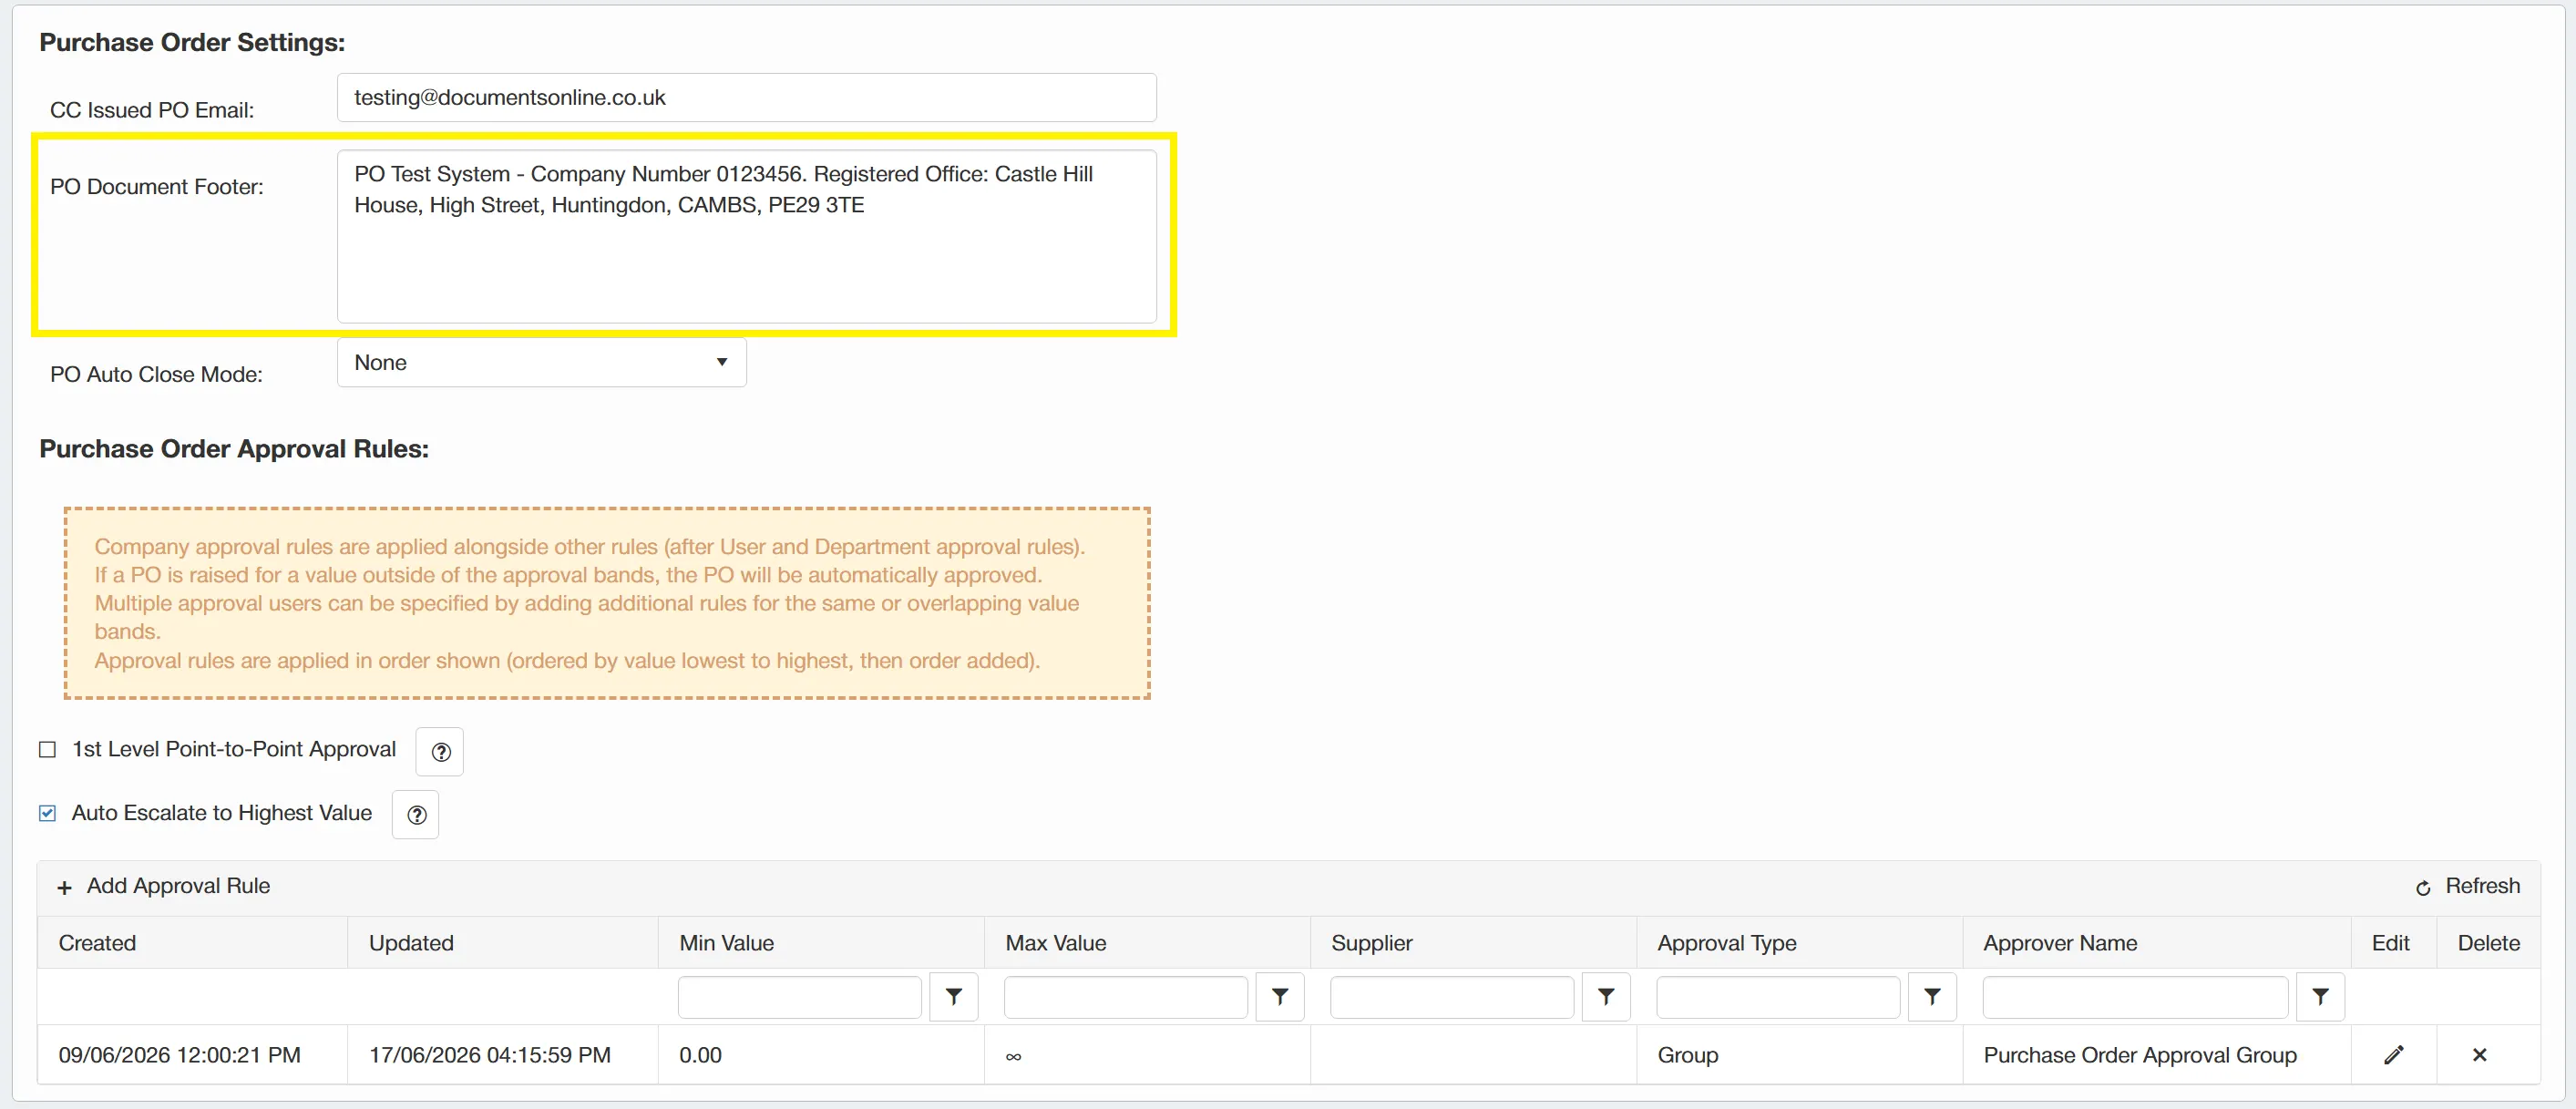
Once you are happy with the details, click to finalise.
Setting the PO Auto Close Mode
The system has the ability to automatically close purchase orders when specified parameters are met.
To view the PO Auto Close settings, go to the Edit Company window.
There are a number of options available for PO Auto Close Mode:
- None: This disables PO Auto Close Mode meaning that purchase orders are not automatically closed.
- Invoiced Value Only: PO's are automatically closed when the full value of the PO is invoiced.
- Invoiced Quantity Only: PO's are automatically closed when the full quantity of the PO line items is invoiced.
- Invoiced Value And Quantity: PO's are automatically closed when both the quantity and value of the PO is invoiced.
- Receipted Value Only: PO's are automatically closed when the full quantity of the PO line items is receipted.
The Invoice options are available only to systems with invoicing features enabled.
To specify your chosen option, simply select it from the PO Auto Close dropdown box.
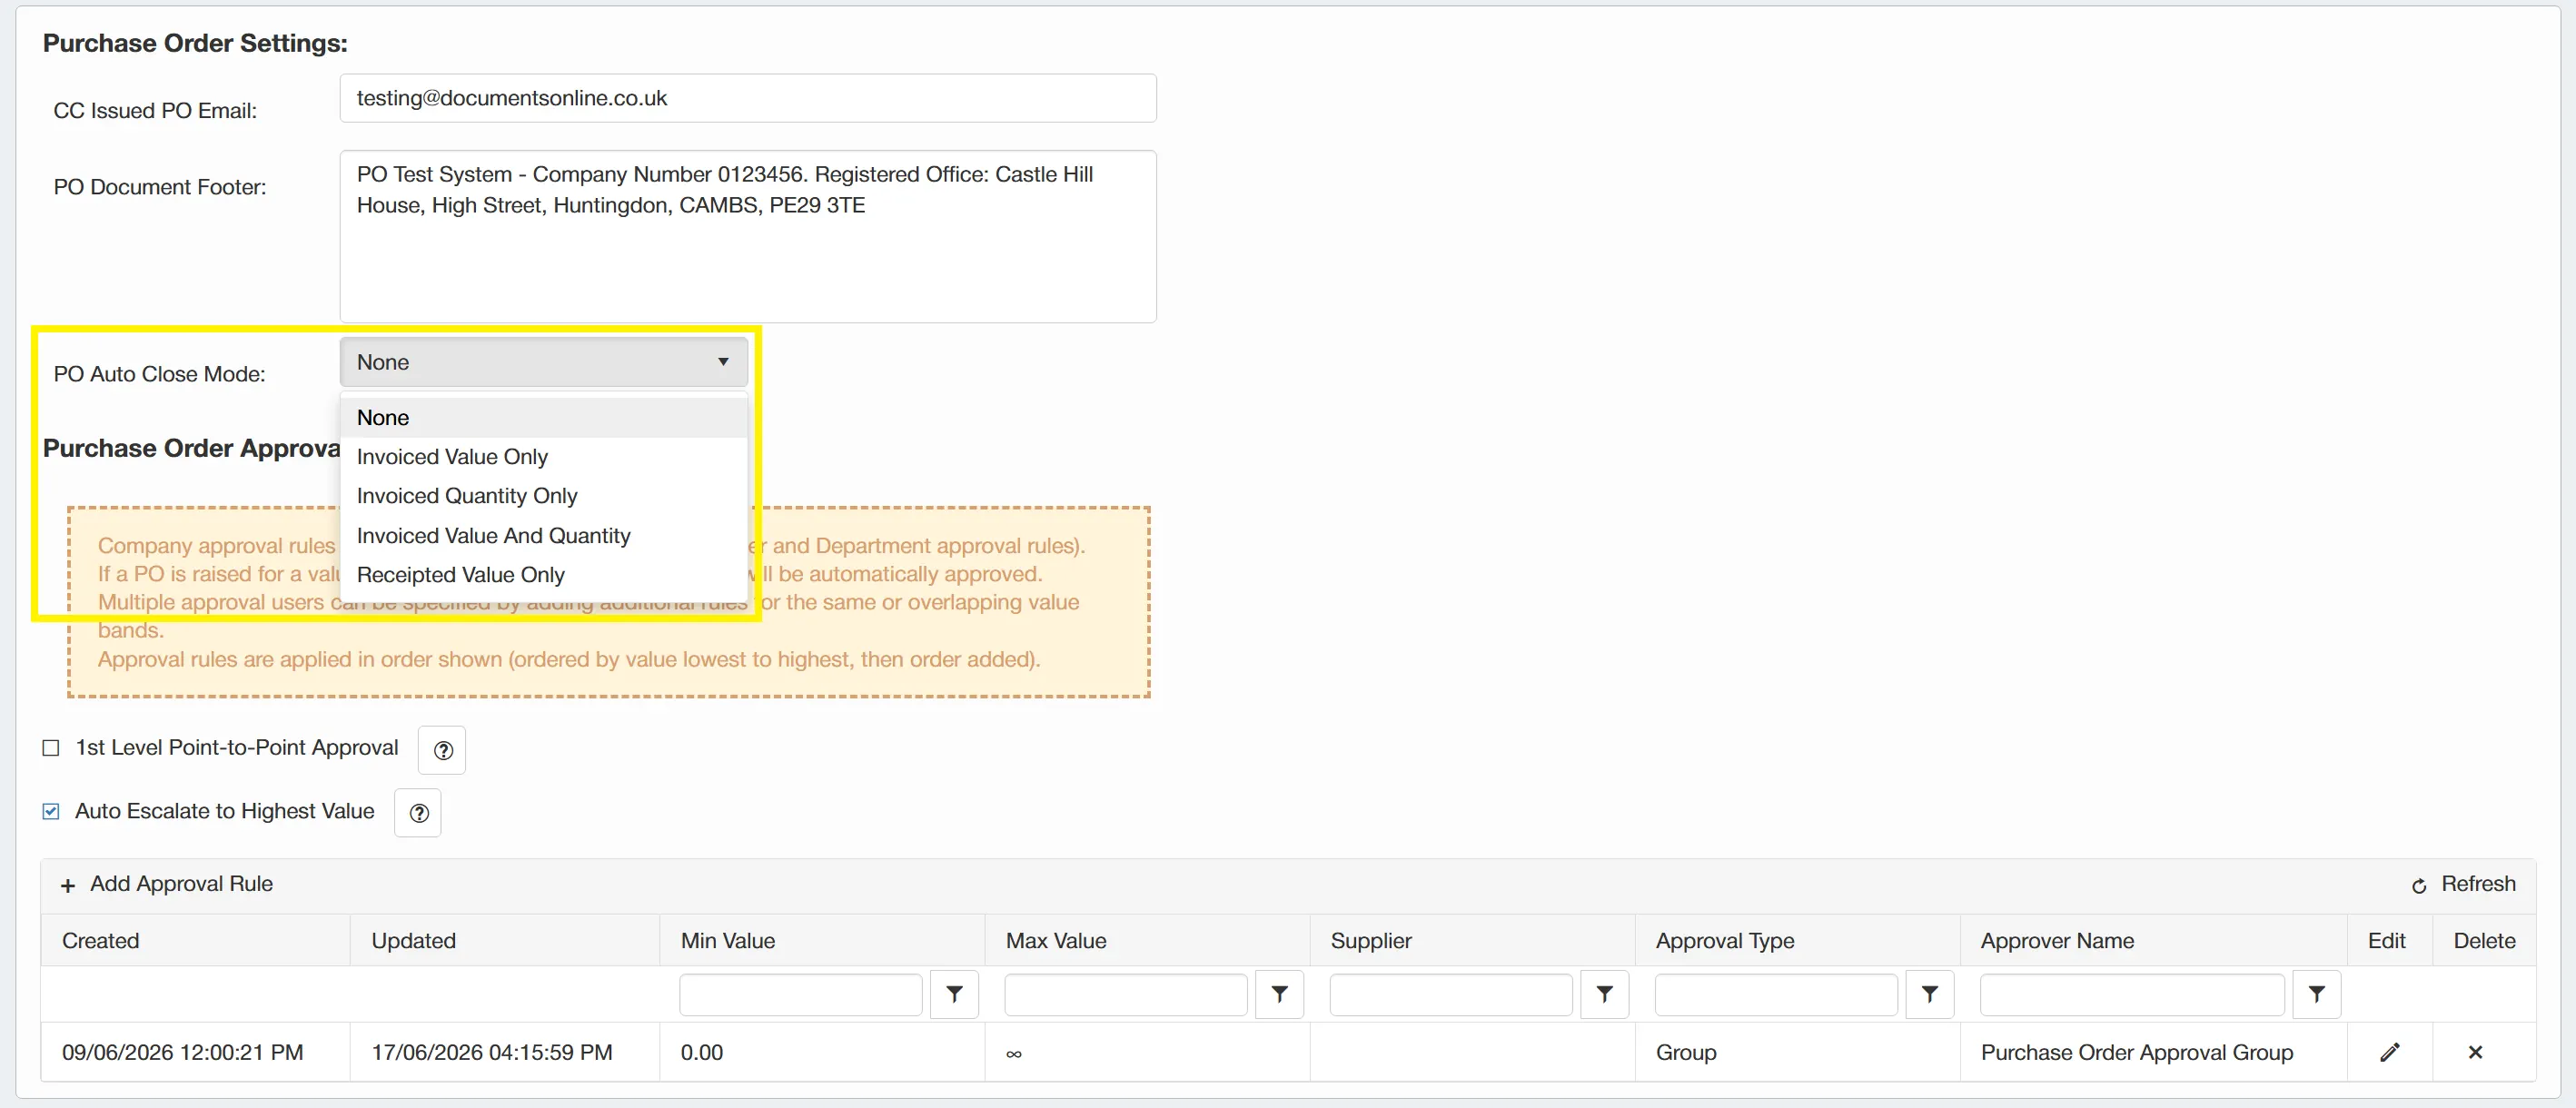
Once you are happy with your selection, click to finalise.
Setting Purchase Order Approval Rules
From the Edit Company window, you are able to set and edit company level approval rules.
These company level approval rules run alongside other rules (after User and Department approval rules).
If a purchase order for a value outside of the approval bands, the PO will be automatically approved. Multiple approval users can be specified by adding additional rules for the same or overlapping approval bands.
The screenshot below shows an example approval rule in which PO's with a minimum value of 0 and an unlimited maximum value will be sent to the Finance Approval Group. This means that with these parameters, any PO raised in the system will fall under this approval rule.
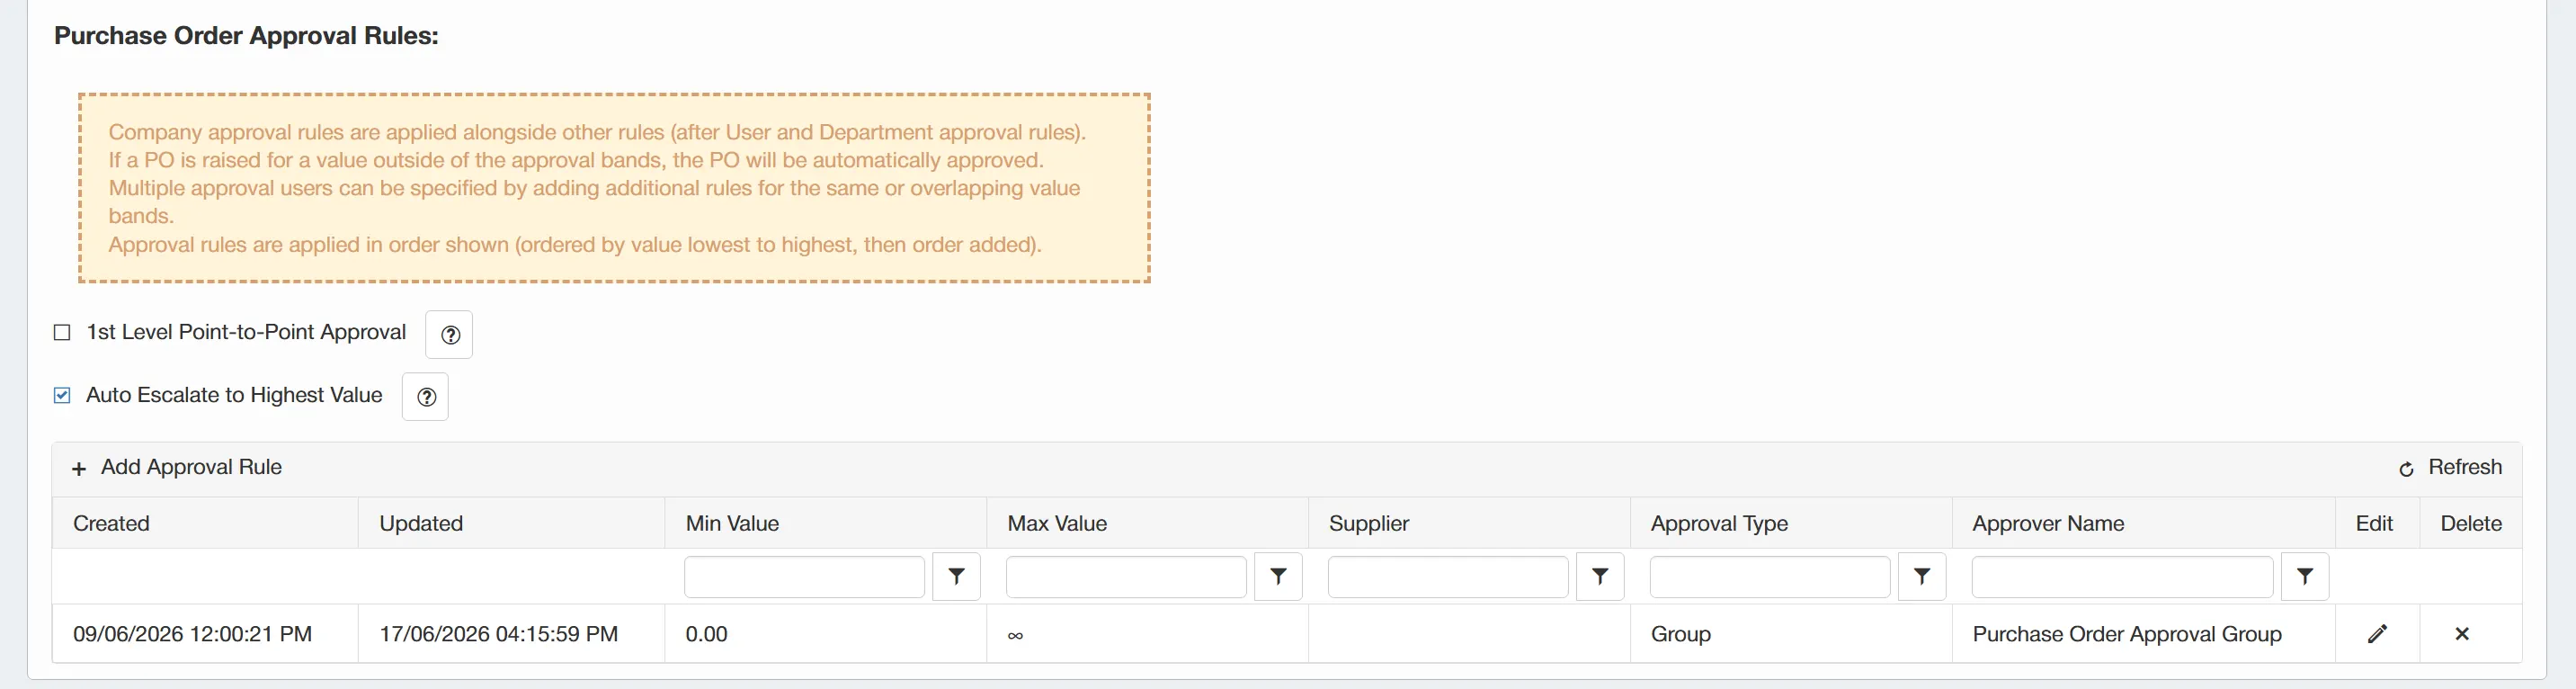
To add a new approval rule simply click . This will bring up a new set of fields which can be populated to set your new approval rule.
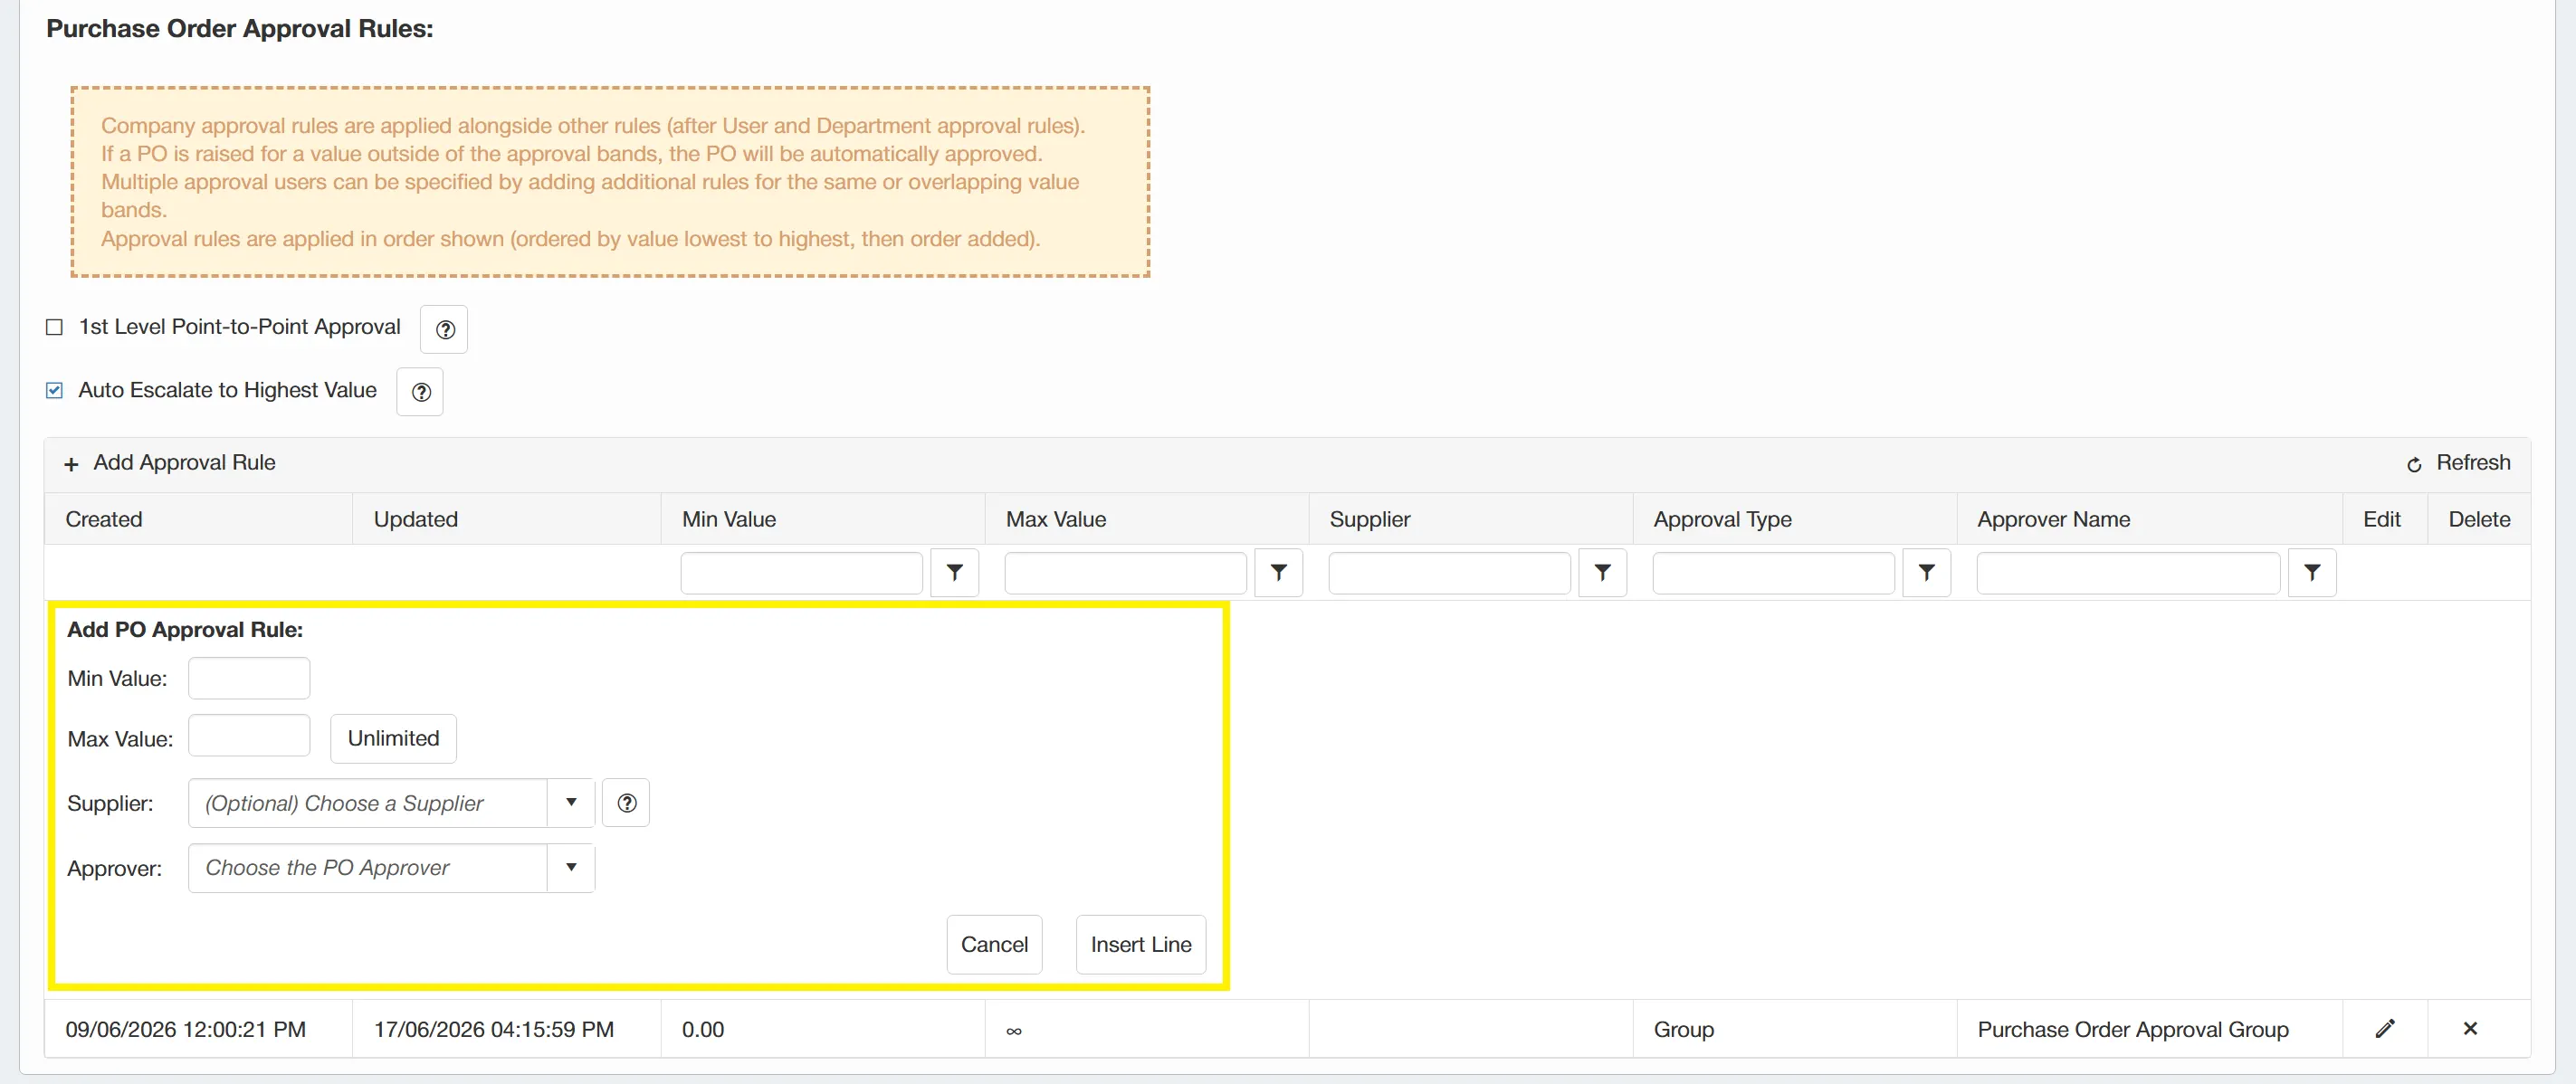
You now need to set the parameters for your approval rule. First, set your minimum and maximum values. Any purchase orders that fall within the two values will be subject to the rule.
Next, you have the option to select a Supplier to which this rule will apply. This is an optional field and is useful for creating an approval rule that is to apply to a specific supplier only. If you leave this field blank, the rule will apply to all suppliers.
Finally, select the approver for this rule. This user or group of users will receive any purchase order approval tasks that have been sent as a result of this rule.
The approver drop down contains not only individual users, but also any approval groups that have been set up. For more information on creating approval groups click here.
Once you are happy with the parameters, click to finalise.
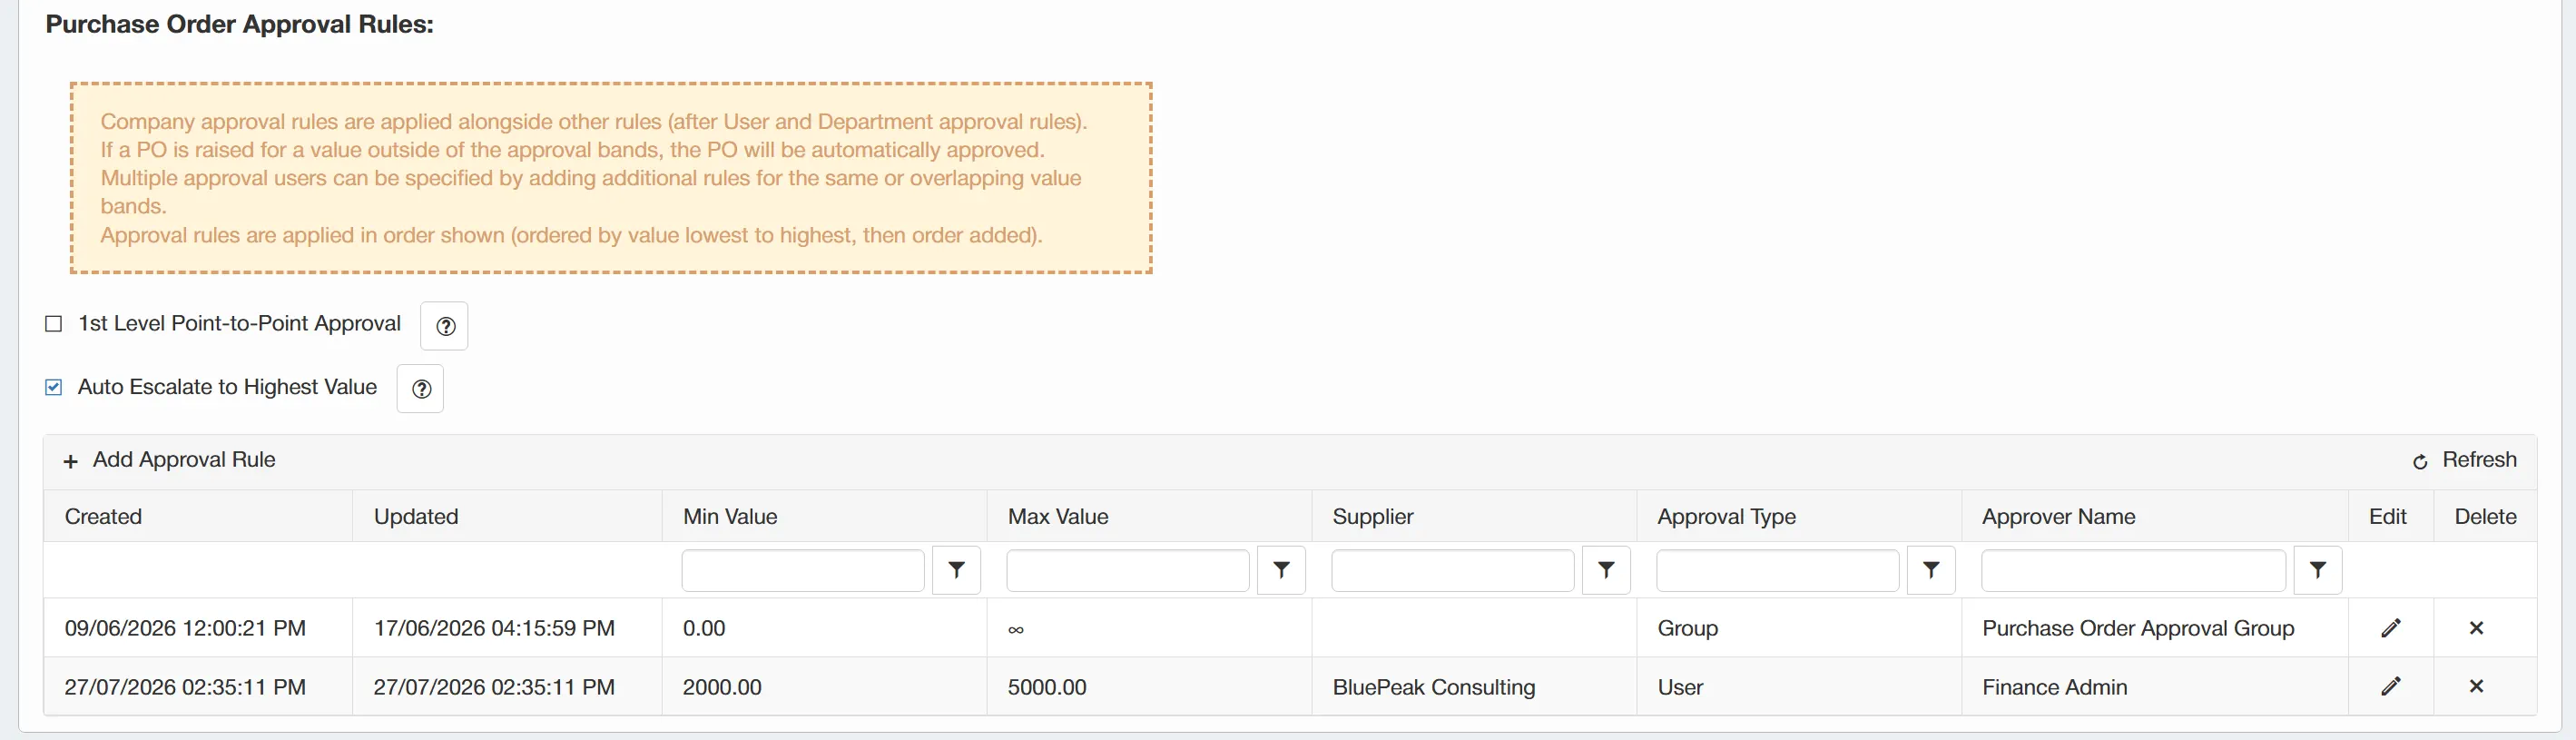
As you can see, the new approval rule has now been added to the grid.
Approval rules in the grid are applied in the order shown, (ordered by value lowest to highest, then order added).
You can go back and edit any of the approval rules by simply clicking on the edit icon within the corresponding row. You can also delete the approval rule by clicking on the .
Only users with the Entity Admin permission enabled can create and edit approval rules.
There is also the option to enable 1st Level Point-to-Point Approval.
To do this, simply tick the ☐ 1st Level Point-to-Point Approval box. With this enabled, users will be required to select a 1st level approver when creating purchase orders.
The 1st Level Approver will need to approve the purchase order before it moves onto the next applicable level of approval in line with the approval rules.
Users can also enable the Auto Escalate to Highest Value feature.
To do this, simply tick the ☐ Auto Escalate to Highest Value box. With this enabled, the PO workflow will automatically escalate to the highest level approver based on its value, rather than each approver in the workflow.
Once you are happy with all changes, click to finalise all changes.
Delivery Note Indexing Settings
This feature is only available to systems with Goods Receipting functionality.
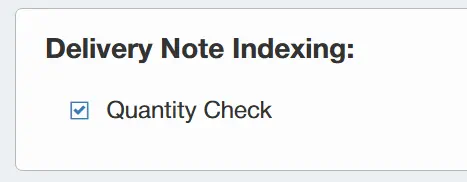
The system has the ability to check quantities when indexing delivery notes against purchase orders. With this ability enabled, the system will check that the quantity is available on the purchase order before allowing you to index a delivery note against it.
To enable this feature, navigate to the Edit Company window and tick the ☐ Quantity Check box.
Once completed, click the to finalise.
Invoice Indexing Settings
This feature is only available to systems with Invoice Approval functionality.
From the Edit Company window you can edit the Invoice Indexing settings by specifying the relevant checks that you would like the system to carry out when indexing invoices.

There are four boxes available to tick, each of these correlates to a different parameter that the system can check invoices by when indexing:
☐ Unit Price Check
☐ Received Quantity Check
☐ Invoiced Quantity Check
☐ Total Amount Check
Simply tick the relevant checks that you would like the system to use when indexing invoices.
There are also two Variance fields available. These allow you to specify how much variance can be applied to the checks.
For example, with the values shown in the below screenshot, the system will allow a variance of up to 50.00 value or 5%.

Once you are happy with the changes click to finalise.
Invoice Auto Approval Settings
This feature is only available to systems with Invoice Approval functionality.
Within the Edit Company window you can edit the Invoice Auto Approval Settings and Invoice Approval Mode.
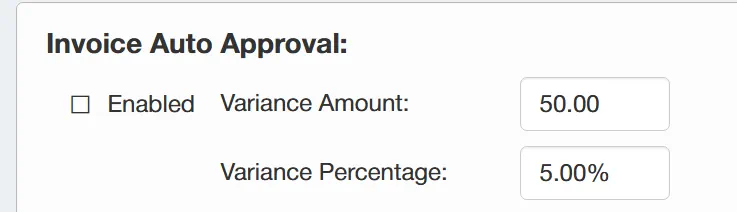
To enable Invoice Auto Approval, tick the ☐ Enabled box. This will enable the system's ability to automatically approve invoices when indexed.
You can also set the Variance Amount and Variance Percentage fields to specify the level of variance that will be accepted for auto approval.
With the parameters shown in the below screenshot, the system will allow a variance of up to 50.00 value or 5%.
Once you are happy with the changes click to finalise.
Invoice Approval Mode
This feature is only available to systems with Invoice Approval functionality.
From the Edit Company window, you can set the Invoice Approval Mode.
You can set the Invoice Approval Mode by clicking on the dropdown menu. This will allow you to select the user or group that will receive Invoice Approval tasks.
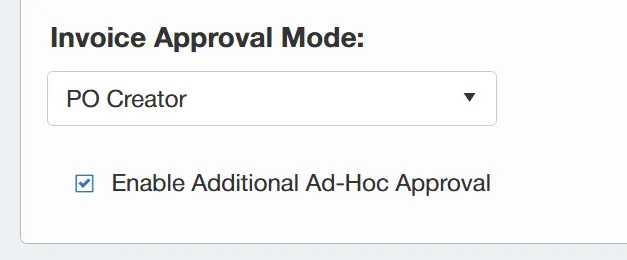
In the screenshot above, the Invoice Approval Mode is set to PO Creator, this means that Invoice Approval tasks will be sent to the user who created the PO to which the invoice is linked.
There is also an ☐ Enable Additional Ad-Hoc Approval checkbox available. This will determine whether the Invoice Additional Approval feature is enabled within the system.
For more information on the Invoice Additional Approval feature, please click here.
Once you are happy with your selection click to finalise.
Branches
You can create and edit branches to ensure that your PO system grows along with your organisation.
Users must have the Entity Admin permission enabled to access this feauture. For information on user permissions, click here.
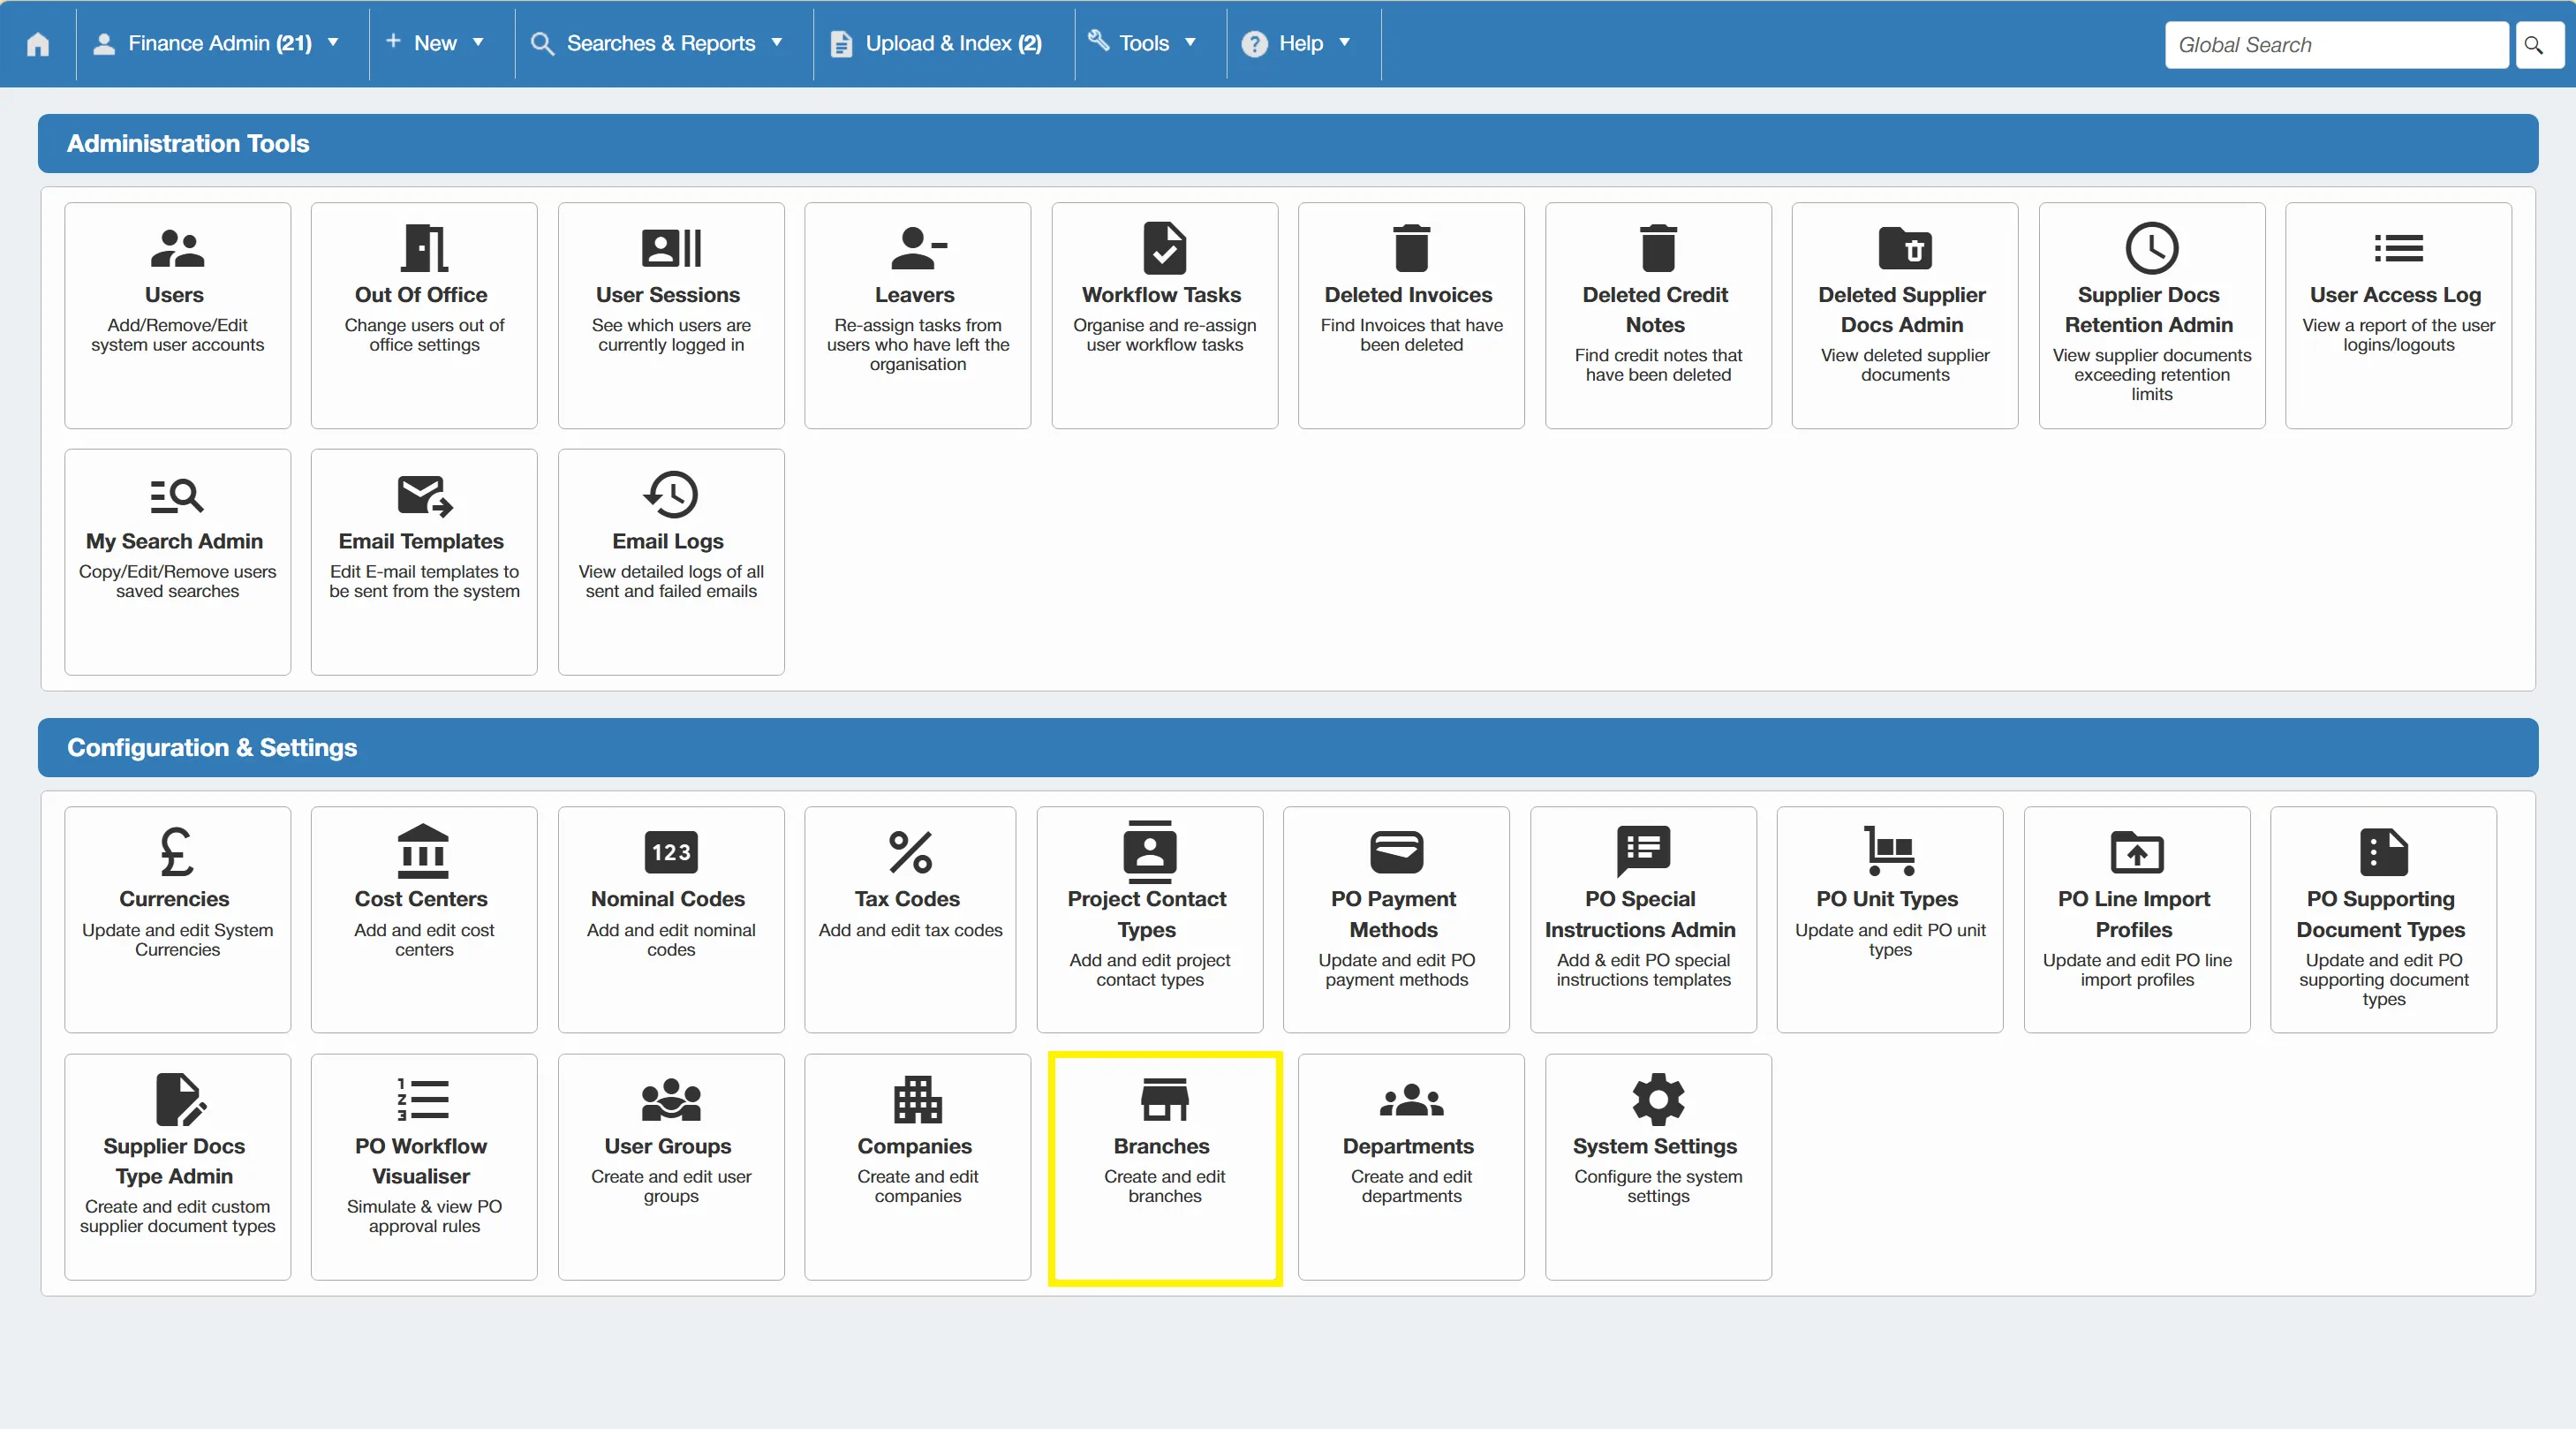
To administer Branches, click on the Branches icon within the Configuration & Settings section.
This takes you to the Branch Administration grid. From here, you can add new branches and administer existing ones.
Creating a New Branch
To add a new branch to the system, click on the button.
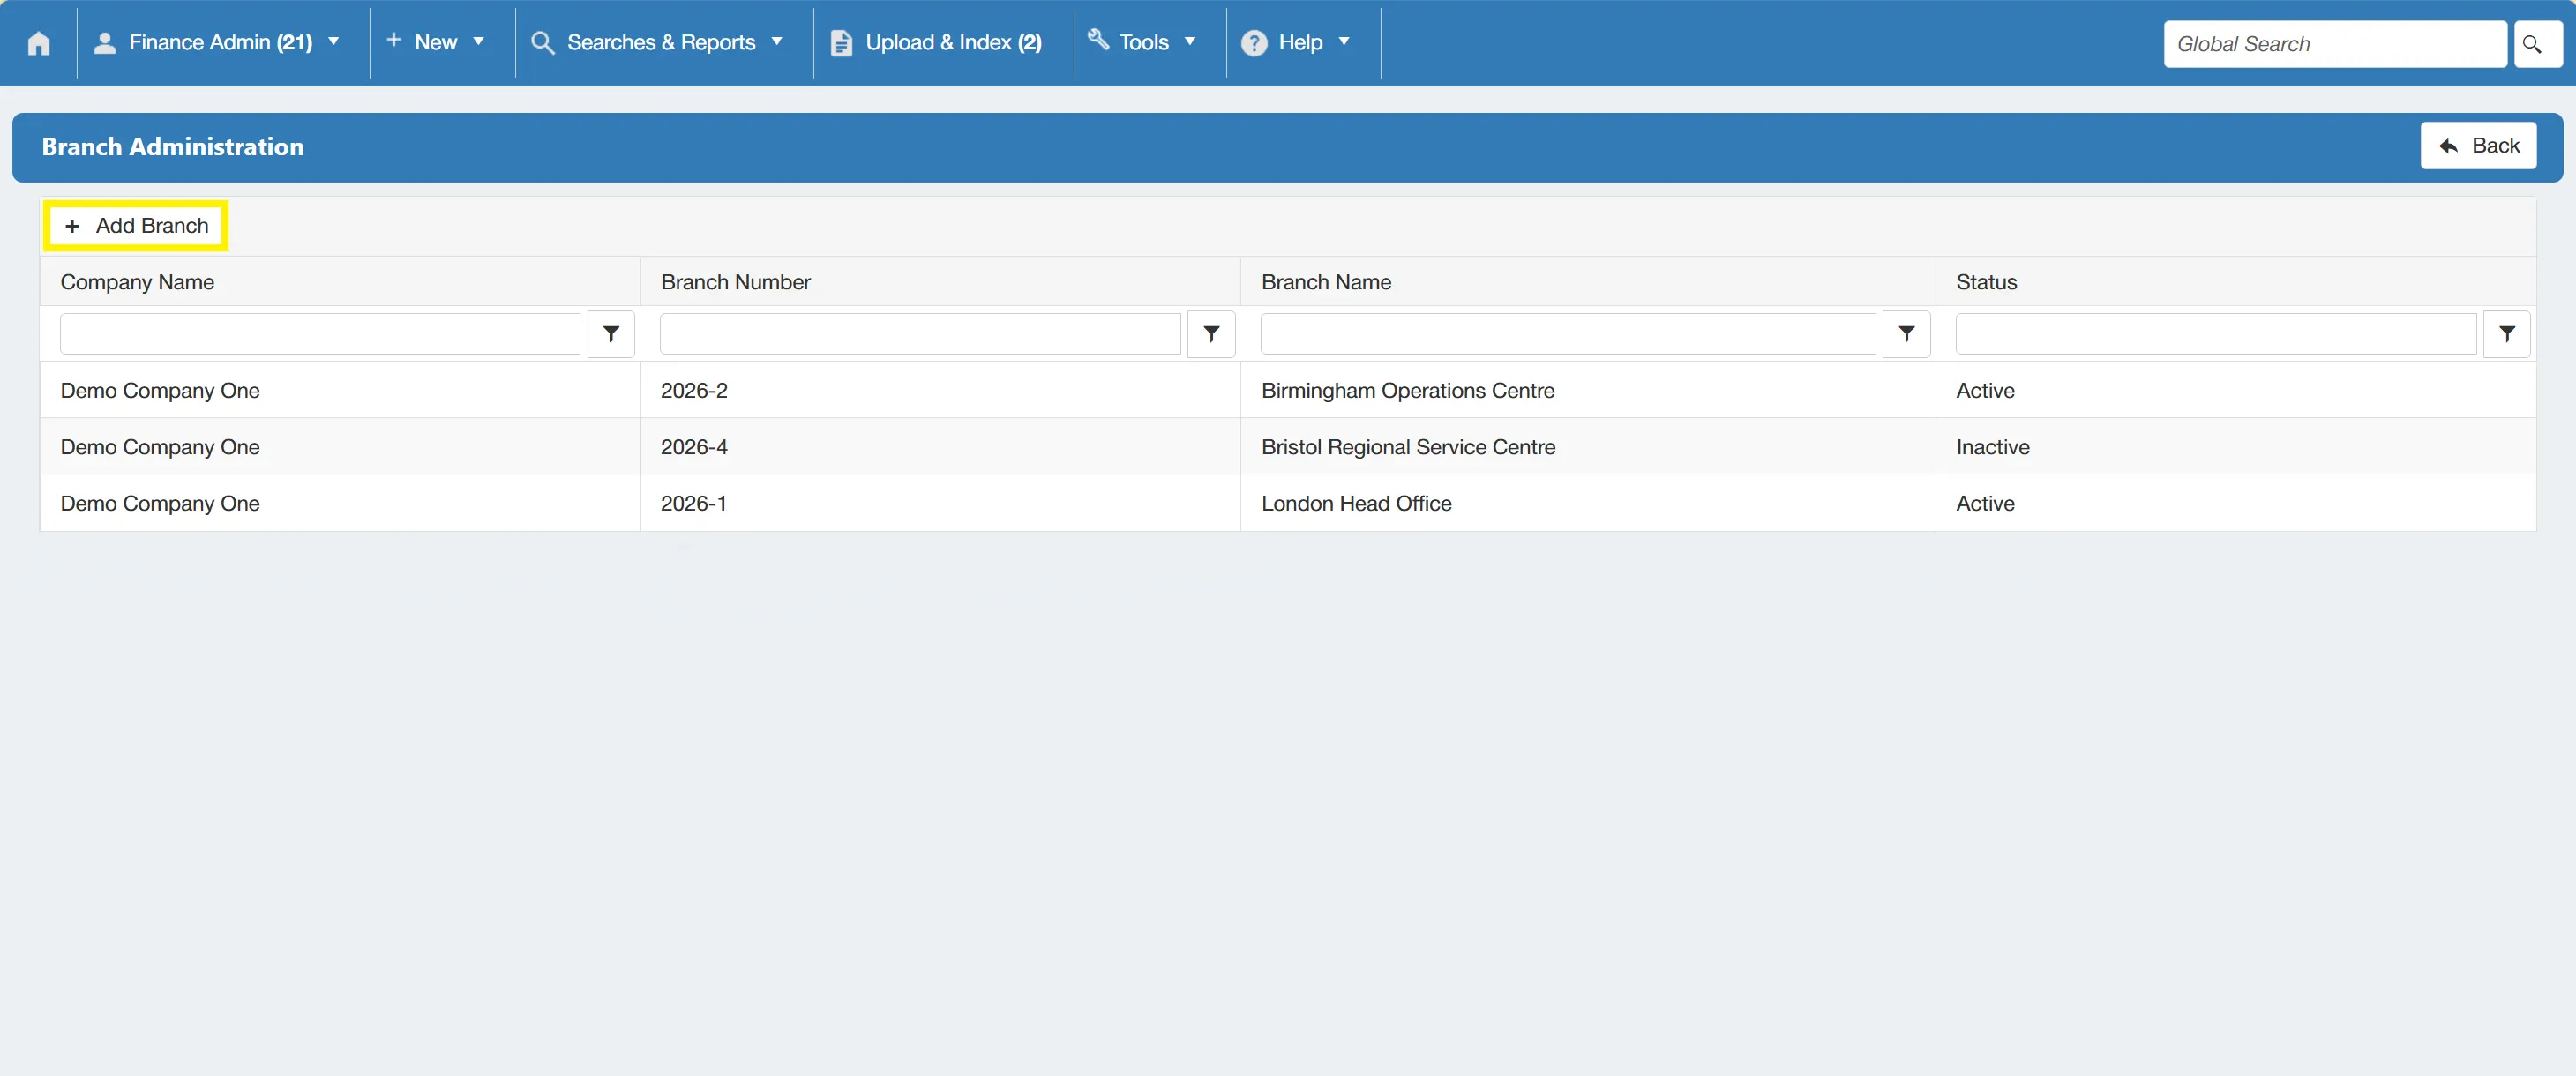
This brings you to a new window where you can add the new branch name and specify whether or not it is active. Once the details are completed, simply click on the button to commit this to the system.
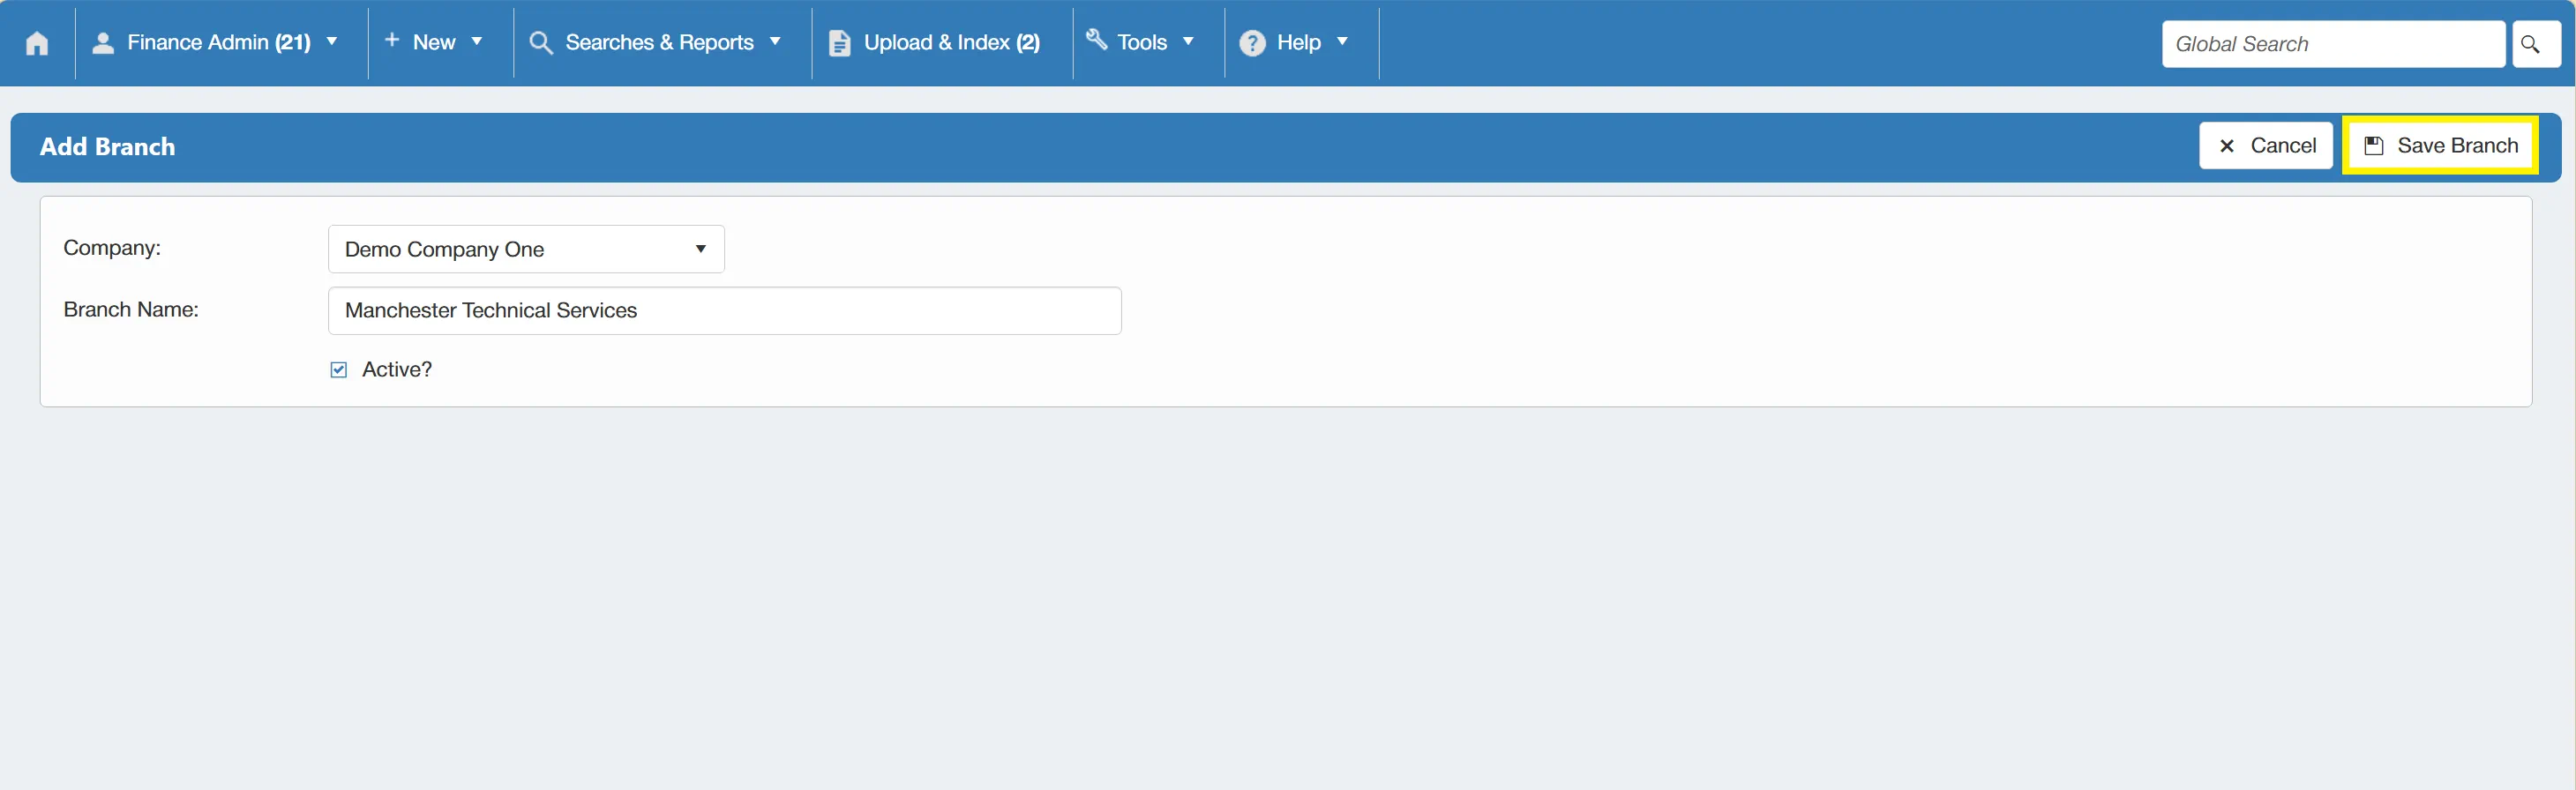
If you now go back to the Branch Administration grid, you will see the new branch.
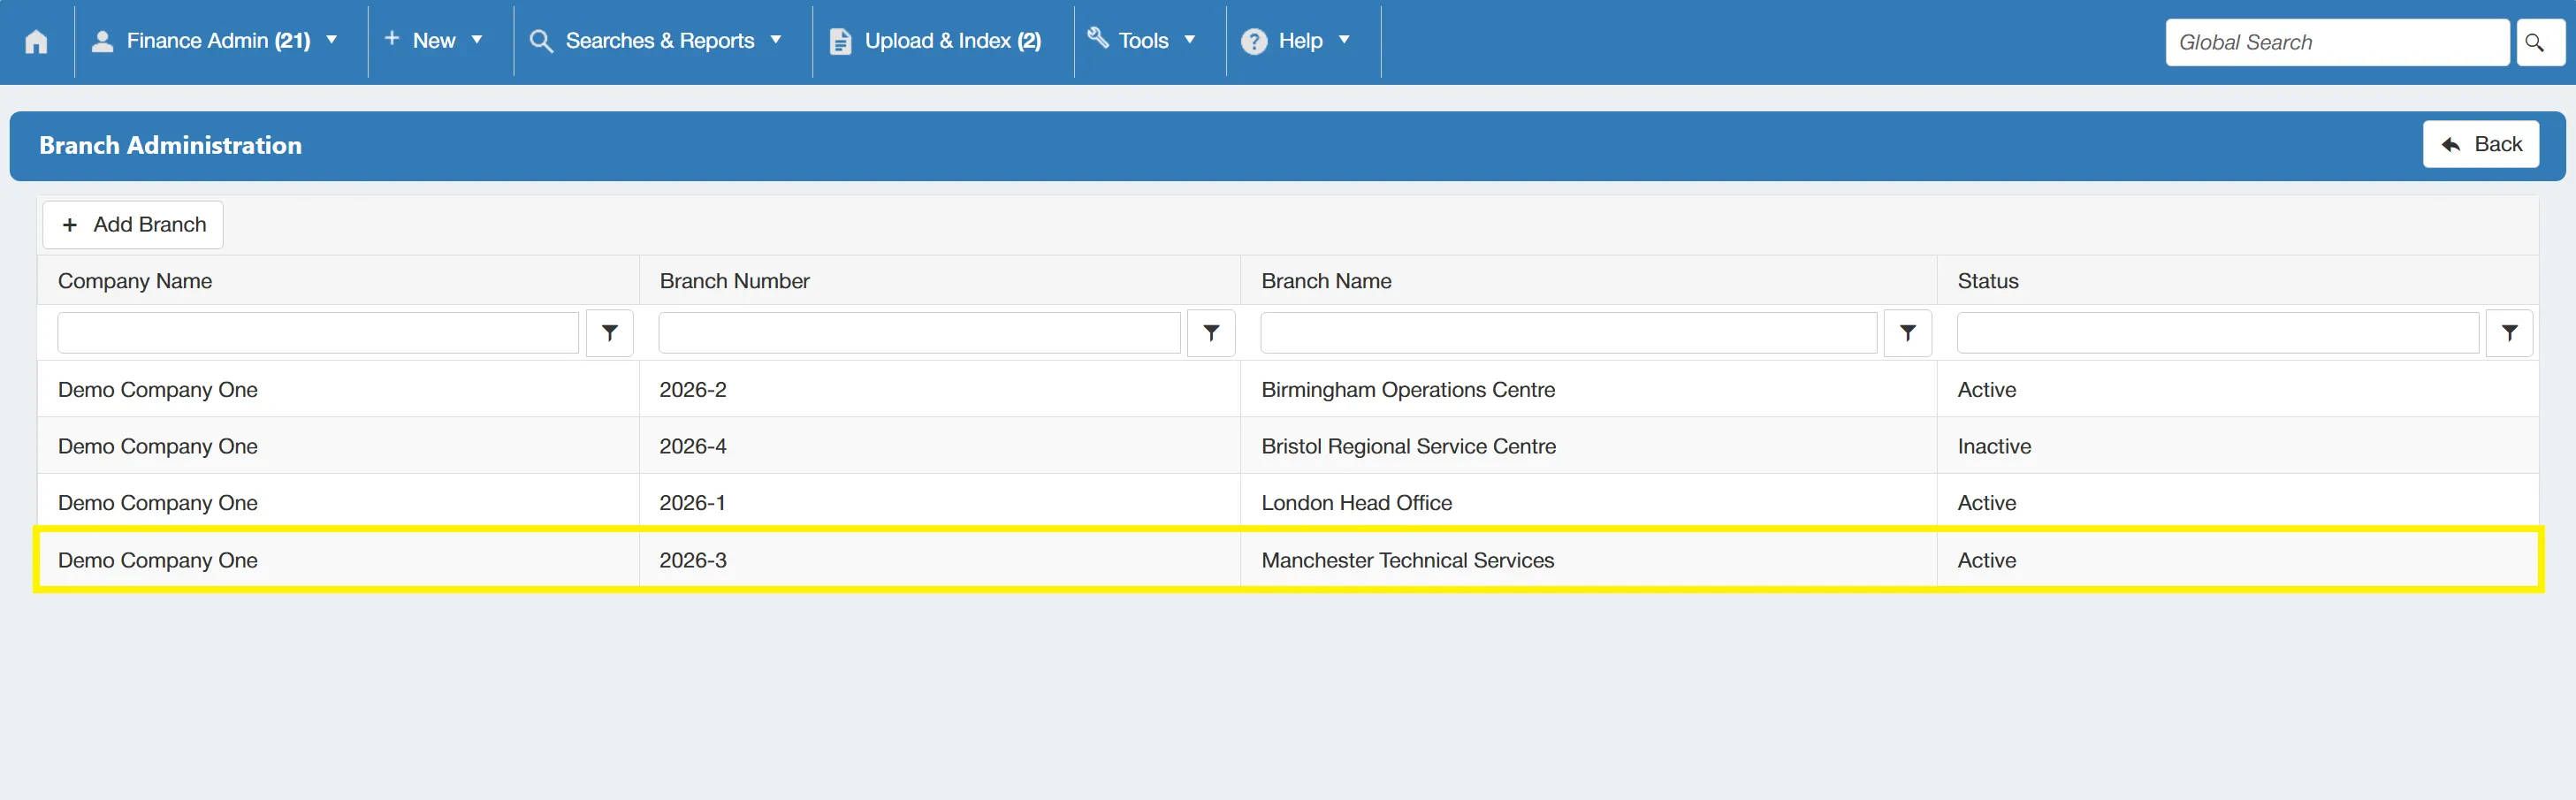
Once a branch has been added to the system, it cannot be removed. It can only be deactivated.
Deactivating A Branch
If you need to deactivate a branch, simply navigate to the Branch Administration Grid and select the branch that you wish to remove.
When viewing the branch, simply un-tick the ☐ Active? box then click to finalise.
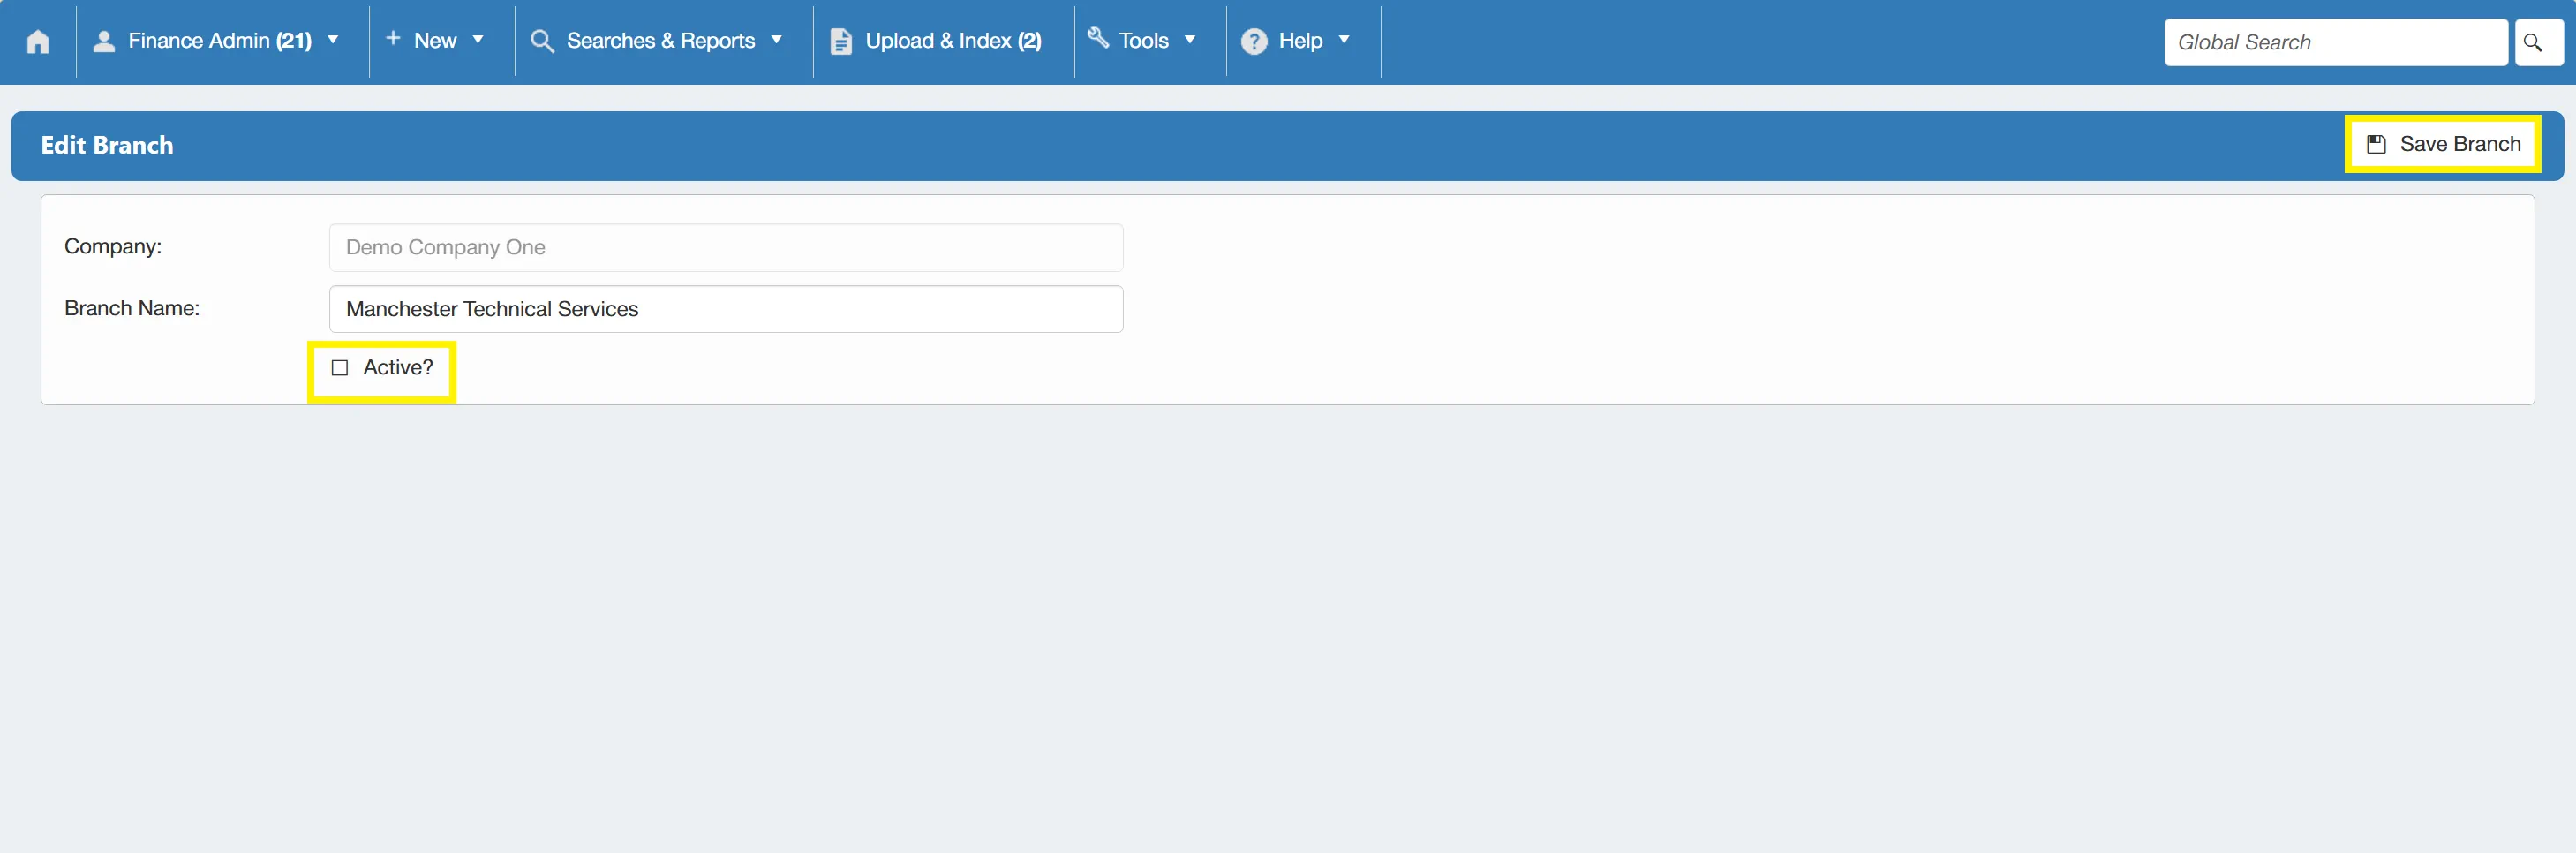
This will deactivate the branch so it can no longer be selected in the system, but it will keep a record of it for audit trail purposes.
Departments
You can create and edit departments to ensure that your PO system grows along with your organisation.
Users must have the Entity Admin permission enabled to access this feauture. For information on user permissions, click here.
To administer Departments, click on the Departments icon within the Configuration & Settings section.
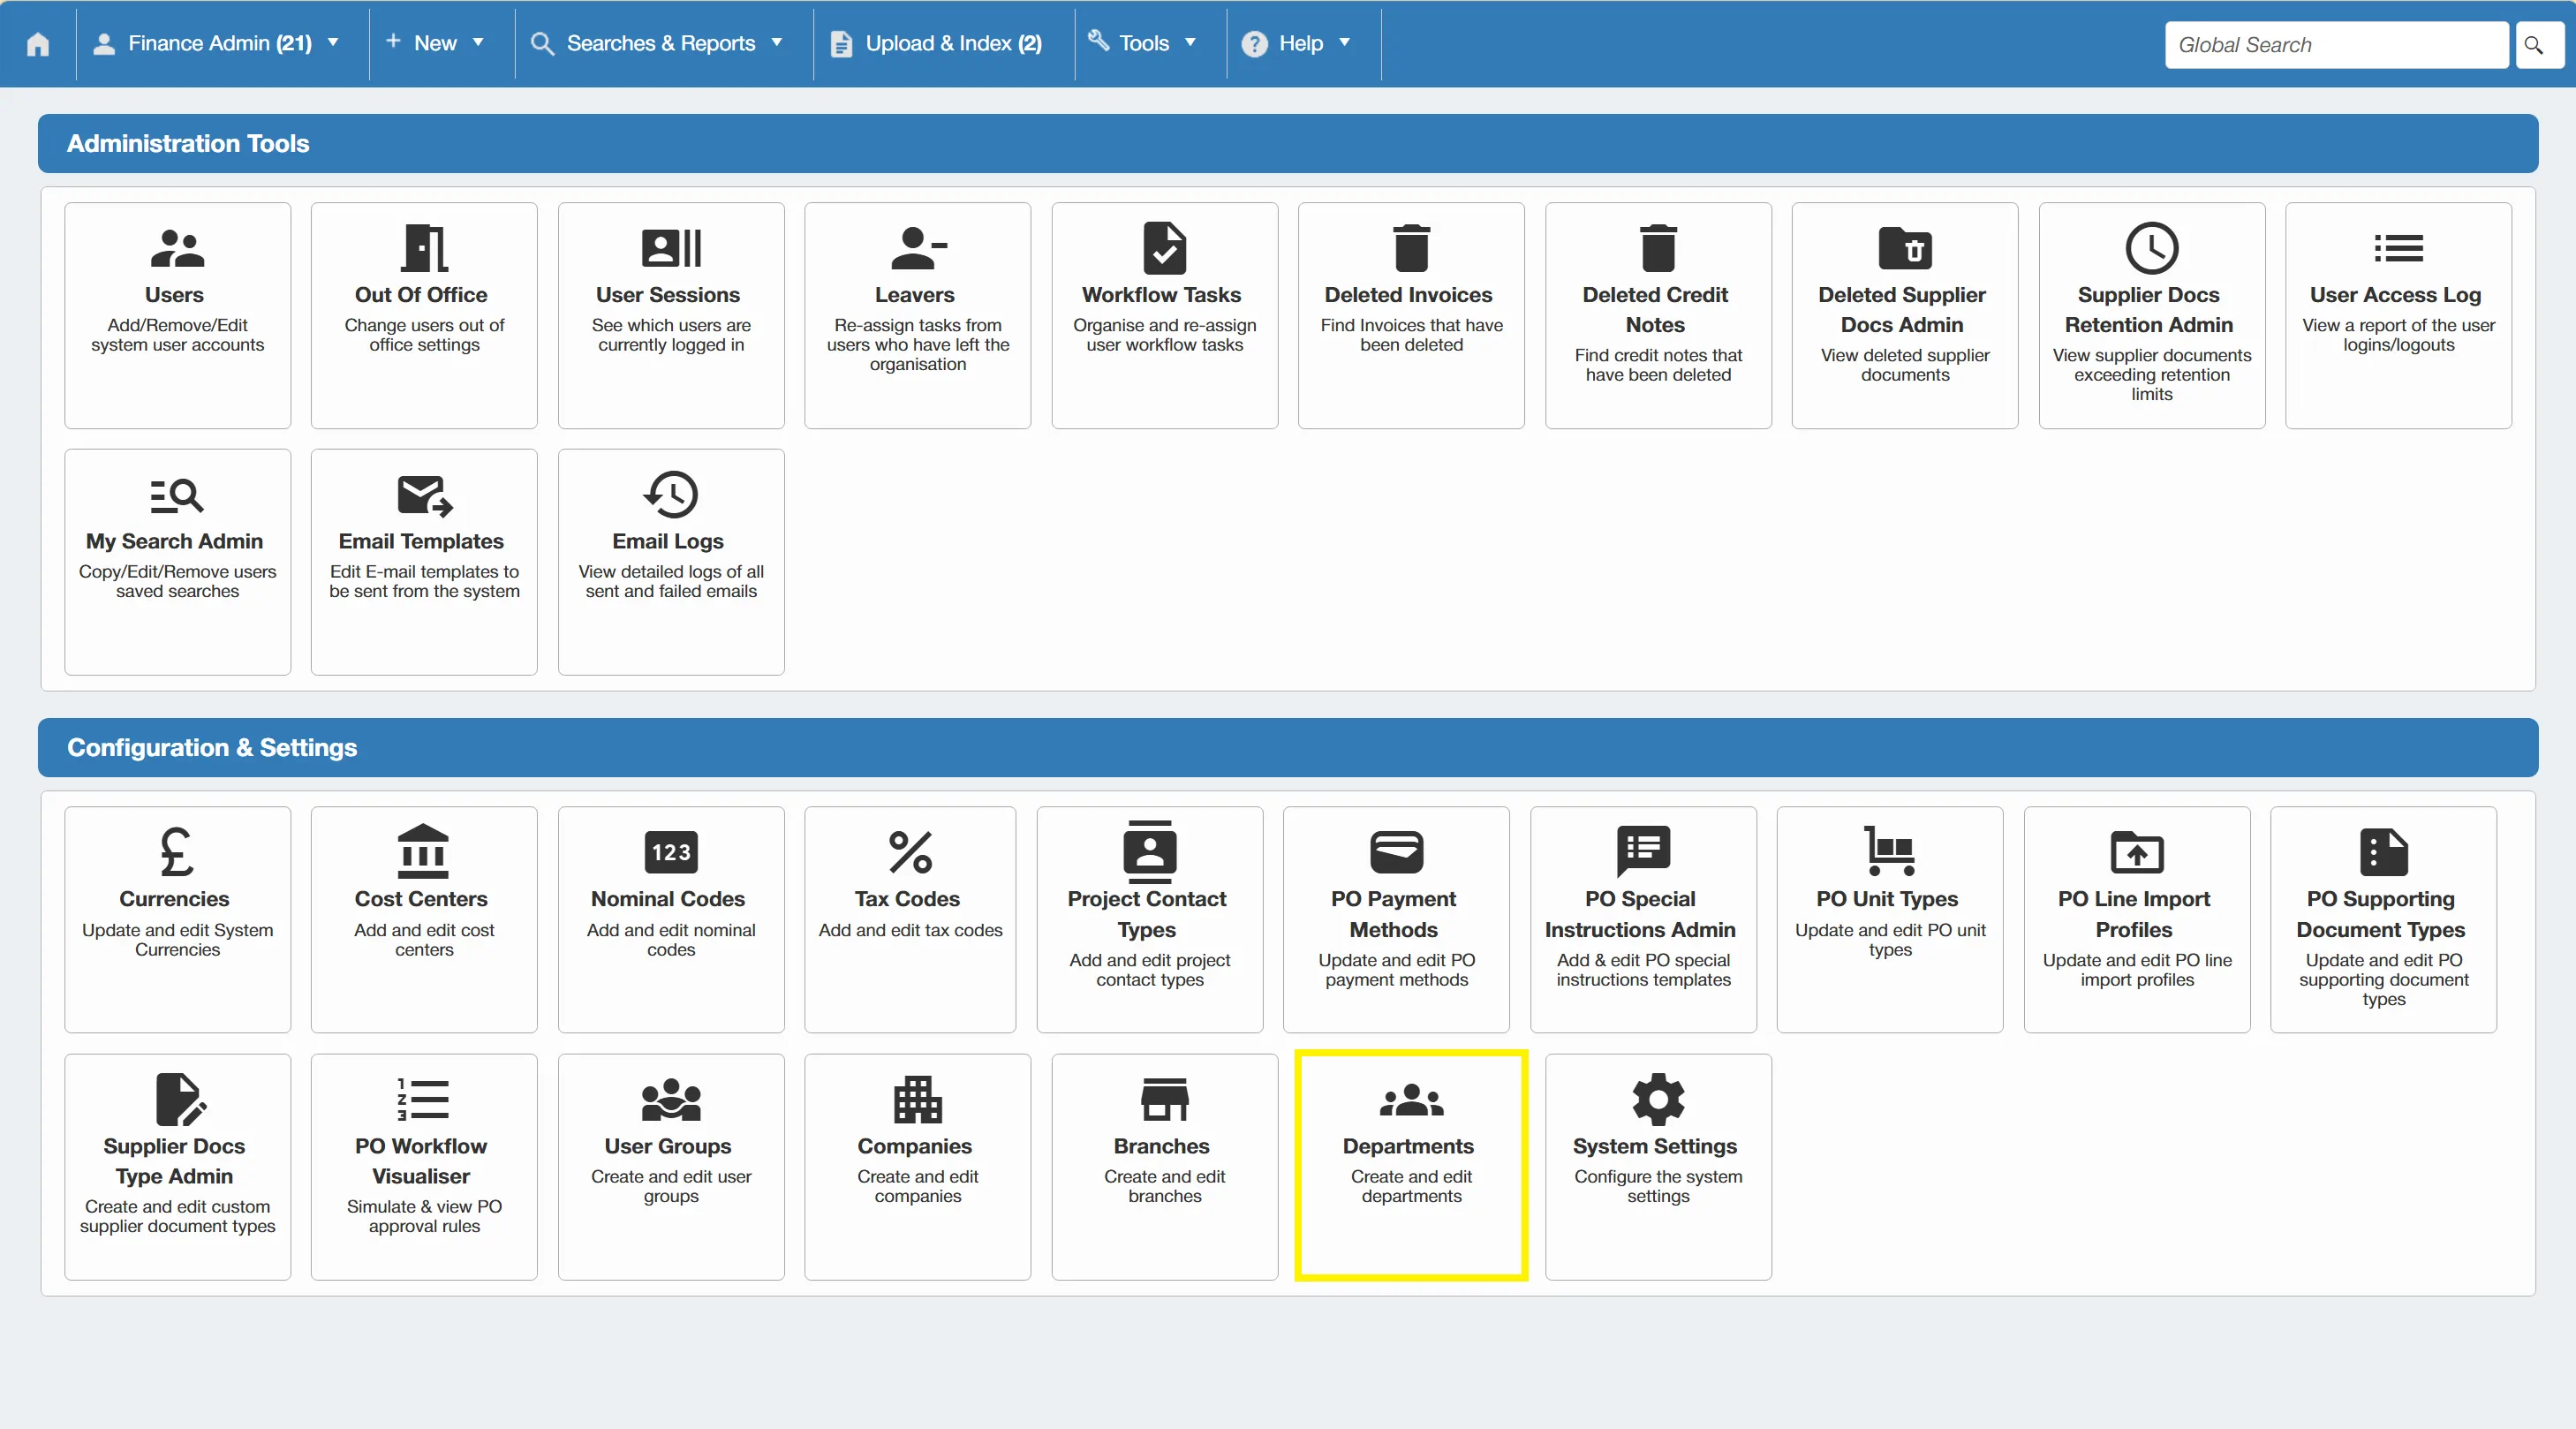
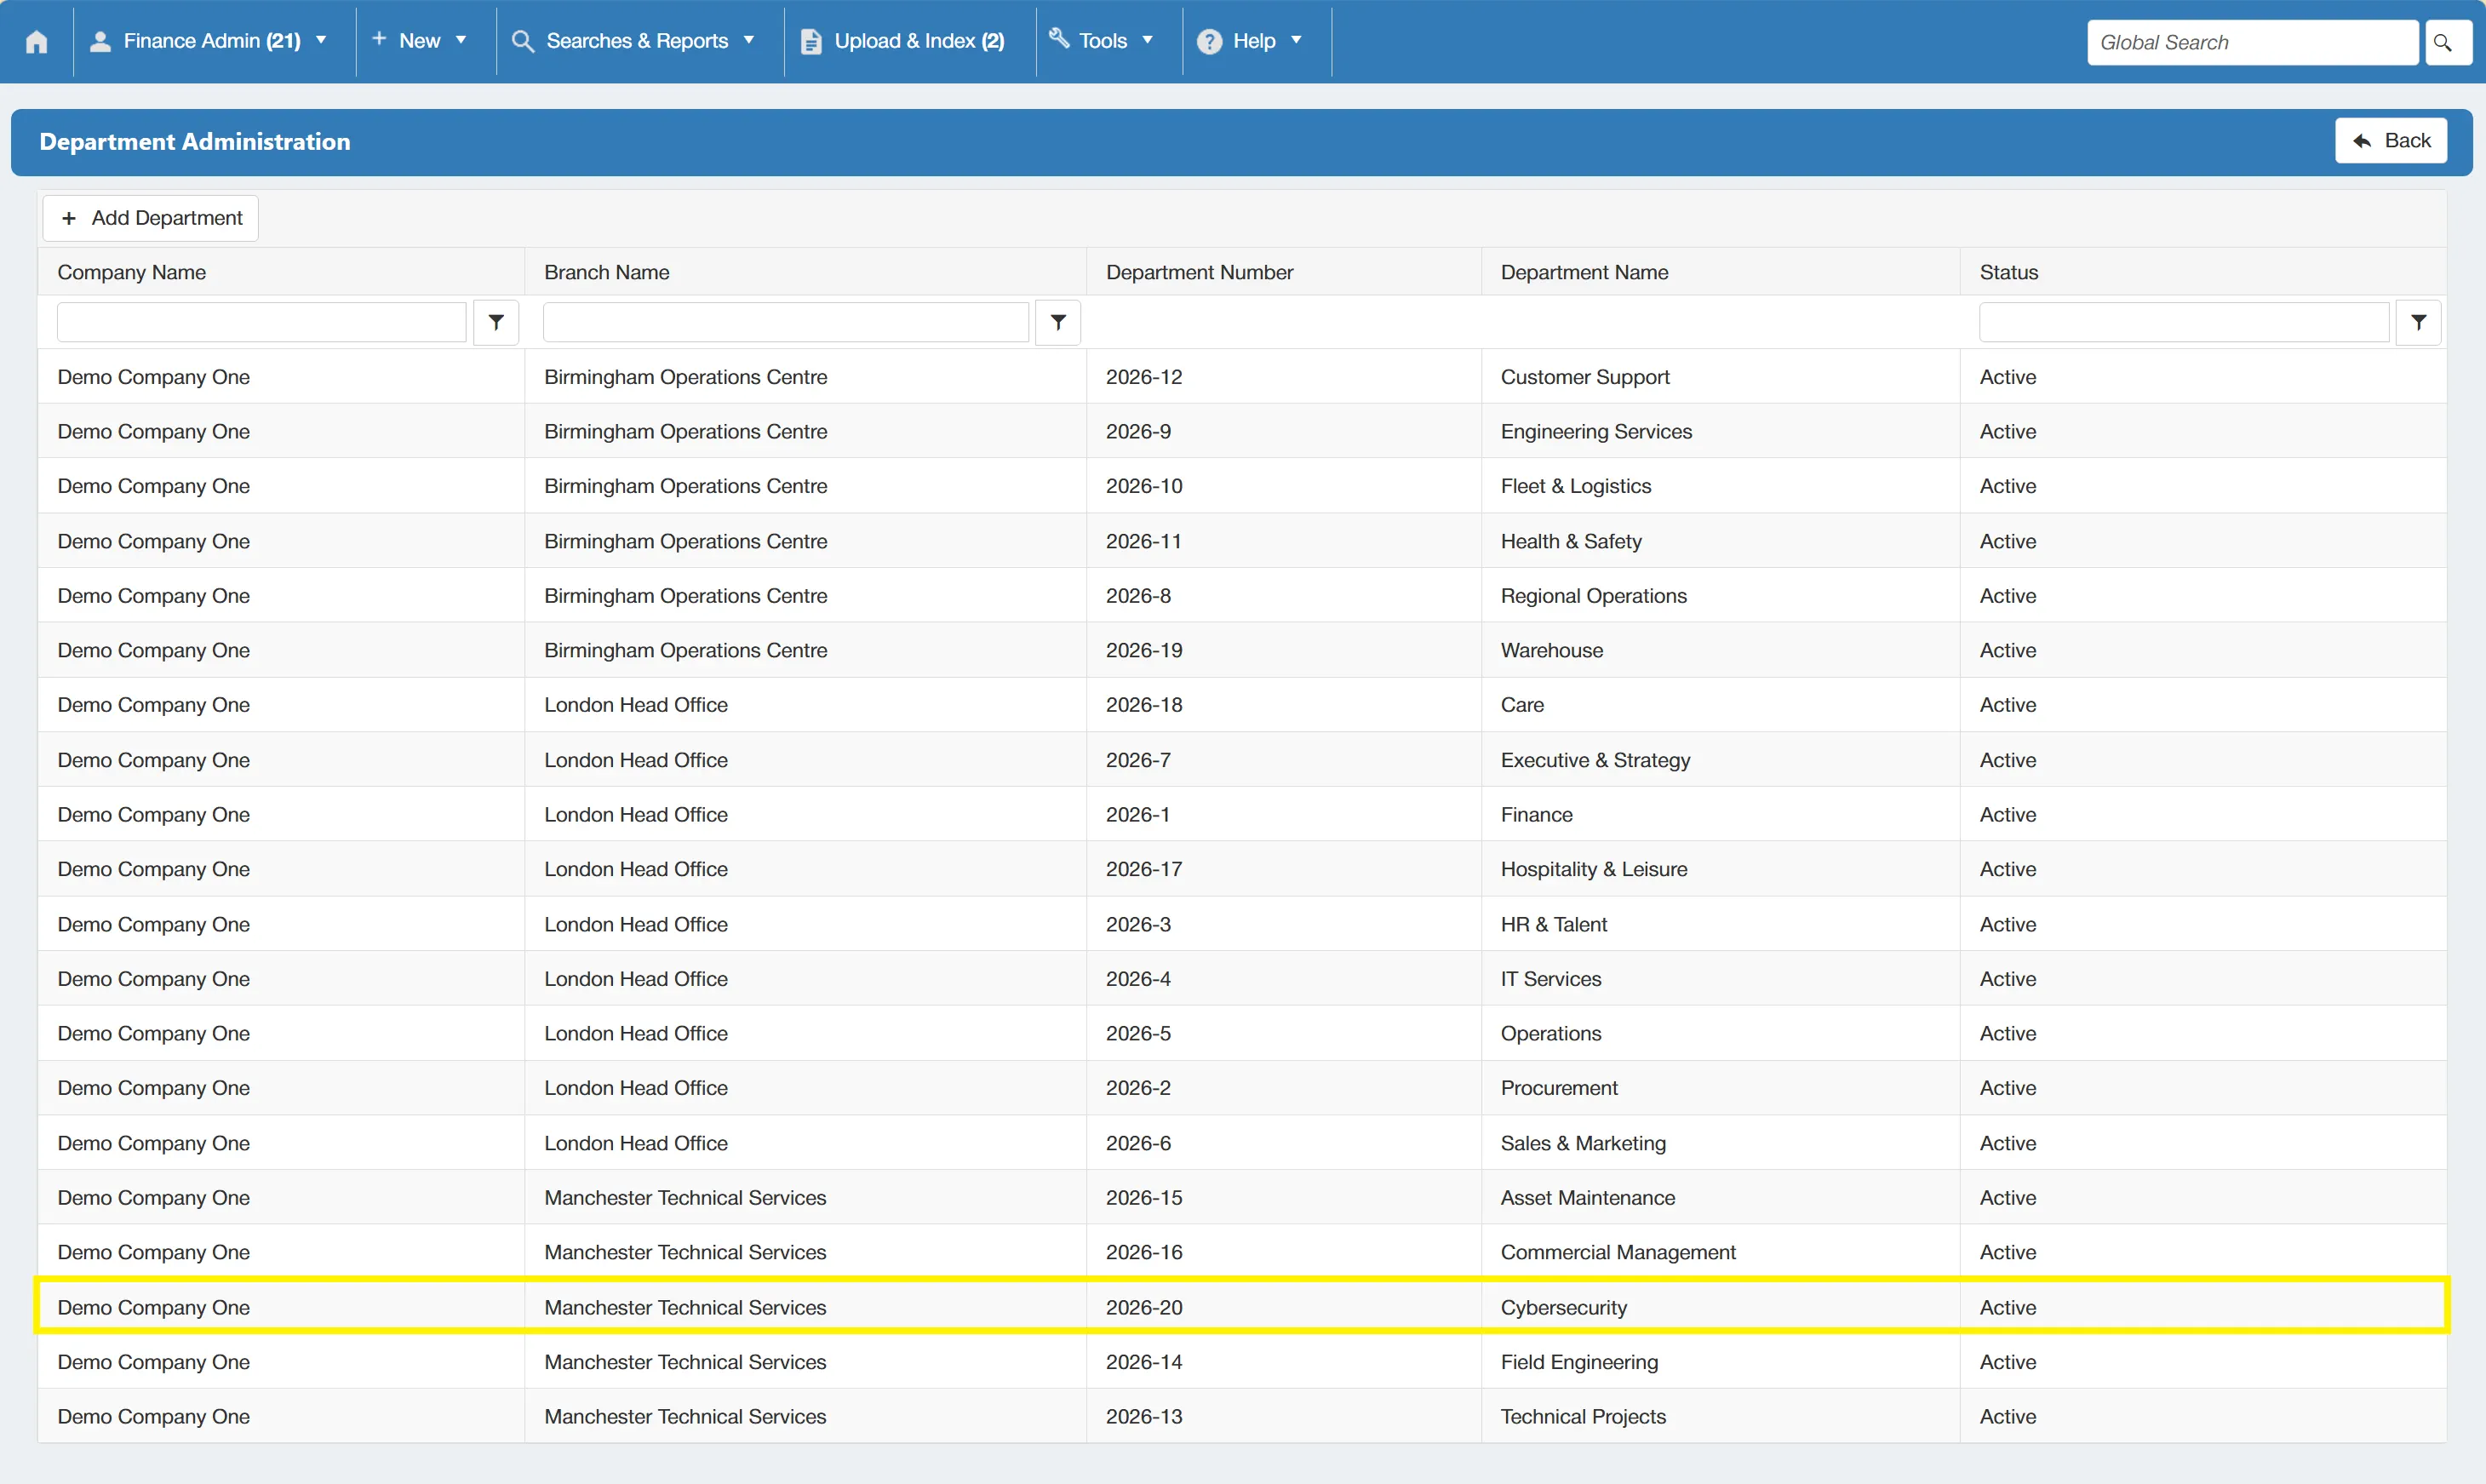
This takes you to the Departments Administration grid. From here, you can add new departments and administer existing ones.
Creating a New Department
To add a new department to the system, click on the button.
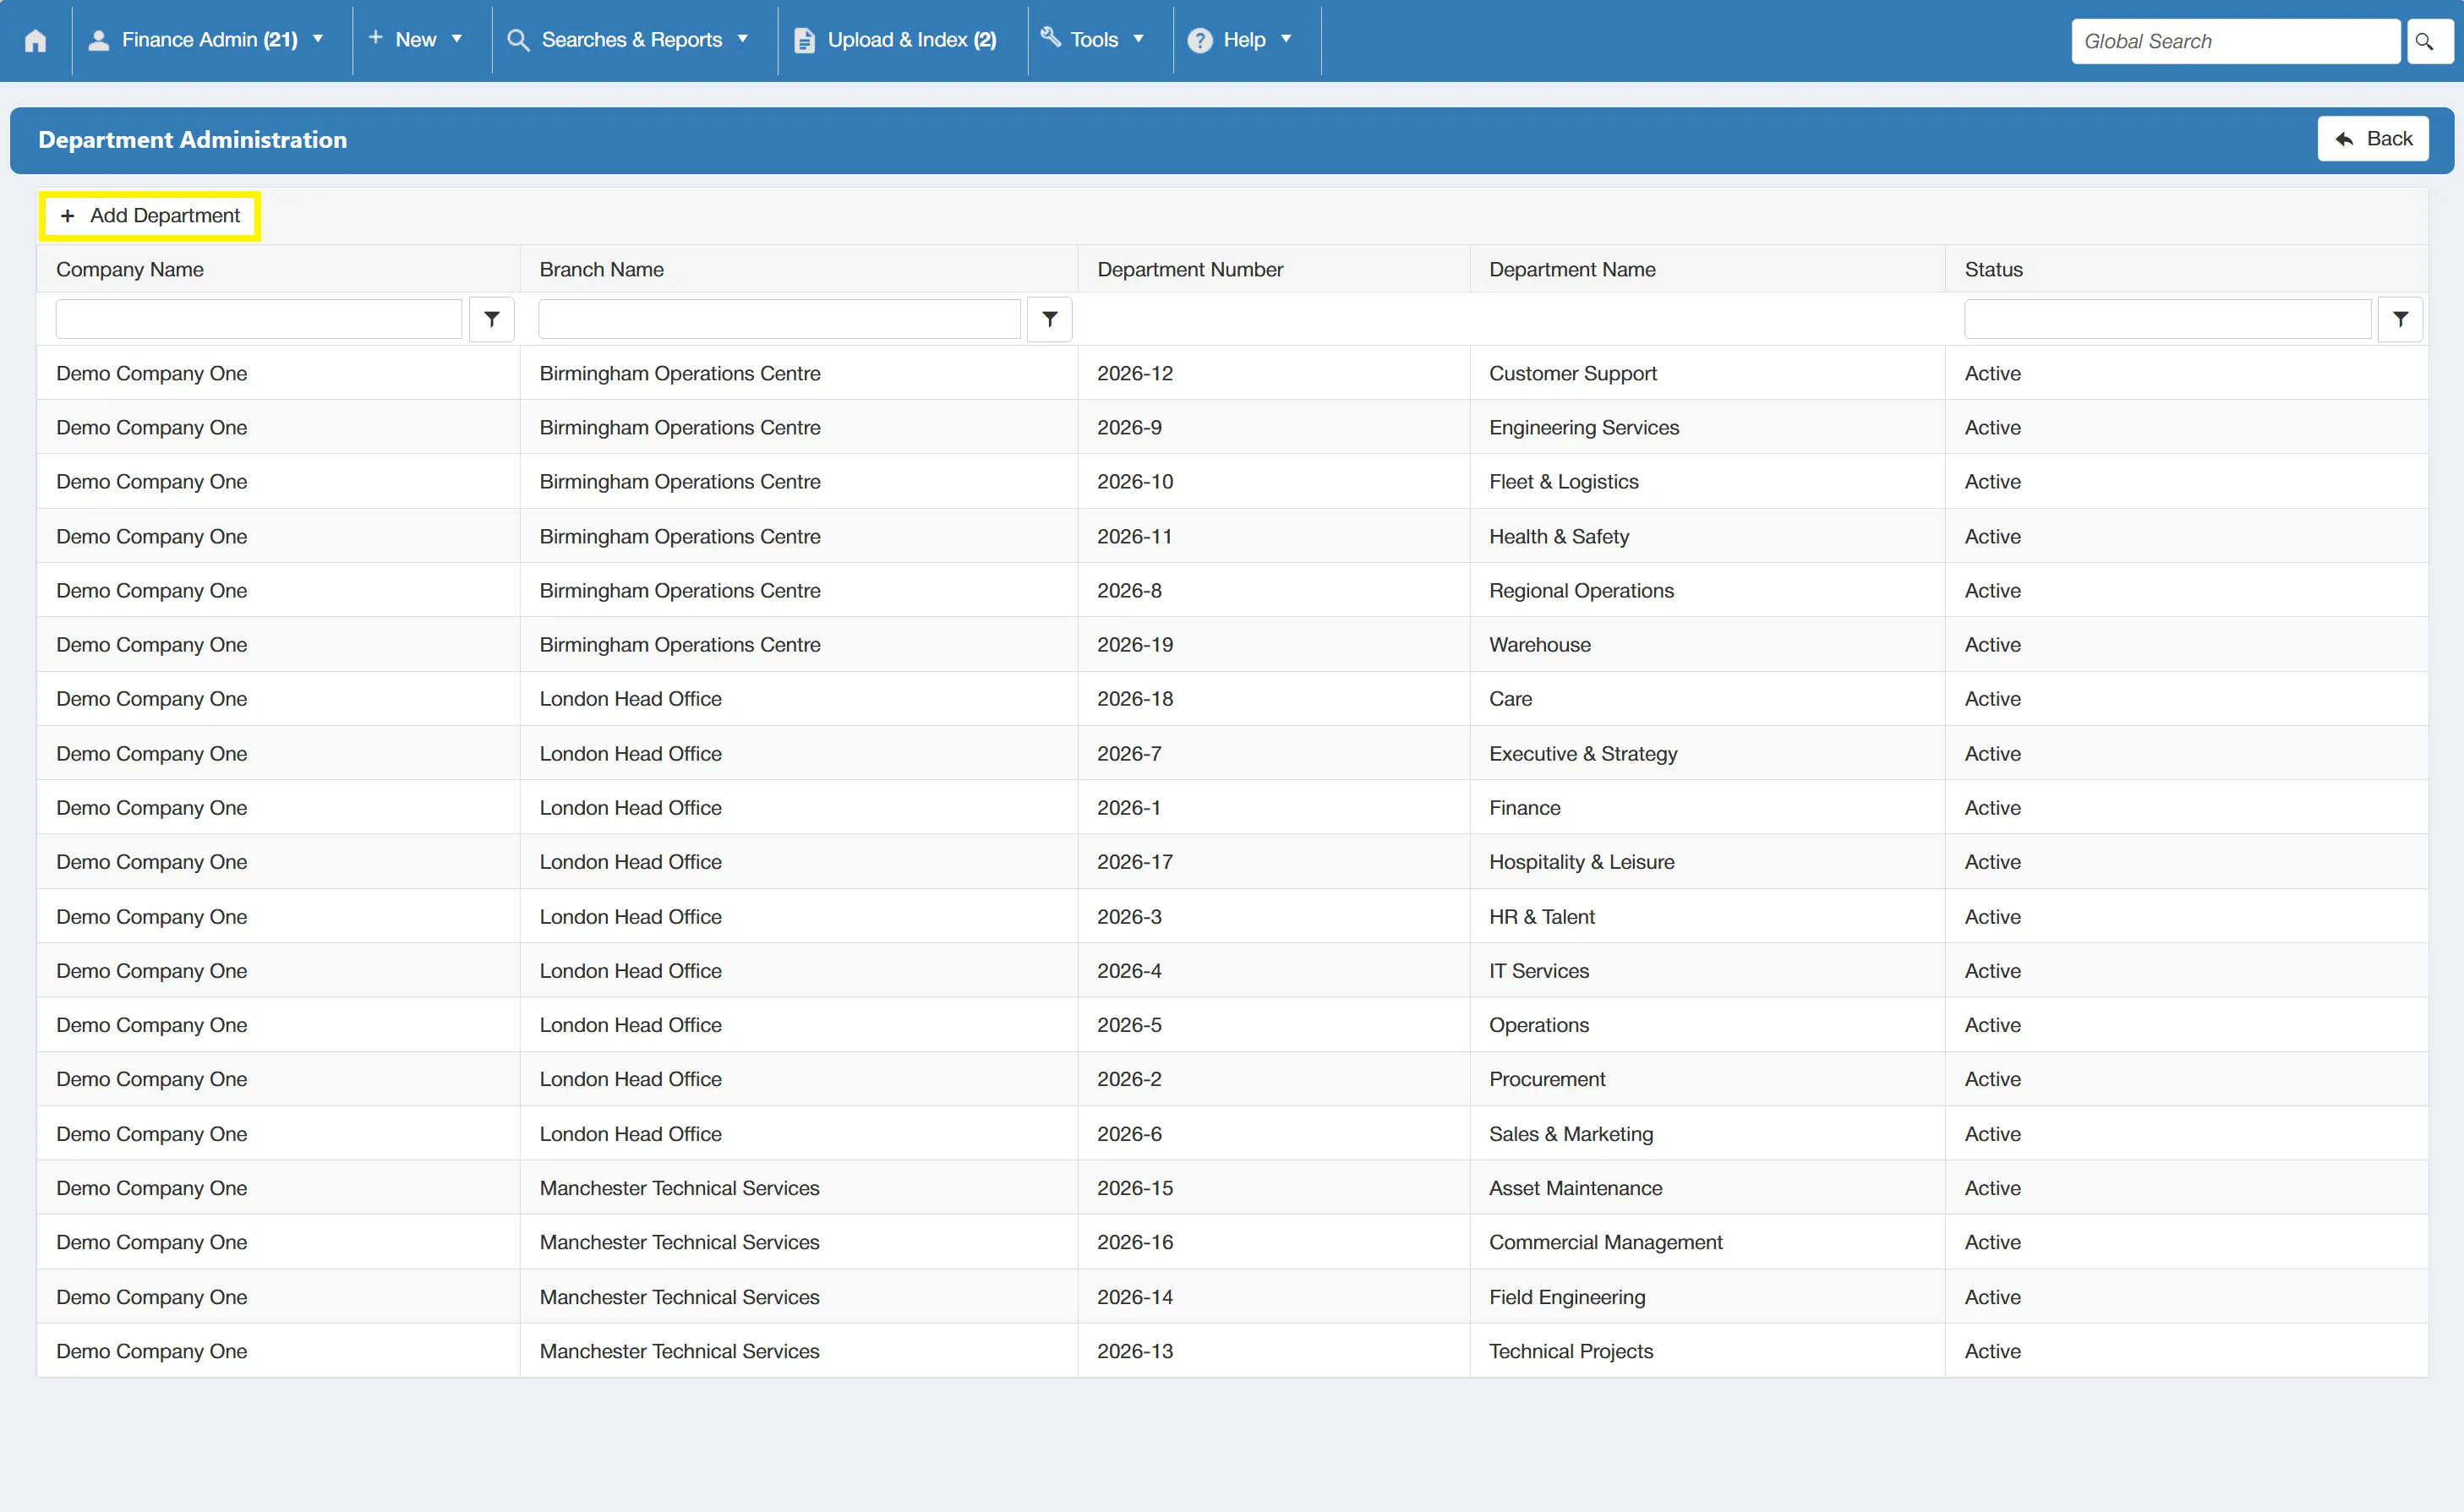
This brings you to a new window where you can add the new department name, specify the branch that it sits within and dictate whether it is active or inactive.
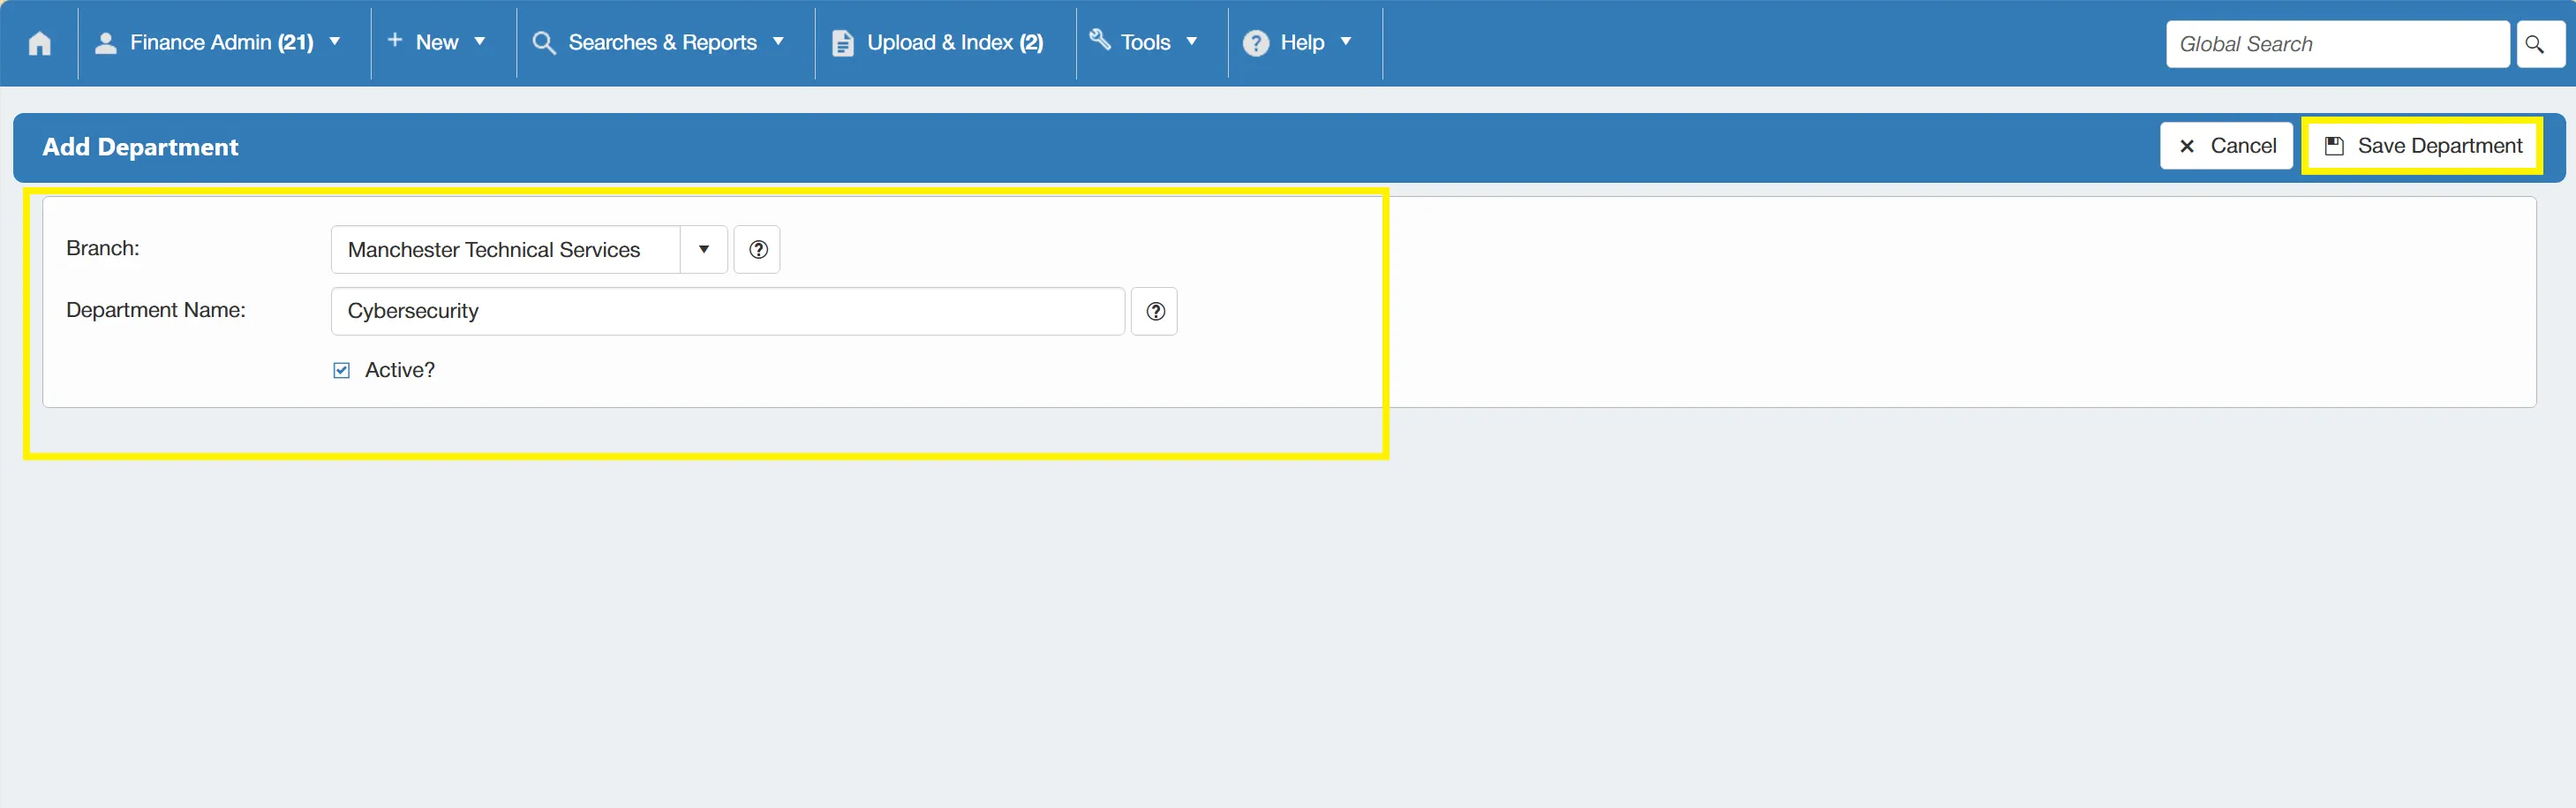
Once the details are completed, simply click on the button to commit this to the system.
You can now begin adding users and setting approval rules for your new department. For more information on adding new users click here and for more information on adding approval rules click here.
If you now go back to the Department Administration Grid, you will see the new department.
Adding Users to a Department
To add users to a department, first select the relevant department from the Department Administration Grid.
Once you have selected the desired department, you will be taken to the Edit Department window.
To add a user to this department, select from the drop down menu.
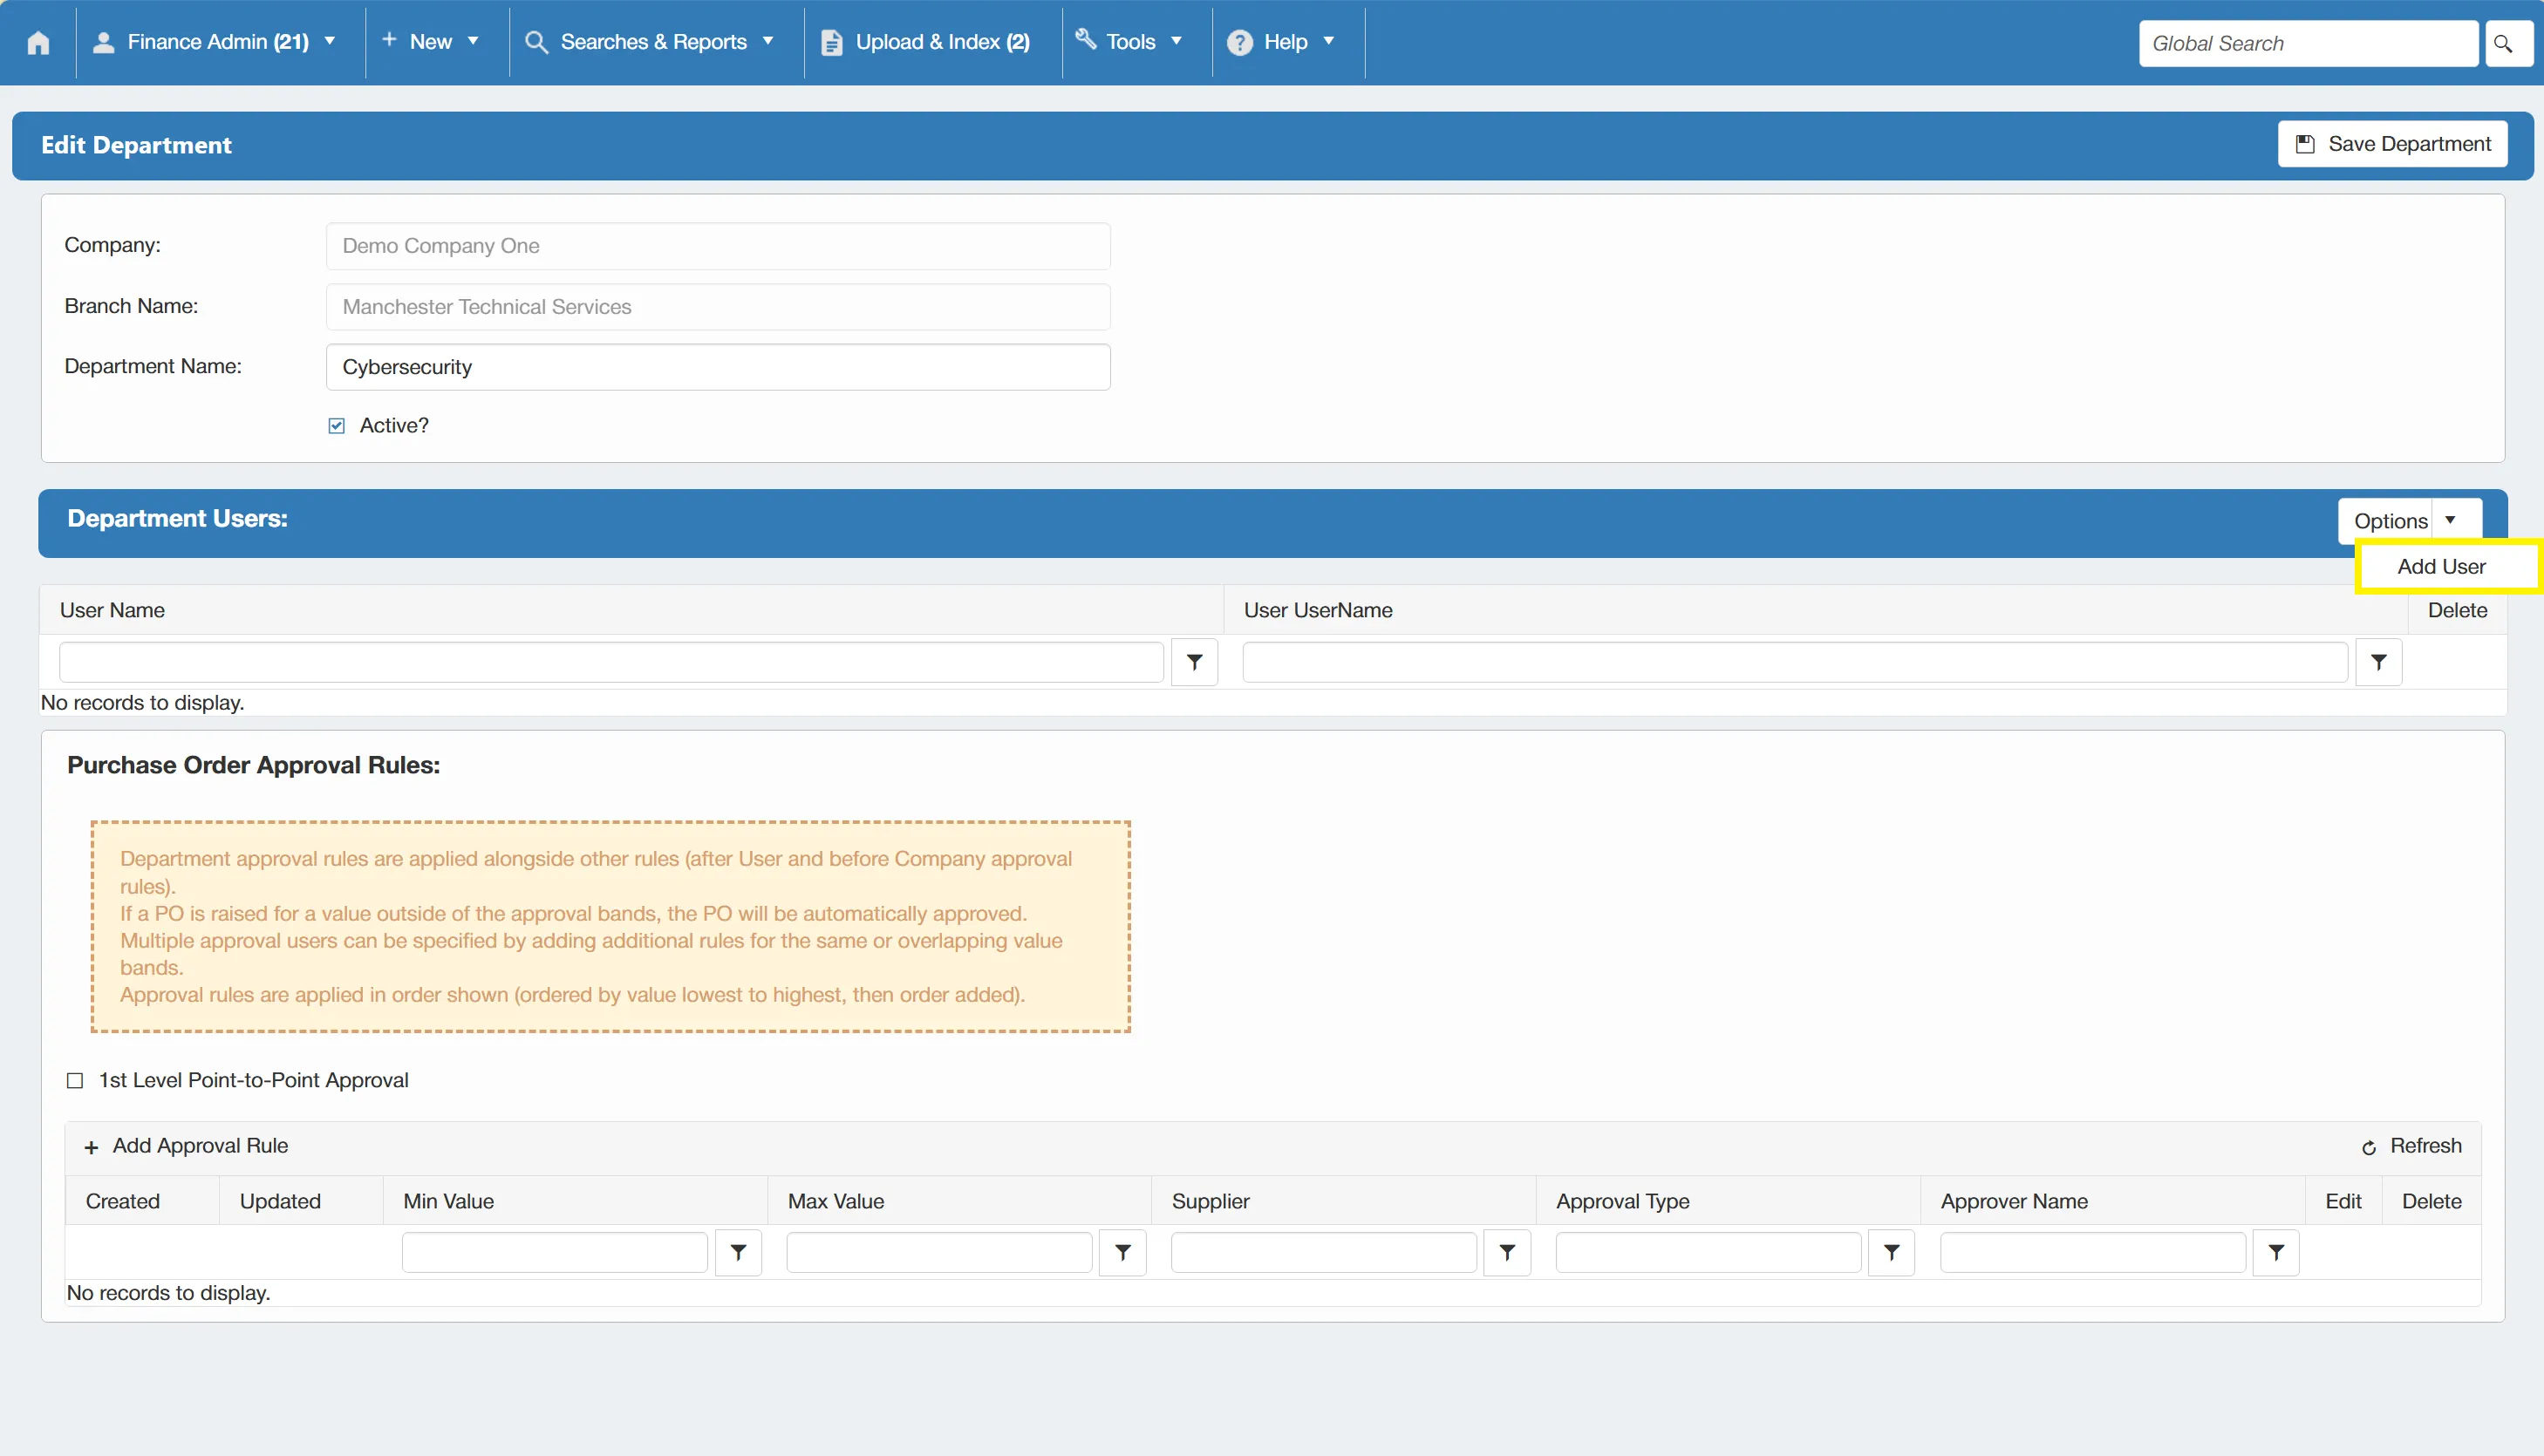
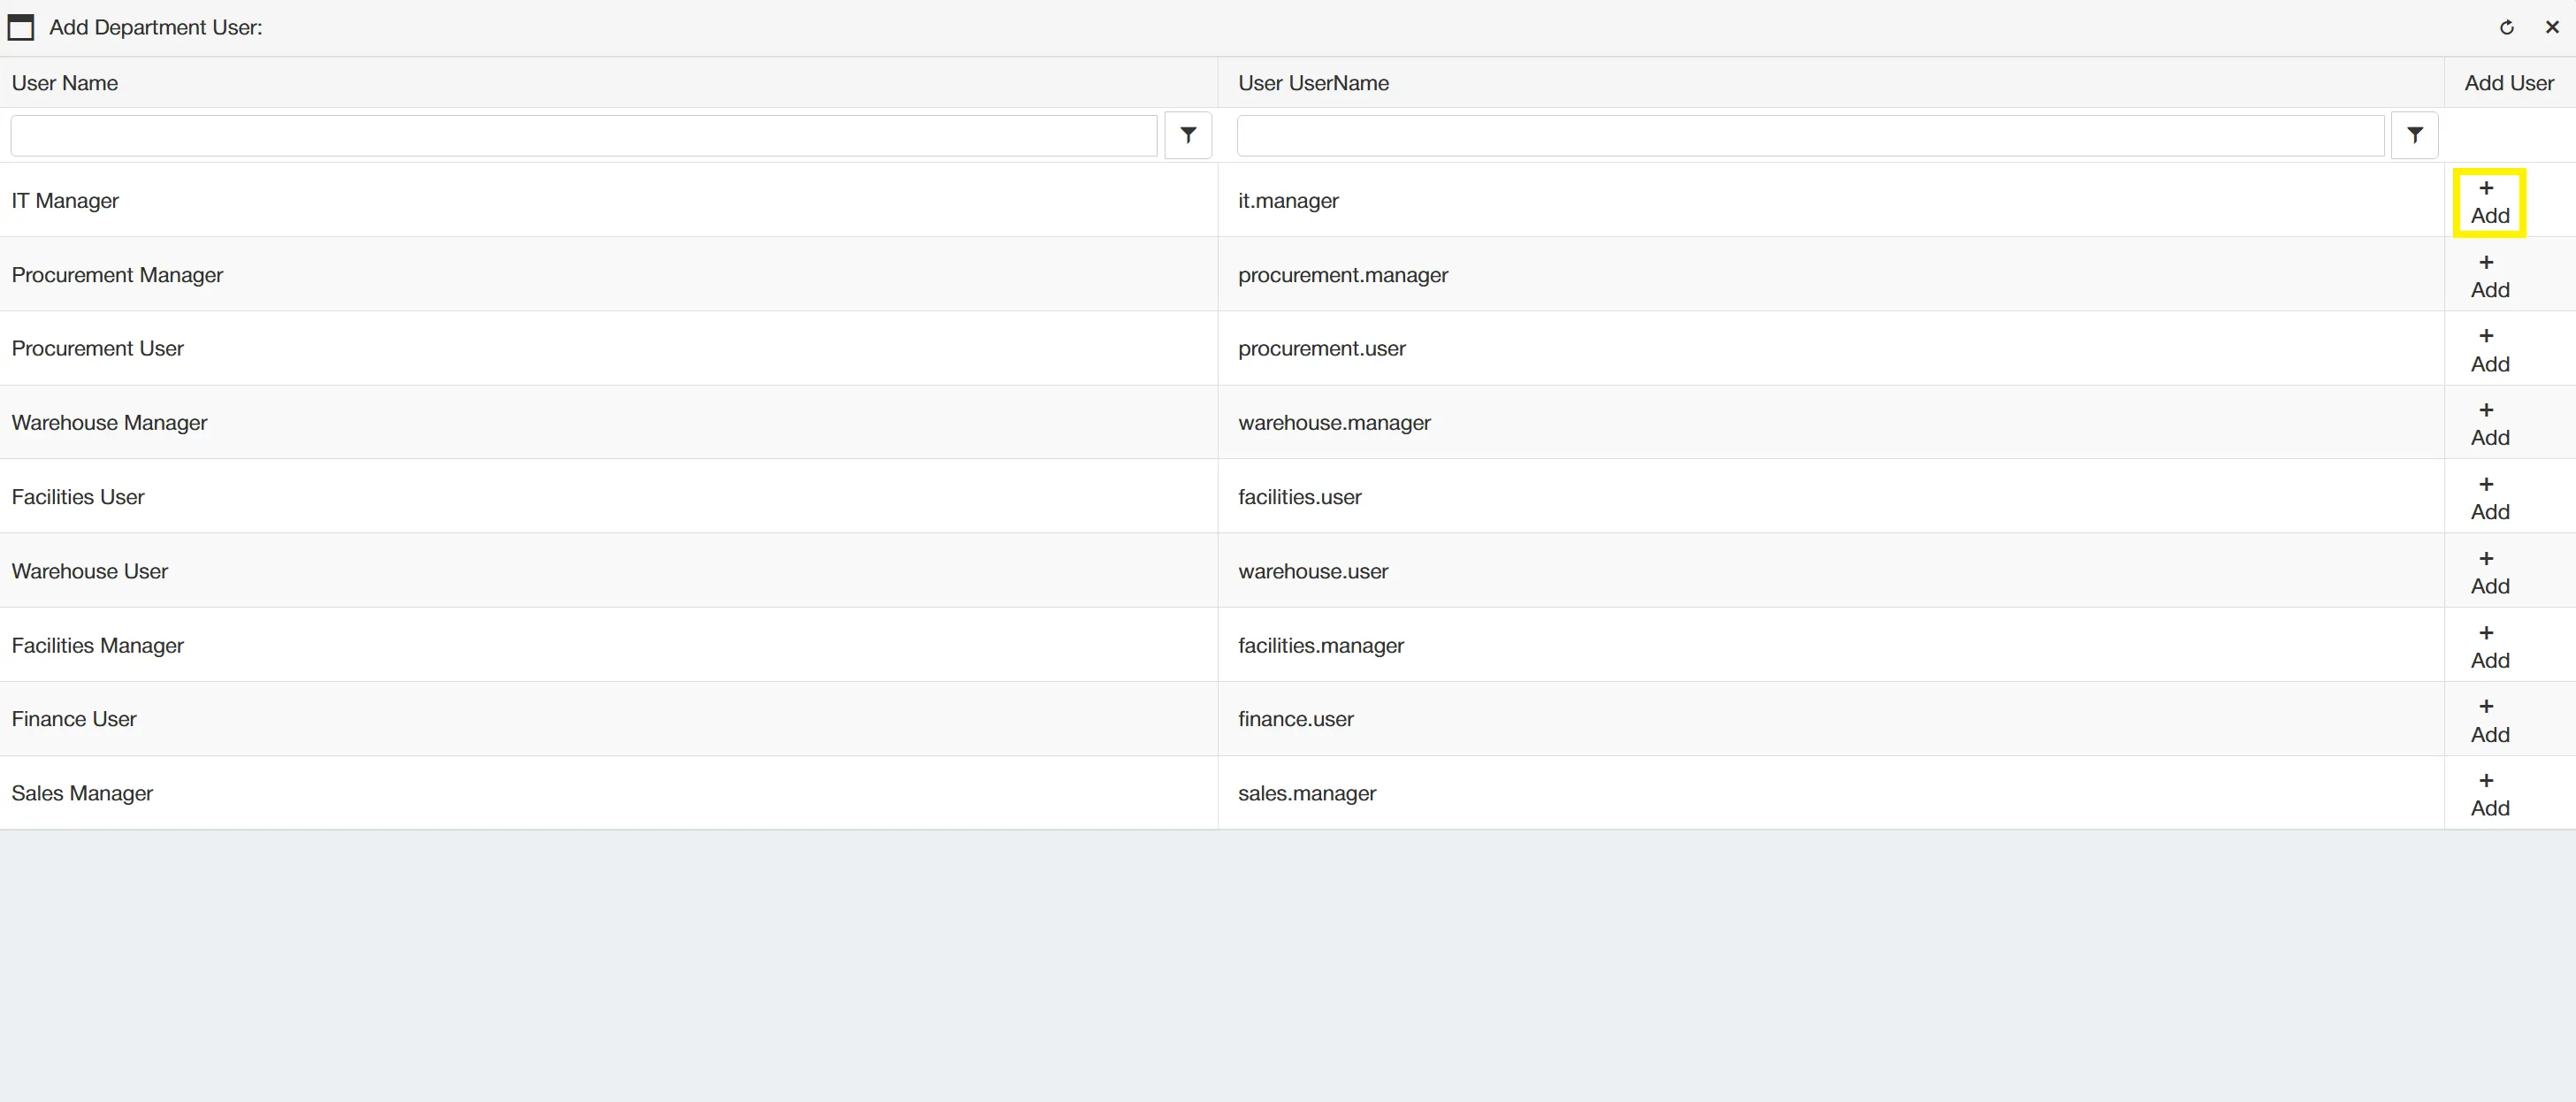
This opens another window with a list of users available to be added to your new department.
To add a user, simply click on the icon.
When you are done adding users, click on the small x to the close the window. You will now see that the Department Users grid has been updated to include the new user(s).
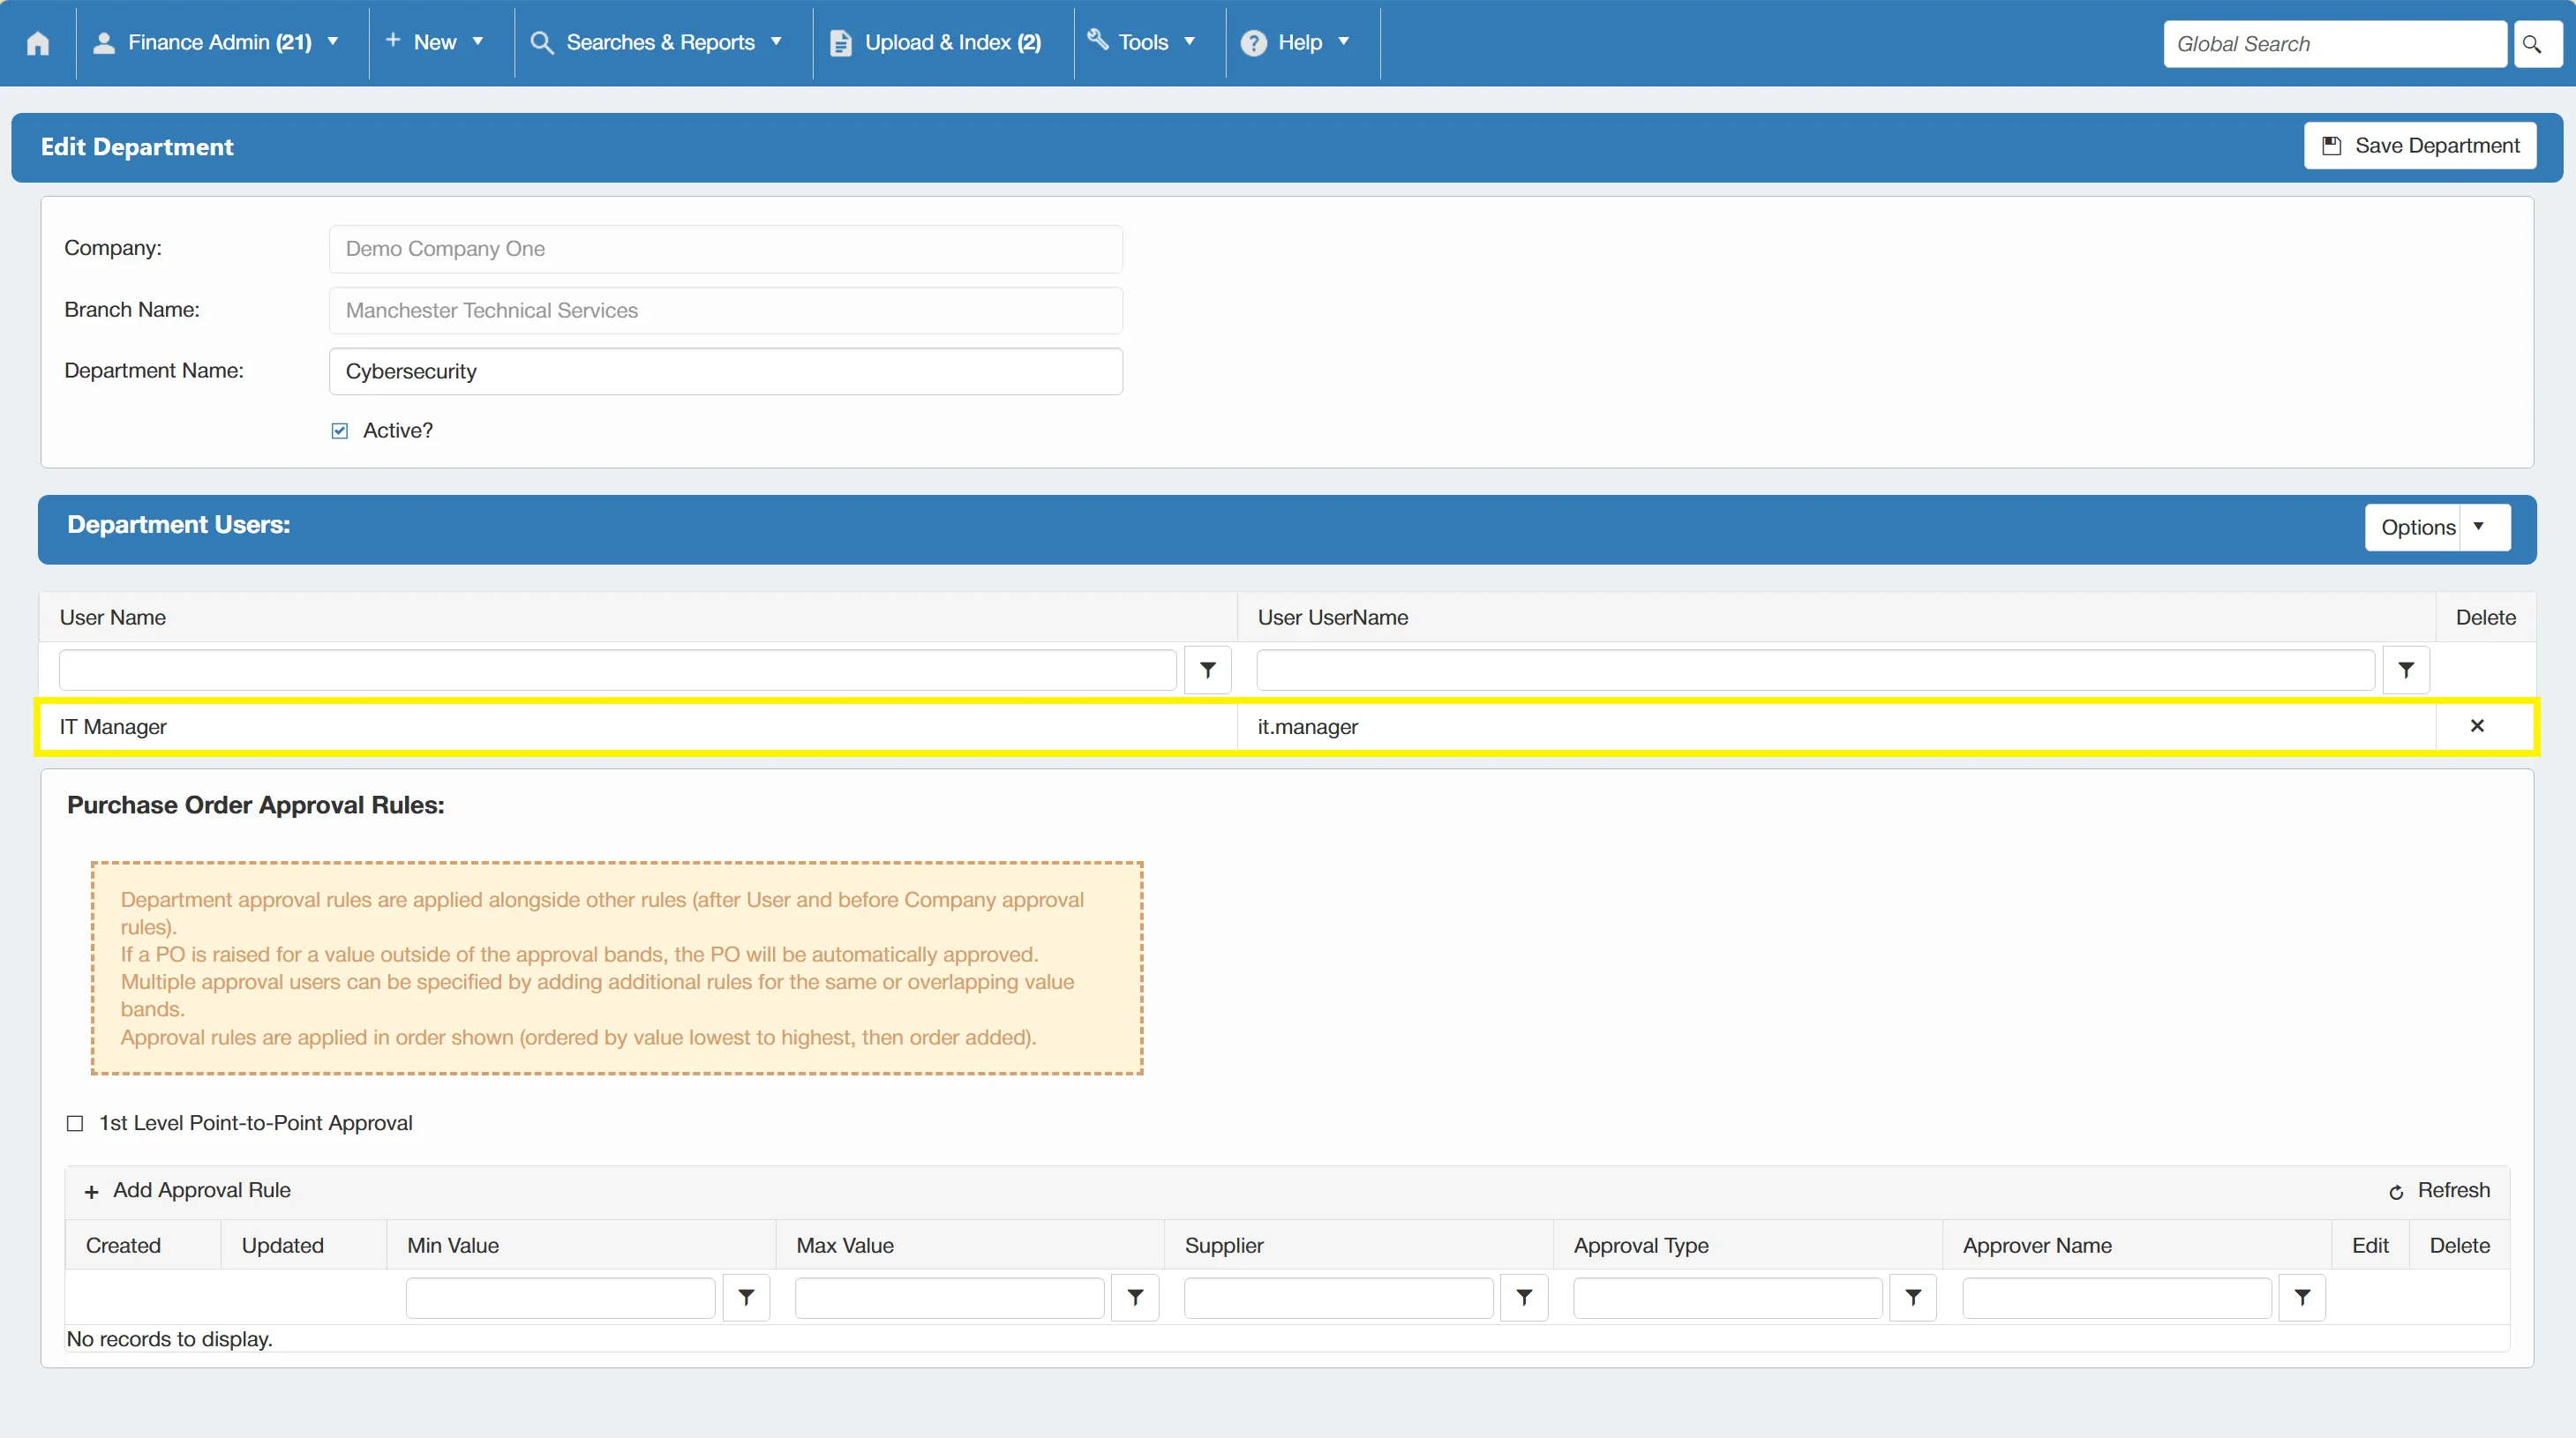
If you need to remove a user, simply click on the icon on the end of the user's line.
When you are done adding users, click .
All users need to be associated with a department in order for them to use the system. (Unless your system is configured to work without departments).
Setting Up PO Approval Rules for a Department
To set up purchase order approval rules for your department select your desired department from the Department Administration Grid.
Once you have selected the desired department, you will be taken to the Edit Department window.
From here, you can create an approval rule by clicking the button. This will bring up a new set of fields which can be populated to set your new approval rule.
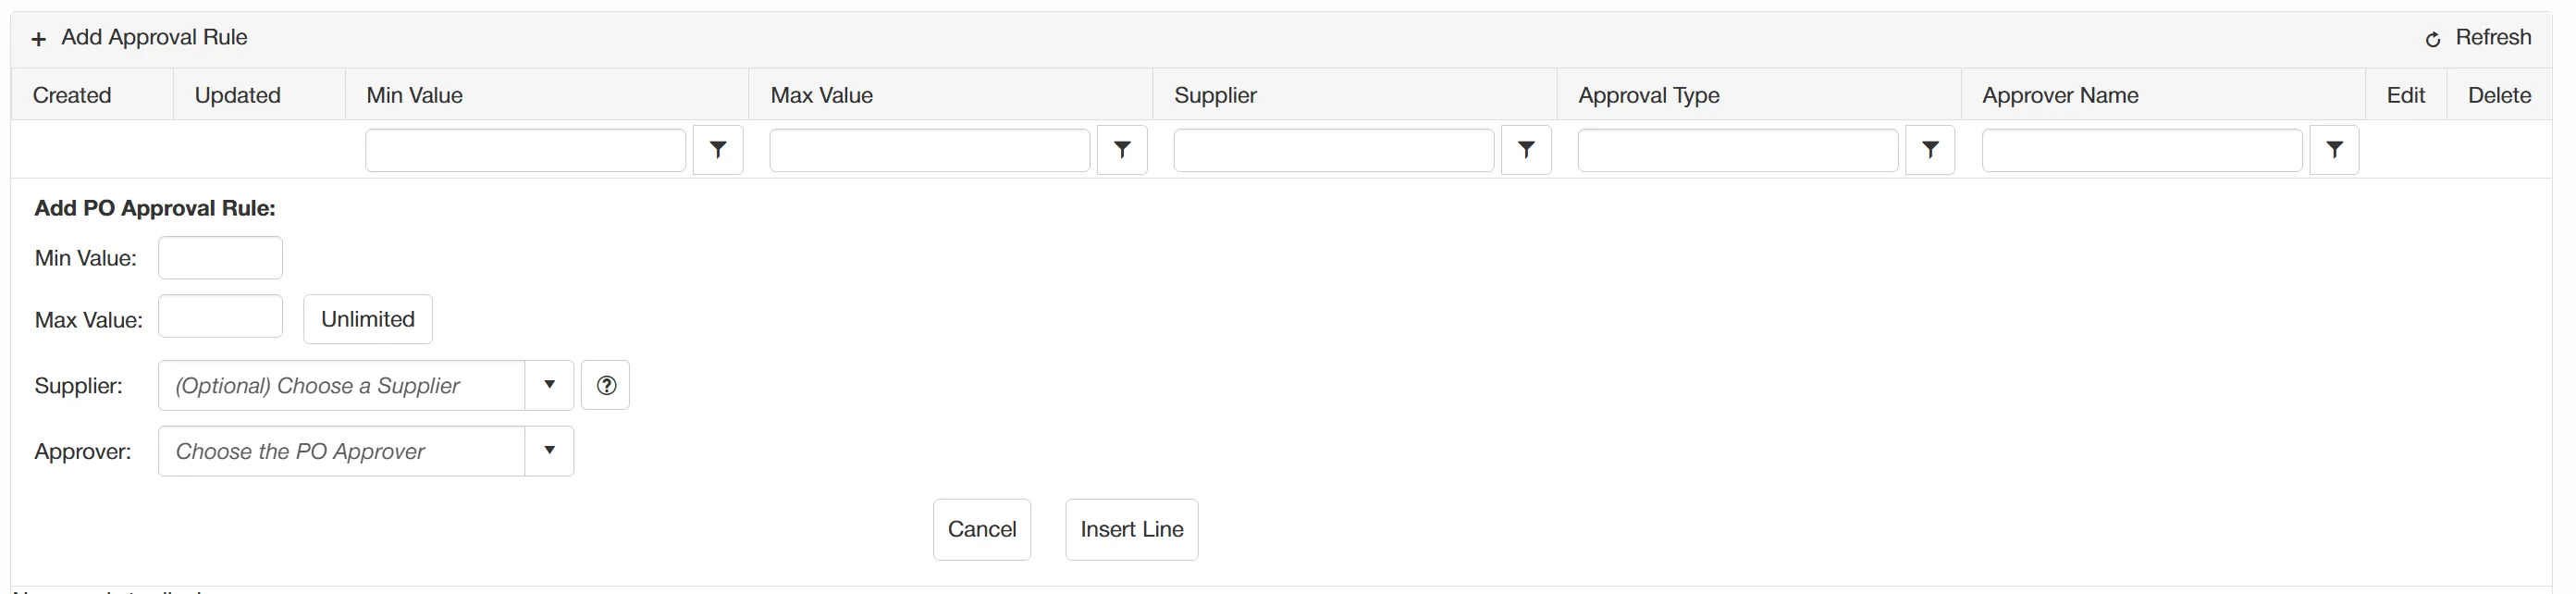
You now need to set the parameters for your approval rule. First, set your minimum and maximum values. Any purchase orders that fall within the two values will be subject to the rule.
Next, you have the option to select a Supplier to which this rule will apply. This is an optional field and is useful for creating an approval rule that is to apply to a specific supplier only. If you leave this field blank, the rule will apply to all suppliers.
Finally, select the approver for this rule. This user or group of users will receive any purchase order approval tasks that have been sent as a result of this rule.
The approver drop down contains not only individual users, but also any approval groups that have been set up. For more information on creating approval groups click here
Once you are happy with the parameters, click to finalise.
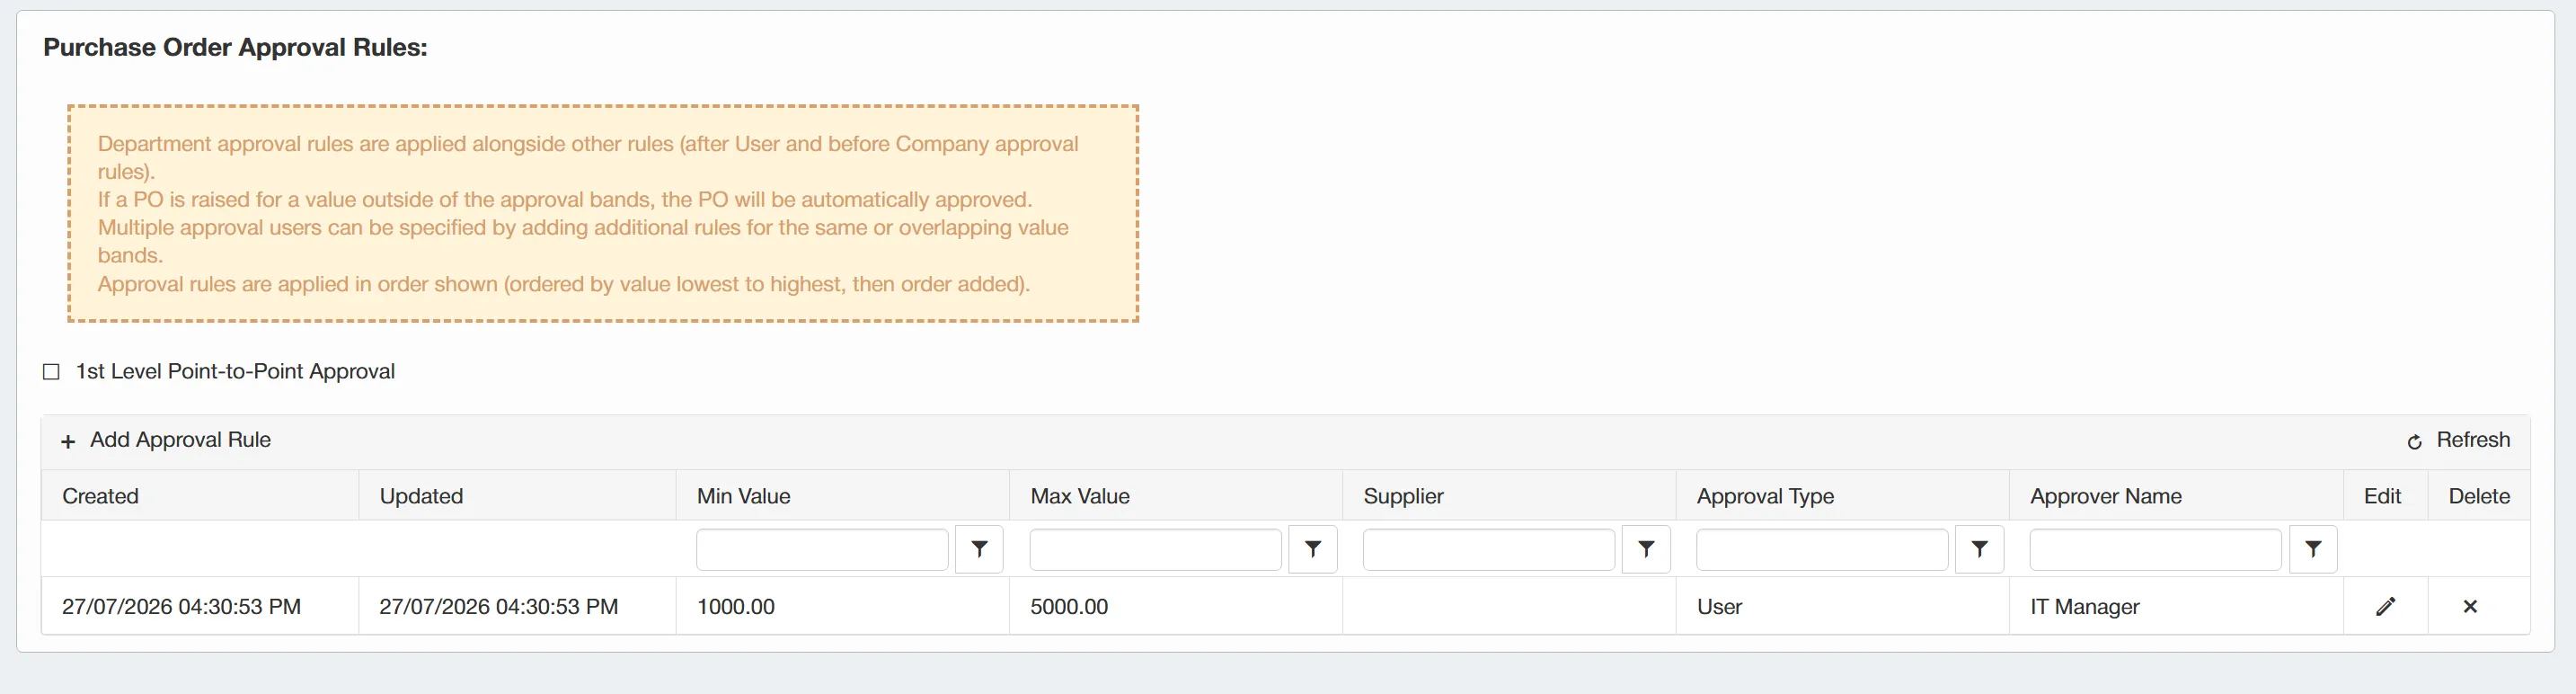
As you can see, the new approval rule has now been added to the grid.
Approval rules in the grid are applied in the order shown, (ordered by value lowest to highest, then order added).
You can go back and edit any of the approval rules by simply clicking on the pencil within the corresponding row. You can also delete the approval rule by clicking on the .
Only users with the Entity Admin permission enabled can create and edit approval rules.
There is also the option to enable 1st Level Point-to-Point Approval.
To do this, simply tick the ☐ 1st Level Point-to-Point Approval box. With this enabled, users will be required to select a 1st level approver when creating purchase orders.
The 1st Level Approver will need to approve the purchase order before it moves onto the next applicable level of approval in line with the approval rules.
Once you are happy with all changes, click to finalise all changes.
System Settings
You can change general system settings from the System Settings section.
Users must have the System Admin permission enabled to access this feauture. For information on user permissions, click here.
To configure system settings, click on the System Settings icon within the Configuration & Settings section.
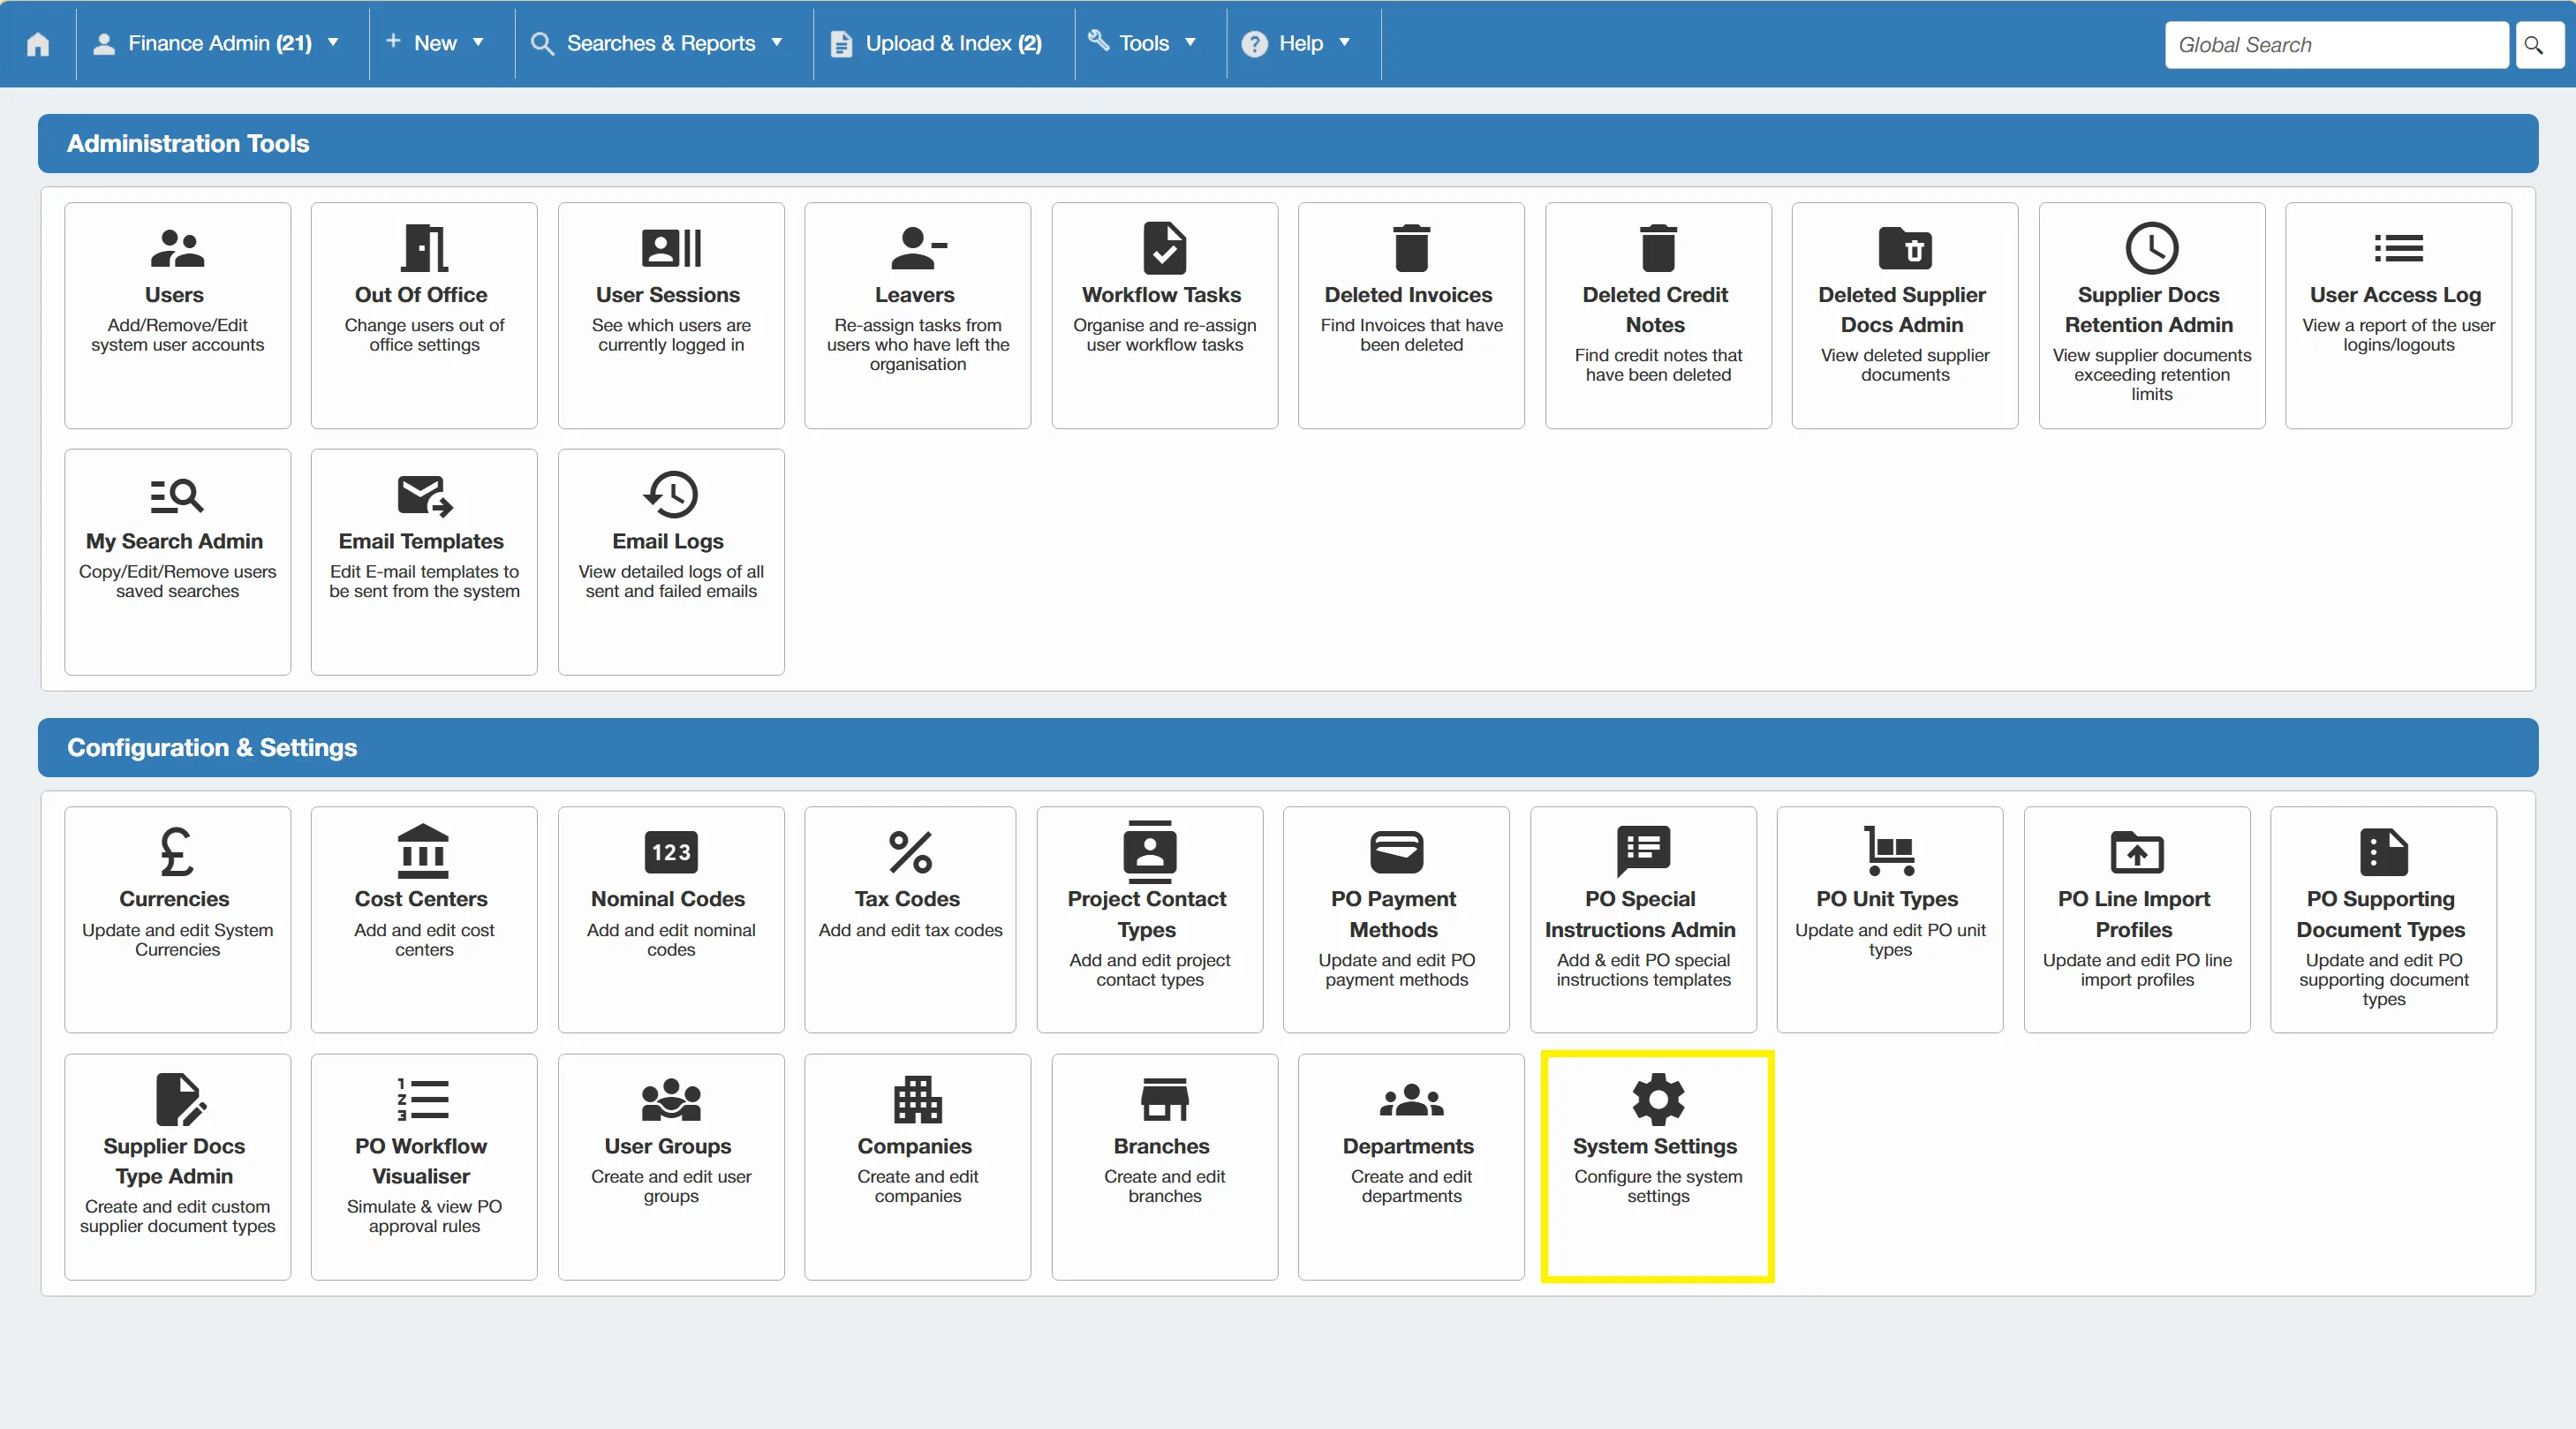
This opens a new window in which you can configure the security and supplier settings.
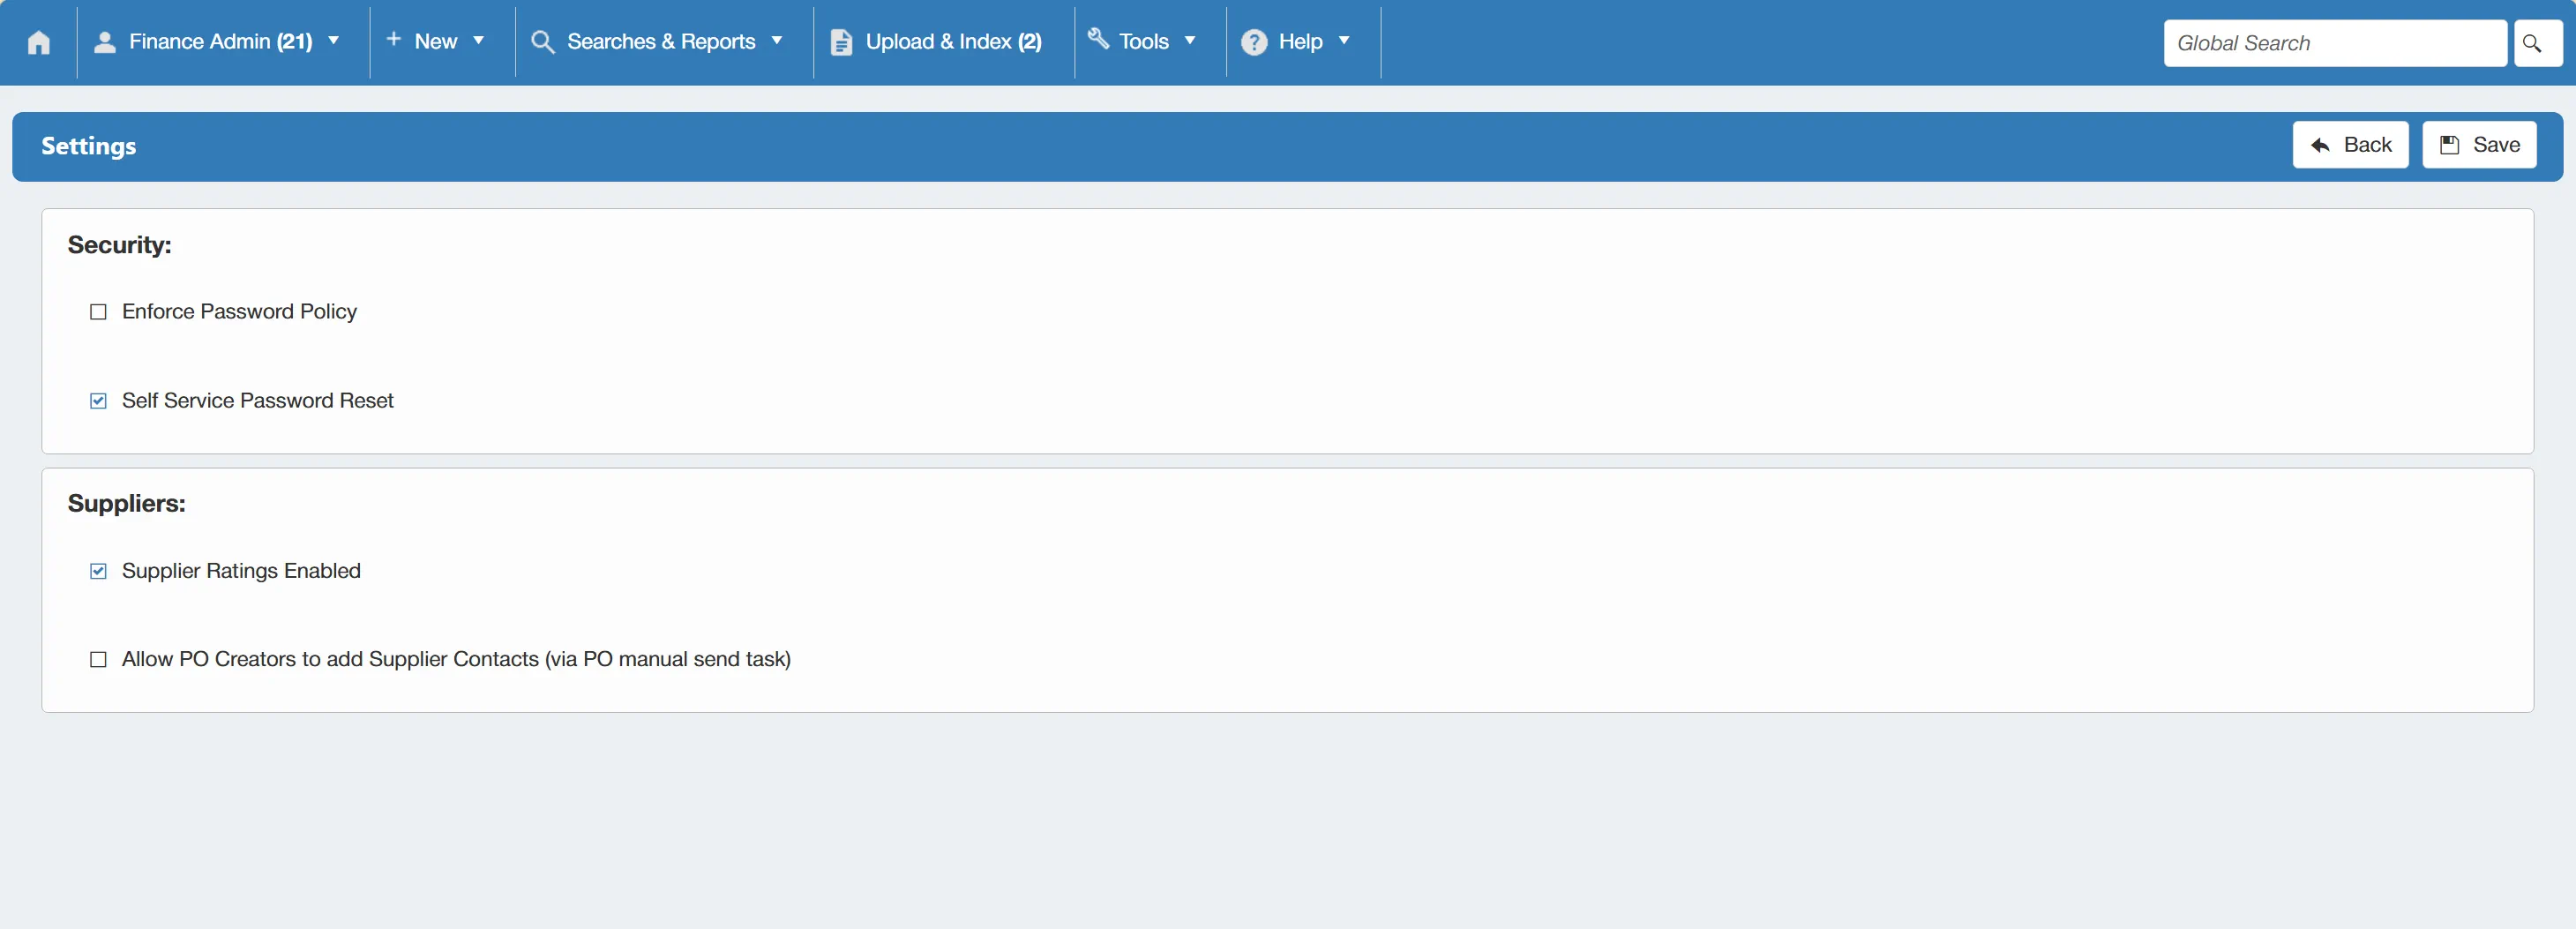
Enforce Password Policy
Under the System Settings window, you can enforce the password policy.
To do this, simply tick the ☐ Enforce Password Policy box.
Enable Self Service Password Reset
Under the System Settings window, you can enable self service password reset. This feature allows users to reset their own passwords.
To do this, simply tick the ☐ Self Service Password Reset box.
Enable Supplier Ratings
Under the System Settings window, you can enable supplier ratings. With this feature enabled, users will be prompted to rate a the supplier after each invoice approval. The ratings will then be displayed on a grid on the dashboard.
To do this, simply tick the ☐ Supplier Ratings Enabled box.
Allow PO Creators to Add Supplier Contacts
Under the System Settings window, you can allow PO creators to add supplier contacts (via a PO manual send task). This feature allows PO creators to add supplier contacts to a PO via the PO manual send task.
To do this, simply tick the ☐ Allow PO Creators to add Supplier Contacts (via PO manual send task) box.