Goods Receipting | Purchase Order System
PO Systems with the Goods Receipting (GR) module enabled have the ability to receipt goods against purchase orders. This allows for tracking of incoming goods.
Click below to watch a video guide on Goods Receipting within the purchase order system:
Receipting Purchase Order Items
On the Dashboard, there is a POs Awaiting Receipt grid:

This grid provides an overview of any purchase orders that have been issued but not yet receipted. It also has a status column to show you if the purchase order is part-receipted.
If a purchase order is part-receipted, it means that some of the items on the order have been received, but not all of them. This can be used as a prompt to follow up with the supplier on the rest of the items.
To receipt a purchase order, you can select Receipt PO on the desired purchase order within the dashboard grid.

Alternatively, you can navigate to on the Tools menu.
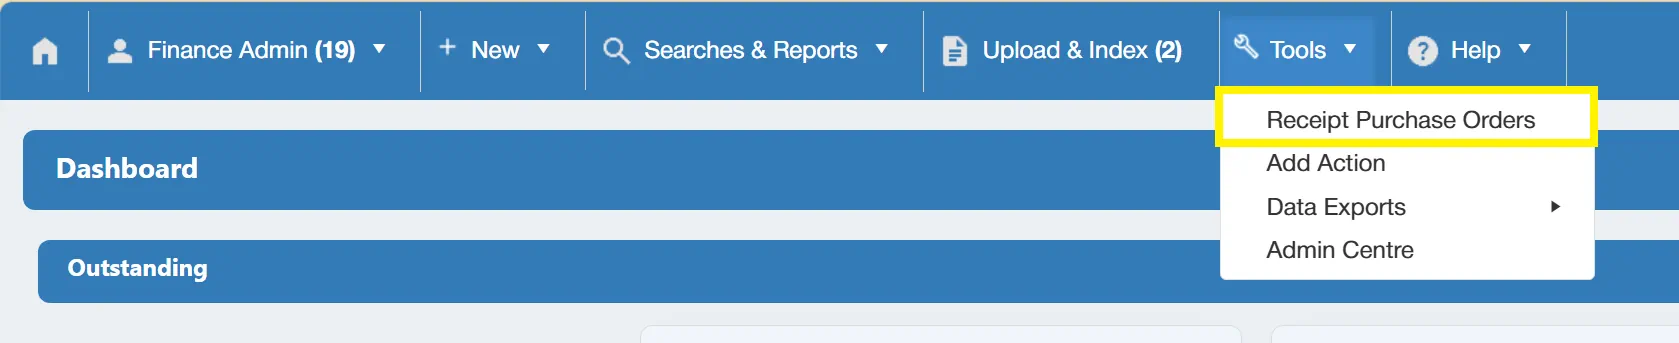
Selecting either option will open the Receipt Purchase Orders window. However, if you take the Receipt PO from the dashboard grid option, some of the details on the new window will be pre-populated.
There are two methods available for receiving goods:
- Generating an Internal GRN (Goods Received Note)
- Uploading and Indexing a Delivery Note
Generating an Internal GRN (Goods Received Note)
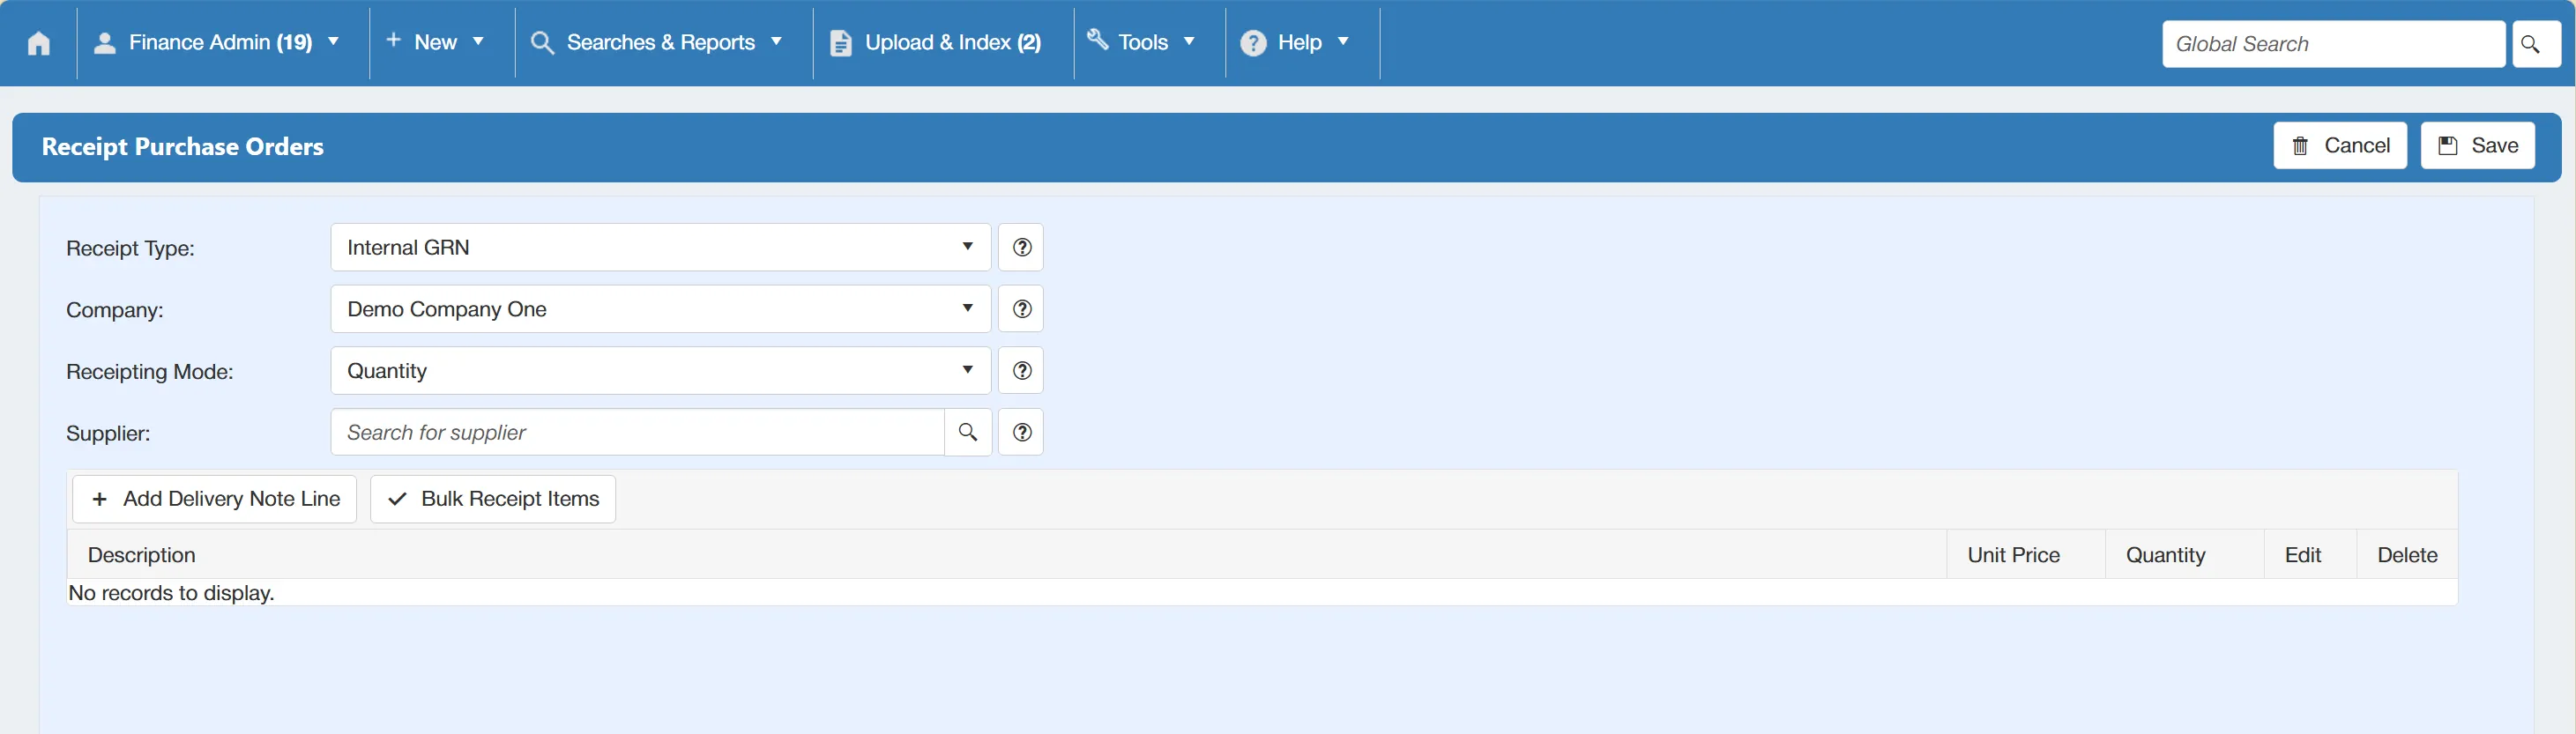
On this window, there are several fields:
- Receipt Type: This field allows you to specify whether this receipt is to produce an internal GRN (Goods Receipt Note) or if you are to upload an existing delivery note. Selecting Upload Delivery Note allows you to upload existing delivery notes - for information on this, click here.
- Company: This allows you to specify the company.
- Receipting Mode: This allows you to specify whether you would like to receipt goods on their quantity or by a percentage.
- Supplier: This allows you to specify the supplier of the goods you are looking to receipt.
Once you have populated the correct details, you need to begin adding items to the delivery note.
There are two ways to add items to the delivery note; manually or in bulk.
Manually Adding Delivery Note Lines
To manually add delivery note lines, select . This will reveal further fields to populate with details of the item.
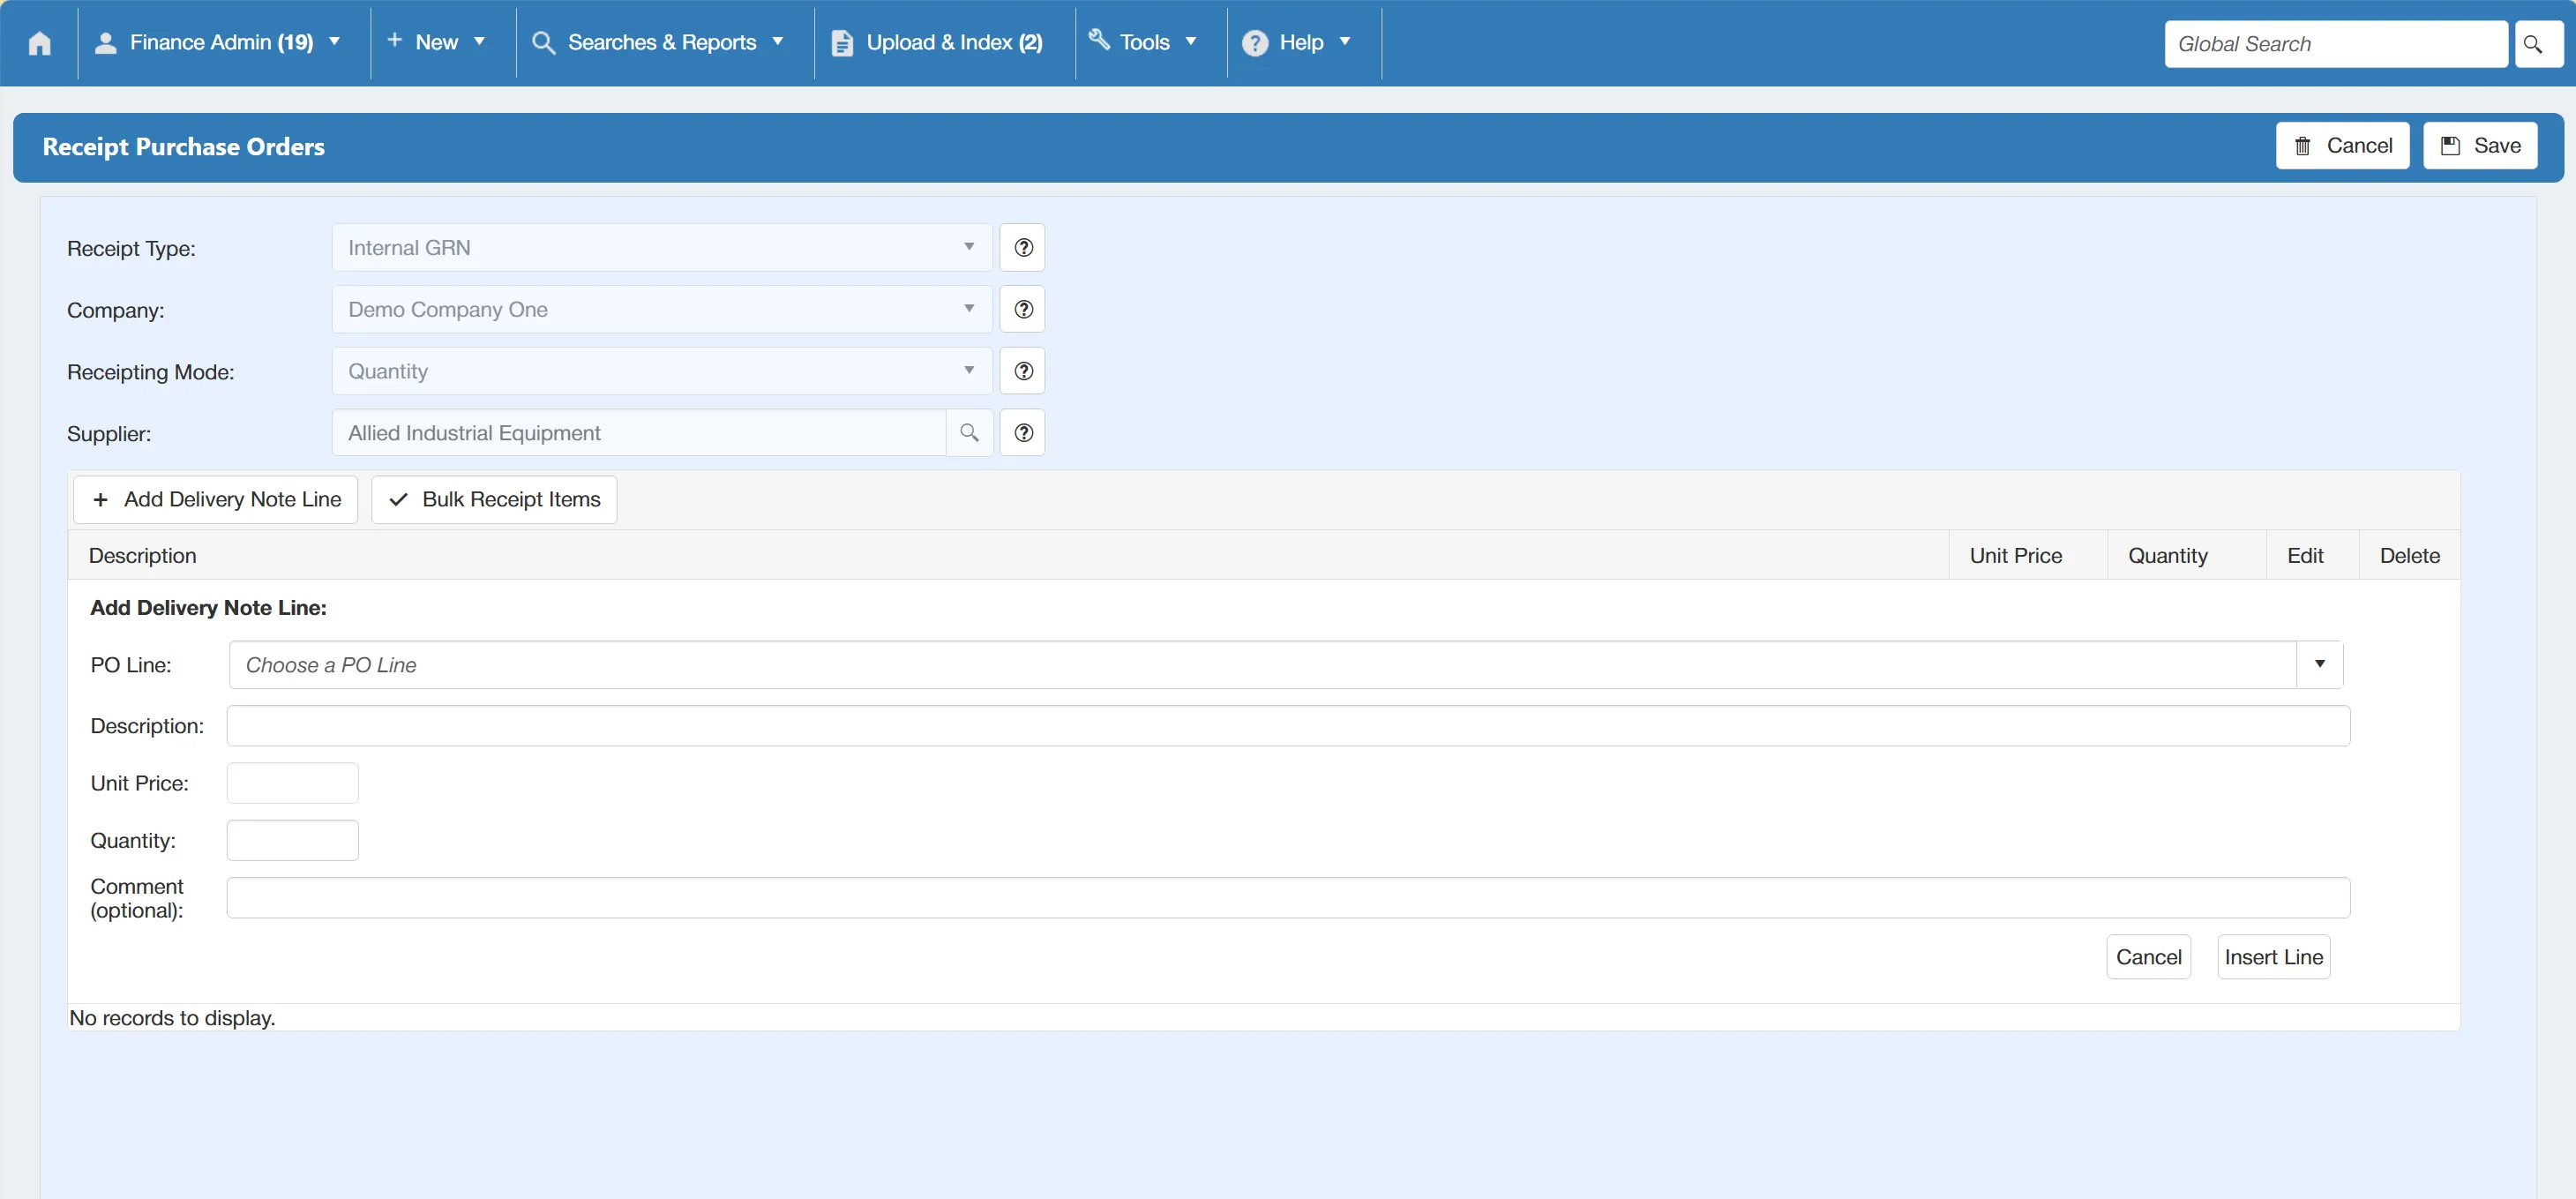
The fields are as follows:
- PO Line: This allows you to select the PO line that you wish to receipt. The drop down menu shows all items for the supplier that have not yet been receipted. It also contains columns showing the received and remaining quantities, allowing you to keep track of part-receipted goods.
- Description: This field is pre-populated by the PO Line selection.
- Unit Price: This field is also pre-populated by the PO Line selection and cannot be edited.
- Quantity: This field defaults to the maximum value of the PO Line, however it can be edited to accommodate part-deliveries.
- Comment: This field is optional but allows you to add a comment explaining a shortfall. This comment will then be displayed on the GRN generated by the system.
Once you are happy with the details, click to add this to the goods receipt note.
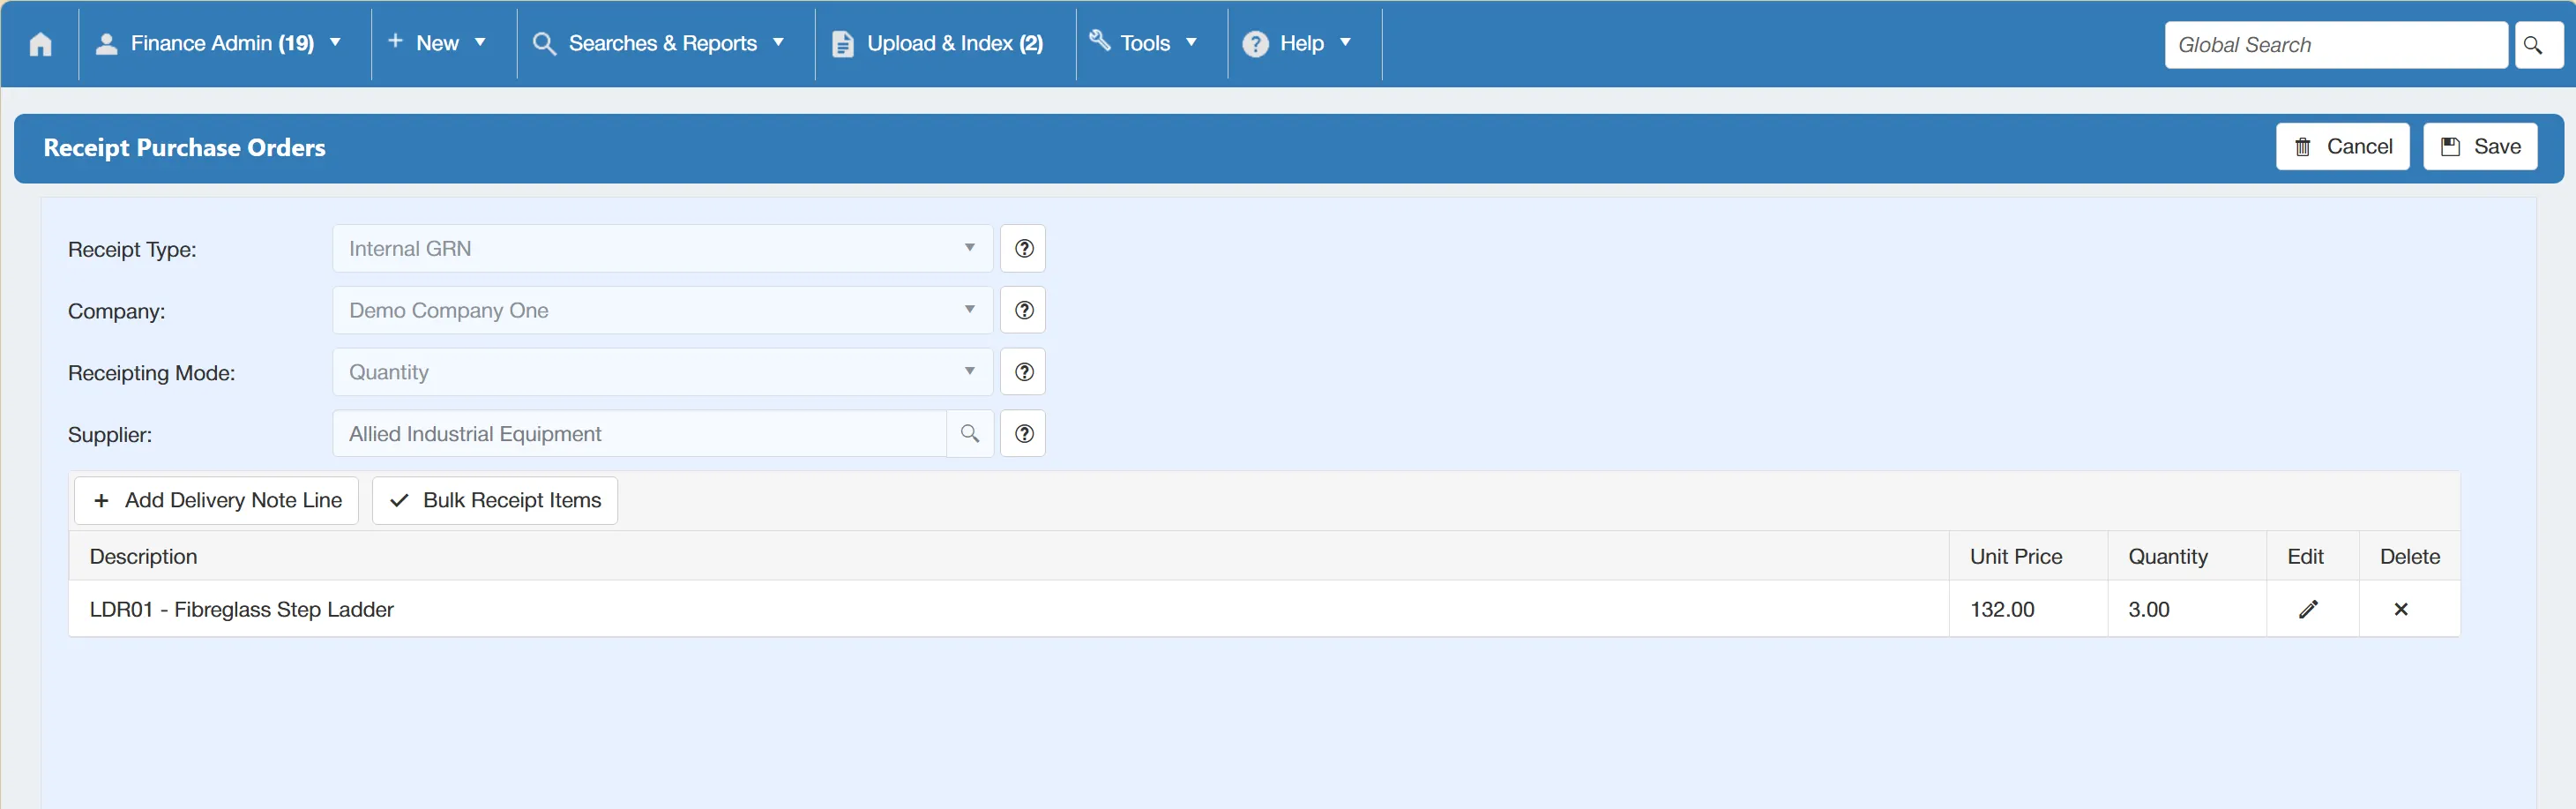
Once the item has been added to the GRN, you can go back and edit it by clicking on the icon. You can also delete the line by clicking on the .
When all required items have been added to the receipt, simply click to generate the GRN.
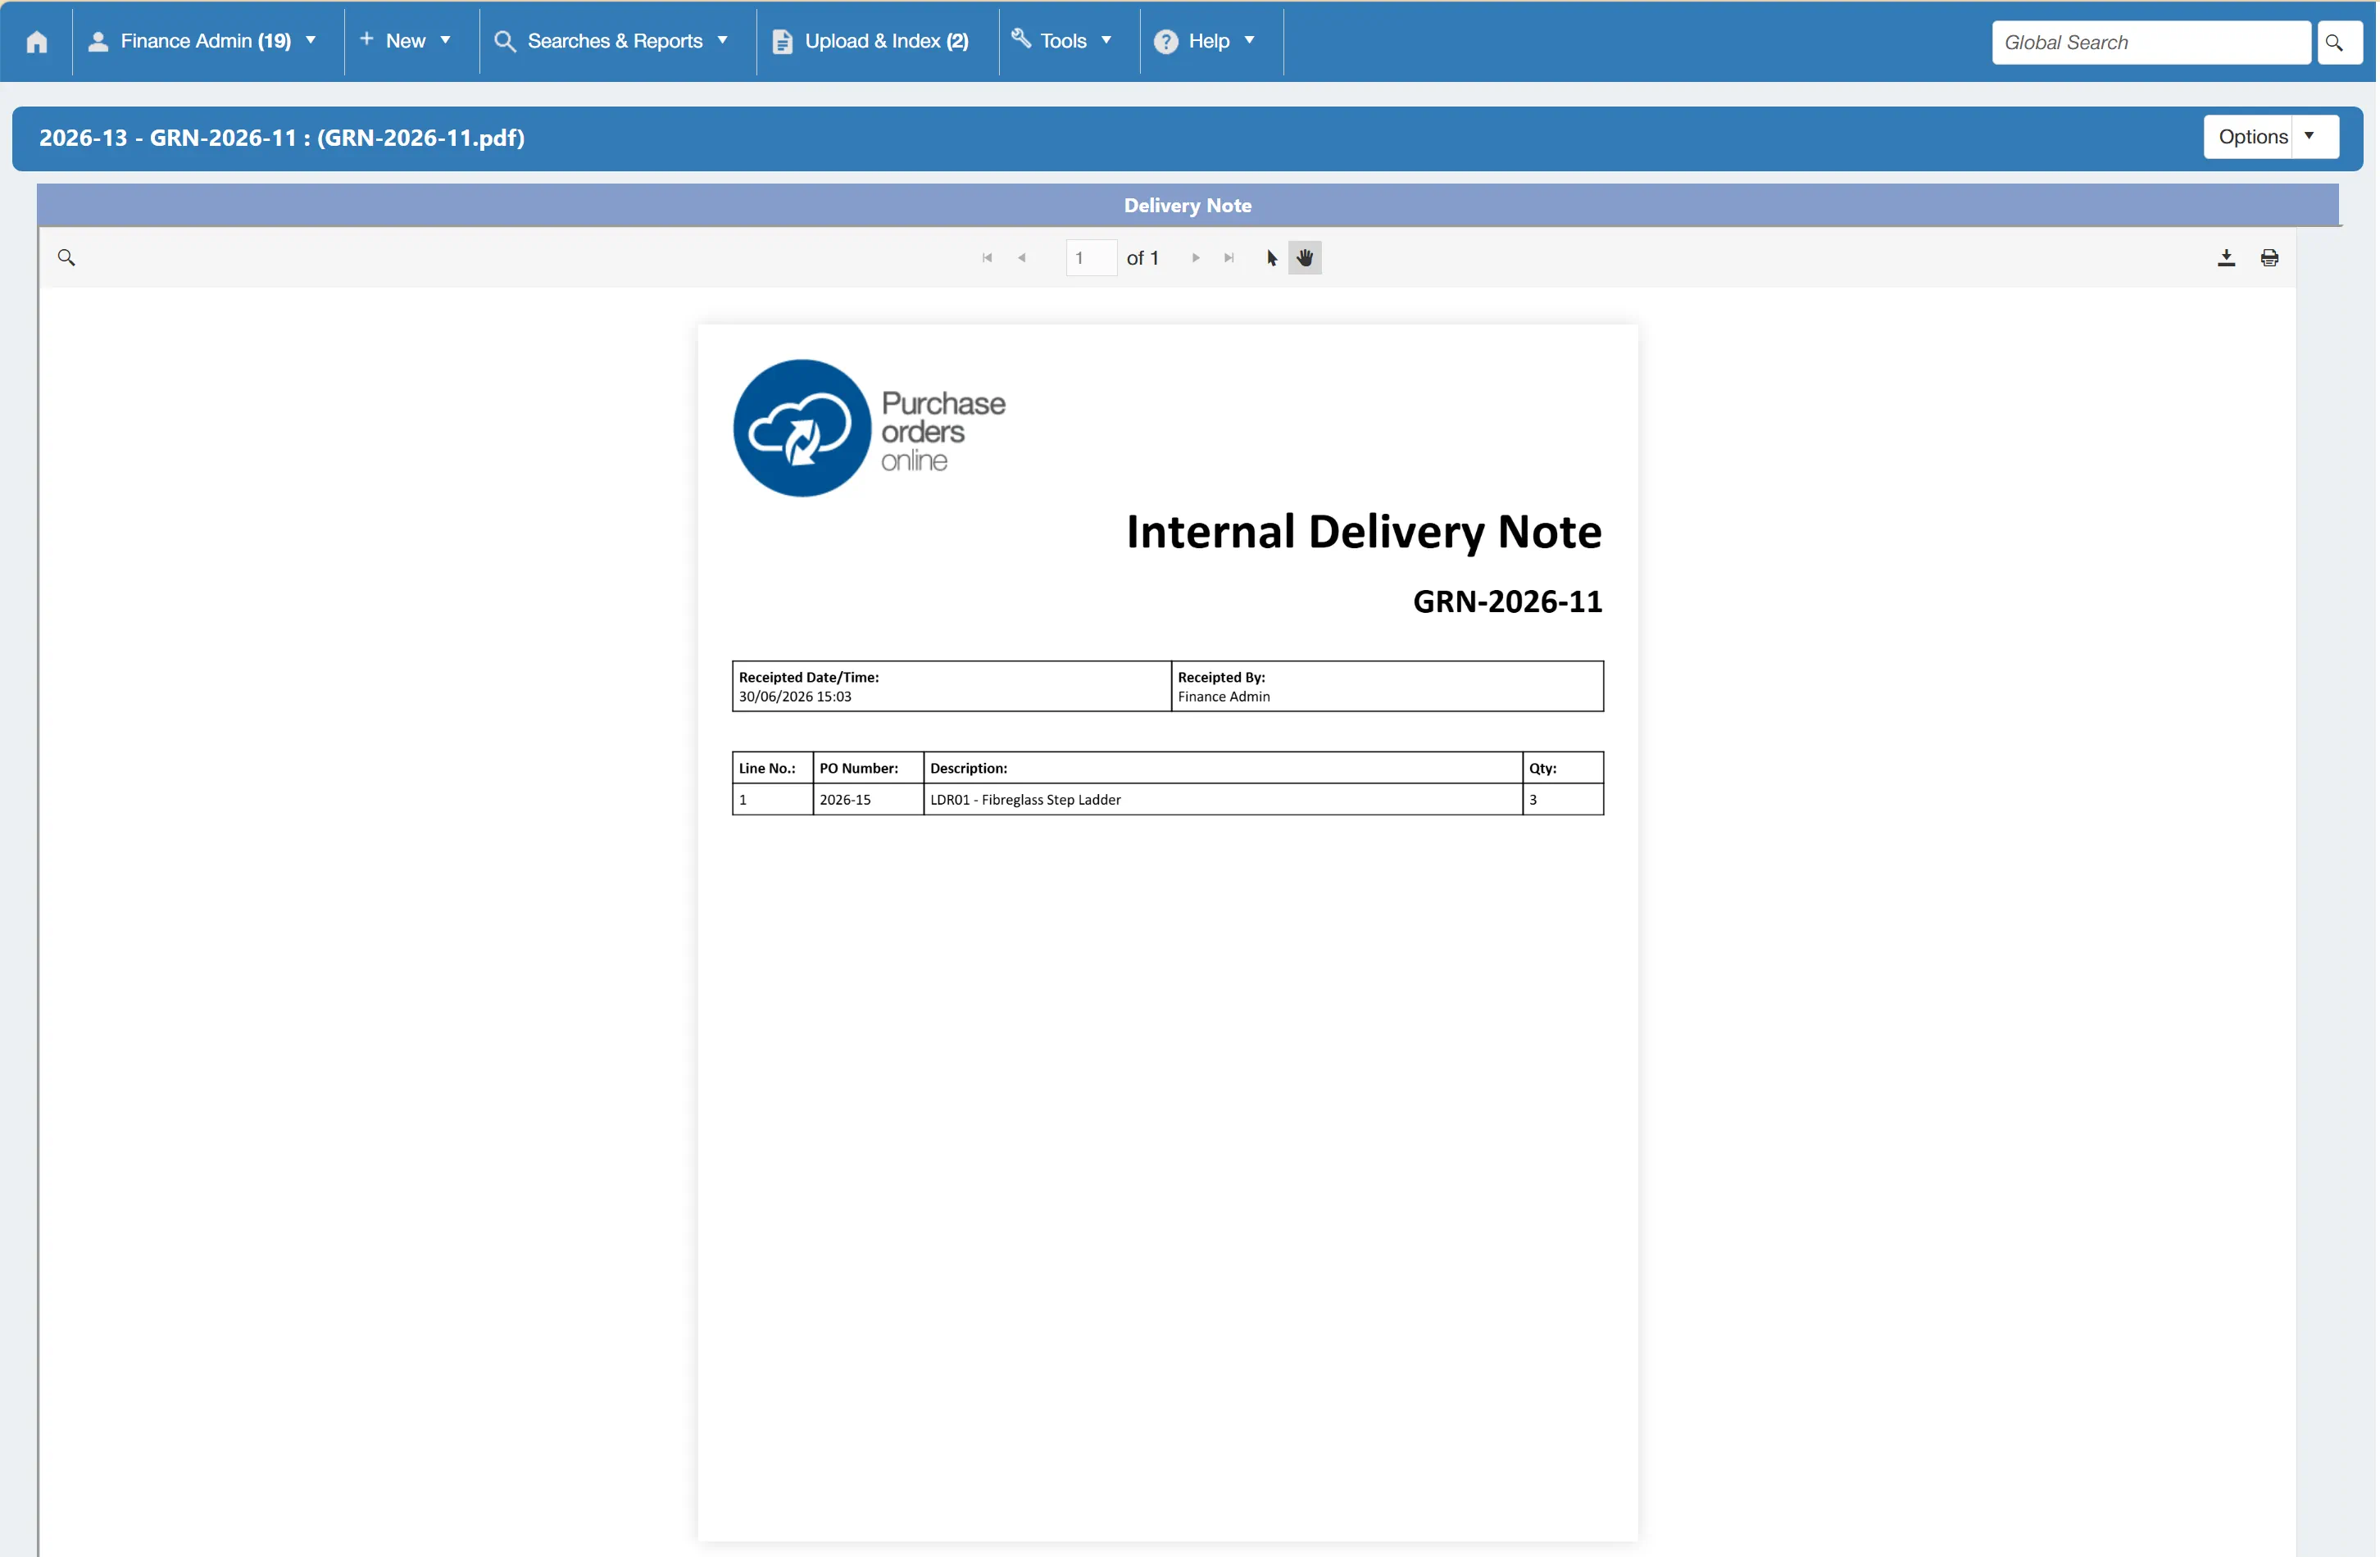
This note can then be downloaded or printed as required.
Once all items have been received against the PO, the purchase order will be removed from the POs Awaiting Receipt grid on the Dashboard.
Bulk Receipting Items
To receipt items in bulk from the Receipt Purchase Orders Window select . This will open a new window.
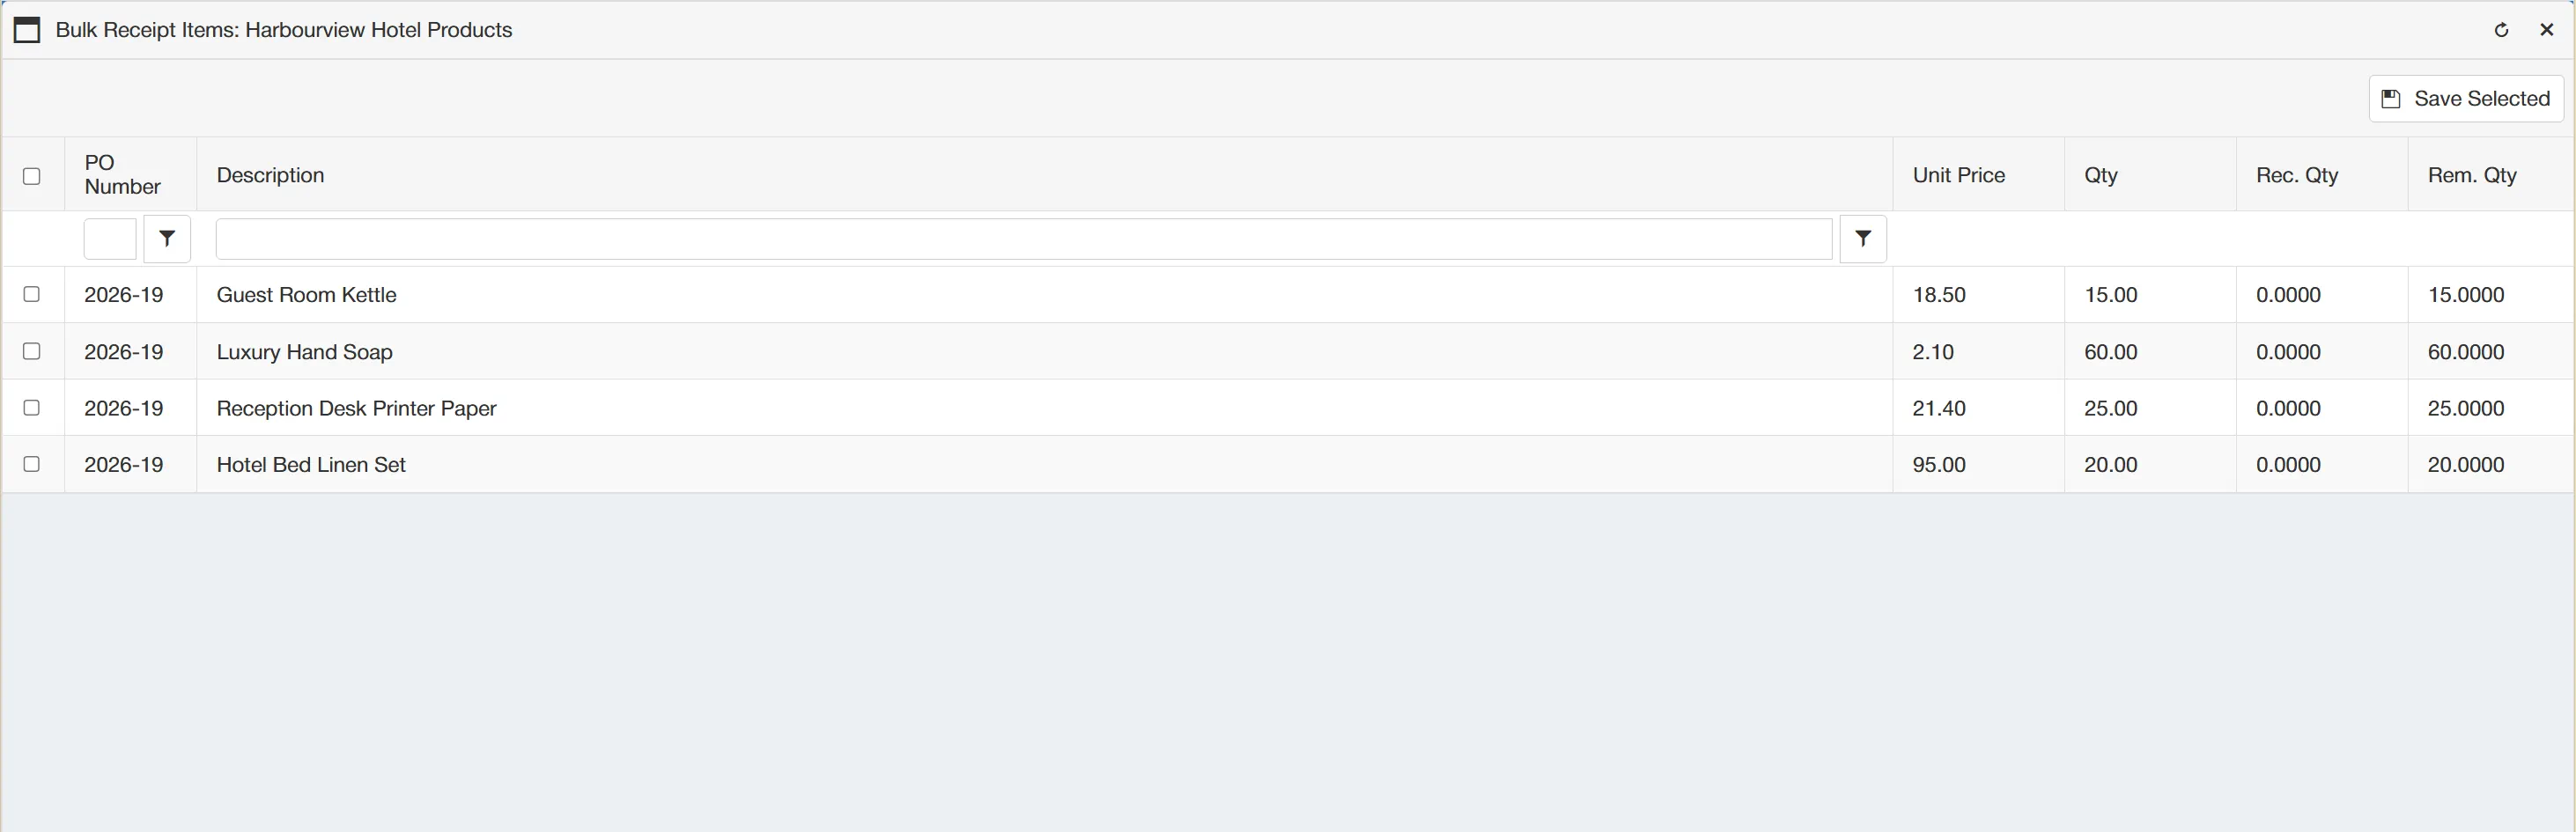
This grid displays any items currently on order from the supplier but not yet fully received. It also contains columns for Received and Remaining Quantity.
You can select multiple items from the grid by ticking the boxes on the left of each row. This allows you to add multiple lines to the GRN at once.
Once you are happy with your selection, click to add the items to the GRN. Doing this removes them from the bulk receipt items window, allowing you to clearly see which items are left.
When all required items have been added to the receipt, simply click to generate the GRN.
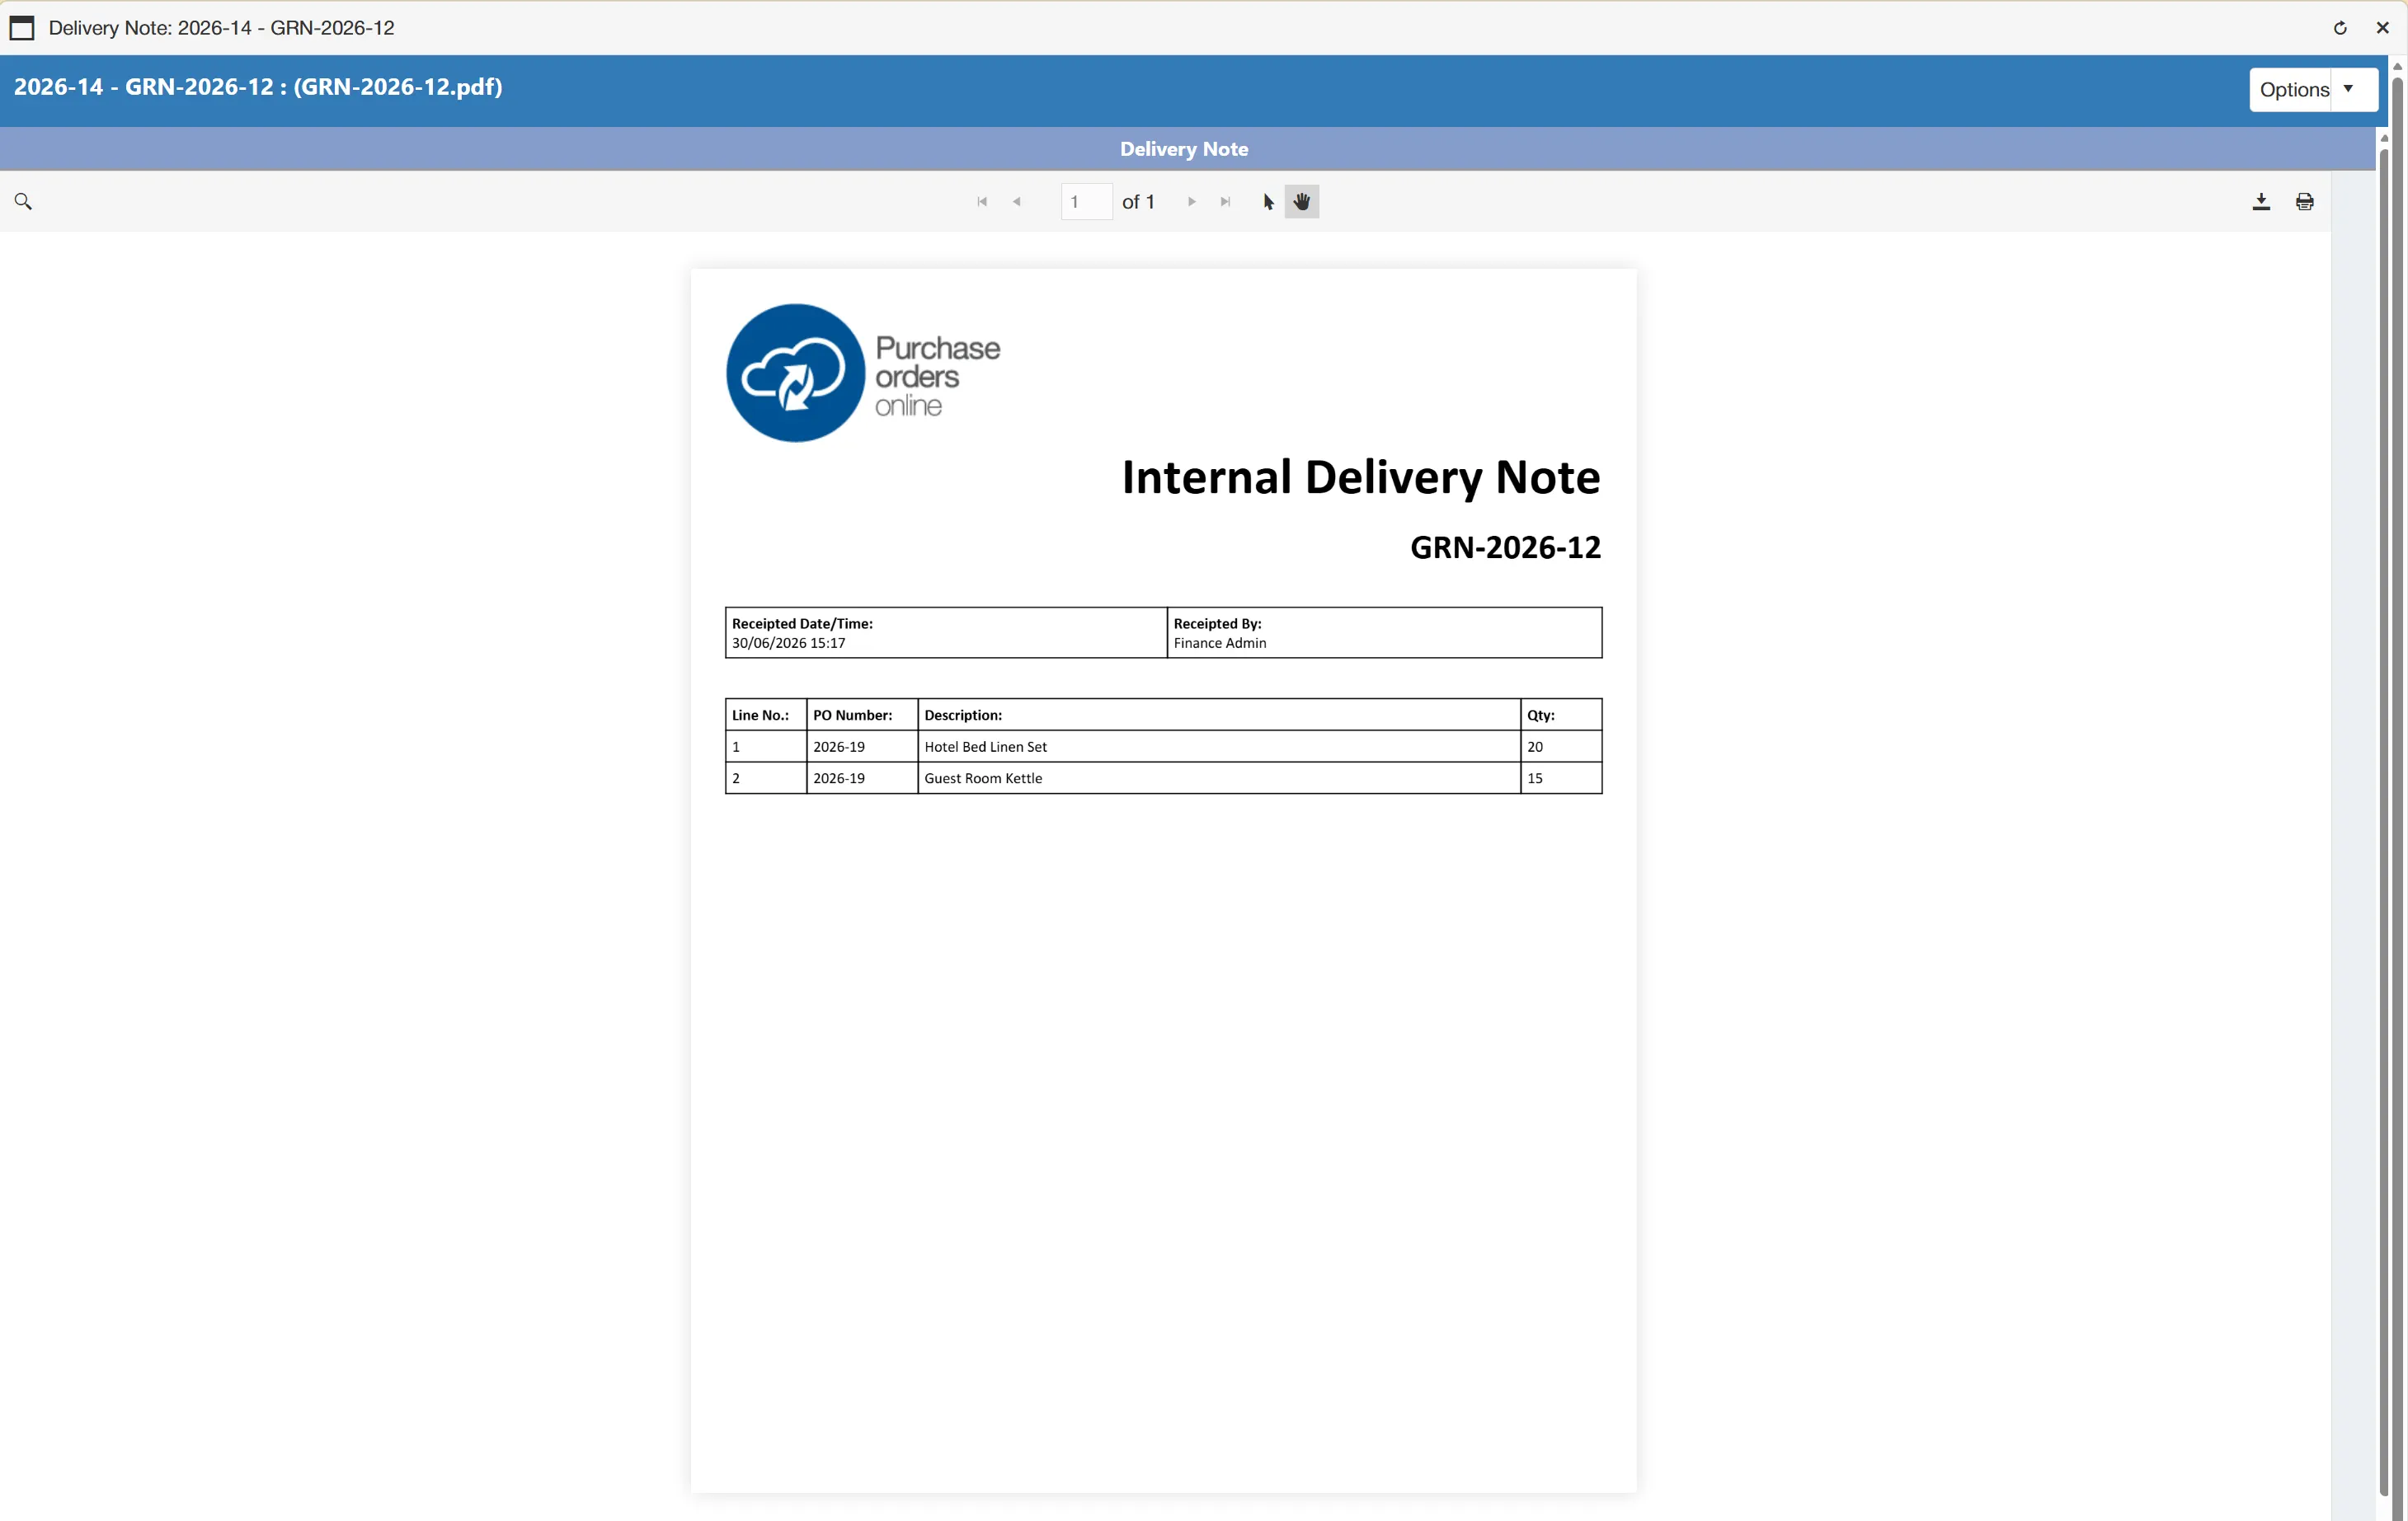
This note can then be downloaded or printed as required.
Once all items have been received against the PO, the purchase order will be removed from the POs Awaiting Receipt grid on the Dashboard.
Uploading & Indexing Delivery Notes
To upload an delivery note into the system, navigate to the Receipt Purchase Orders window, either via the Tools menu or the POs Awaiting Receipt grid on the Dashboard.
Once on this window, you can change the Receipt Type field to Upload Delivery Note.
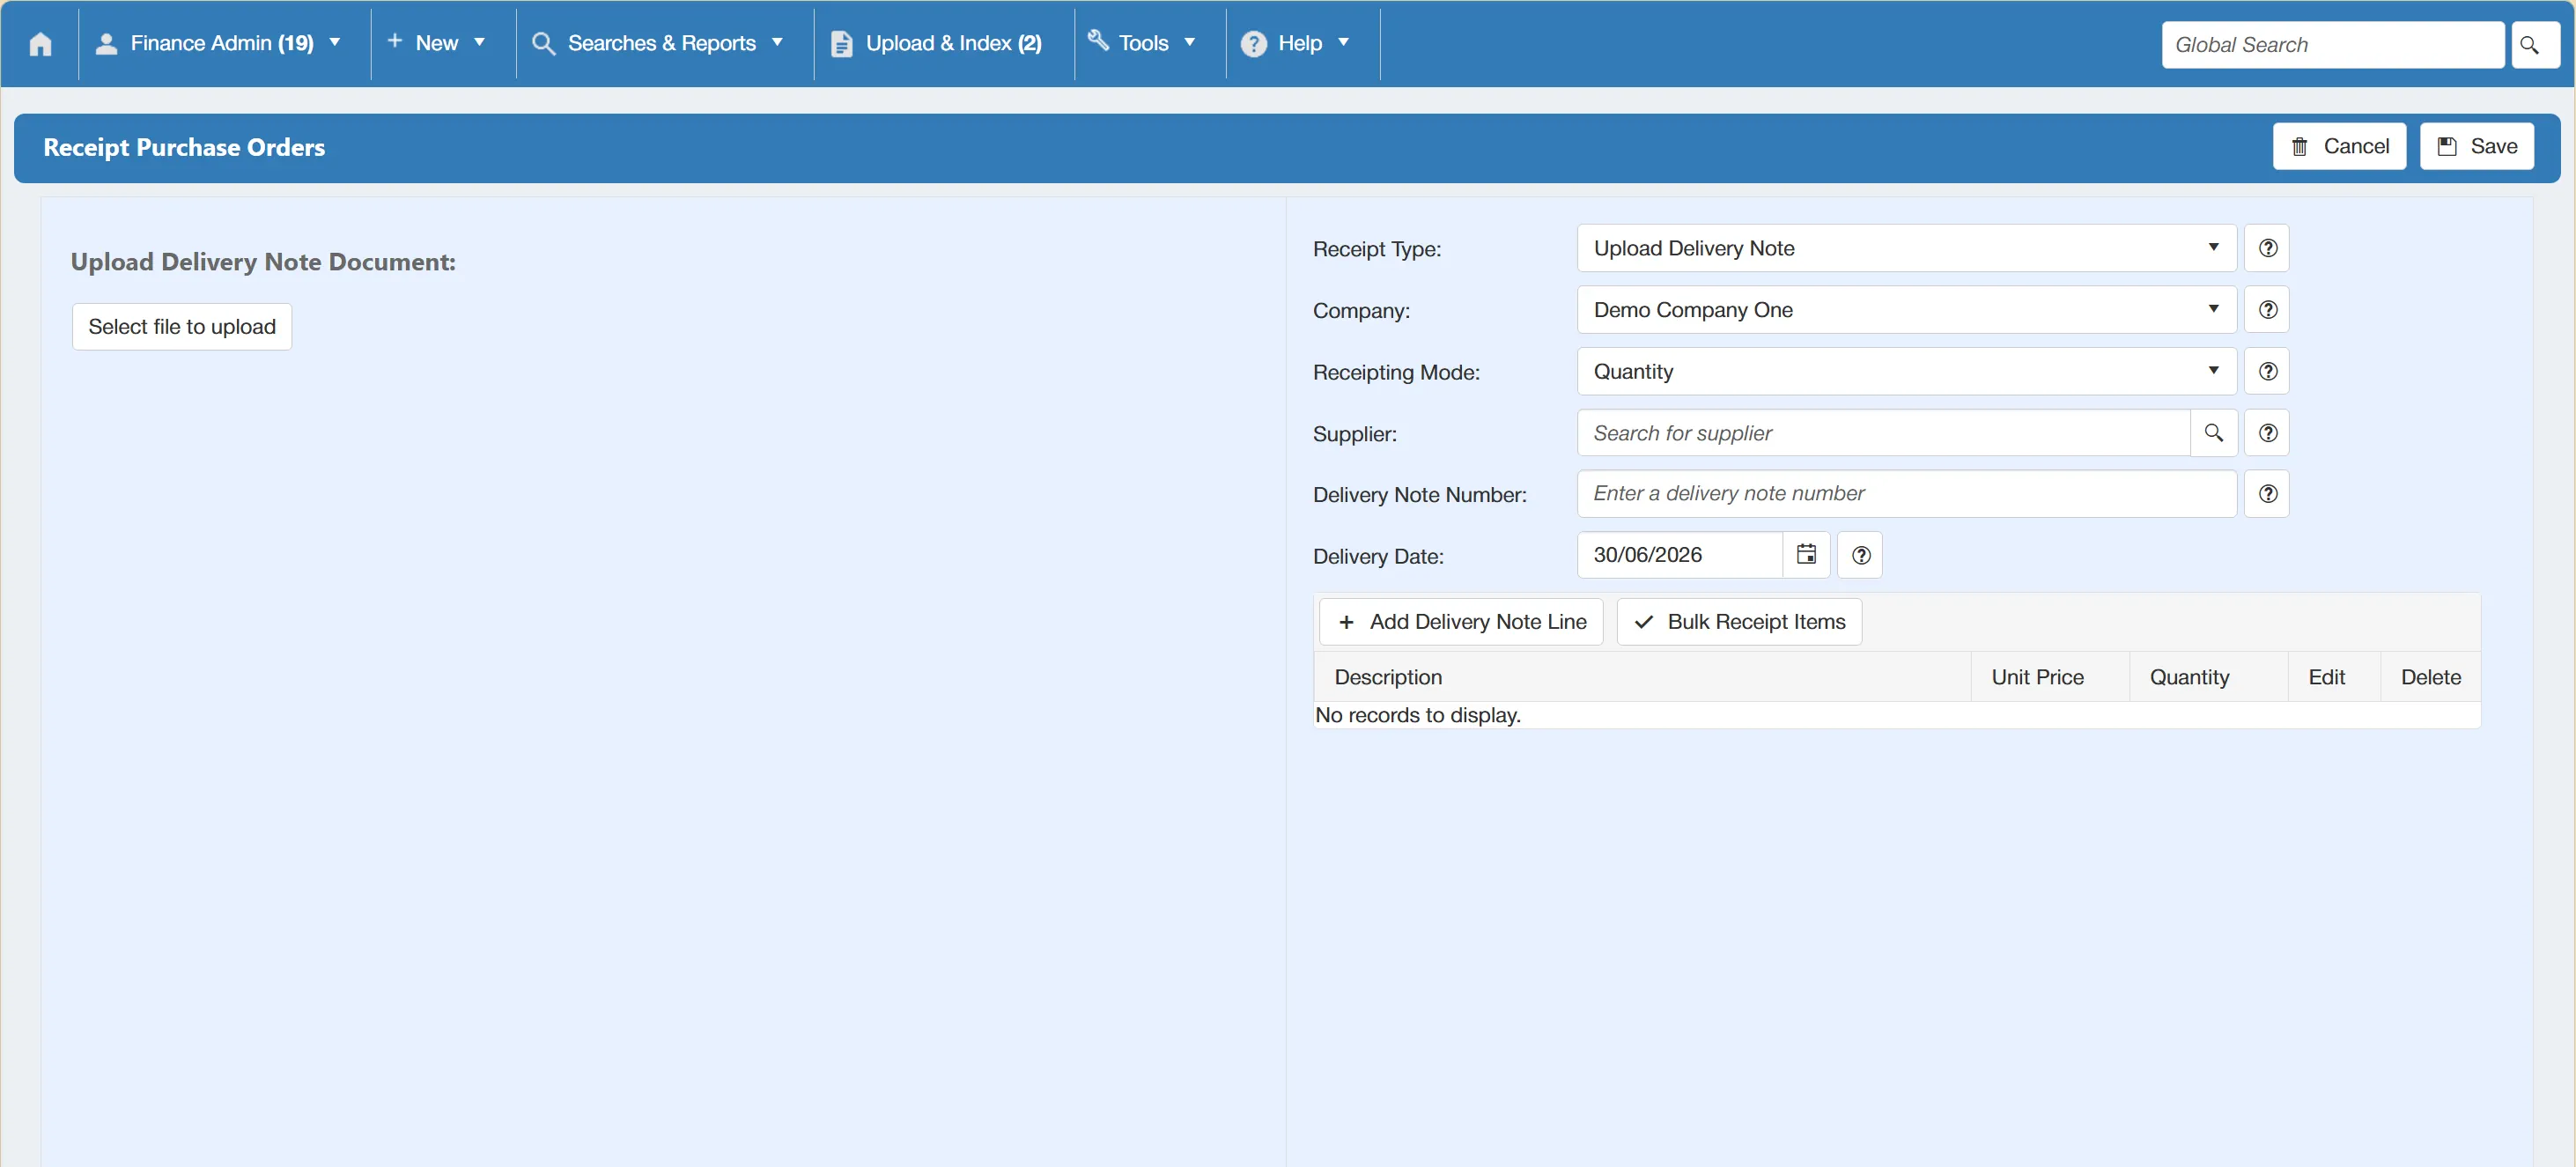
Selecting this option changes the window to show the button on the left hand side. Clicking this button allows you to select the Delivery Note file for upload.
Once this has been selected, you will see the document appear in a preview on the left hand side of the window.
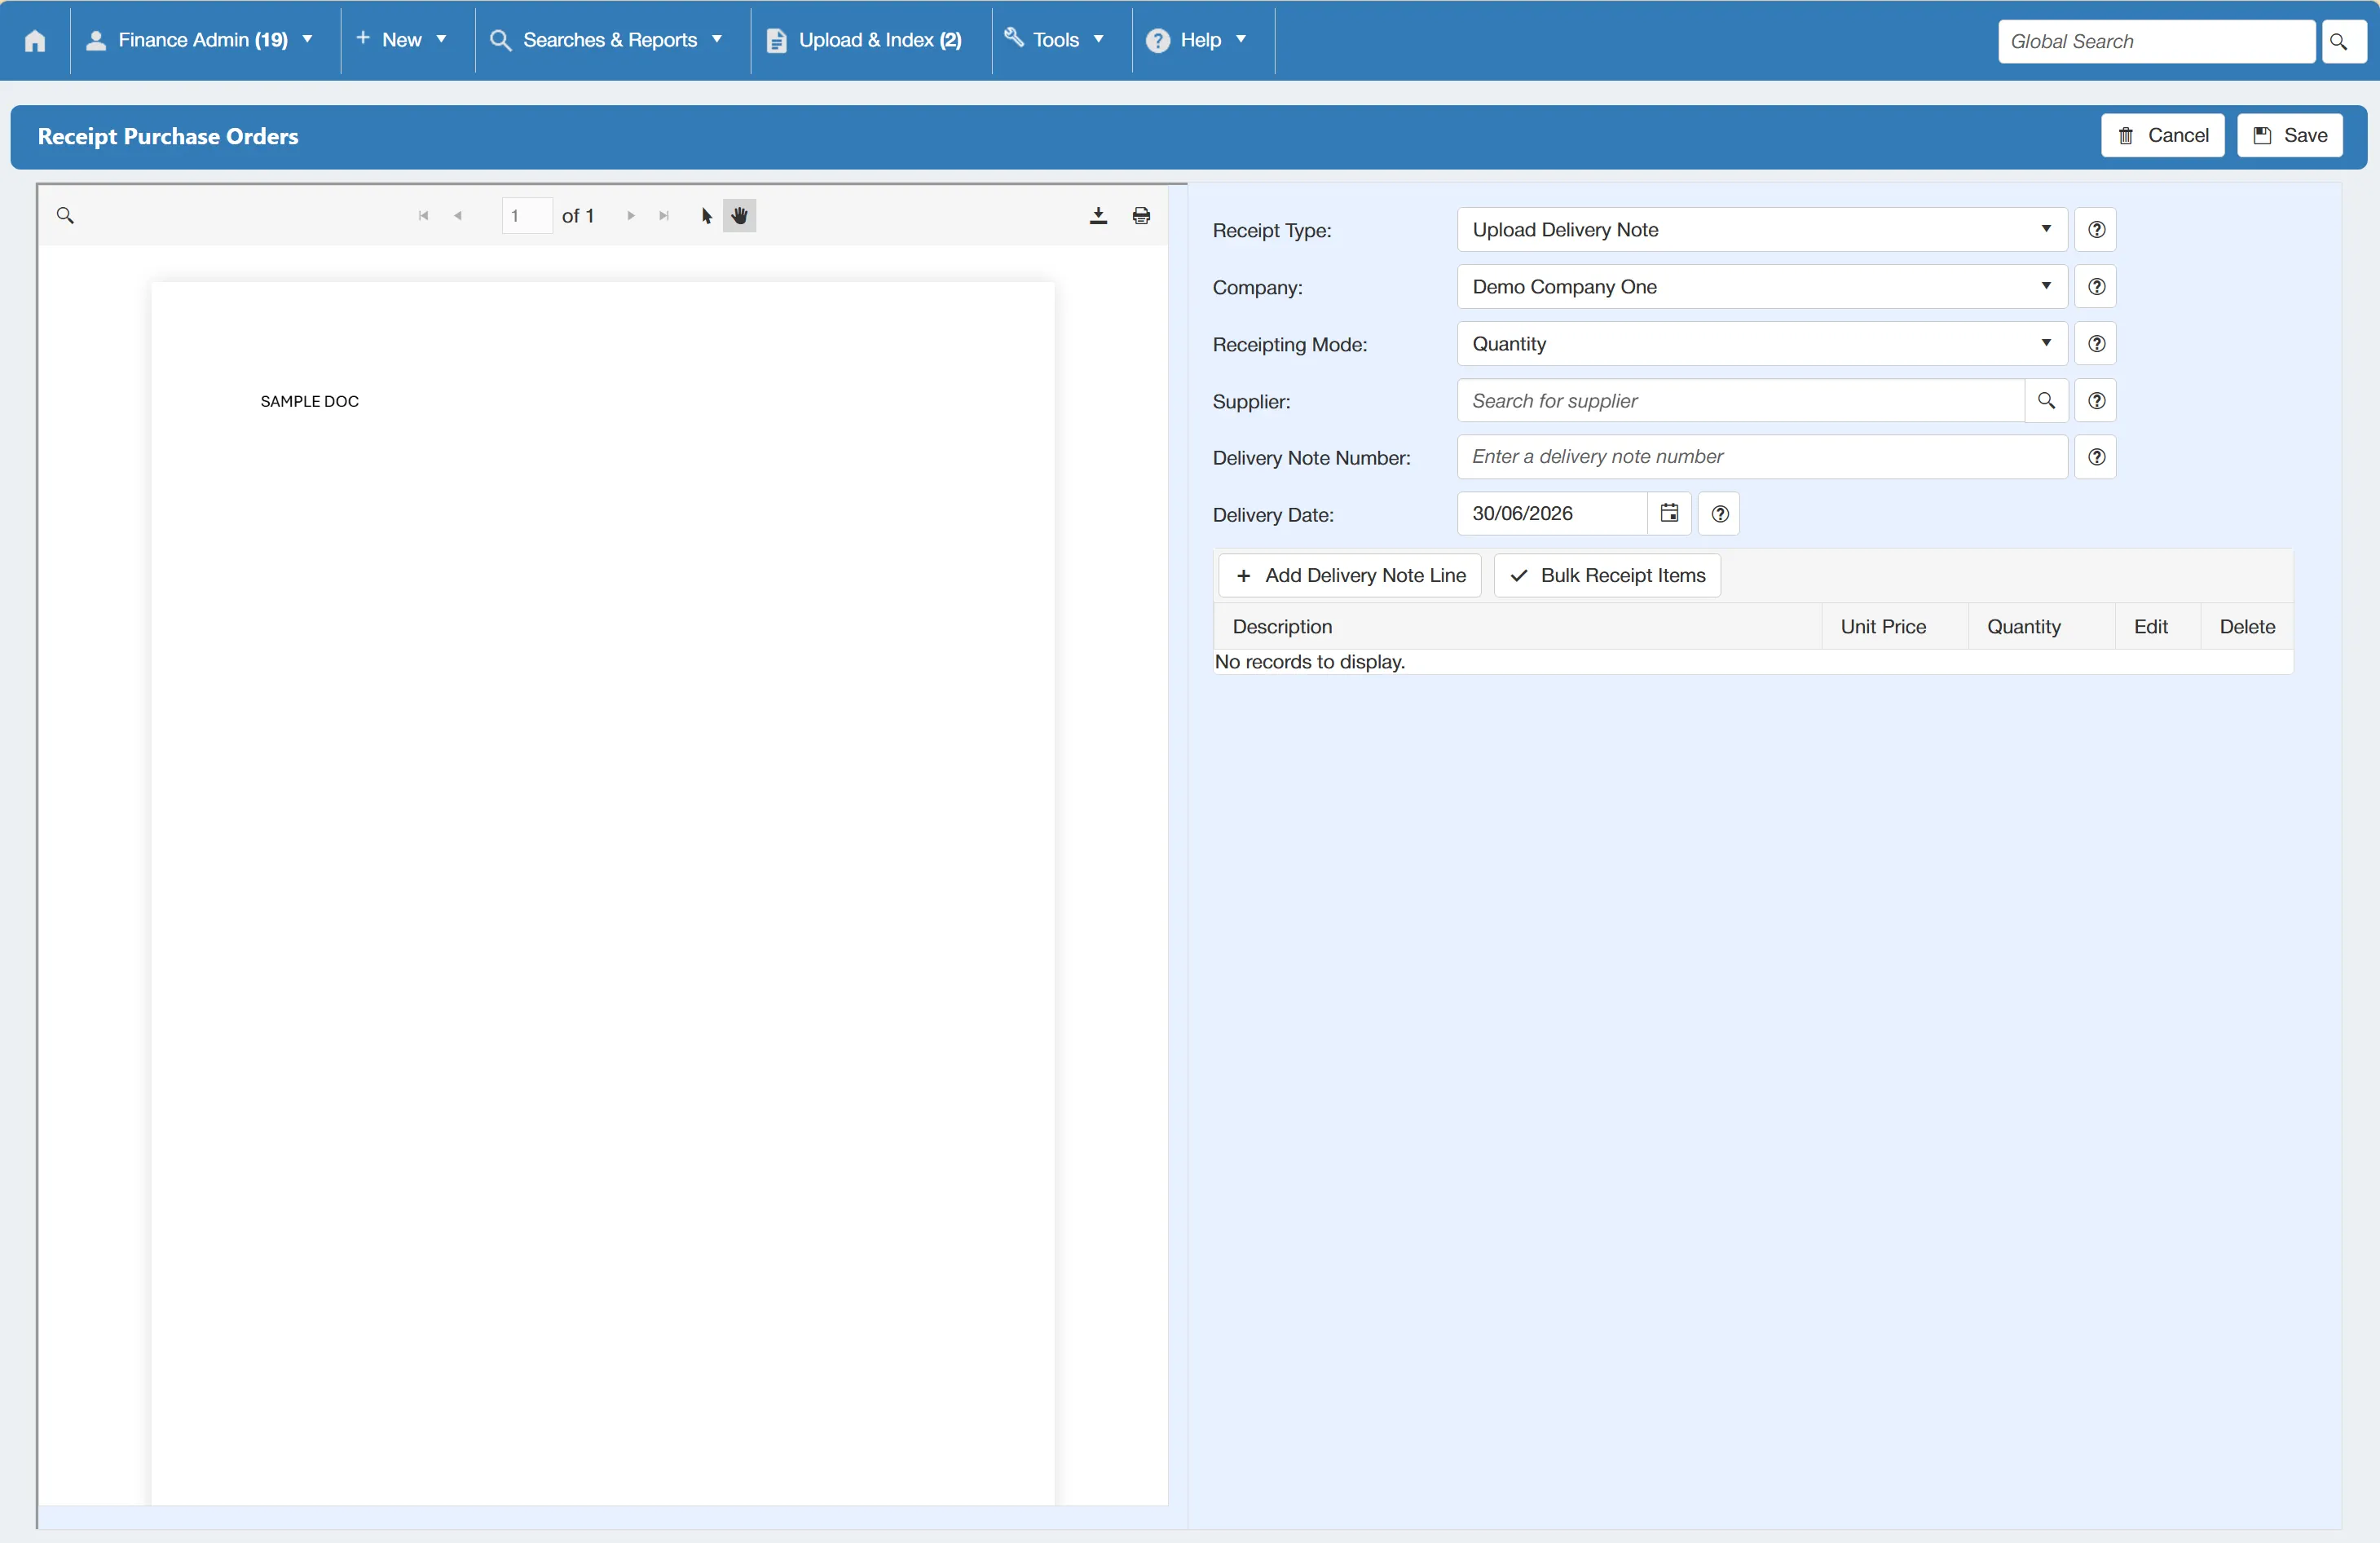
You can then complete the fields on the right hand side of the window.
The fields are as follows:
- Receipt Type: This is where you can specify if you are receipting using an uploaded delivery note or an internal GRN.
- Company: Allows you to specify the company that you are receipting for.
- Receipting Mode: This allows you to specify whether you would like to receipt goods on their quantity or by a percentage.
- Supplier: This allows you to specify the supplier of the goods you are looking to receipt.
- Delivery Note Number: This allows you to add the delivery note number.
- Delivery Date: This allows you to specify the delivery date.
Once you have populated the correct details, you need to begin adding items to the delivery note.
There are two ways to add items to the delivery note; manually or in bulk.
For more information on manually adding items to the receipt, click here.
For more information on adding items to the receipt in bulk, click here.