Invoices | Purchase Order System
For purchase order software with the Invoice Approval module included, you can upload and process invoices against your purchase orders.
The following features are applicable only to systems with Invoice Processing features enabled.
Uploading an Invoice
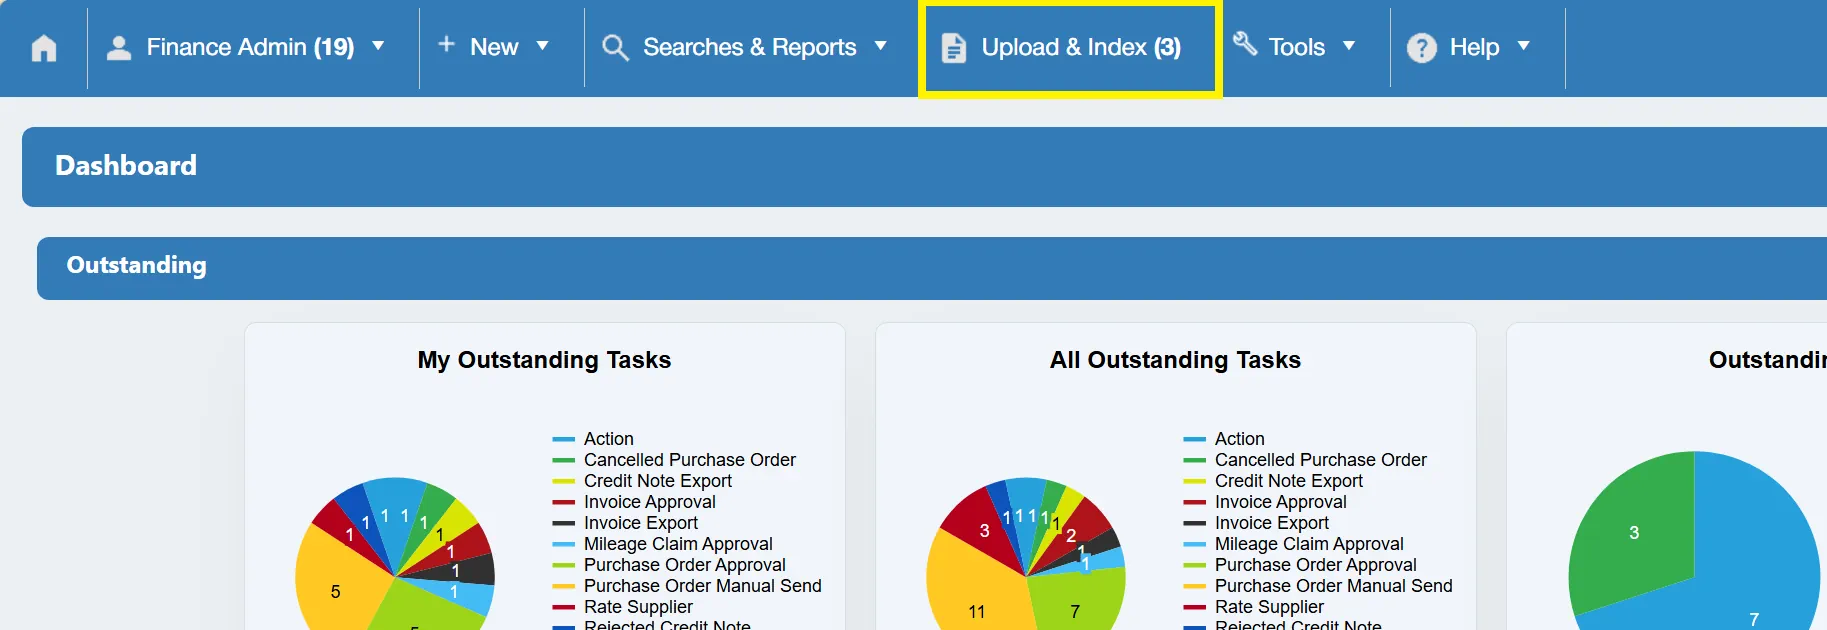
To upload an invoice into the system, navigate to on the Navigation Bar.
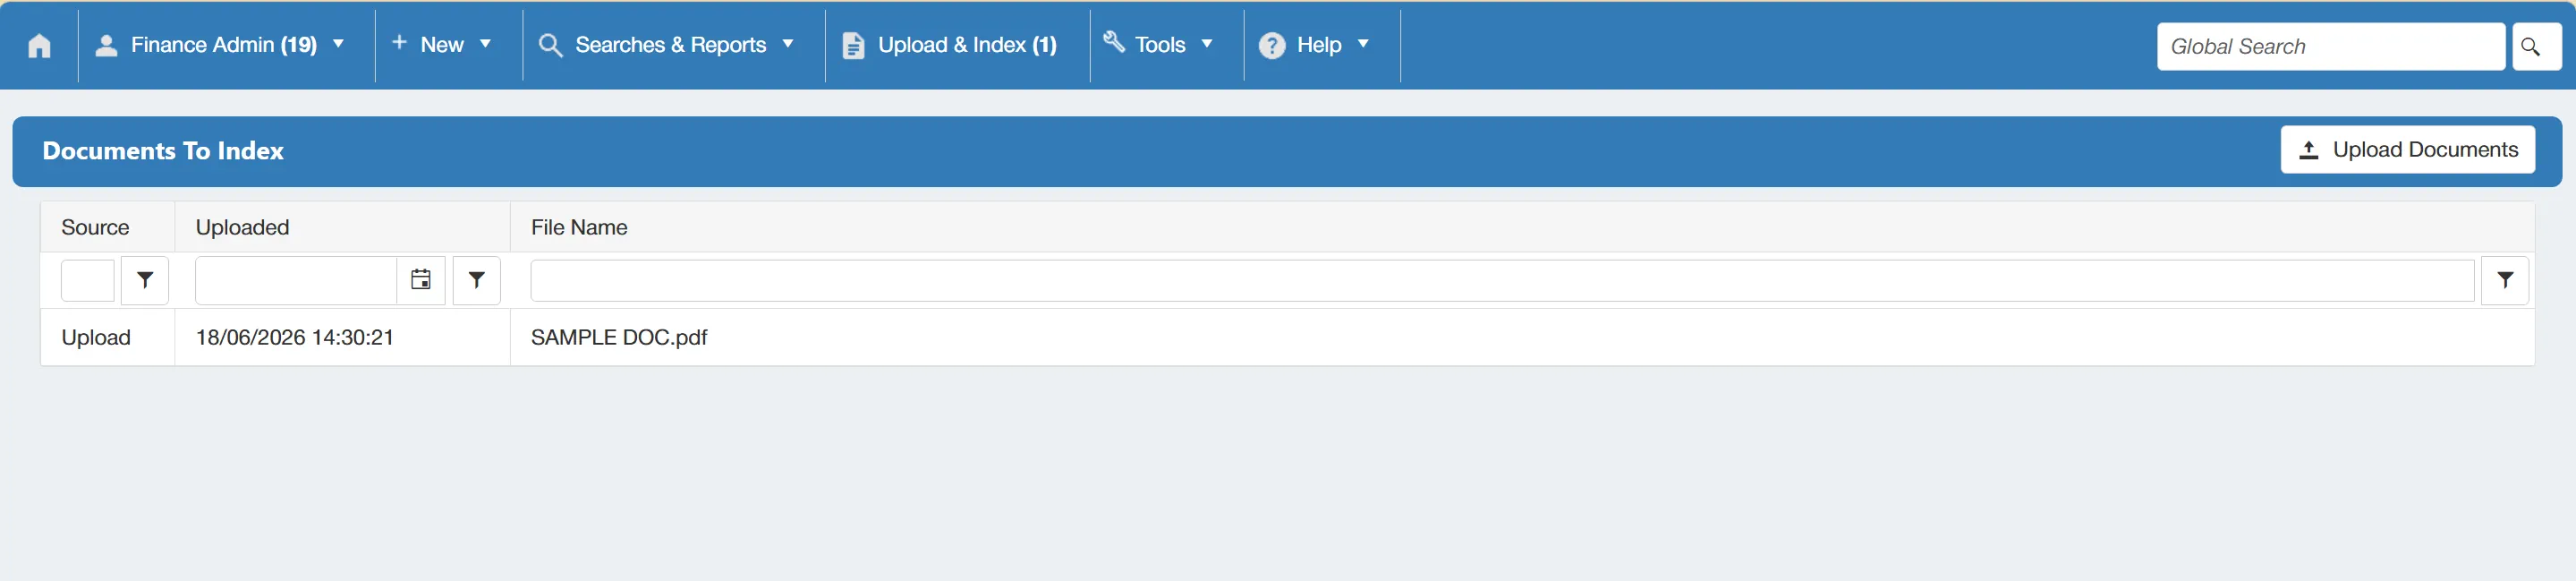
This will open a new window which displays any documents that have been uploaded into the system and are awaiting indexing.
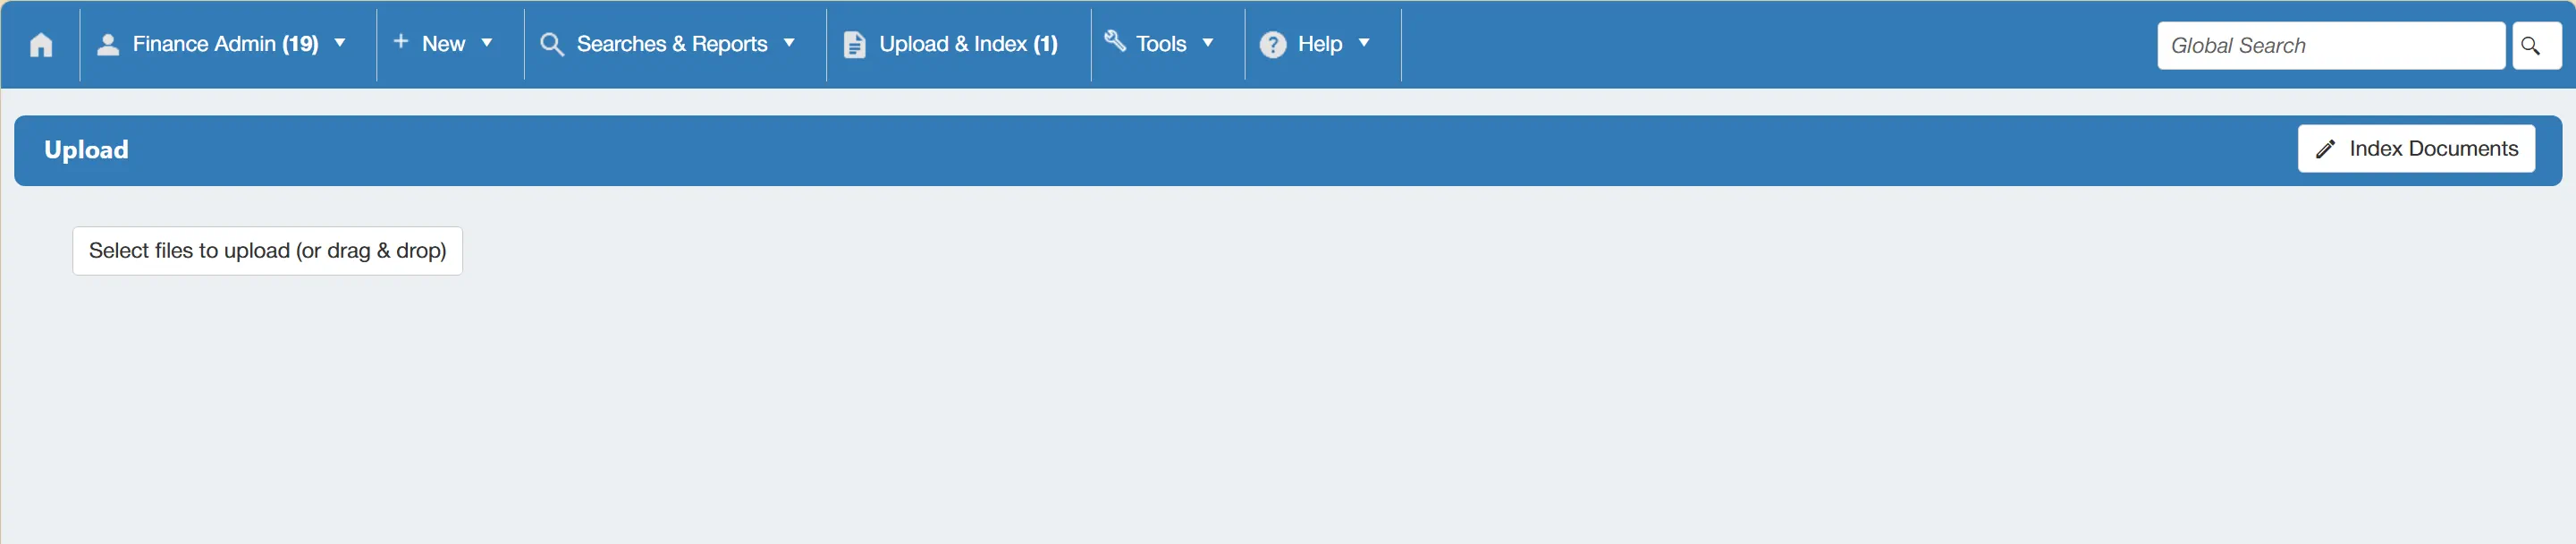
To upload a new document, simply click the button. This will take you to a new window where you can drag & drop or select a file to upload from your device.
Once you have selected a file, the file name will be listed in the window along with a green dot to confirm that it has successfully uploaded.

When the upload is in progress, the dot will be yellow and if the upload was unsuccessful, the dot will be red.
Indexing an Invoice
If you have just uploaded an invoice document and are still on the Upload window, you can simply click to begin indexing the invoice.
Alternatively you can access the list of documents ready to be indexed by selecting on the Navigation Bar.
This takes you to the Documents to Index window which displays any documents that have been uploaded into the system awaiting indexing.
To index an invoice, select the file from this grid and this will open a new window.
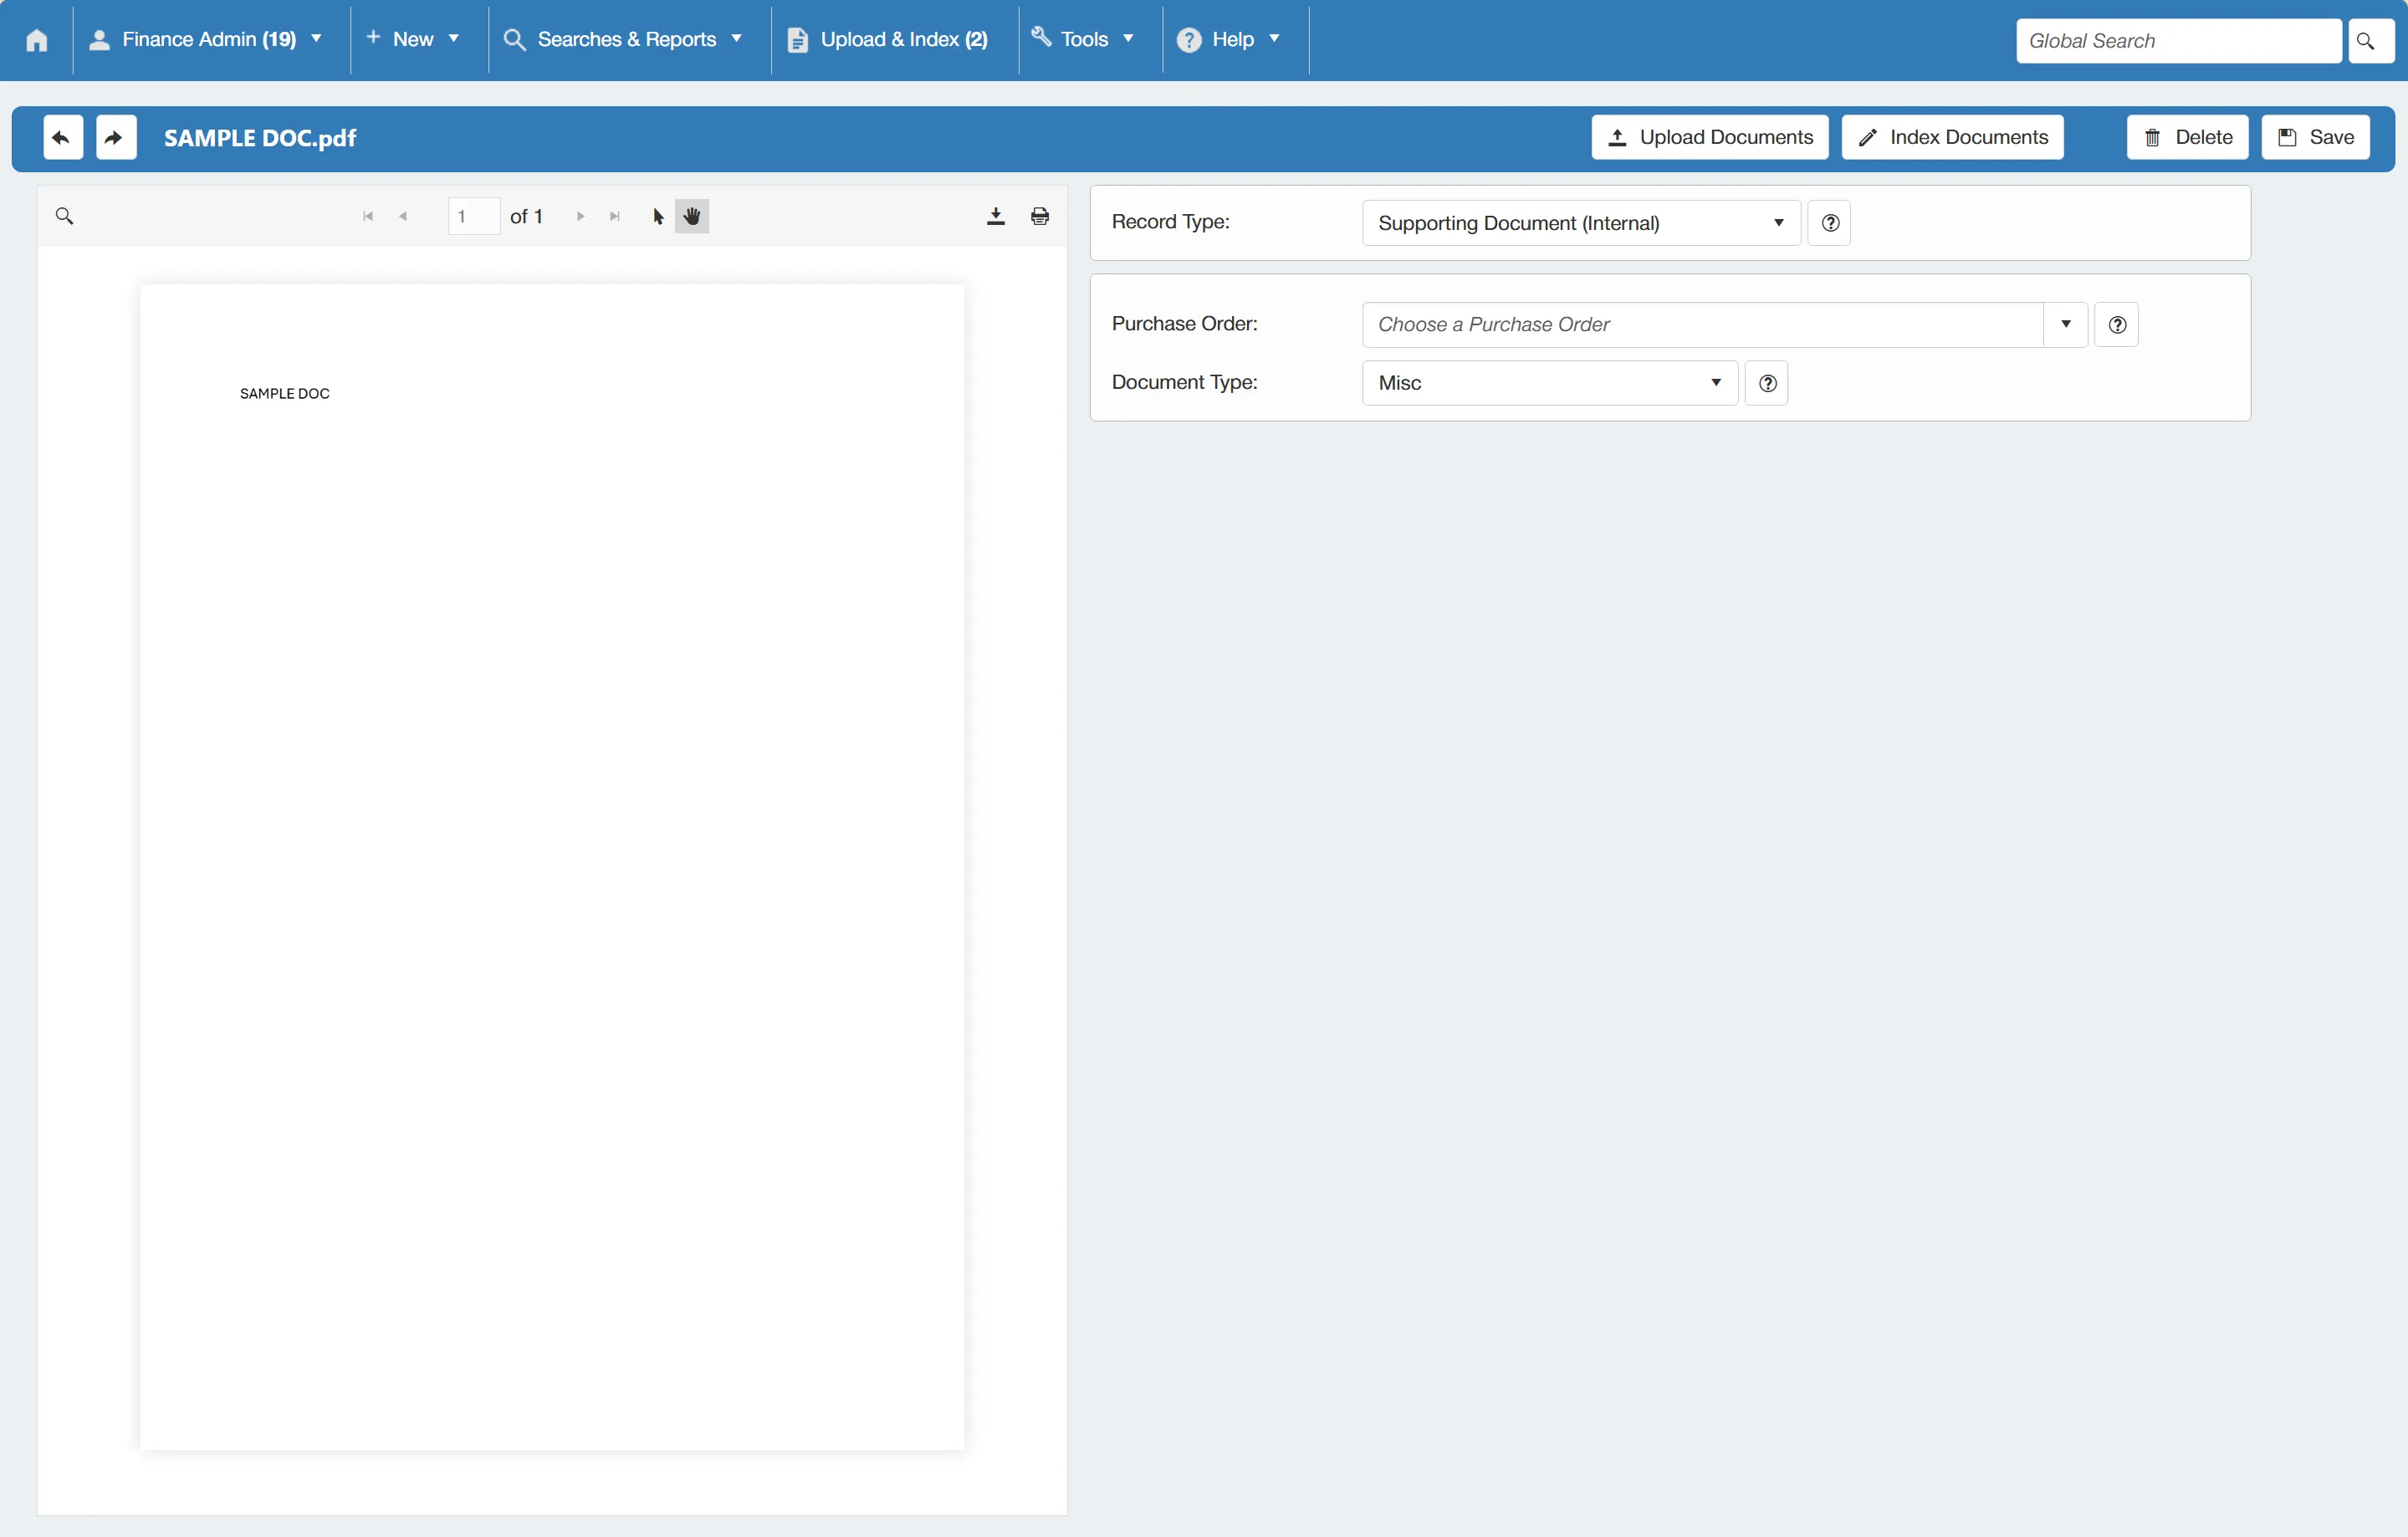
This window displays the invoice document on the left and some fields on the right which will need to be completed.
You first need to designate the Record Type. To do this, select Invoice from the drop down menu.
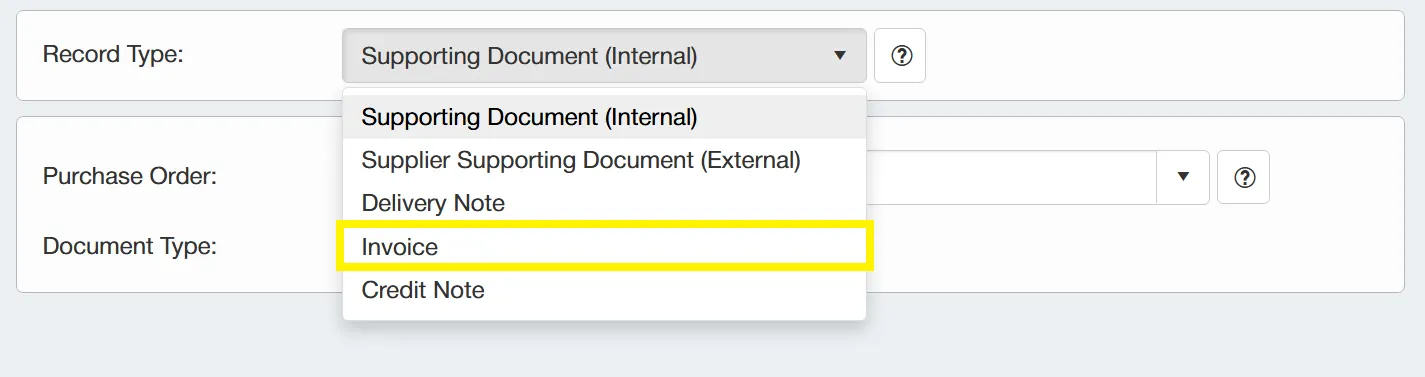
This will present further fields which are specific to indexing an invoice.
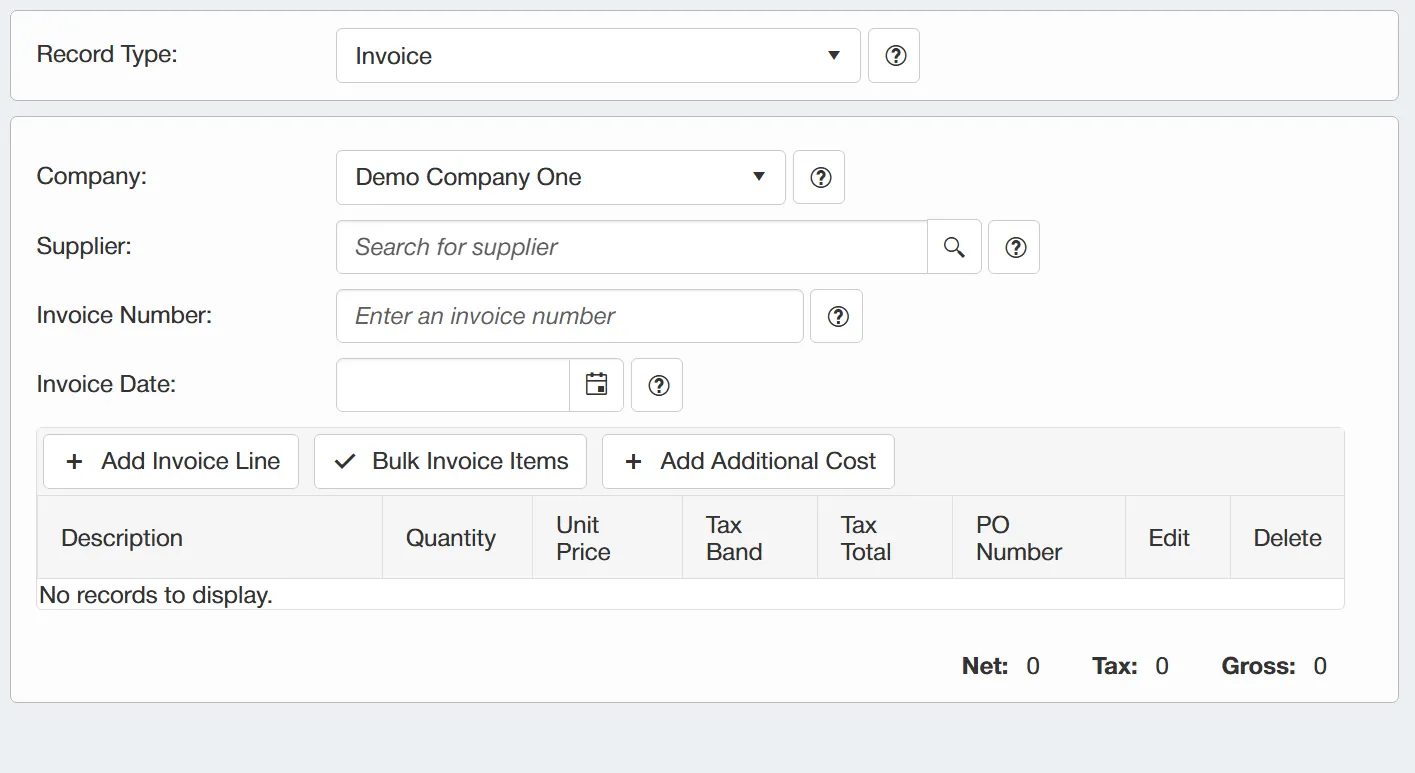
The fields are as follows:
- Company: This allows you to designate the company to which the invoice is going to be indexed.
- Supplier: This allows you to select the supplier that sent the invoice.
- Invoice Number: This is the invoice number present on the invoice document.
- Invoice Date: This is the invoice date present on the invoice document.
Once you have filled these details in, you need to begin adding invoice lines. There are two ways to do this:
Once you have added the invoice lines, simply click to send this invoice for approval.
For more information on invoice approval, click here
Manually Adding an Invoice Line
To manually add an invoice line, select . This will open further fields which will allow you to specify the invoice line's details.
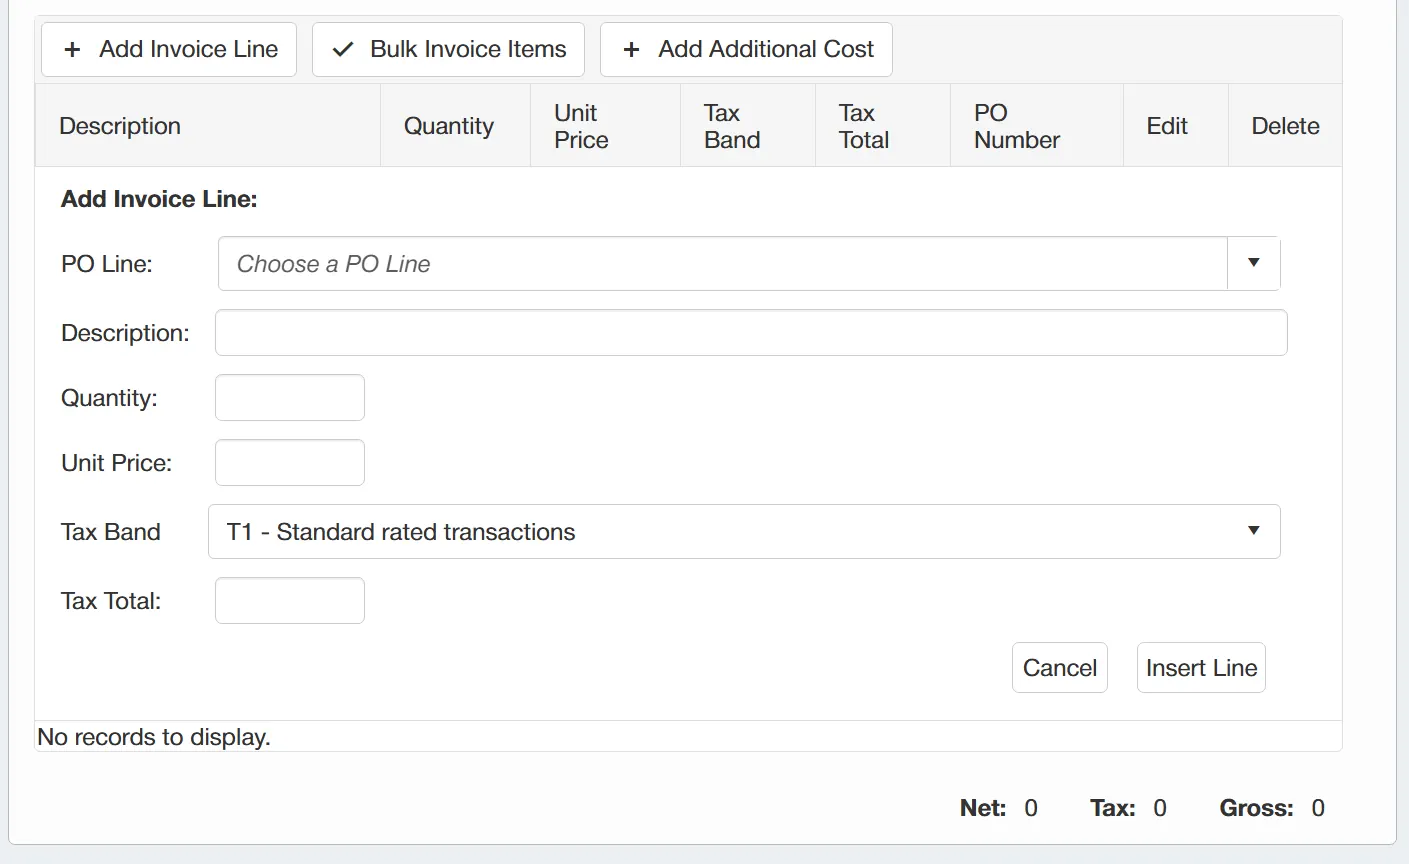
The fields are as follows:
- PO Line: This is a drop down field that allows you to select a purchase order line to be invoiced. Within this field, there is information such as the PO number to which the item relates, the line description, quantity, received quantity, invoiced quantity and unit price.
The Received and Invoiced quantity in the PO Line drop down allows you to see if any of the items have been received or previously invoiced. For example, you may have 5 items on order and only 2 have been received, therefore you will want to come back at a later time to invoice the balance.
- Description: This field will be automatically populated when you select a PO line.
- Quantity: This field will remain blank, allowing you to manually dictate the quantity that you would like to invoice.
- Unit Price: This field will be automatically populated when you select the PO line, however, it can still be edited if you require manual changes.
- Tax Band: This field will automatically select the correct tax band as per the purchase order, however again, it can be manually changed if required.
- Tax Total: This field will remain blank until you specify a quantity, as the system will then work out the tax total based on this figure.
Once you are happy with the details, click to add the line to the invoice.
The item will then be displayed along with its details on the grid.
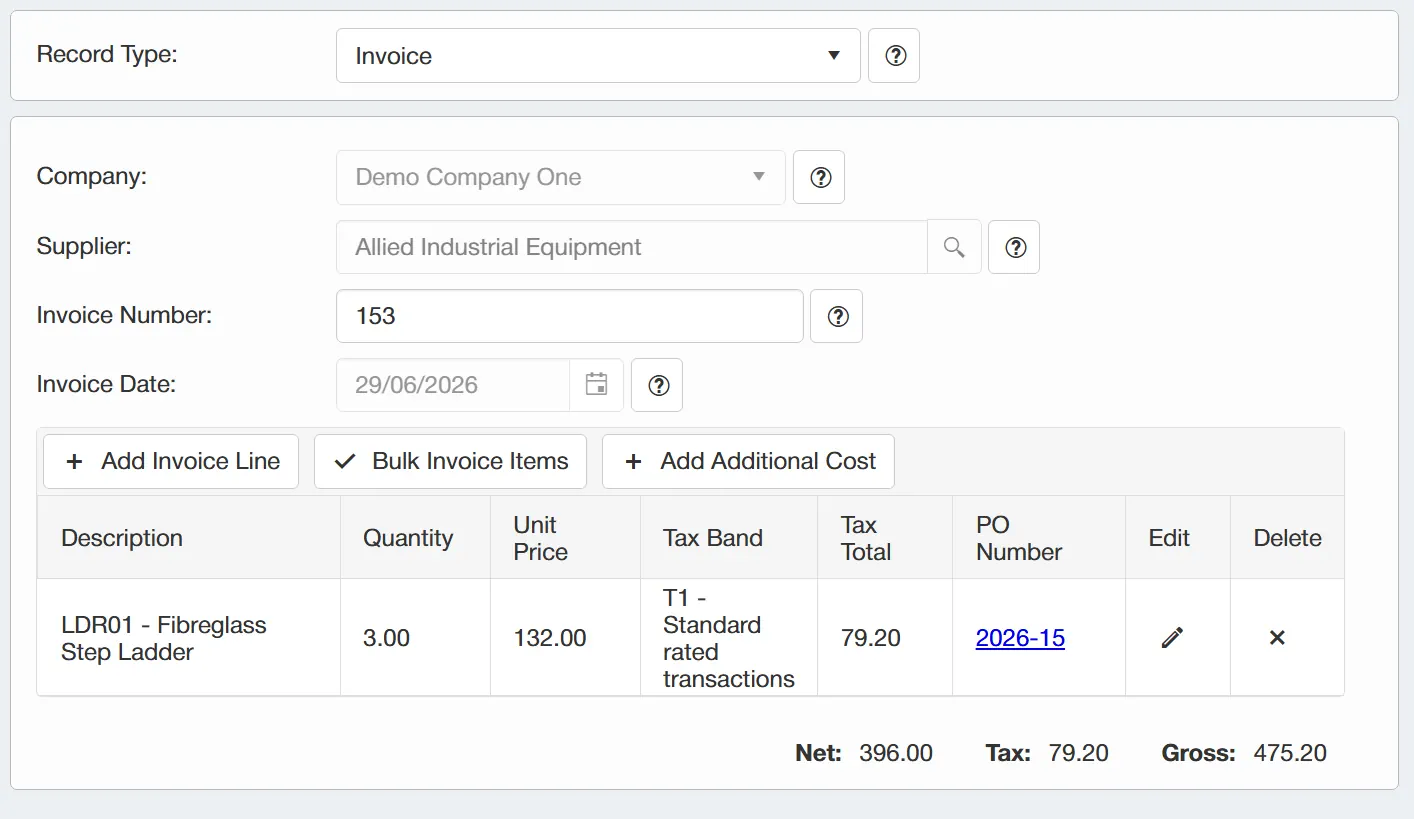
If the item has not been receipted on the system, the line will appear in red to indicate that you have not actually received the goods prior to invoicing.
When adding a line to an invoice, the system will carry out checks on the item's price and quantity in accordance with your Invoice Indexing Settings. For more information on these settings, click here
Bulk Invoicing Lines
To add invoice lines in bulk, select . This will open a new window.
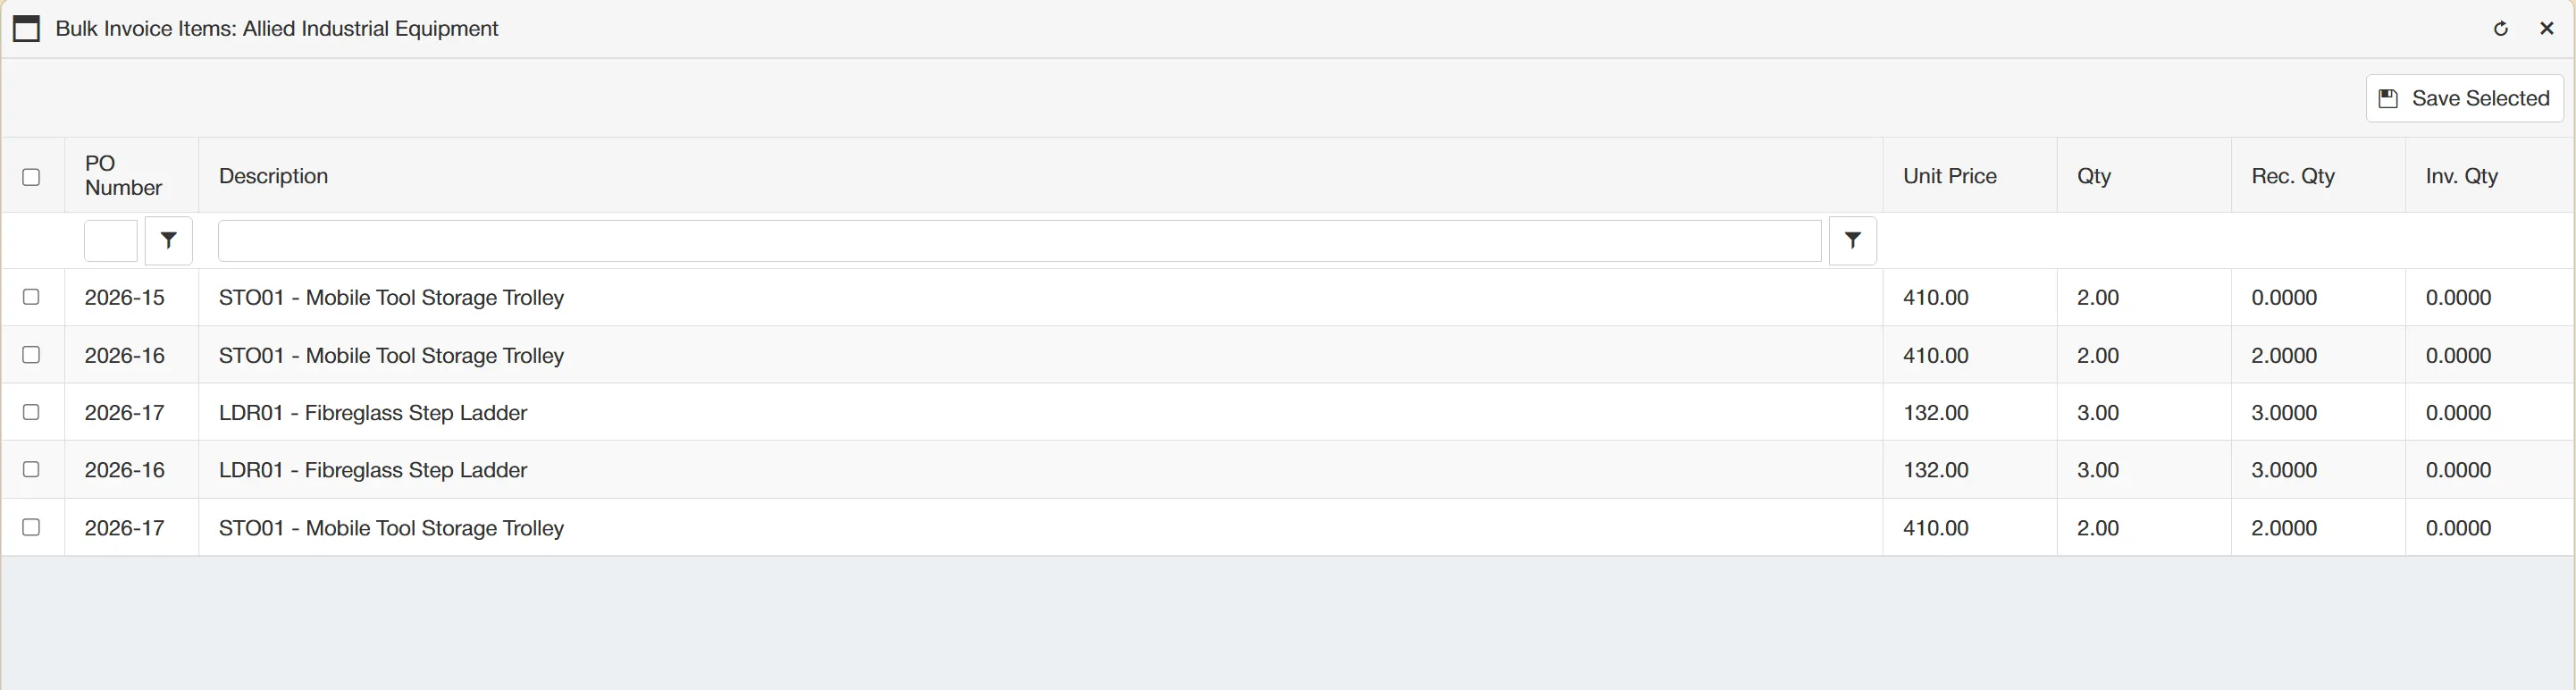
This grid displays any items currently on order from the supplier. It also gives an overview of the status of each item, for example, how many have been receipted and invoiced.
You can select multiple items from the grid by ticking the boxes on the left of each row. This allows you to add multiple lines to the invoice at once.
Once you are happy with your selection, click to add them to the invoice. Doing this removes them from the bulk invoice window, allowing you to clearly see which items are left.
Adding Additional Costs
You may have instances where the supplier's invoice contains an item that was not present on the purchase order. A common example of this is delivery charges, as these can sometimes be excluded from the supplier's quotation.
The system allows you to add extra charges such as this at the invoice indexing stage. To do this, simply click .
This opens a new window with various fields allowing you to detail the additional cost.
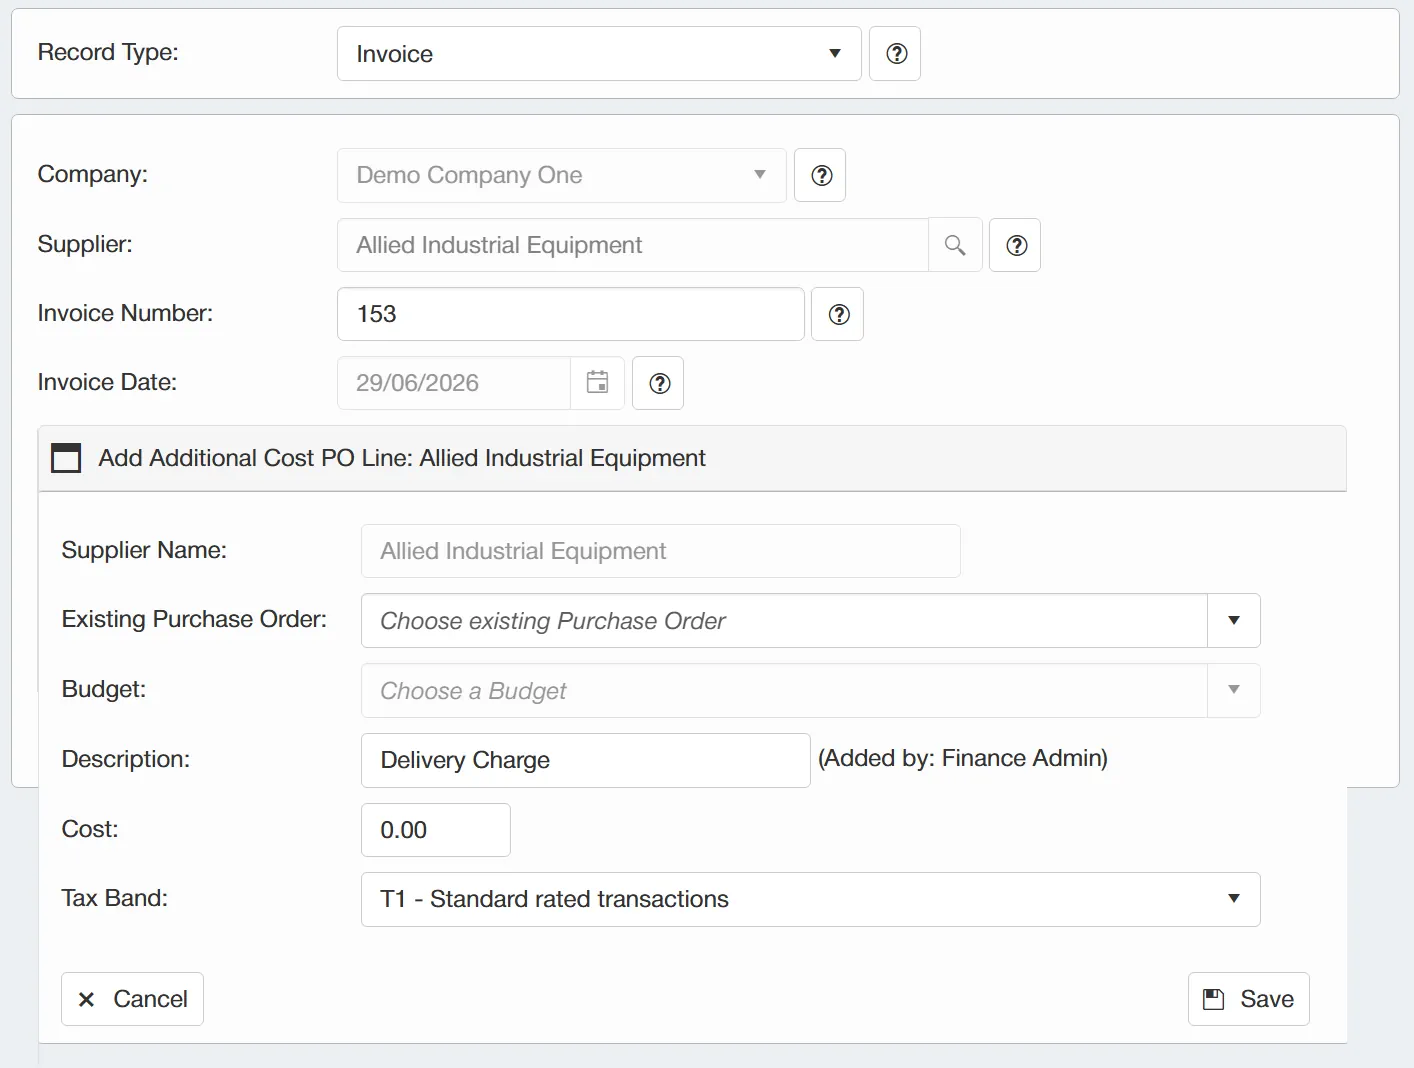
The fields on this window are as follows:
- Supplier Name: This field is pre-populated and read-only as it is linked to your original choice when you began indexing the invoice.
- Existing Purchase Order: This allows you to select the purchase order to which the additional cost is going to be linked.
- Budget: This allows you to specify which budget the additional cost is going to come from.
- Description: This is a free-text field allowing you to specify exactly what the additional cost is.
- Cost: This field allows you to fill in the additional cost value.
- Tax Band: This field allows you to select the relevant tax band for this cost.
Once you are happy with the details, click to add this to the invoice.
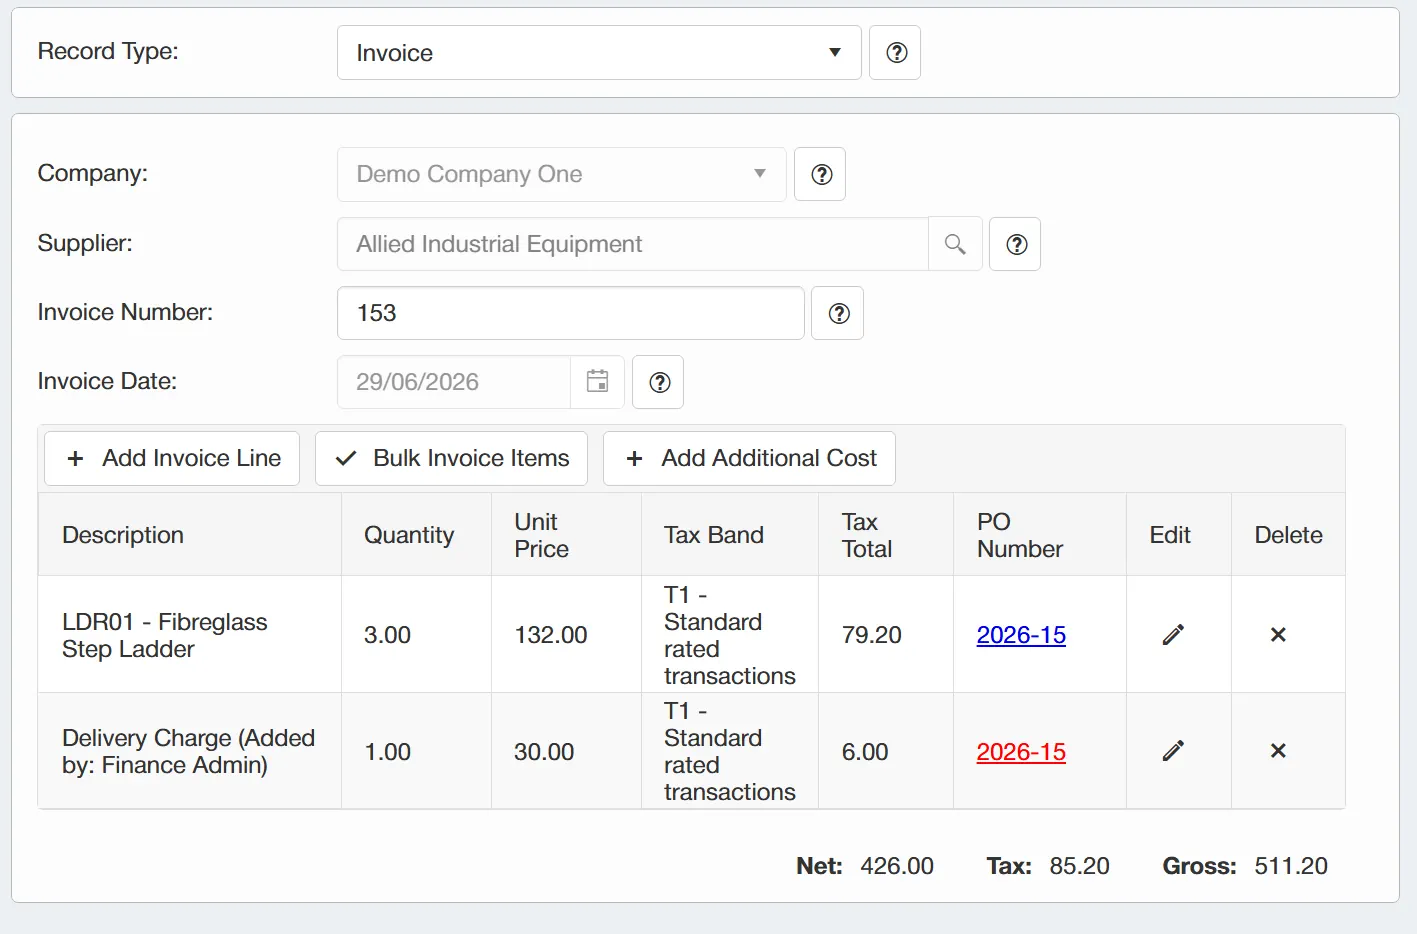
The line will be displayed in red as the system acknowledges that this line was not present on a purchase order and therefore not receipted. The system also notes the user who added this cost for audit purposes.
Invoice Approval
Once an invoice has been saved on the system it will be sent for approval in line with your approval settings.
For more information on Invoice Approval Settings click here
Invoice Approval Task
When an invoice is submitted for approval, the approver (the PO Creator) will receive an Invoice Approval task.
To view your tasks, simply open the My Tasks Grid.
From this grid, you can open the relevant Invoice Approval task.
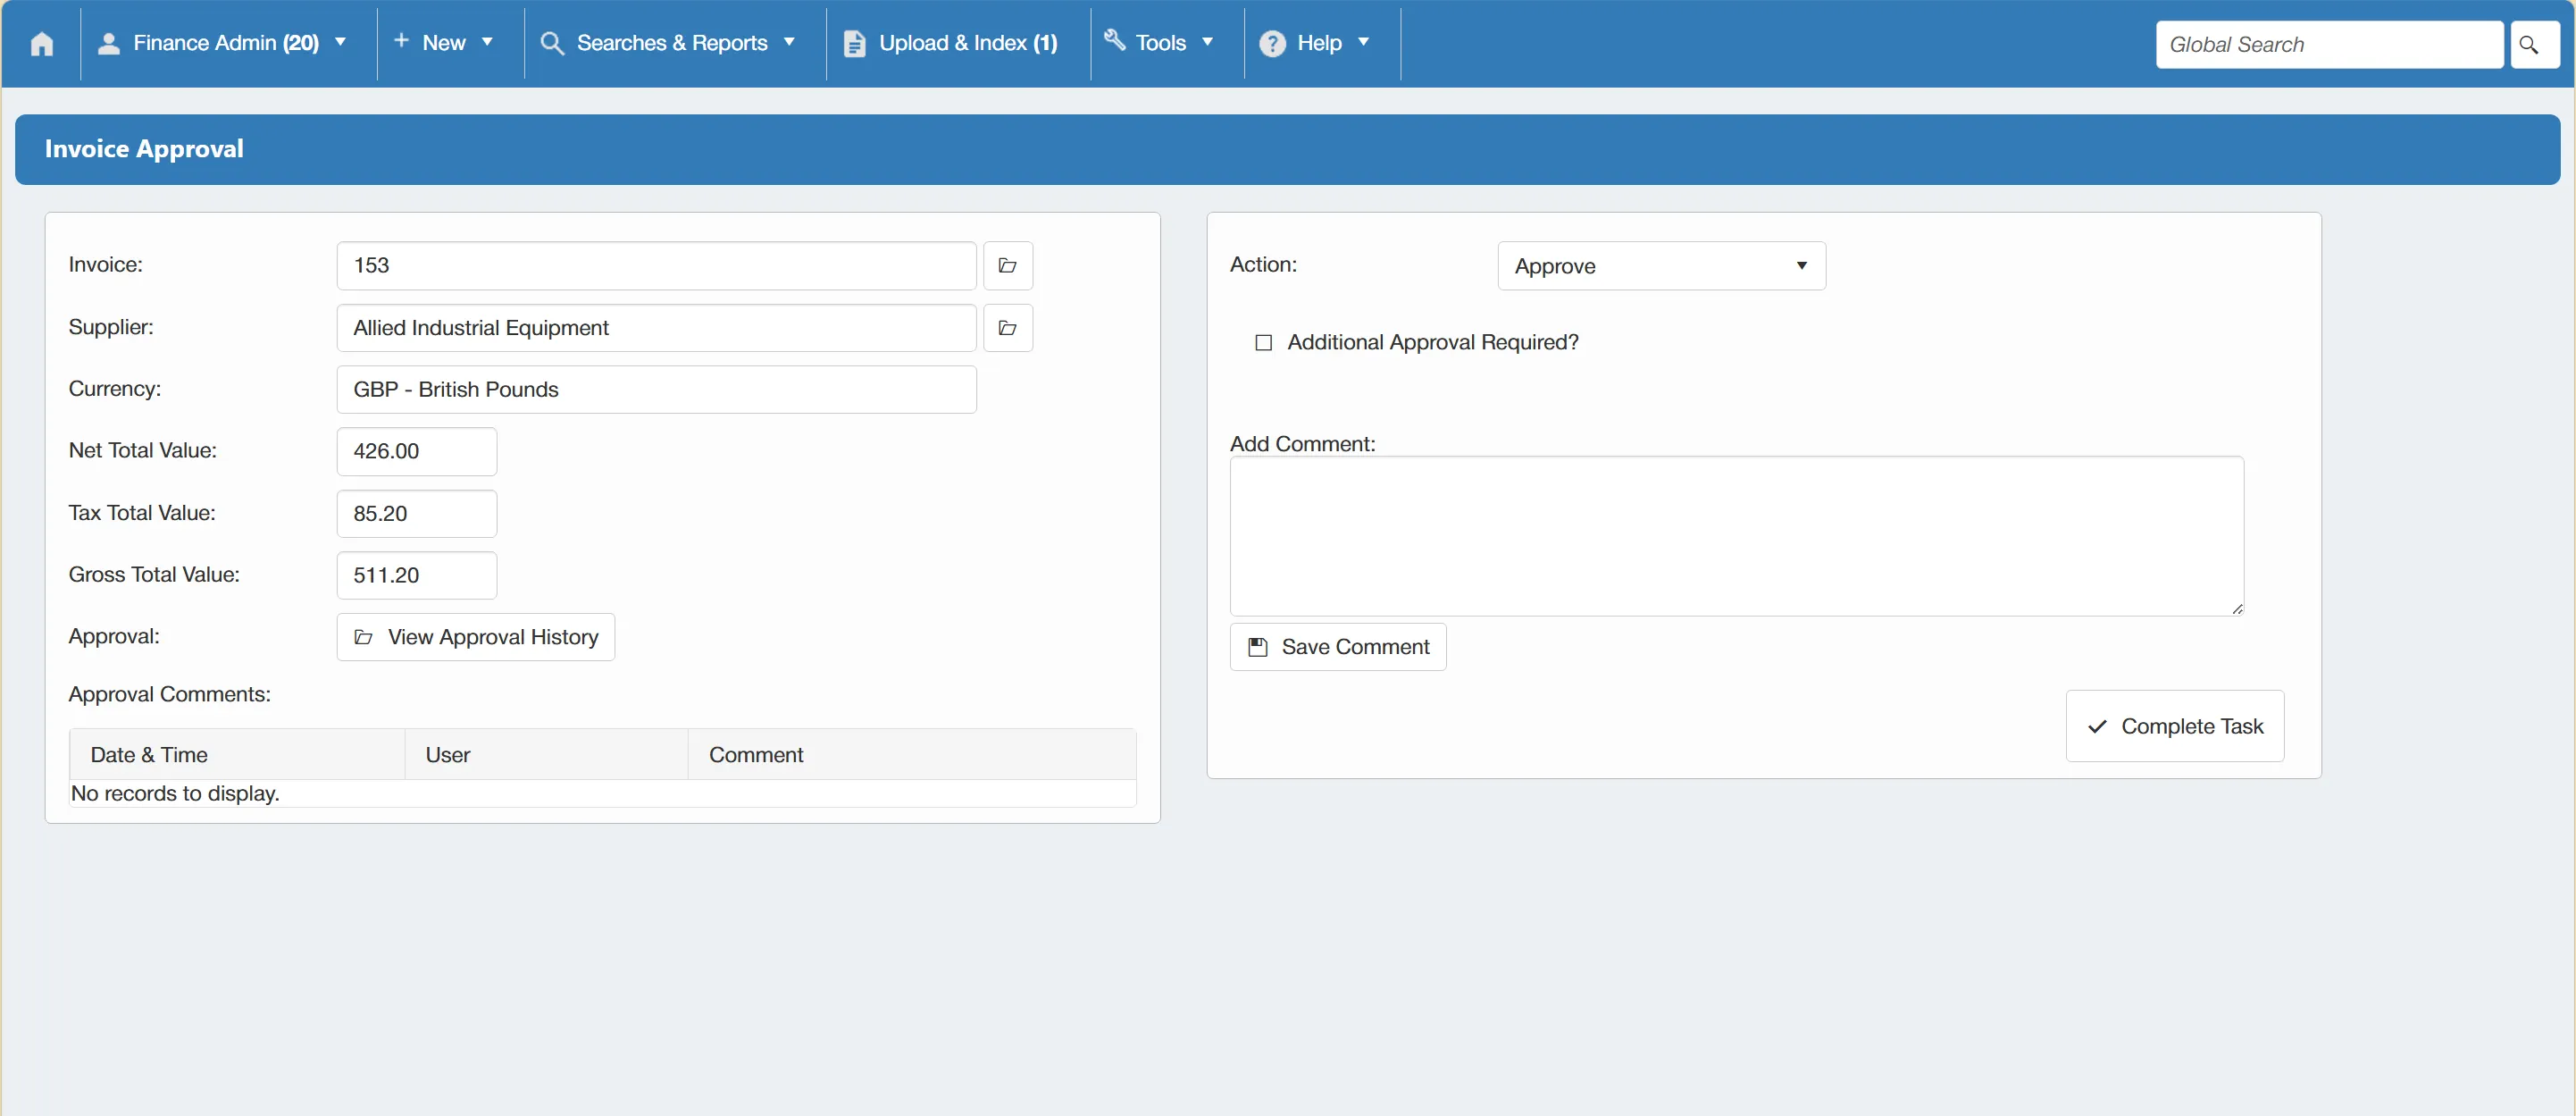
The task is laid out in two sections:
- On the left, you have the invoice details such as Net Total Value, Tax Total Value, Gross Total Value, Approval History and Approval Comments.
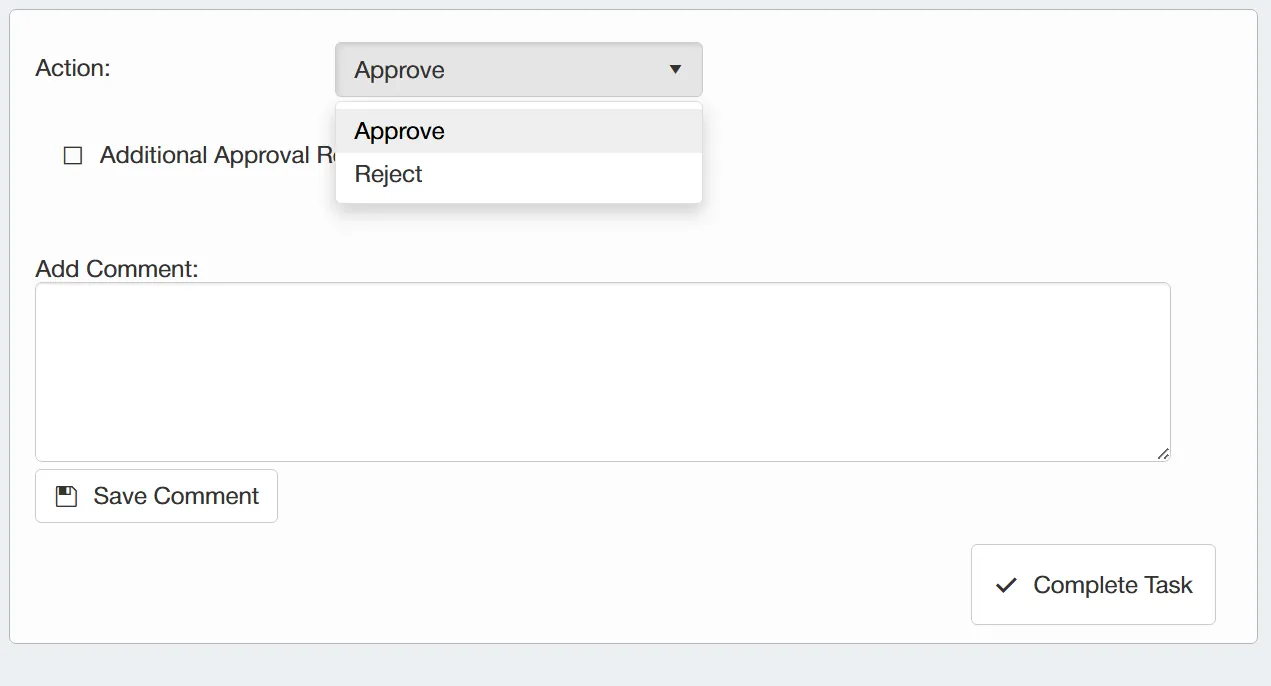
- On the right, you have the available actions. In an Invoice Approval task, the available actions are; Approve or Reject.
You can also view a copy of the invoice document by clicking on the button at the end of the Invoice field.
There are two options available on an Invoice Approval task:
- Approve: This approves the invoice and marks it as ready for export. When Approve is selected, an ☐ Additional Approval Required? checkbox appears below. For more information on this, click here.
- Reject: This allows you to reject the invoice and sends it back to the PO creator for review. When rejecting an invoice, you must add a comment to accompany it as this provides the PO creator with information to review.
If you add a comment, it will appear in the Approval Comments grid on the left hand side of the approval window.
Once you have chosen your action and added any comments (if required), simply click .
Invoice Additional Approval
Within the Invoice Approval window, there is an option for ☐ Additional Approval Required?. This feature allows you to approve the invoice, but also send it for another level of ad-hoc approval. This is particularly useful for invoices that have special, one-off approval requirements which do not fit within the standard approval rules.
When the ☐ Additional Approval Required? is ticked, a new Assign To: field is presented. This drop down menu allows you to specify which user you would like the additional approval task to be assigned to.
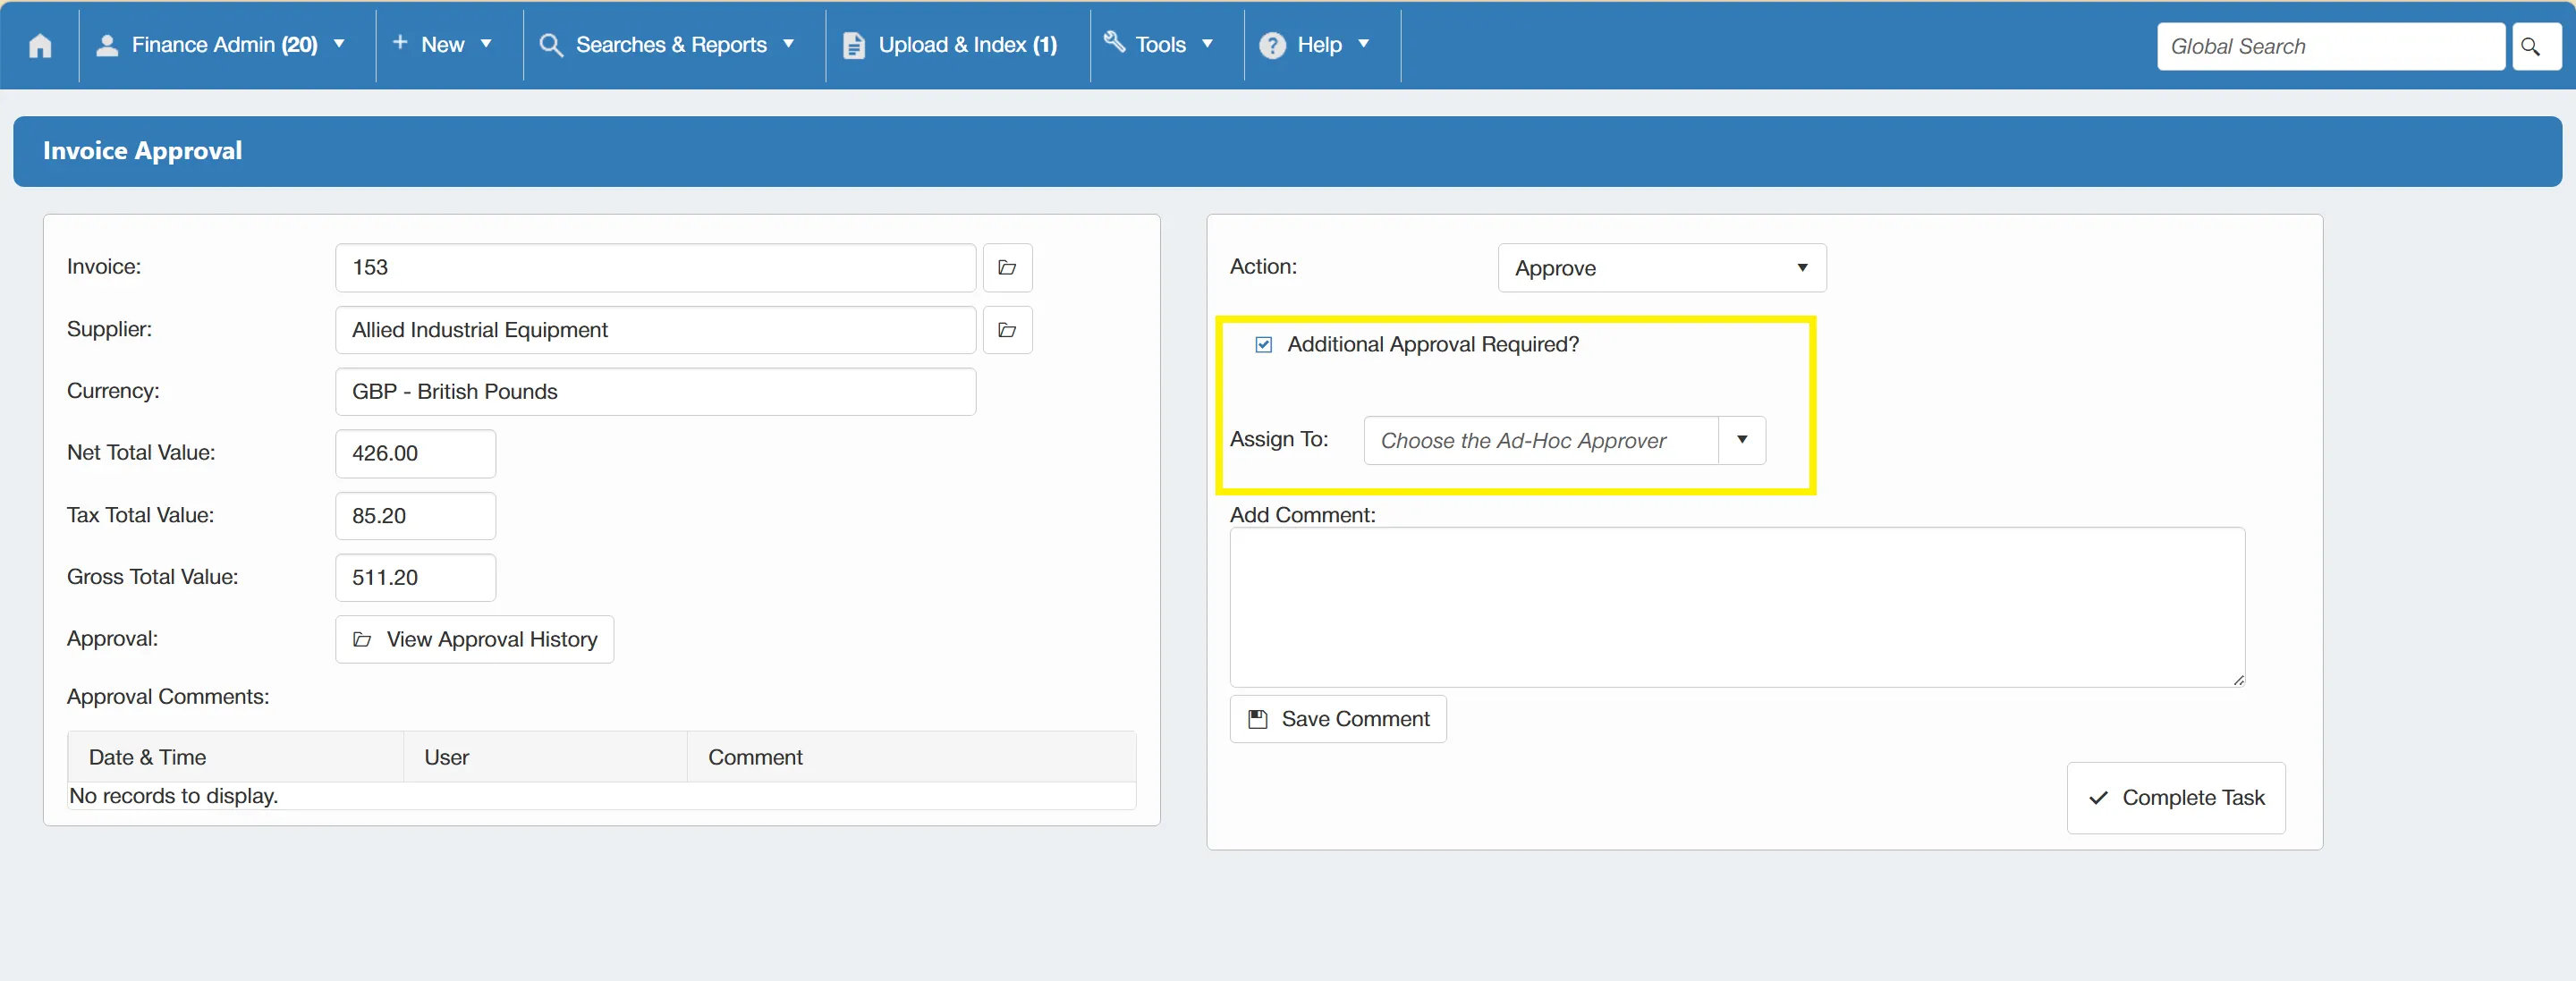
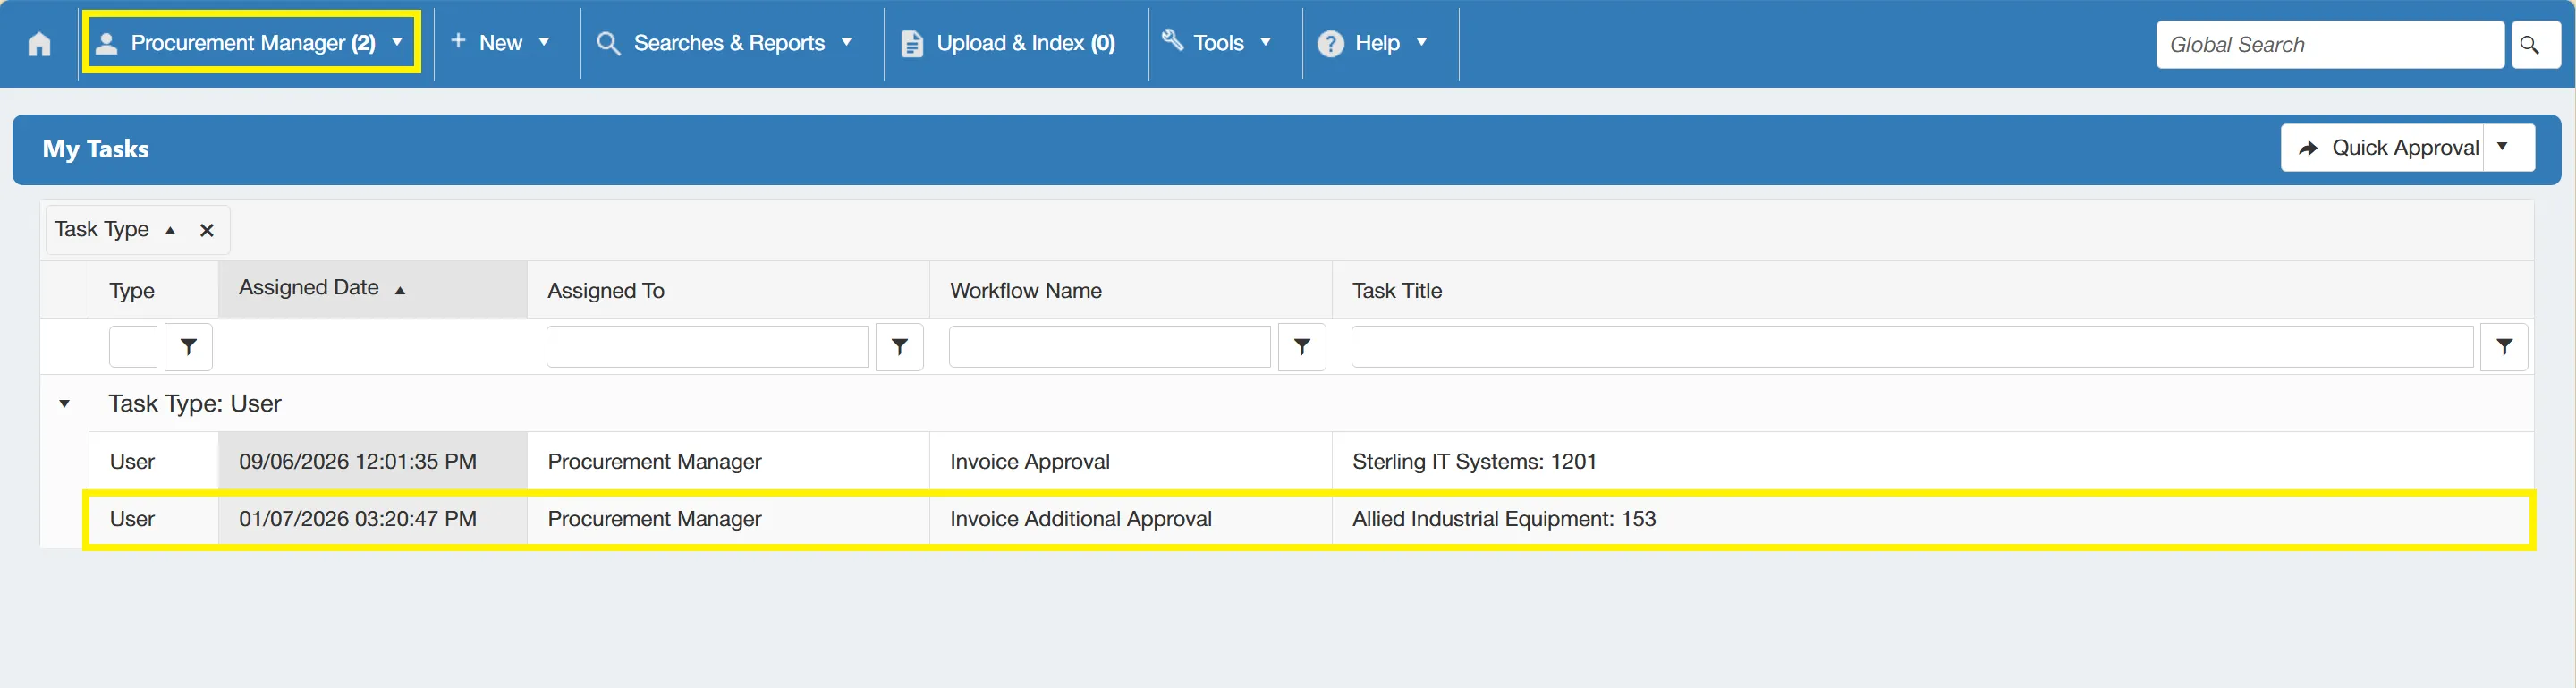
Once approved by the first user, the invoice is sent to the designated additional approval user. This user receives an Invoice Additional Approval task.
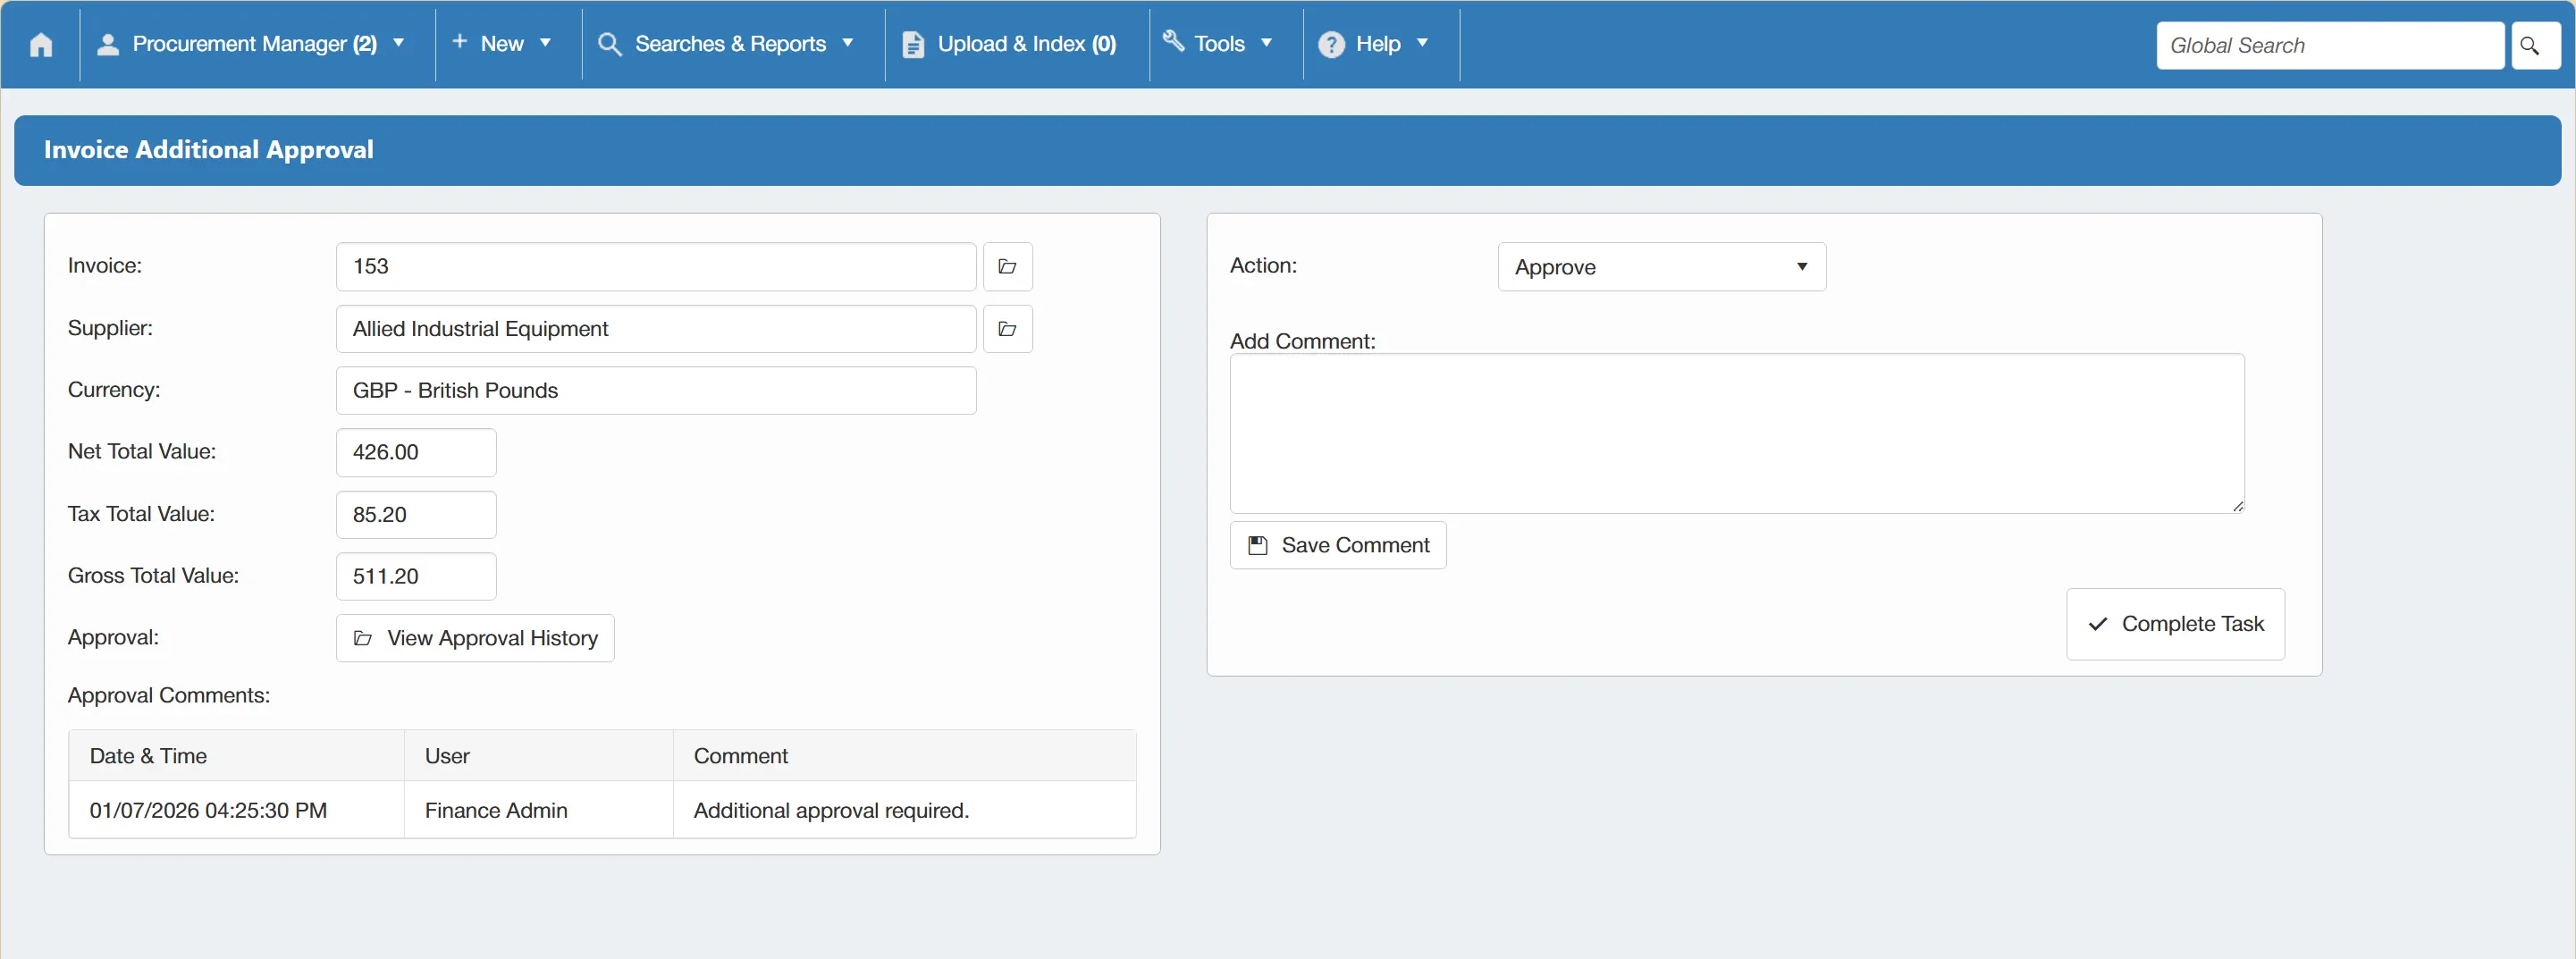
When opening this task, you will a task window which is very similar to the standard Invoice Approval task. The only exception is that there is no option to assign the task for another level of ad-hoc approval. This is because additional invoice approval can only be used once.
The Invoice Additional Approval feature can be toggled on/off within the Companies configuration section. For more information on this, click here.
Rejected Invoice Task
When an invoice is rejected, a Rejected Invoice task is sent to the user who indexed the invoice.
To view your tasks, simply open the My Tasks Grid.
From this grid, you can open the relevant Rejected Invoice task.
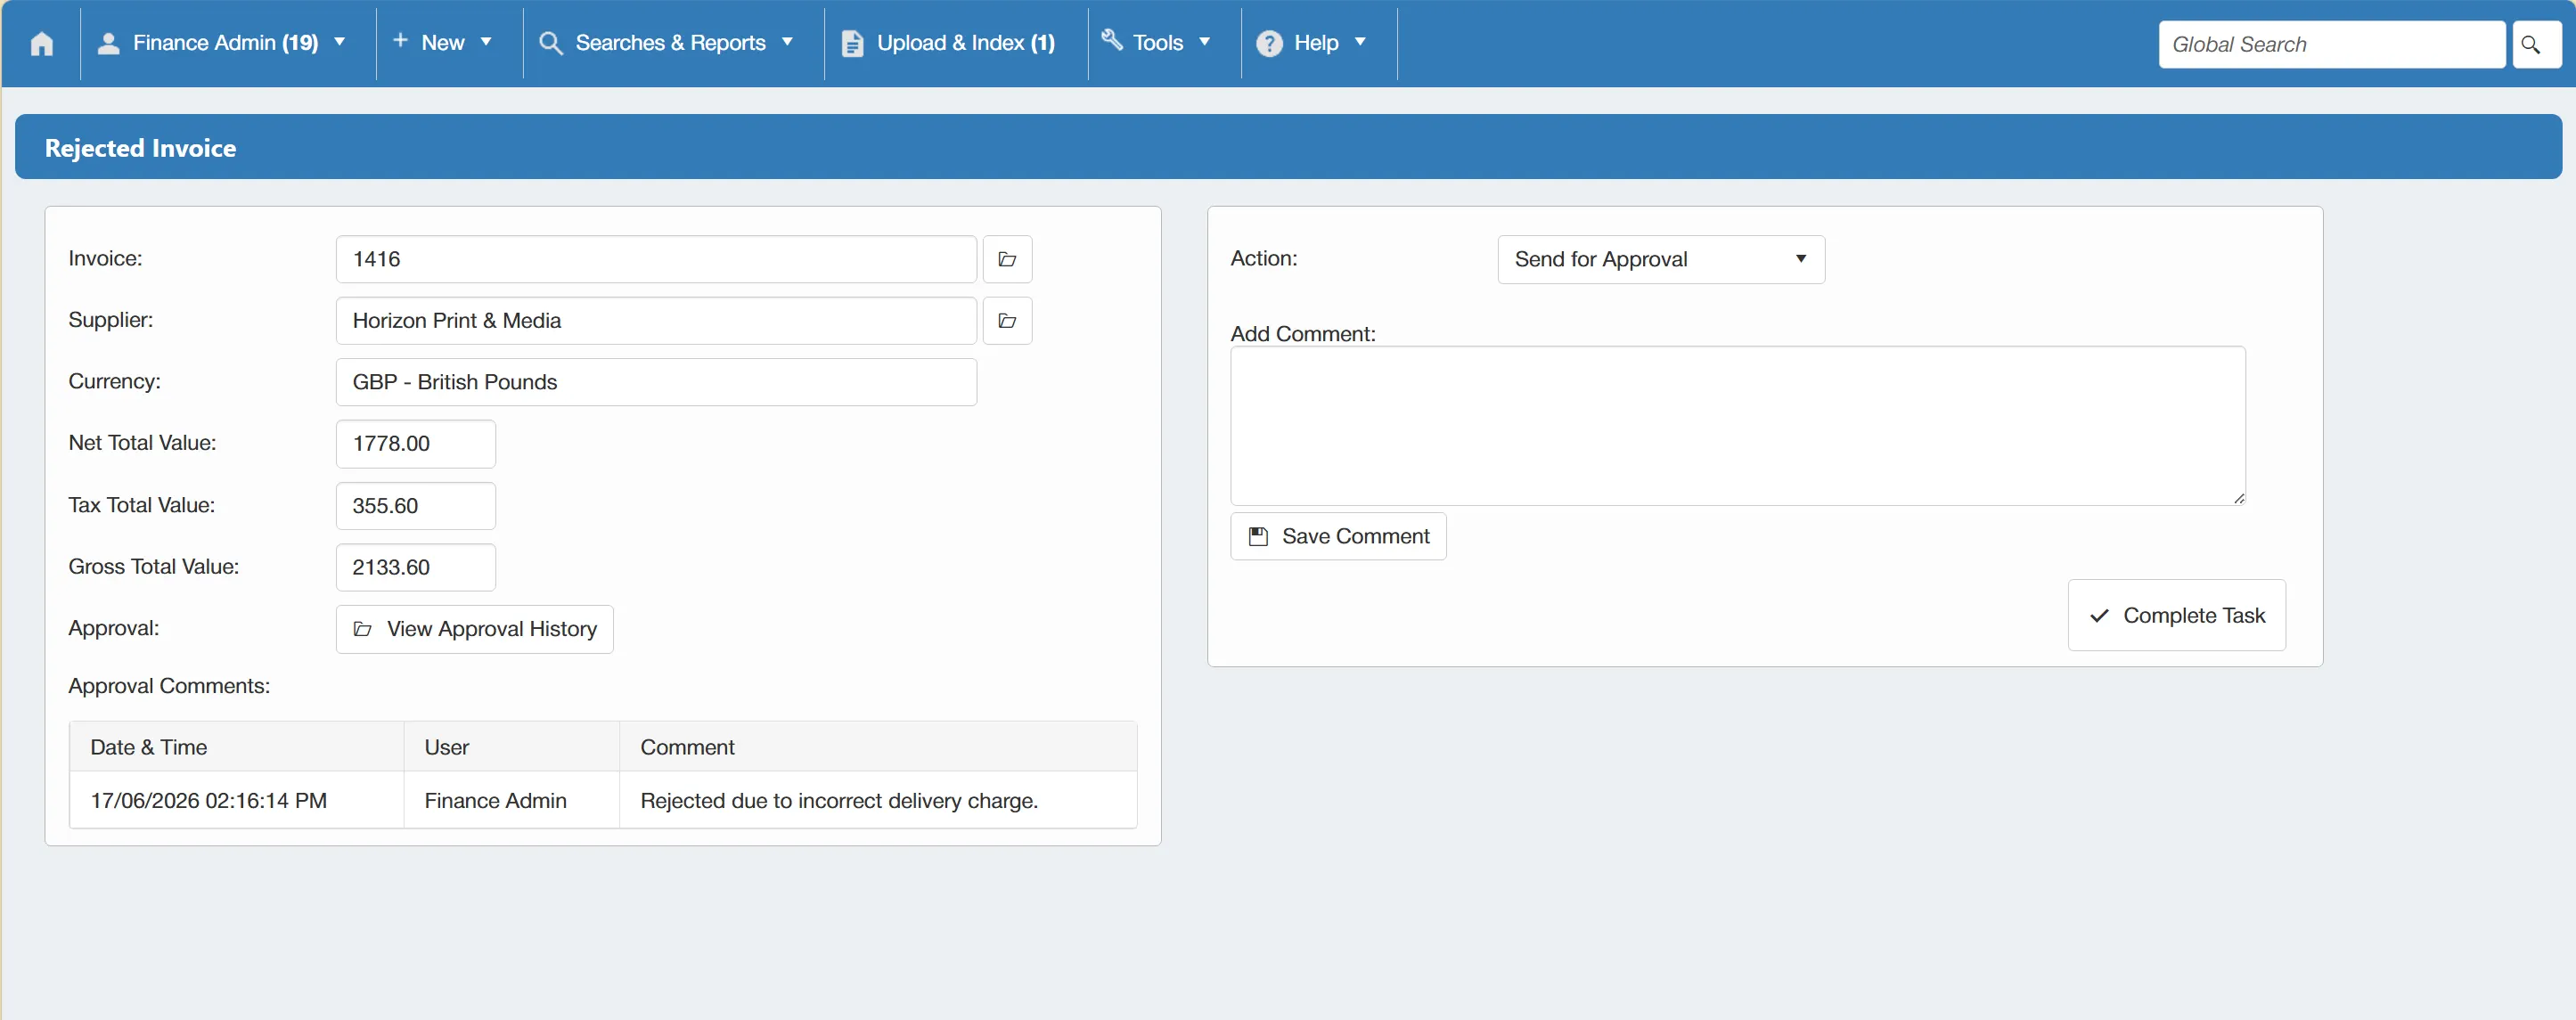
The task is laid out in two sections:
- On the left, you have the invoice details such as Net Total Value, Tax Total Value, Gross Total Value, Approval History and Approval Comments.
- On the right, you have the available actions. In a Rejected Invoice task, the available actions are; Send for Approval, Void and Void and ReIndex.
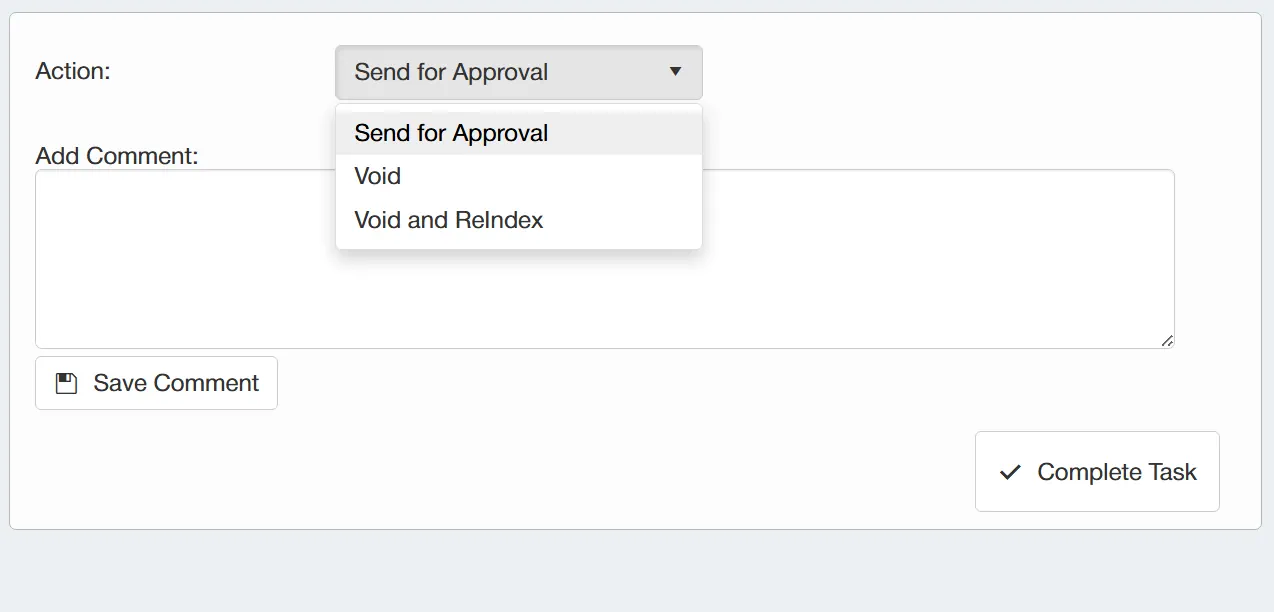
You can also view a copy of the invoice document by clicking on the button at the end of the Invoice field.
There are three options available on an Invoice Approval task:
- Send for Approval: This re-submits the invoice to the approver for approval.
- Void: This voids the invoice if you no longer wish to send it for approval.
- Void and ReIndex: This voids the invoice and takes you back to the indexing window to amend the details before re-submitting it.
There is also the facility to add a comment to the Invoice Approval workflow by filling out the Add Comment box and clicking button.
Once you are happy with your desired action, simply click .
Invoice Exports
Approved invoices can be exported from the system in .csv format, ready to be imported into your separate accounts system.
To carry out an export, you must navigate to under the Tools menu.
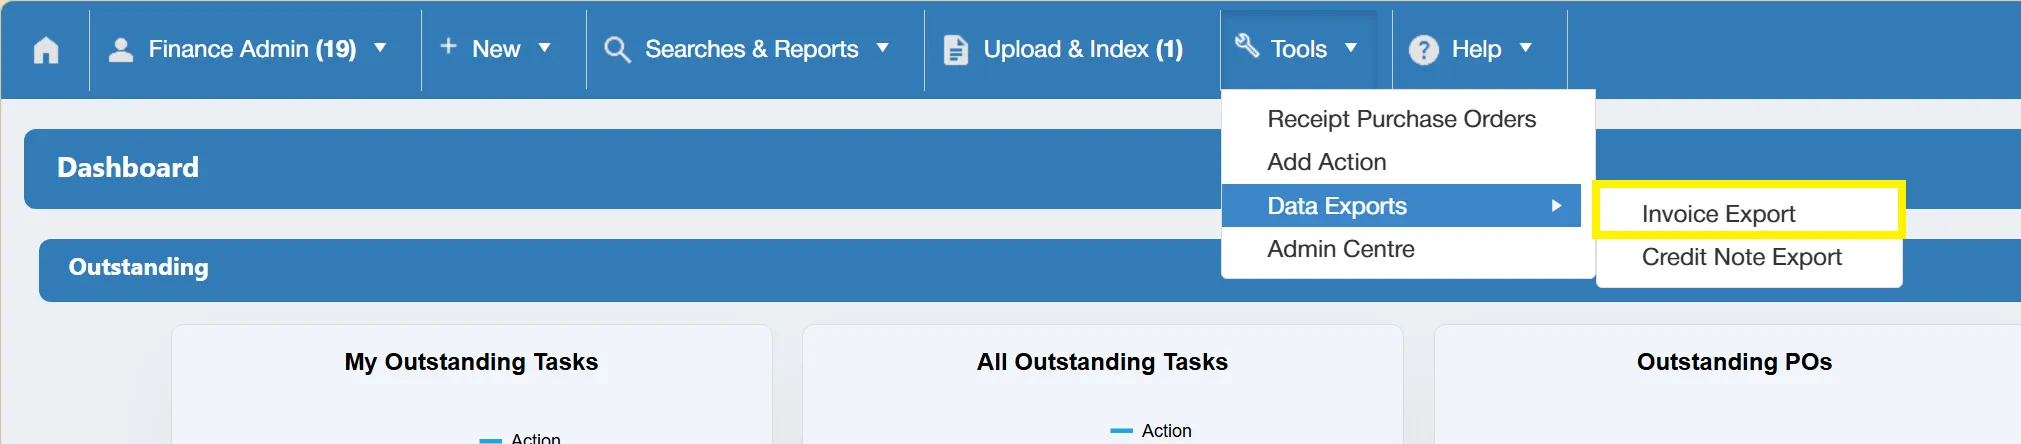
This takes you to a new window displaying an Invoice Export Administration grid which contains previous exports.

From this grid, users can carry out the following actions:
- Revoke Export: This revokes the selected export, effectively returning the associated invoices back to the "pool" to be re-exported.
- Regenerate Export File: This creates another copy of the export file for the associated invoice export. This function is helpful if you have lost the original export file.
At the top of the grid, there is a button, this will allow you to carry out a new export of any invoices currently sat within the "Invoices to Export" pool.

The New Export window allows you to specify the following parameters:
- Export Mode: Allows you to choose the type of export. Data Only or Data & Documents.
- Company: Allows you to specify the company that you are going to export the invoices from.
A Data Only export produces a CSV file containing the invoice data such as values and invoice numbers.
A Data & Documents export produces a zip file containing the same CSV but with the invoice files also included.
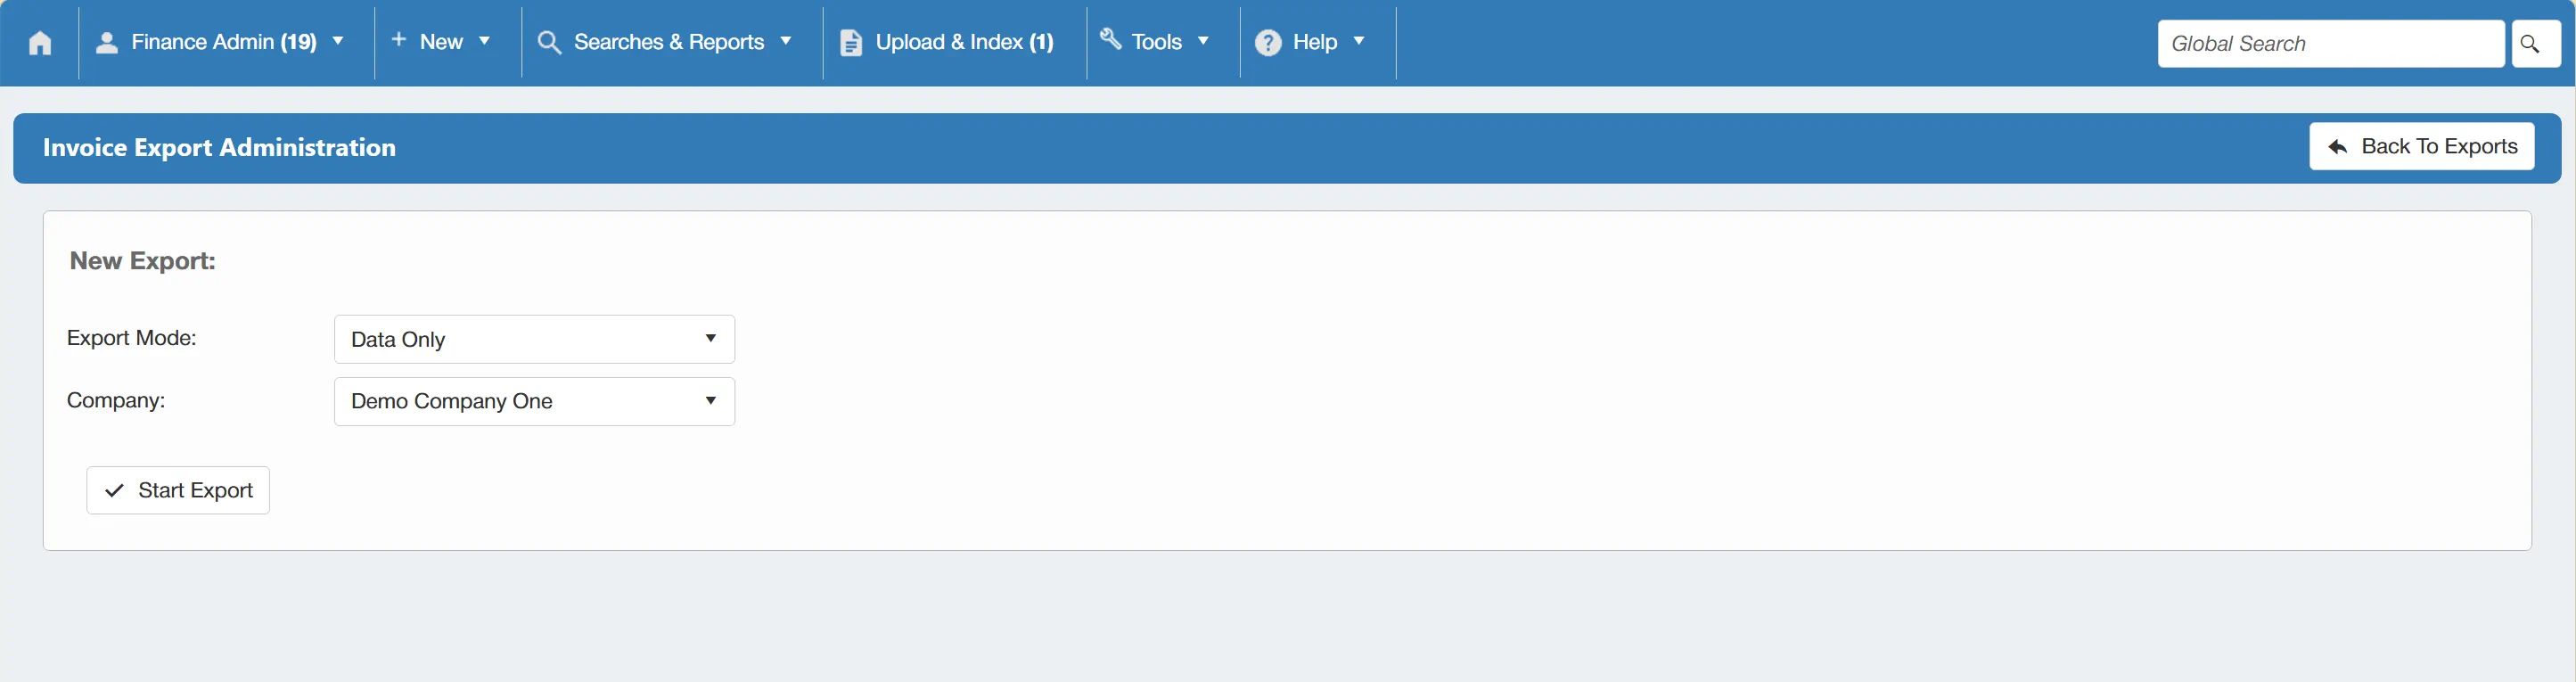
Once you have selected the export mode and company, click to begin the export.
A new line will then be added to the Invoice Export Administration grid, this line will have a status of Processing.
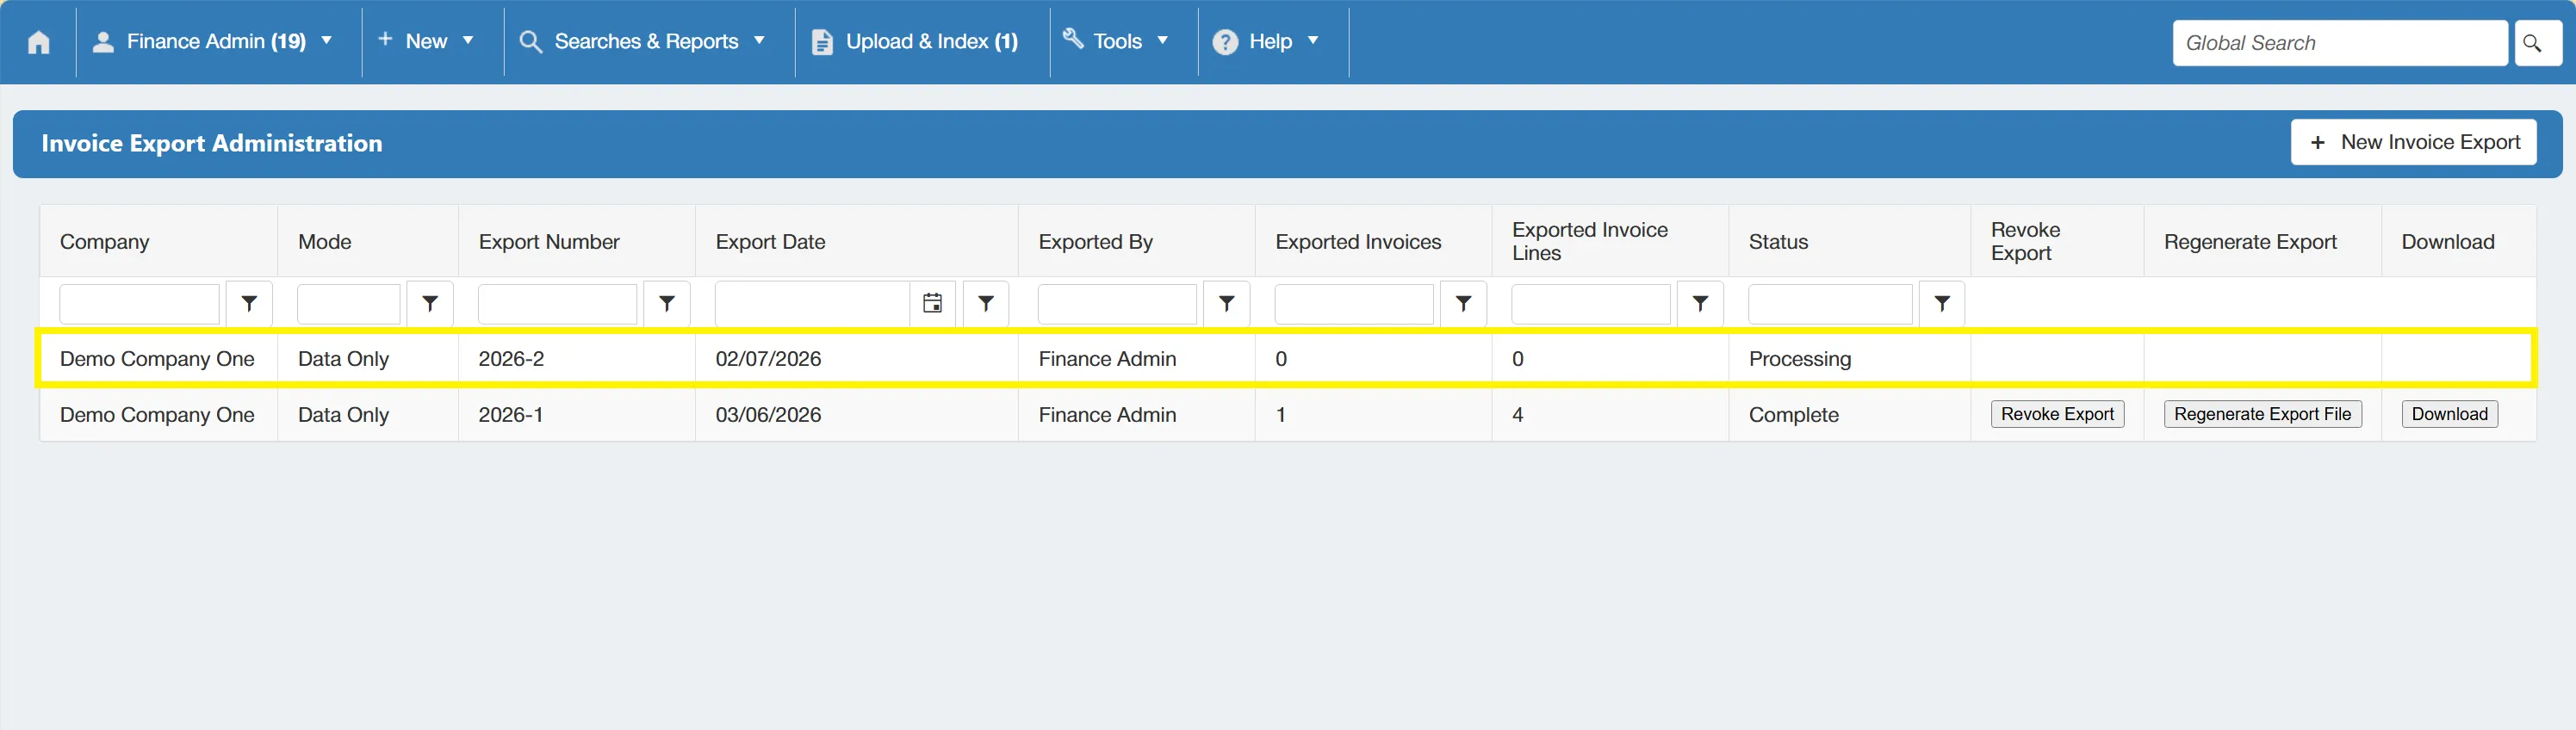
If you then reload the page, the line will be completed. You now have the ability to Download the relevant CSV file/Zip flder.
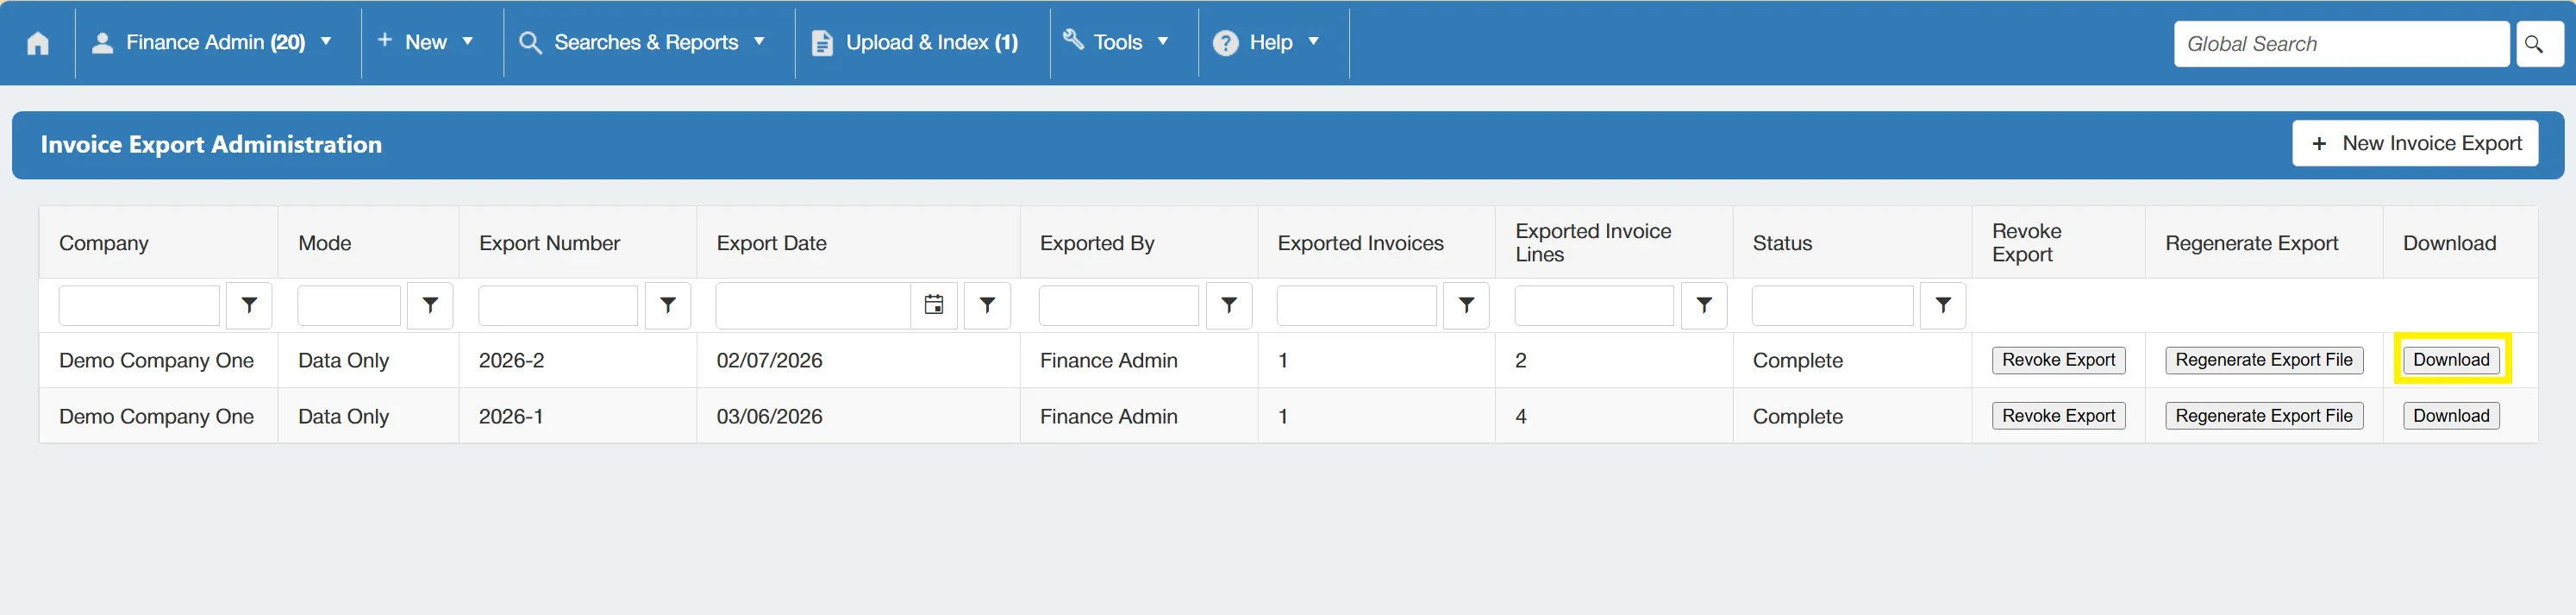
Once the export has been completed, the user who carried out the export will receive an Invoice Export Task.
Invoice Export Task
Once an Invoice Export has been carried out in the system, the user who initiated the export will receive an Invoice Export task.
To view your tasks, simply open the My Tasks Grid.
From this grid, you can open the relevant Invoice Export task.
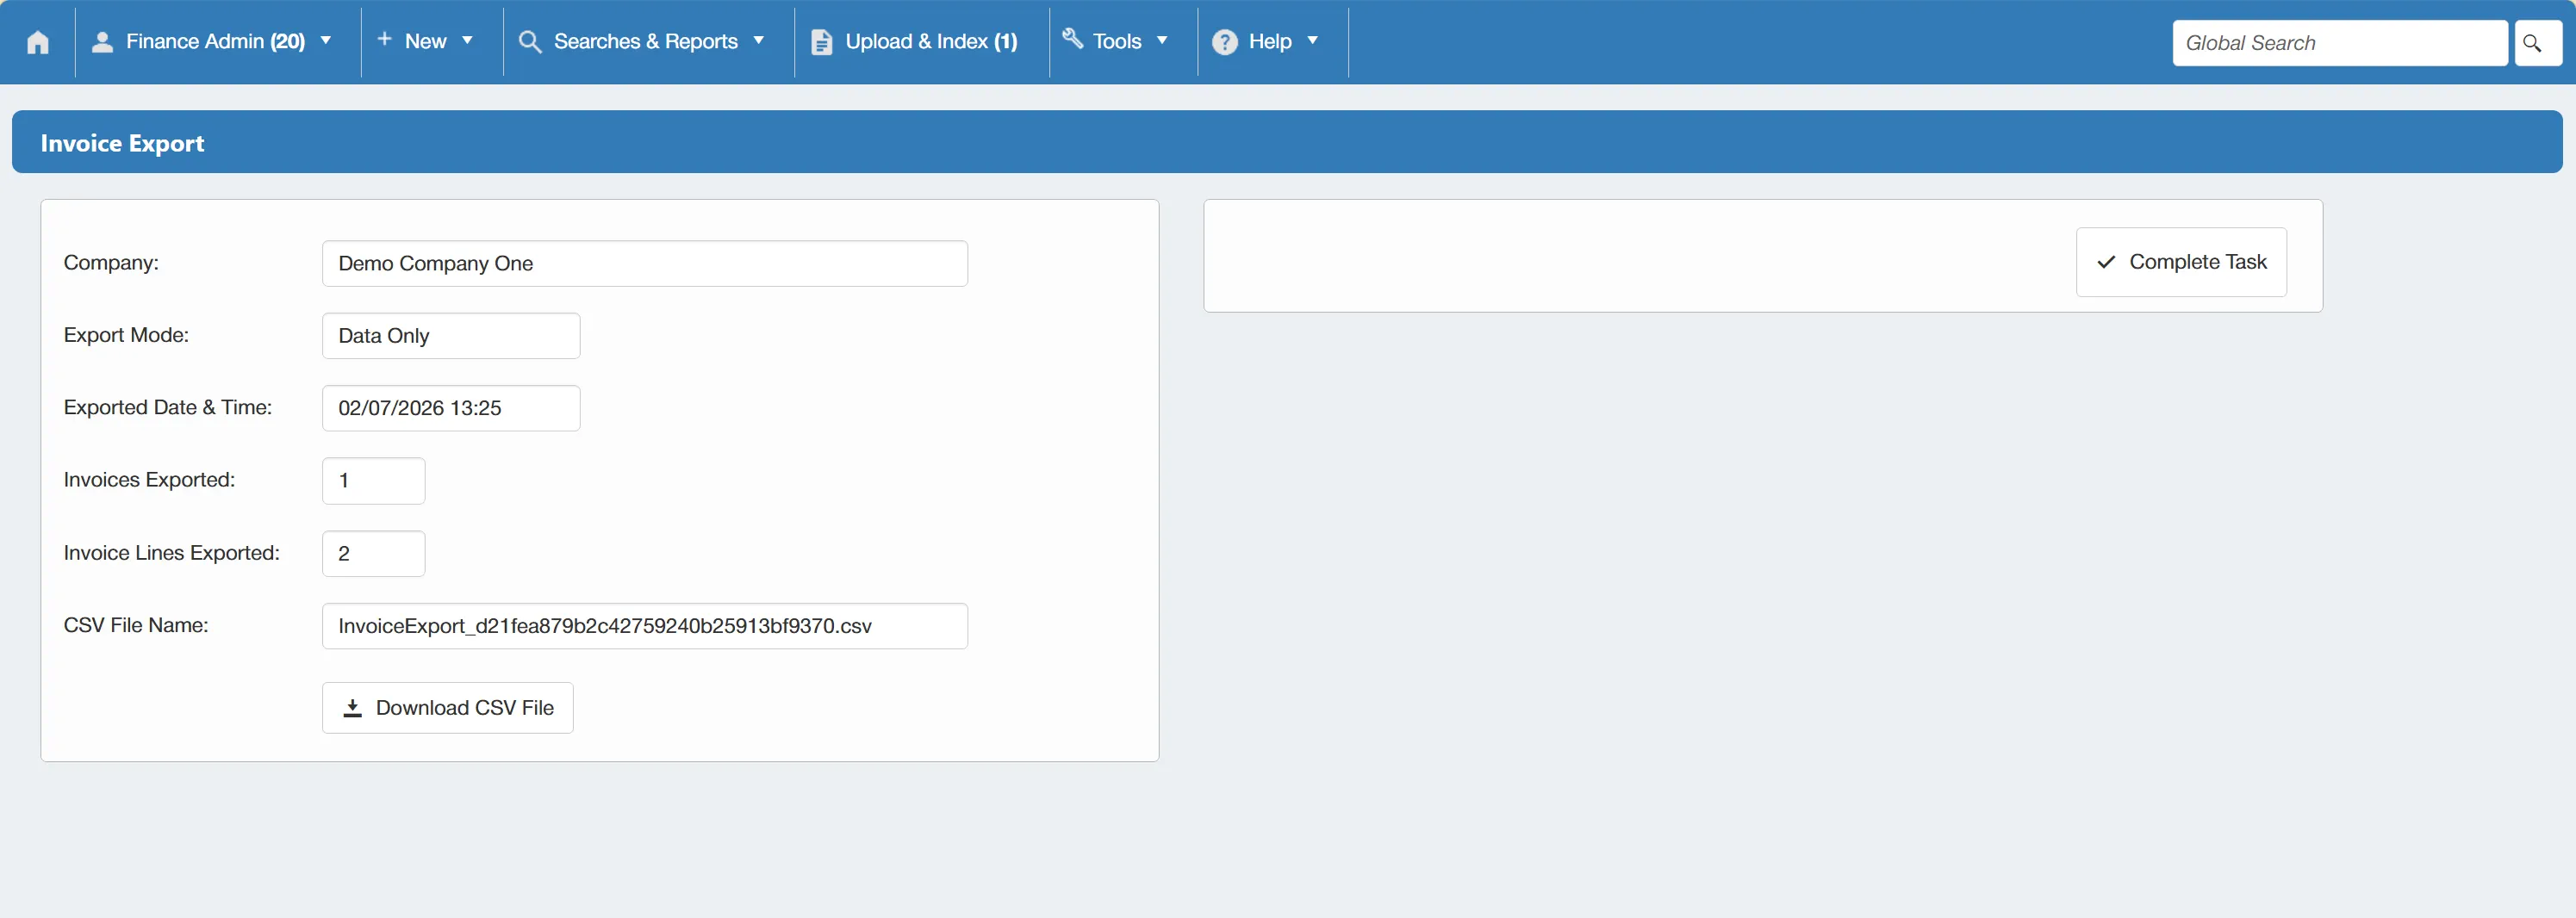
This task allows you to view the export information and download a CSV copy of the export file.
- On the left, is the invoice export information such as: Company, Exported Date & Time, quantity of Invoices Exported, quantity of Invoice Lines Exported and the CSV File Name. There is also a button to download the CSV file.
- On the right is the standard task actions, in this case, there is only one action available which is to .
To download the CSV file, simply click .
Once you have downloaded the CSV file (if required), simply click to remove this task from you list.
Deleting an Invoice
Users with the Invoice/Credit Note Delete user permission enabled, have the ability to delete invoices. This is particularly useful if an invoice has been incorrectly indexed.
Deleted invoices can be re-indexed if required, or they can remain within the Deleted Invoices Administration Grid for future reference.
For more information on the Deleted Invoices Administration Grid, and re-indexing invoices, click here.
To delete an invoice, select the when viewing an invoice.
For more information on searching for invoices, please click here.
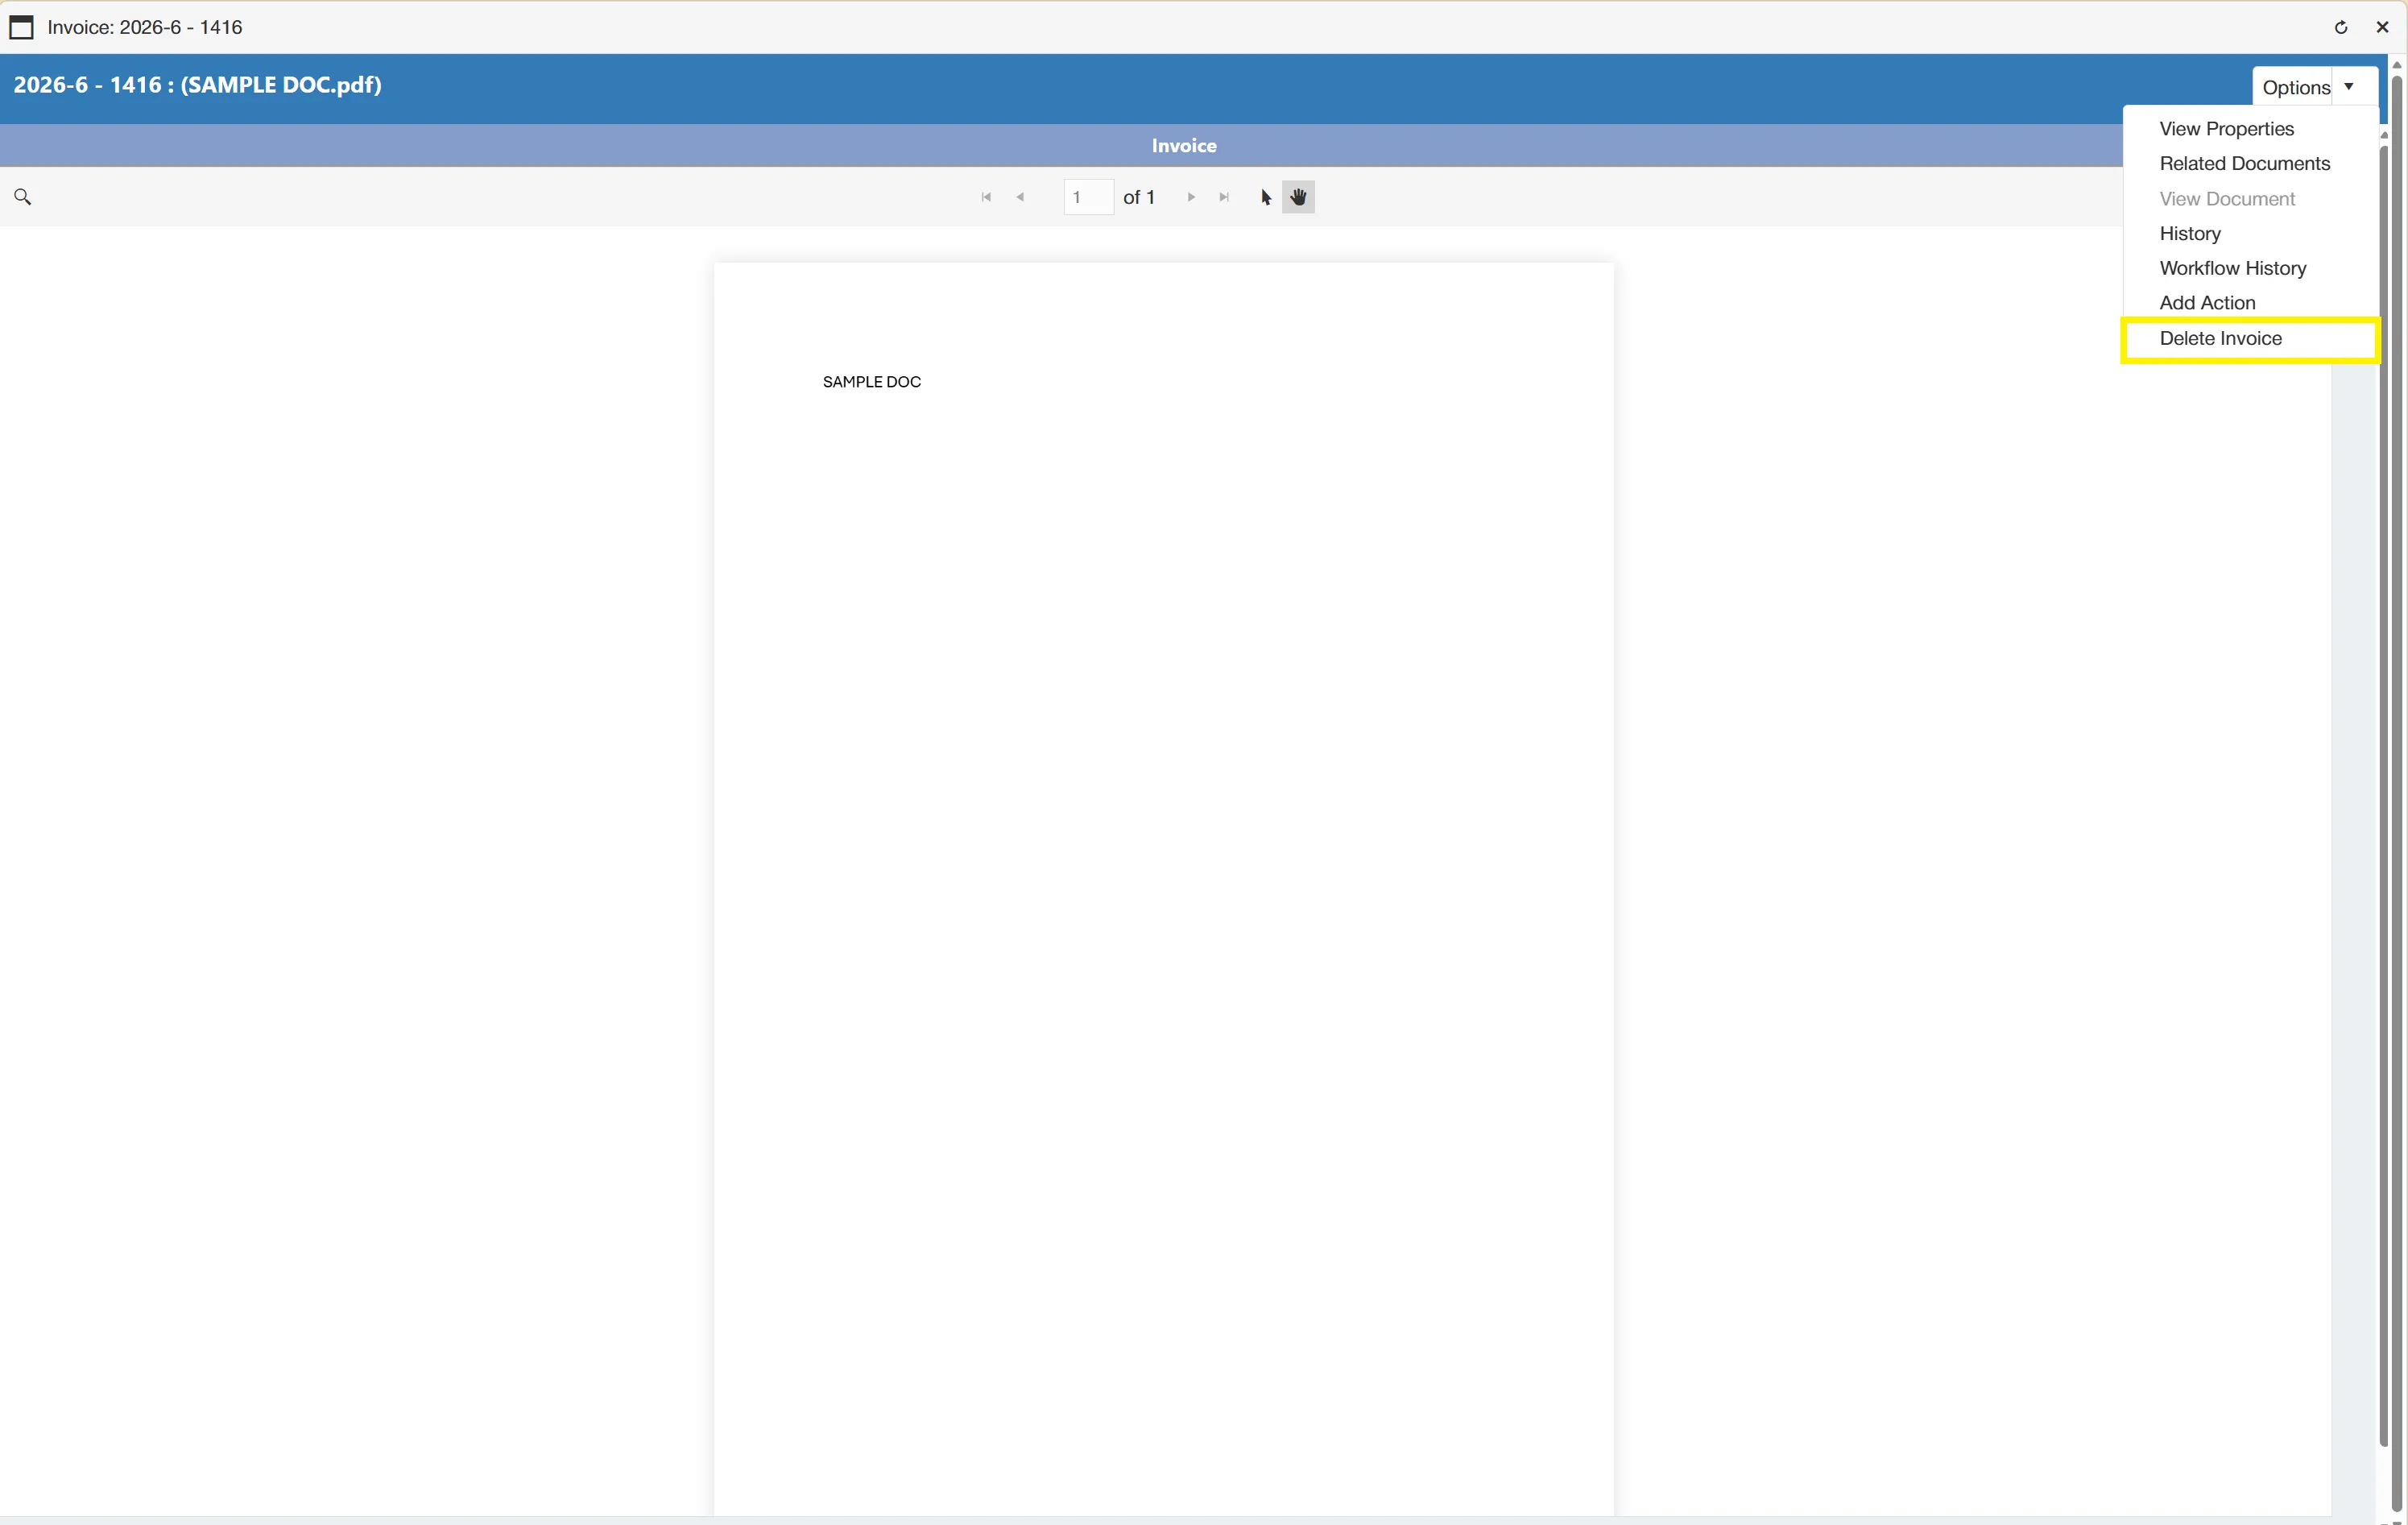
This takes you to a new window and asks you to specify a reason for the deletion. This reason will be logged against the deleted invoice for future auditability.
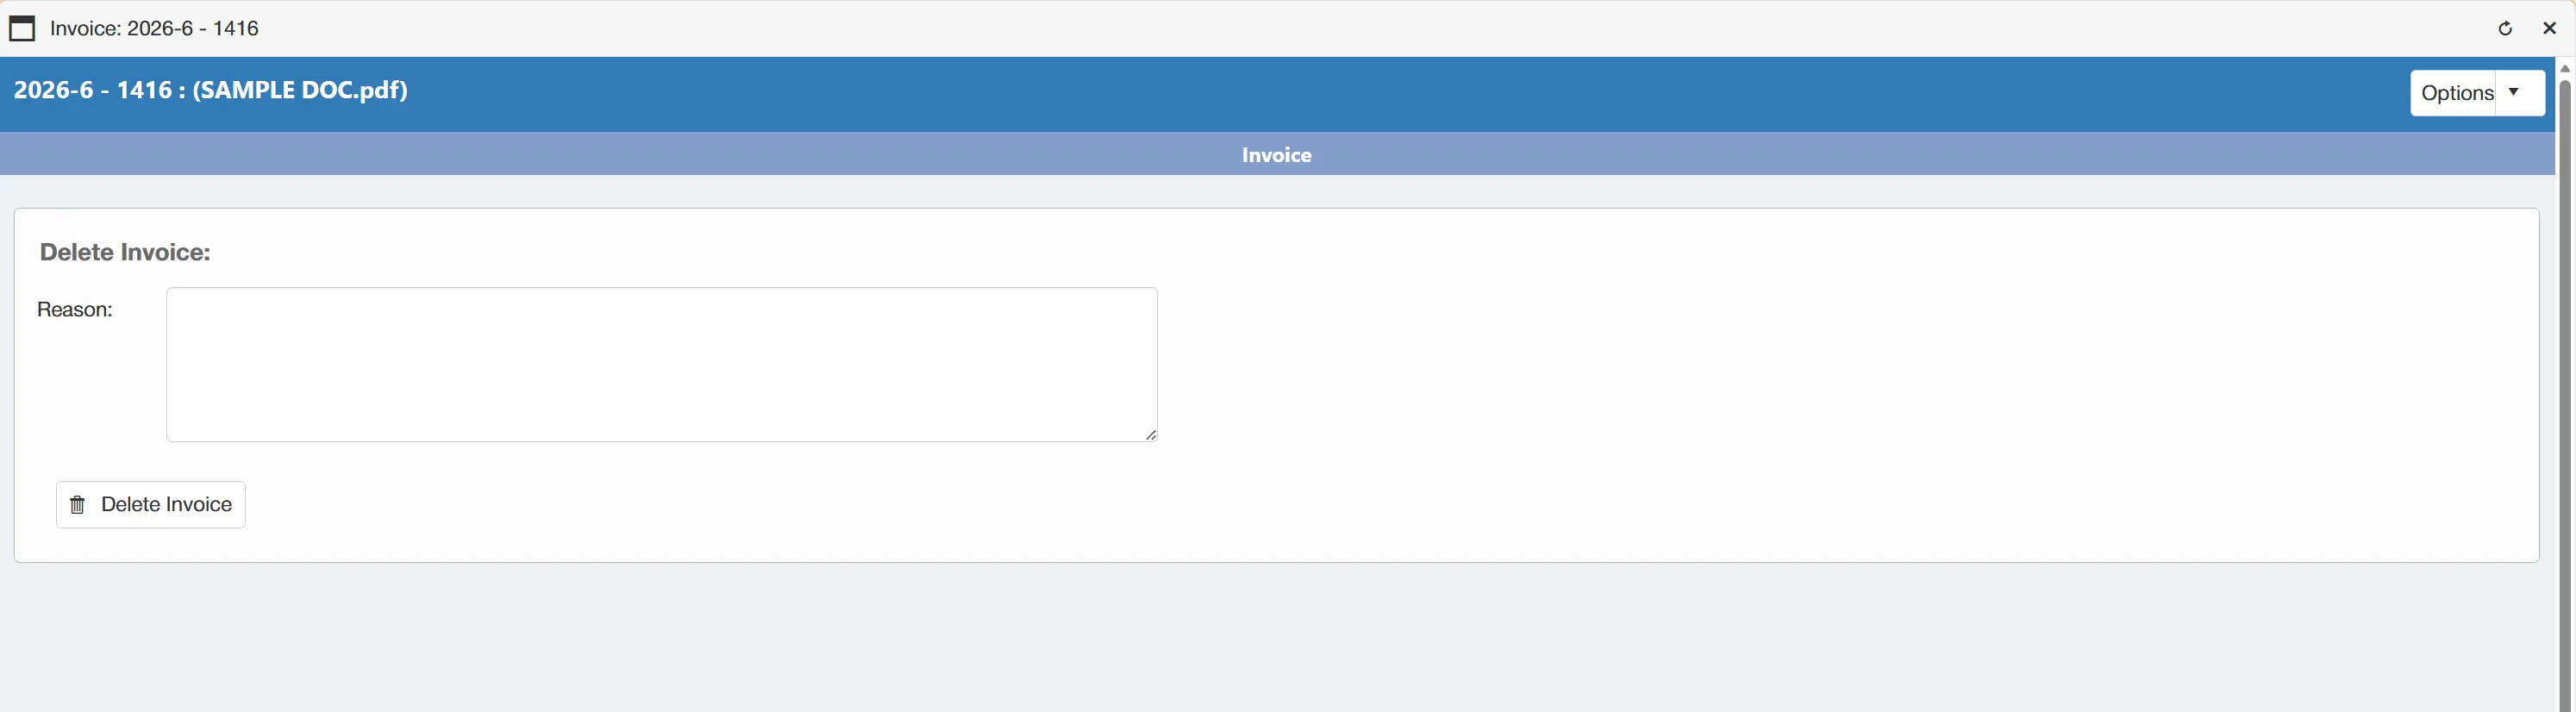
It is not possible to delete an invoice without adding a reason.
Once the reason is added, simply click .