Suppliers | Purchase Order System
Within the system you will need to set up suppliers in order to raise purchase orders as each purchase order requires a supplier to be specified.
New Supplier
Hovering over will expand another menu consisting of:
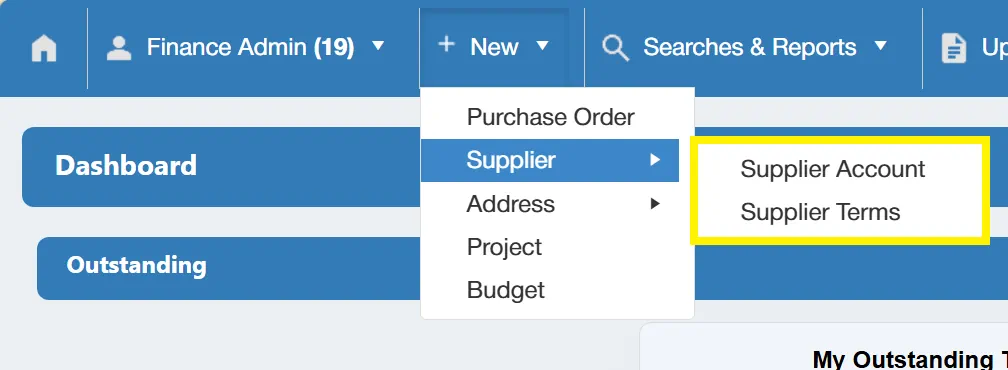
From here you can create new supplier accounts and terms.
Only users with the Supplier Admin permission enabled can create suppliers and terms. This is to ensure that only authorised members of staff are able to set up new supplier accounts. For more information on permissions, click here.
Creating a New Supplier Account
To create a new supplier account, hover over and select .
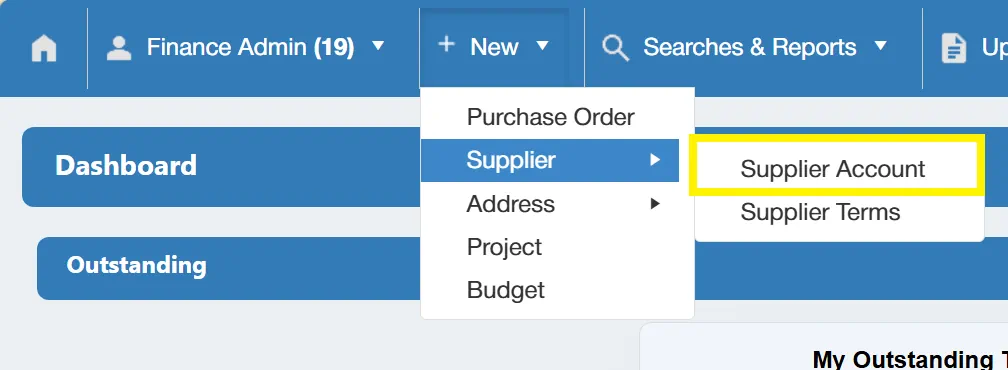
This will open a new window in which you can populate the details relating to the new supplier.
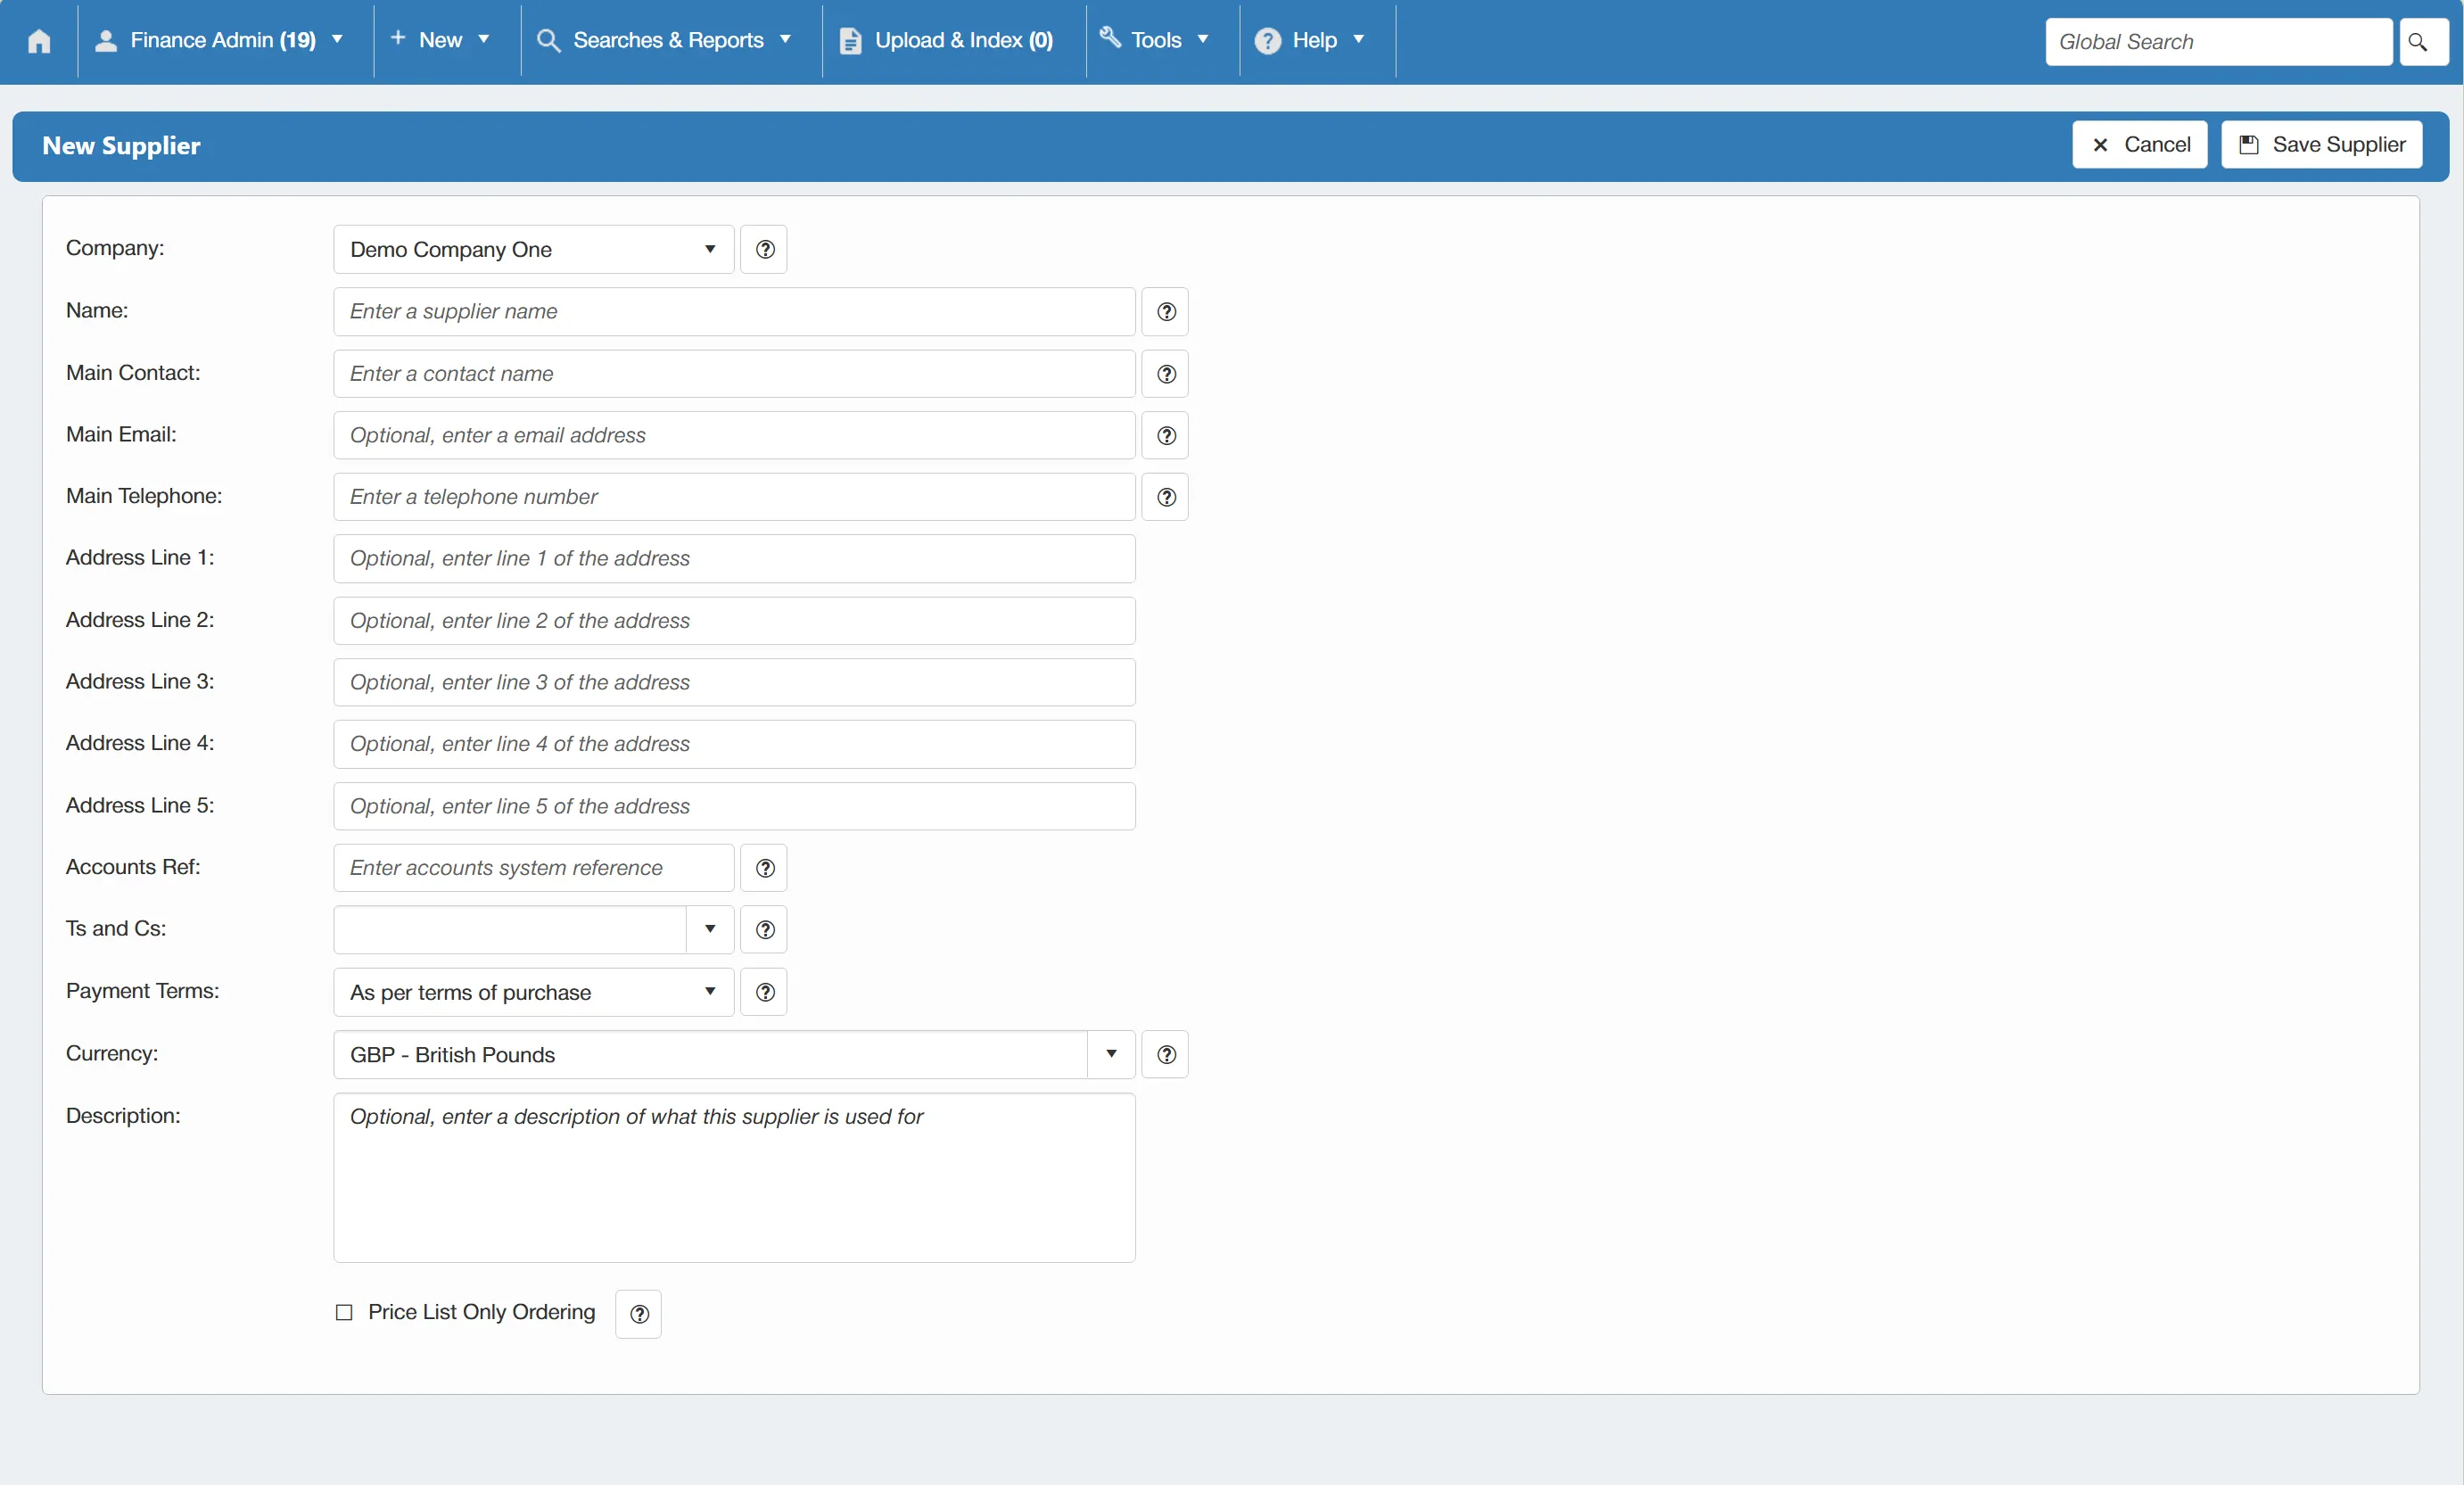
You will need to fill out the relevant name and contact details. There is also a field to select the Terms & Conditions, this is a dropdown field and is powered by terms that are set up within the system. For more information on setting up these terms, click here
At the bottom of the window, there is a option. If this is ticked, PO creators will not be able to add items to PO's for this supplier via free text - they can only order items on the supplier's price list.
Each supplier account requires a unique Accounts Reference.
Once you are happy with the details, simply click to commit this to the system.
For information on editing an existing supplier, click here
Creating New Supplier Terms
To create new supplier terms, hover over and select .
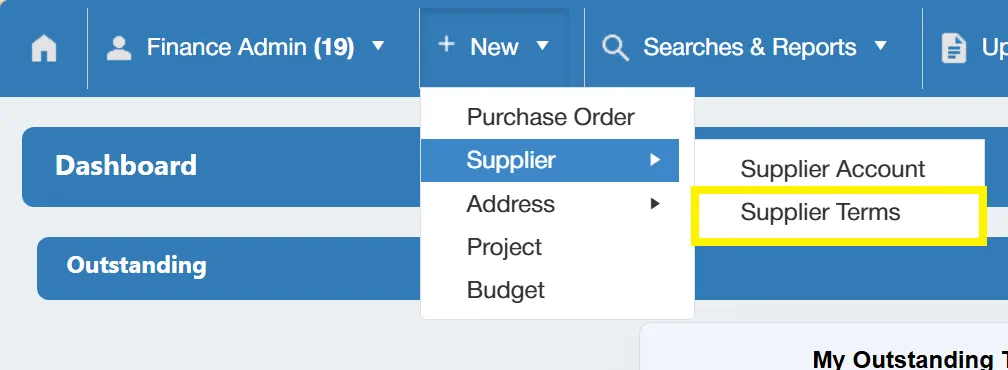
This will open a new window in which you can fill in the terms along with a name for this set of terms.
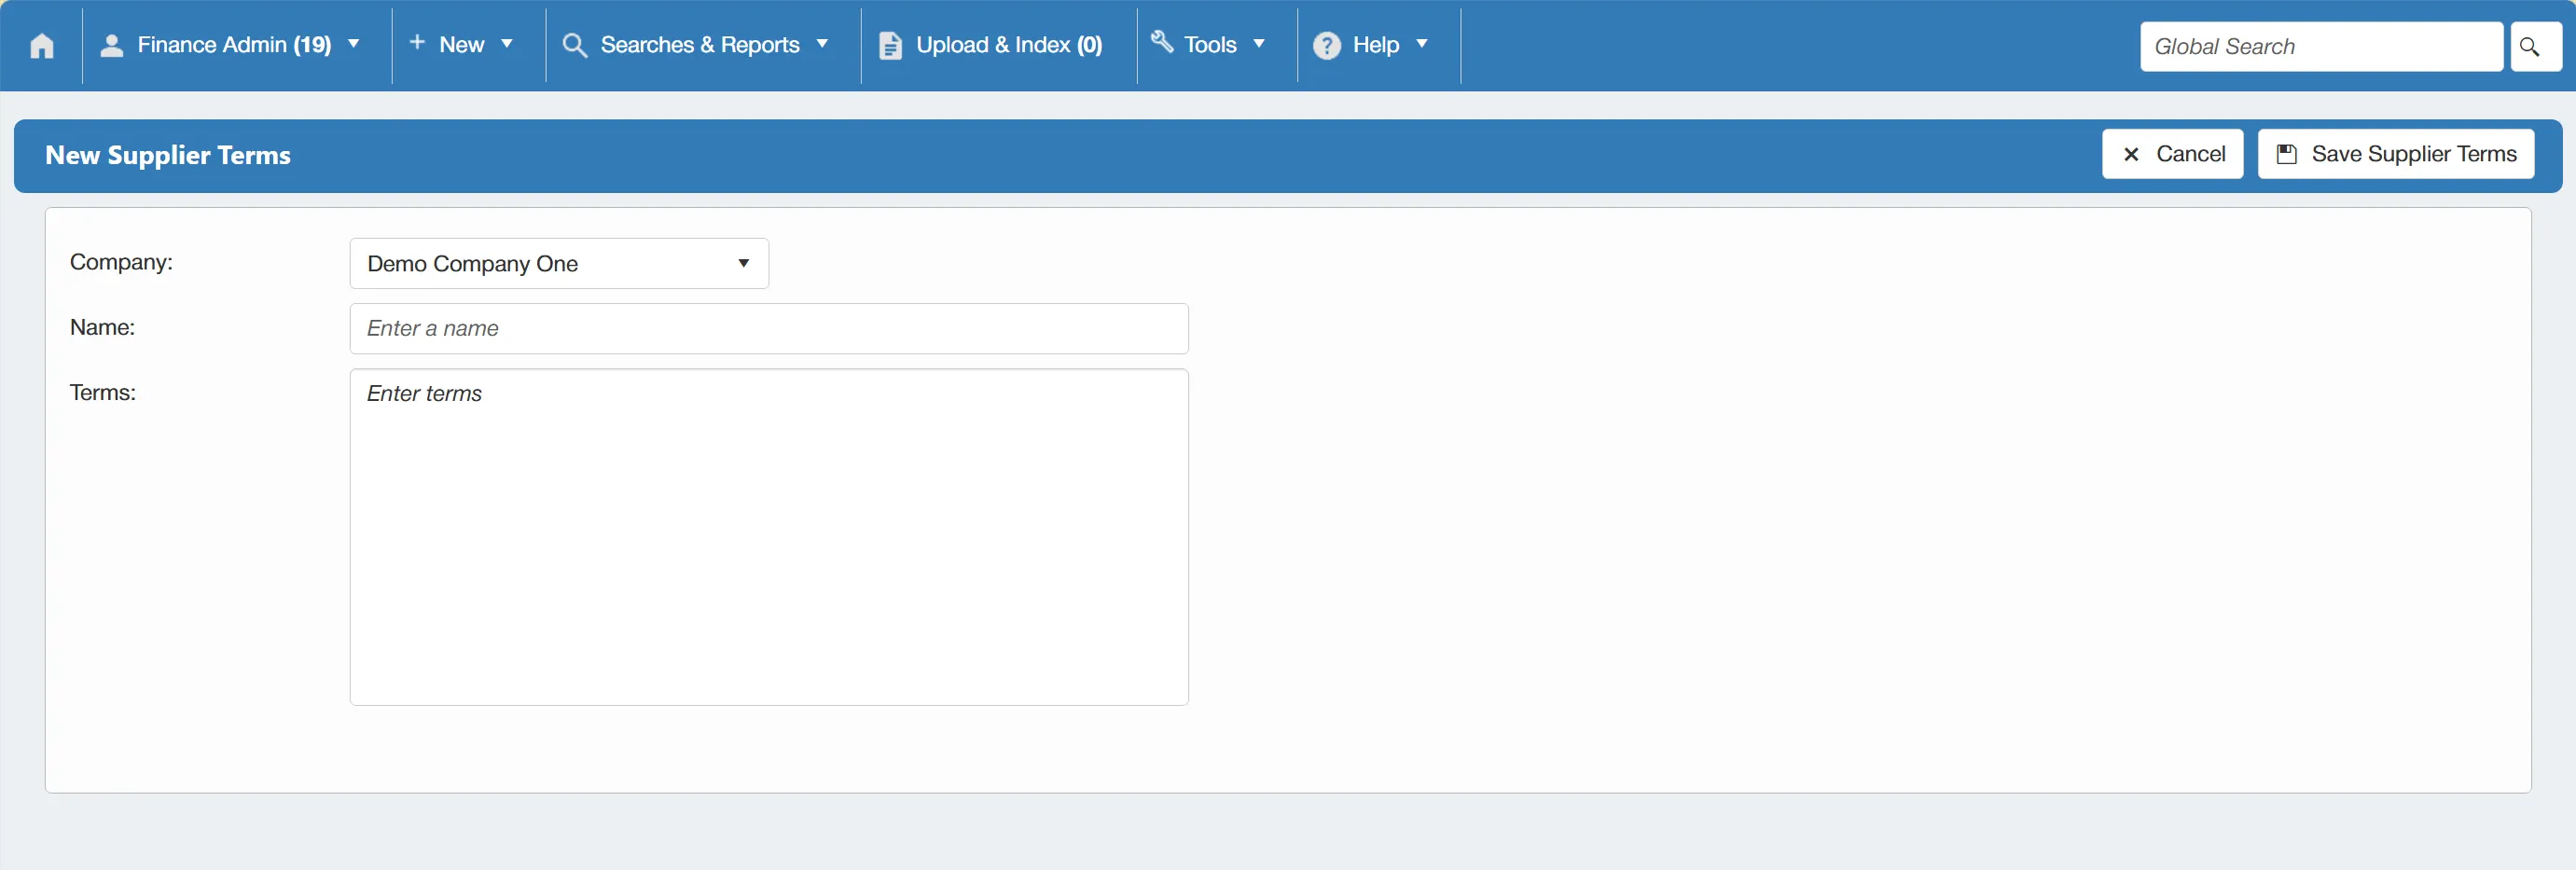
Once you are happy with the terms, simply click to commit these to the system.
Once the terms are saved, they will appear as an option under the Ts and Cs drop down when creating a new supplier account.
Existing Suppliers
There are a number of functions available that can be carried out on existing supplier accounts within the system. These include:
Information on carrying out these functions can be found below.
Editing a Supplier Account
From the Supplier Account Window, you can edit the supplier details by clicking and selecting .
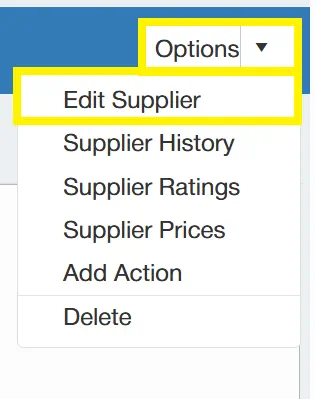
For information on accessing the Supplier Account Window, click here
Clicking on will allow you to make changes to the various fields within this window.
Once you are happy with your changes, simply click to finalise them.
Only users with the Supplier Admin permission enabled can edit suppliers. For more information on permissions, click here.
Viewing Supplier History
From the Supplier Account Window, you can view Supplier History by clicking and selecting .
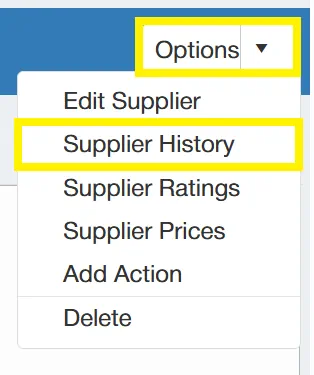
For information on accessing the Supplier Account Window, click here
Clicking on will allow you to view history for the supplier. This shows information such as when the account was viewed or amended. It also allows you to see which details were changed.
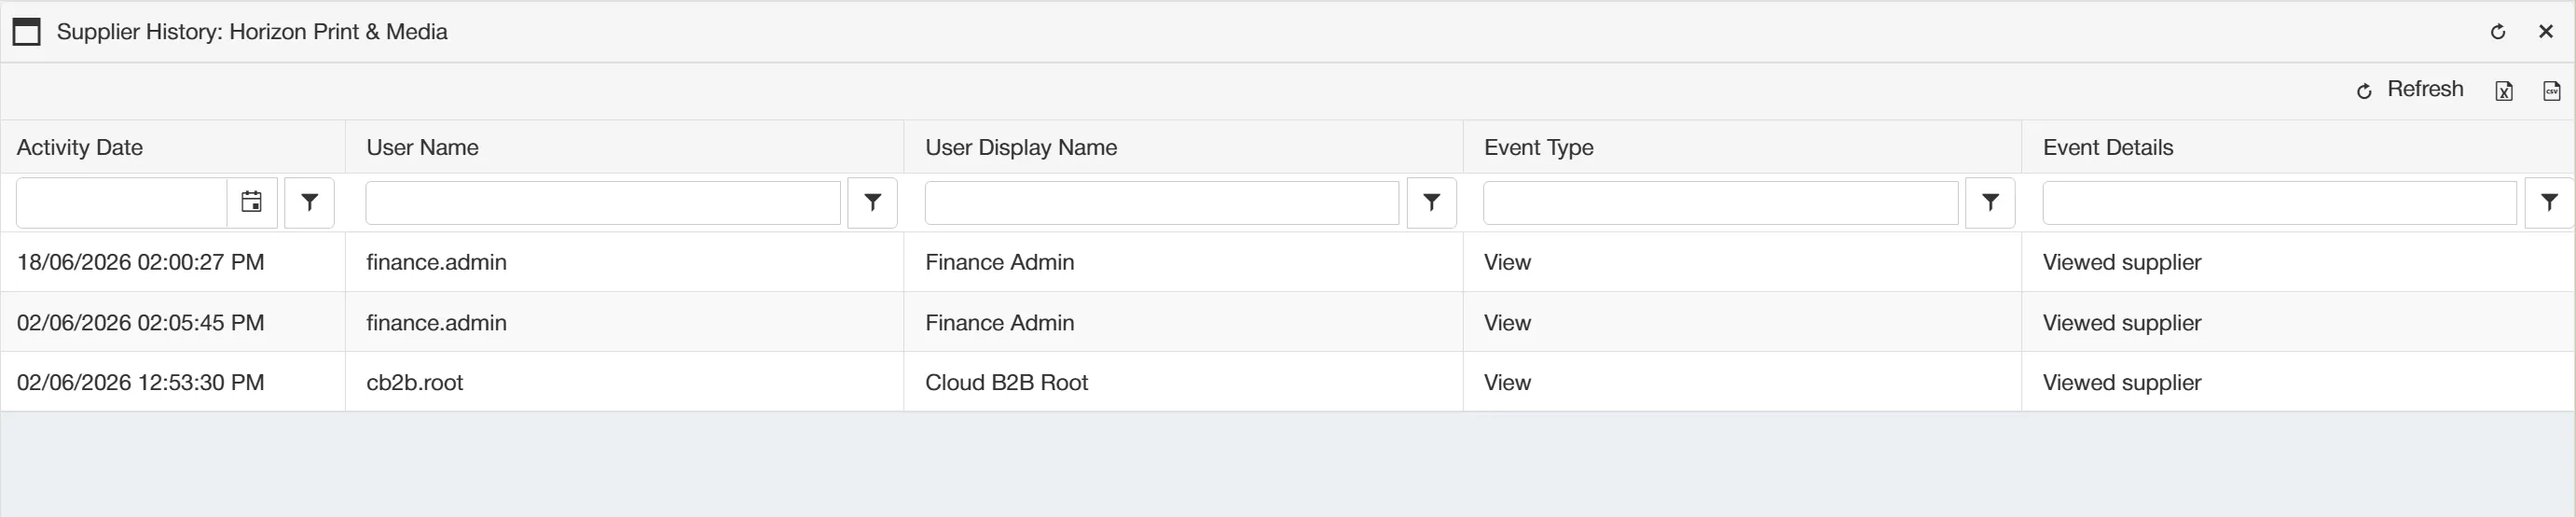
The columns in the grid can be filtered and sorted using the fields at the top of each column.
Viewing Supplier Ratings
From the Supplier Account Window, you can view the Supplier Ratings by clicking and selecting .
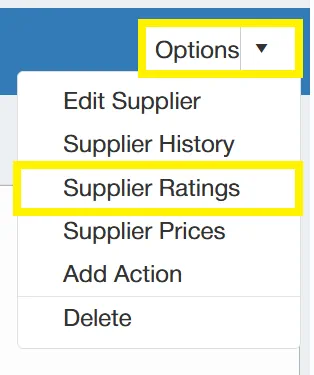
For information on accessing the Supplier Account Window, click here
Clicking on will allow you to view the supplier's ratings. This is displayed in a grid showing the comment, date of rating and which user provided the rating.
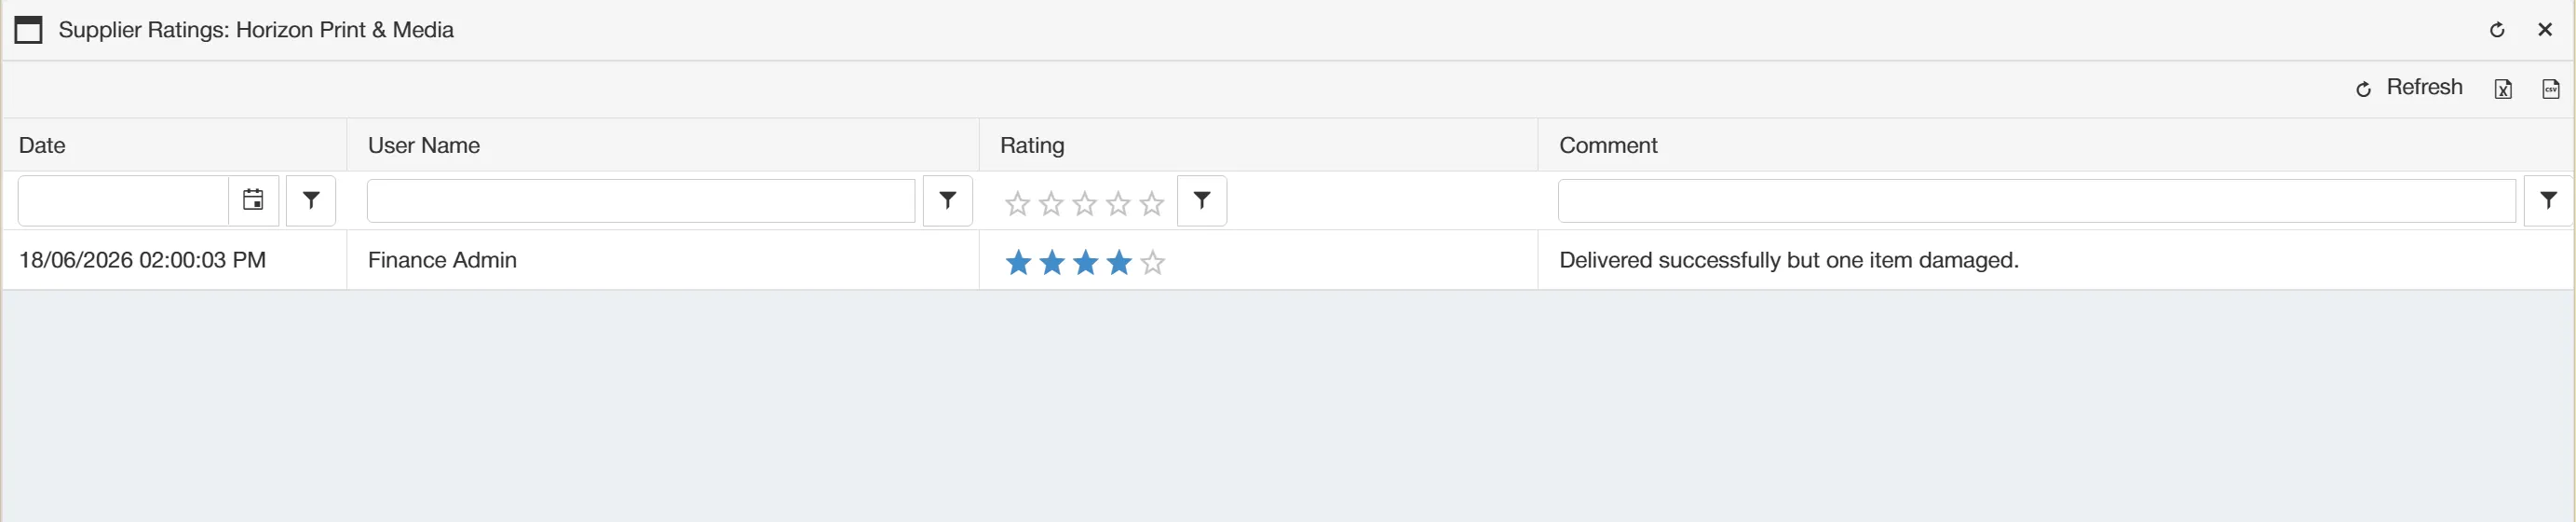
The columns in the grid can be filtered and sorted using the fields at the top of each column.
Adding Supplier Price Lists
To add a supplier price list to an existing supplier, you must first open the supplier account.
For information on finding an existing supplier and opening their account click here
Once you have opened the supplier account, select from the drop down menu.
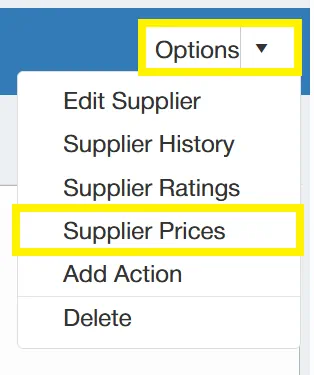
This will open a new window displaying any existing price lists.
There are two ways to add supplier prices; you can either add them manually or via a bulk import.
Manually Adding Supplier Prices
Once you have opened the Supplier Prices window, click .
A new row will appear at the top of the grid with empty fields, allowing you to add a new product.
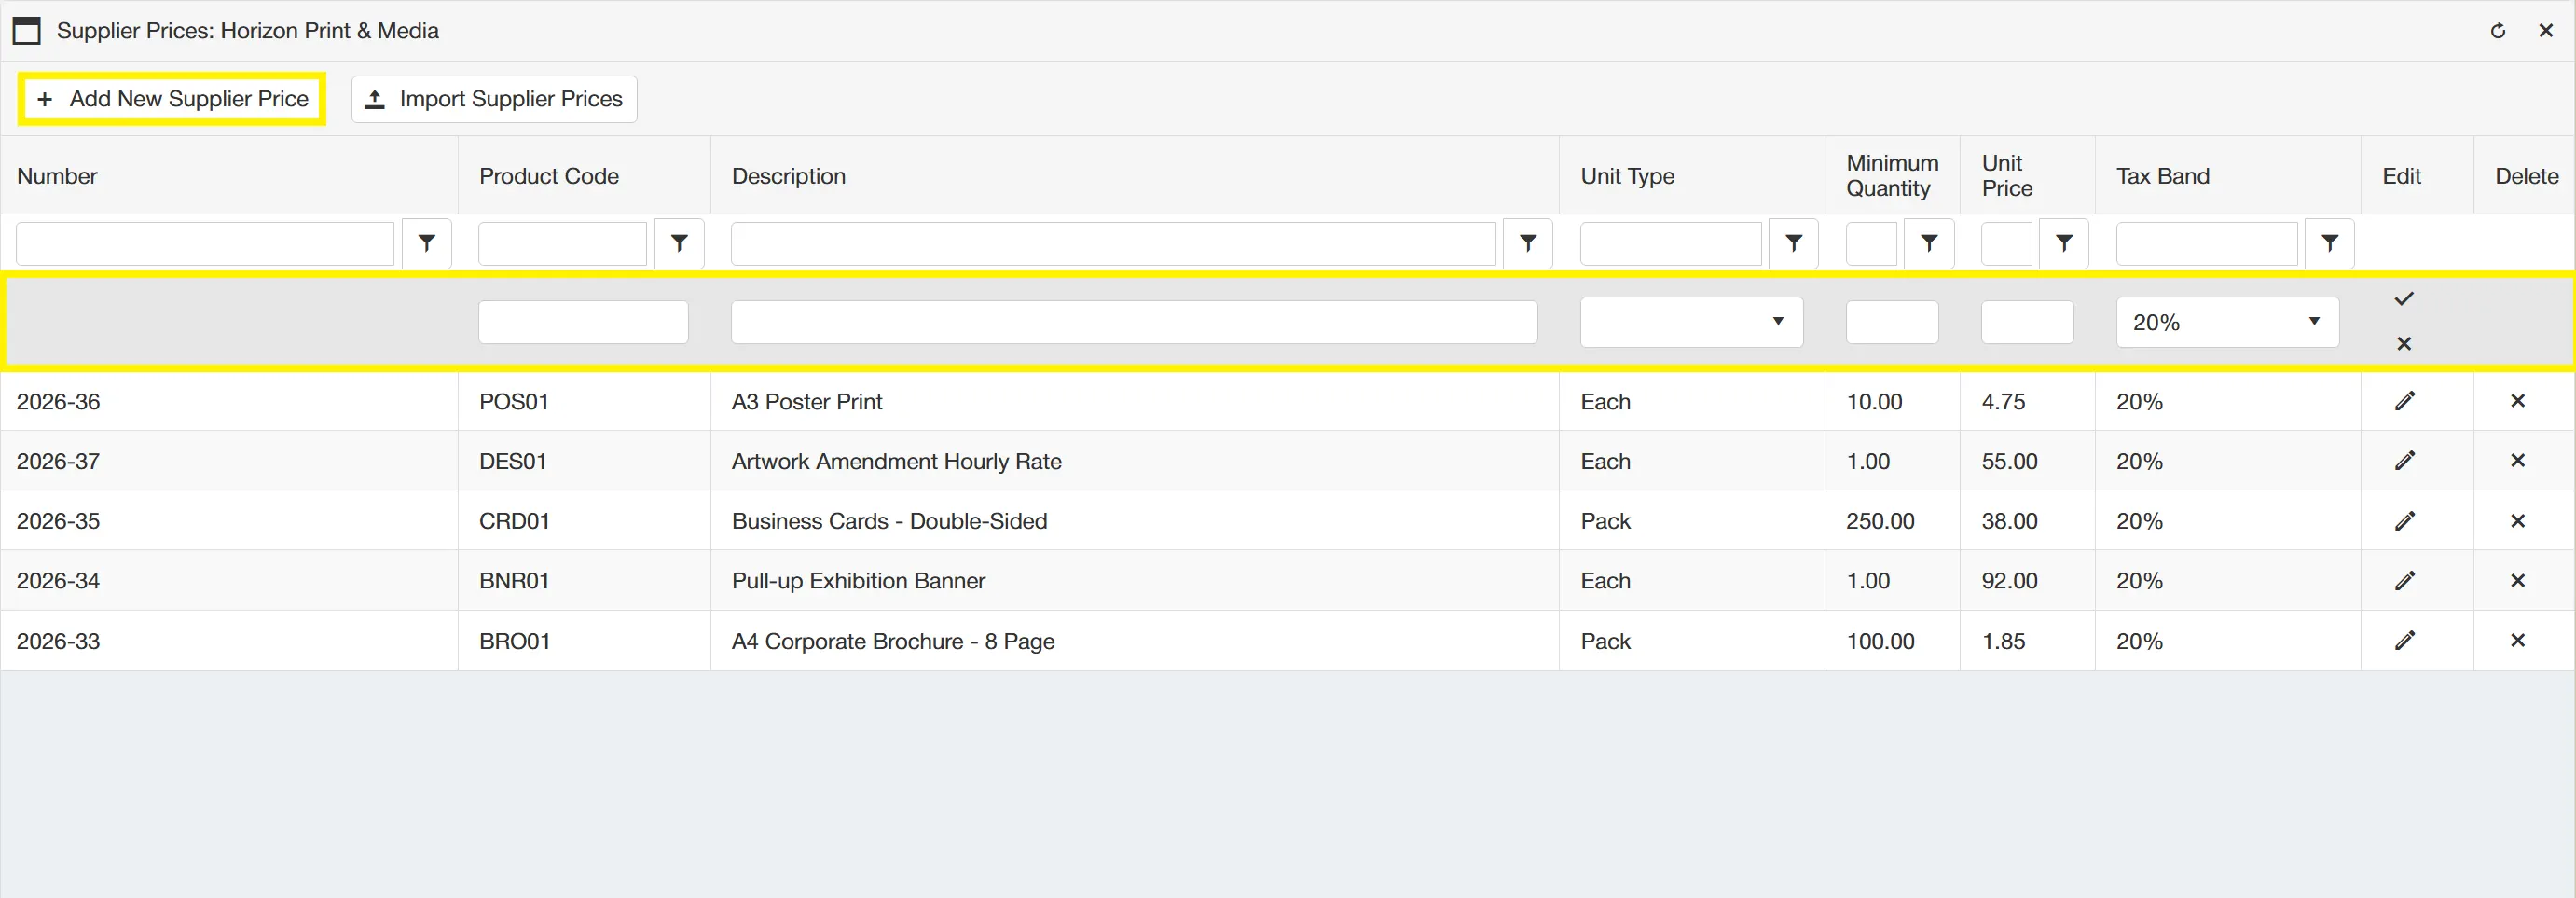
You now need to populate the empty fields with the Product Code, Description, Unit Type, Minimum Quantity, Unit Price and Tax Band.
Once you are happy with the details, simply click on the to add this item to the list.
You can also manually remove individual prices from the list by clicking on the .
Importing Supplier Prices
From the Supplier Prices window, you can click to bulk import prices.
Clicking on this button will open a new window.
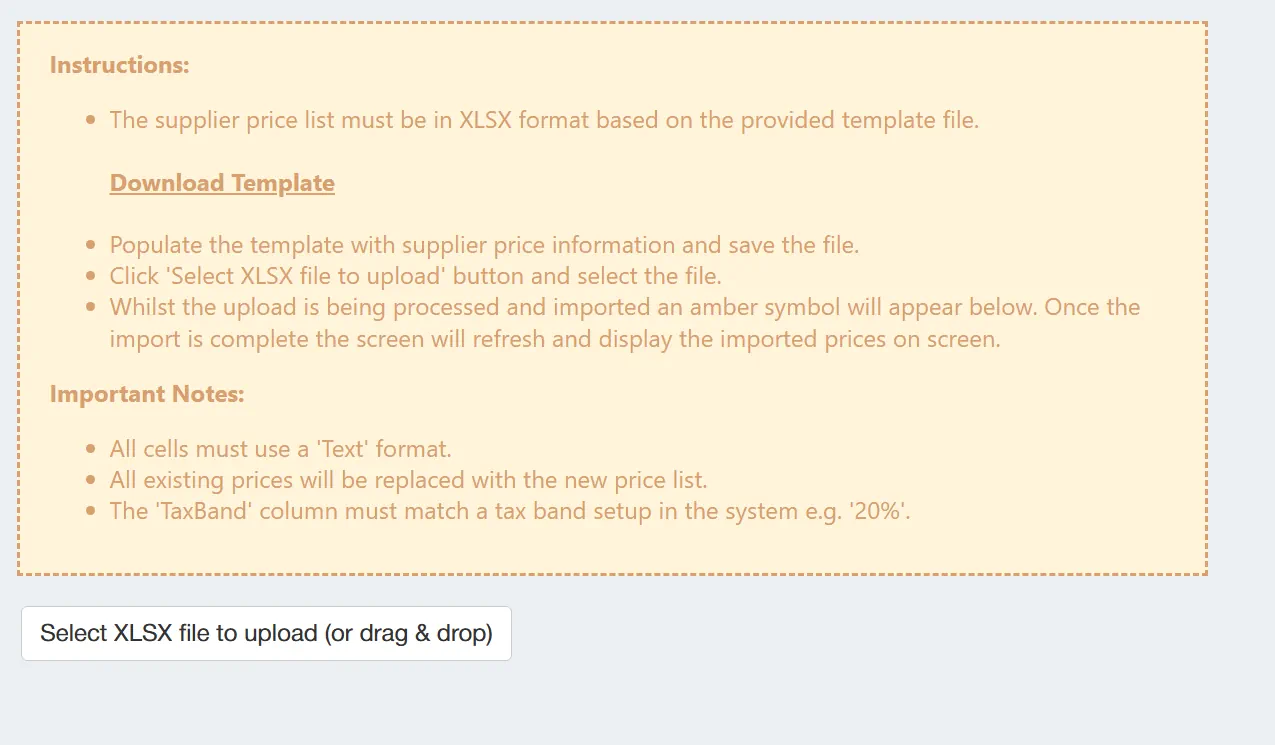
This window includes a guide on importing prices and a link to the relevant import template. Following this guide, you can download the template and populate it with your desired pricing information.
When you have completed the file, simply upload it to the system by dragging and dropping it or clicking on the button.
Once the file has been uploaded, the window will automatically refresh and show the updated Supplier Price List grid.
Adding Actions Against Suppliers
From the Supplier Account Window, you can add an action against the supplier. To do this, simply click within the drop down menu.
Actions are reminders that you can set for yourself against various items within the system such as; Suppliers, Purchase Orders, Budgets, Invoices, Credit Notes and Projects. You can assign a date and time for the action to occur, at which point you will receive an email notification and task.
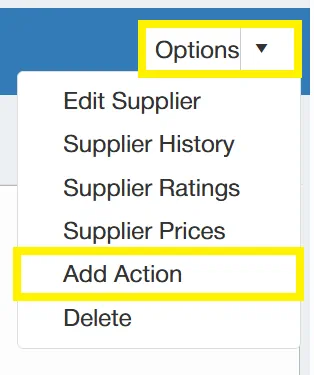
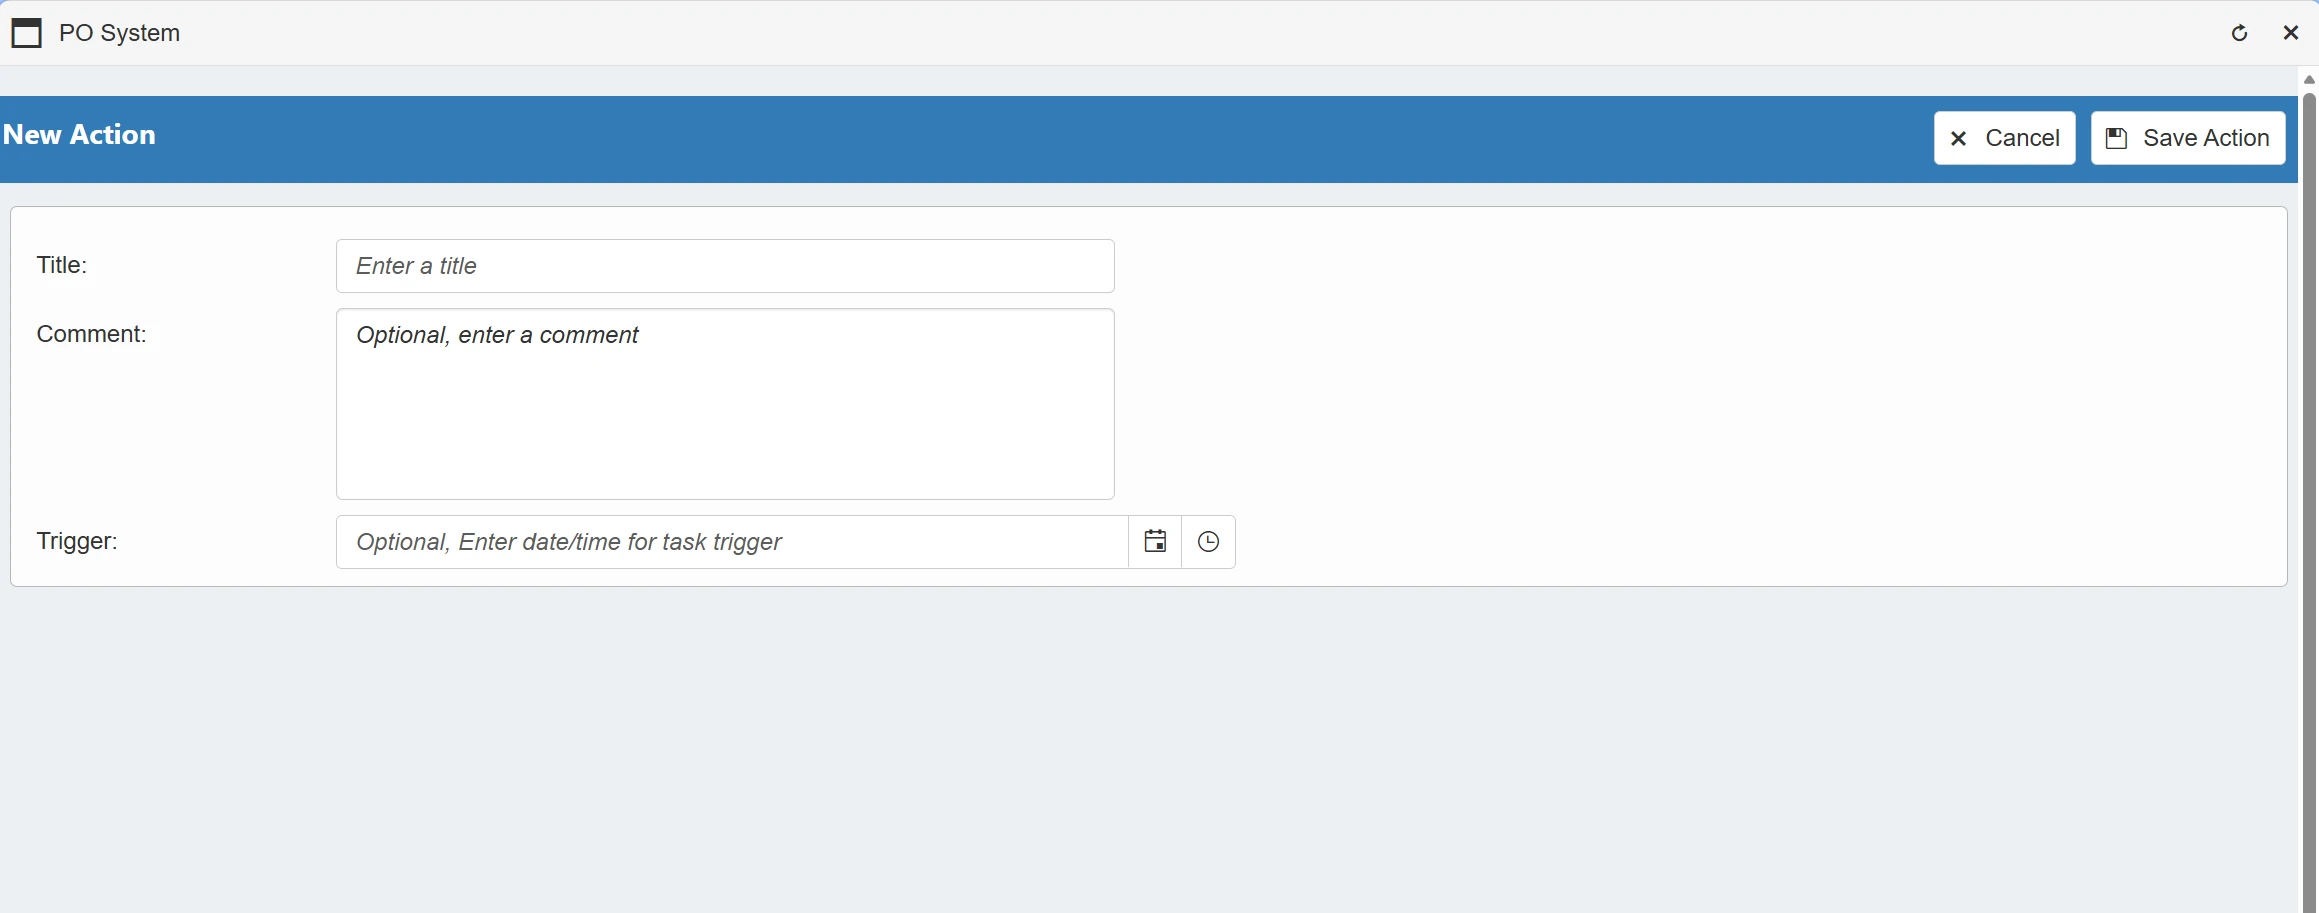
Clicking on this button will take you to a new window where you can specify the action's Title, Comment and Trigger date/time.
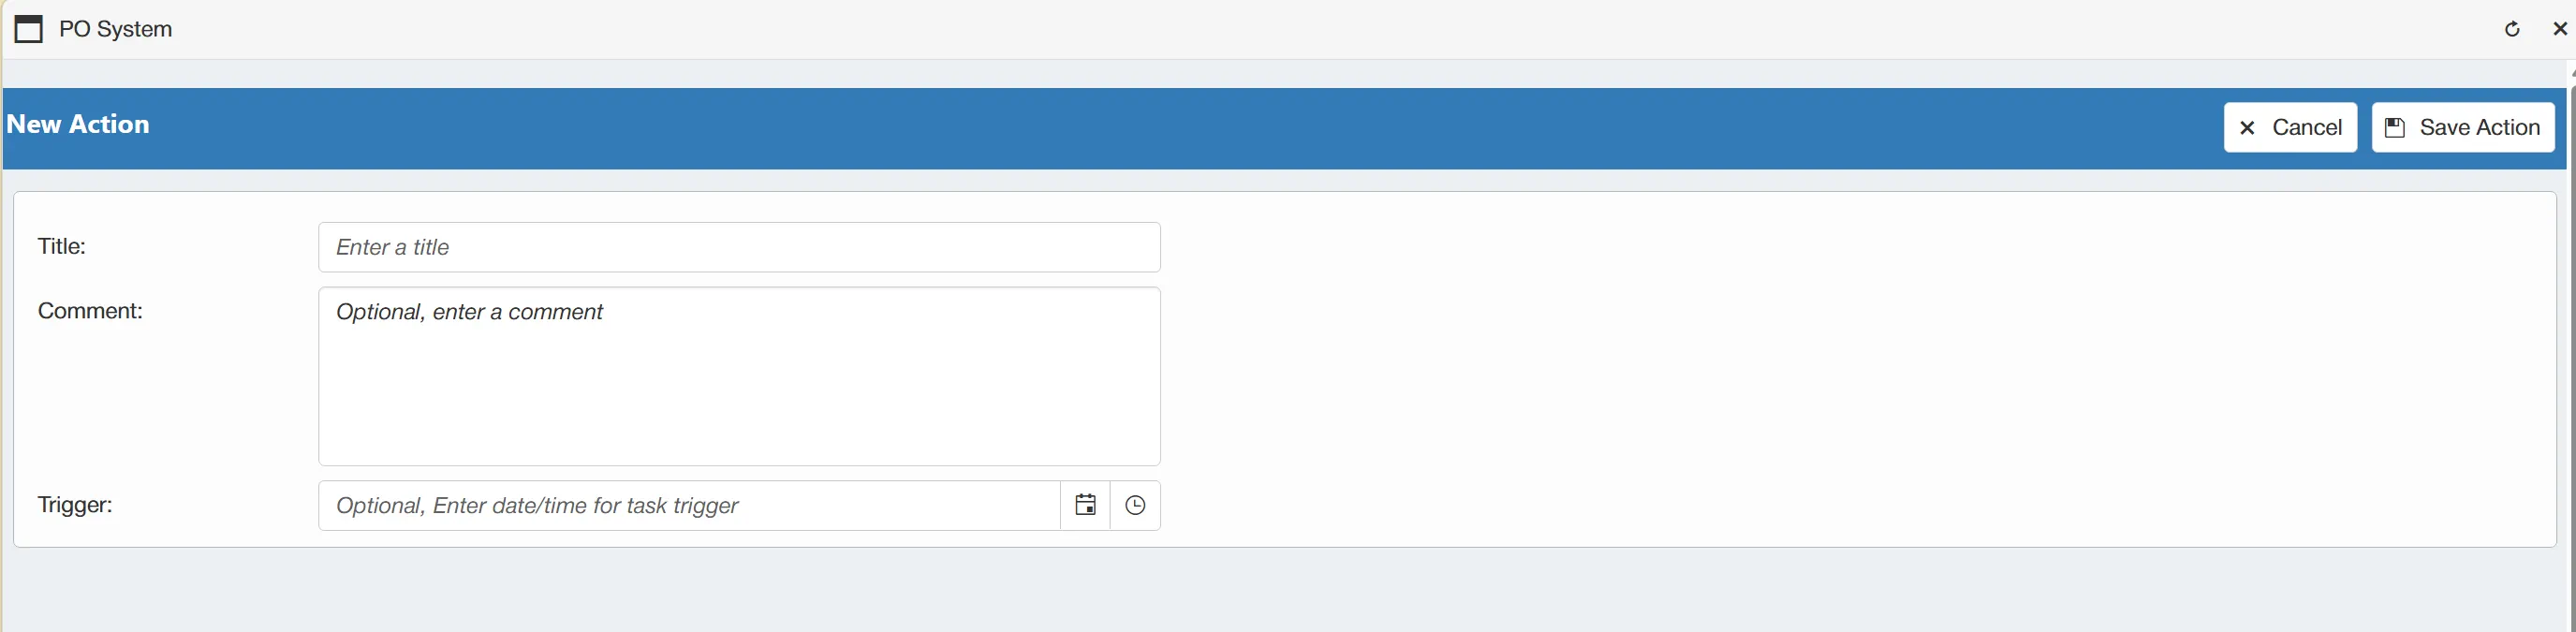
Once you are happy with the details, simply click to finalise this.
For information on viewing upcoming actions, click here
Deleting a Supplier
You can delete a supplier account via the Supplier Account Window. To do this, click within the drop down menu.
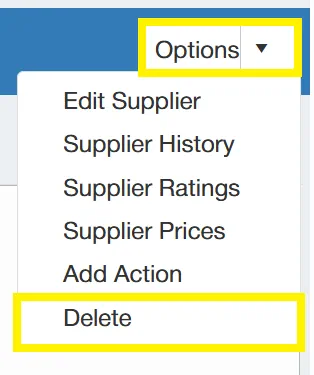
It is only possible to delete a supplier when they have no linked purchase orders. Once a purchase order has been raised against the supplier, the account cannot be deleted (regardless of whether the purchase order is open or closed). If you no longer wish to use a supplier but cannot delete it, you can instead mark it as inactive. For more information on this see the below section.
Marking a Supplier as Inactive
In the event that you no longer require a supplier but cannot delete it, you can instead mark them as inactive. To do this, select
You will then be able to un-tick the ☐ Active box. You then need to click to finalise this.
Rating Suppliers
Each system has a Supplier Rating facility available. This includes a Supplier Rating grid on the dashboard which displays all suppliers along with their rating.
The rating consists of 5 stars, with 5 being excellent and 1 being poor.
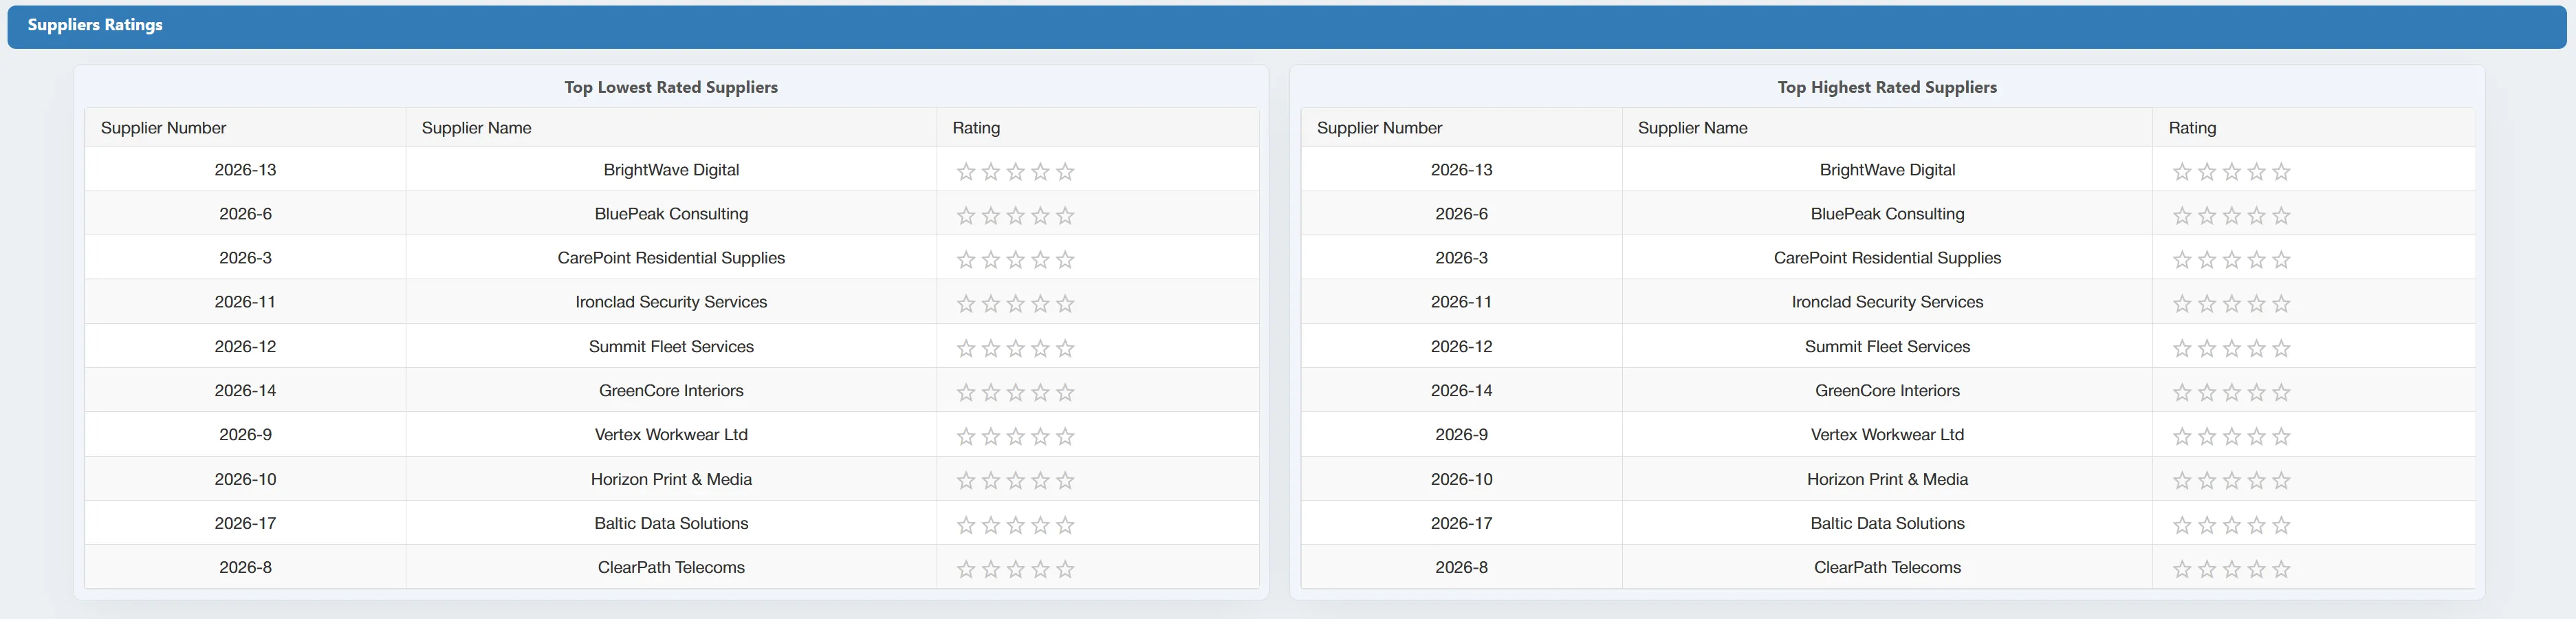
You can click onto the individual line within the grid to review the Supplier's rating in more detail along with relevant comments.
Rate Supplier Task
Once an invoice has been approved, the PO creator will receive a Rate Supplier task.
This is only applicable if the Supplier Ratings Enabled setting is active within the System Settings. For more information on this setting, click here.
To view your tasks, simply open the My Tasks Grid.
From this grid, you can open the Rate Supplier task.
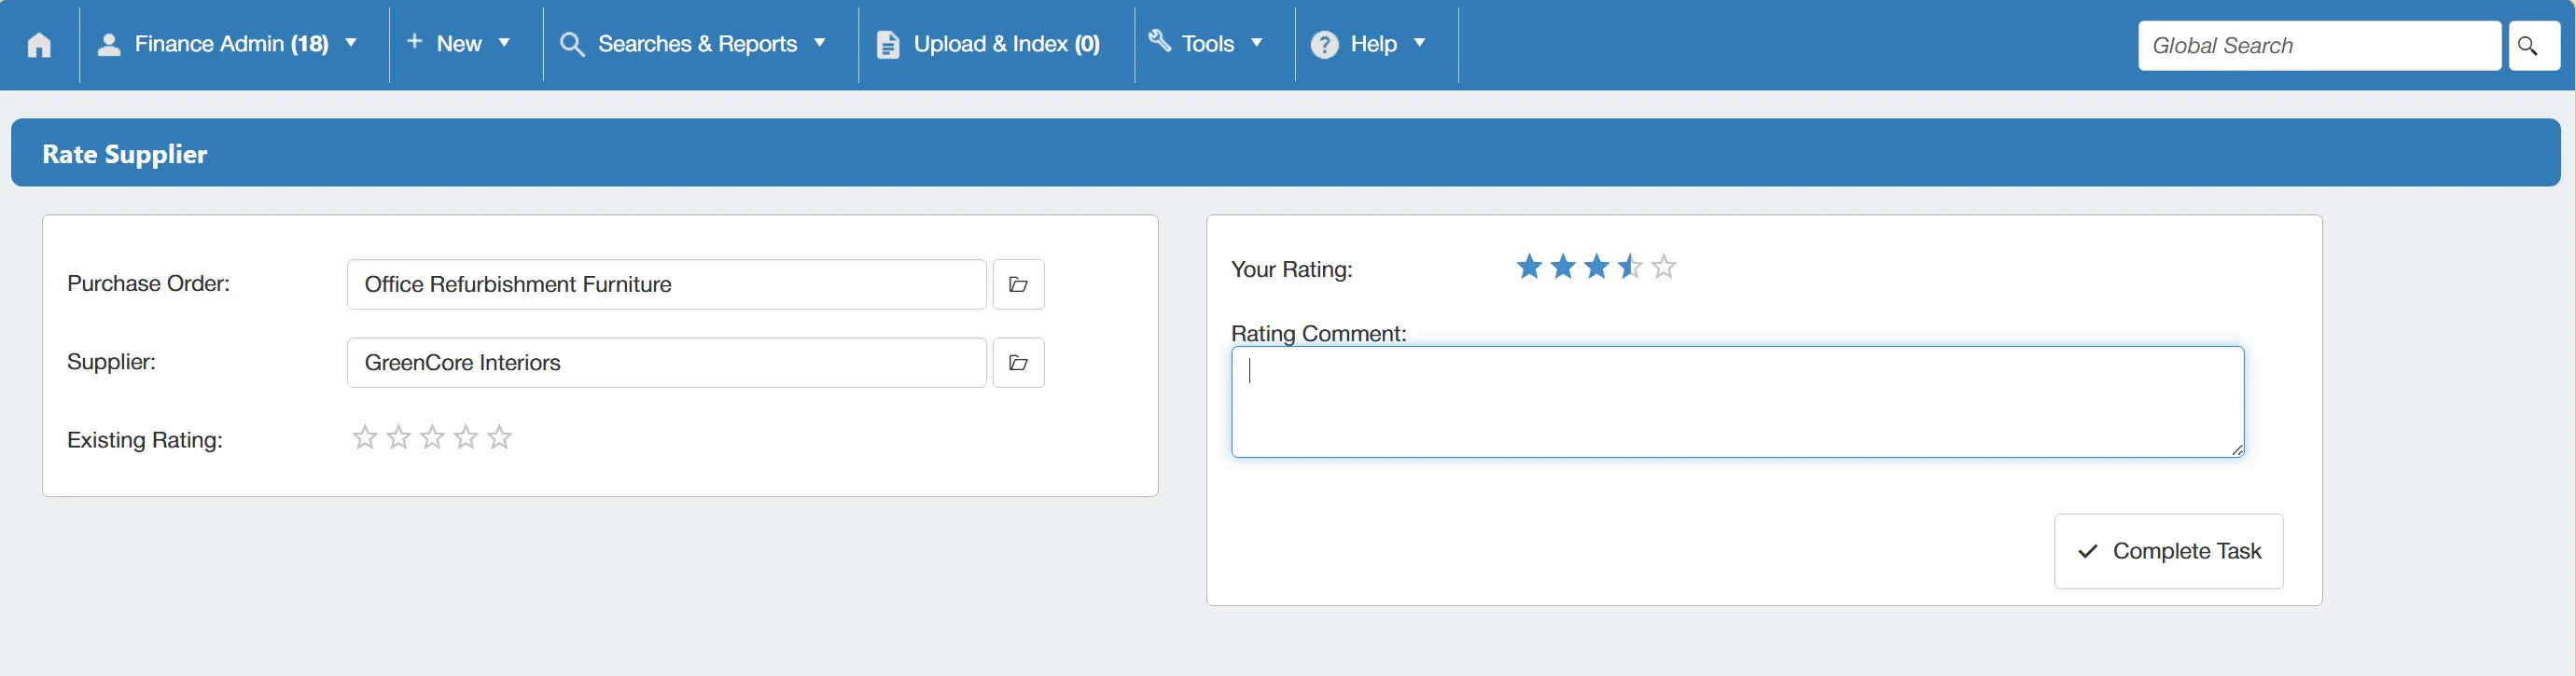
This task prompts you to provide a rating for the supplier based on the recent order.
- On the left hand side of the window is the supplier details including their existing rating.
- On the right hand side you can select a rating and include a comment.
Ratings are given out of 5 stars with 1 star being poor and 5 stars being excellent.
When giving a supplier rating, you must give a comment to go along with this as it allows users to see why a supplier has their current rating.
To rate the supplier, simply select the number of stars you wish to give along with a relevant comment and click .
Supplier Documents
PO Systems with the Supplier Documents module enabled have the ability to upload compliance documents and link them to suppliers.
Uploading a Supplier Document
To upload a supplier document into the system, first click on the toolbar.

This takes you to the Documents To Index window. This window will display any documents that have been uploaded into the system, however, you can also upload new documents from here.
To do this, you first need to click .
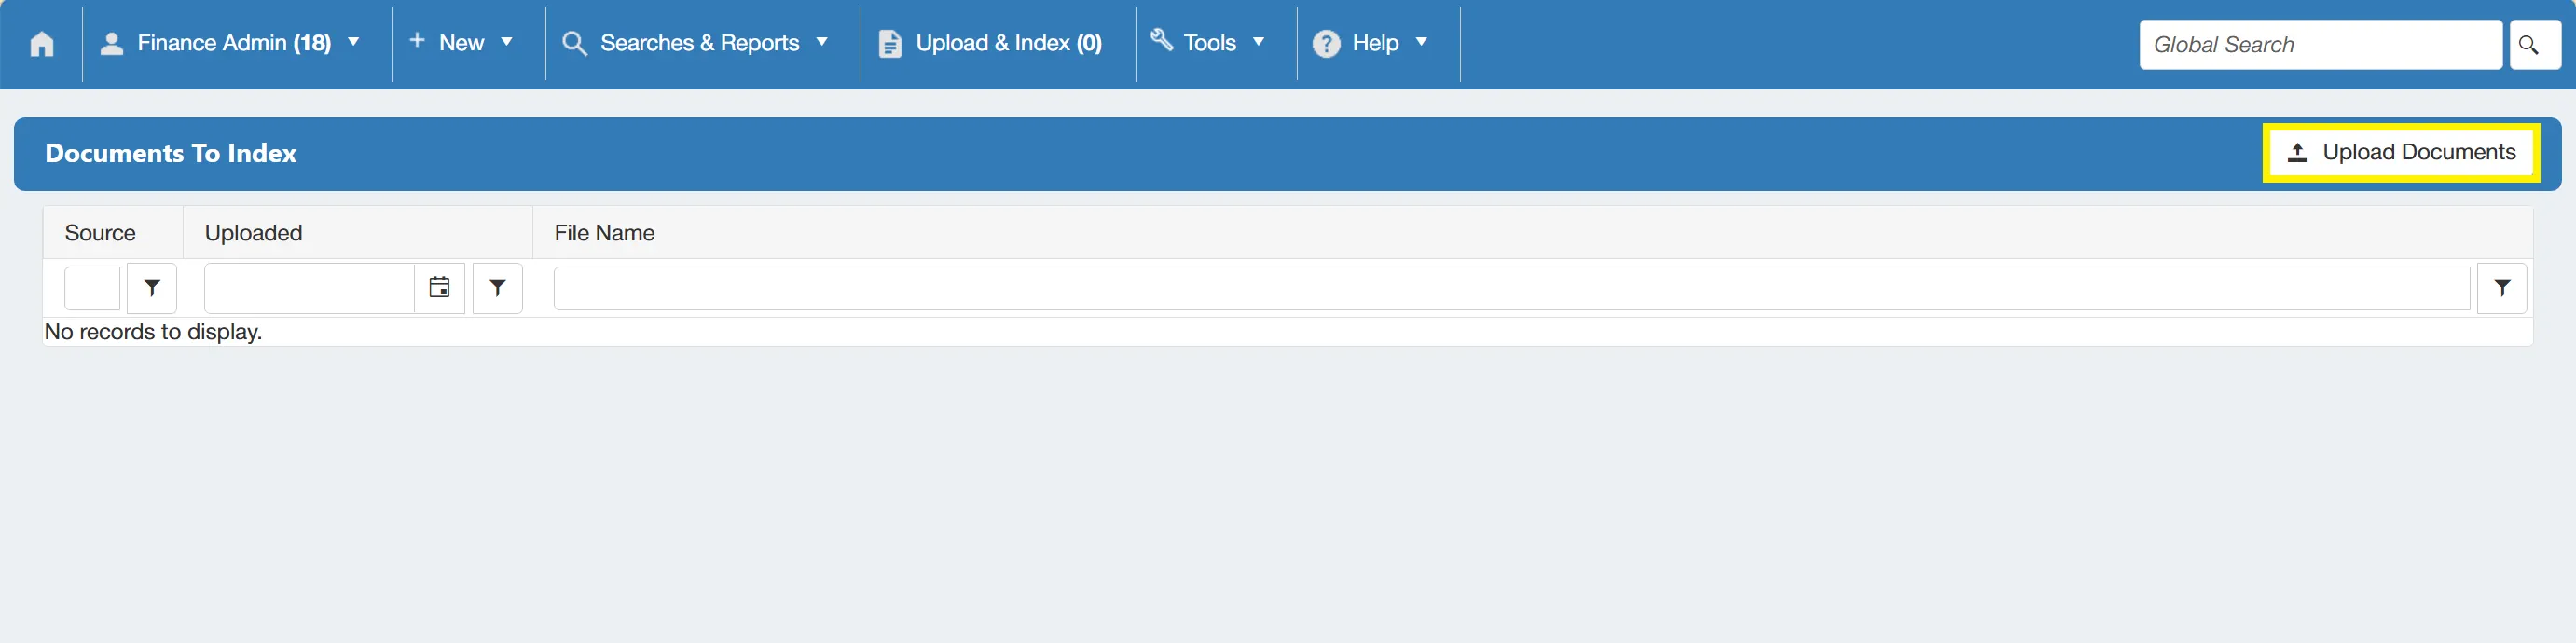
Clicking the will take you to a new window where you can upload a new document.
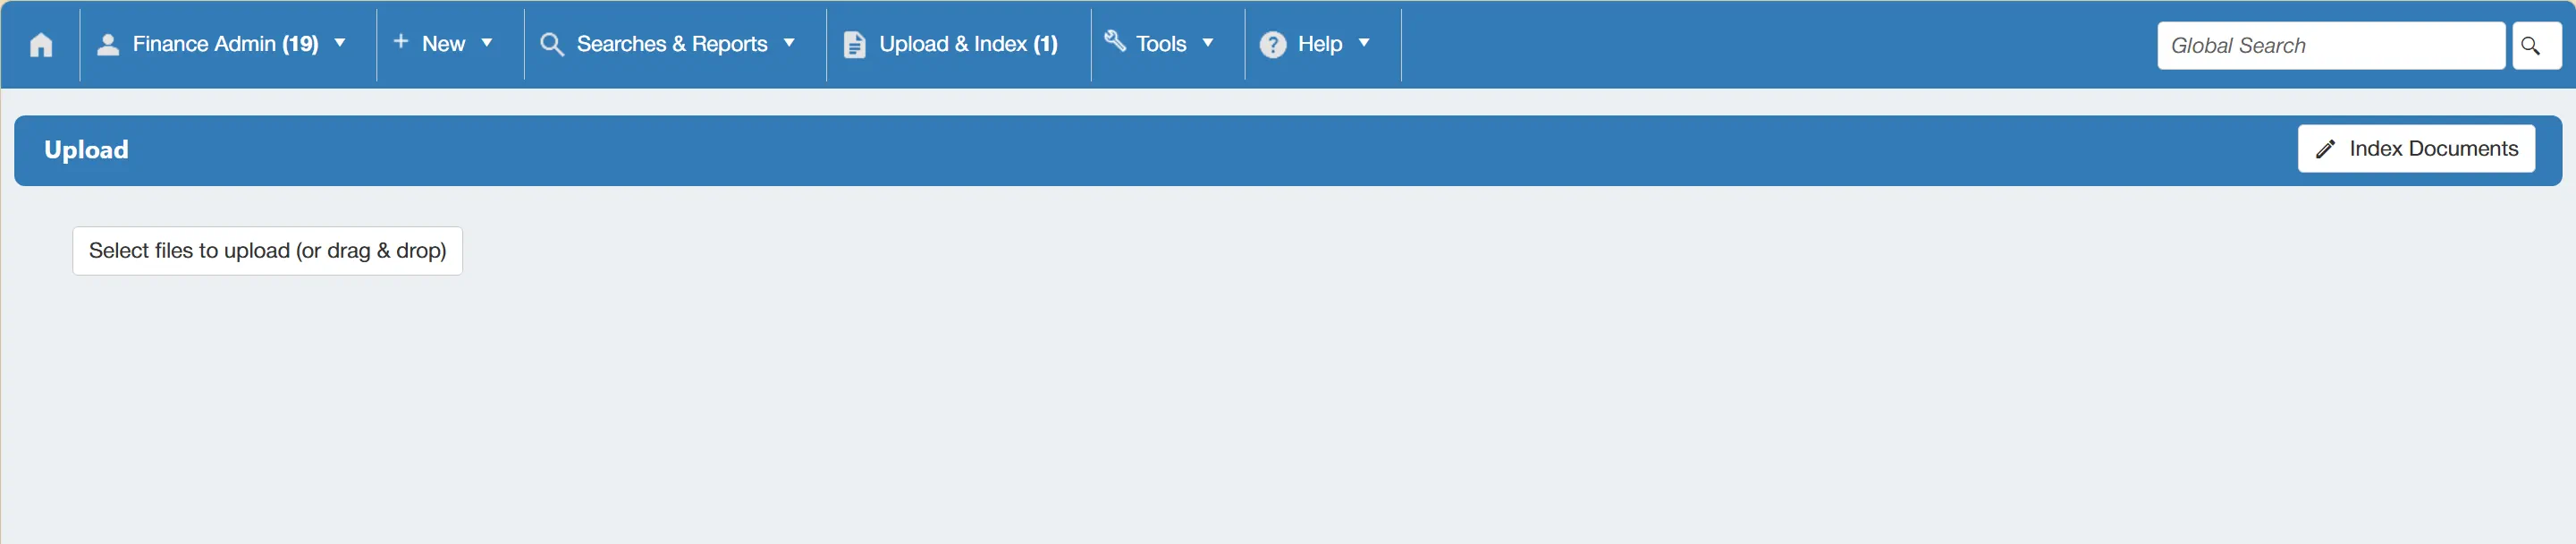
Once you have selected a file, the file name will be listed in the window along with a green dot to confirm that it has successfully uploaded.

When the upload is in progress, the dot will be yellow and if the upload was unsuccessful, the dot will be red.
Indexing a Supplier Document
If you have just uploaded an invoice document and are still on the Upload window, you can simply click to begin indexing the invoice.
Alternatively you can access the list of documents ready to be indexed by clicking on the from the toolbar.
This takes you to the Documents to Index window which displays any documents that have been uploaded into the system awaiting indexing.
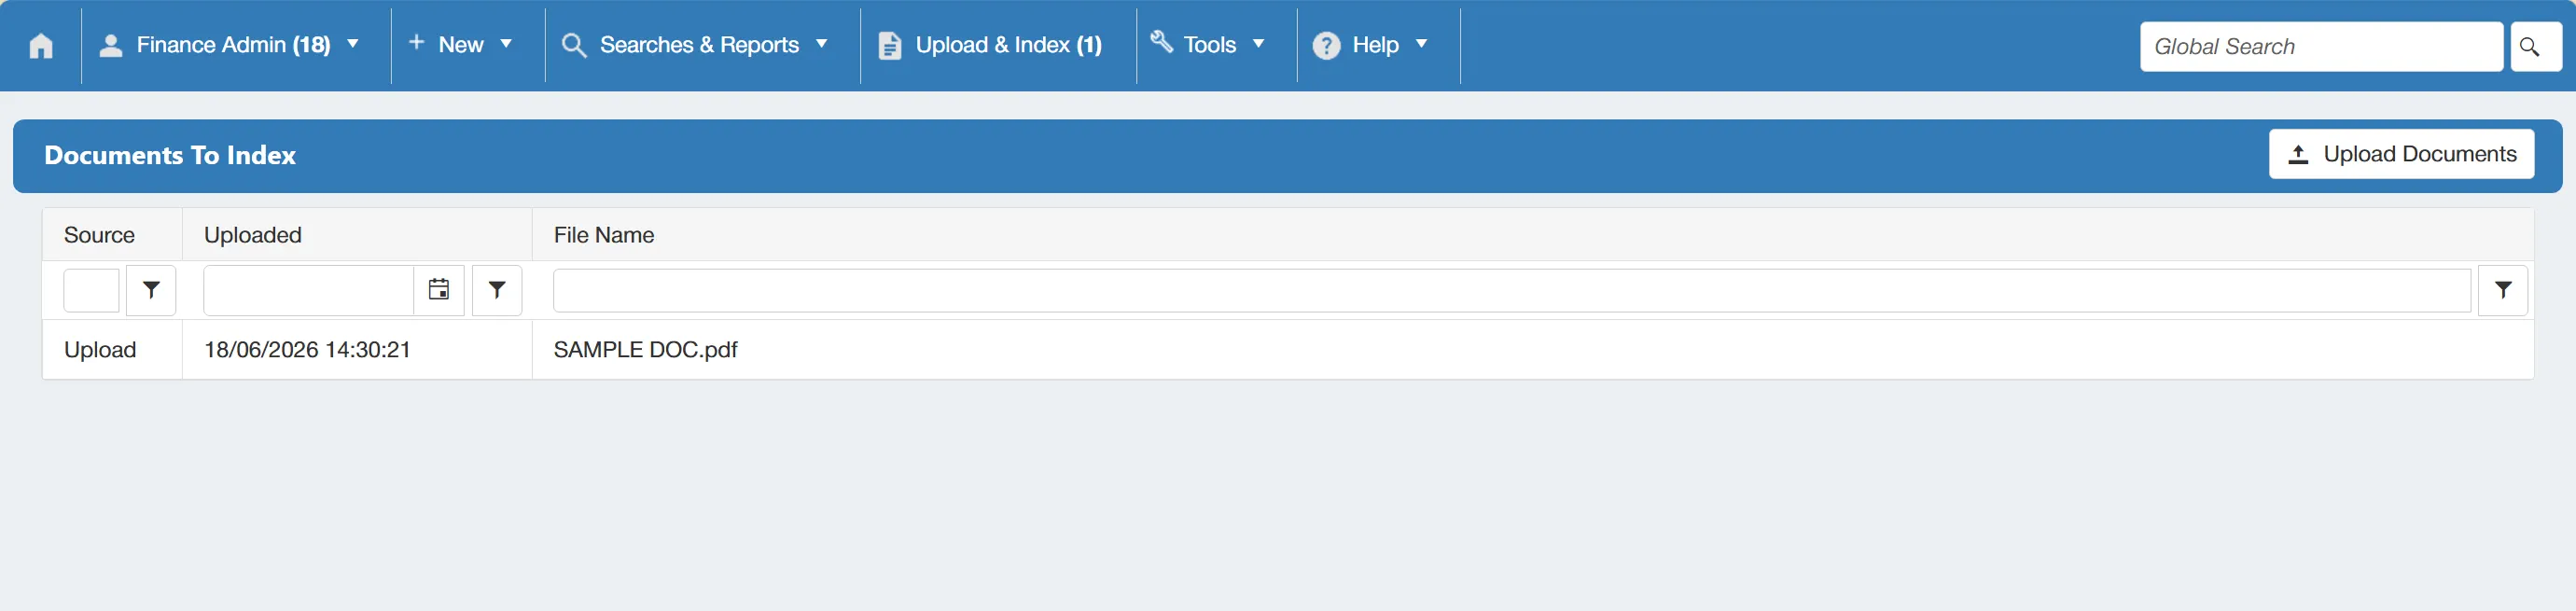
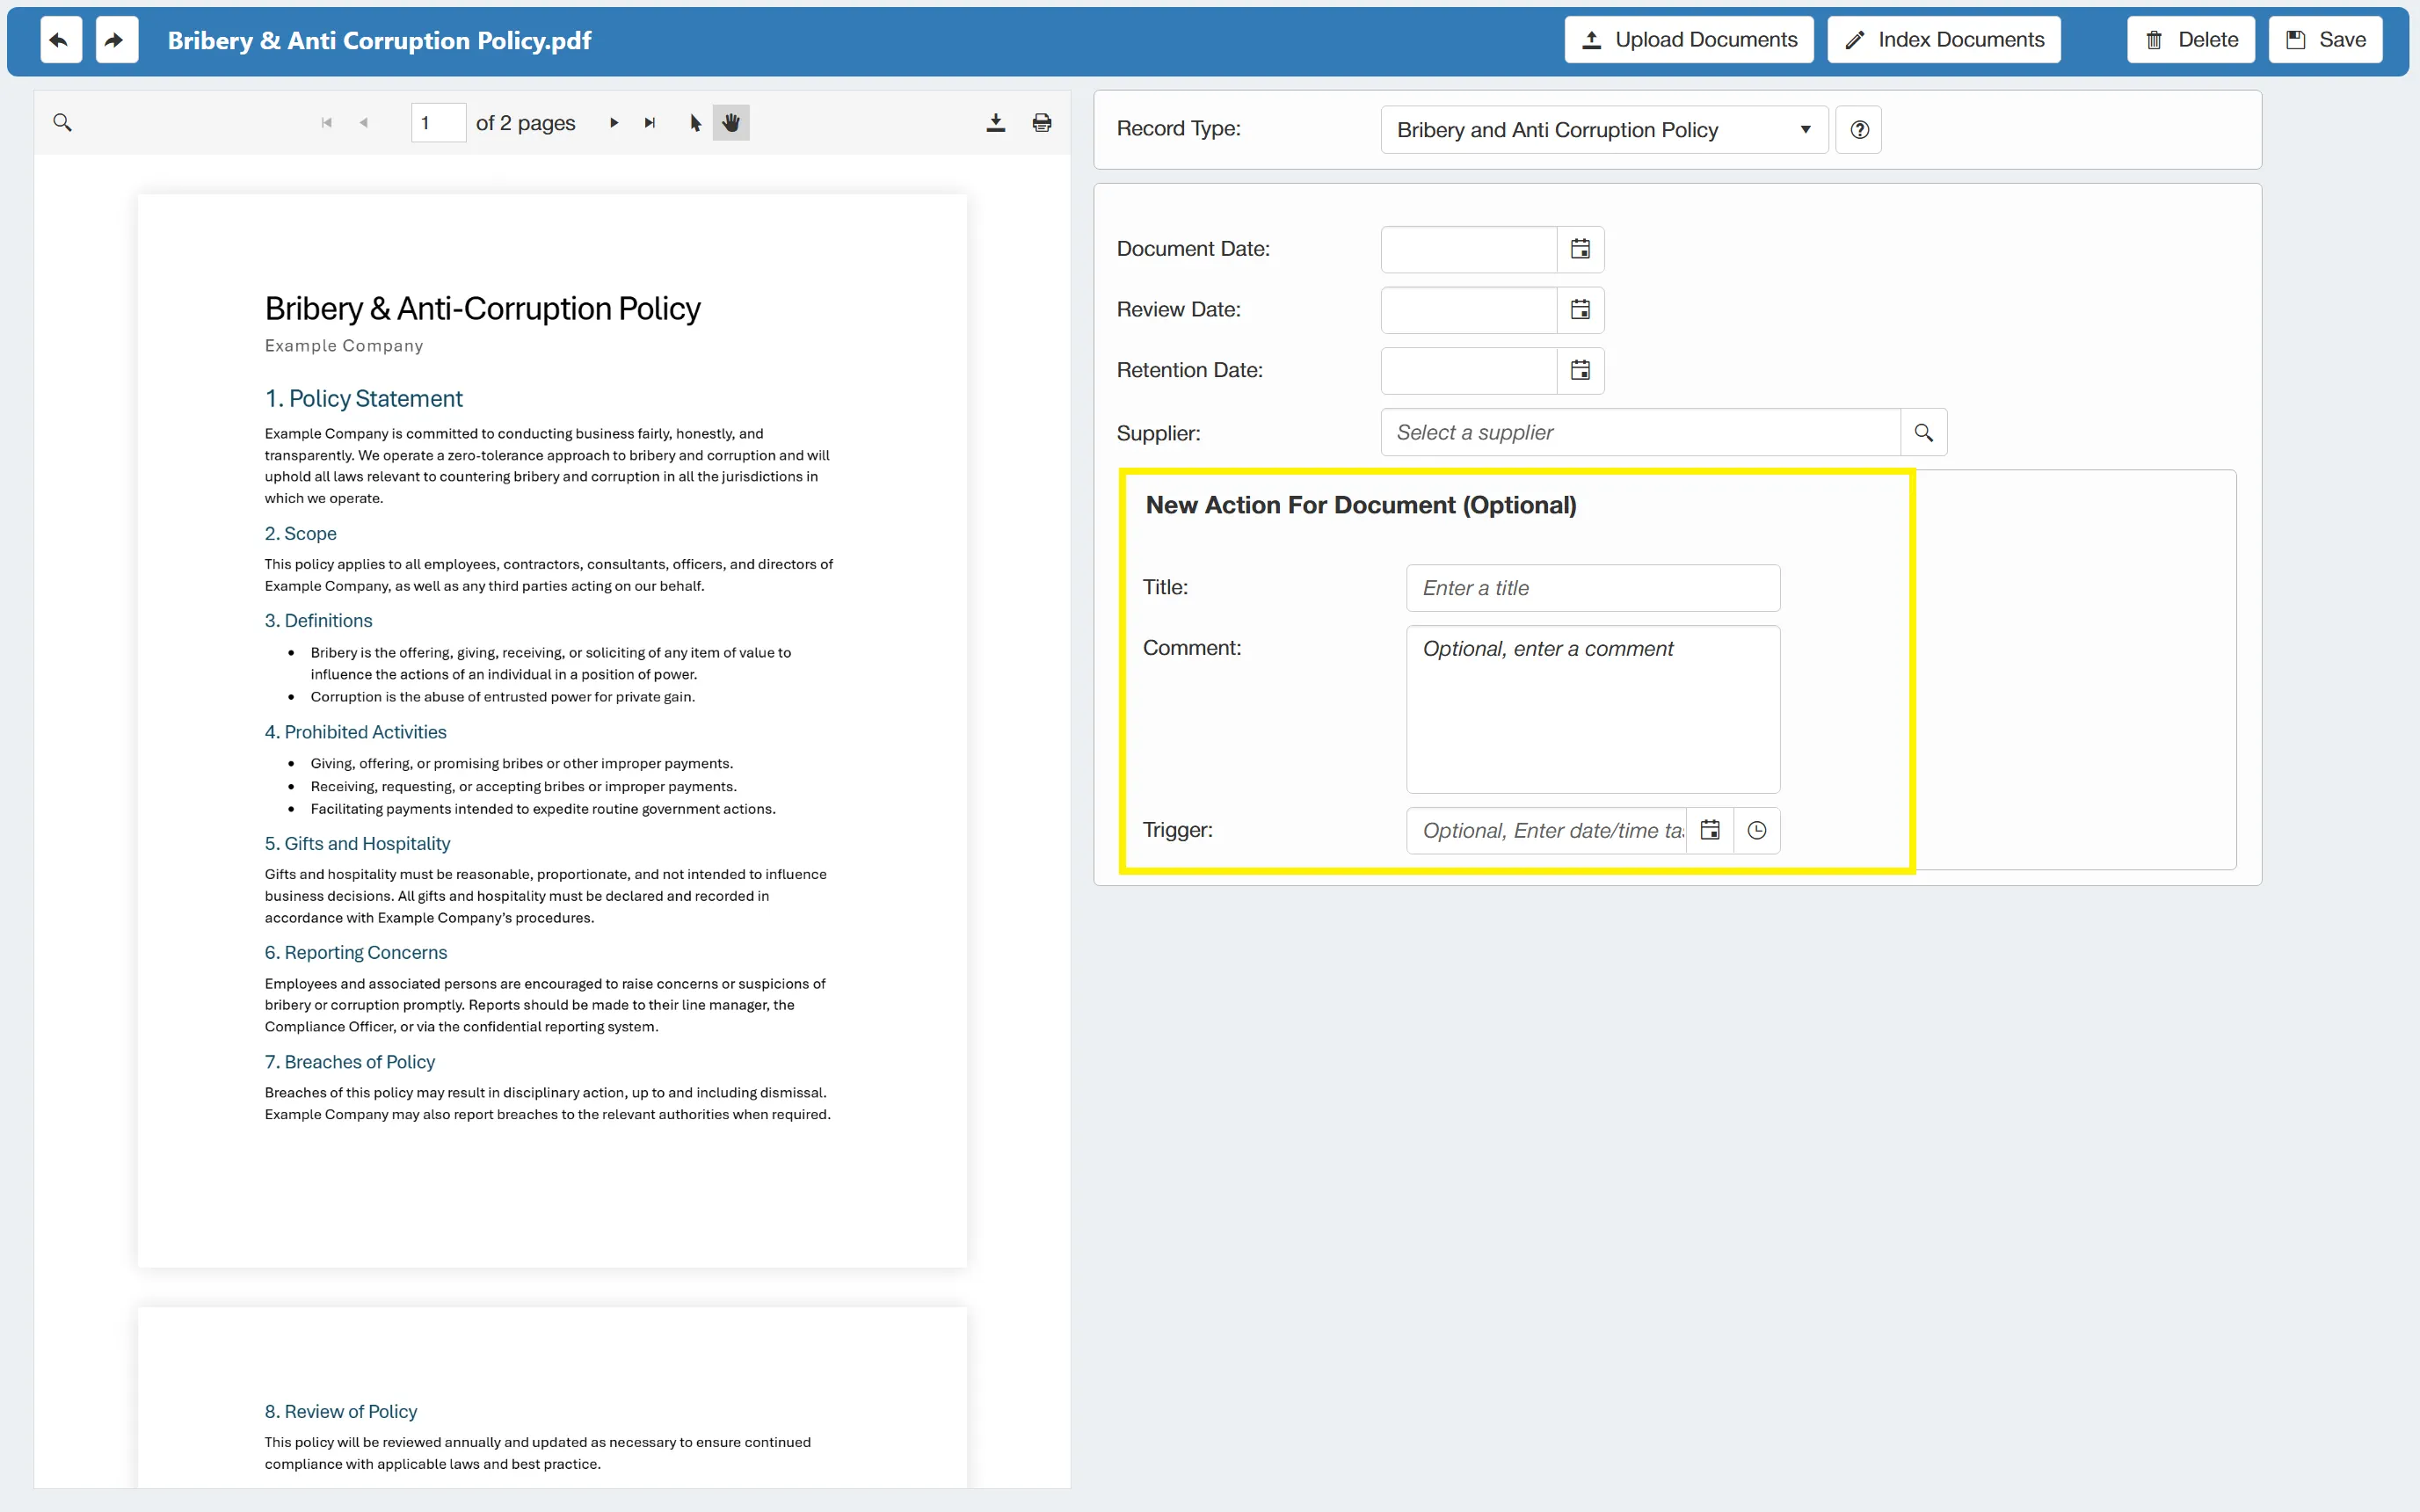
To index an invoice, select the file from this grid and this will open a new window.
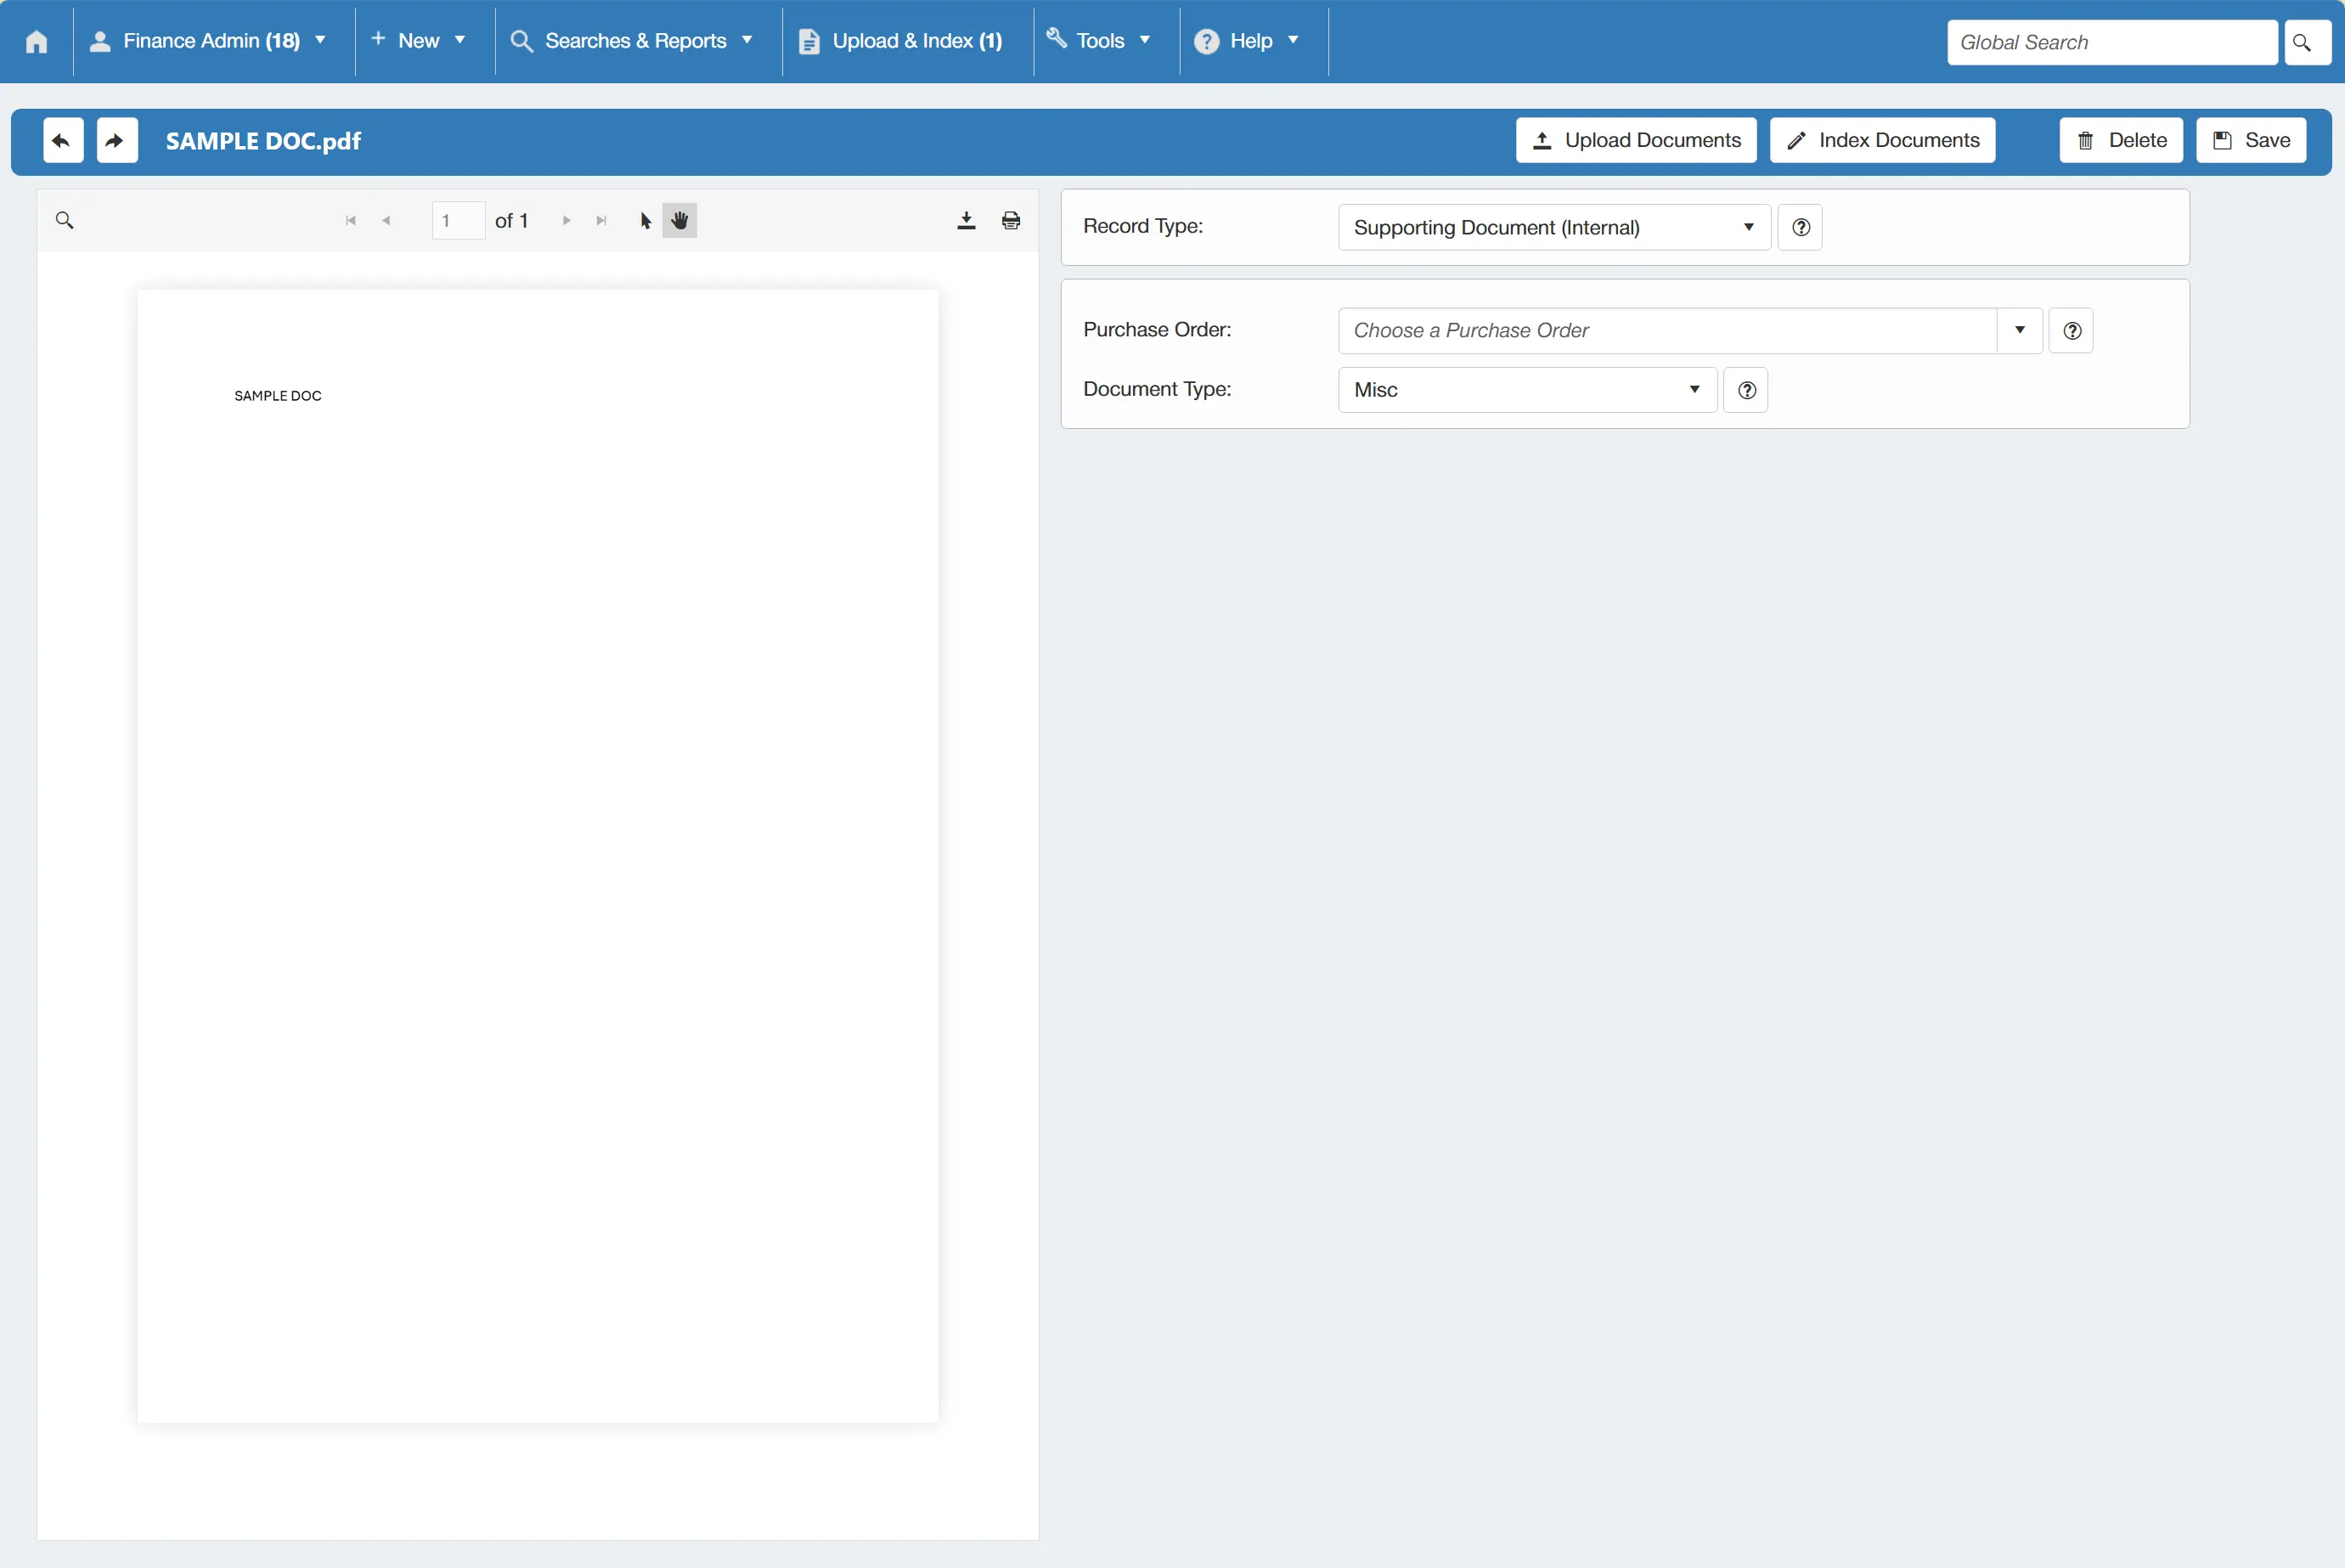
This window displays the invoice document on the left and some fields on the right which will need to be completed.
You first need to designate the Record Type. To do this, select the relevant Supplier Document Type from the drop down menu.
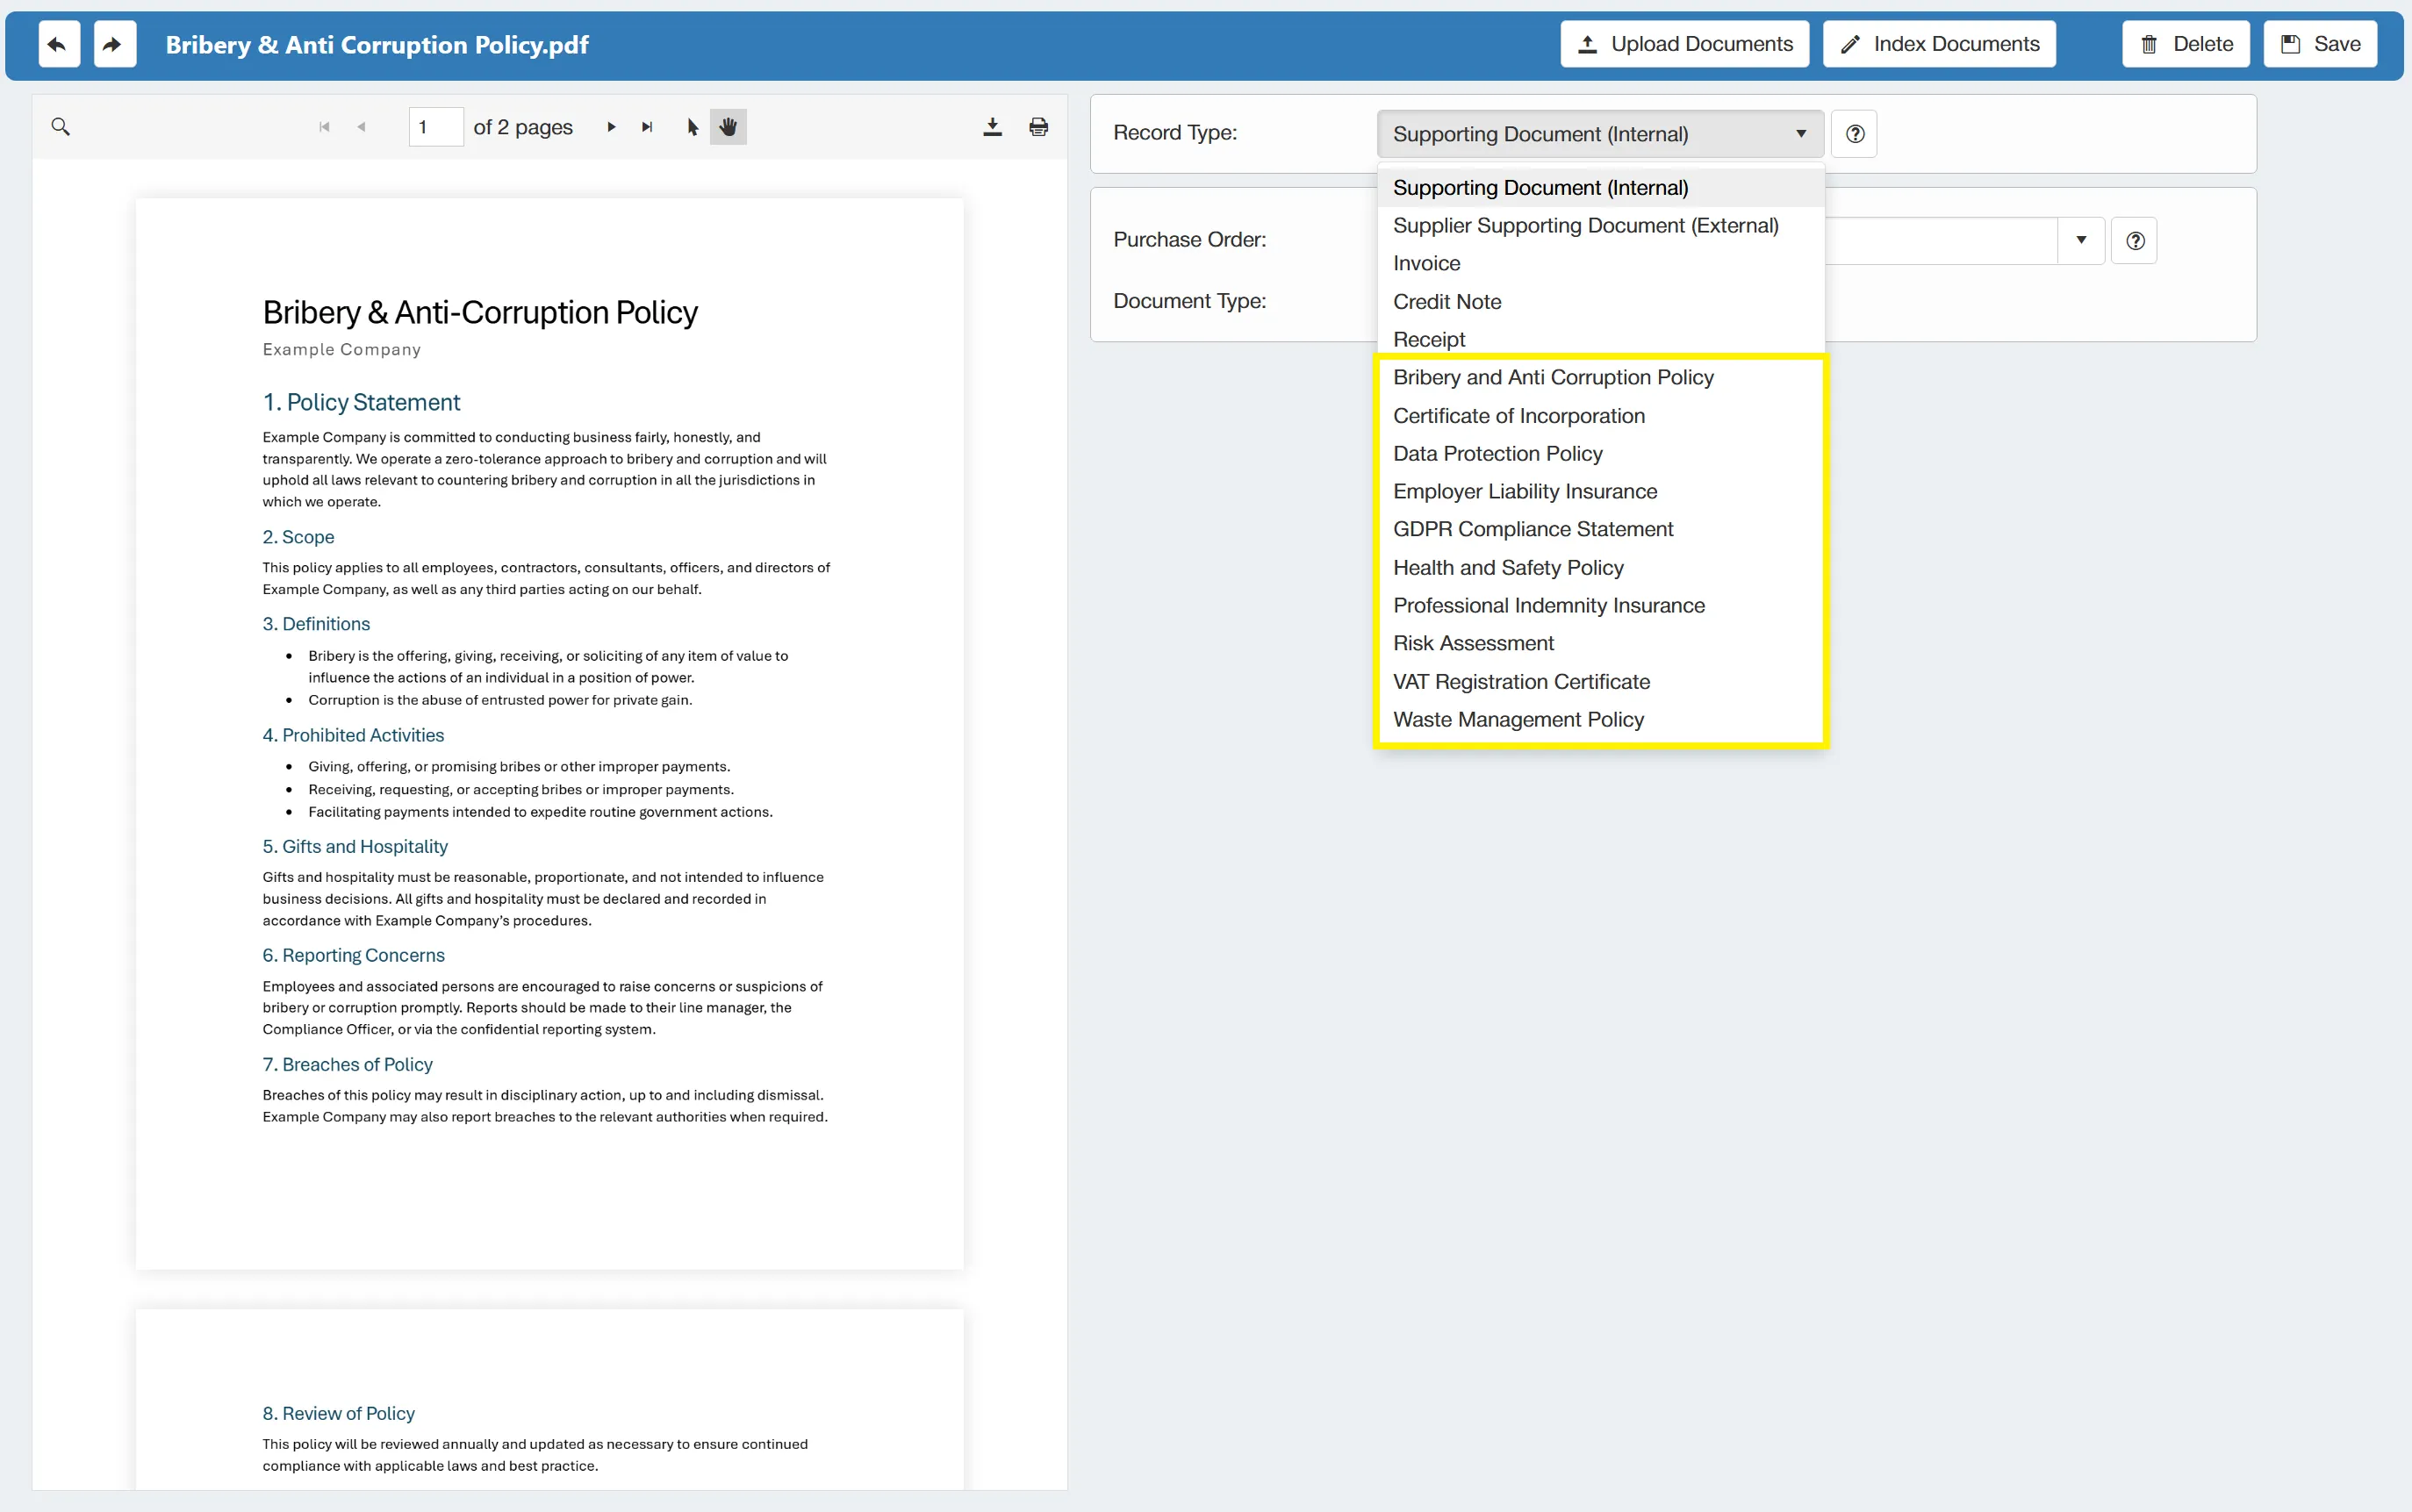
The list of Supplier Document Types can be administered from the Supplier Docs Type Admin section of the Admin Centre.
Once the Record Type is selected, further fields are displayed for the user to input relevant details.
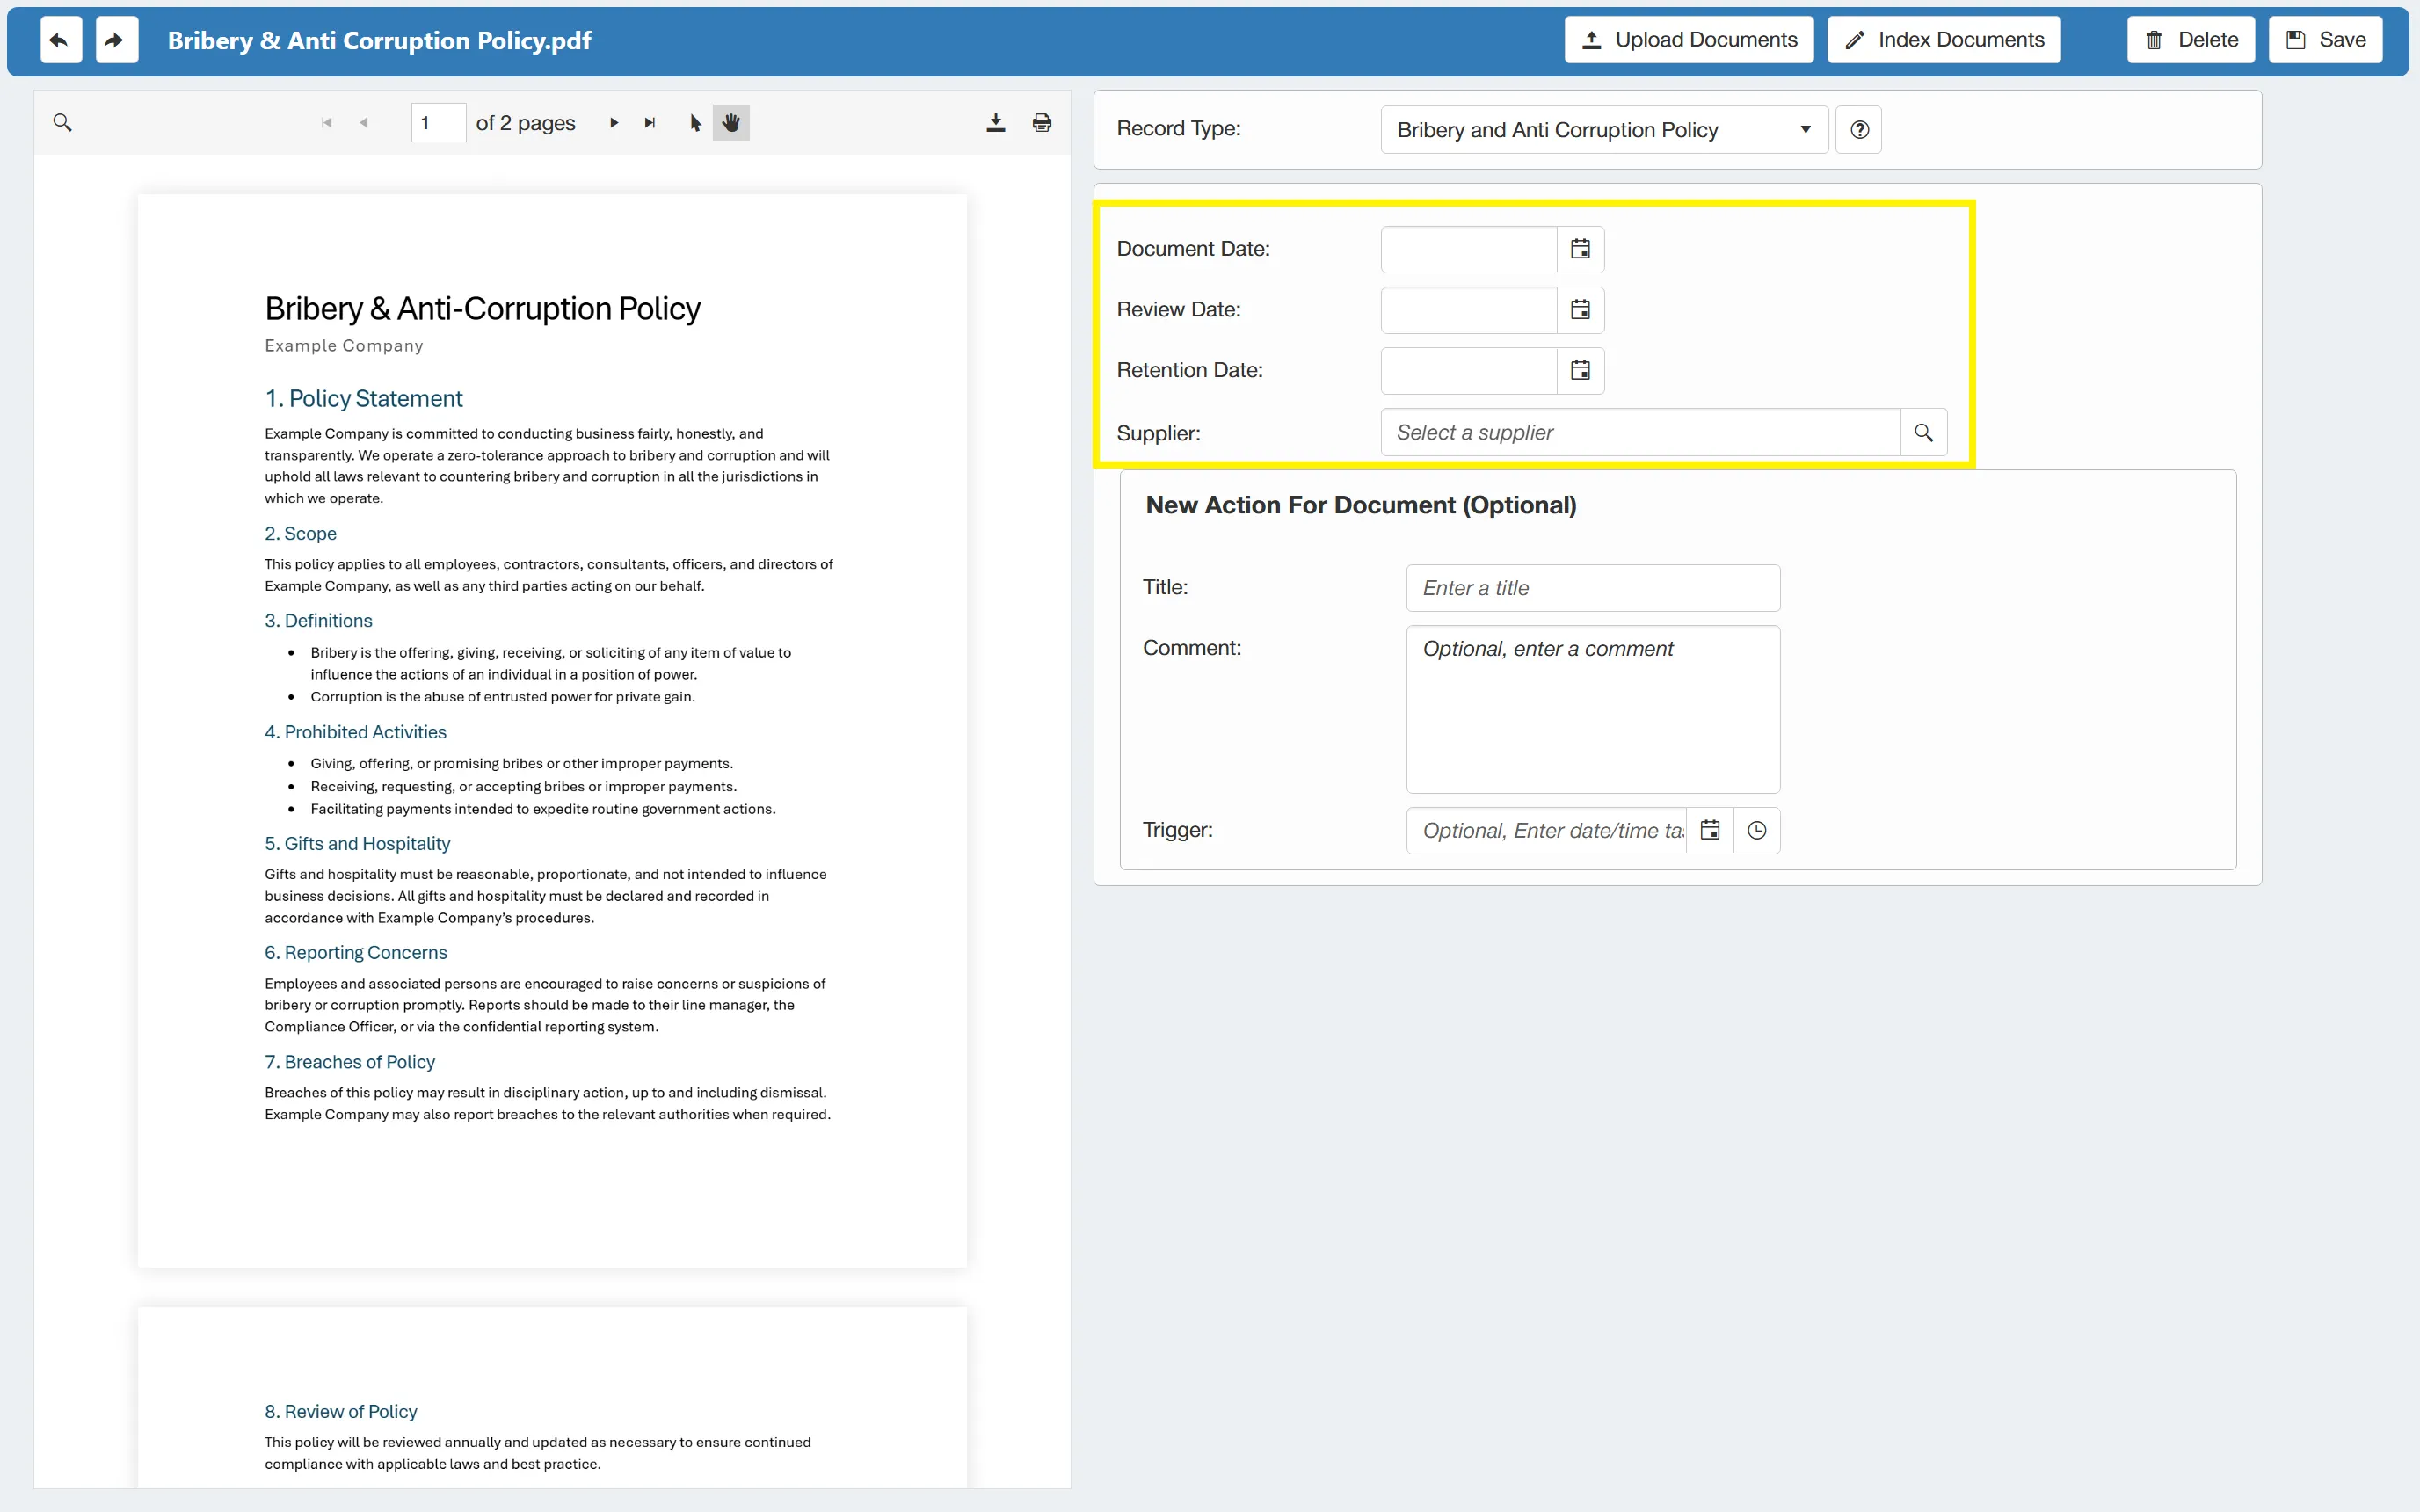
The fields displayed are as follows:
- Document Date: This is the date displayed on the document itself.
- Review Date: The date on which the document will be marked for review.
- Retention Date: The date on which the document will be moved to the Supplier Docs Retention grid.
- Supplier: The supplier to which you would like to link the document.
If Forced Review/Retention dates are set for this document type, these will be calculated in line with the Document Date. For more information on Forced Review/Retention dates, click here.
There is also the option set an action against this particular document. This is an optional feature which would ensure the system sends you an action reminder at the specified date/time.
Once you are happy with the details, simply click to proceed.
Existing Supplier Documents
There are a number of options available when viewing an existing supplier document. These options are:
- View Properties
- Edit Properties
- Delete Document
- Reviews
- History
- Add Action
For more information on searching for existing Supplier Documents, click here.
View Properties
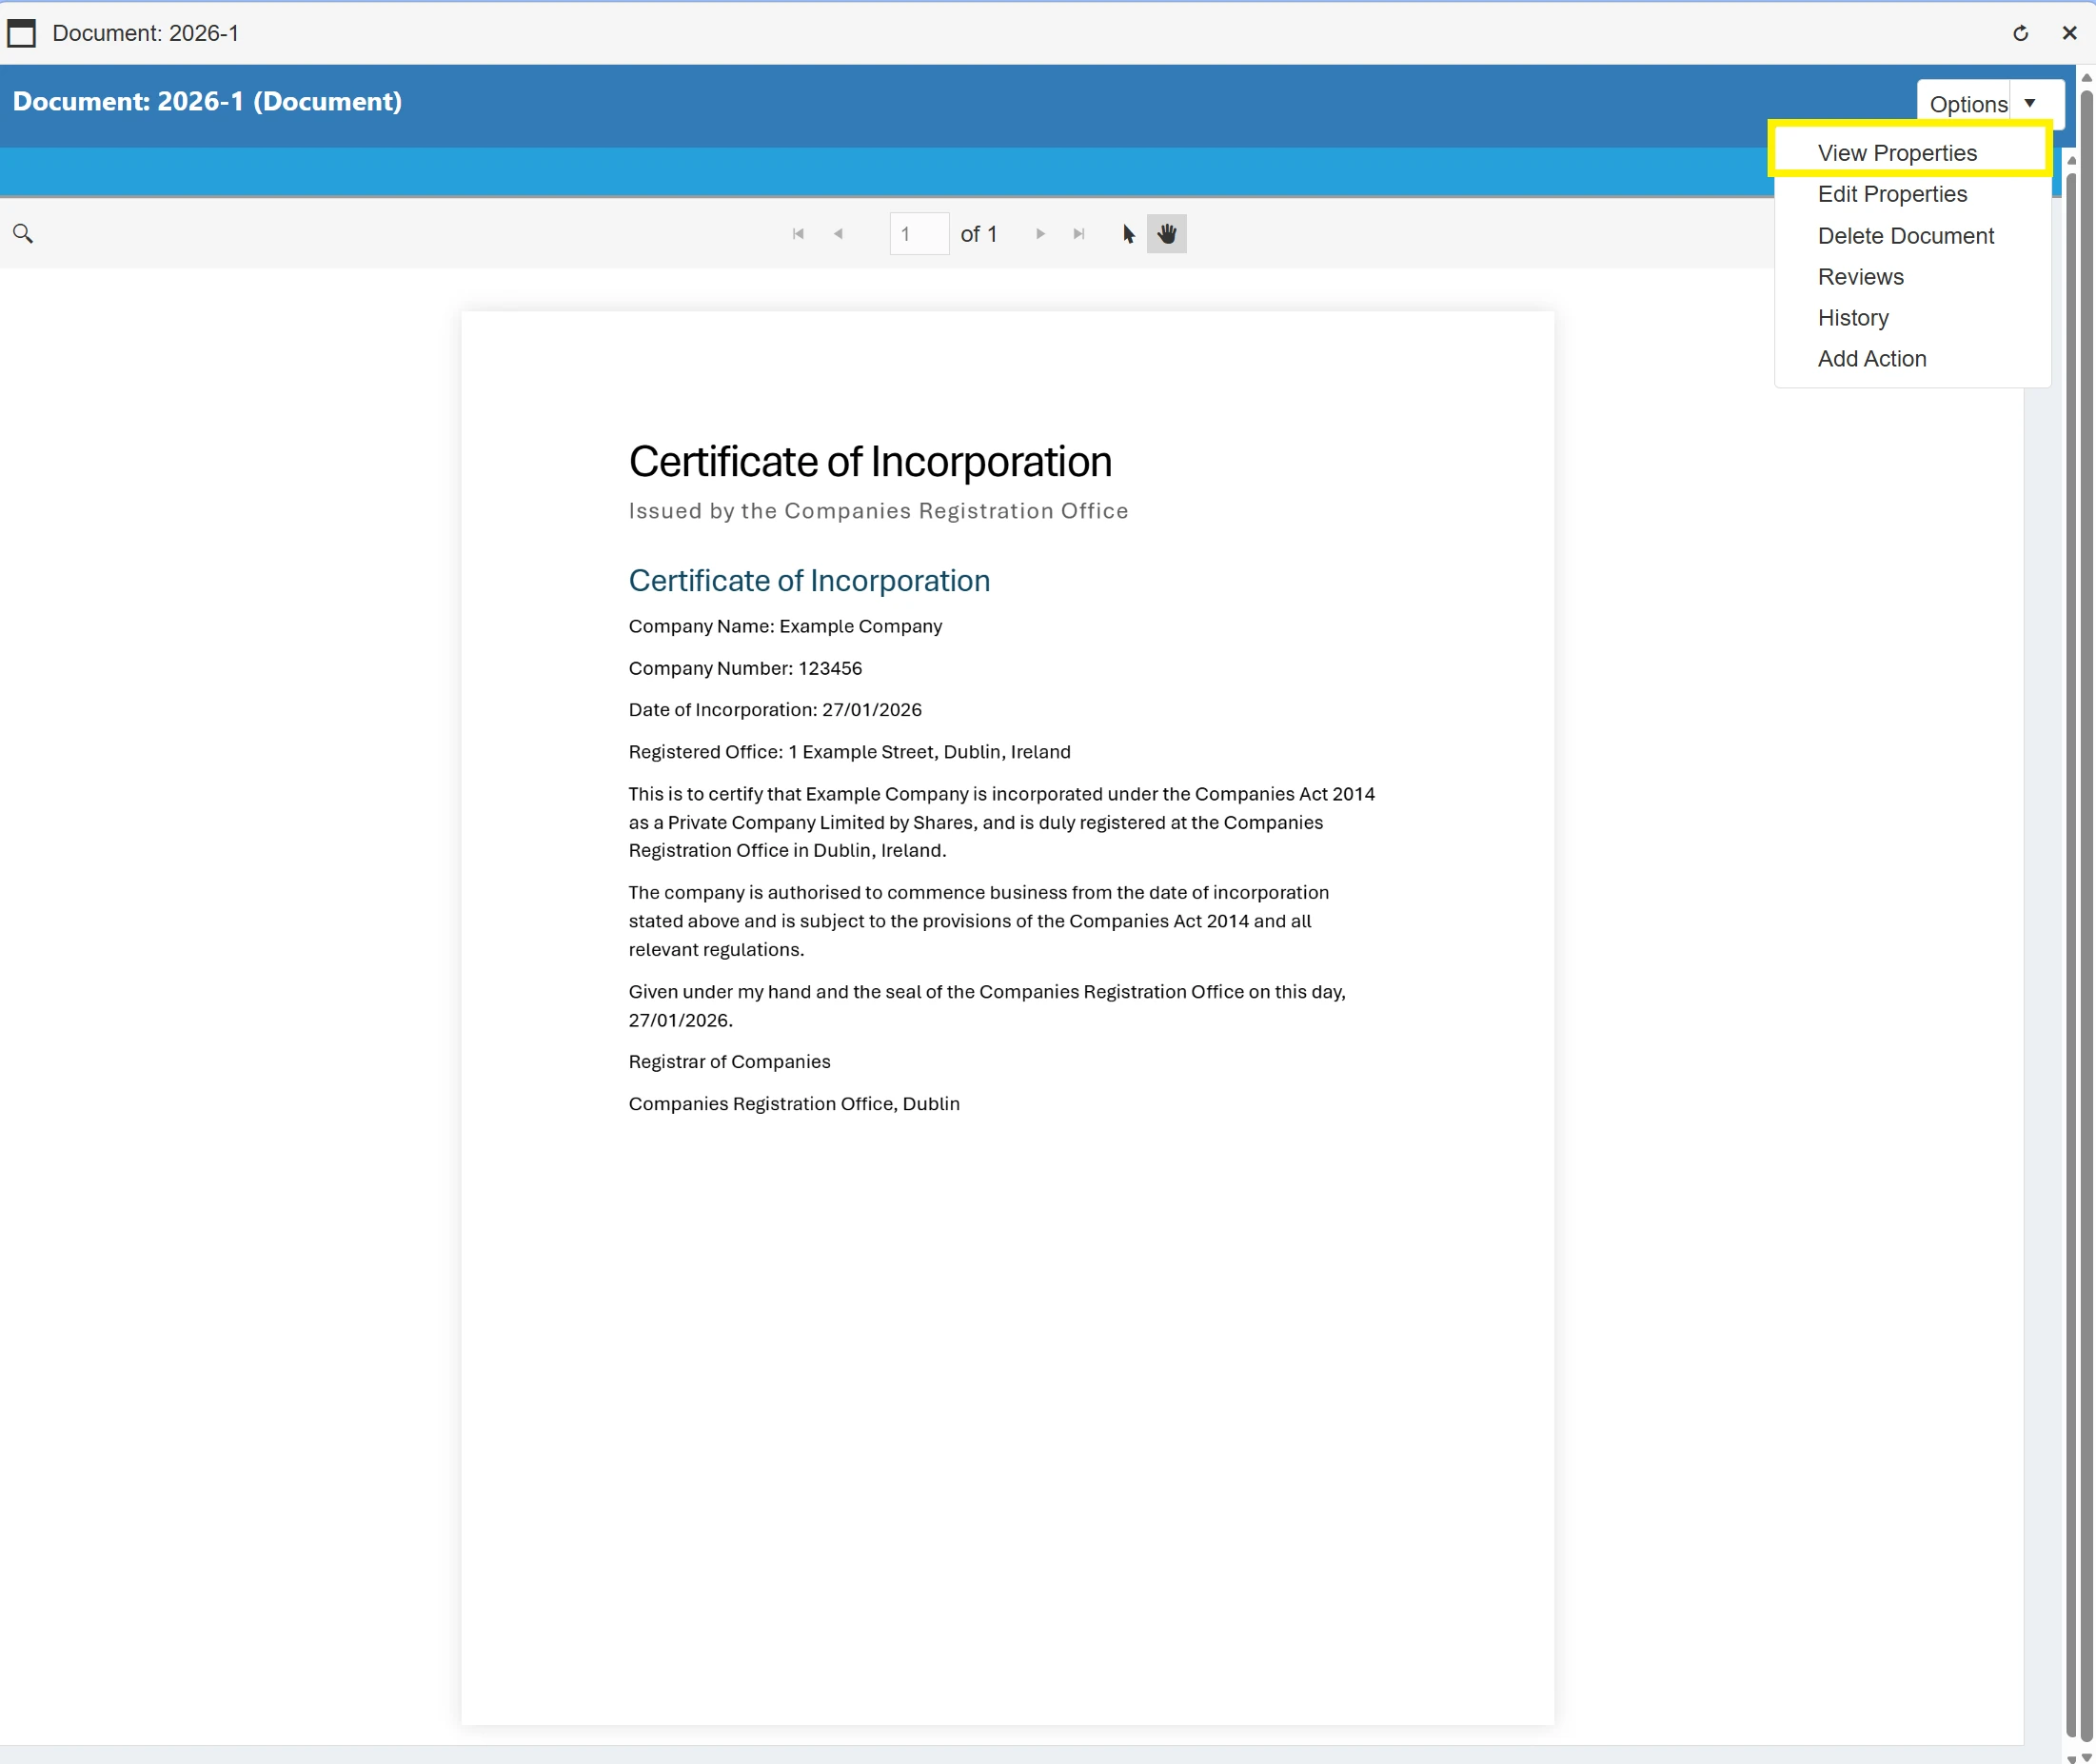
The View Properties option allows you to review the properties given to the document when it was indexed.
To access the View Properties Window, simply select from the drop down menu.
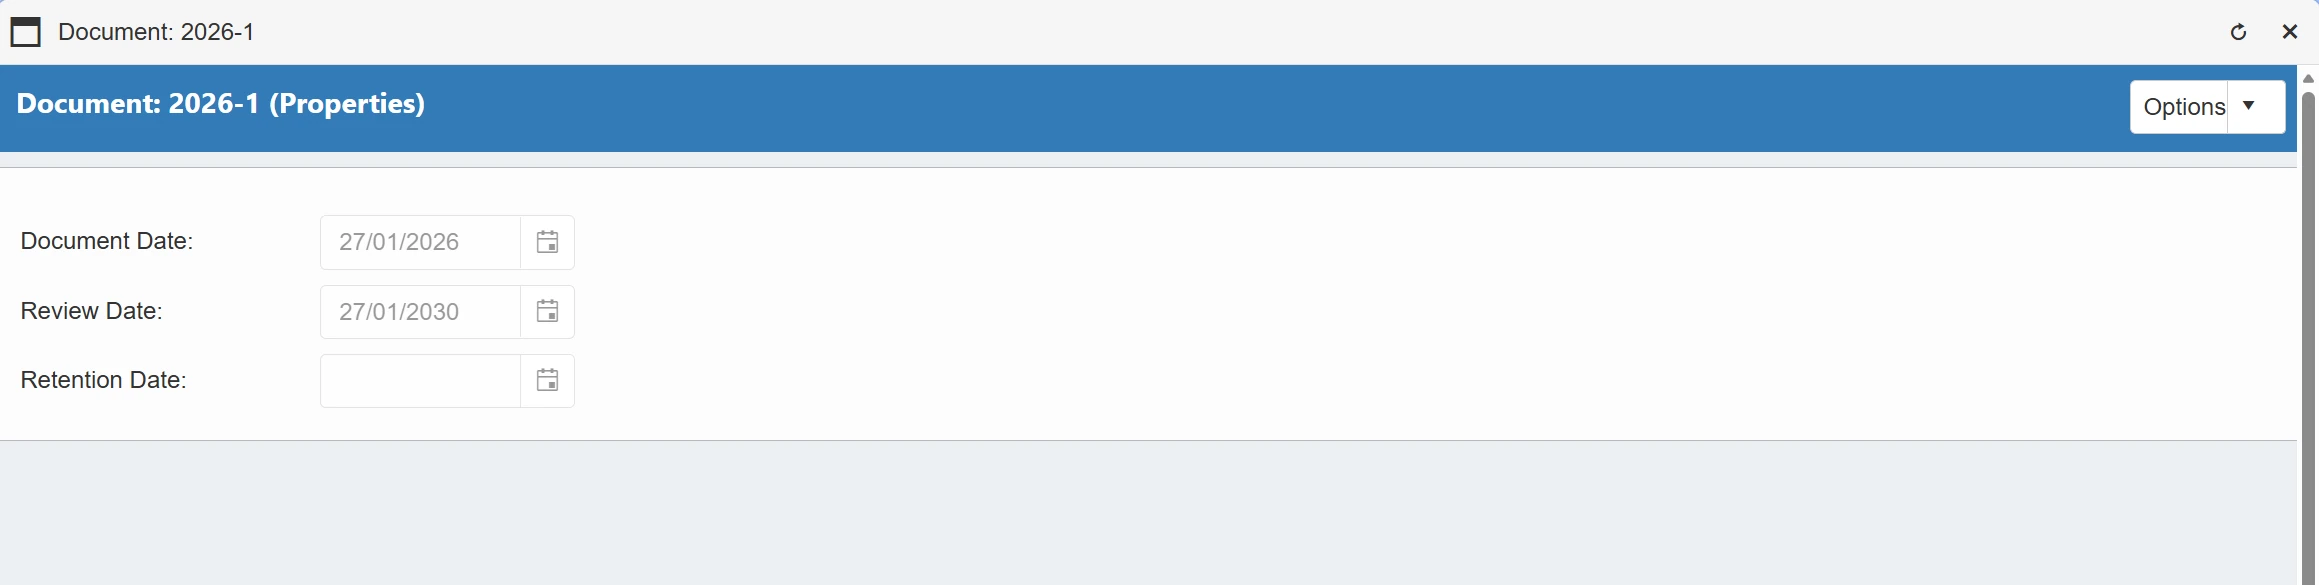
This will open a new window showing the document's properties, such as:
- Document Date
- Review Date
- Retention Date
Edit Properties
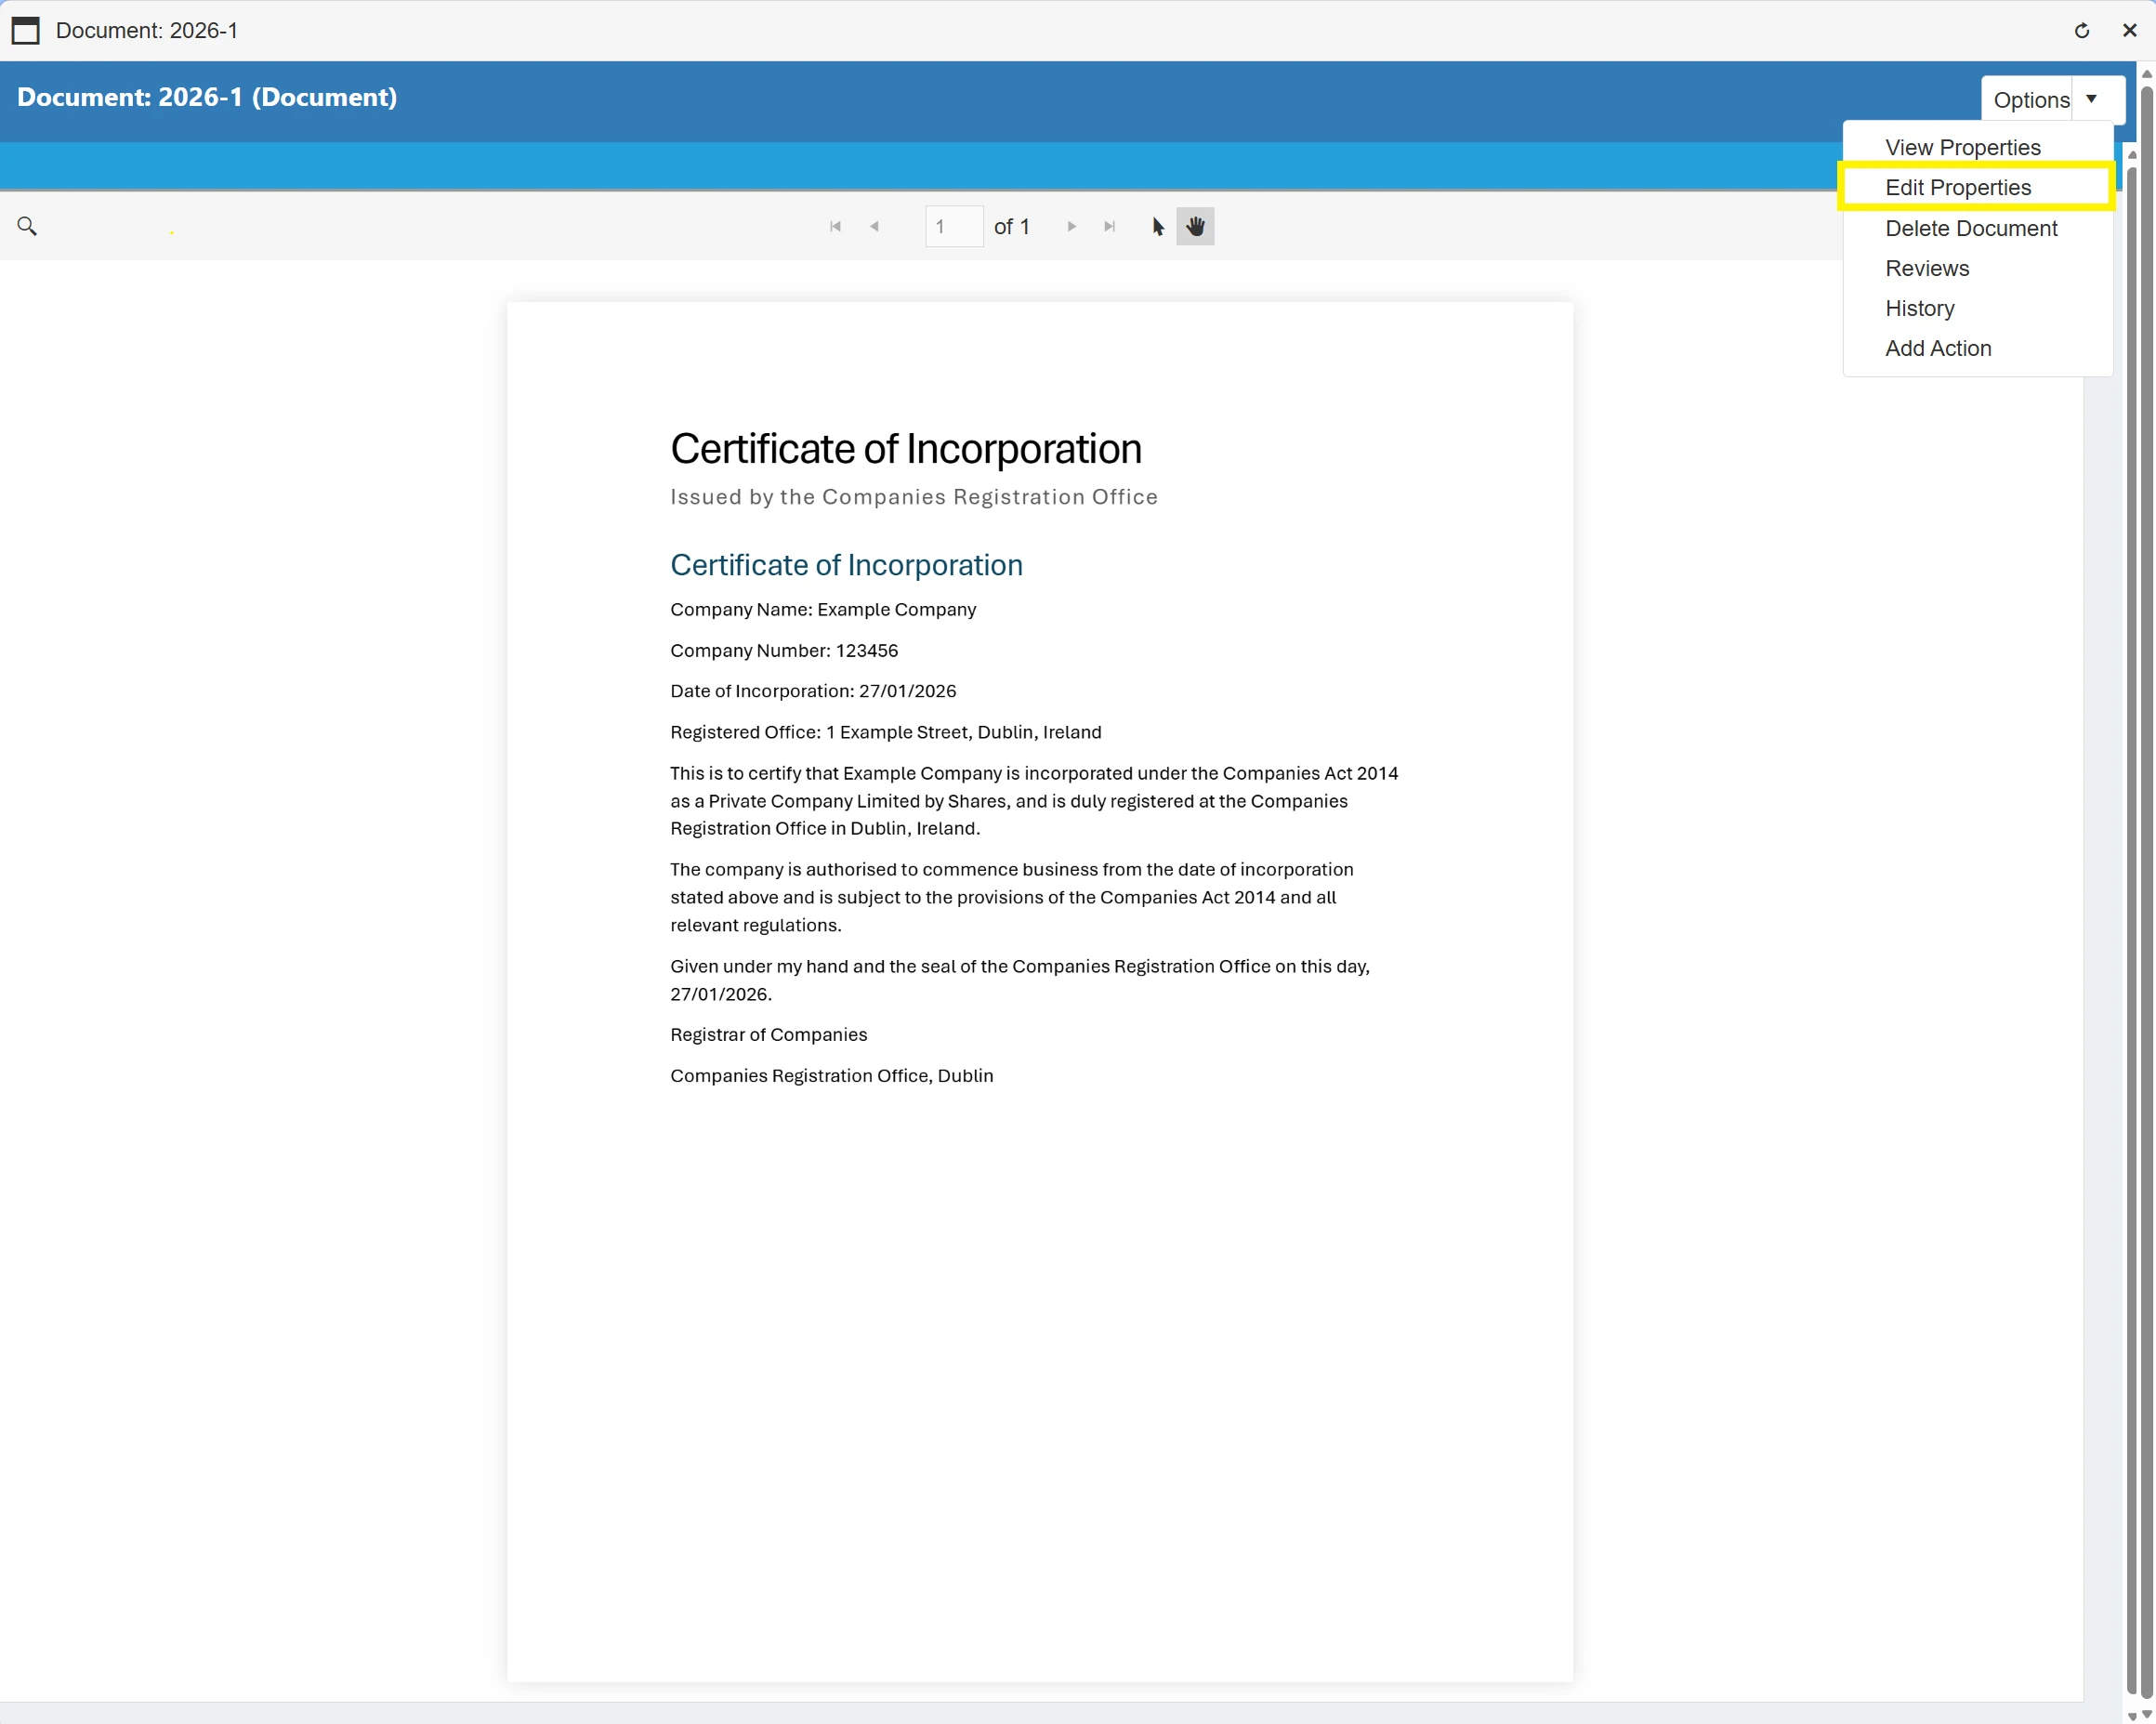
The Edit Properties option allows you to edit the properties originally given to the document when it was indexed.
To access the Edit Properties Window, simply select from the drop down menu.
This will open a new window showing the document's properties, however, they will now be editable. The shown properties are:
- Document Date
- Review Date
- Retention Date
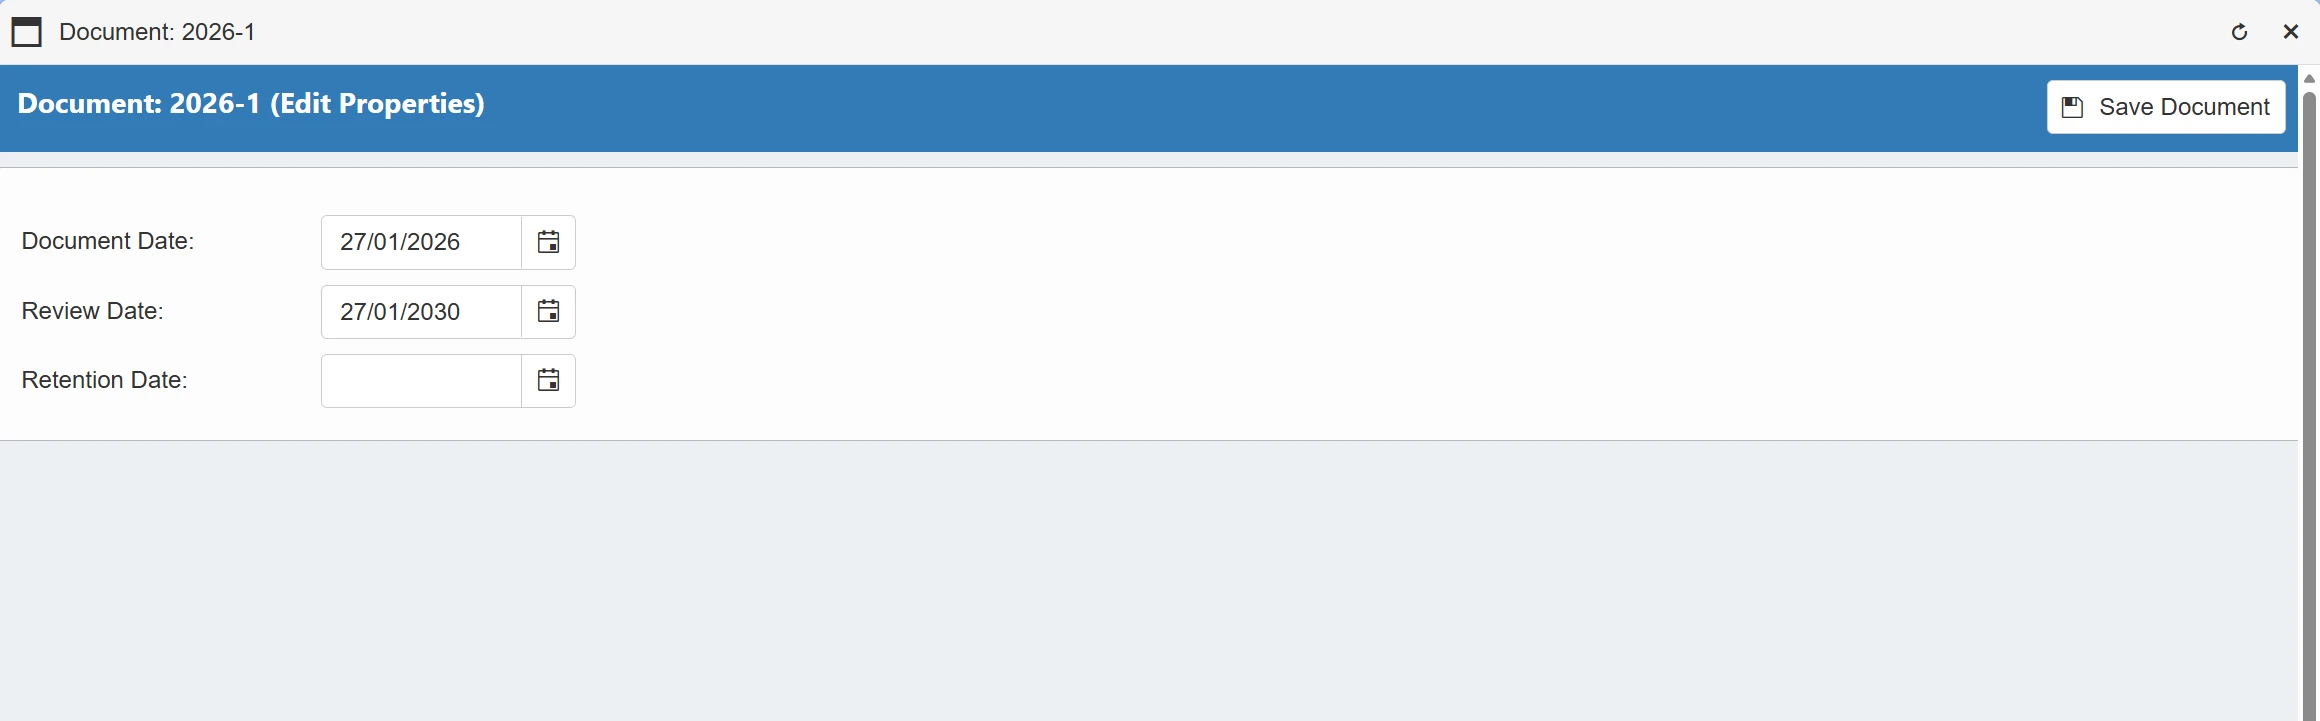
It is important to note that if a document has Forced Review or Retention dates, these cannot be edited and will be greyed-out accordingly.
Delete Document
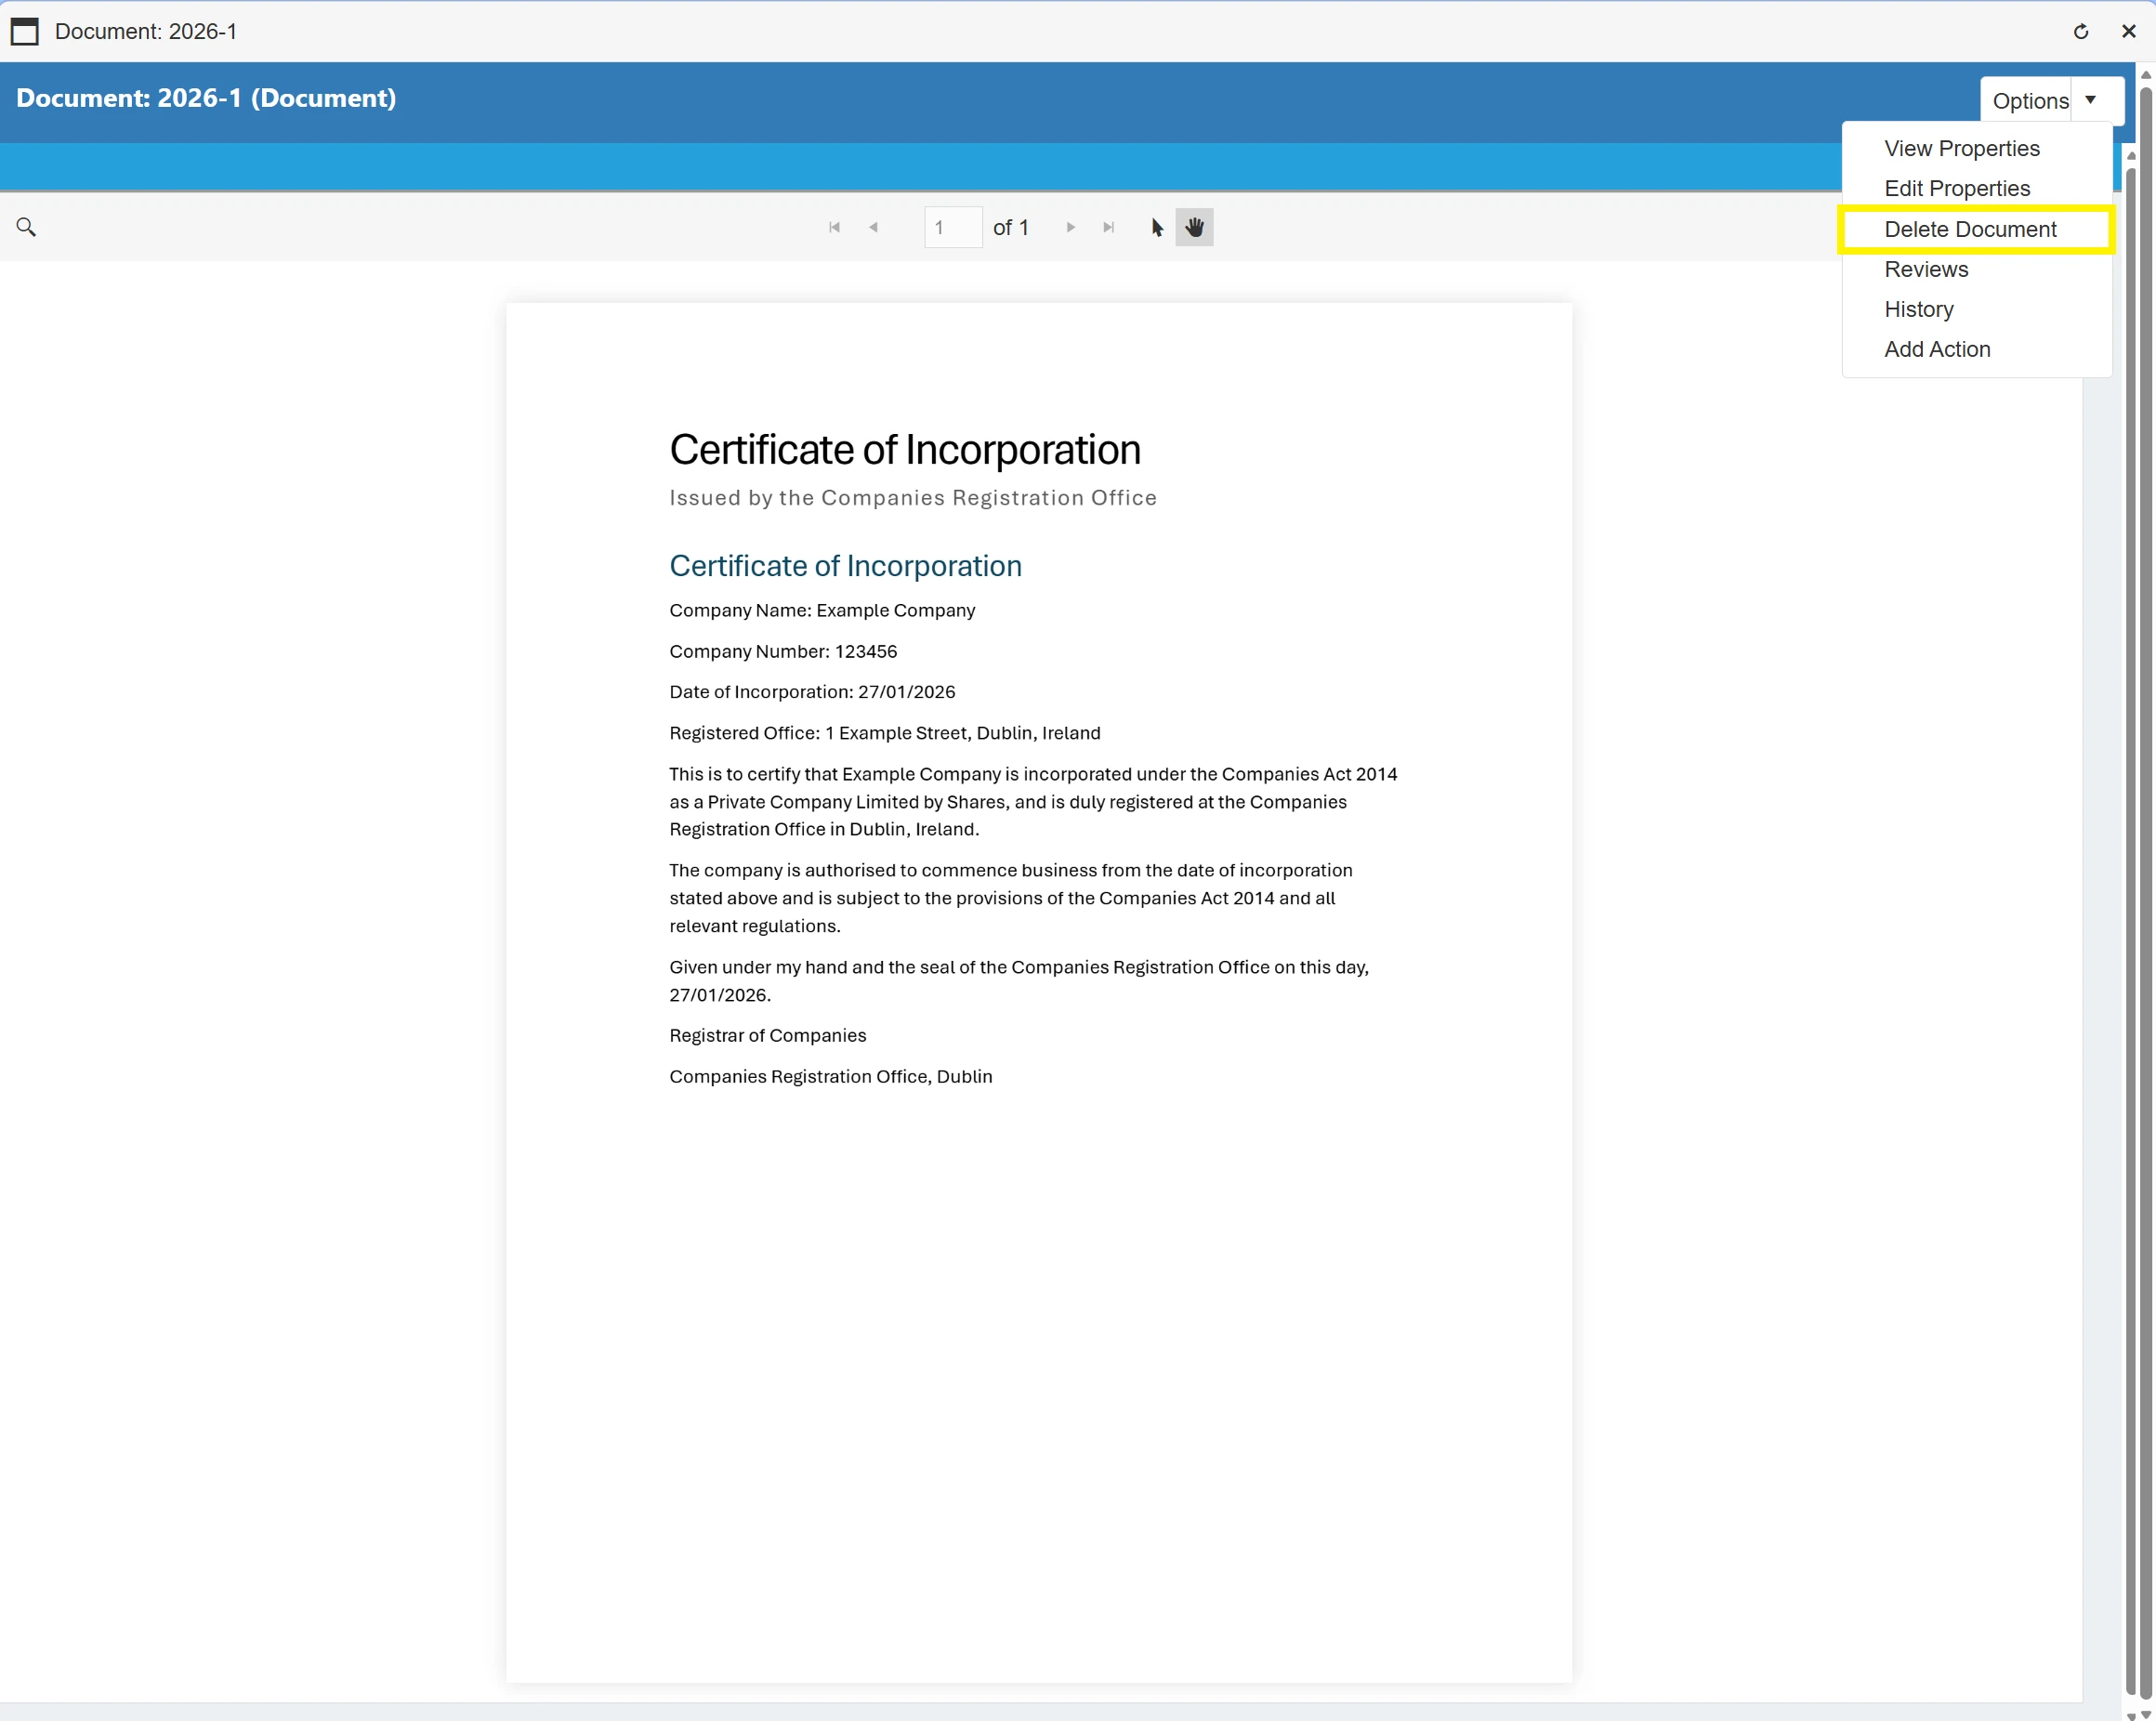
The Delete Document option allows admin users to delete unwanted supplier documents.
To access the Delete Documents function, simply select from the drop down menu.
This will open a new window, prompting the user to input a reason behind the deletion. This also serves as a log for audit purposes.
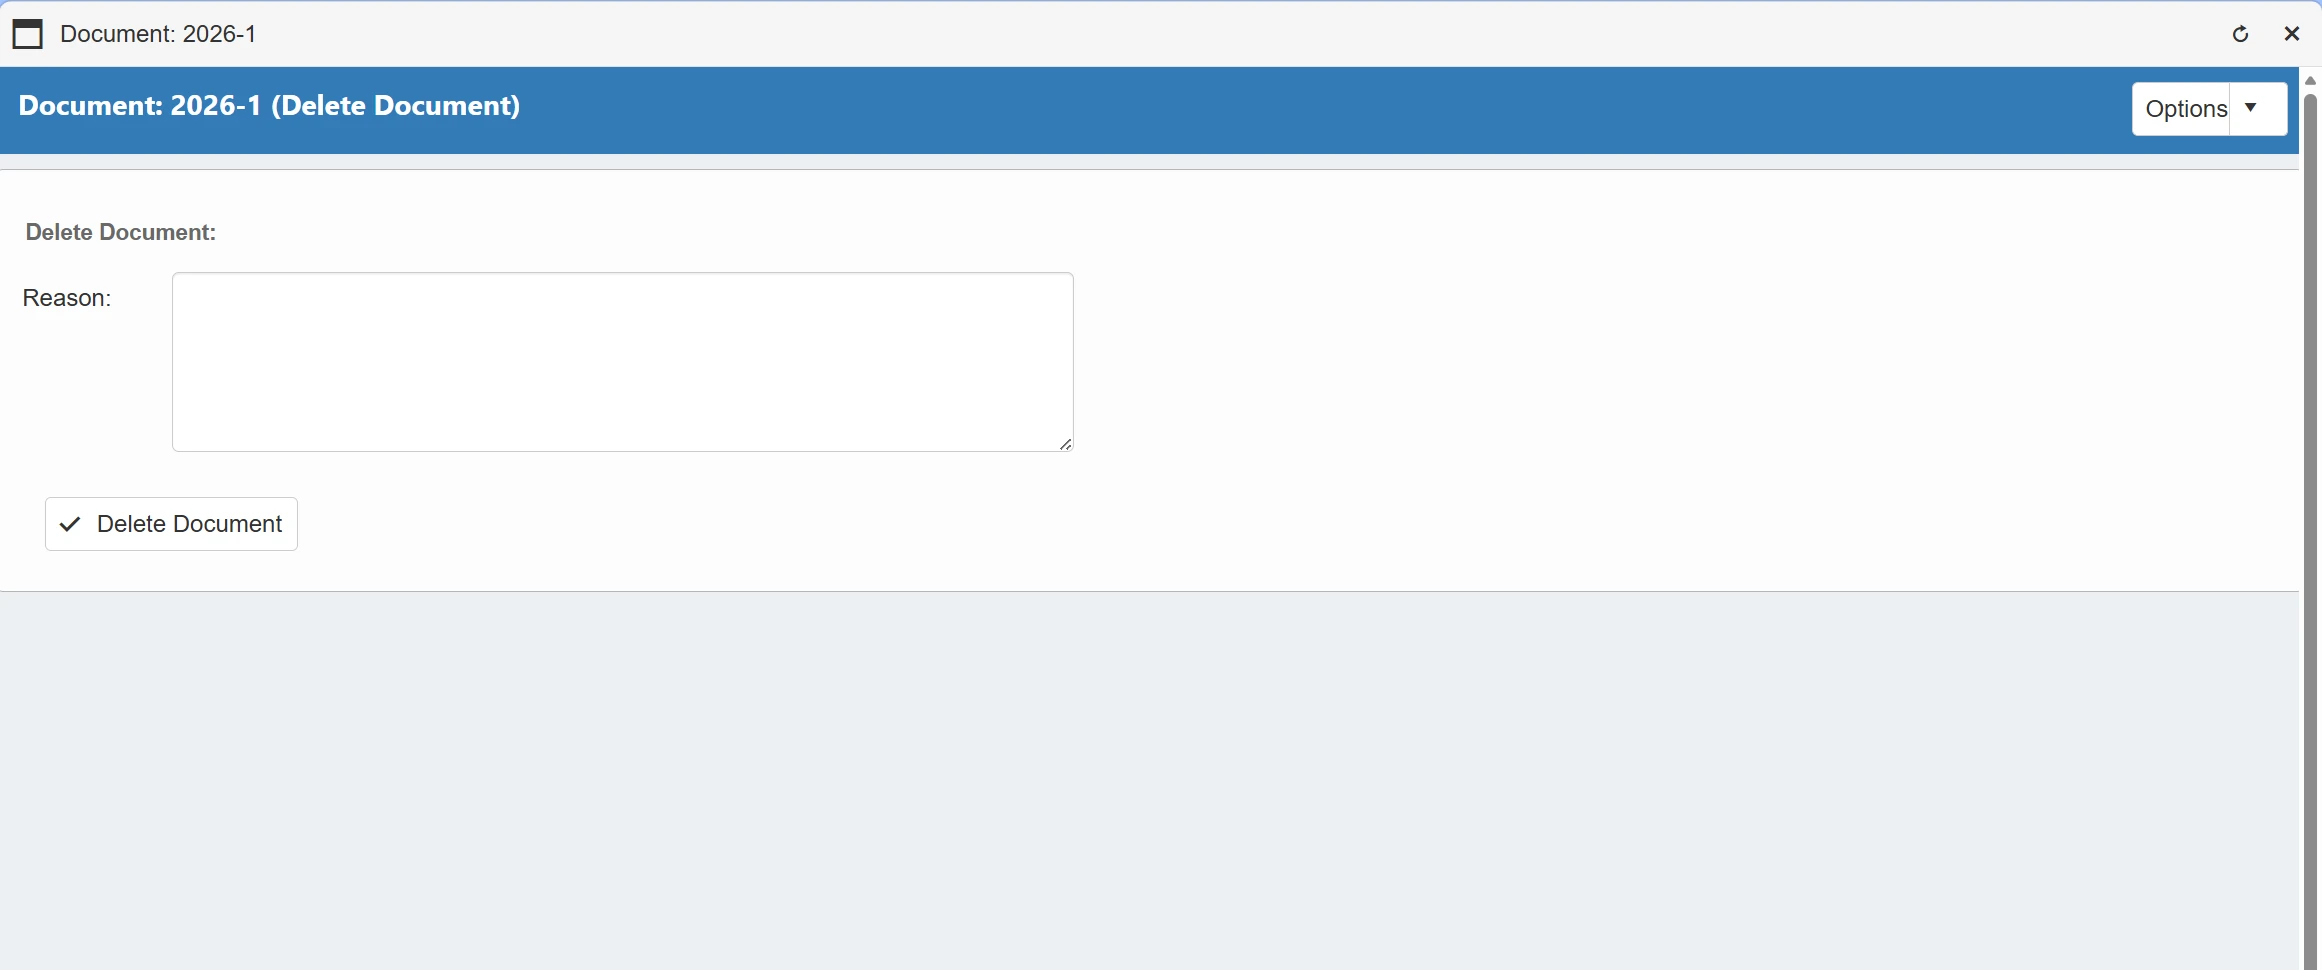
Once you have input a reason for the deletion, simply click to confirm.
Once the document is deleted, it will be sent to the Deleted Supplier Docs Admin section - users with relevant permissions will then be able to restore or permanently delete the document. For more information on this, please click here.
Reviews
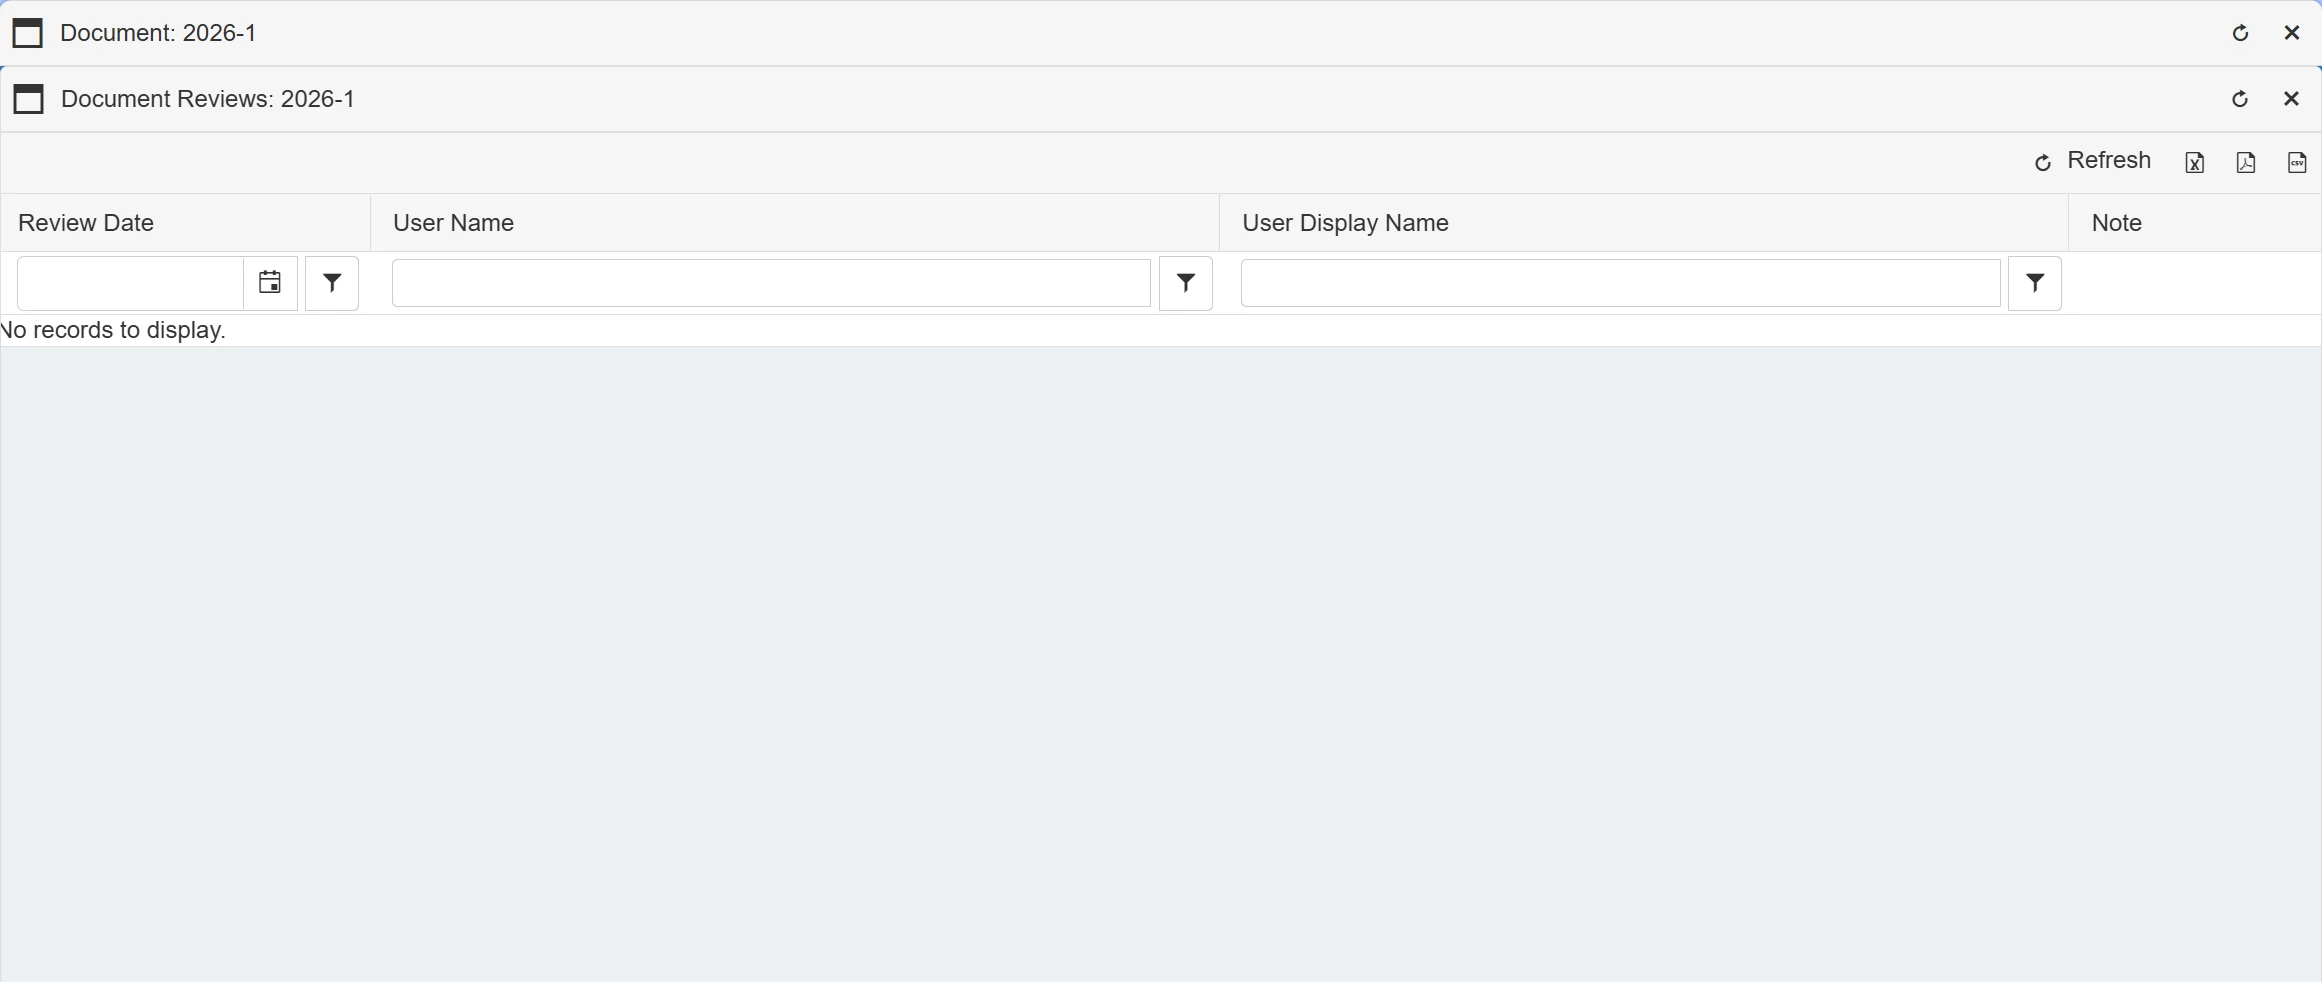
The Reviews option allows users to view a history of reviews that have taken place against this document.
To access the Reviews section, simply select from the drop down menu.
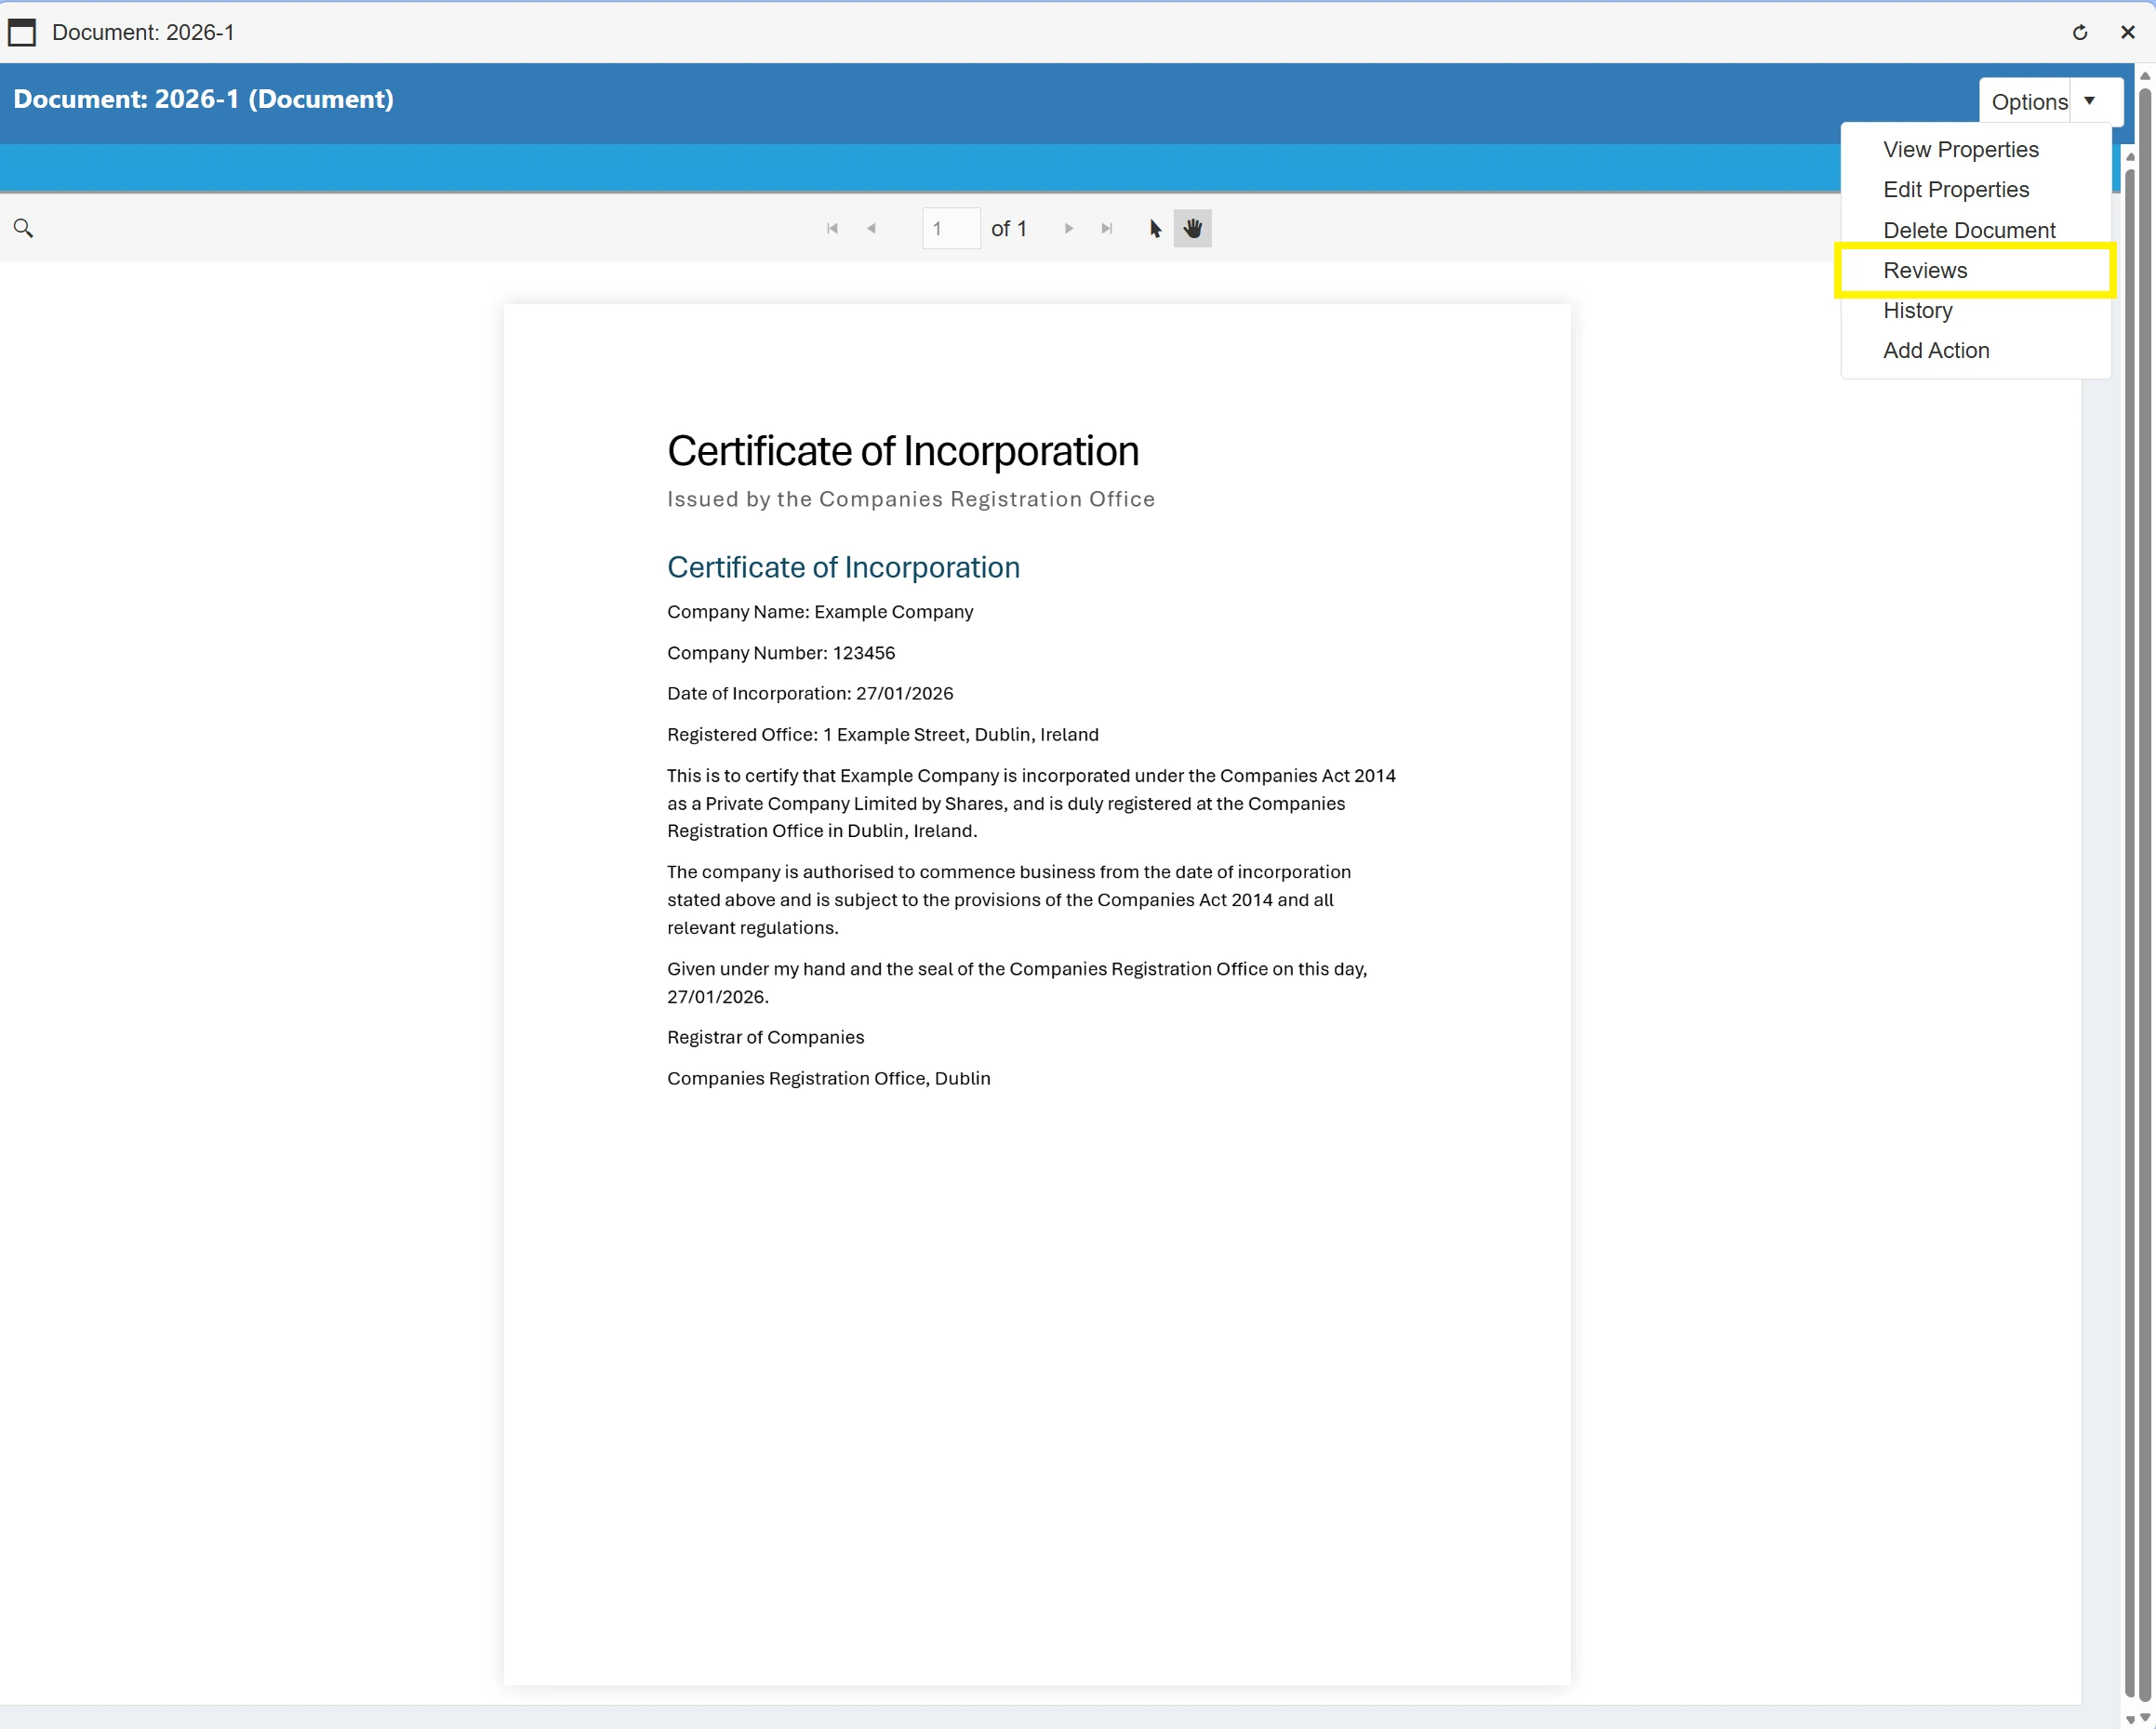
This will open a new window displaying a grid which will contain details of any previous reviews carried out against this document.
History
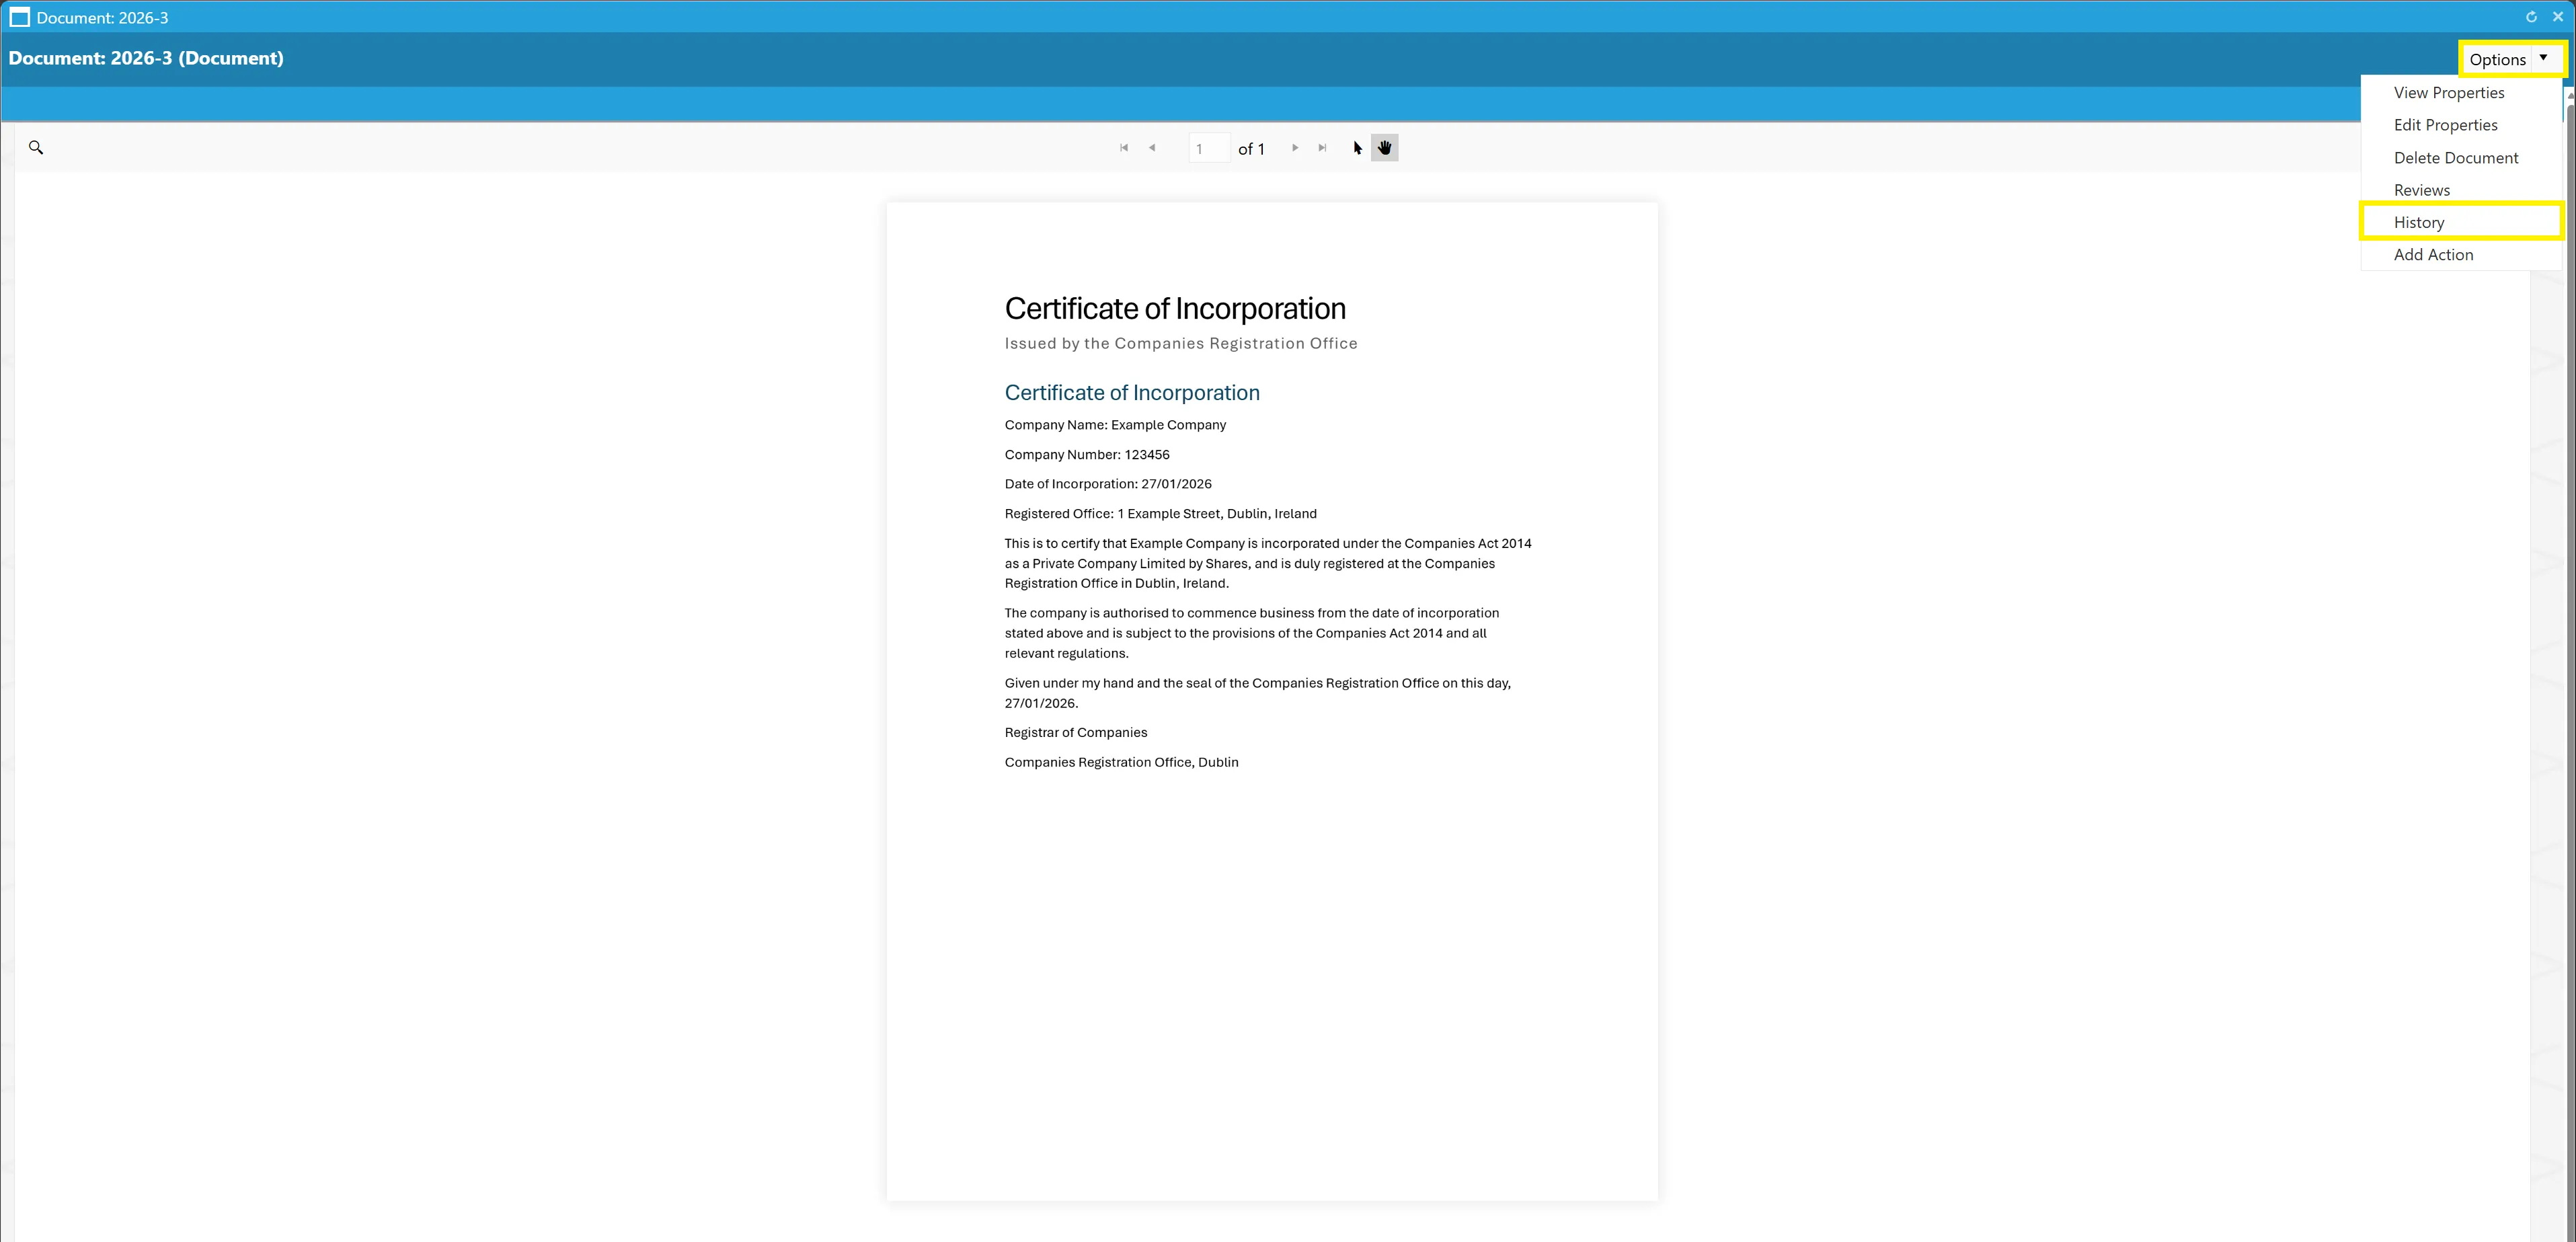
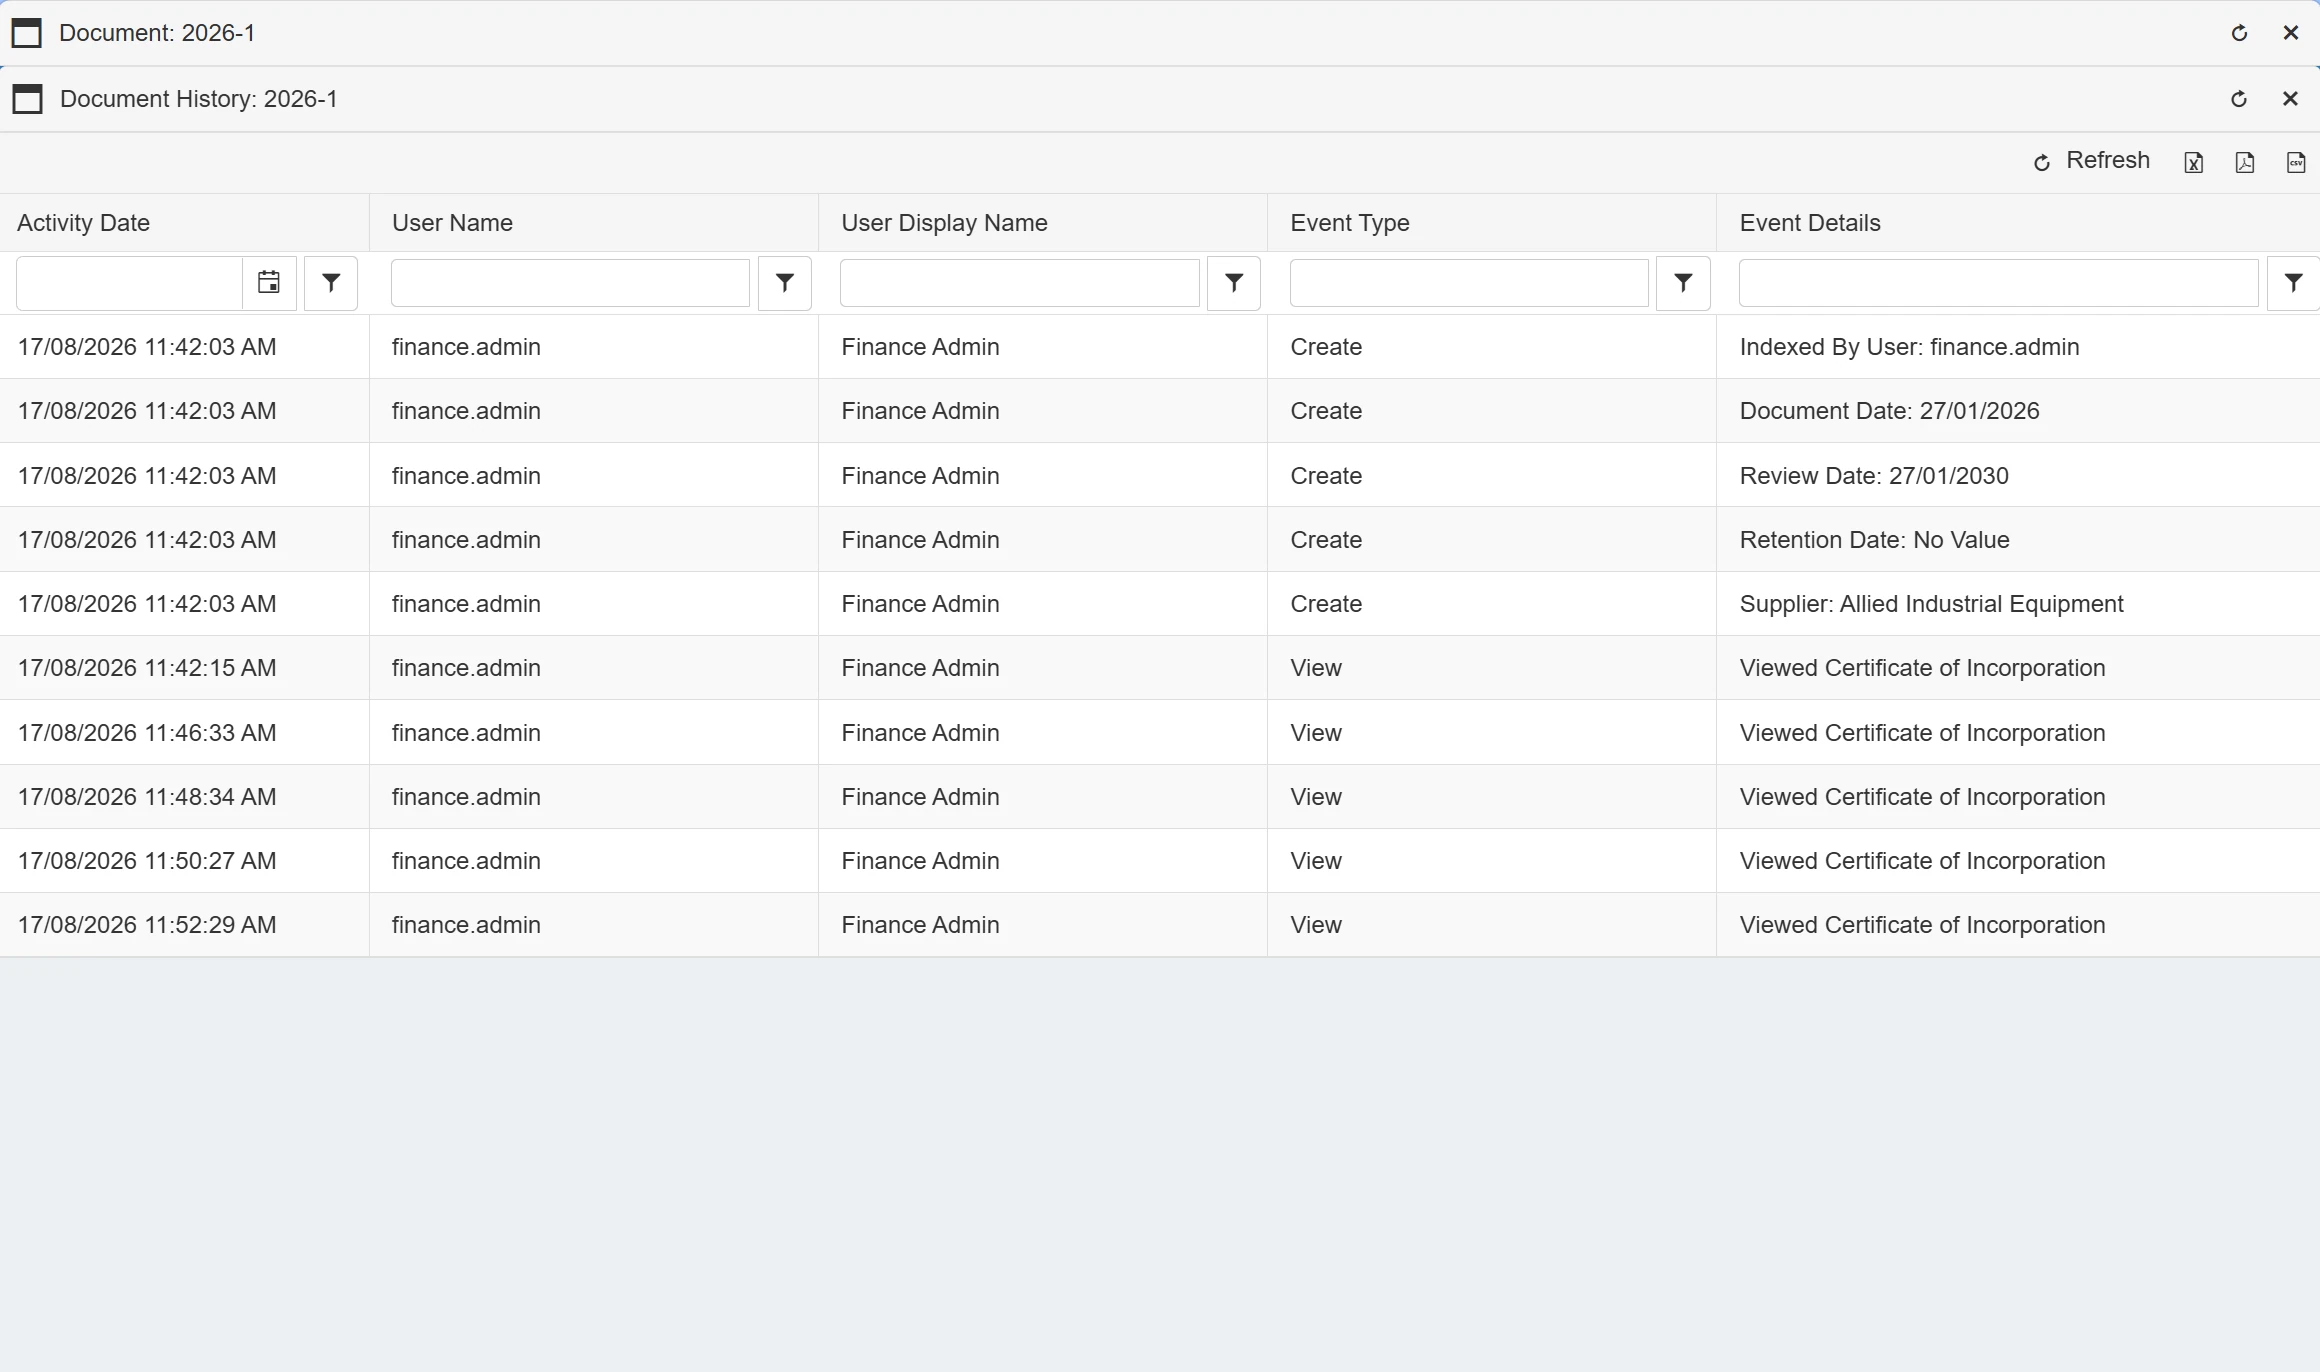
The History option allows users to review any previous events carried out against this document, including who has viewed or interacted with it. This is particularly useful for audit purposes.
To access the History section, simply select from the drop down menu.
This will open a new window displaying a grid which contains details of any event carried out against this document.
Add Action
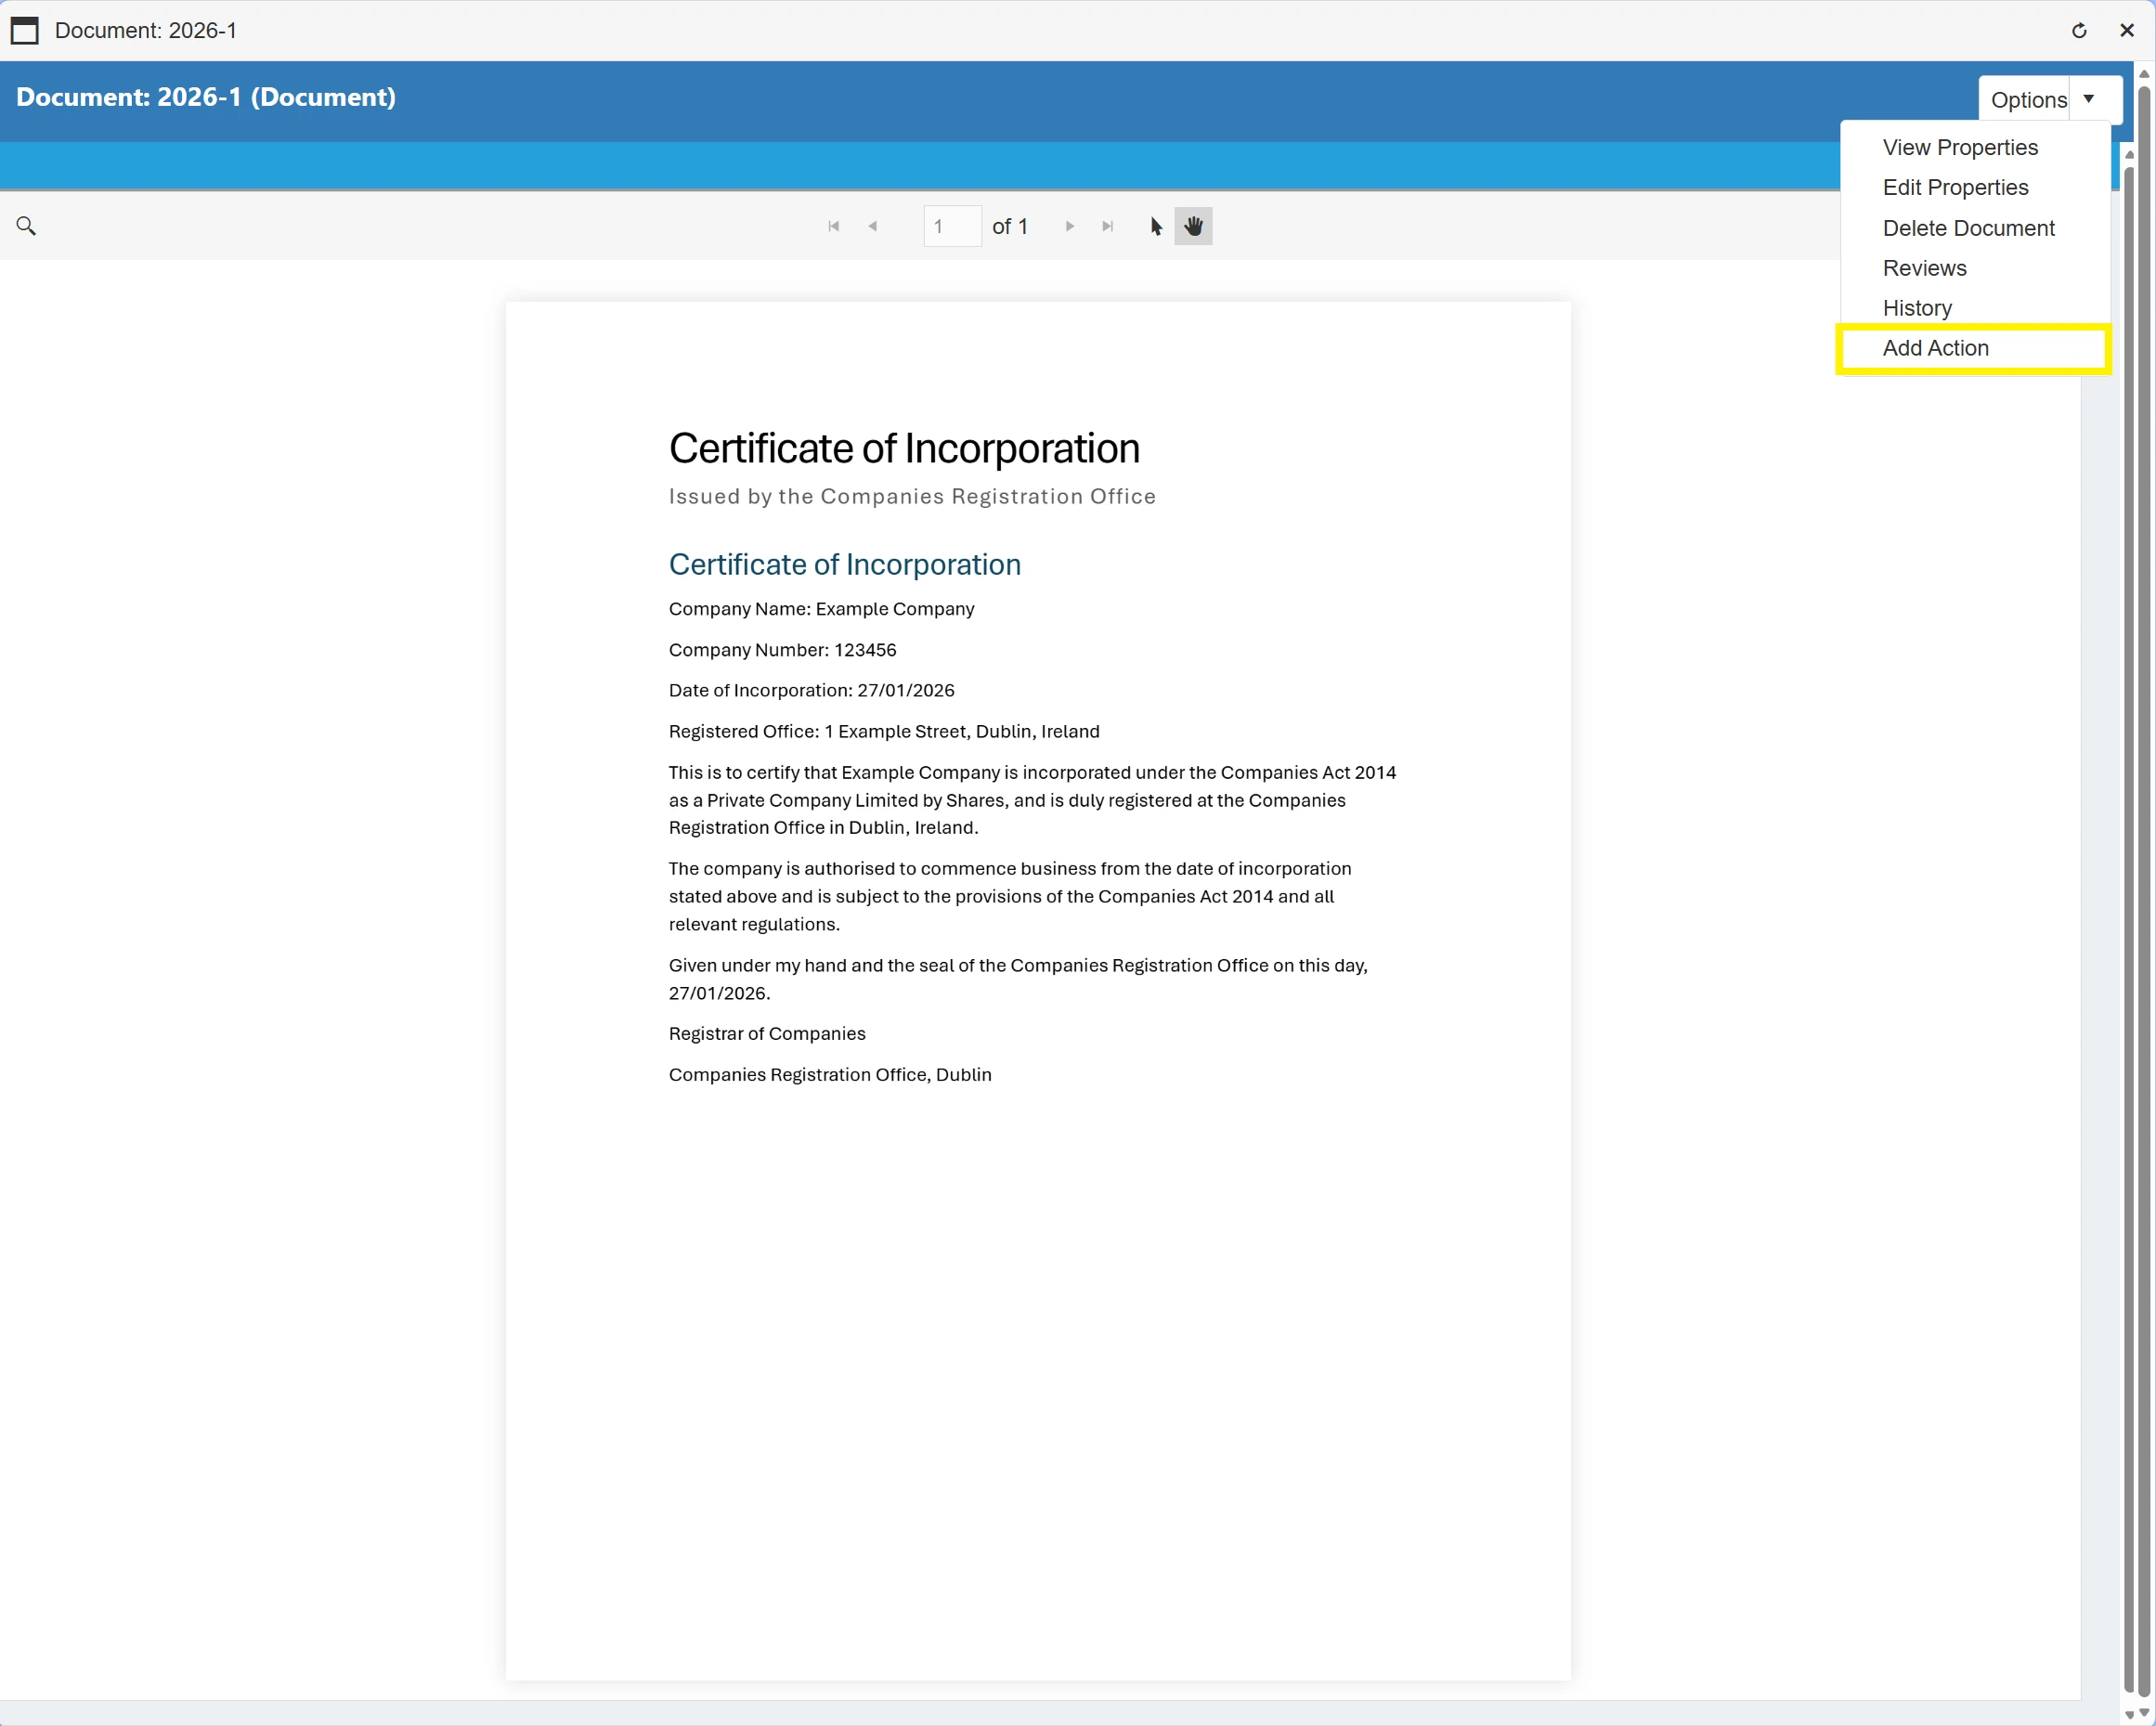
The Add Action option allows users to add an action against a specific document for future reminders.
To access the Action section, simply click from the drop down menu.
This will open a new window allowing you to add the action's details and trigger time/date.
Once happy to proceed, simply click to continue.
?>Further information on Actions can be found by clicking here.