Purchase Orders | Purchase Order System
Creating a purchase order is very straightforward, below is a guide to carry out the whole creation process.
Click below to watch a video guide on Purchase Order Creation within the purchase order system:
New Purchase Orders
Select the to begin creating PO's within the system.
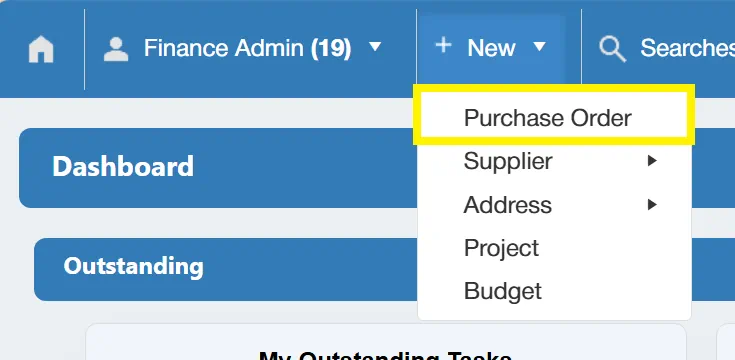
Creating a Purchase Order
Selecting from the New Menu, will take you to the New Purchase Order window.
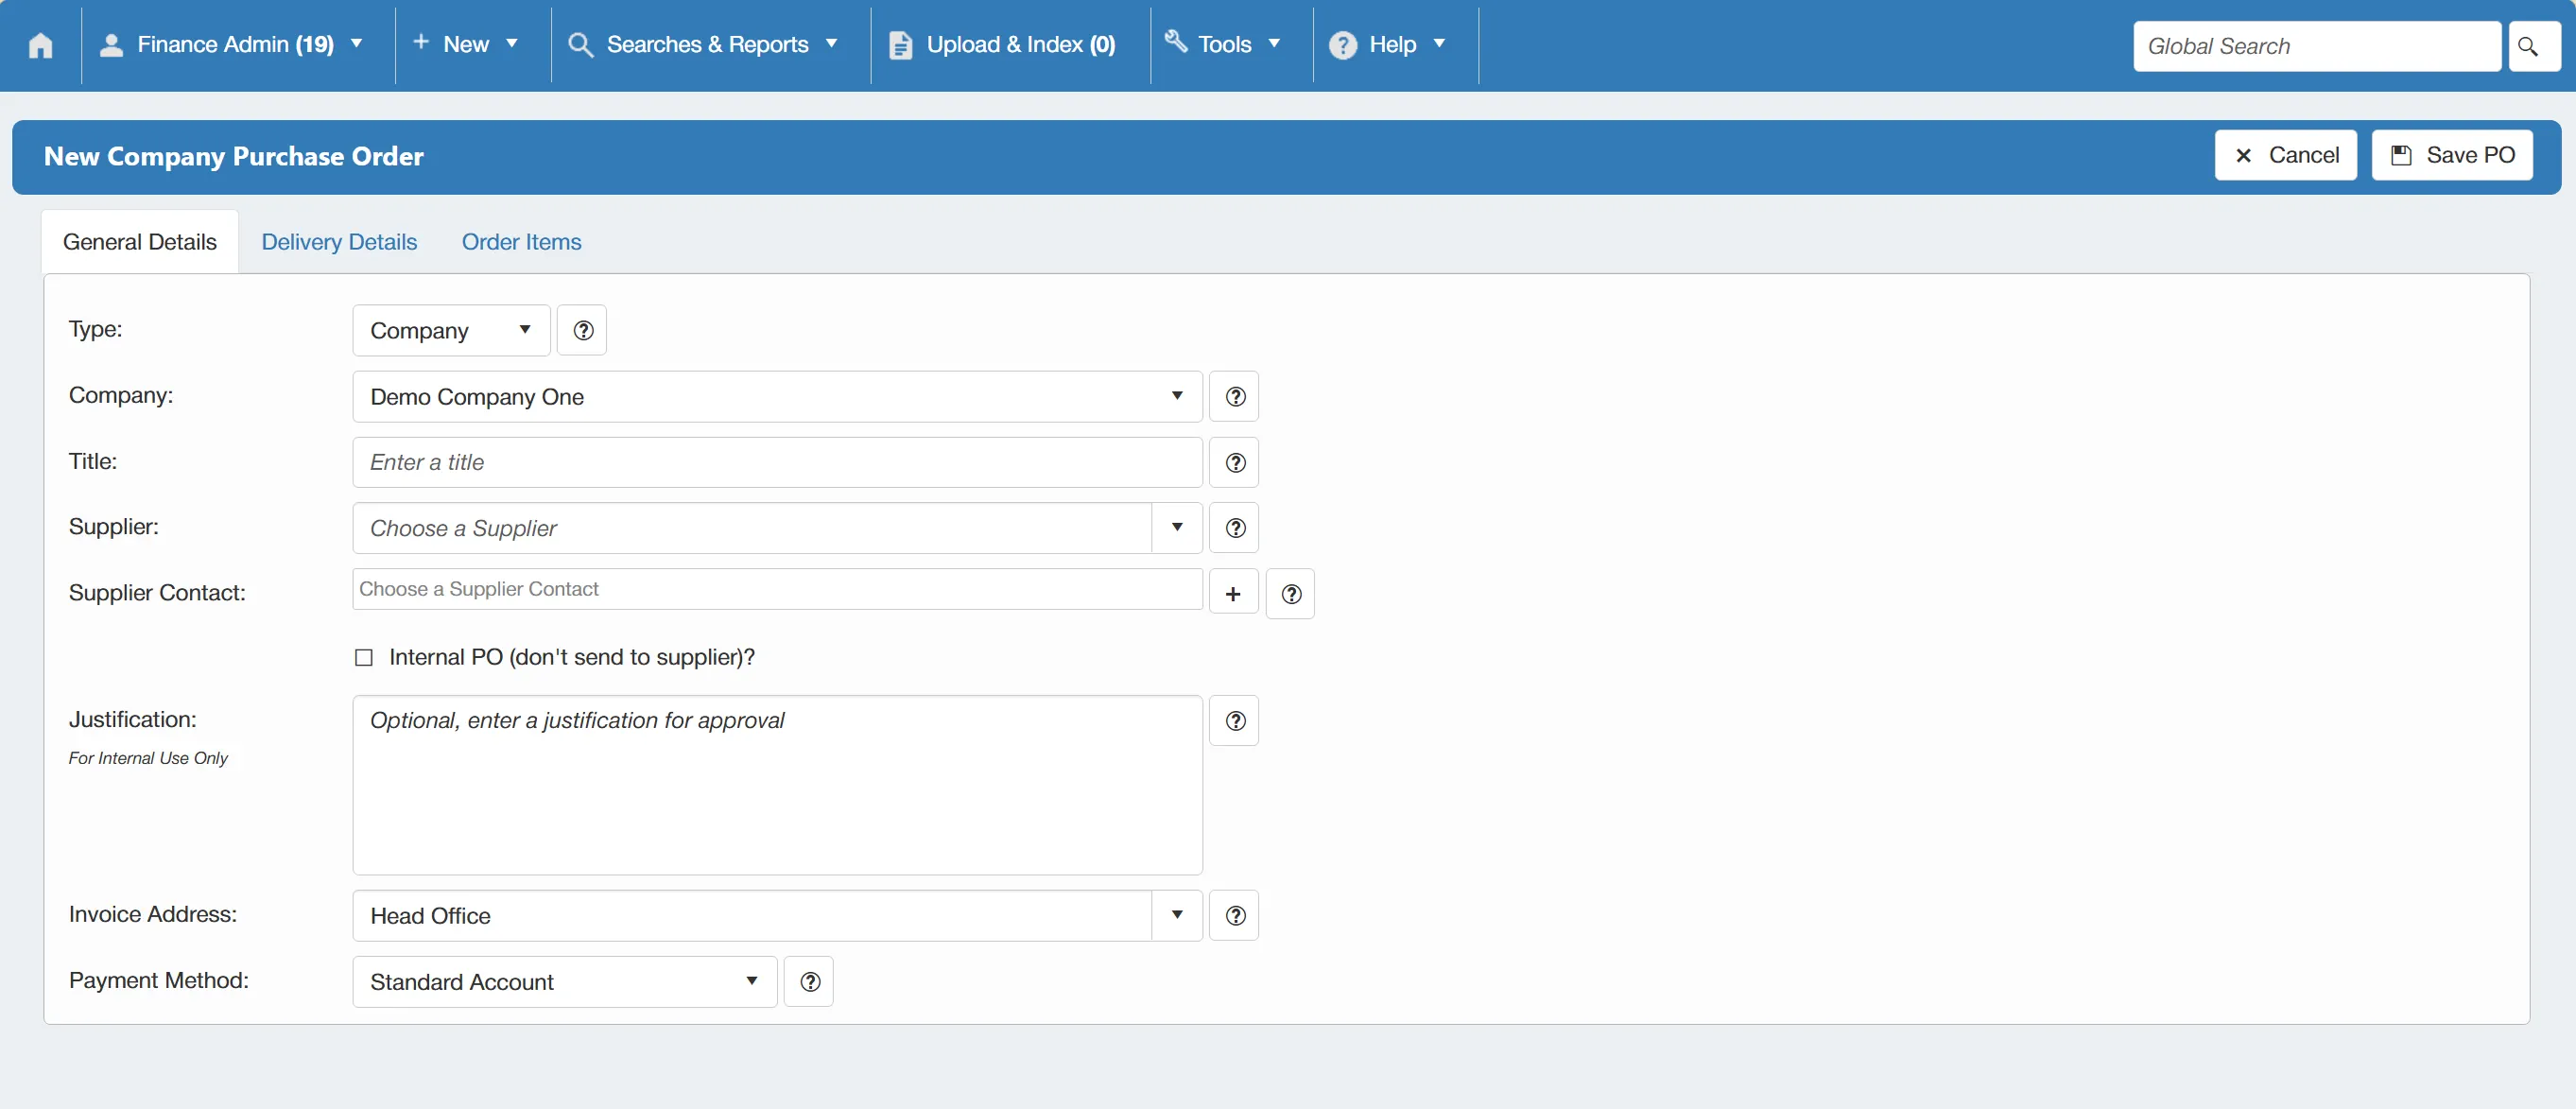
In this example, we are going to create a Company level purchase order. The process for creating Department and Project level purchase orders is similar, with the only difference being that you will need to specify which Department or Project you are raising the PO against.
General Details Tab
On the General Details tab, you will be required to fill in the relevant information within a selection of fields. The fields are as follows:
- Type: This is where you will specify the type of Purchase Order being raised (Company, Department or Project level).
- Company: This defaults to the Company that you have selected. If there are multiple companies within your system, you can choose the desired one for this purchase order.
- Title: This is your purchase order's title and will be displayed on the purchase order document as the Subject.
- Supplier: This is the supplier to whom you are issuing the purchase order. You can only choose one supplier per purchase order.
- Supplier Contact: This is the specific contact within your supplier that you are going to address the purchase order to. You may have different contacts with the supplier depending on the items/services being ordered. This field allows you to select the required person. There is also a icon alongside this field which allows users to add new supplier contacts on an ad-hoc basis.
- ☐ Internal PO (don't send to supplier)?: This box determines whether or not the purchase order is to be automatically emailed to the supplier upon approval. There must be a Supplier Contact specified in the above field in order for the PO to be emailed out.
- Justification: This is an internal field in which you can add detail regarding the order. This information is then sent alongside the purchase order through the approval chain for approving users to view, however it is not displayed on the purchase order itself for the supplier to view.
- Invoice Address: This field allows you to specify the address to which the invoice should be sent. This may differ from the delivery address.
- Payment Method: This drop down allows you to specify the method of payment for the goods or services. You can add more options to this list from the Admin section - click here for more information.
There are also tooltips available alongside each field. Simply hover over the ? to show information relating to each field.
The ability to add new Supplier Contacts during the PO creation stage is locked to the PO Creator: Add Supplier Contact user permission. For more information on User Permissions, click here.
Delivery Details Tab
The Delivery Details tab is where you can specify information relating to the delivery of the goods or services.
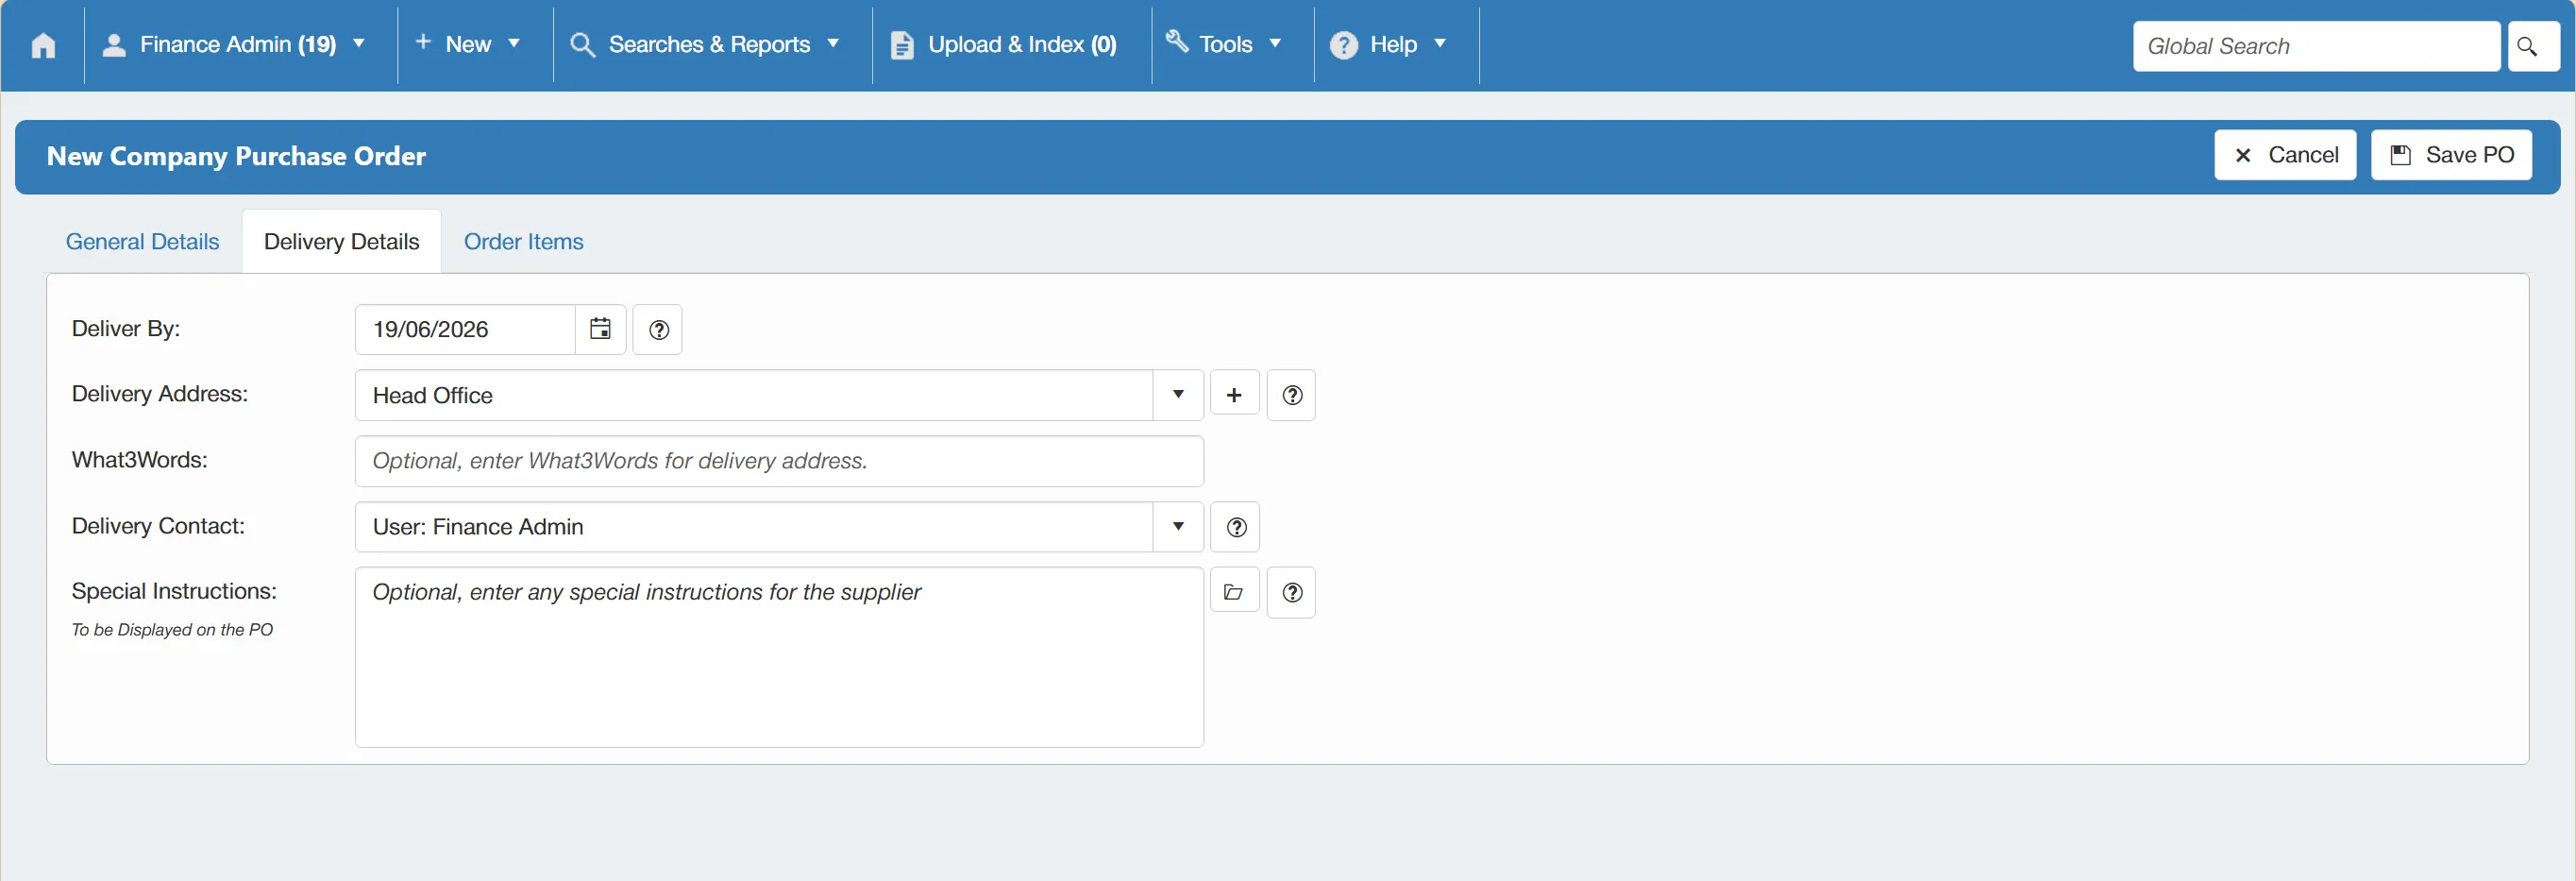
The fields on this tab are as follows:
- Deliver By: This field allows you to specify a date on which you would like the goods/services to be delivered. It will then be displayed on the purchase order document for the supplier to view.
- Delivery Address: This field allows you to specify the address to which you would like the goods or services delivered. This will then be displayed on the purchase order document. There is also a icon alongside this field which allows users to add new delivery addresses on an ad-hoc basis.
- What3Words: This field is optional and allows you to specify a What3Words code to help guide delivery drivers to your requested location. This information will be clearly displayed on the PO document.
- Delivery Contact: This field allows you to specify the contact who will be responsible for receiving the goods or services.
- Special Instructions: This field can contain information that will be displayed on the purchase order for the supplier to view. For example, you may want to add specific delivery instructions. There is also a icon alongside this field which allows the user to select a pre-defined special instructions template. For more information on Special Instruction Templates click here
The ability to add new Delivery Addresses during the PO creation stage is locked to the PO Creator: Add Delivery Address user permission. For more information on User Permissions, click here.
The ability to create and edit Special Instructions templates is locked to the PO Special Instructions Template Admin user permission. For more information on User Permissions, click here.
Order Items Tab
Once you are happy with the information on the General Details and Delivery Details tabs, you can now begin adding purchase order lines. To do this, simply click on the Order Items tab.
This takes you to a new window with an empty grid:
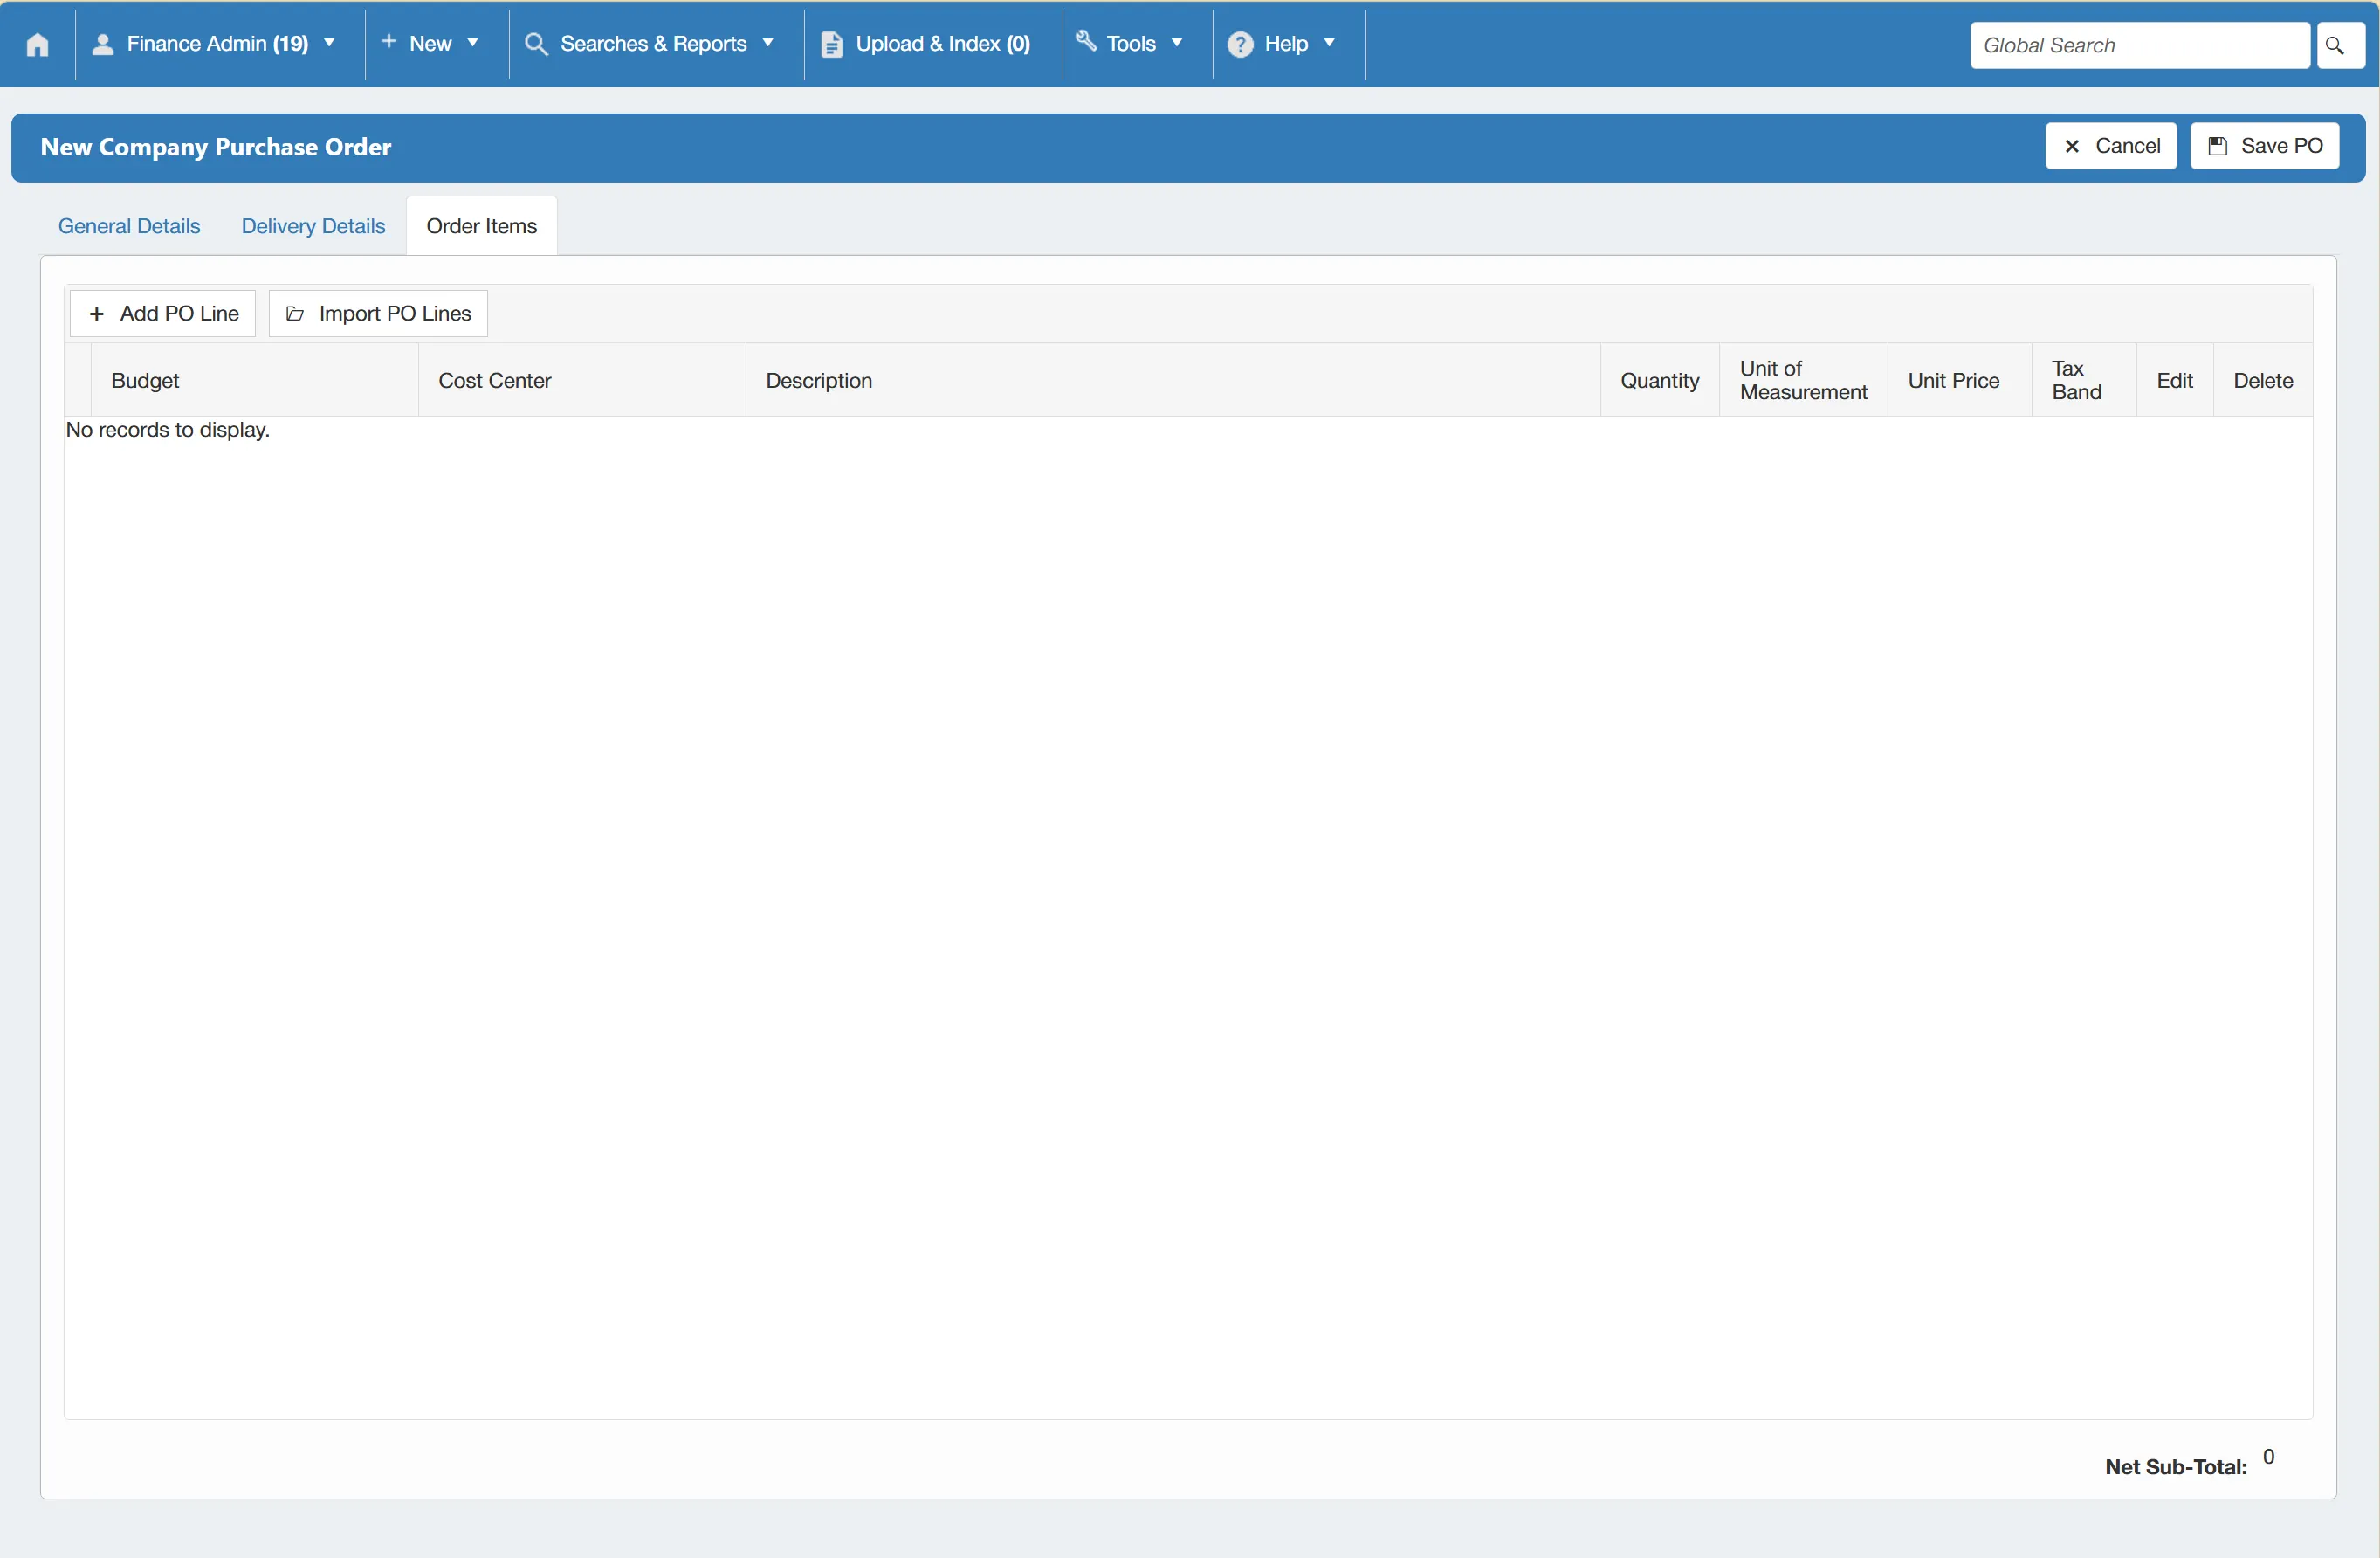
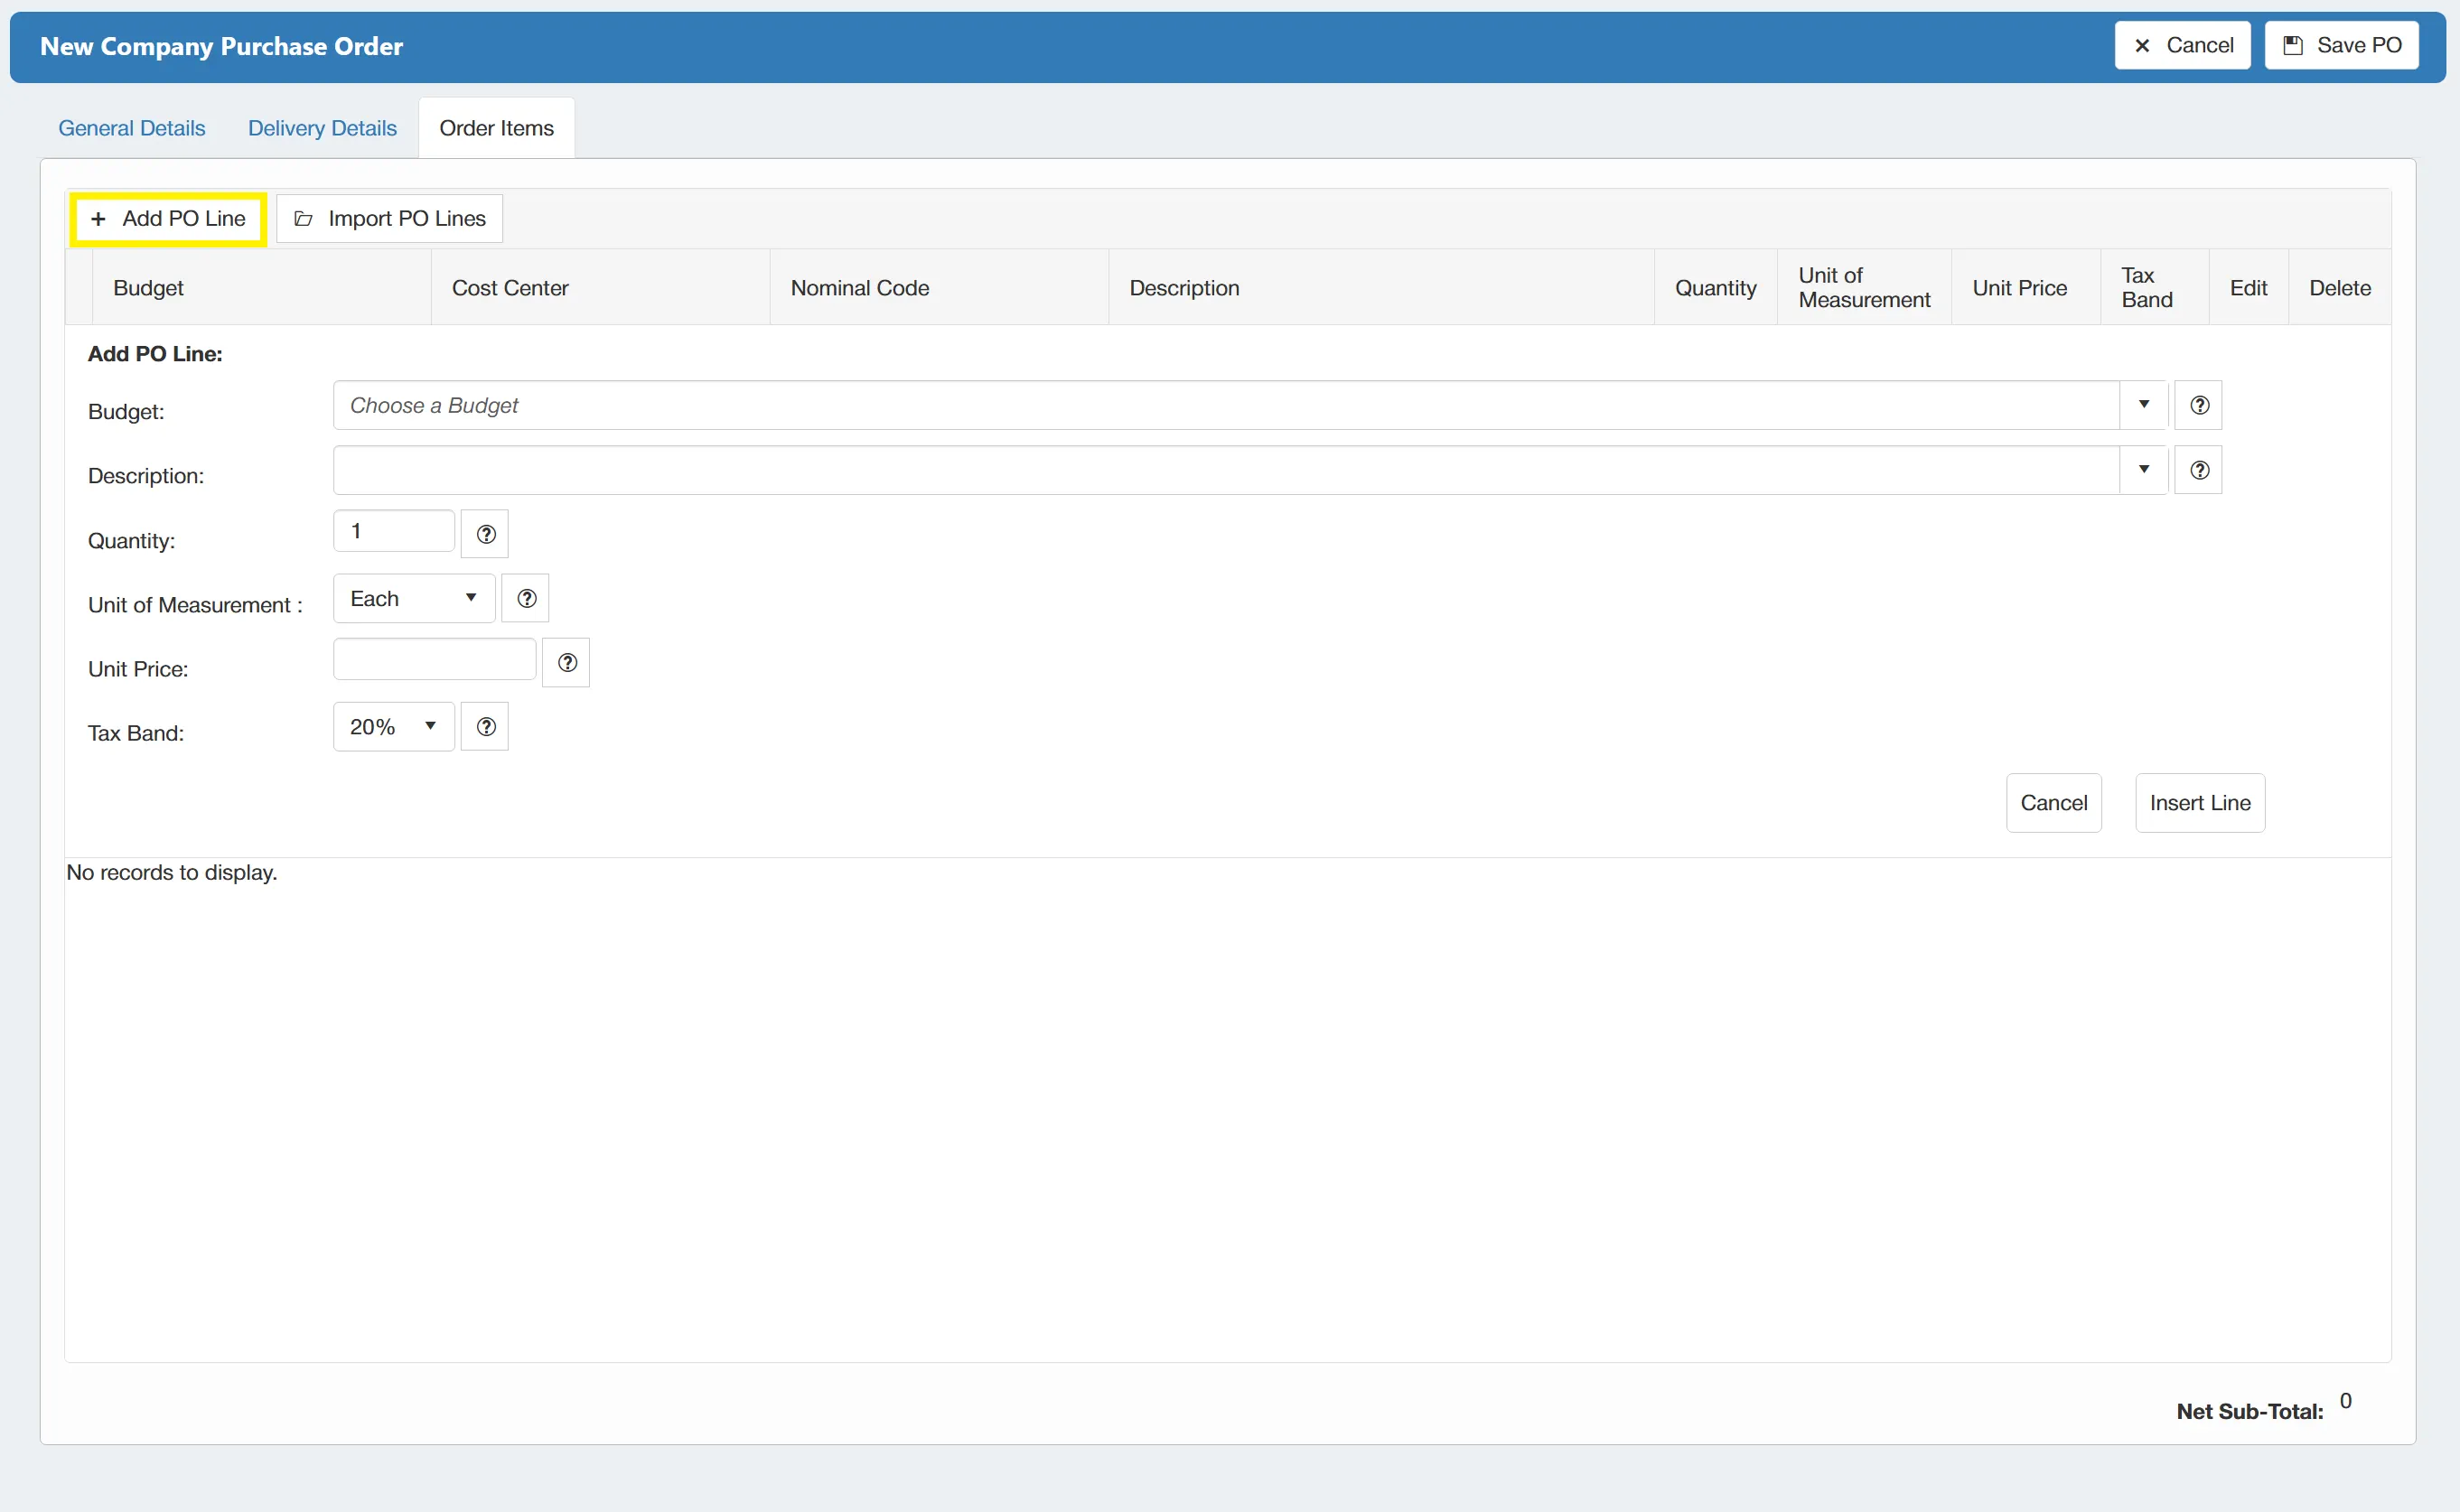
To begin adding lines to the purchase order, click . This will expand a new selection of fields which allow you to select a Budget, Item Description, Quantity, Unit of Measurement, Unit Price and Tax Band.
When selecting the Budget, you will see that there is a Remaining column. This allows you to see how much of the budget is remaining before you add the item. This figure updates in real-time to ensure that you are always working to the latest figure.
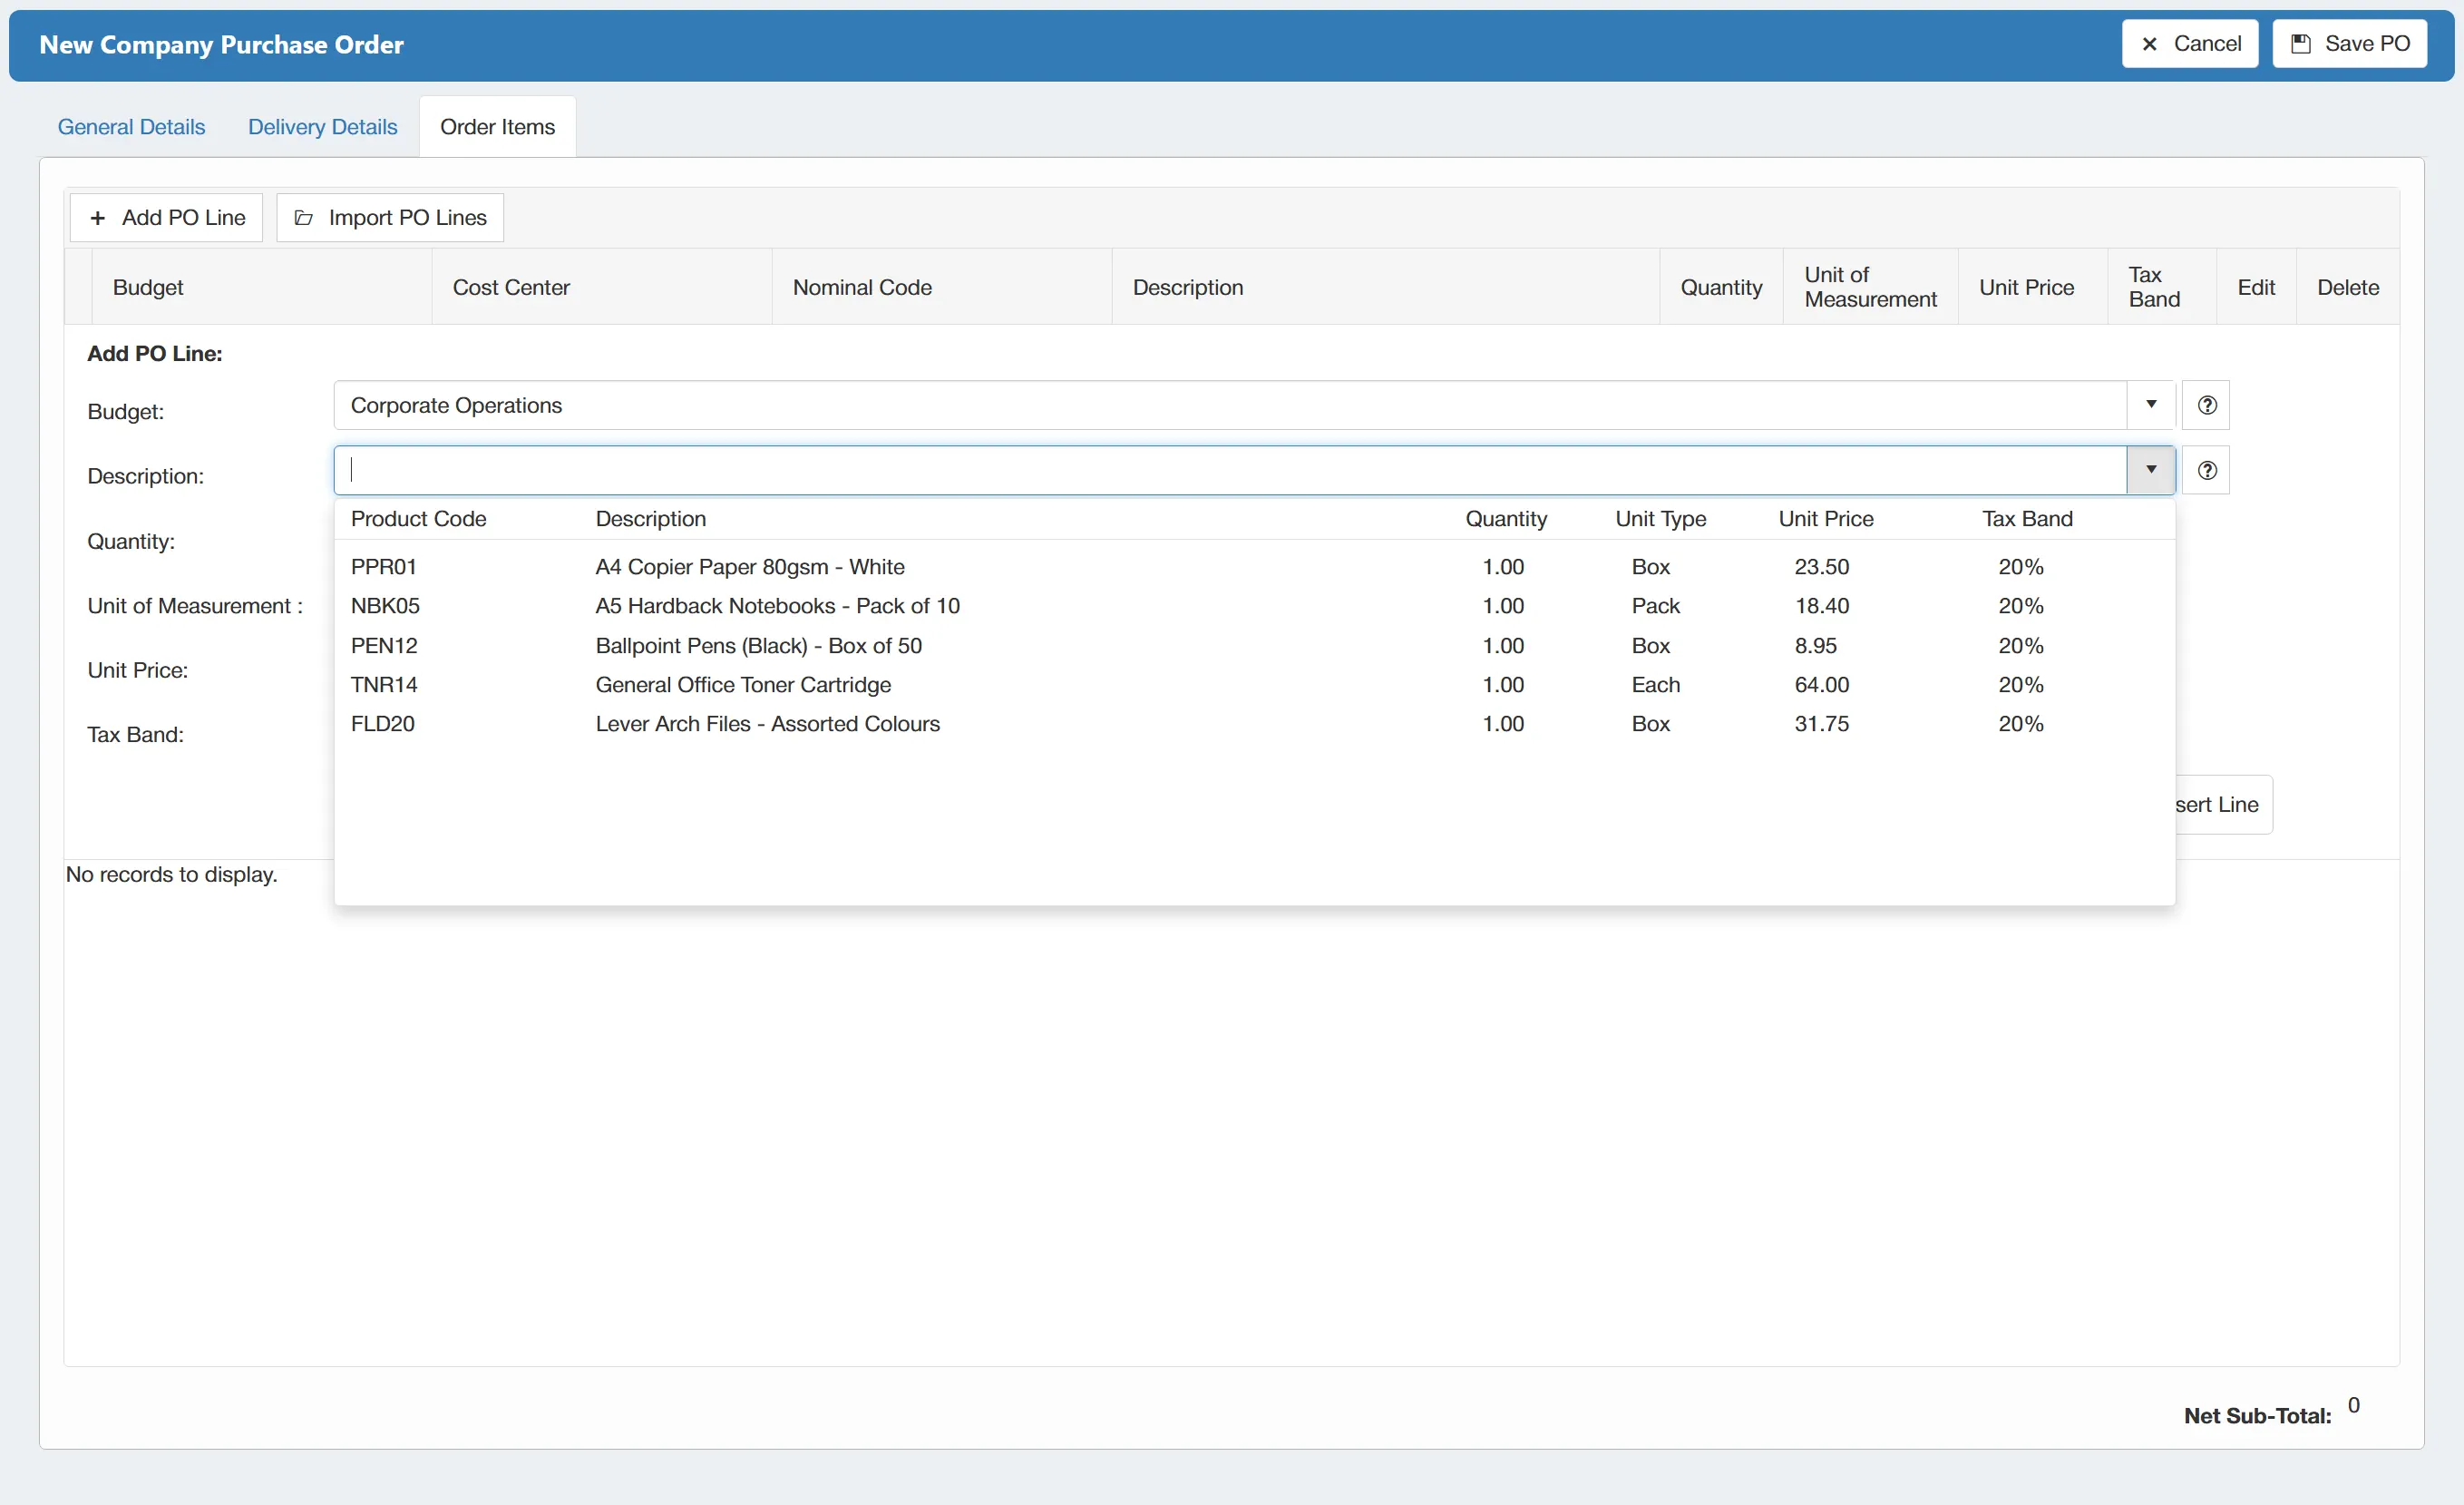
When adding an item, simply click into the Description field and this will bring up any items that have been added to the supplier's price list.
For information on setting up supplier price lists, click here
If you click on one of the items in the description table, it will populate the rest of the fields (Quantity, Unit of Measurement & Unit Price) accordingly.
The Description field also supports free-text, meaning that you can add any item you wish, even if it is not part of the supplier's price list.
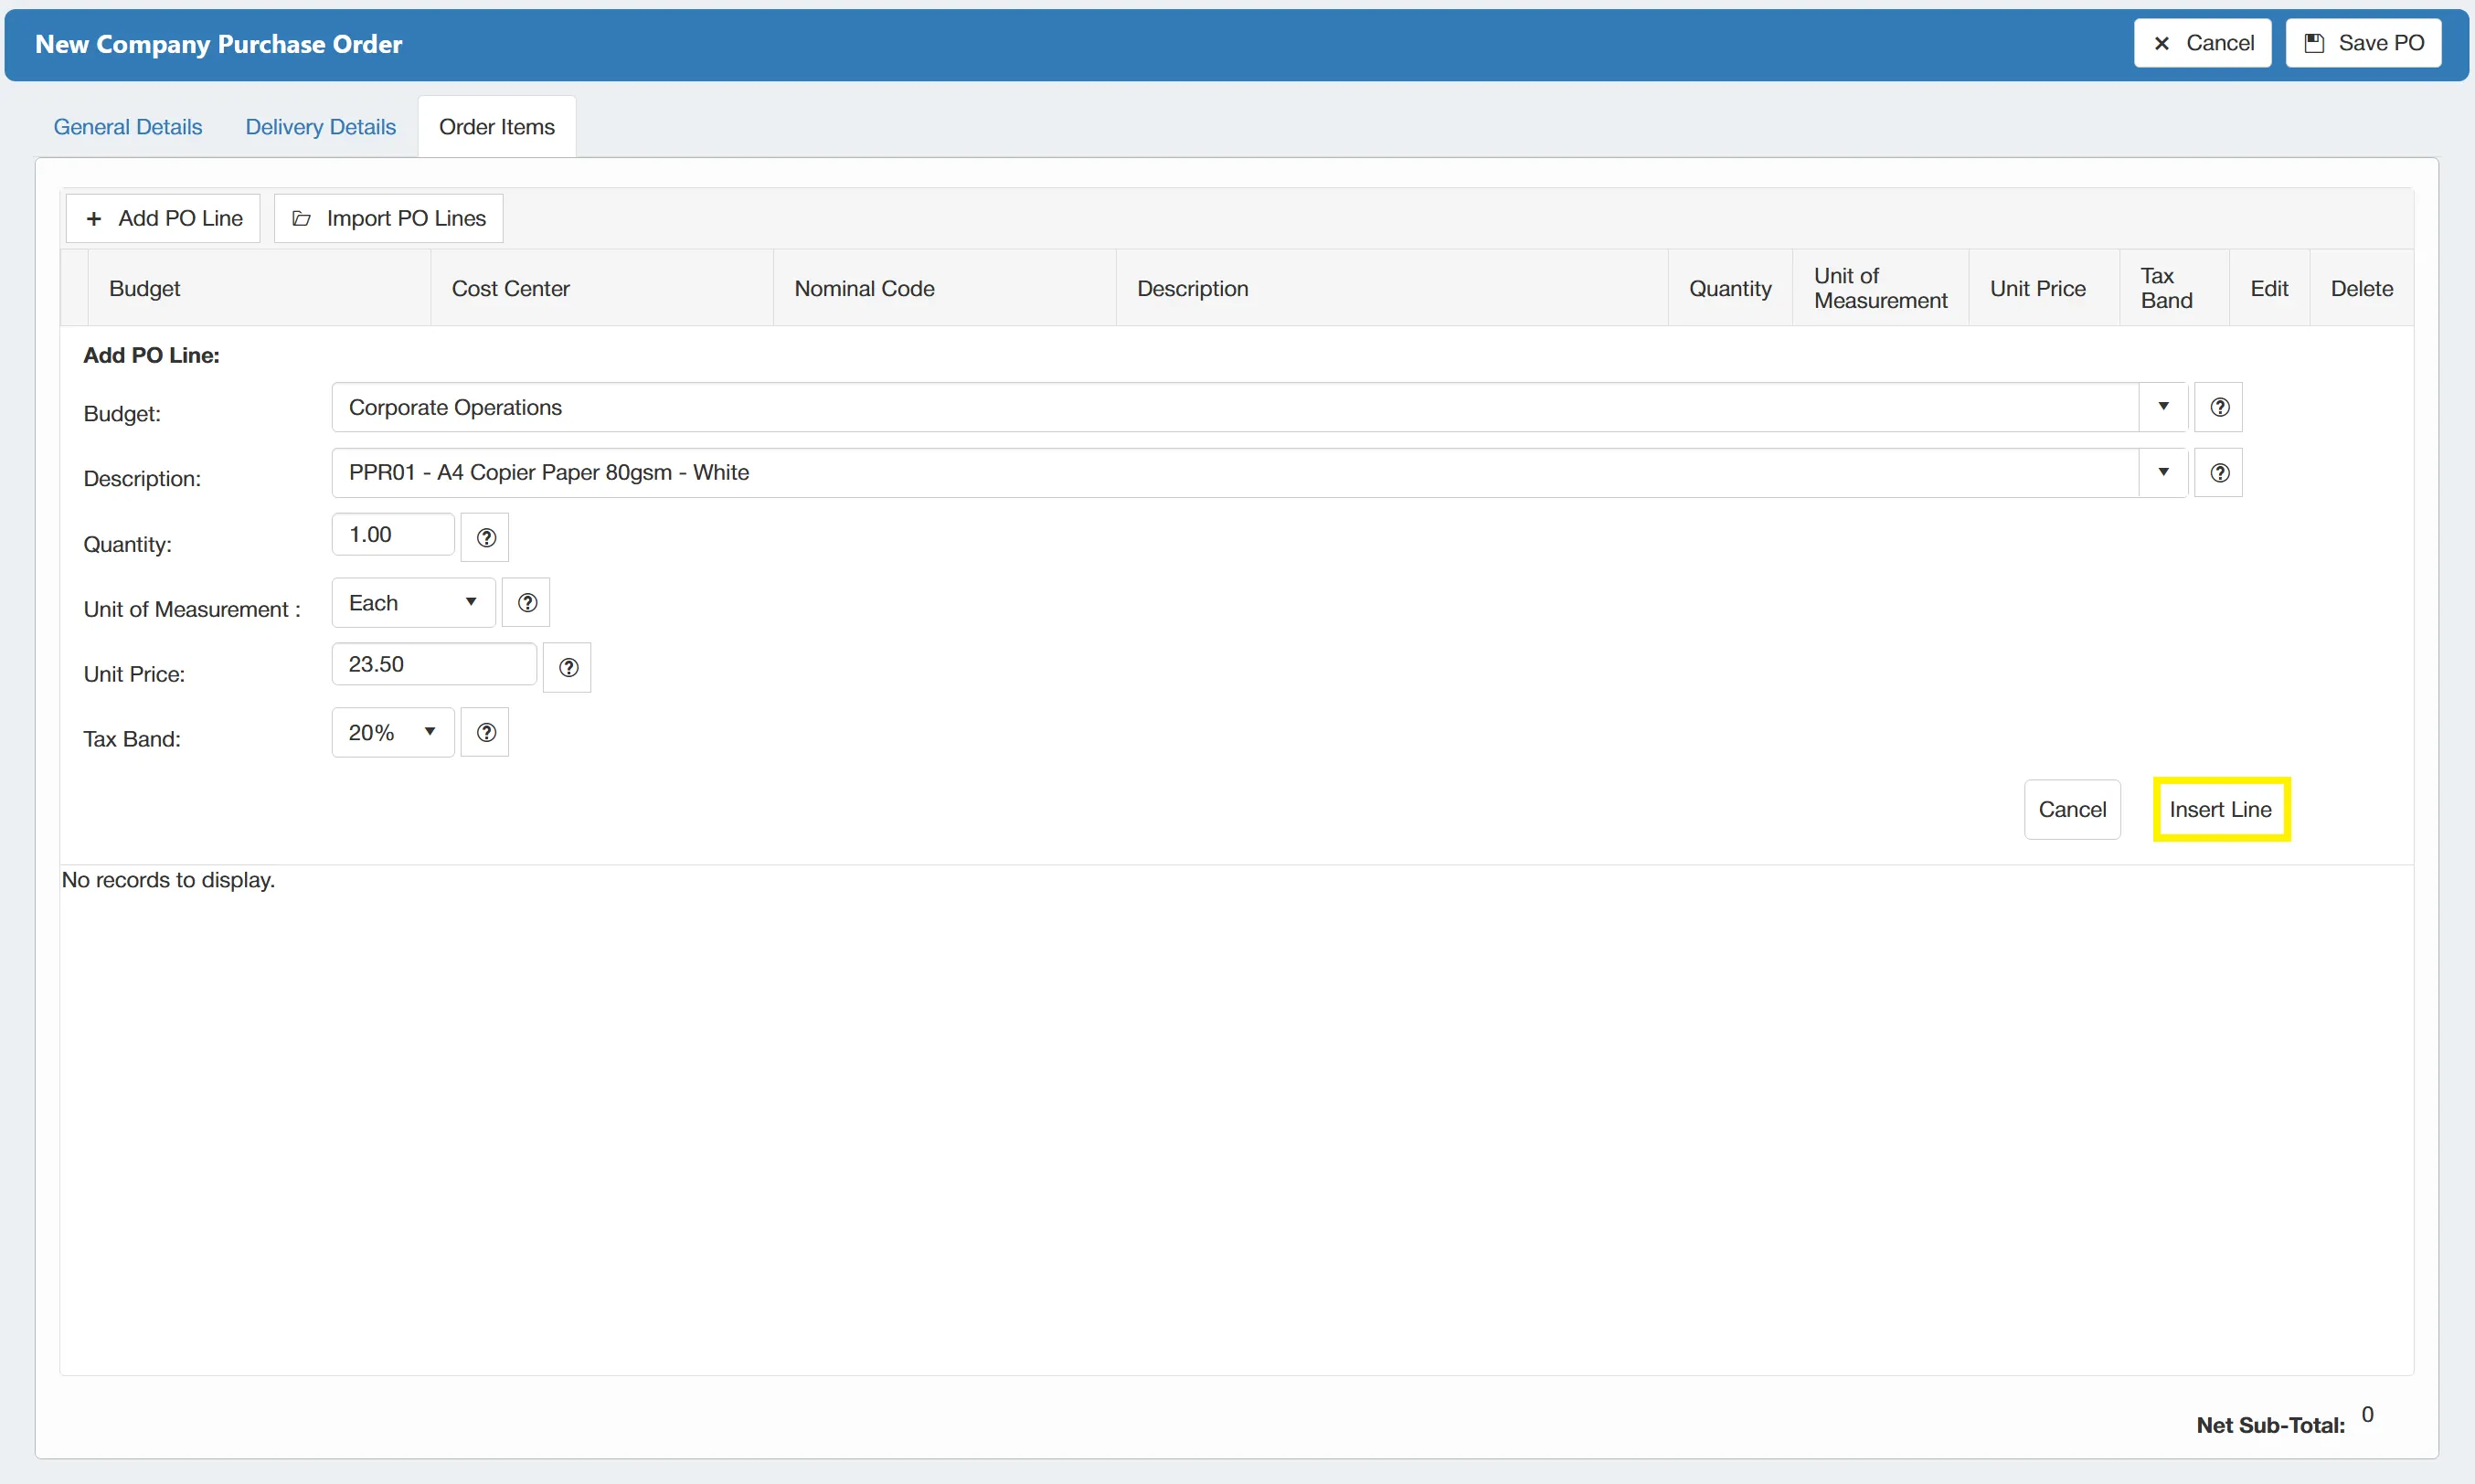
Once you are happy with the item and details, simply click to add this to the purchase order.
This adds the item to the grid along with the relevant details.
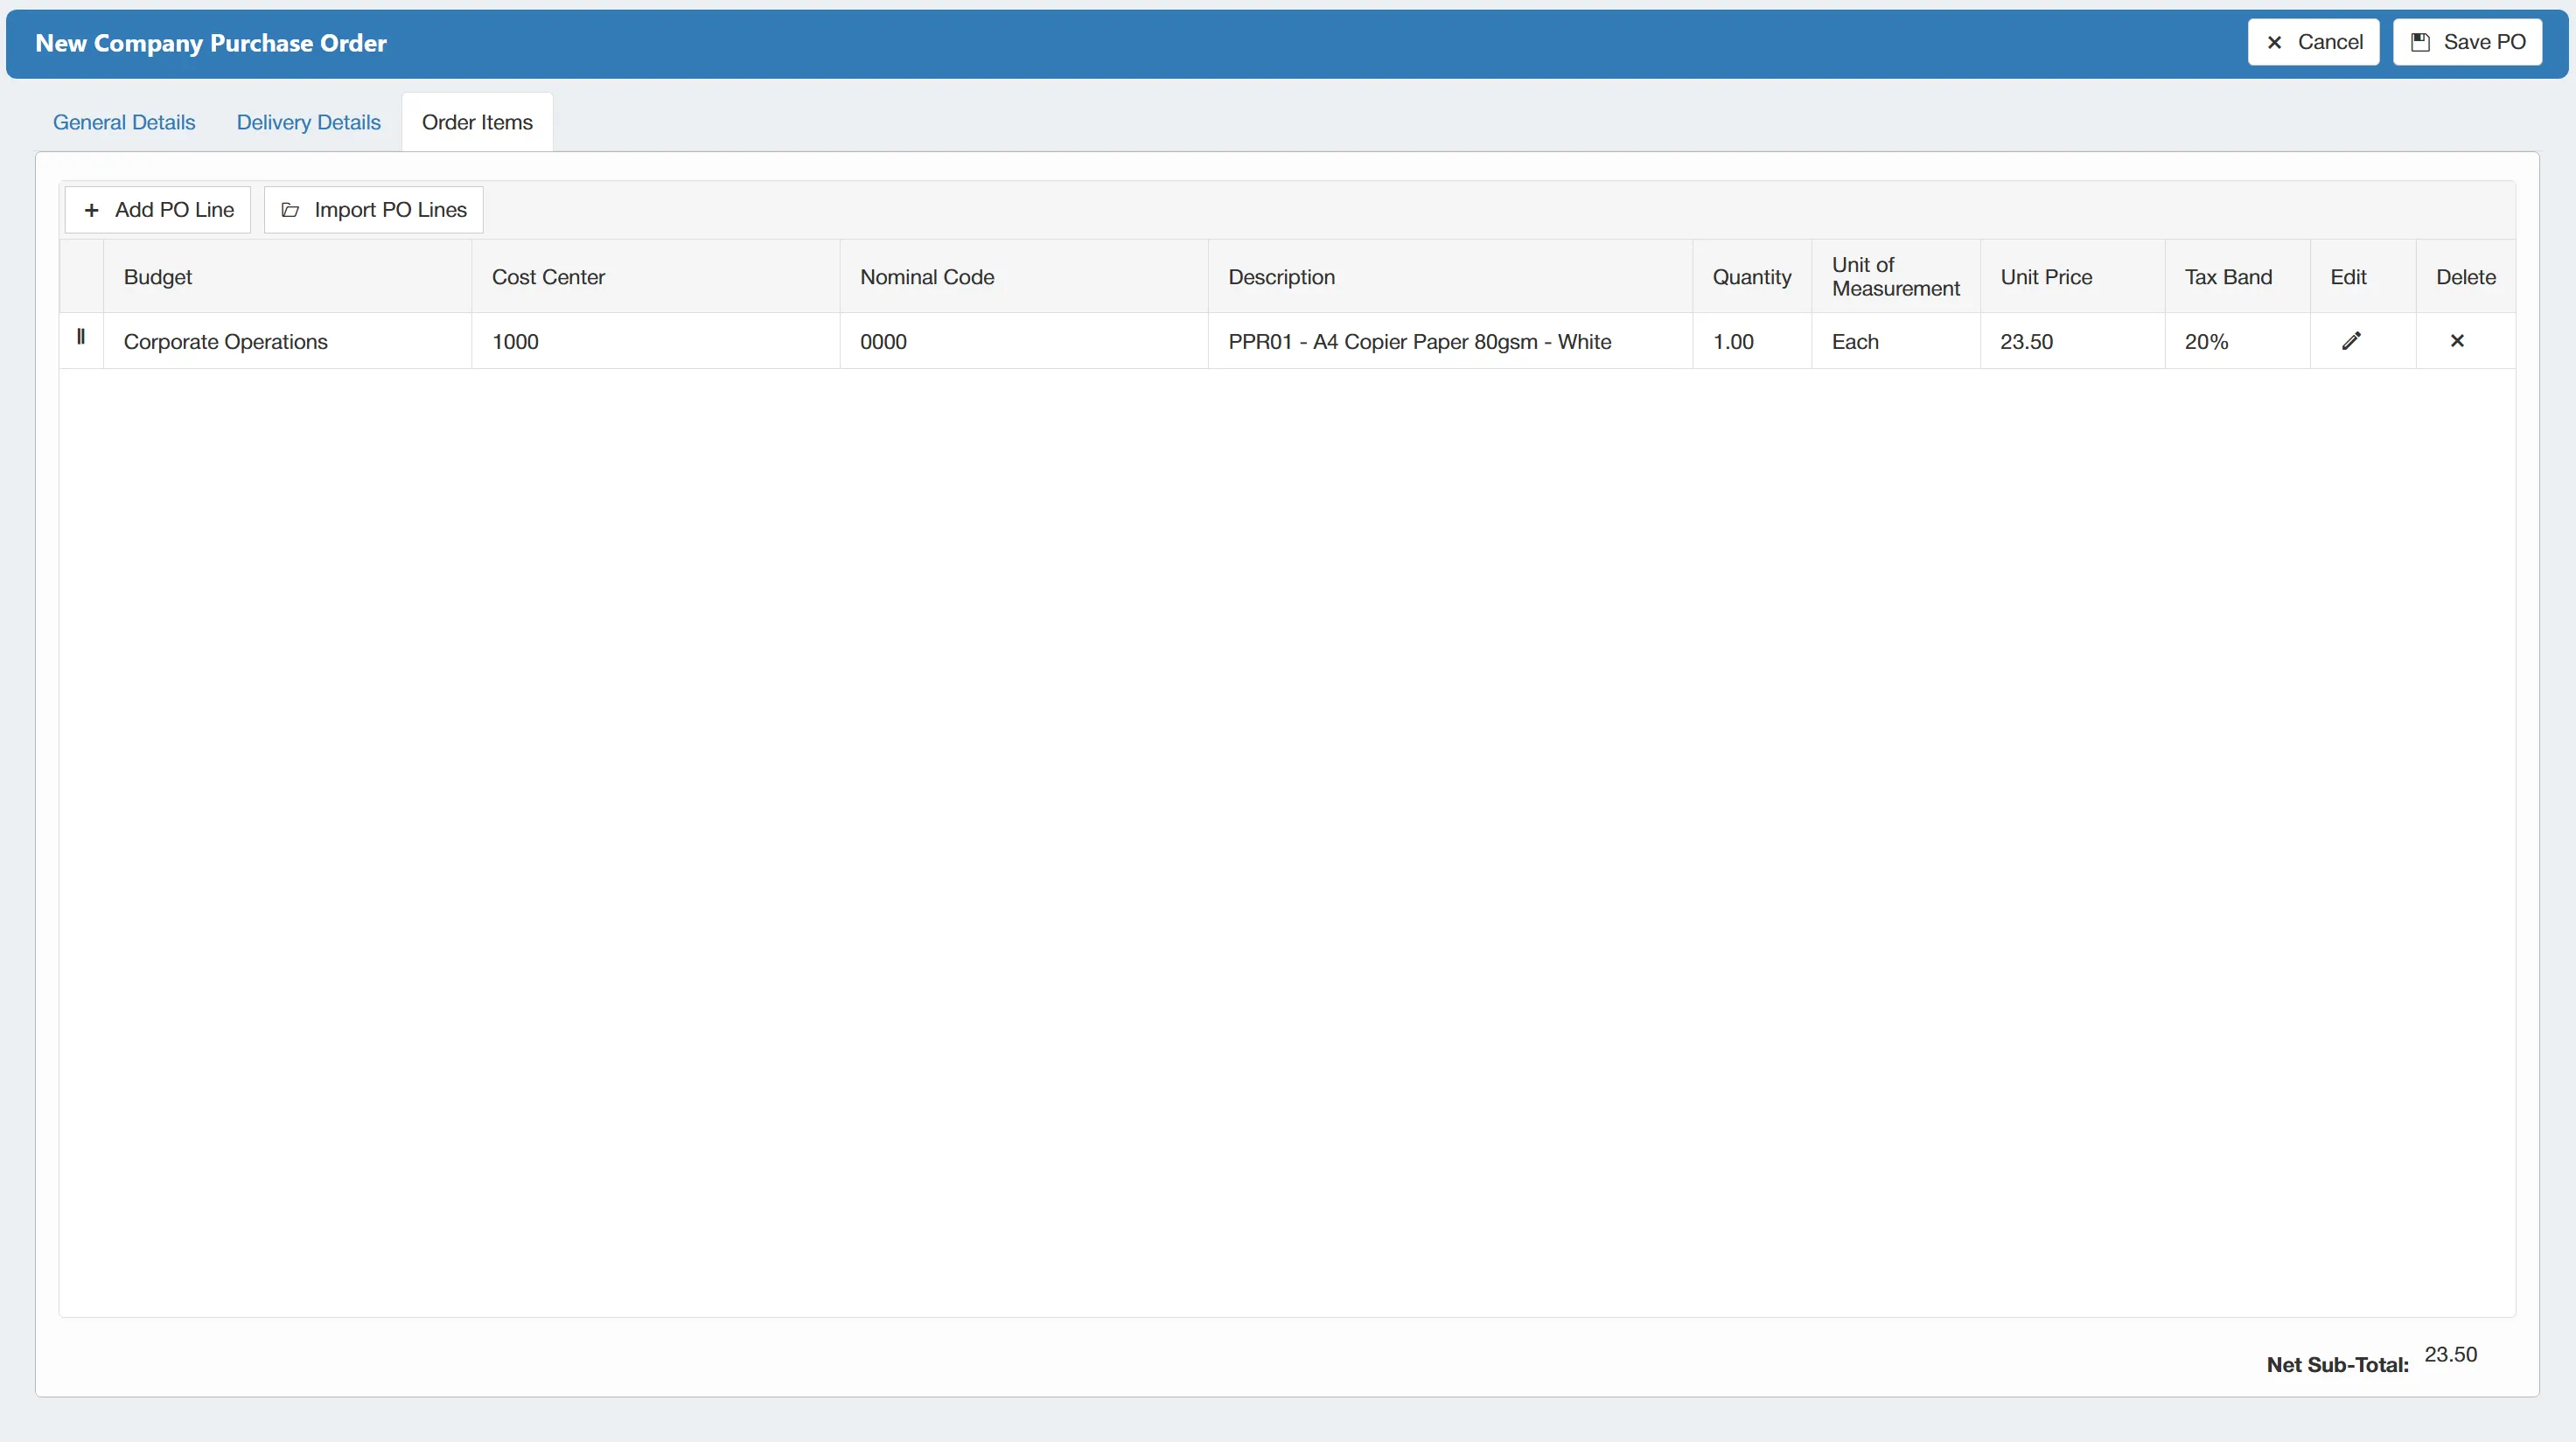
The Net Sub-Total figure will update accordingly to give you an up-to-date figure for the purchase order.
You can go back and edit the line by clicking on the icon and you can delete the whole line by simply clicking on the .
If you have multiple items on the grid, you can re-organise their position by holding the icon and dragging it to the desired position. This is particularly helpful if you would like to move a specific item to the top of the list.
Import PO Lines
Whilst you can add PO Lines manually as above, the system also has a bulk-import facility available. This allows you to import a large number of lines from a spreadsheet, this can be much more efficient than manually adding each item line-by-line.
To do this, simply click on the button.
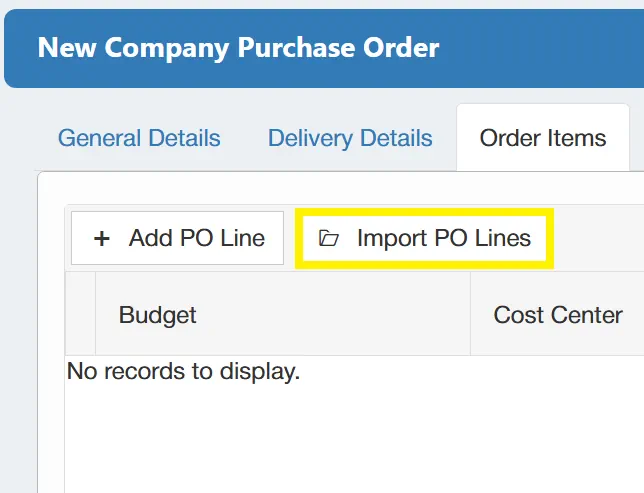
This takes you to a new window which allows you to specify the following:
- Budget: Allows you to choose the budget to which you would like the items to be linked.
- Template: Allows you to select the import template (this is the template that your spreadsheet must follow for the system to import correctly). You can set up multiple templates, for more information on this click here.
- Action: There are two options available; Overwrite PO Lines or Append PO Lines. The first will ensure that any items imported will overwrite any previously imported items currently on the purchase order. The second option will add the imported items to any existing items on the purchase order.
- Upload File: This is where you can click to select the XLSX file containing the lines you wish to import.
Once you have selected your options and uploaded the file, simply click to carry out the import.
You will then be taken back to the Order Items grid to view your newly imported lines.
Purchase Order Document
Once you are happy with your purchase order lines and details, click to save the purchase order.
This takes you to the Purchase Order Document preview window.
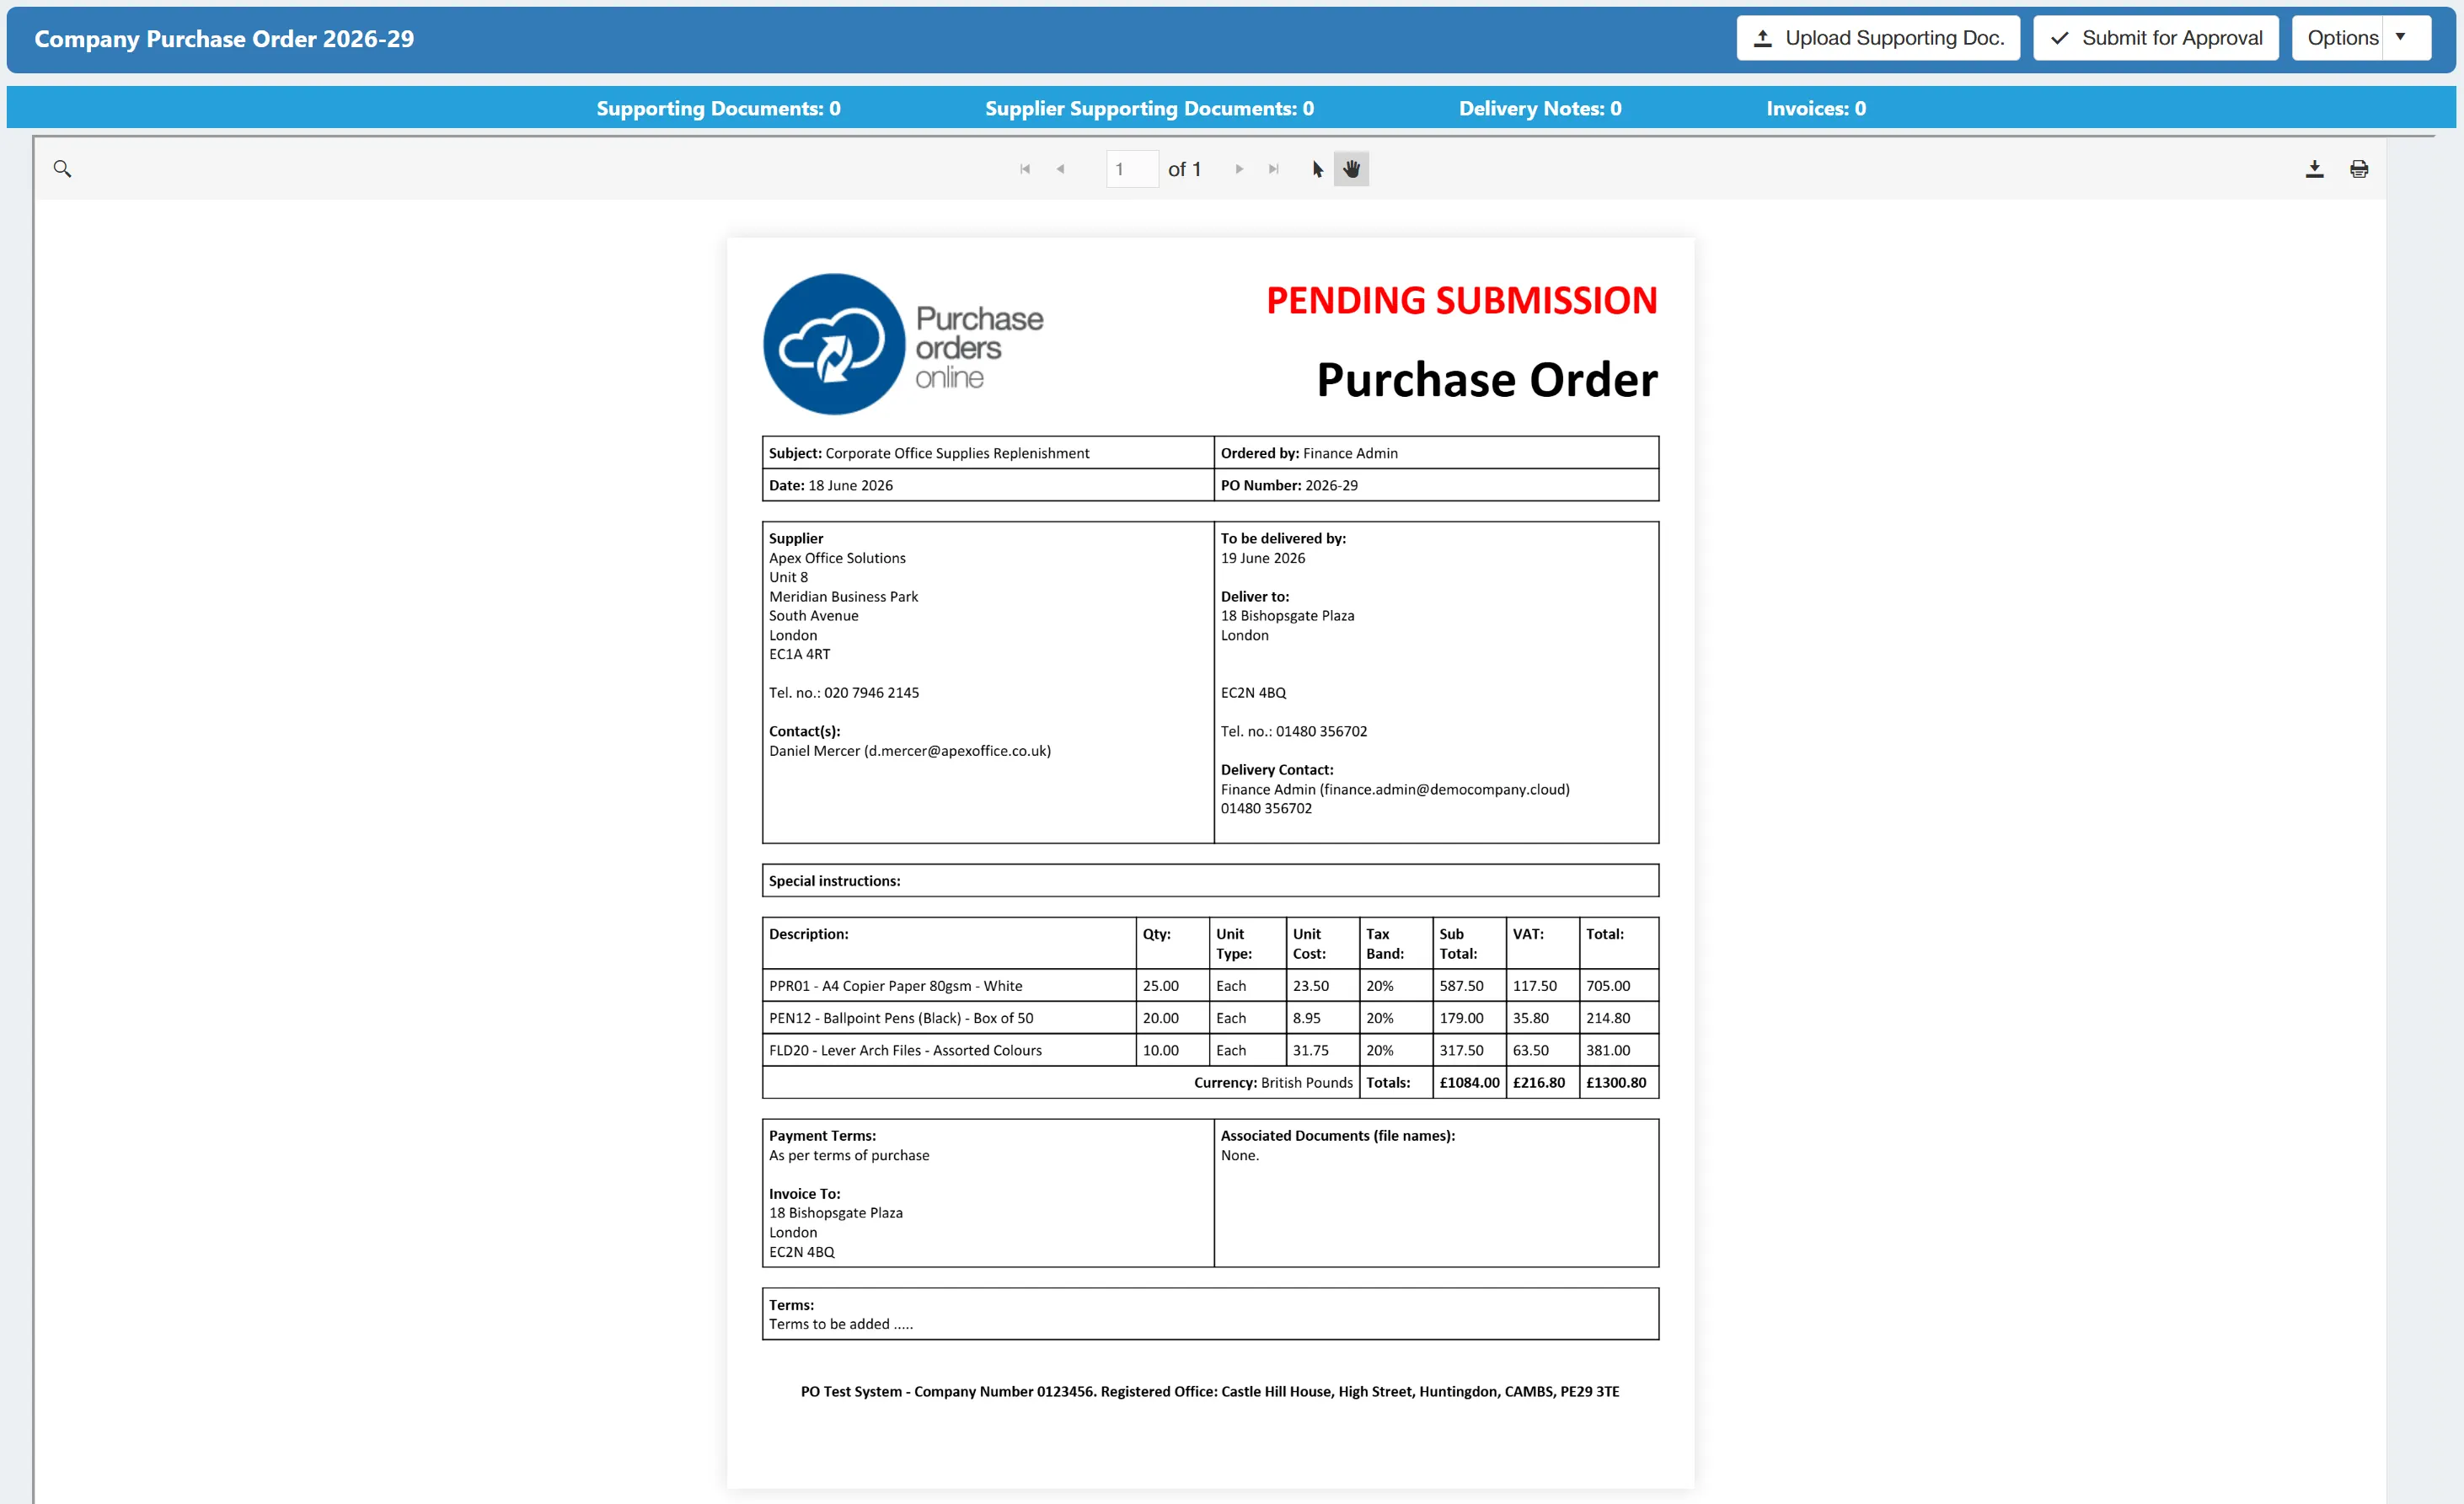
The red text in the top right of the document shows you its current status within the approval workflow. (This text will not be present when the document is approved and sent to the supplier - it is for internal use only).
The document includes all relevant information as specified in the General Details, Delivery Details and Order Items tabs along with your company Terms at the bottom of the document.
You can set different company terms for different suppliers, allowing you to tailor them as needed. For more information on this click here
The system also generates a PO number which ensures that each document has a unique, individual number.
Within this window, you have several options available:
- : This allows you to upload and attach a supporting document to the purchase order. For more information on this click here
- : This allows you to submit the PO for approval.
- : This presents you with further actions that can be undertaken against the purchase order.
Upload Supporting Doc
To upload a supporting document against a purchase order, simply click on the Purchase Order Document preview window.
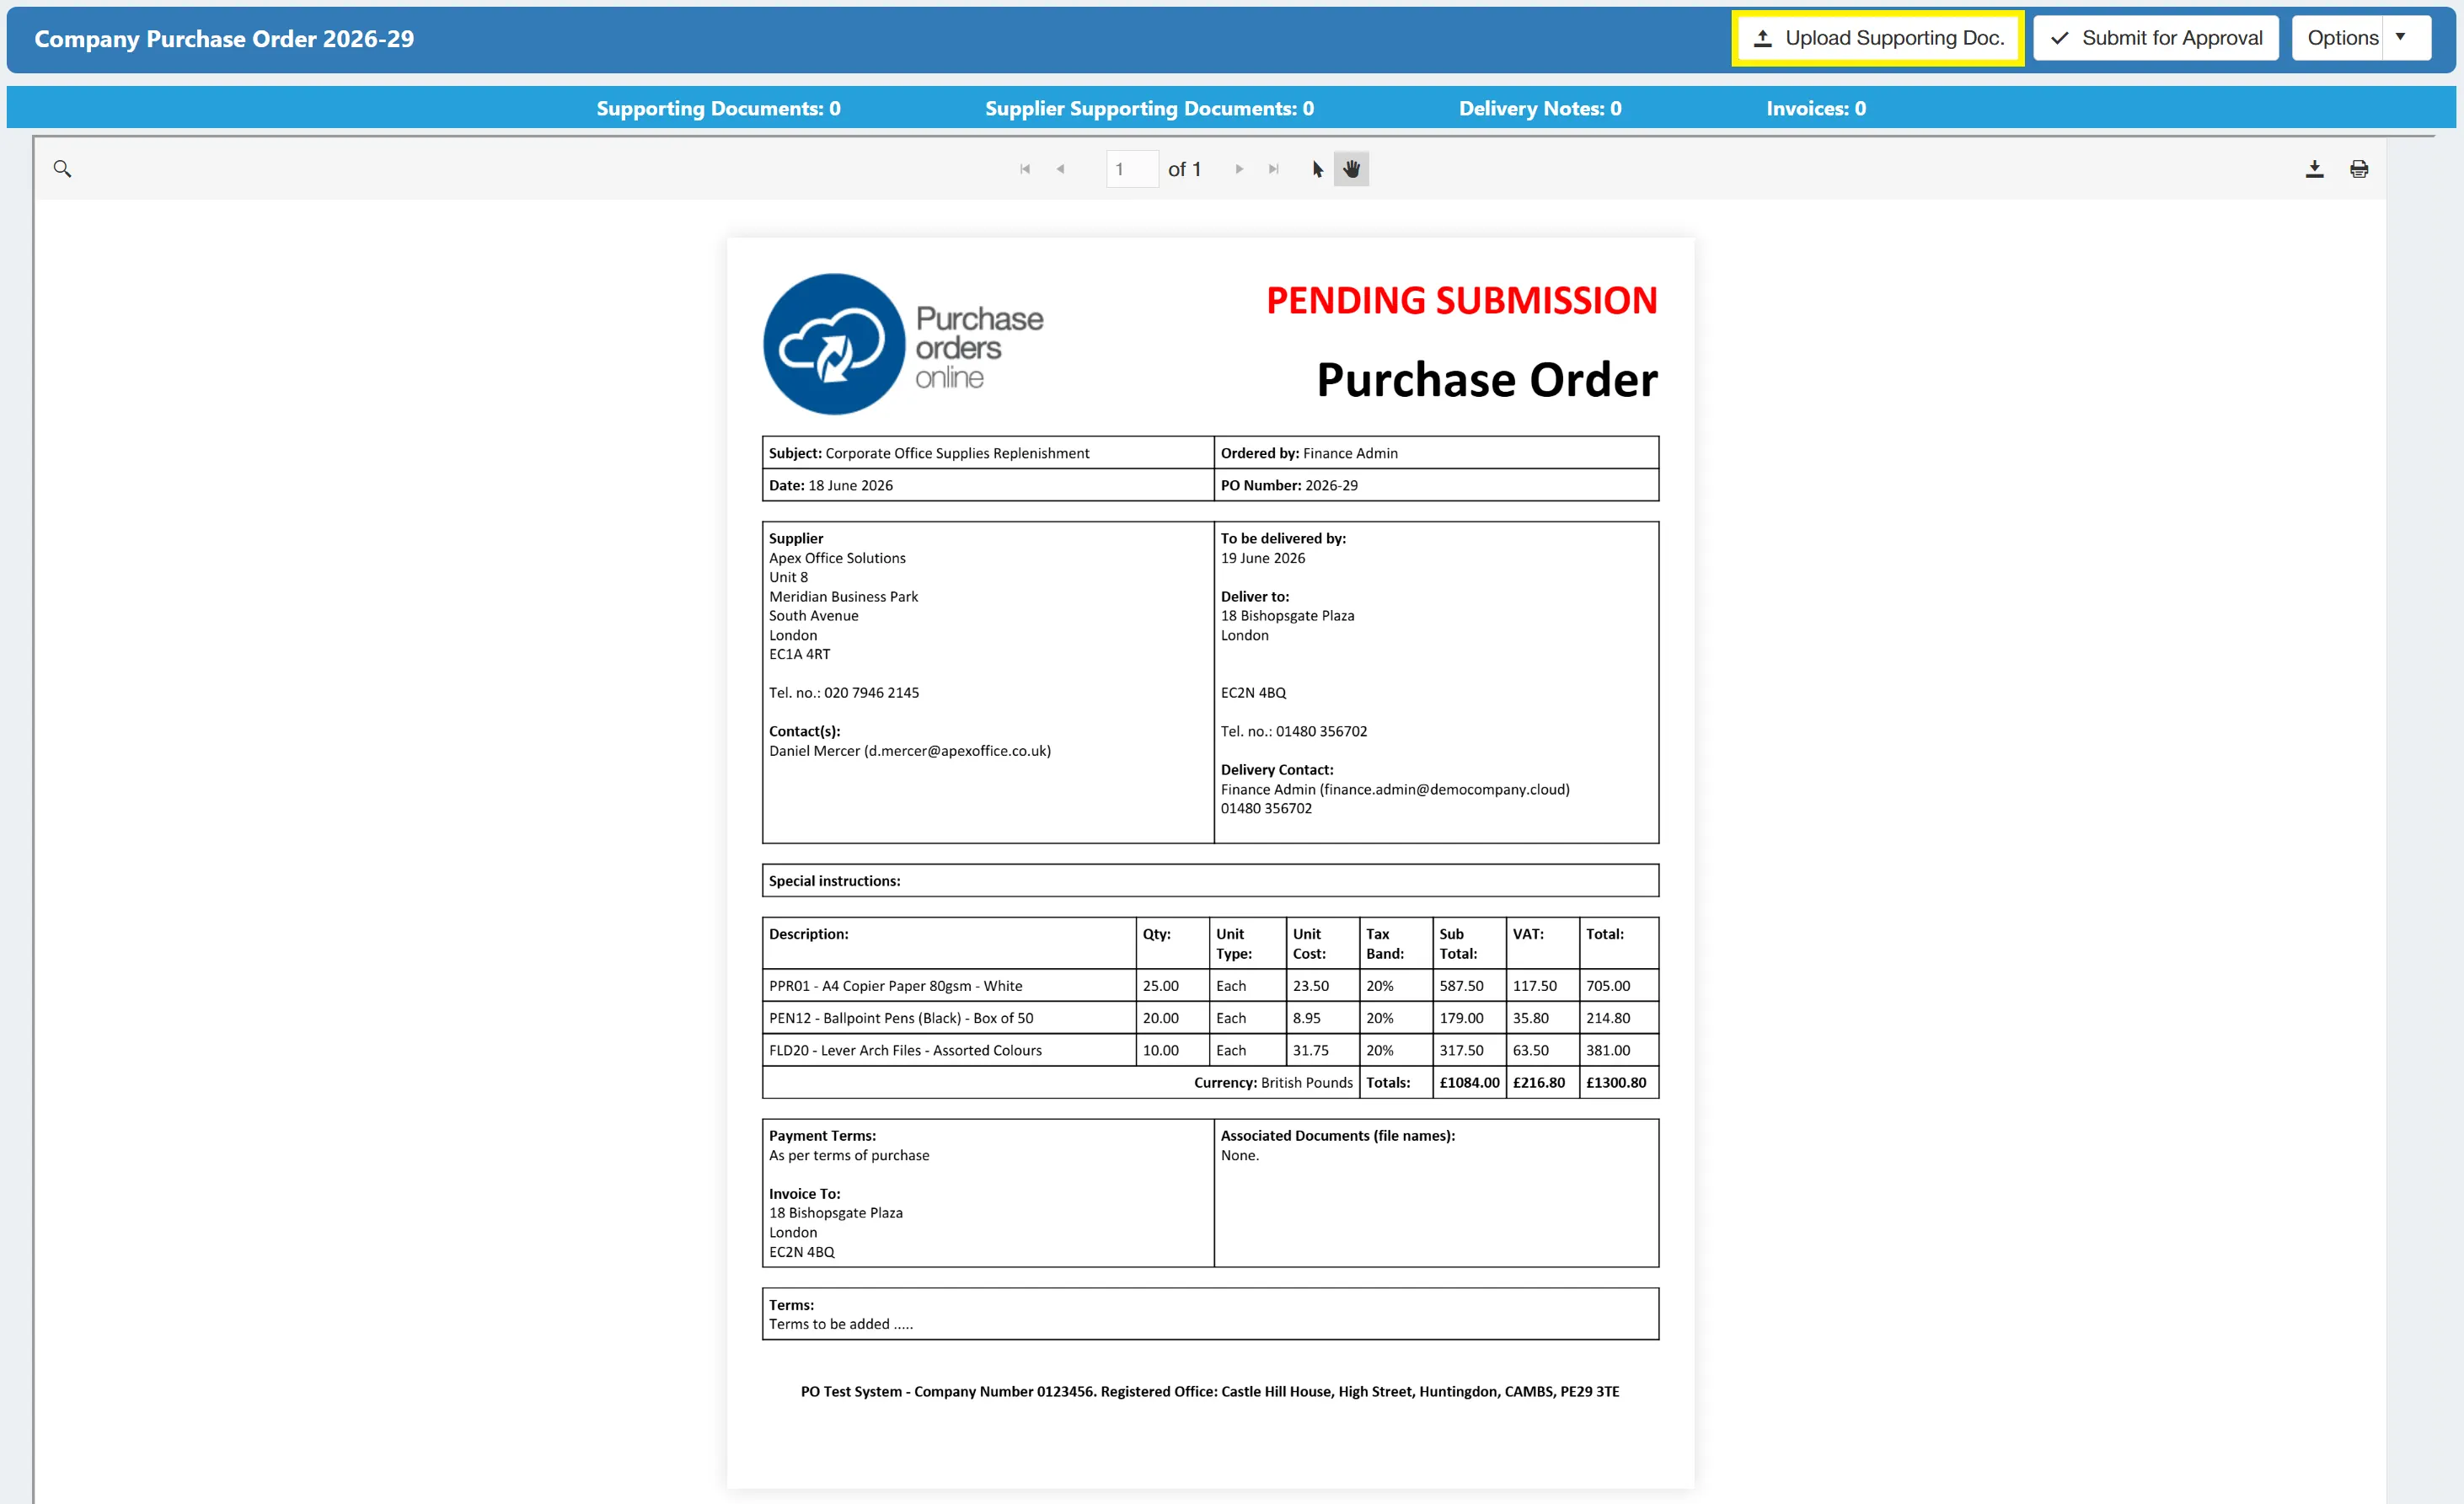
This takes you to a new window where you can drag-and-drop or select the file you wish to upload.
Once the document uploads, you will be shown a preview window along with some fields on the left hand side.
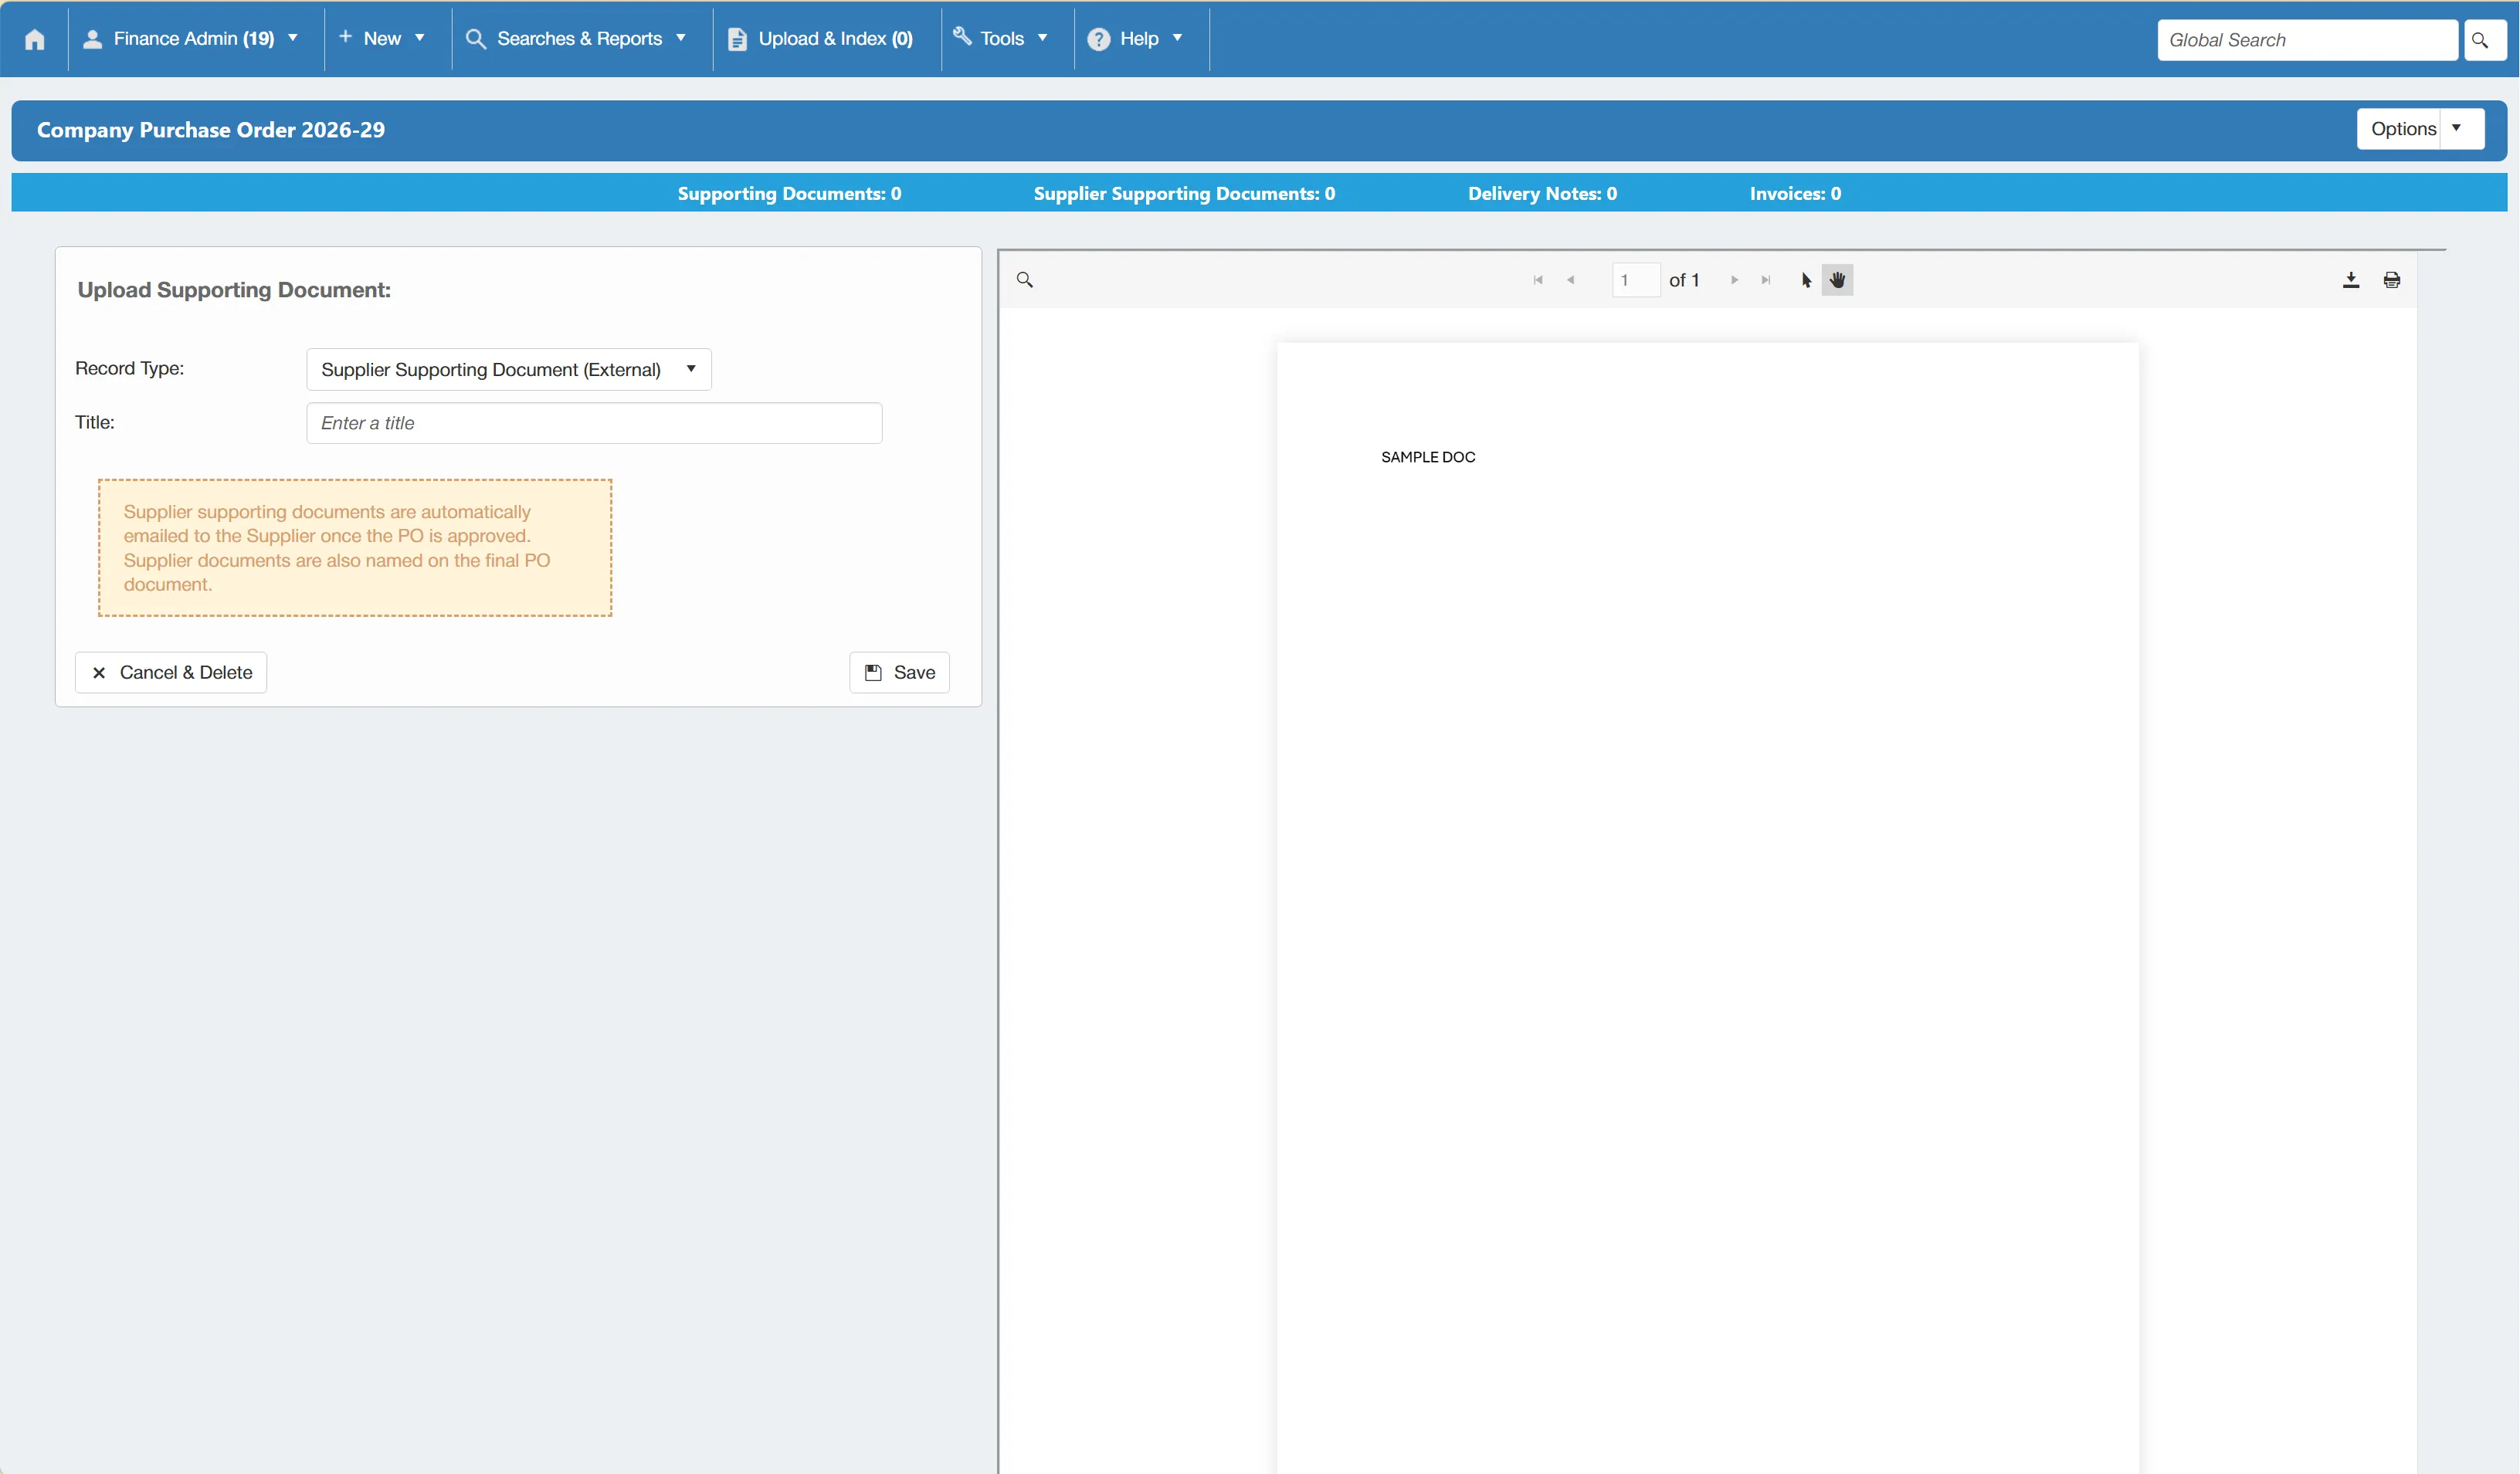
On the left hand side of the window, you can select the Record Type and Title.
- Record Type: This field has two options; Supporting Document (Internal) and Supplier Supporting Document (External). The Supporting Document will be attached to the PO throughout it's approval workflow but will not accompany the PO when sent to the supplier i.e. a quotation that the approver would like to review before approving the PO. The Supplier Supporting Document will accompany the PO throughout the whole process and will also be sent to the supplier i.e. a technical drawing or specification that you would like the supplier to review.
- Title: This is simply the title that you would like to give the document. If you are uploading an Internal supporting document, you can choose from some preset titles. However, if you are uploading an External supplier supporting document, you can add your own title accordingly.
Once you are happy with the details, simply click to attach this document to the purchase order.
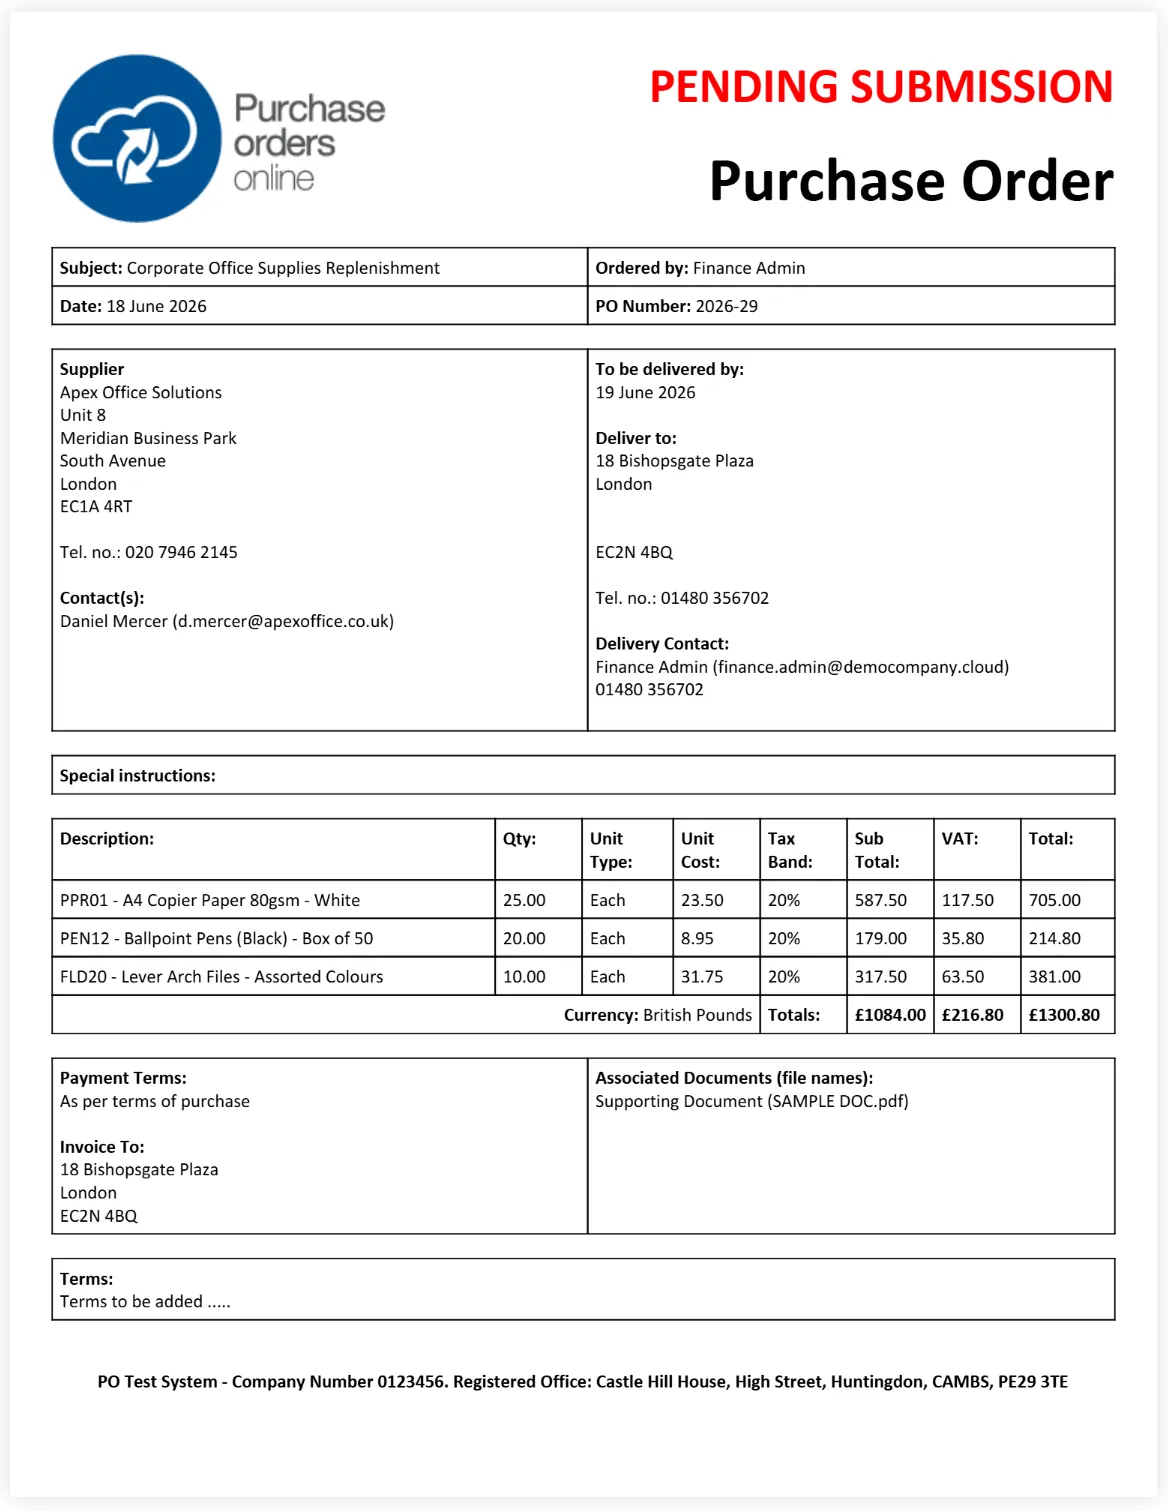
If the document is an External Supplier Supporting Document, then it will be displayed on the purchase order as shown above.
Purchase Order Document Options
When viewing the PO document from the preview window, click on the button to view several available actions.
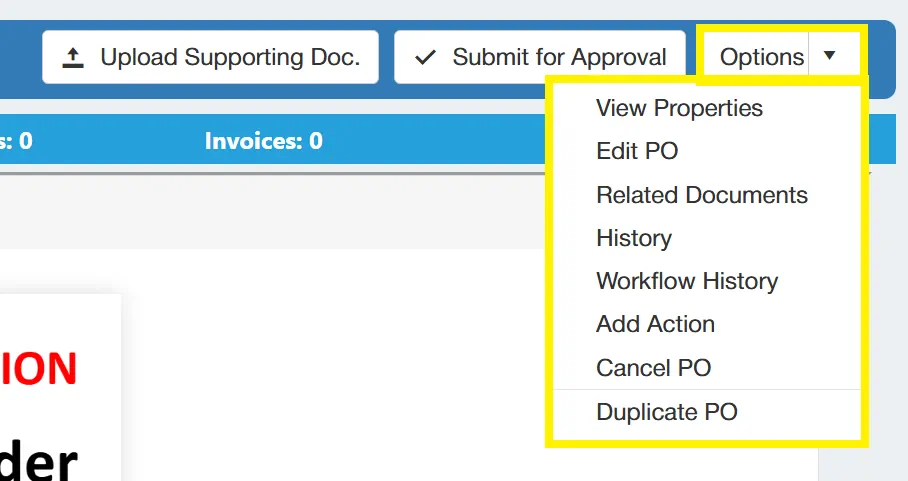
- View Properties: This allows you to view the properties of the purchase order via fields you filled out when creating the document.
- Edit PO: This allows you to go back and edit the purchase order's details, including the item details.
- Related Documents: This allows you to view the uploaded supporting documents.
- History: This shows the history of the purchase order within the system since its creation.
- Workflow History: This shows you the history of the purchase order with regards to its journey through the approval workflow.
- Add Action: This allows you to add an action against the purchase order. (For more information on Actions, click here).
- Cancel PO: This allows you to cancel the purchase order if it is no longer required. Cancelling a purchase order means that the value taken from the relative budgets will be automatically re-assigned.
- Duplicate PO: Duplicating a PO will copy the details and items onto a new document with an updated date and a unique Purchase Order Number. This is particularly helpful if you regularly order the same items.
Submit PO For Approval
Once you are happy with the details on your purchase order, simply click . This will send the PO onto the approver to review and action.
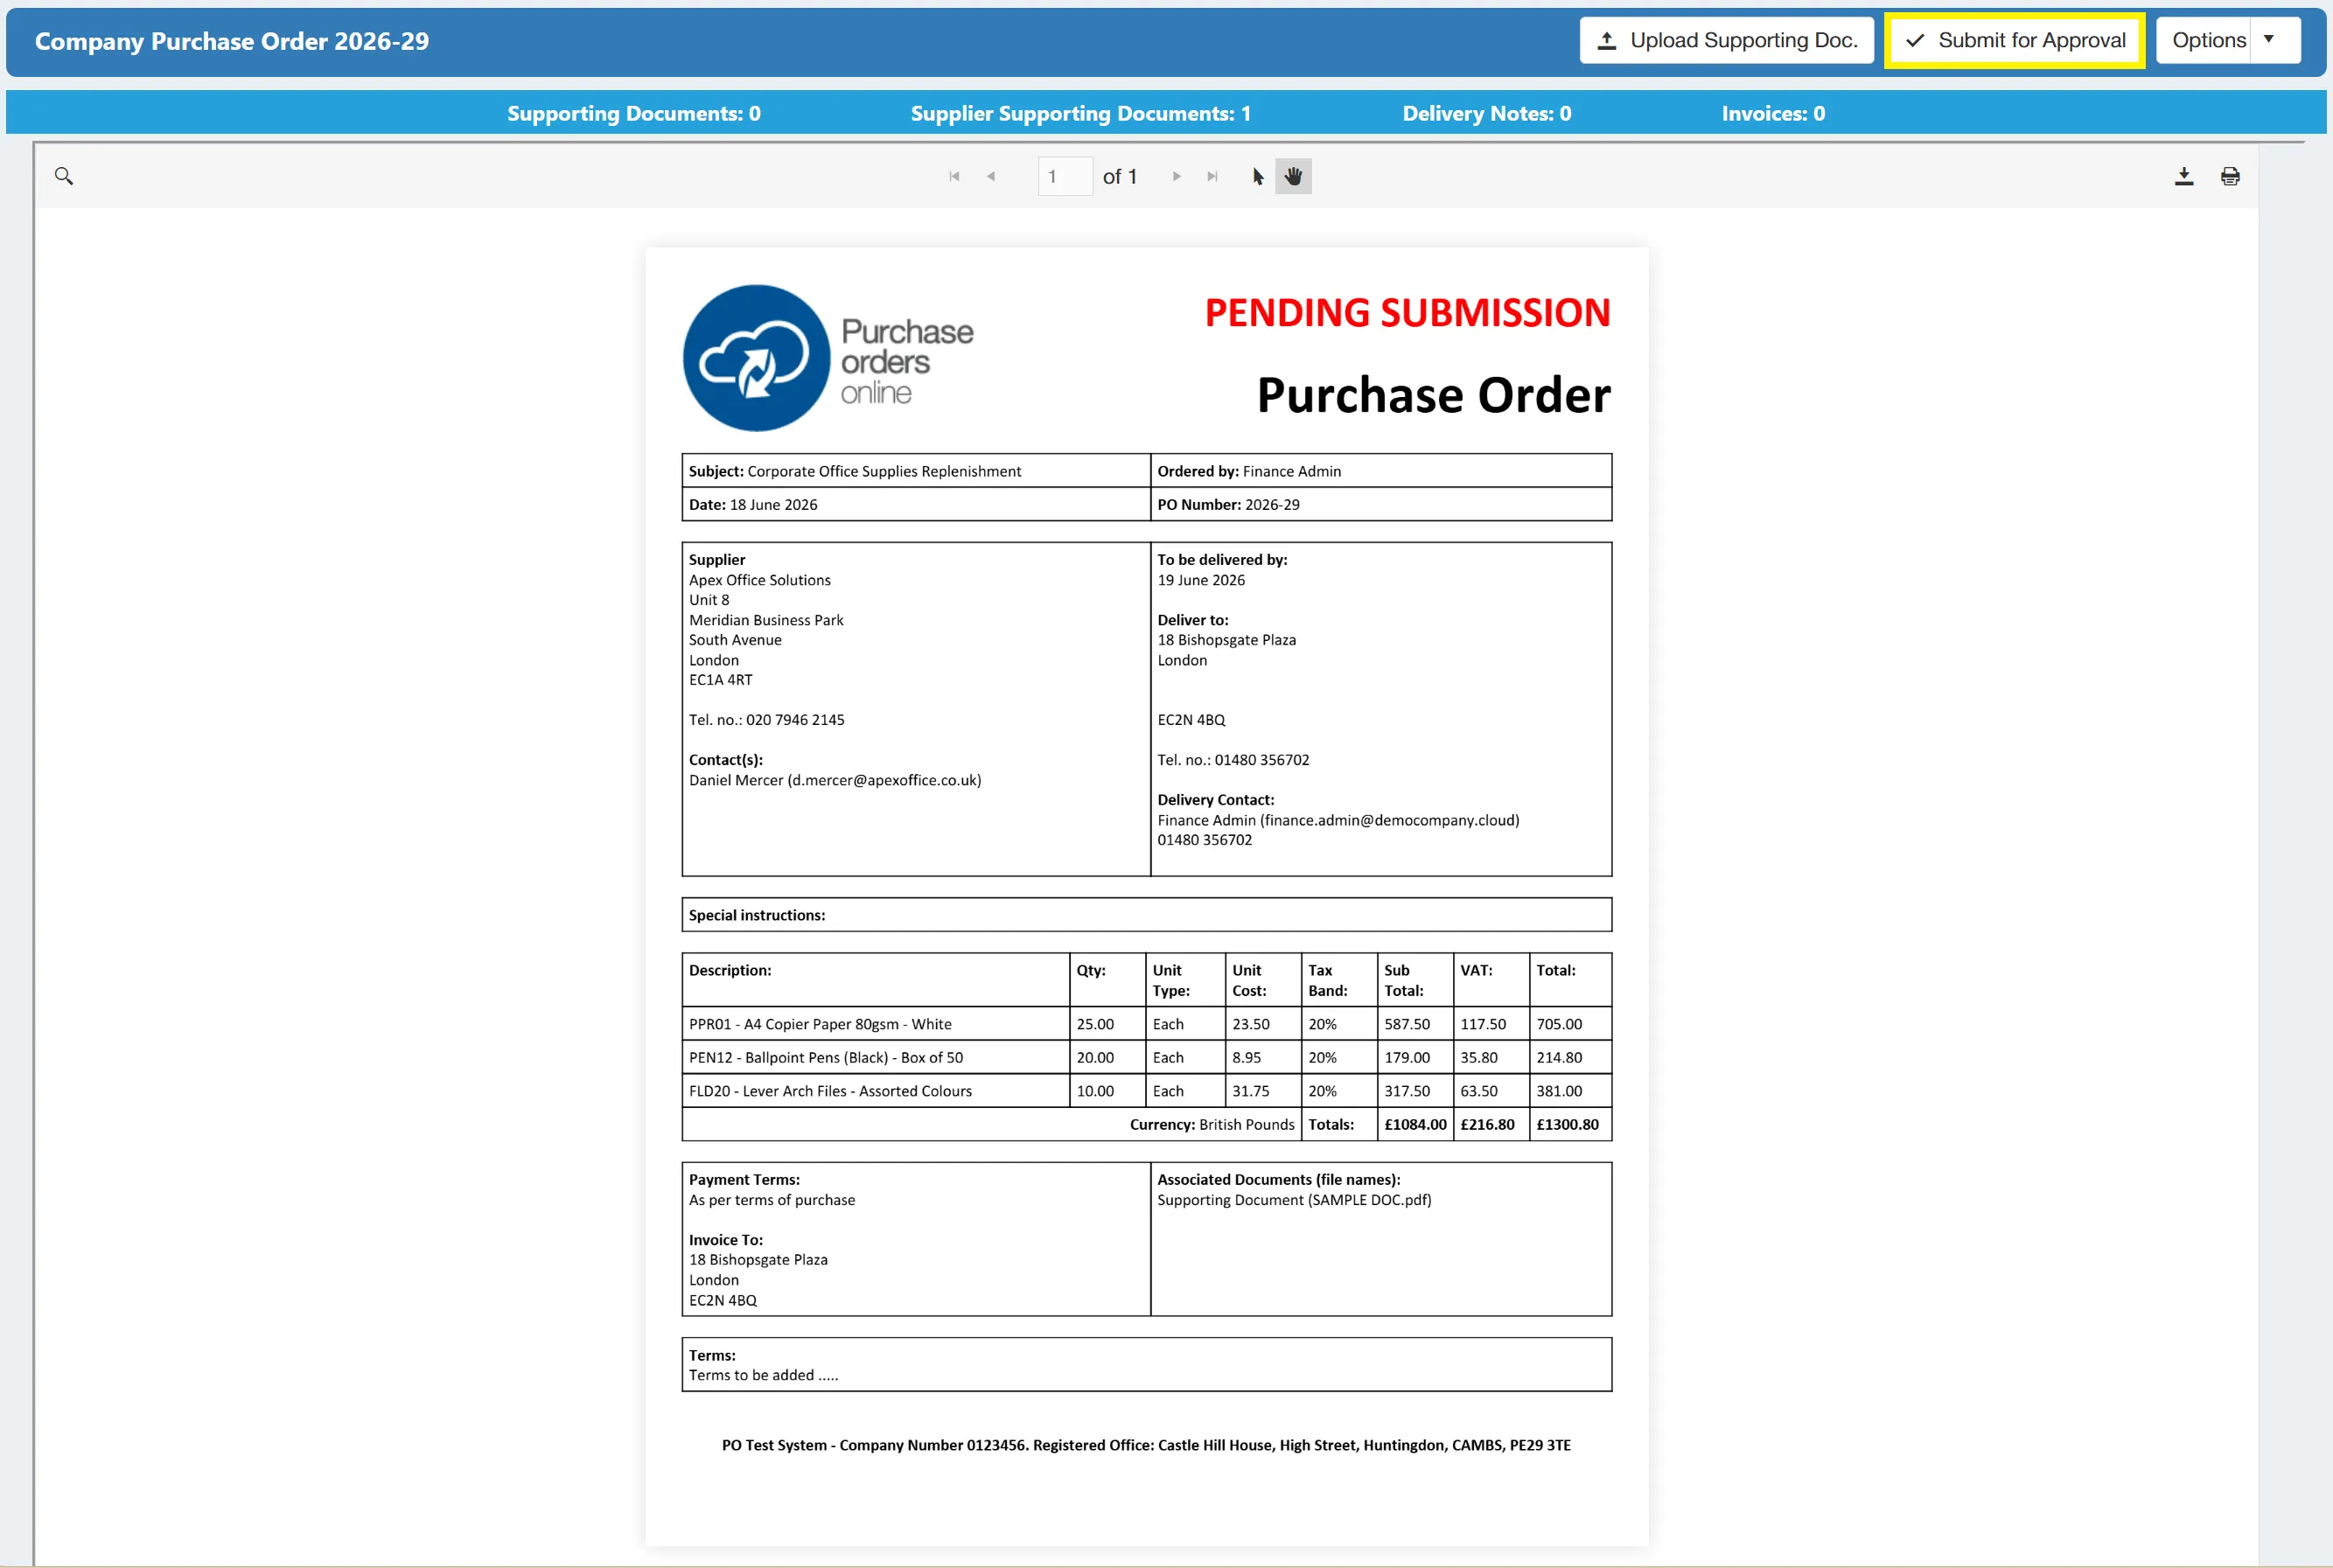
If there are no approval rules set up within the system, the PO will automatically approve.
Existing Purchase Orders
There are a number of options available when viewing an existing purchase order. These options are:
- View Properties
- Related Documents
- History
- Workflow History
- Add Action
- Close PO
- Revoke PO
- Un-Close PO
- Duplicate PO
Click on the above links for more information on each option.
Close PO & Revoke PO are only available to users with the PO Admin permission enabled. For more information on user permissions, click here.
Duplicate PO is available to users with the PO Creator permission enabled. For more information on user permissions, click here.
For more information on searching for existing purchase orders, click here.
View Properties
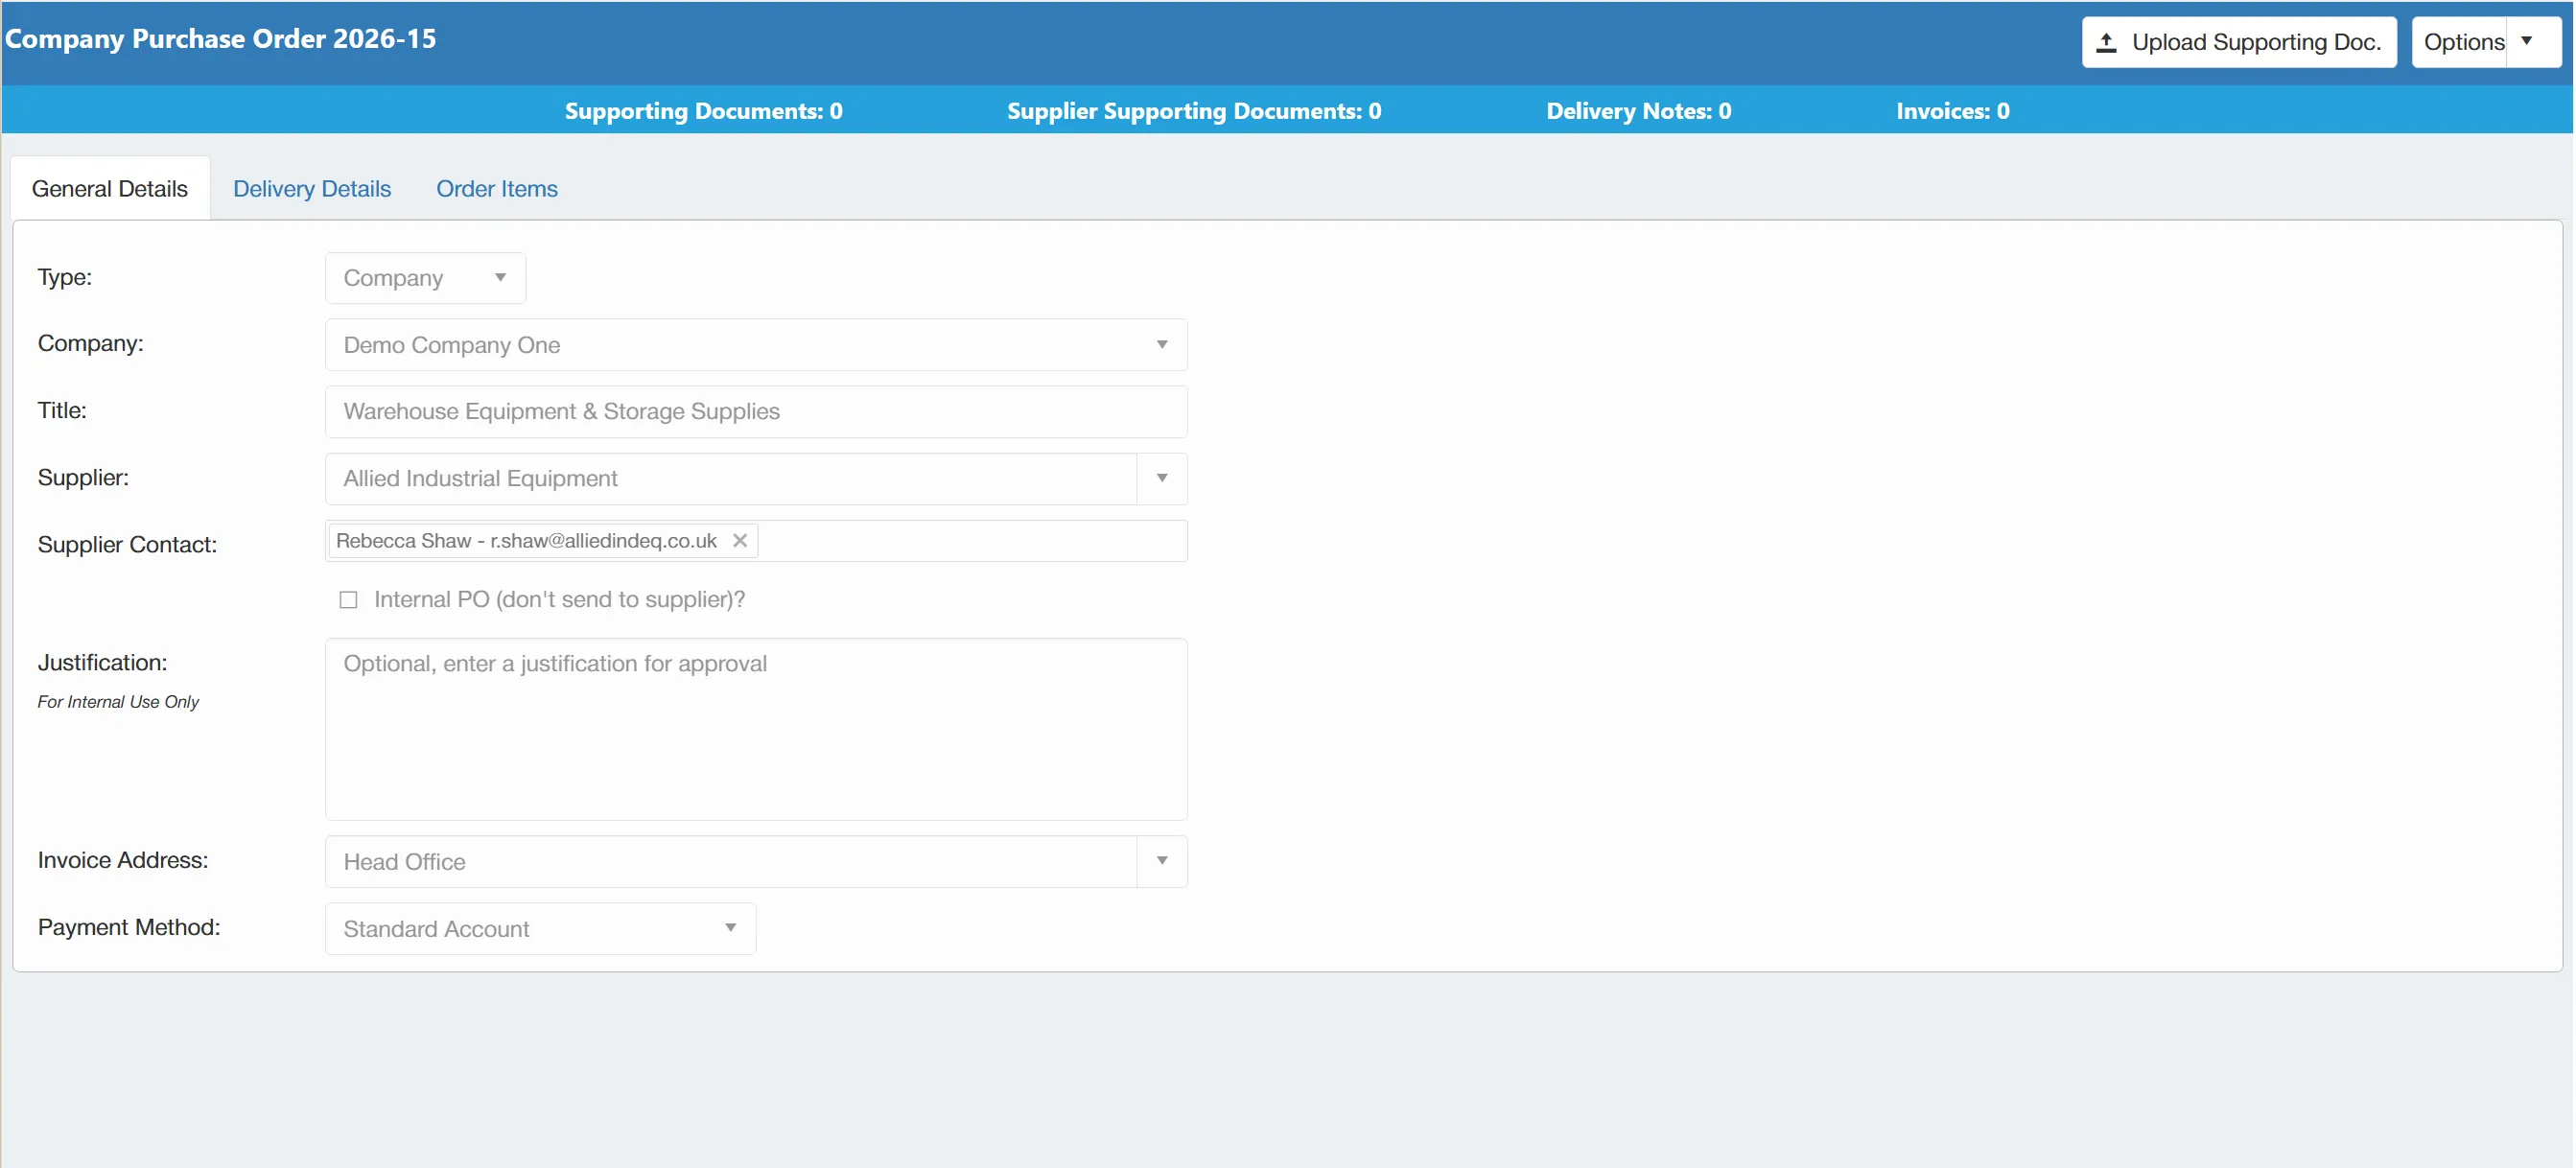
The View Properties option allows you to review the properties that make up the purchase order in a clear format as opposed to looking for them on the PO document.
To access the View Properties Window, simply select from the drop down menu.
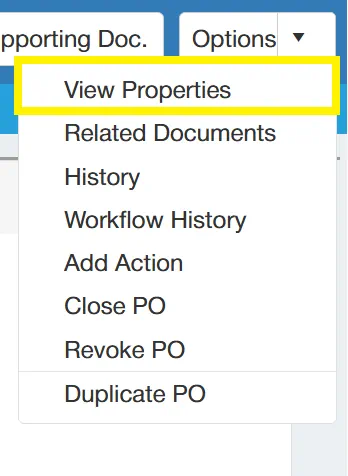
This will open a new window showing the purchase order details. This window is similar to the purchase order creation window, however, this is in a read-only state as the details are already locked down.
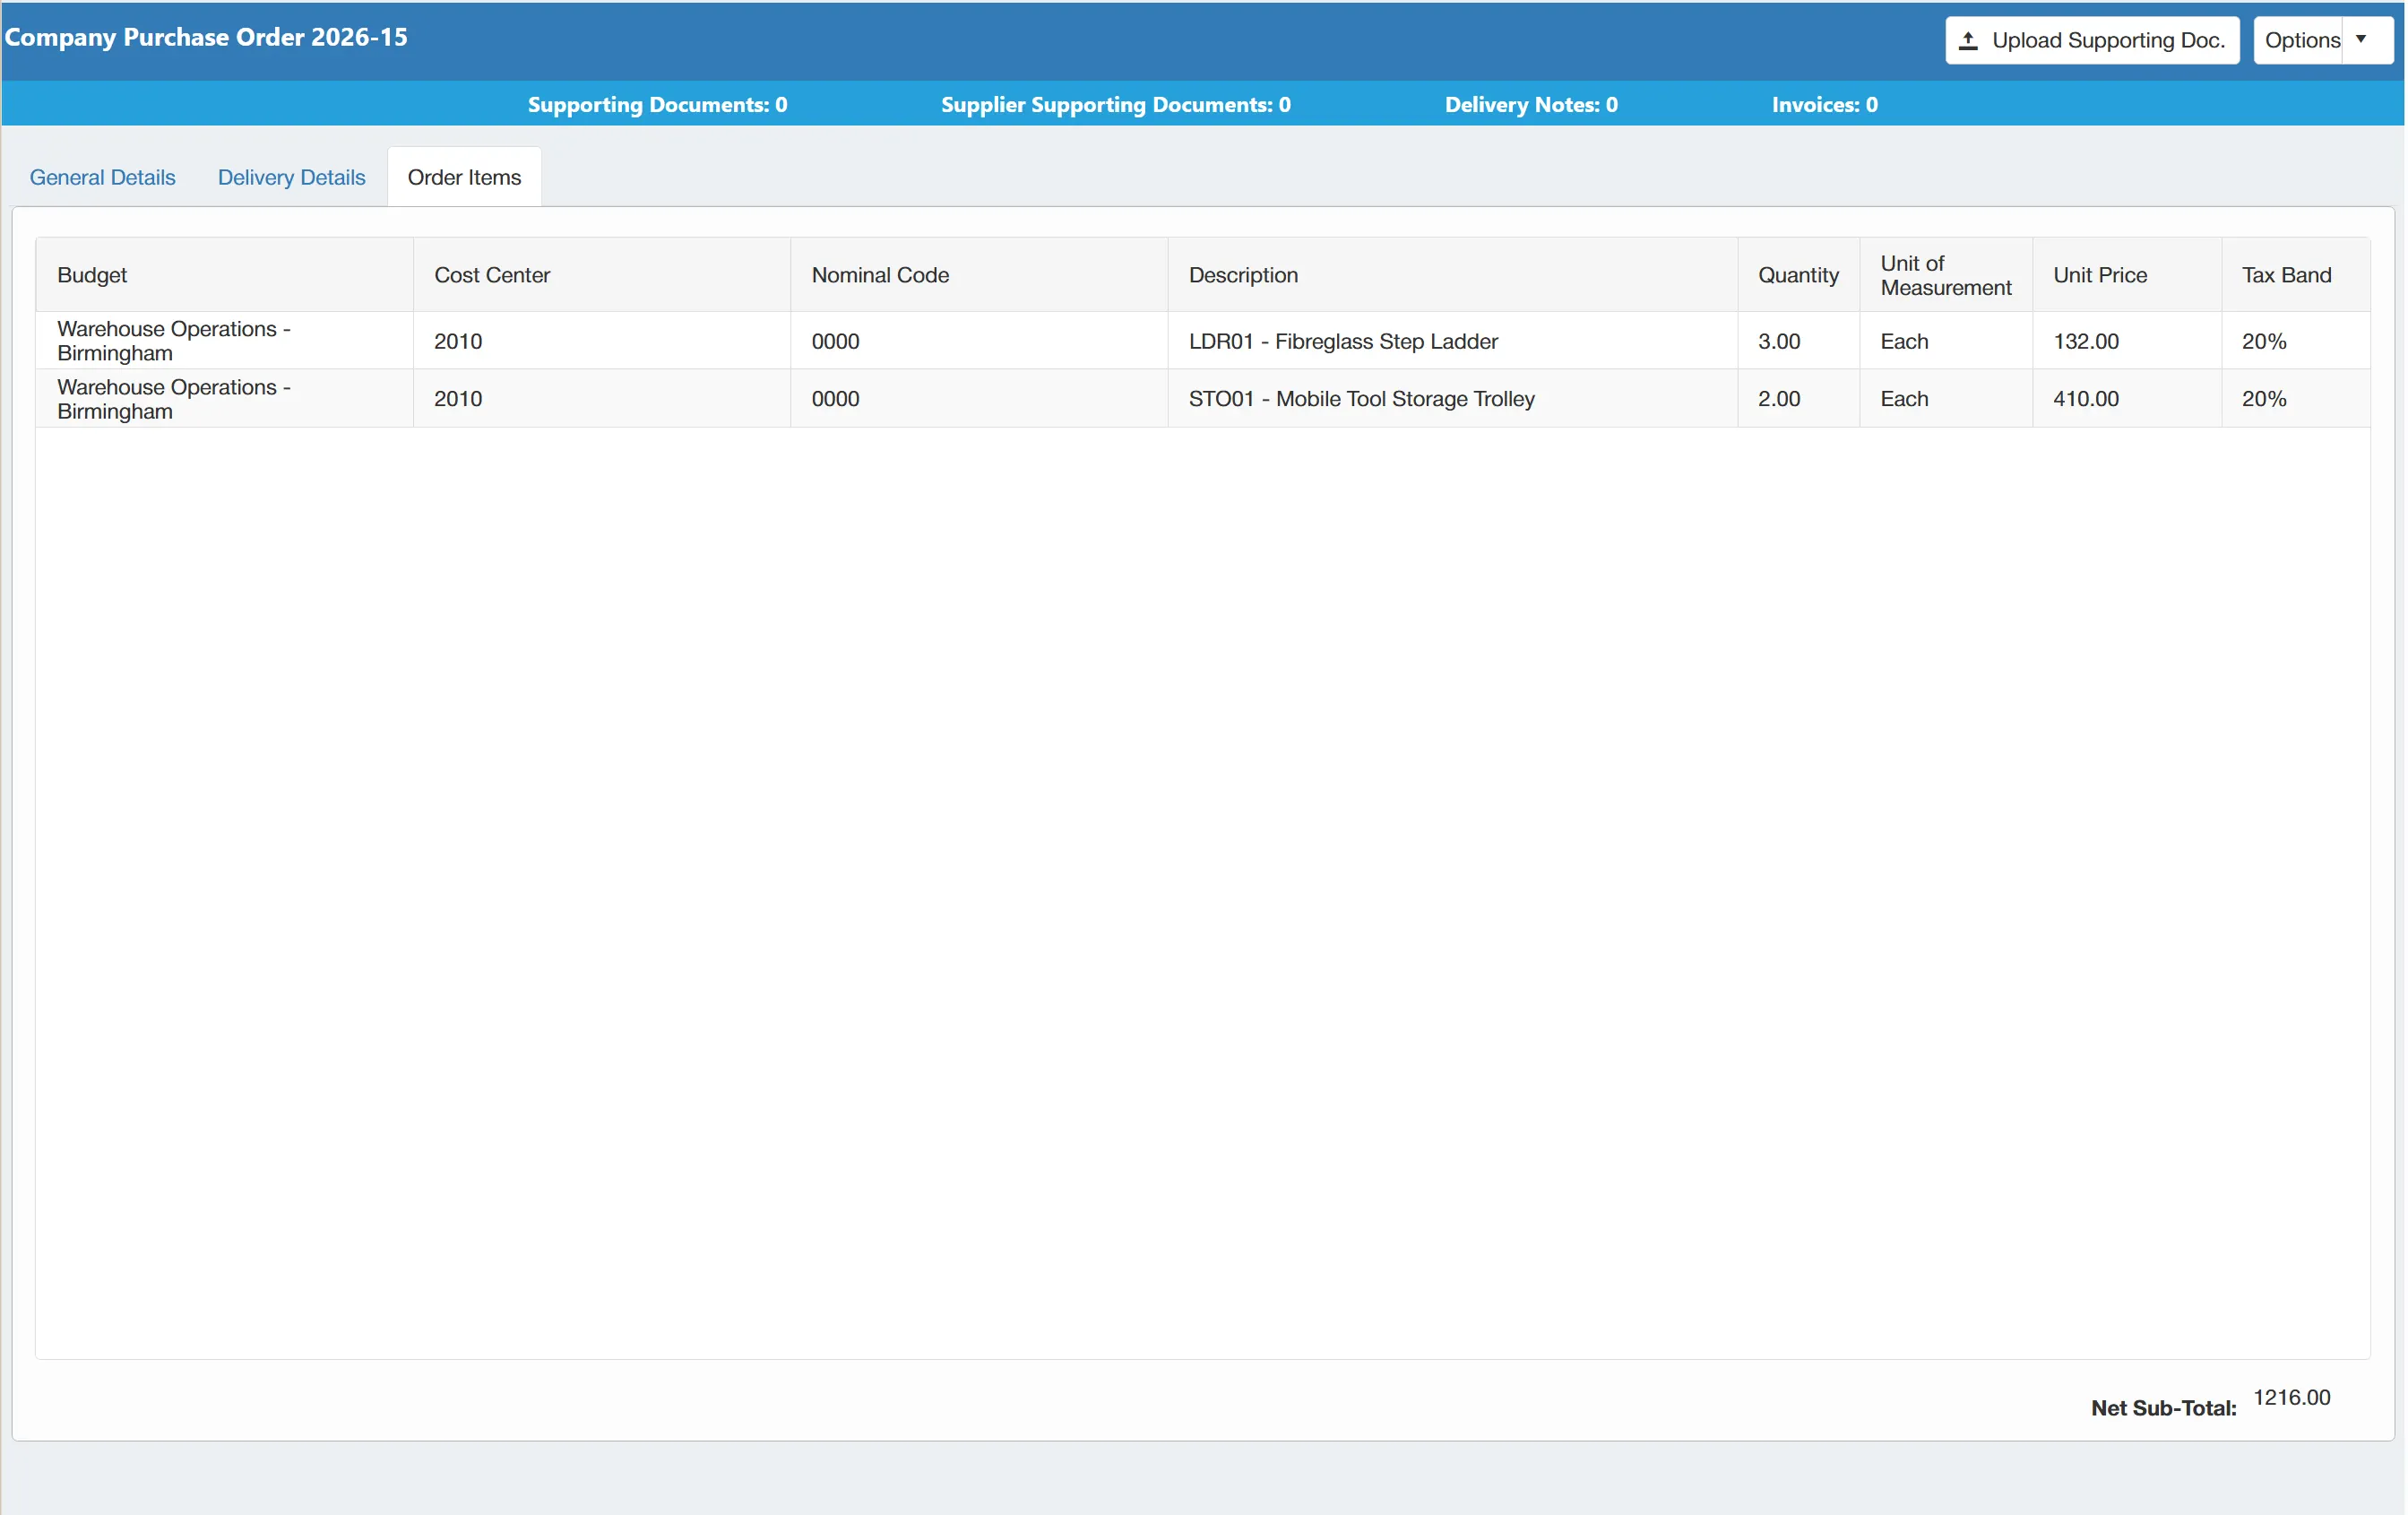
You can also view the individual line item details by selecting the tab.
Related Documents
Any documents that have been linked to a purchase order can be viewed using the Related Documents option.
For more information on attaching documents to purchase orders, click here.
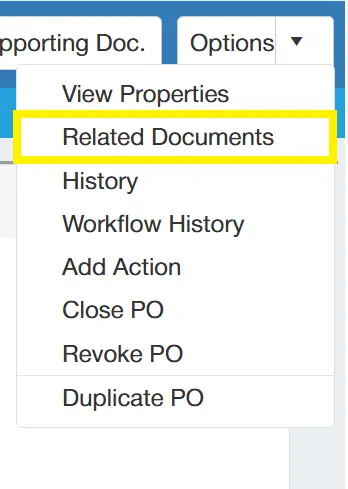
To access the Related Documents Window, simply select from the drop down menu.
This opens a new window, displaying any documents that have been linked to a purchase order. The documents are listed in a grid which displays key information such as; when it was uploaded, who uploaded it, the title, and type of document.
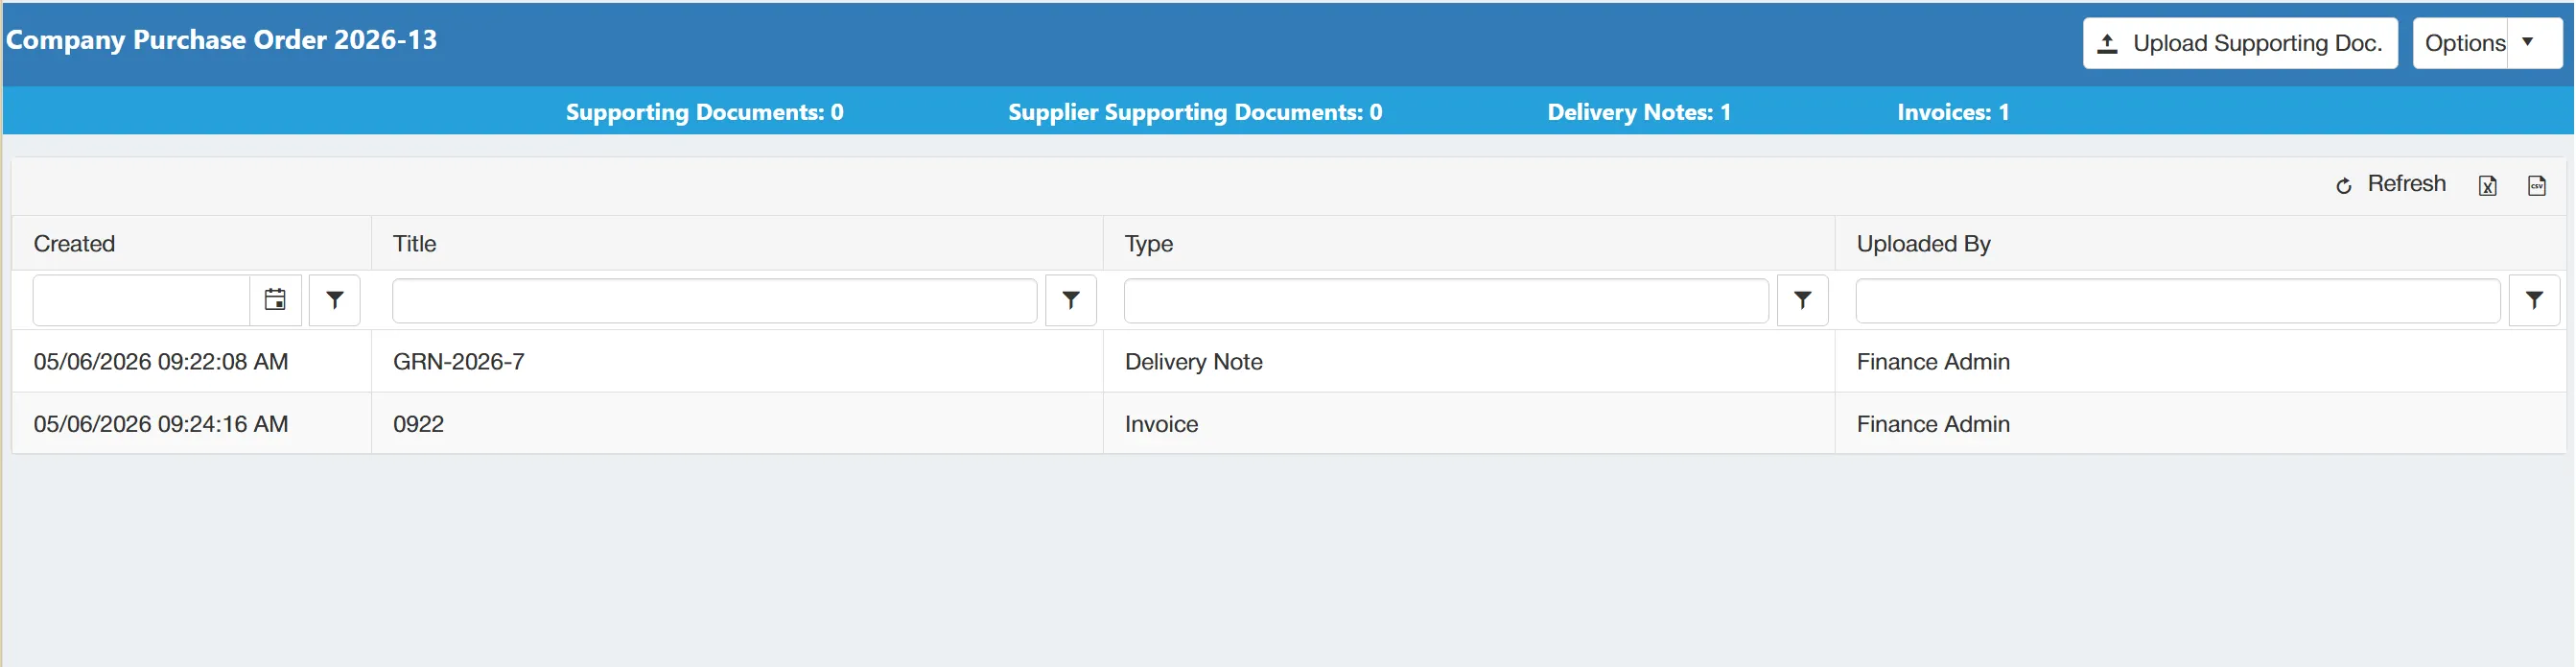
System-generated documents such as internal delivery notes and invoices are also displayed on the Related Documents grid as they are linked to the purchase order.
To view one of the documents, simply click on the relevant line in the grid.
This displays the document in a viewer which allows you to review it in full.
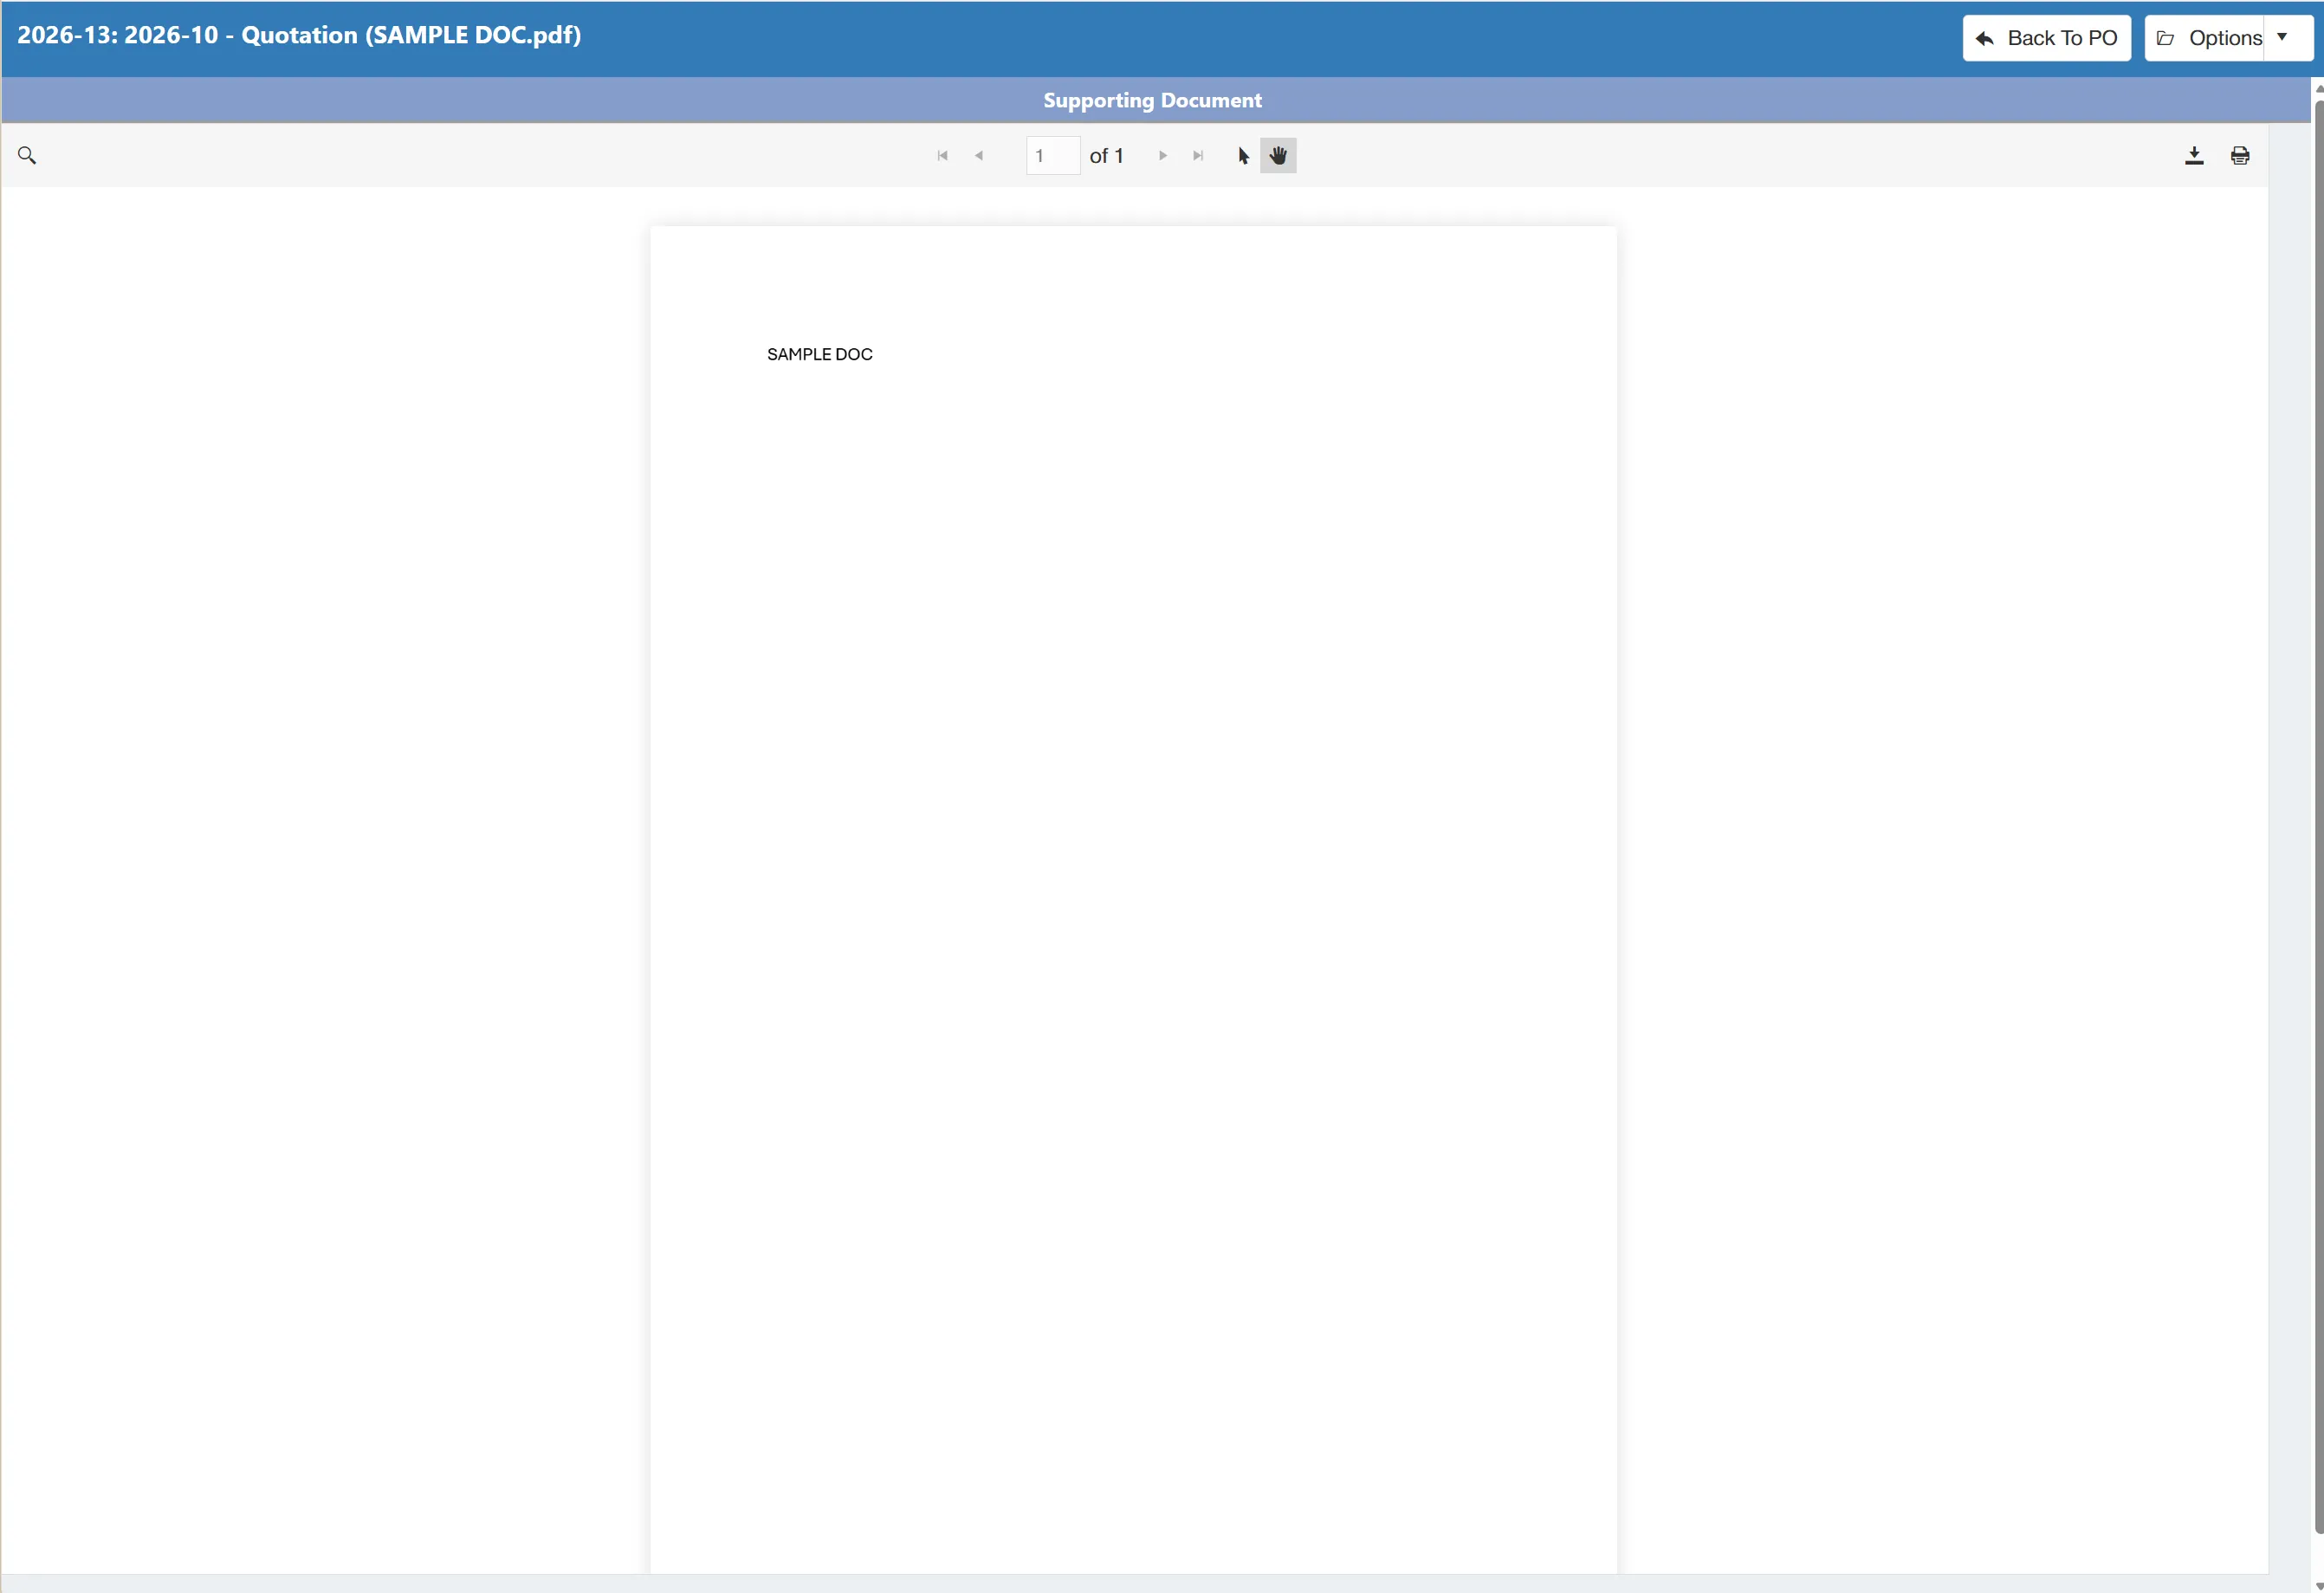
Documents can also be downloaded from the viewer for offline use.
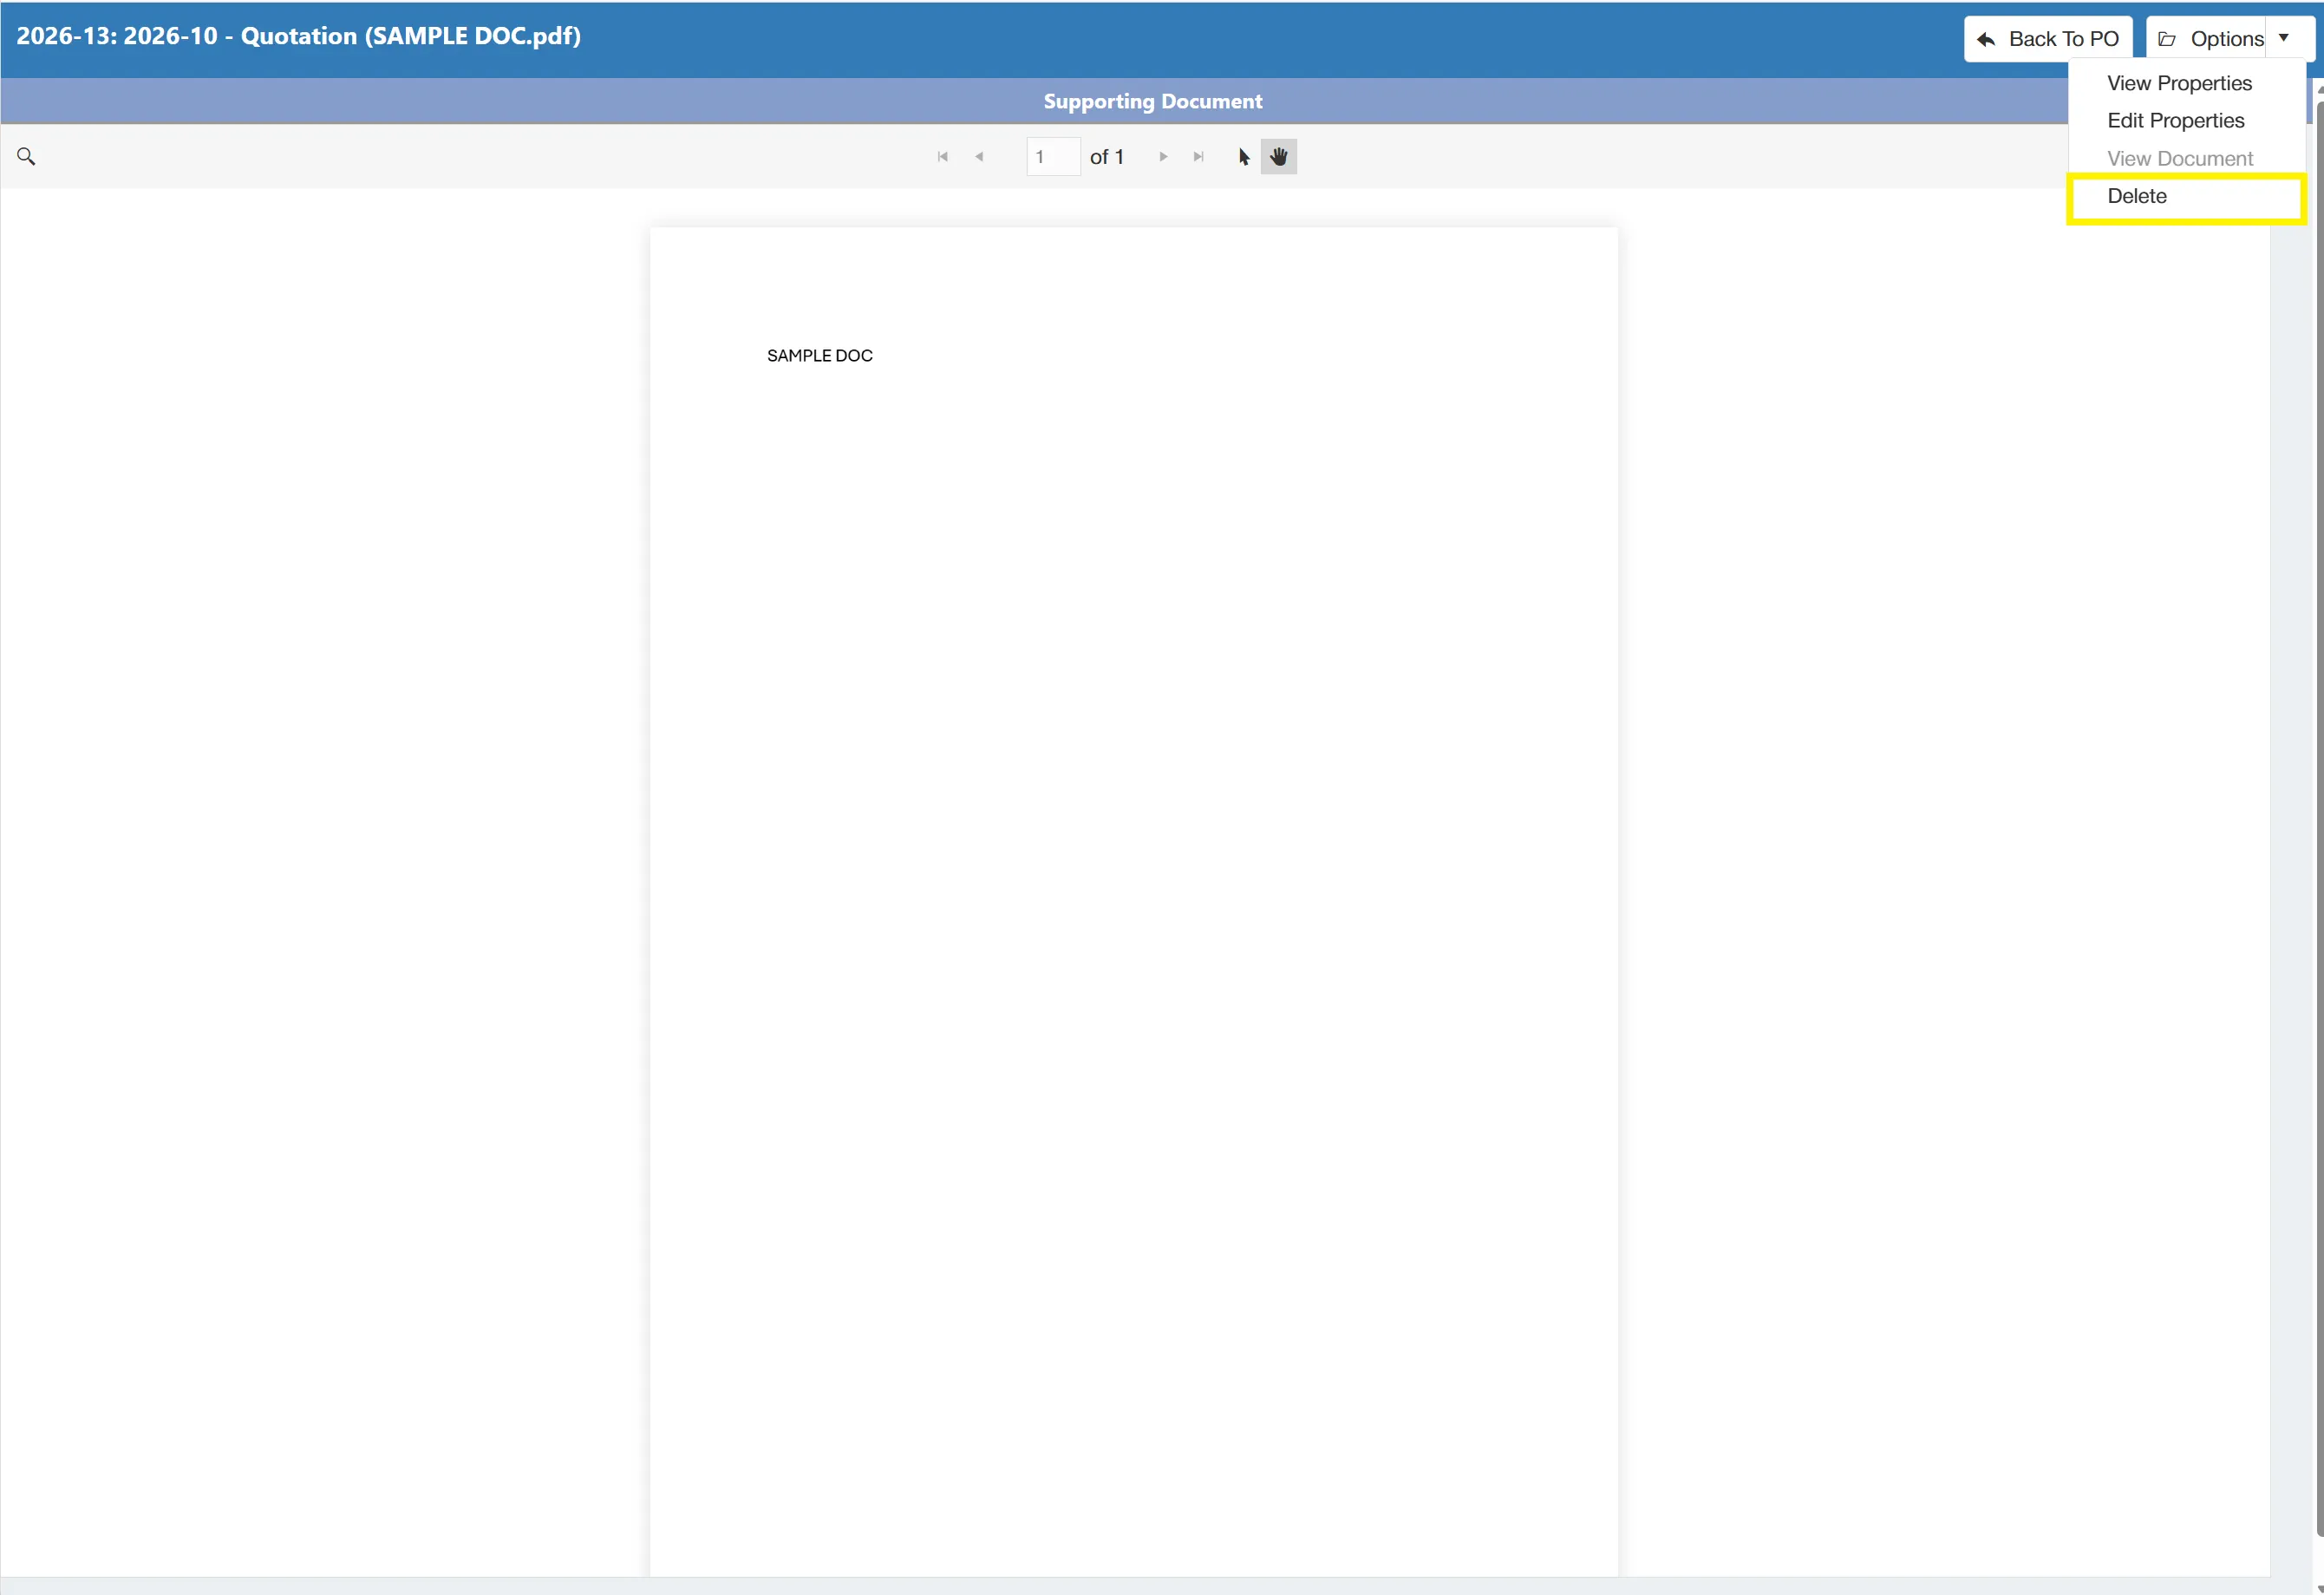
You can delete a related document by selecting from the drop down menu.
History
The system logs any activity on purchase orders within the History section. This ensures full audit accountability.
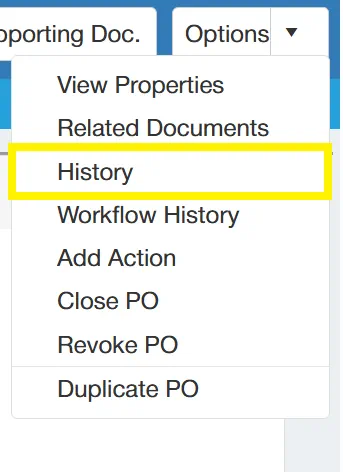
To access the History Window, simply select from the drop down menu.
This opens a new window displaying a grid, containing any activity against the purchase order along with key information.
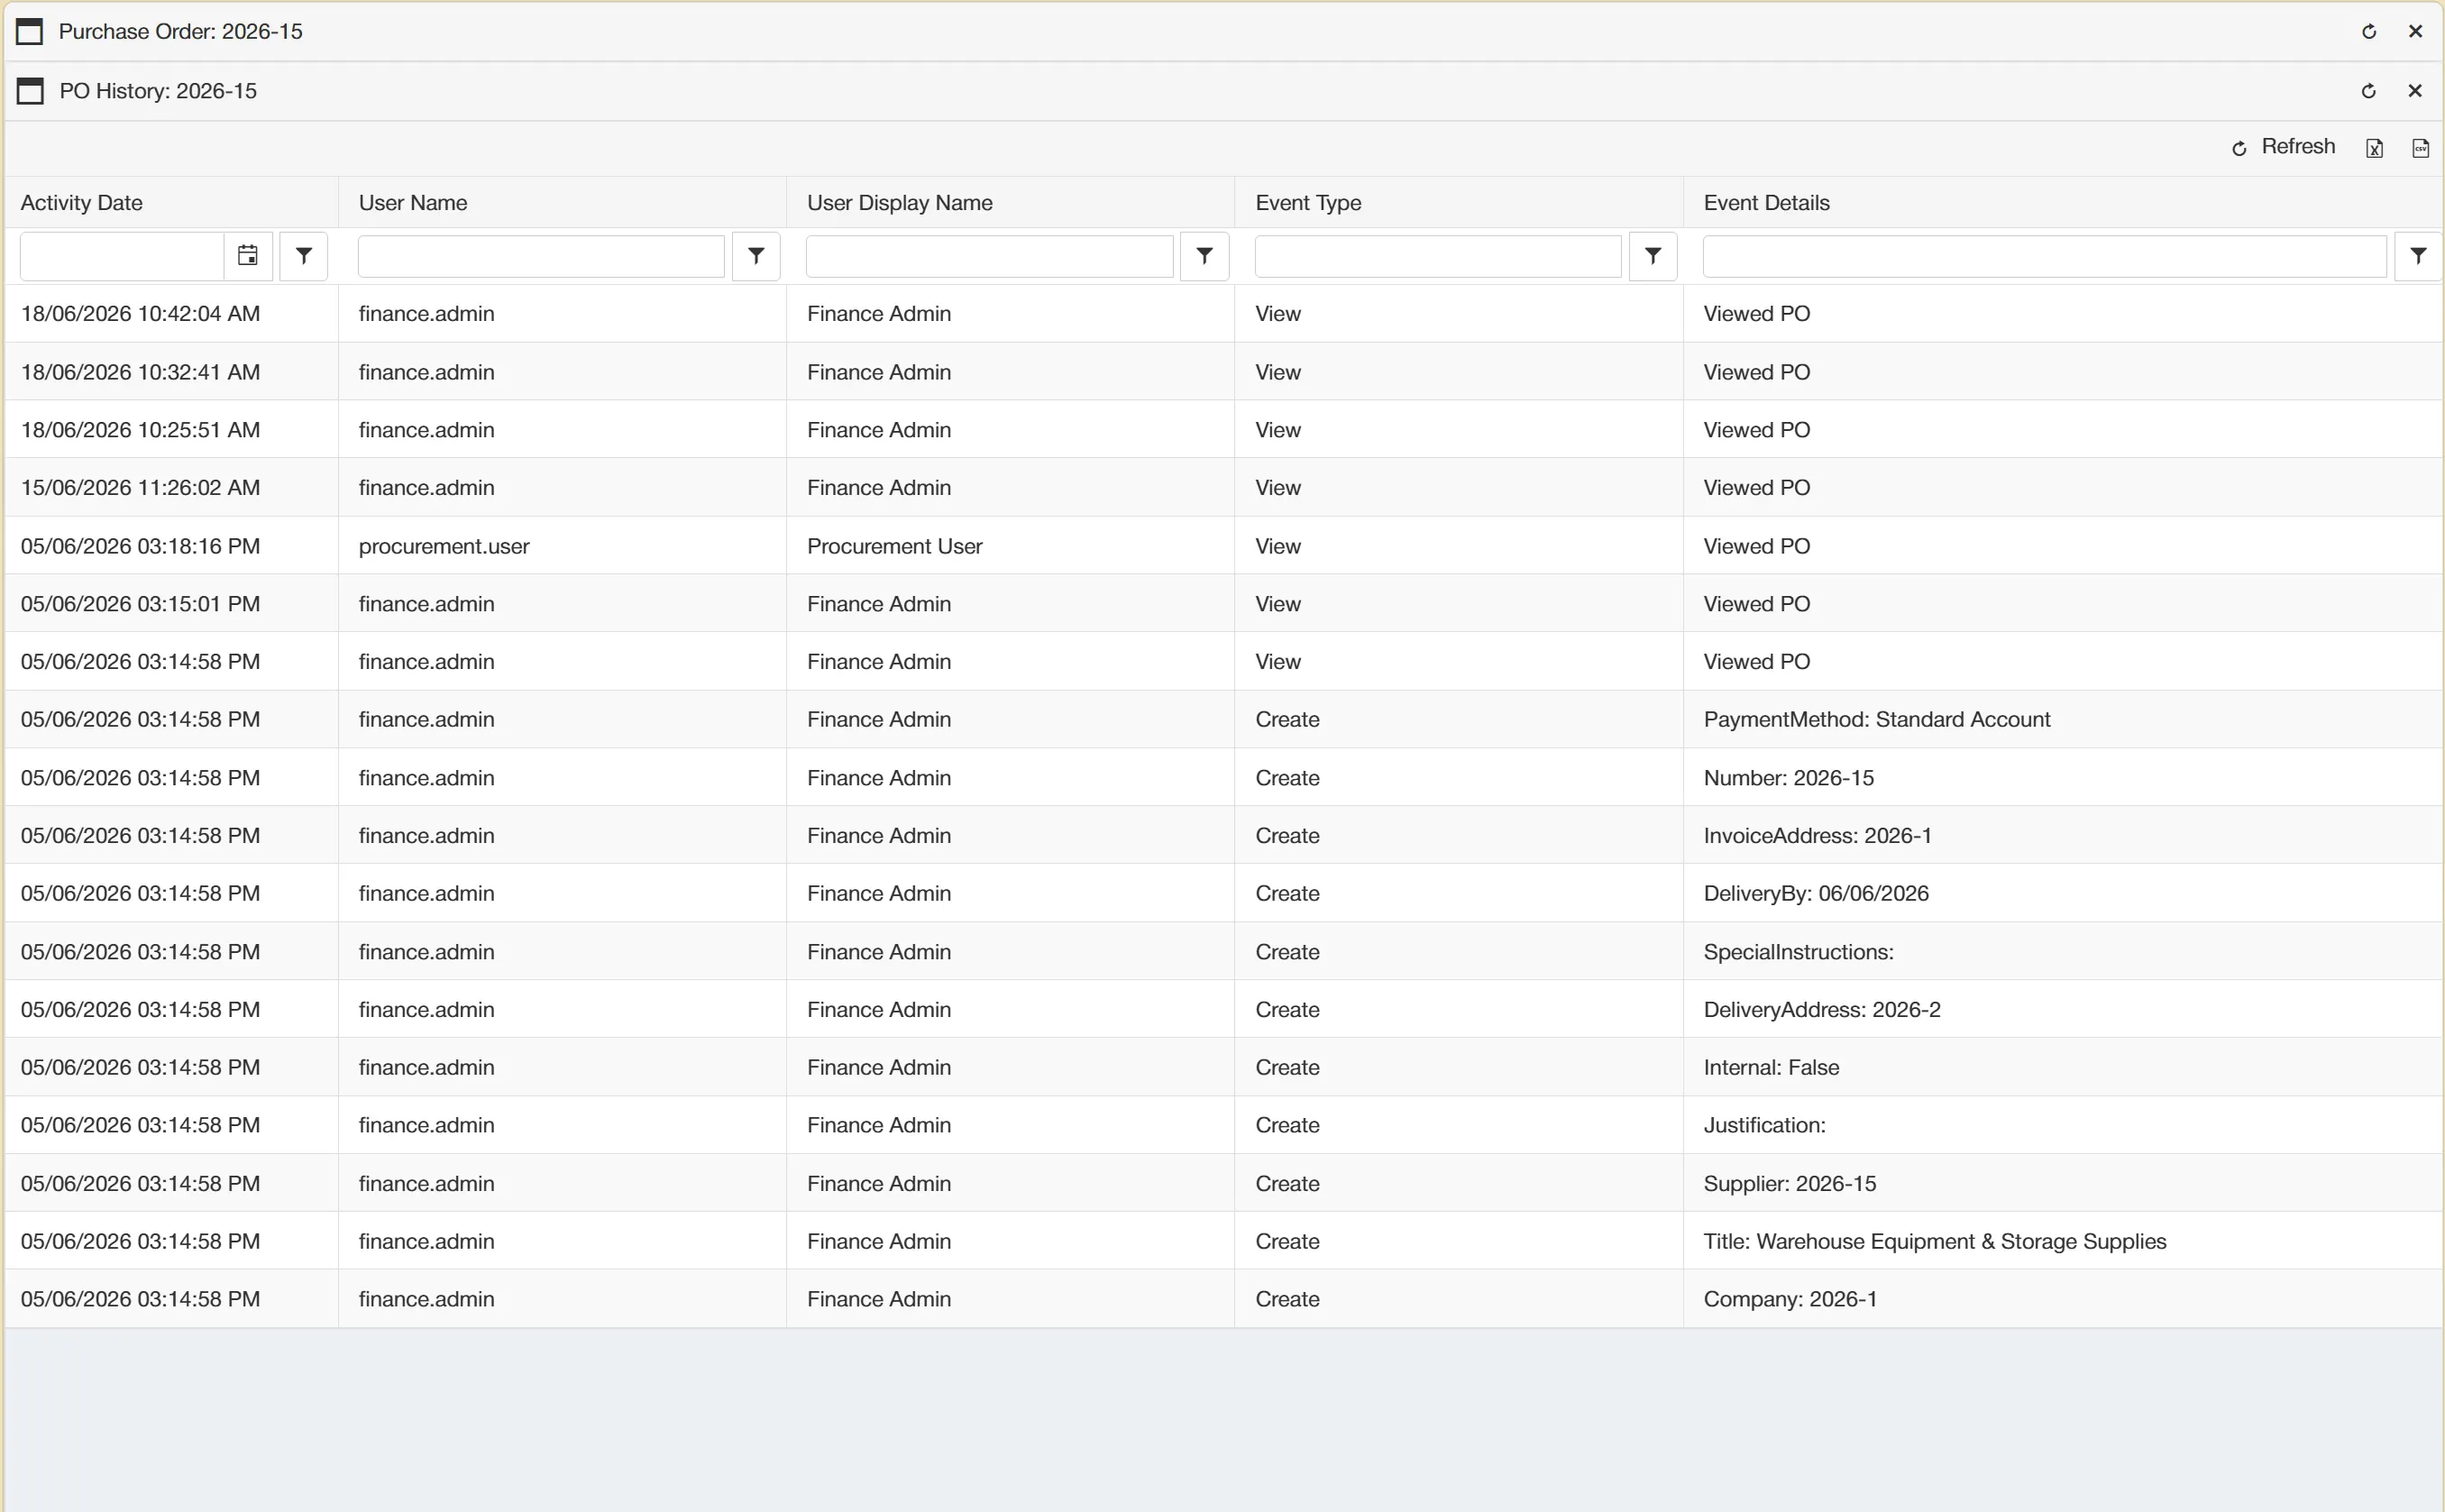
The information displayed on the grid consists of:
- Activity Date: The date and time on which the event took place.
- User Name: The user name to which the event is linked.
- User Display Name: The display name of the user who carried out the event.
- Event Type: The type of event that took place.
- Event Details: More specific details describing the event.
This grid can be downloaded in Excel or CSV format if required.
Workflow History
The system records any history relating to a purchase order's workflow. This allows users to ascertain the journey that a purchase order has been on through it's approval process.
The Workflow History is different to the History. Workflow History displays information strictly regarding the purchase order's workflow, whereas History, displays any other activity relating to the purchase order.
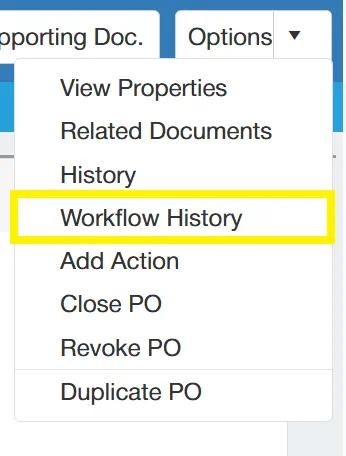
To view the Workflow History, simply select from the drop down menu.
This opens a new window containing key information relating to the workflow history.
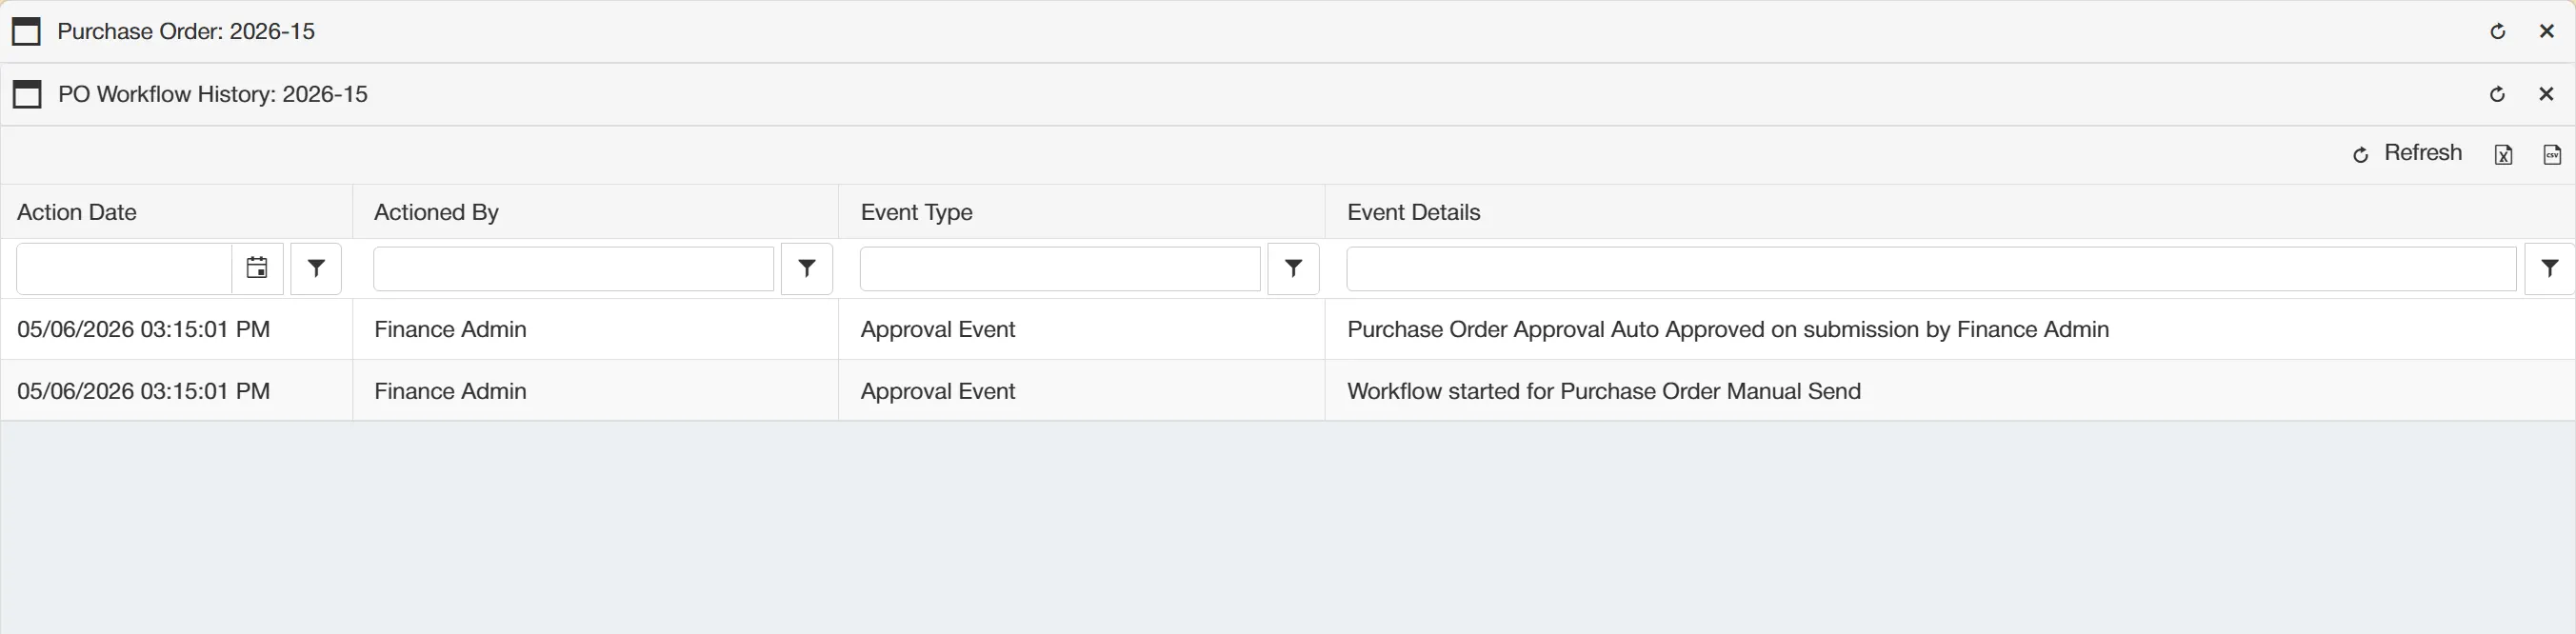
The information displayed is as follows:
- Action Date: The date and time on which the action took place.
- Actioned By: The name of the user who carried out the action.
- Event Type: The type of action carried out.
- Event Details: More specific details describing the event.
The grid also displays any workflow comments that have been added along the process.
This grid can be downloaded in Excel or CSV format if required.
Add Action
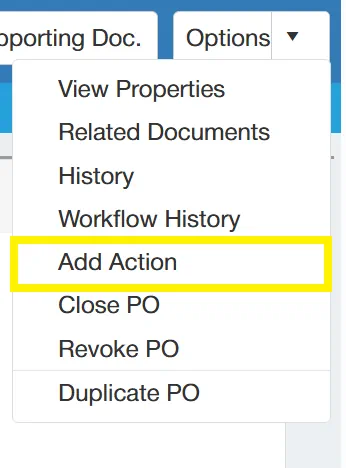
Users can add actions against purchase orders. To do this, simply click within the drop down menu.
Actions are reminders that you can set for yourself against various items within the system such as; Suppliers, Purchase Orders, Budgets, Invoices, Credit Notes and Projects. You can assign a date and time for the action to occur, at which point you will receive an email notification and task.
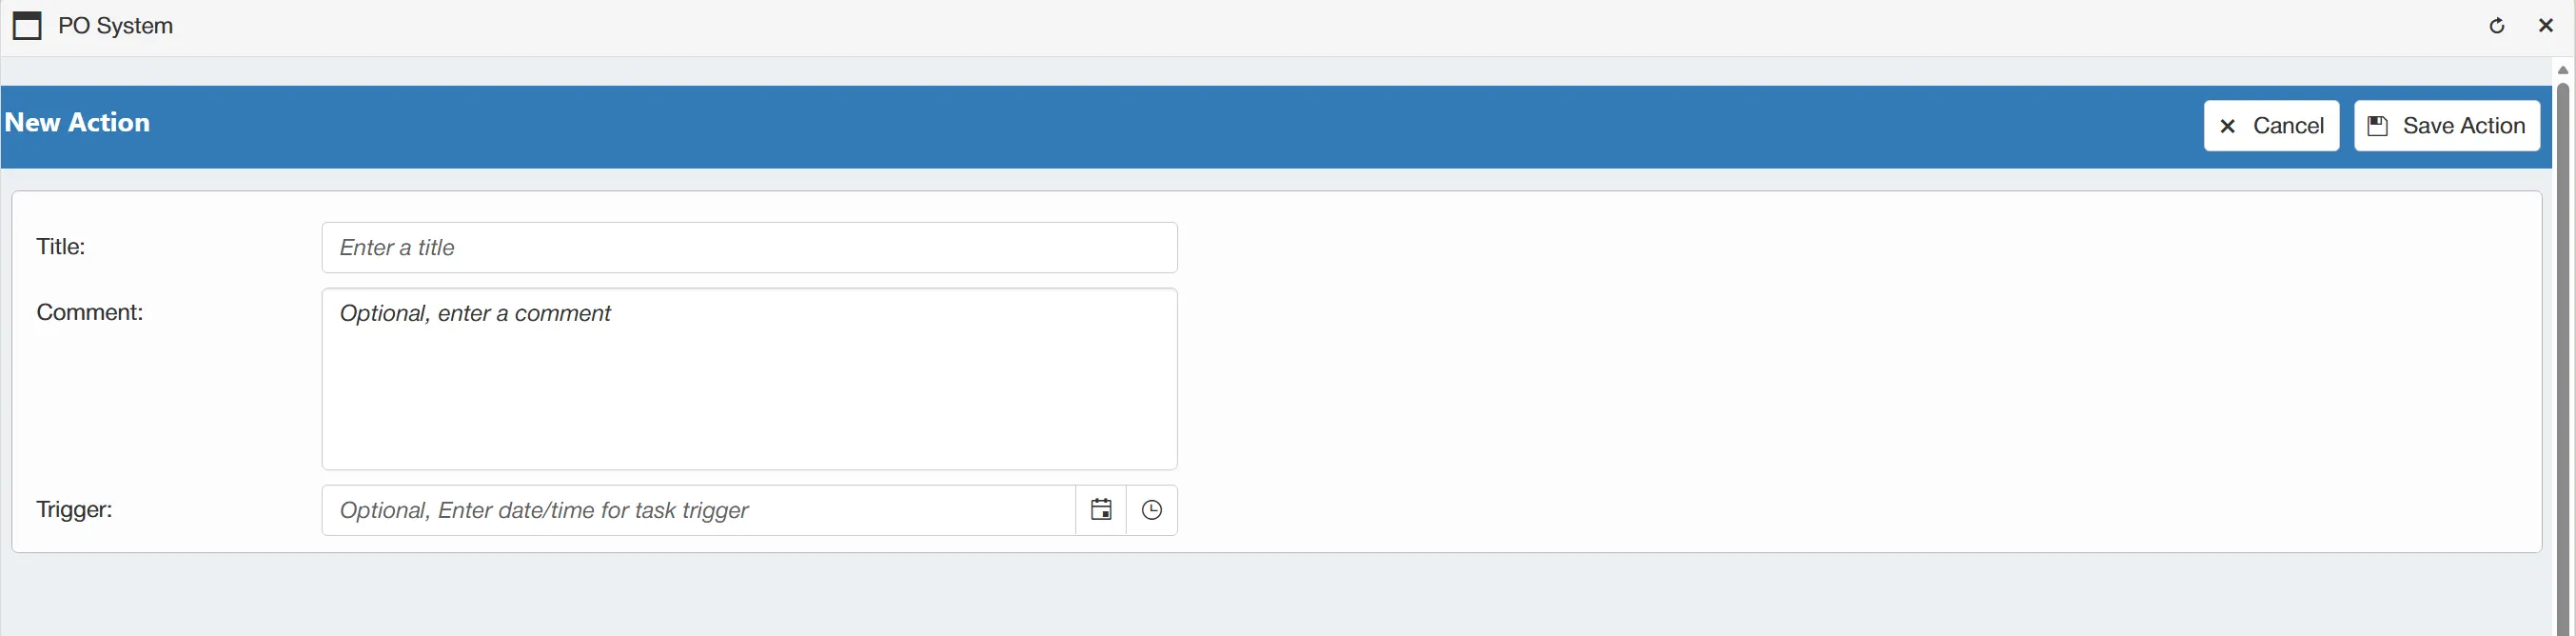
Clicking on this button will take you to a new window where you can specify the action's Title, Comment and Trigger date/time.
Once you are happy with the details, simply click to finalise this.
For information on viewing upcoming actions, click here
Close PO
Users with the PO Admin permission enabled have the ability to manually close a purchase order. This is useful if you require a purchase order to be closed without processing it through the full workflow (for example if you do not require the invoicing stage for this particular PO).
For more information on user permissions, click here.
To manually close a purchase order, simply select from the drop down menu.
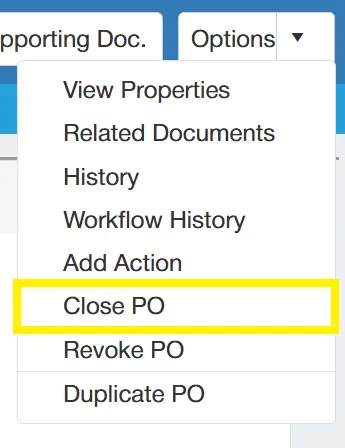
Selecting Close PO will open a new window with fields to complete prior to closing the purchase order.
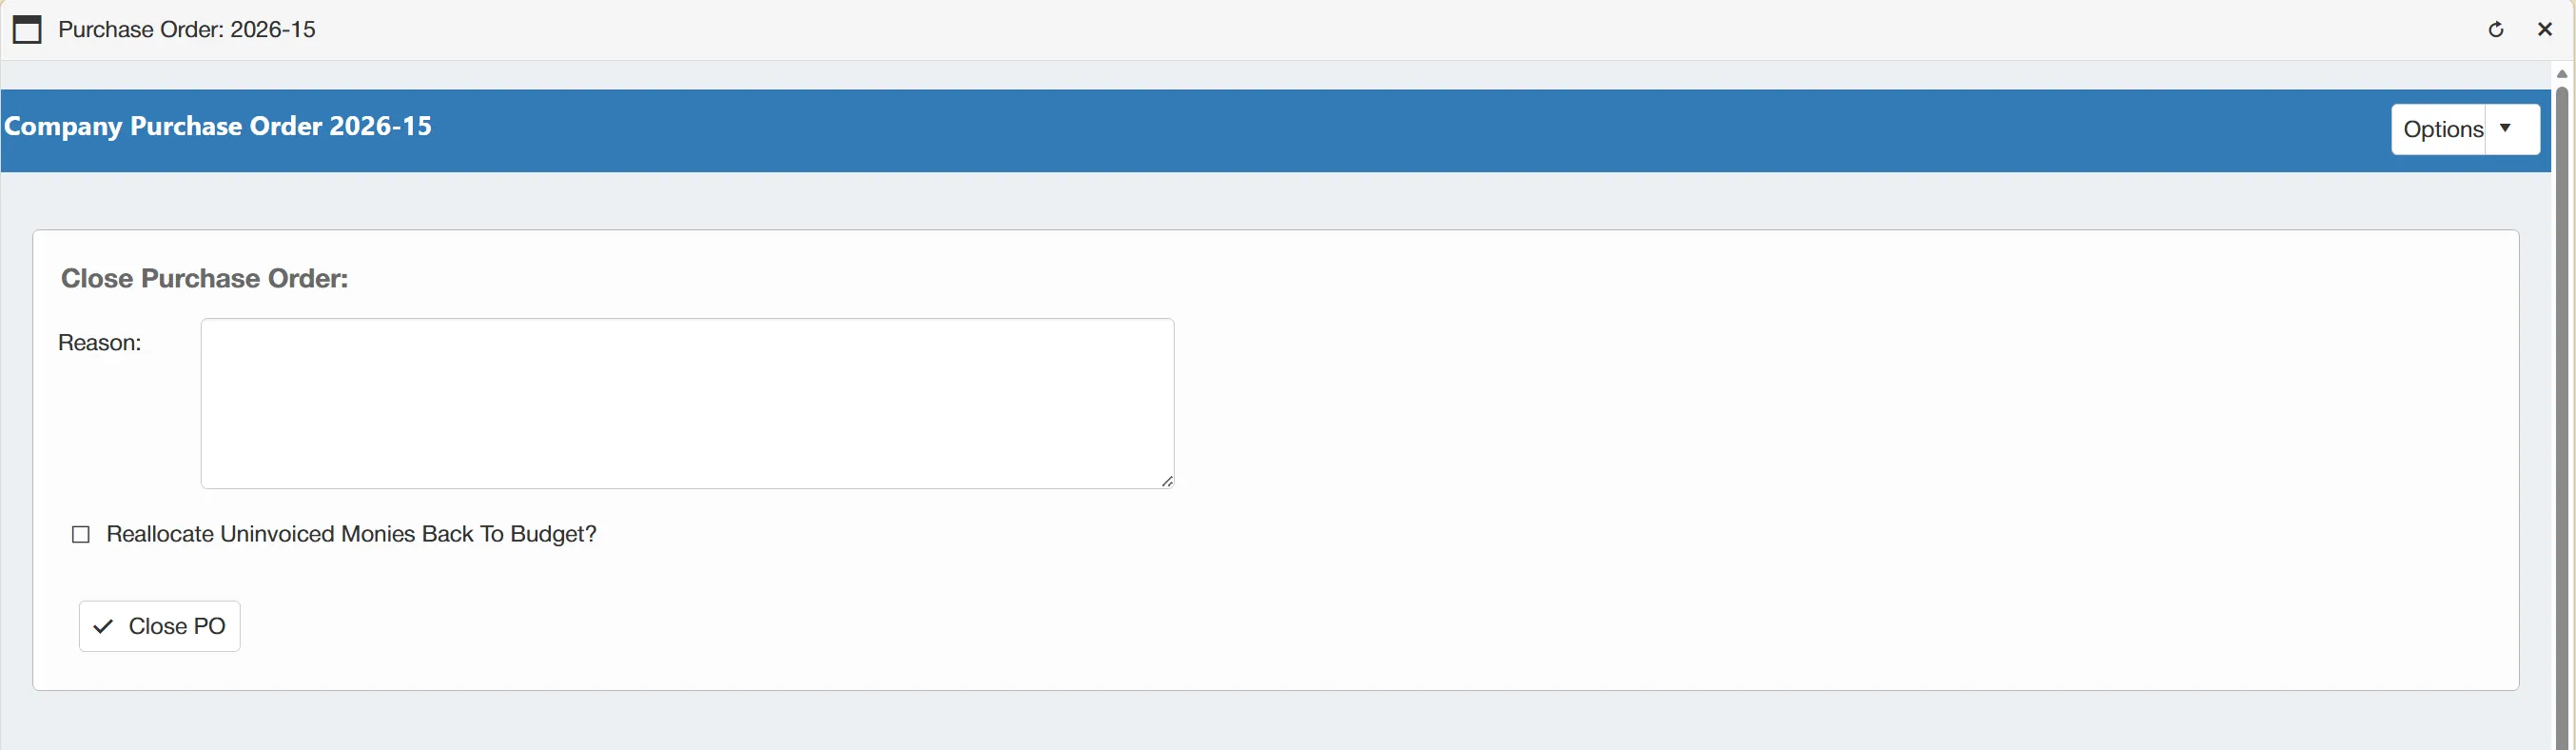
- Reason: Users are asked to provide a reason prior to closing the PO as this is required for audit trail purposes. Users are not able to close the PO without providing the reason.
- ☐ Reallocate Uninvoiced Monies Back To Budget?: Ticking this box ensures that any monies that have not yet been invoiced, will be reallocated back into their respective budgets. This saves the user from having to manually edit the budgets retrospectively. (This is an optional field).
Once you have completed these fields, simply click to close the purchase order.
Revoke PO
Users with the PO Admin permission enabled have the ability to manually revoke a purchase order. This is useful if you need to revoke a PO that has already been sent to the supplier.
For more information on user permissions, click here.
To manually revoke a purchase order, simply select from the drop down menu.
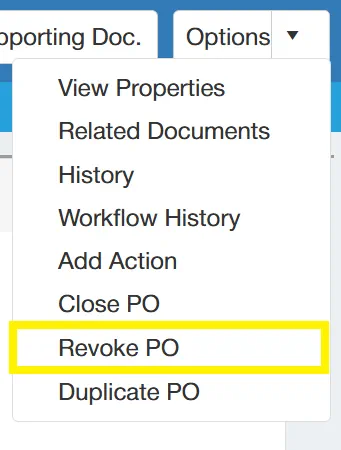
Selecting Revoke PO will open a new window with fields to complete prior to closing the purchase order.
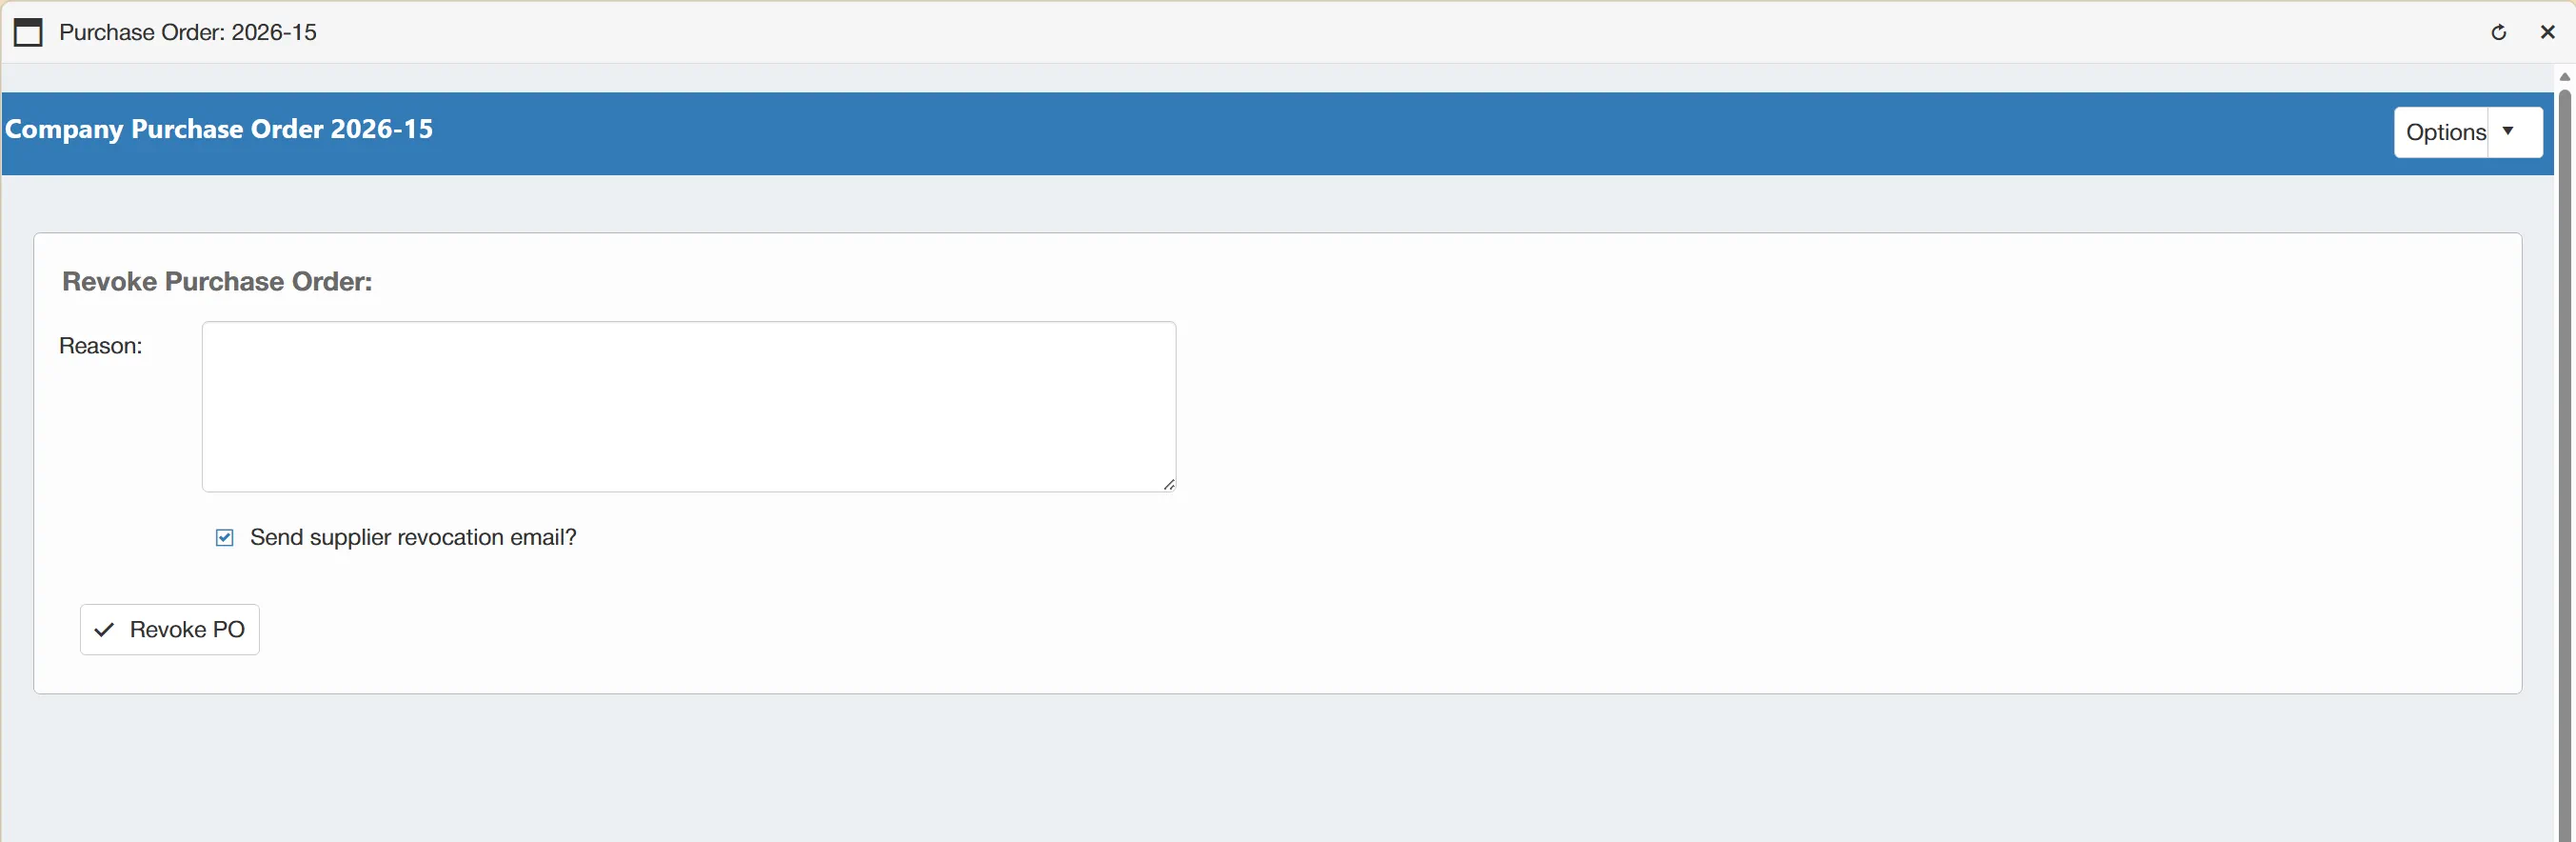
- Reason: Users are asked to provide a reason prior to revoking the PO as this is required for audit trail purposes. Users are not able to revoke a PO without providing the reason.
- ☐ Send supplier revocation email?: Ticking this box ensures that an email is sent to the supplier advising that the purchase order is revoked and therefore no longer valid. This prevents unauthorised spend.
Once you have completed these fields, simply click to revoke the purchase order.
Un-Close PO
Users with the PO Admin permission enabled also have the ability to un-close a purchase order. This is helpful in the event that a PO has been incorrectly closed and you wish to re-open it.
For more information on user permissions, click here.
To Un-Close a PO, simply select from the drop down menu.
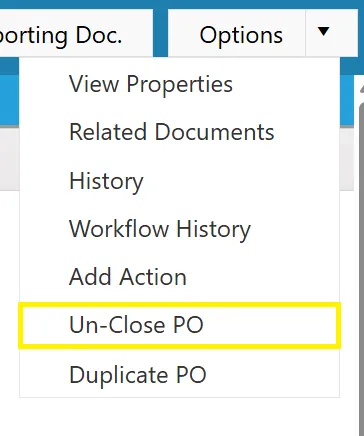
Selecting Un-Close PO will open a new window with fields to complete prior to reopening the purchase order.

- Reason: Users are asked to provide a reason prior to re-opening the PO as this is required for audit trail purposes. Users are not able to Un-Close a PO without providing the reason.
Once you have provided this informaiton, simply click to revoke the purchase order.
Duplicate PO
Users with the PO Creator permission enabled have the ability to duplicate existing purchase orders. This is useful for repeat orders, as it allows you to copy a previous PO and amend it as required.
For more information on user permissions, click here.
To duplicate a purchase order, simply select from the drop down menu.
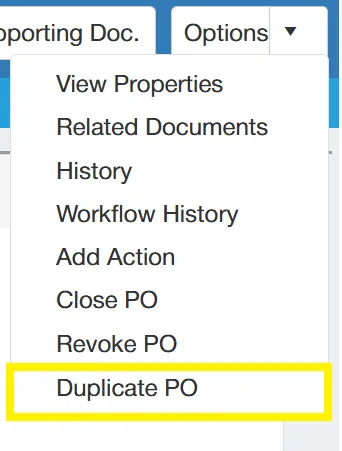
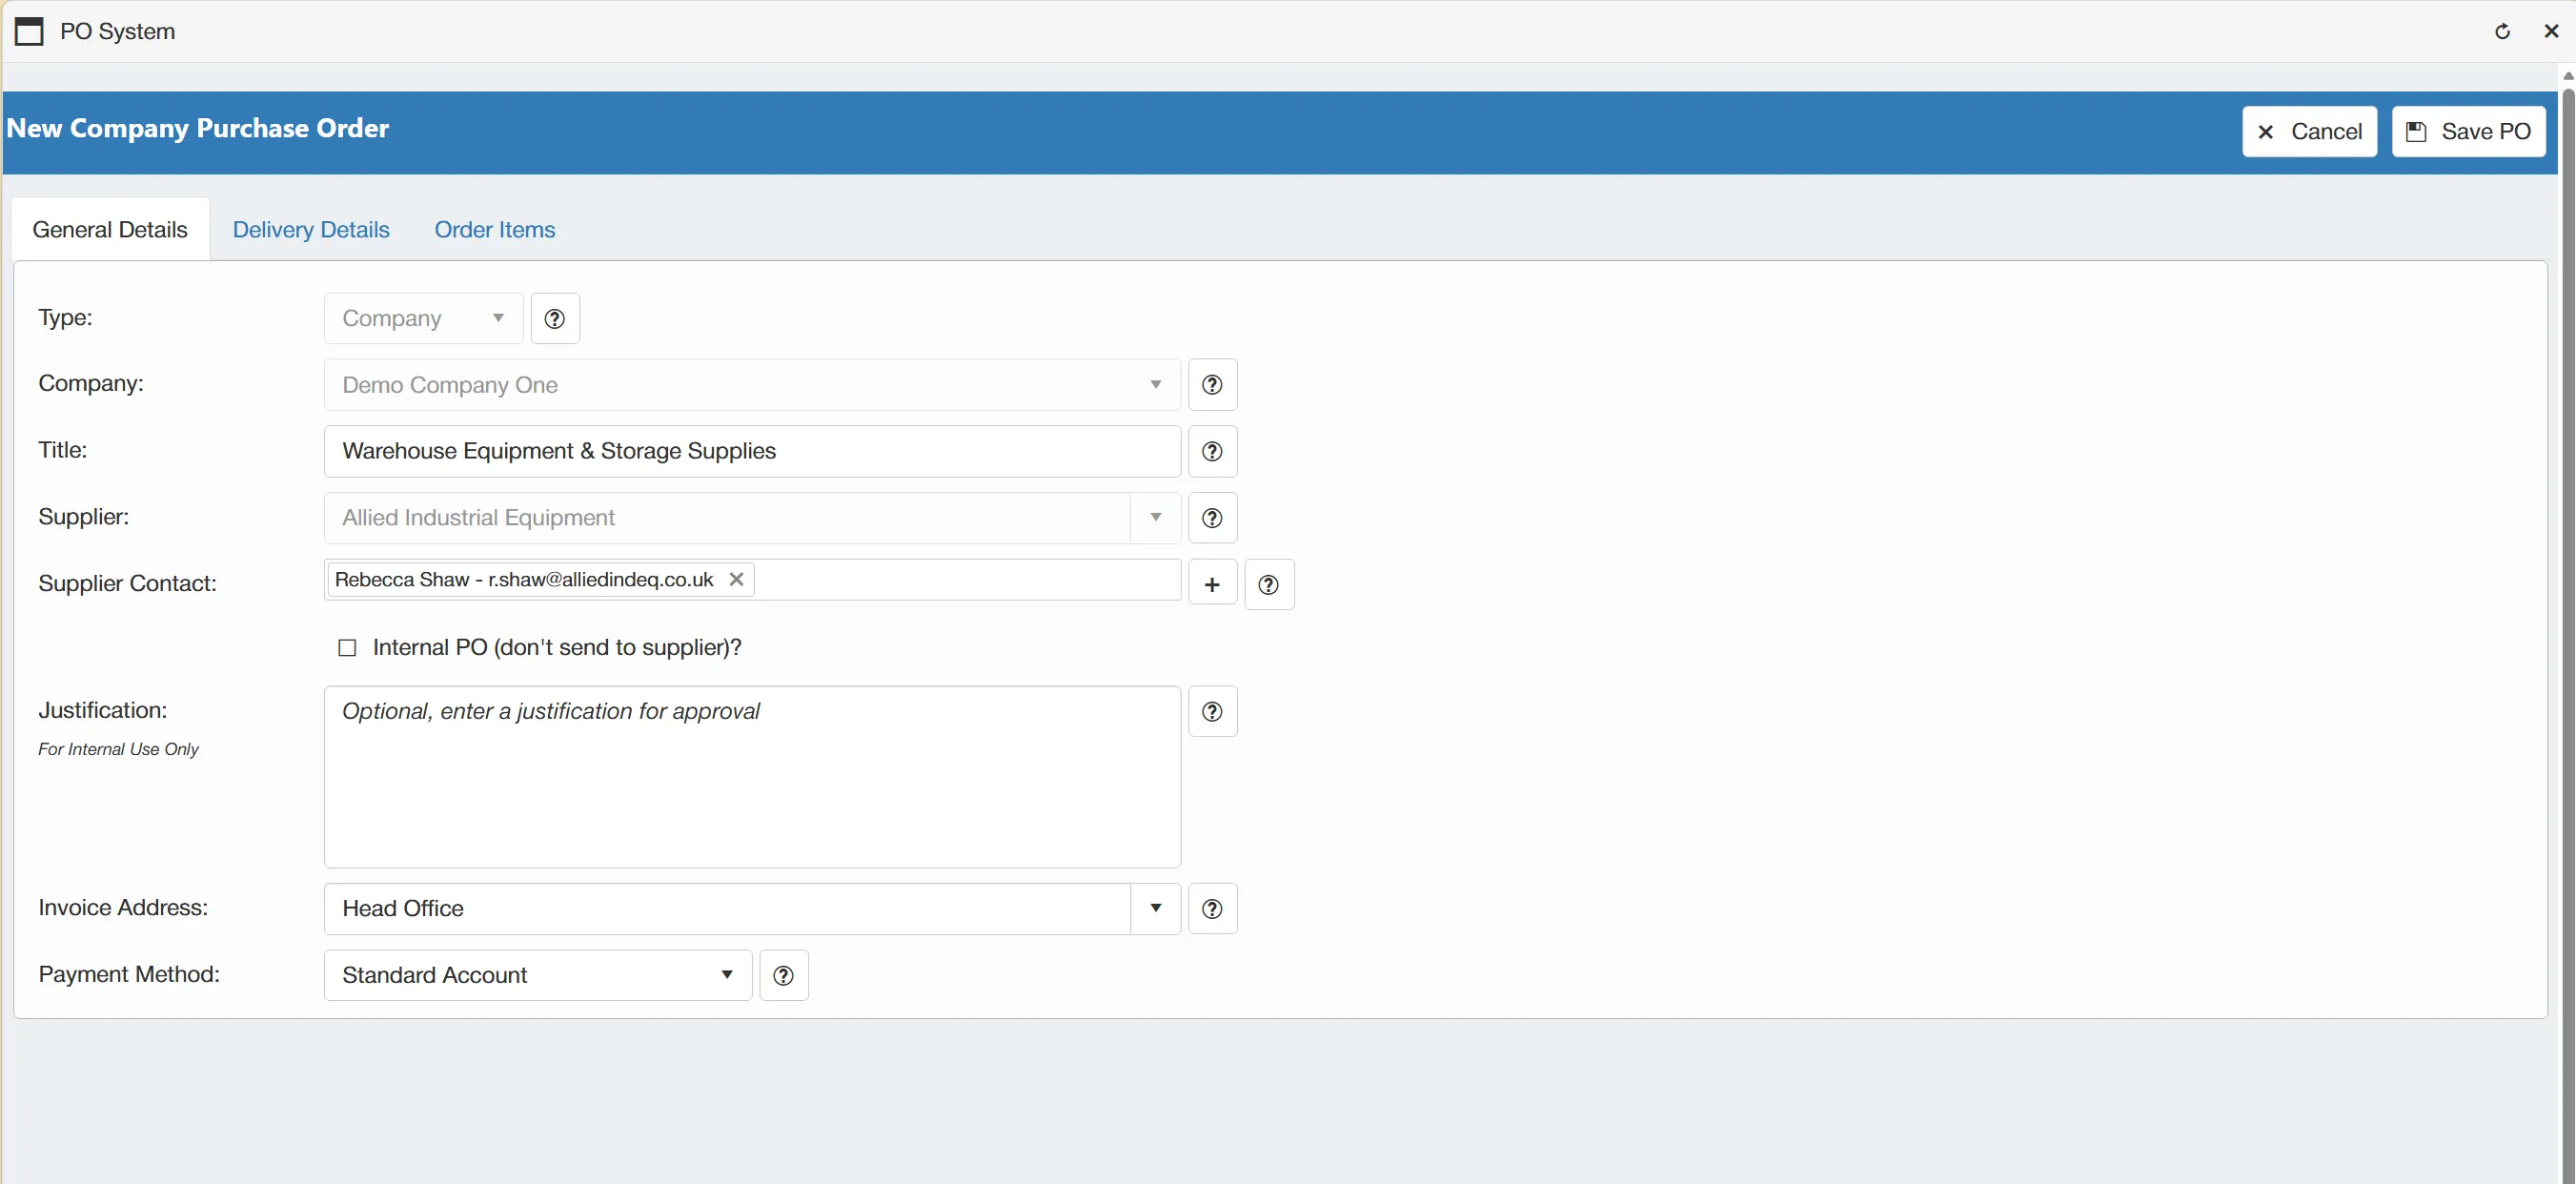
Selecting Duplicate PO opens a new window, similar to the PO creation window, however, the fields are already populated. The information from the original PO has been carried over to this new one.
The item information is also carried over from the original purchase order.
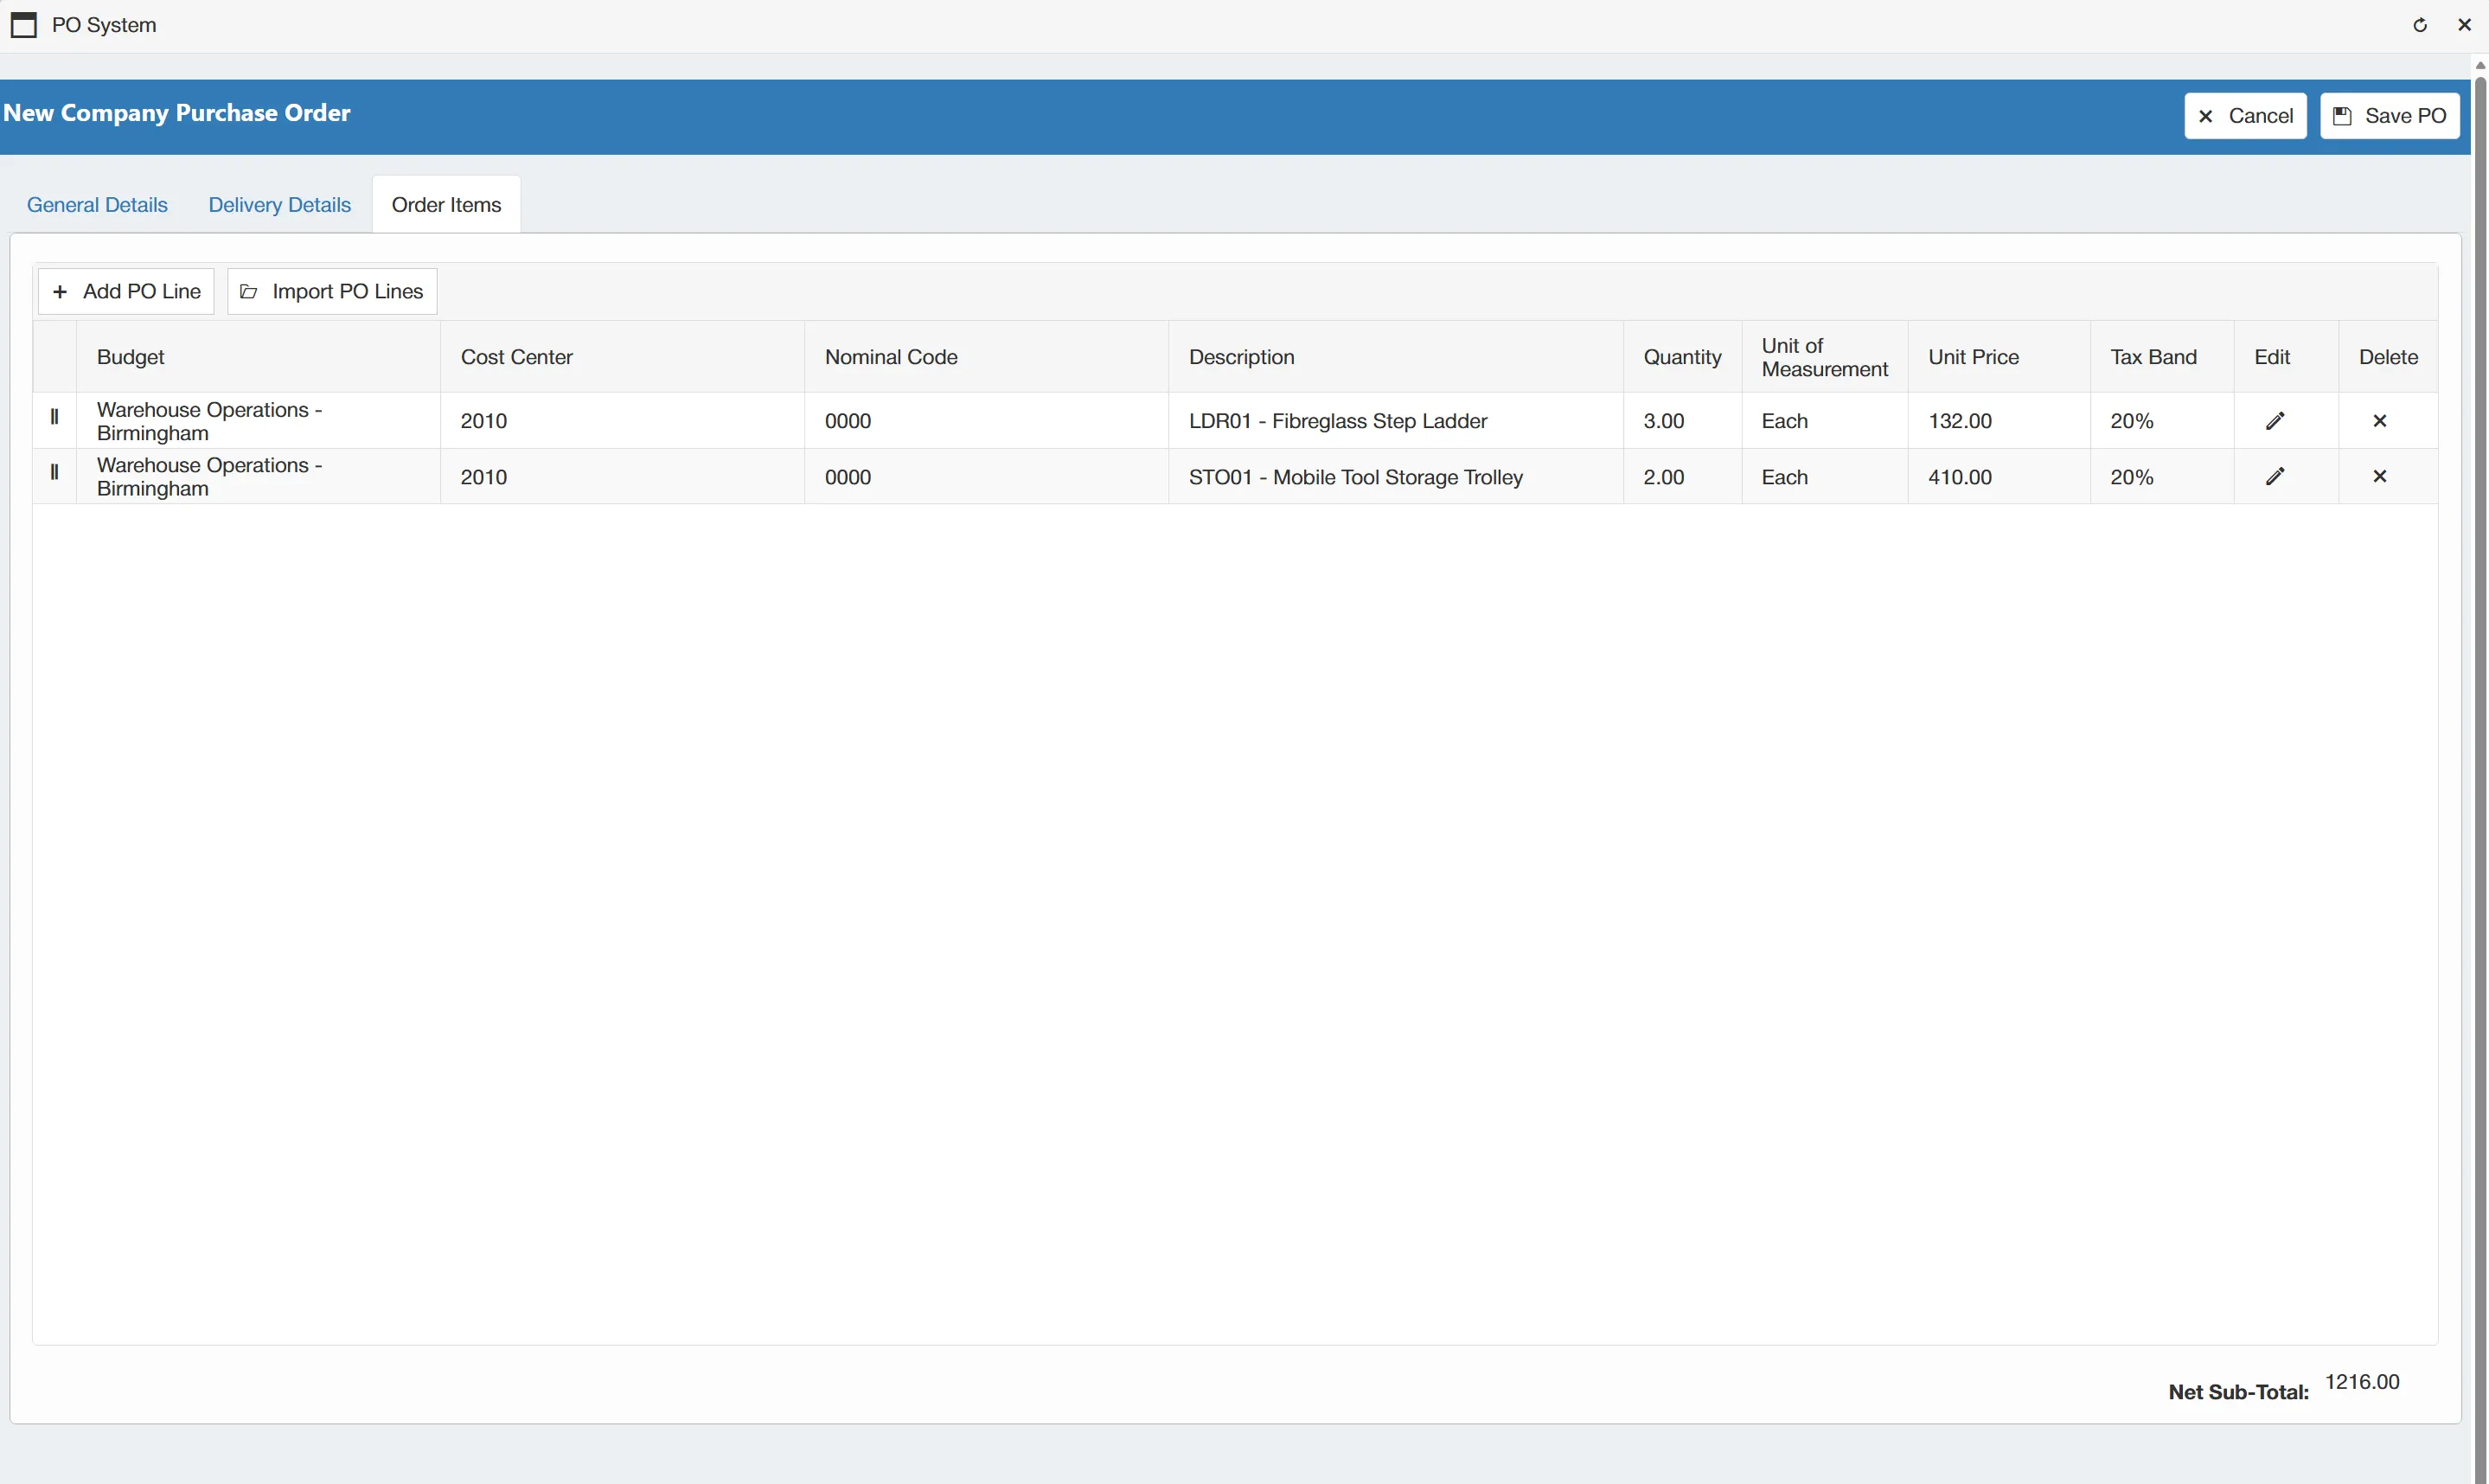
Users can edit any of this information to tailor this version of the purchase order to their needs. For example, they may wish to change the quantity of items or even add new items to the order.
The duplicate purchase order is given a new, unique PO number to ensure that it is differentiated from the original order.
Users can now follow the standard workflow to process this new PO. For more information on purchase order creation, click here
Purchase Order Tasks
There are several Purchase Order related tasks within the system. These are as follows:
- Purchase Order Approval Task
- Rejected Purchase Order Task
- Cancelled Purchase Order Task
- Purchase Order Manual Send Task
Click on the links above for more information on each task.
Purchase Order Approval Task
Click below to watch a video guide on Purchase Order Approval Tasks within the purchase order system:
When a purchase order is submitted for approval, a Purchase Order Approval Task is sent to the designated approver (in line with the approval rules set up in your system).
To view your approval tasks, simply open the My Tasks Grid.
From here, open the Purchase Order Approval task you wish to action. This will take you to the Purchase Order Approval window.
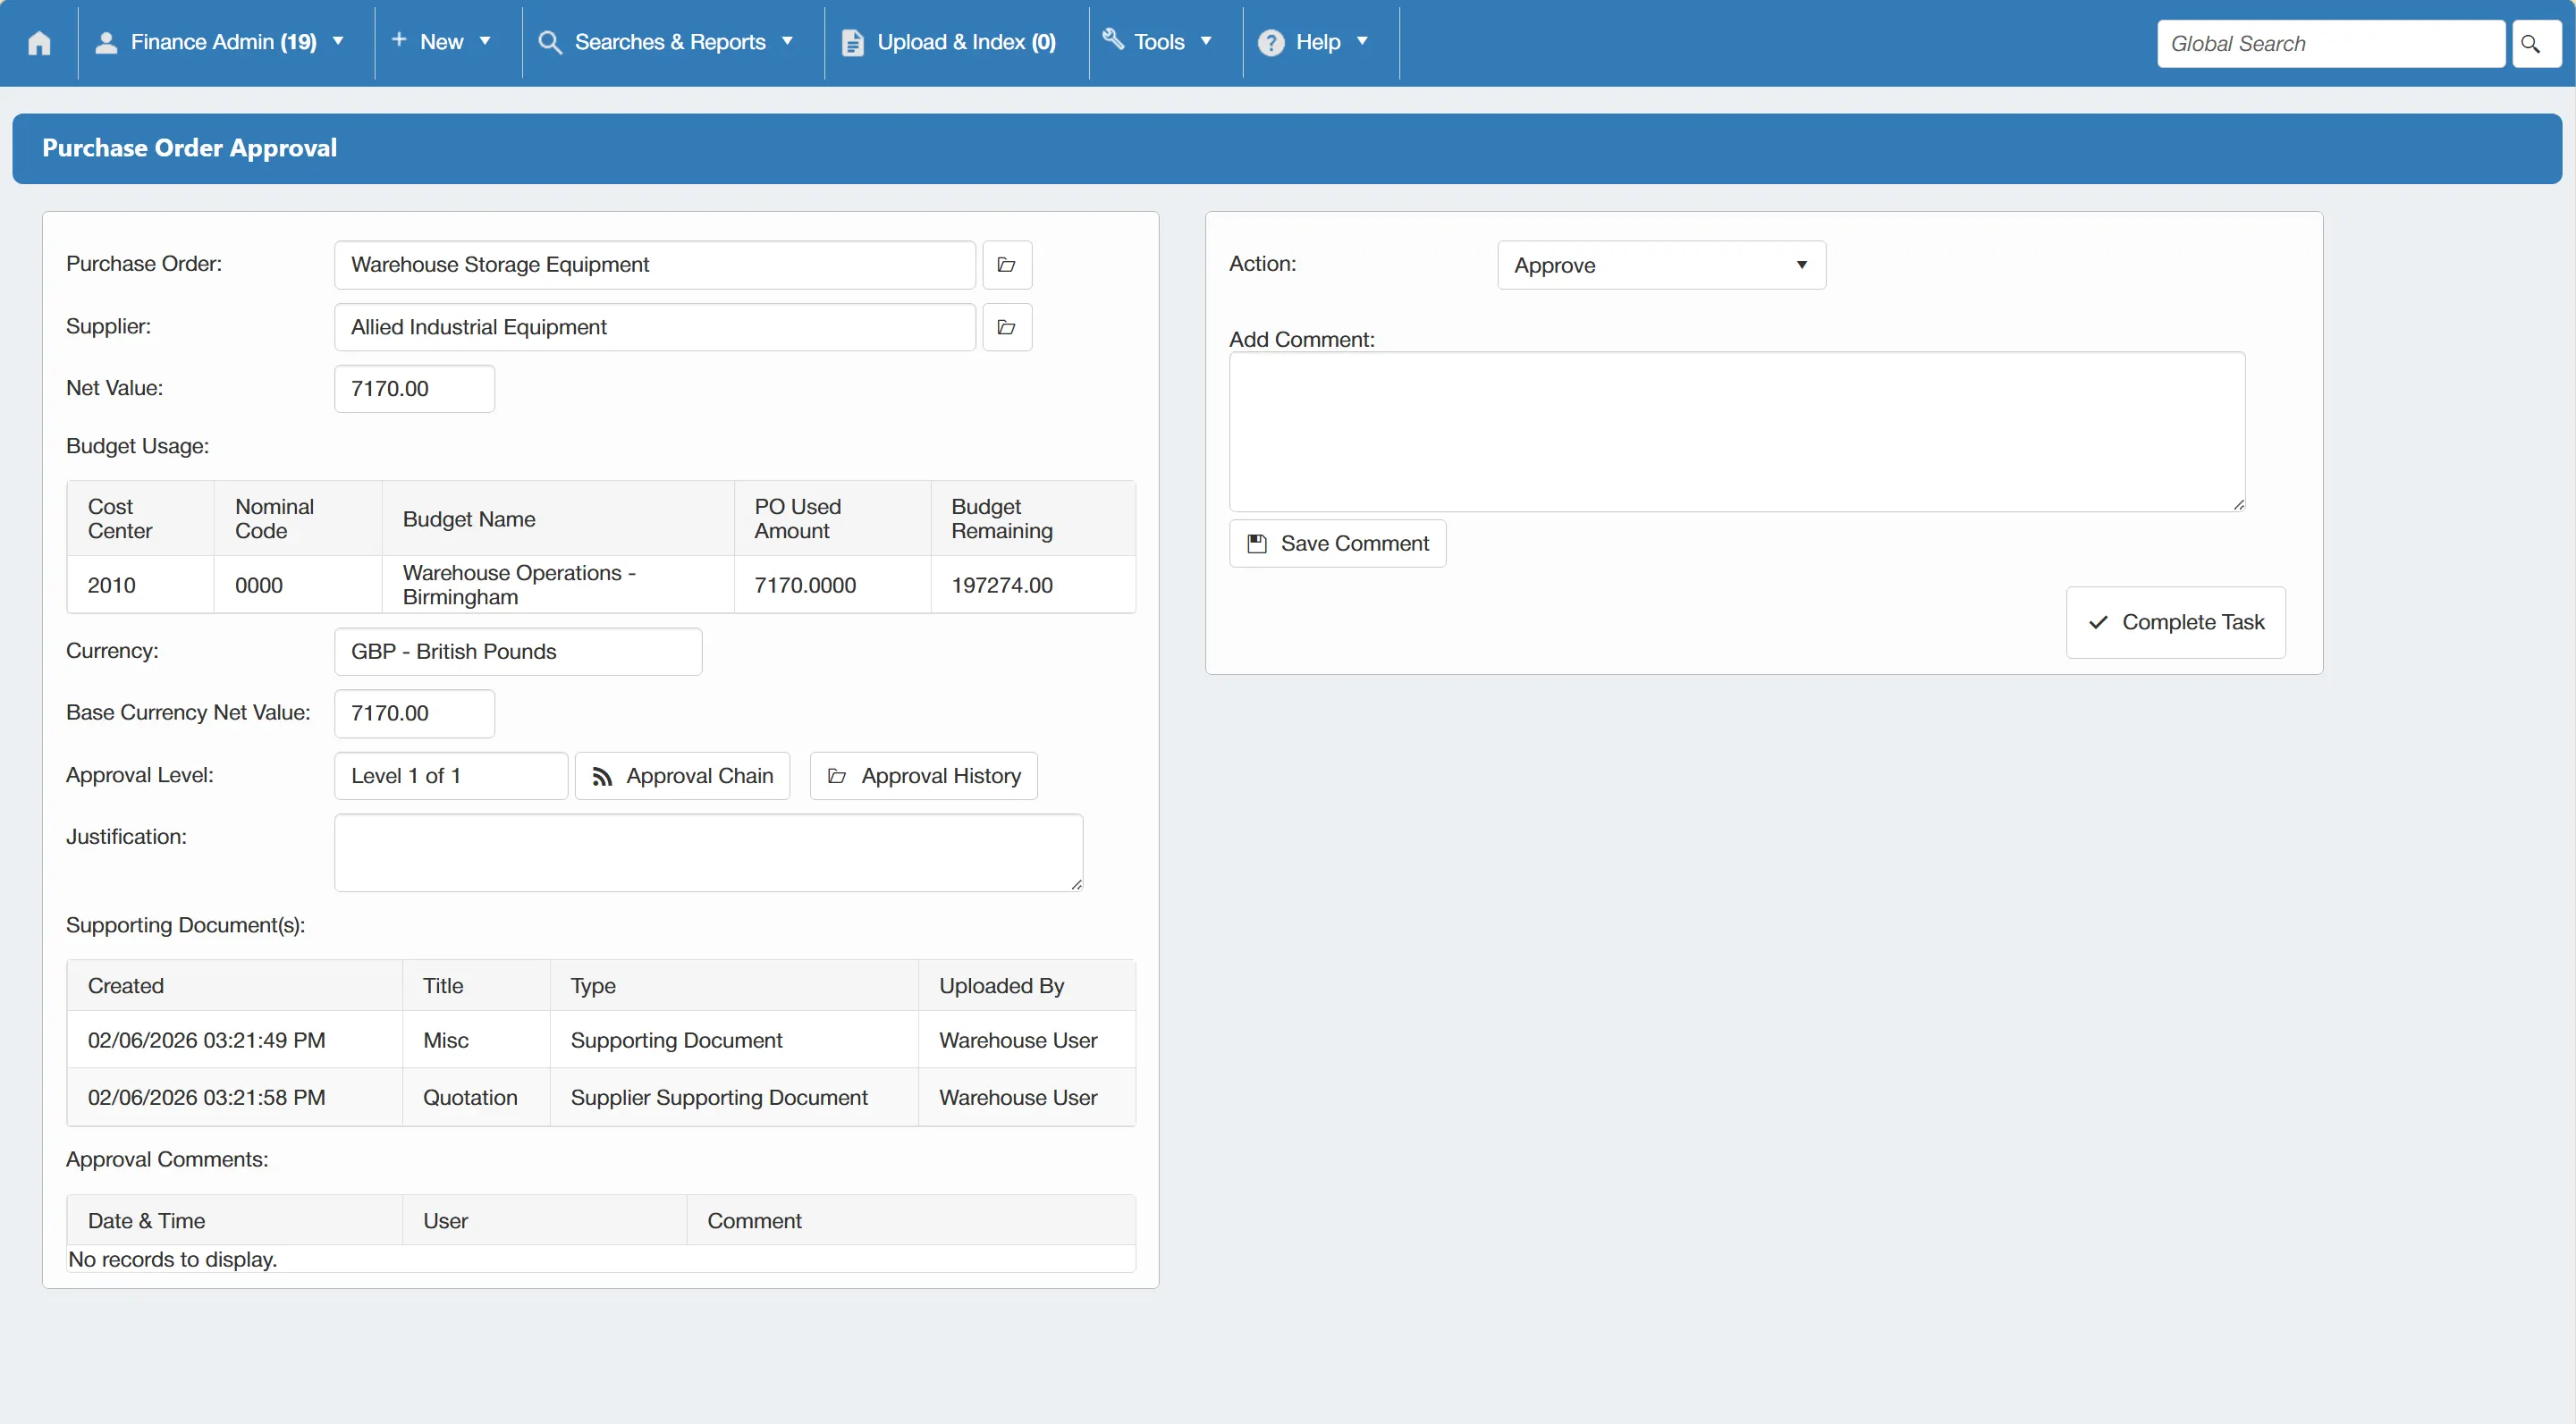
This window is split into two sections:
- On the left, you have the purchase order and relevant budgetary information such as Net Value, Budget Remaining amount, Currency, an internal Justification and any Supporting Documents that accompany the PO such as a quotation.
- On the right, you have your available actions such as; Approve, Reject and Cancel.
You can also view a copy of the purchase order document by clicking on the button at the end of the Purchase Order field.
To action the Purchase Order, simply choose the required action from the drop down box on the right hand side of the window.
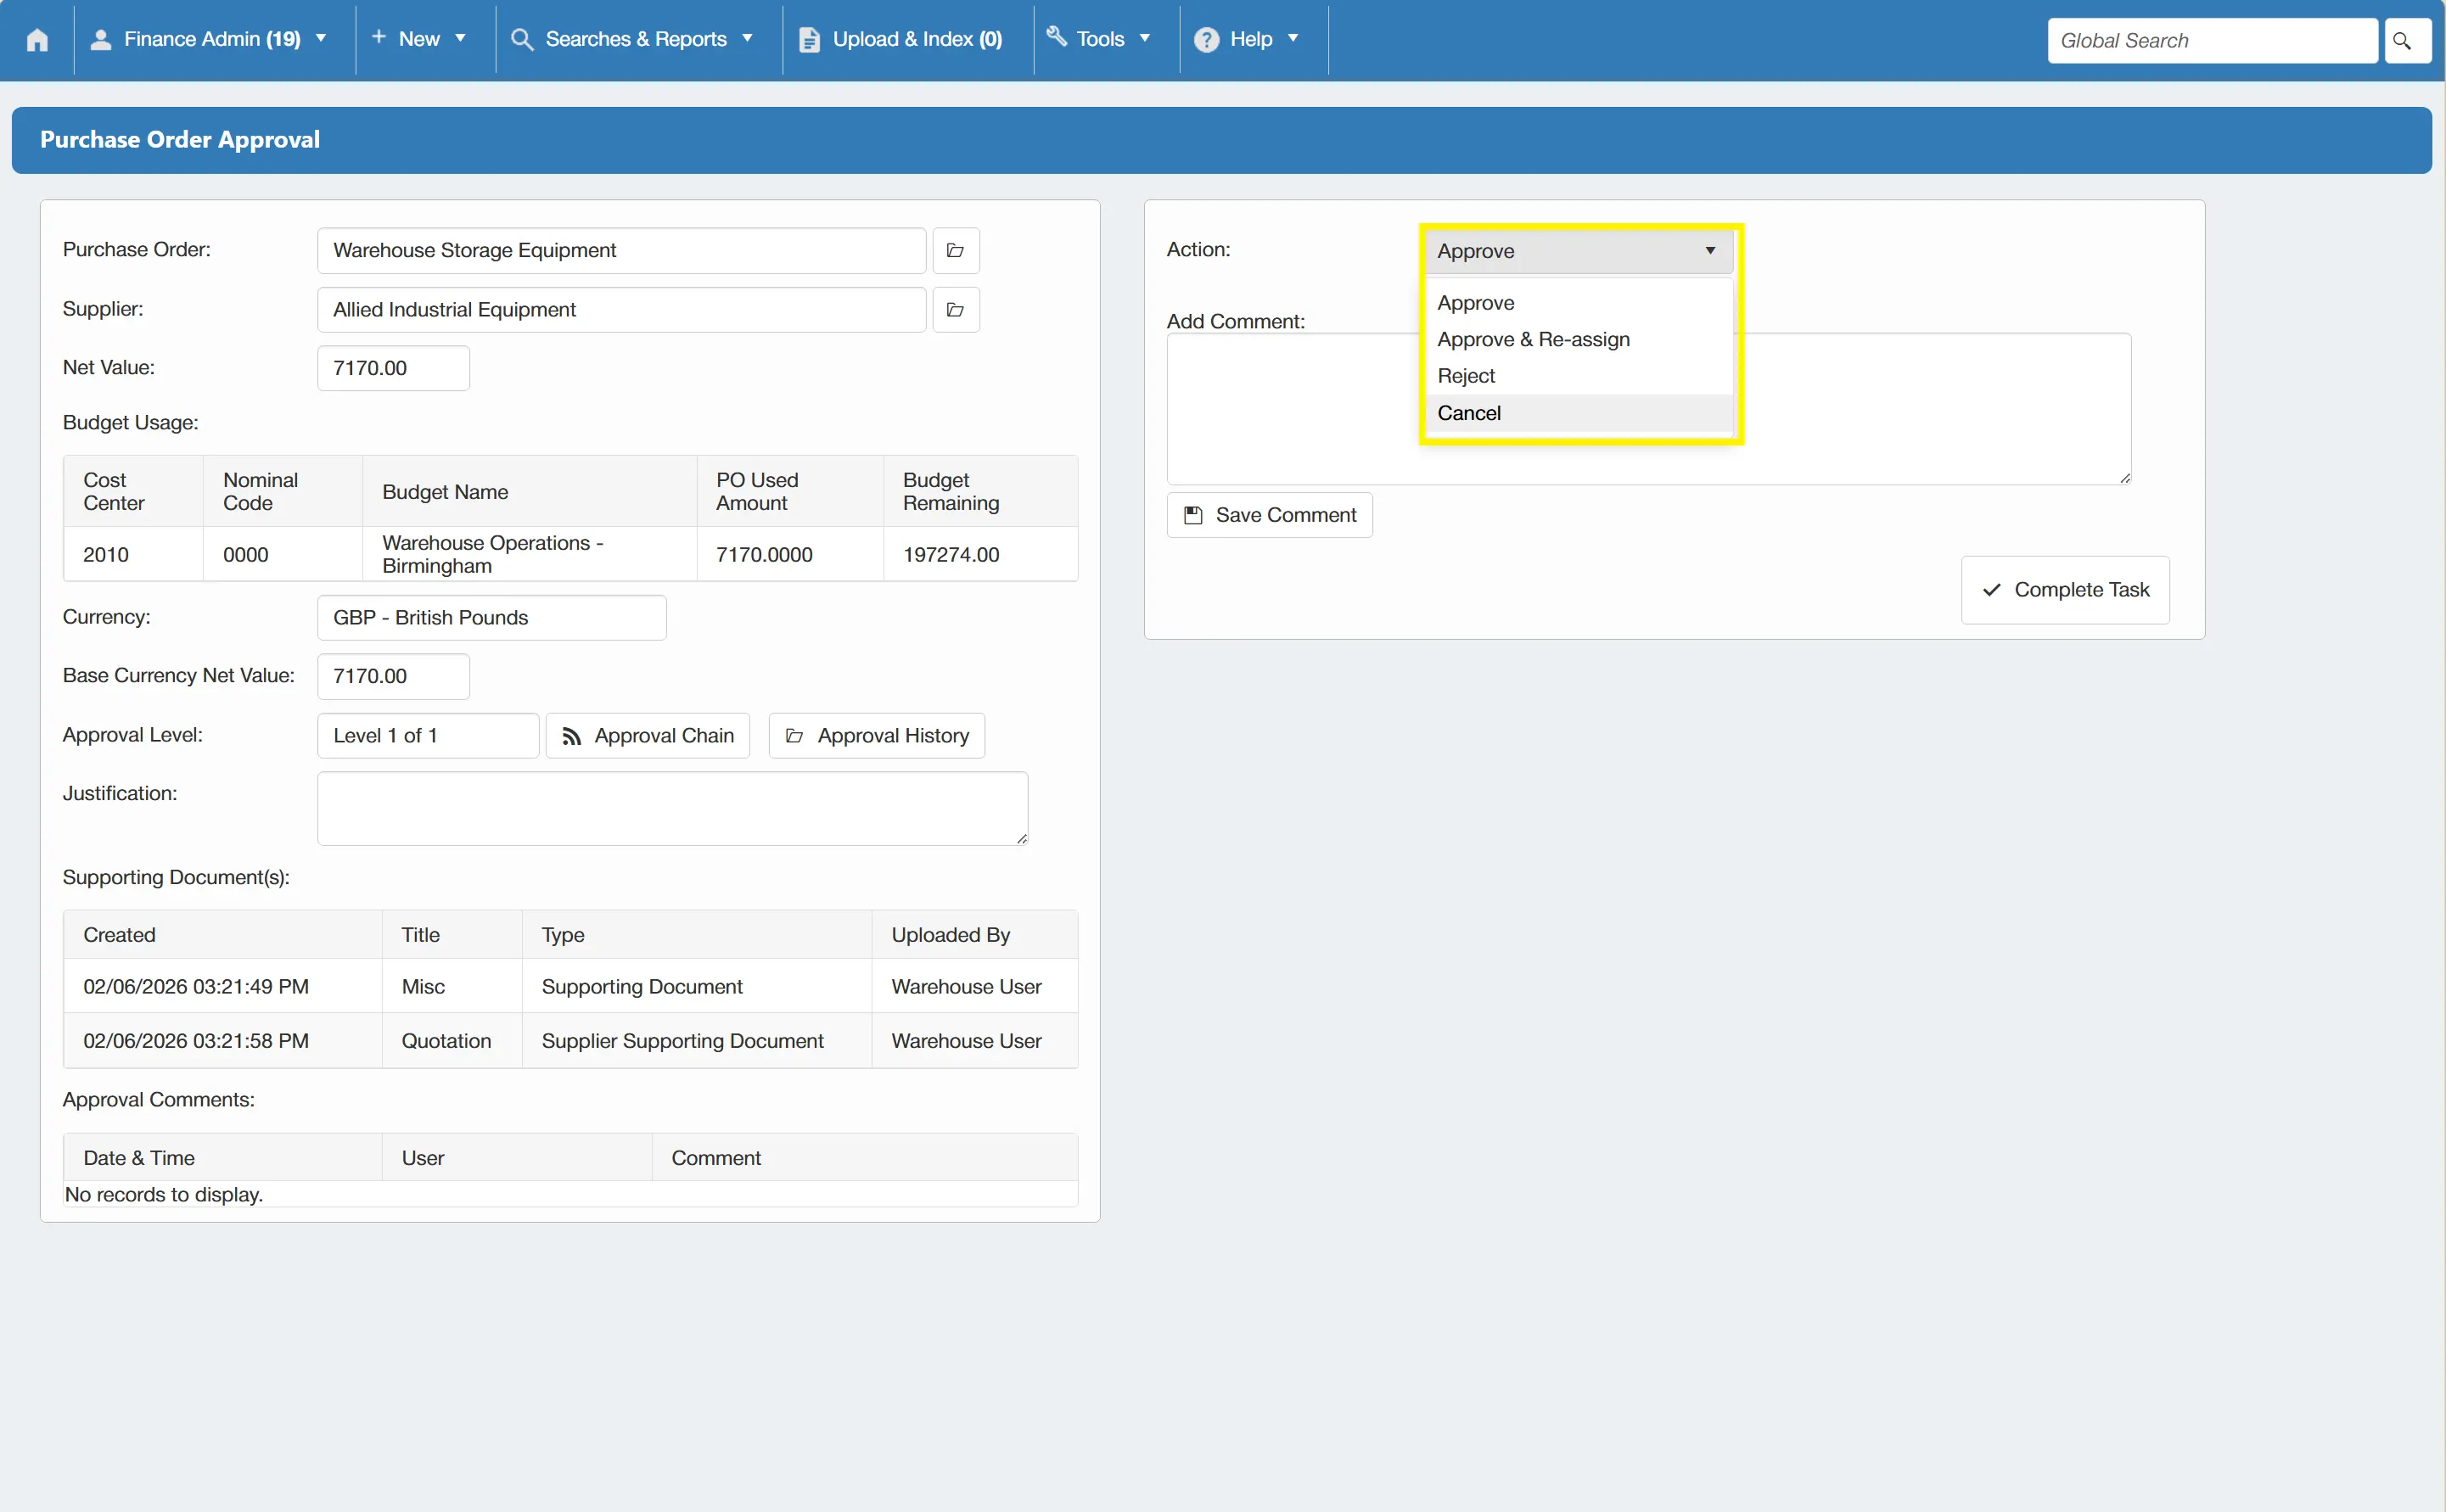
There are four options available when approving a purchase order. They are:
- Approve: This sends the purchase order on to the next level of approval (if applicable) or simply marks the purchase order as Issued if there are no further approval levels.
- Approve & Re-assign: This allows the user to approve the PO but also send it on for another level of approval on an ad-hoc basis. When selecting Approve & Re-assign, the user can then specify the user that they would like to escalate the approval to.
- Reject: This rejects the purchase order and sends it back to the PO Creator. When rejecting a PO, the system asks you to include a comment in the Add Comment box below. This is to ensure that the PO creator understands why the PO is rejected and provides an audit trail.
- Cancel: This marks the purchase order as cancelled and automatically assigns the PO value back to the relevant budgets.
If you add a comment, it will appear in the Approval Comments grid on the left hand side of the approval window.
Only users with the PO Escalate user permission enabled have access to the Approve & Re-assign action. They must also have this user permission enabled to have PO's escalated to them. For more information on user permissions, click here.
Once you have chosen your action and added any comments (if required), simply click .
Rejected Purchase Order Task
When a purchase order is rejected, a Rejected Purchase Order task is sent to the PO creator.
To view your tasks, simply open the My Tasks Grid.
From this grid, open the Rejected Purchase Order task that you wish to action. This will take you to the Rejected Purchase Order window.
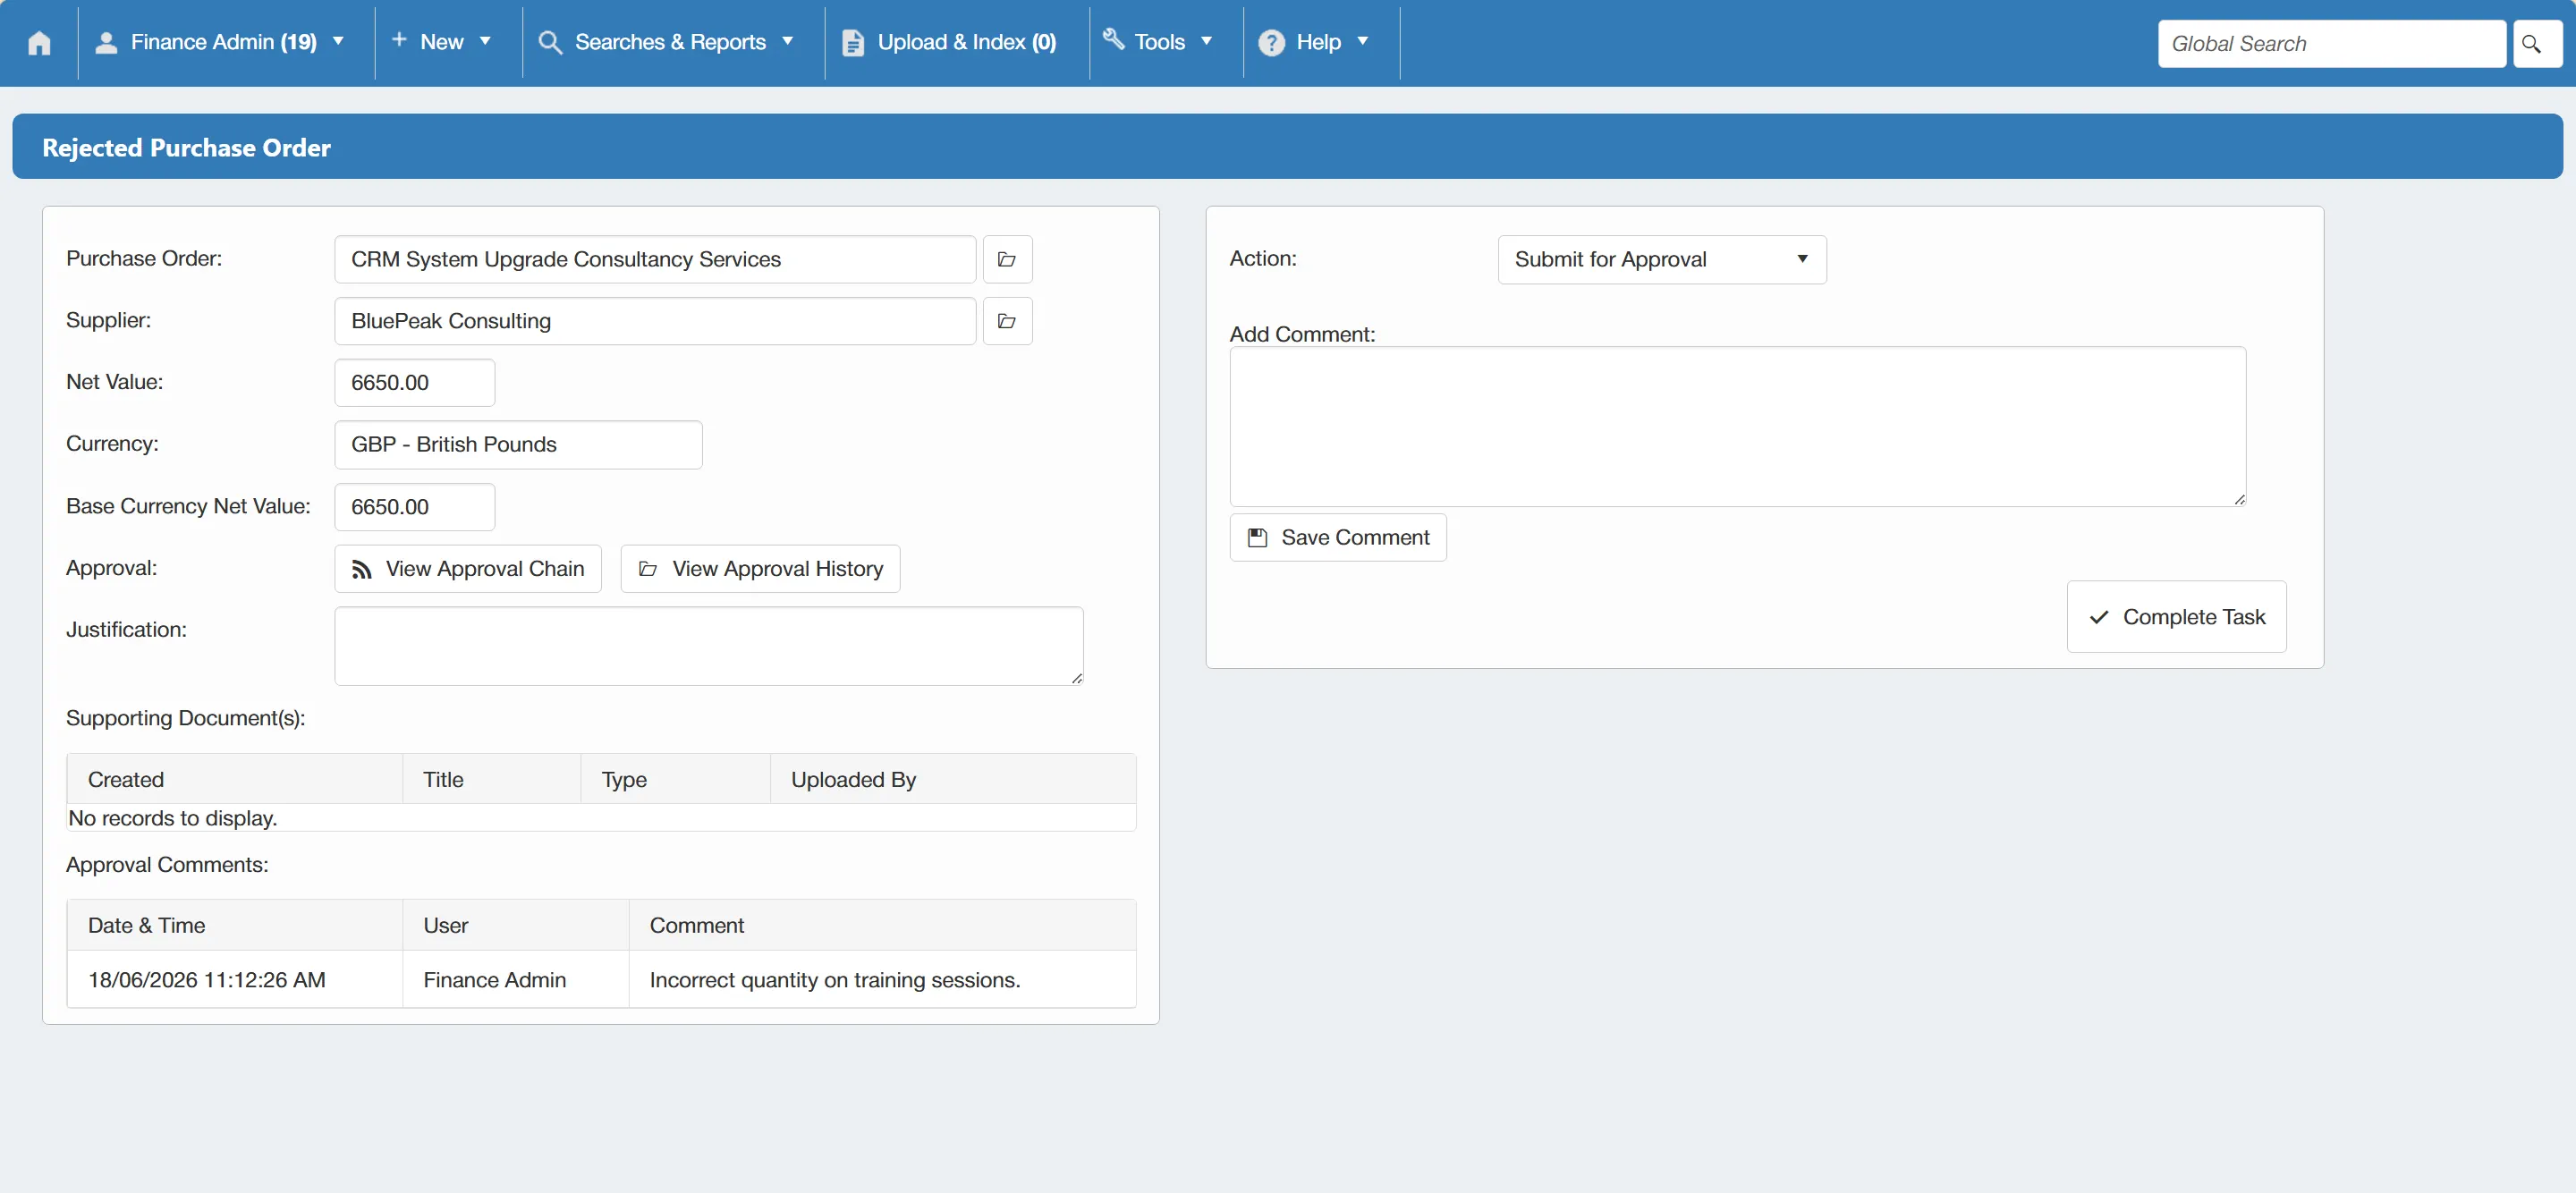
Similarly to the Purchase Order Approval task, the Rejected Purchase Order task is laid out in two sections:
- On the left, you have the purchase order details along with Net Value, Currency, Approval History, Justification, Supporting Documents and Approval Comments.
- On the right, you have your available actions such as; Submit for Approval and Cancel.
You can also view a copy of the purchase order document by clicking on the button at the end of the Purchase Order field.
The Approval Comments are key to this task as they will give the user an indication as to why the purchase order was rejected.
To action the Rejected Purchase Order, simply choose the required action from the drop down box on the right hand side of the window.
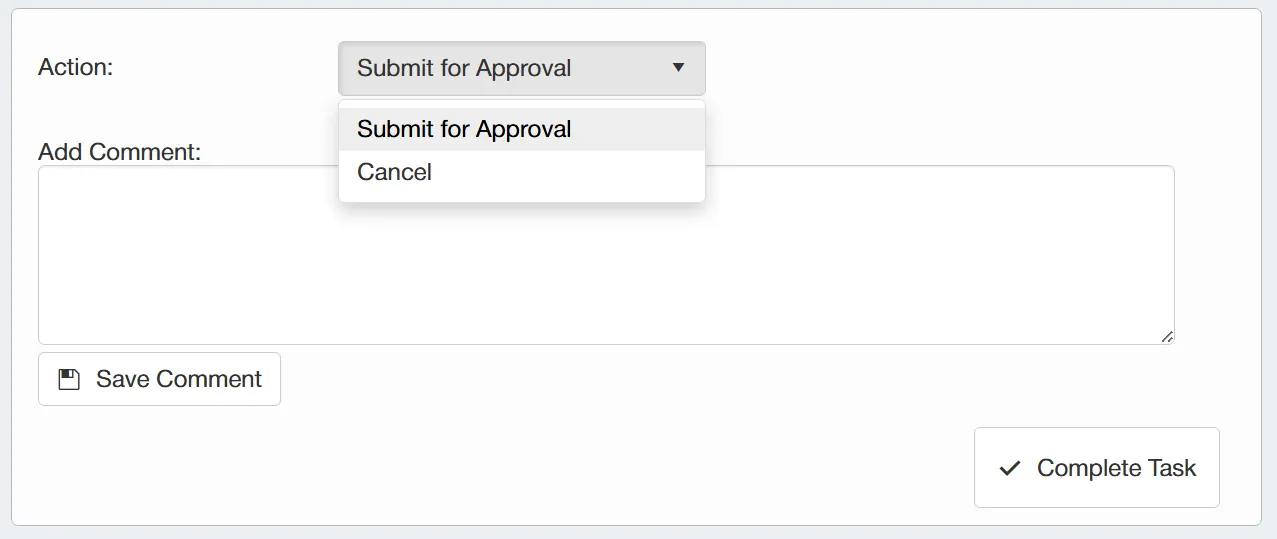
There are two options available when approving a purchase order. They are:
- Submit for Approval: This allows you to re-submit the purchase order for approval.
- Cancel: This allows you to cancel the purchase order and automatically re-assign the values back to their respective budgets.
Before re-submitting the purchase order you may want to edit it (for example, if you have obtained a better rate from the supplier), to do this, simply click on the button at the end of the Purchase Order field. This takes you to the purchase order. From there you can edit the purchase order accordingly.
Once you have chosen your action and added any comments (if required), simply click .
Cancelled Purchase Order Task
If you cancel a purchase order, you will receive a Cancelled Purchase Order task.
To view your tasks, simply open the My Tasks Grid.
From this grid, simply open the Cancelled Purchase Order task that you wish to view. This task acts as a notification that the purchase order has been cancelled.
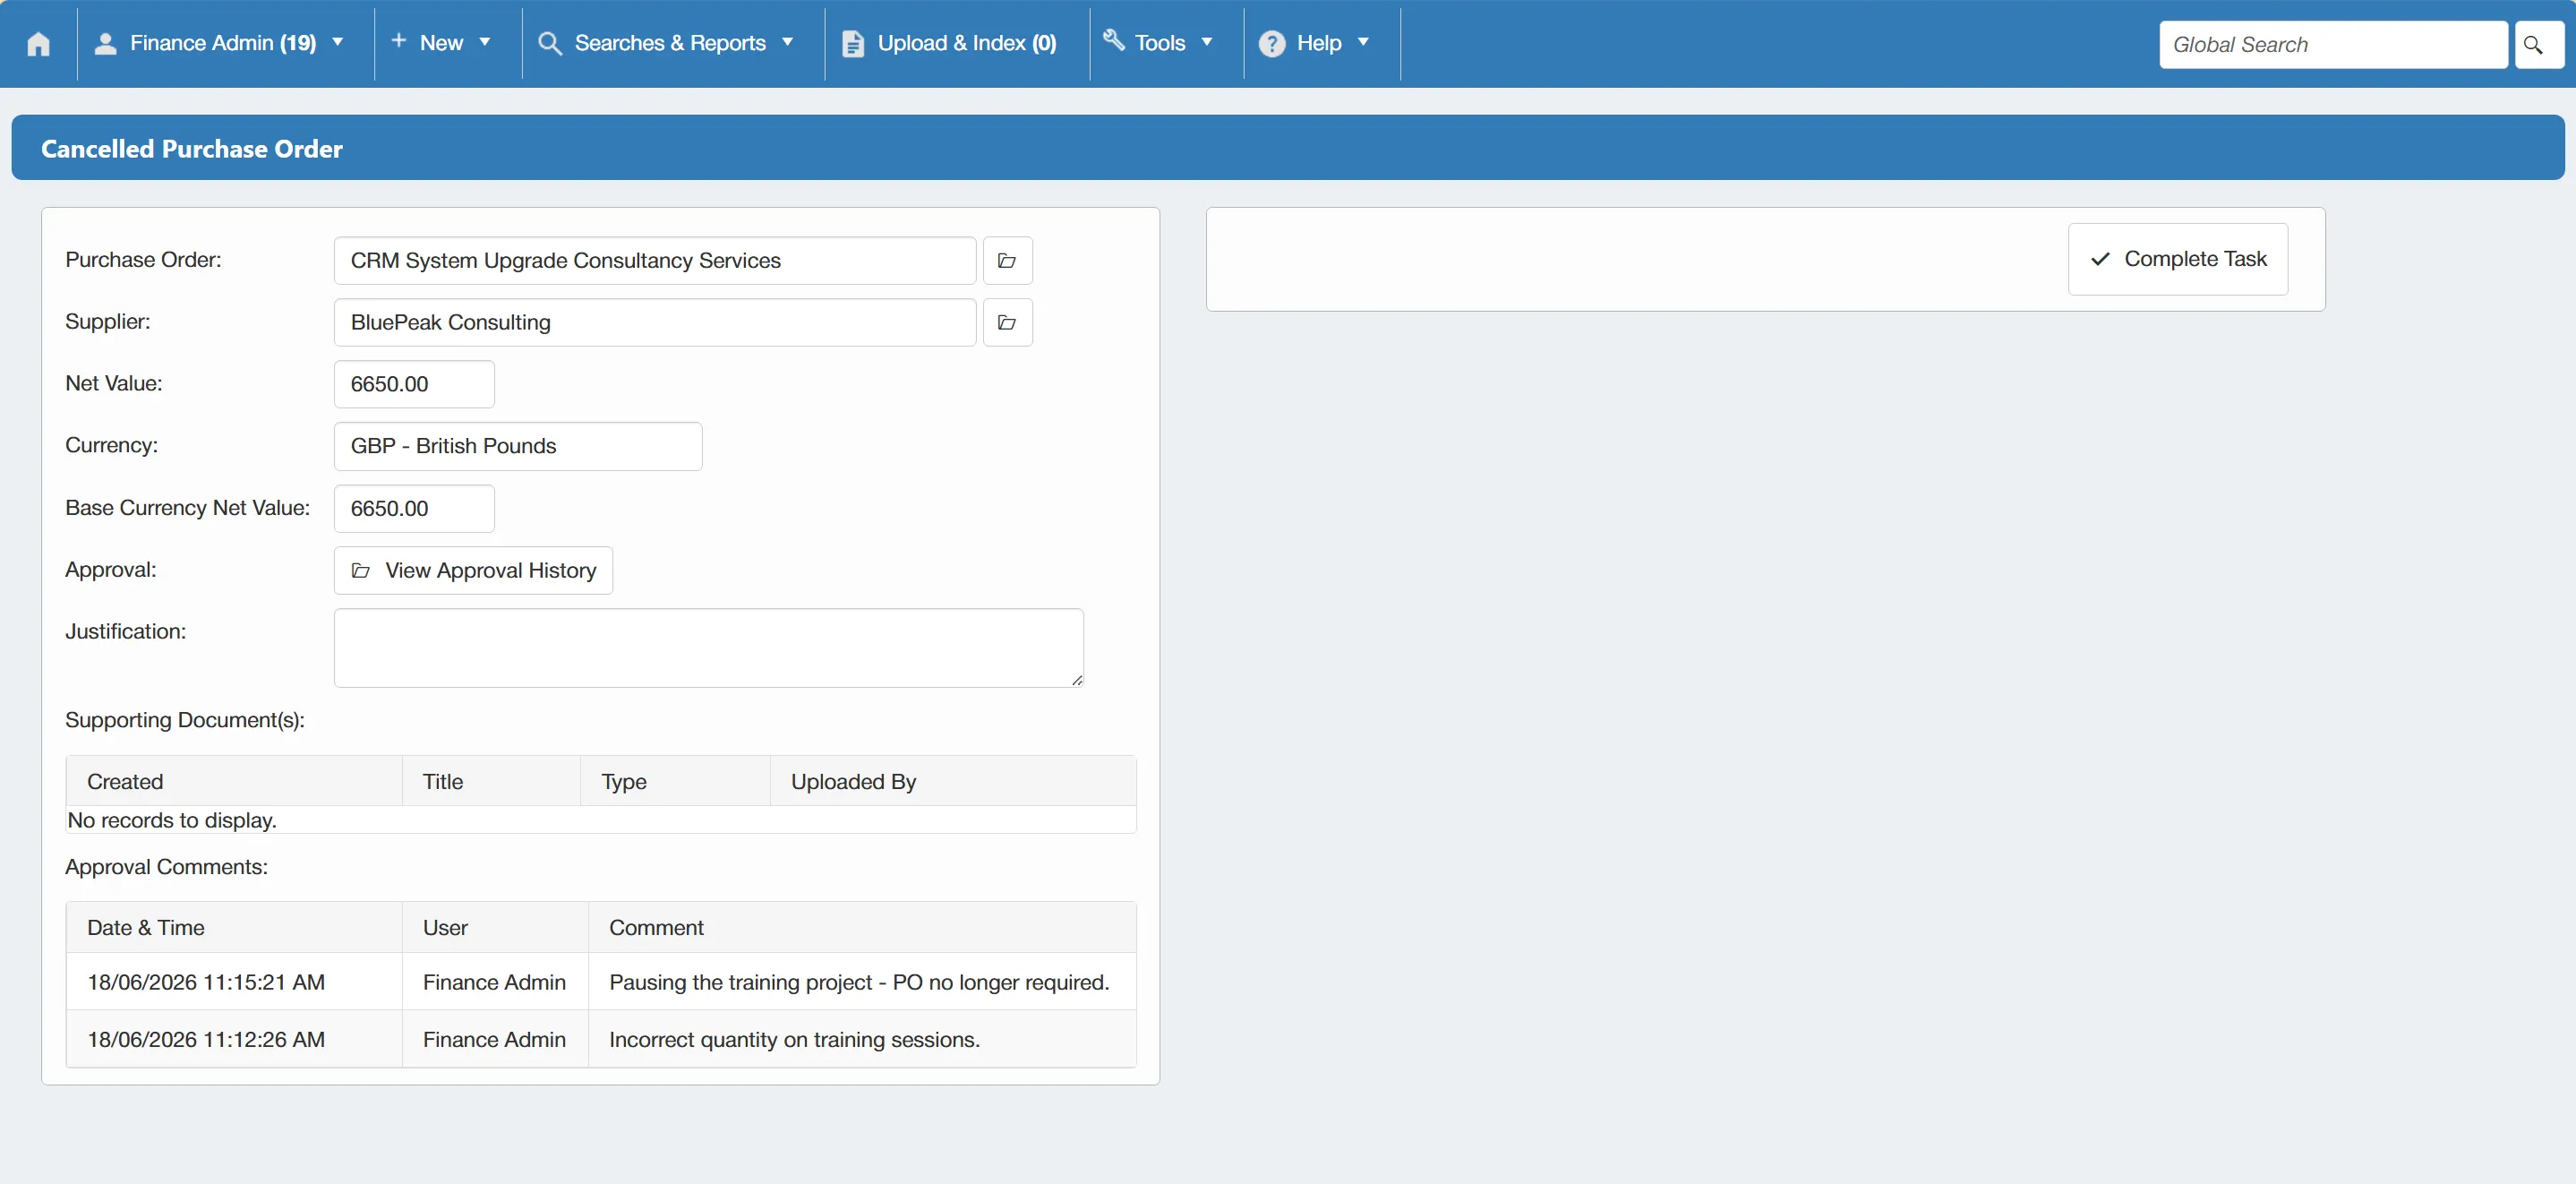
Similarly to the previous tasks, the Cancelled Purchase Order task is laid out in two sections:
- On the left, you have the purchase order details along with Net Value, Currency, Approval History, Justification, Supporting Documents and Approval Comments.
- On the right, you have the available actions. In this task, there is only one available action which is .
Completing this task simply removes it from your task list as the purchase order itself has already been assigned the Cancelled status.
Purchase Order Manual Send Task
When a purchase order is approved and no further approval is required, it will typically be sent directly to the supplier (providing there is an email address available and the Internal PO (don't send to supplier)? box has not been ticked).
However, in instances where no email address is available for the supplier or this box has been ticked, the system will generate a Purchase Order Manual Send task which will be sent to the PO creator.
To view your tasks, simply open the My Tasks Grid.
From this grid, simply open the relevant Purchase Order Manual Send task.
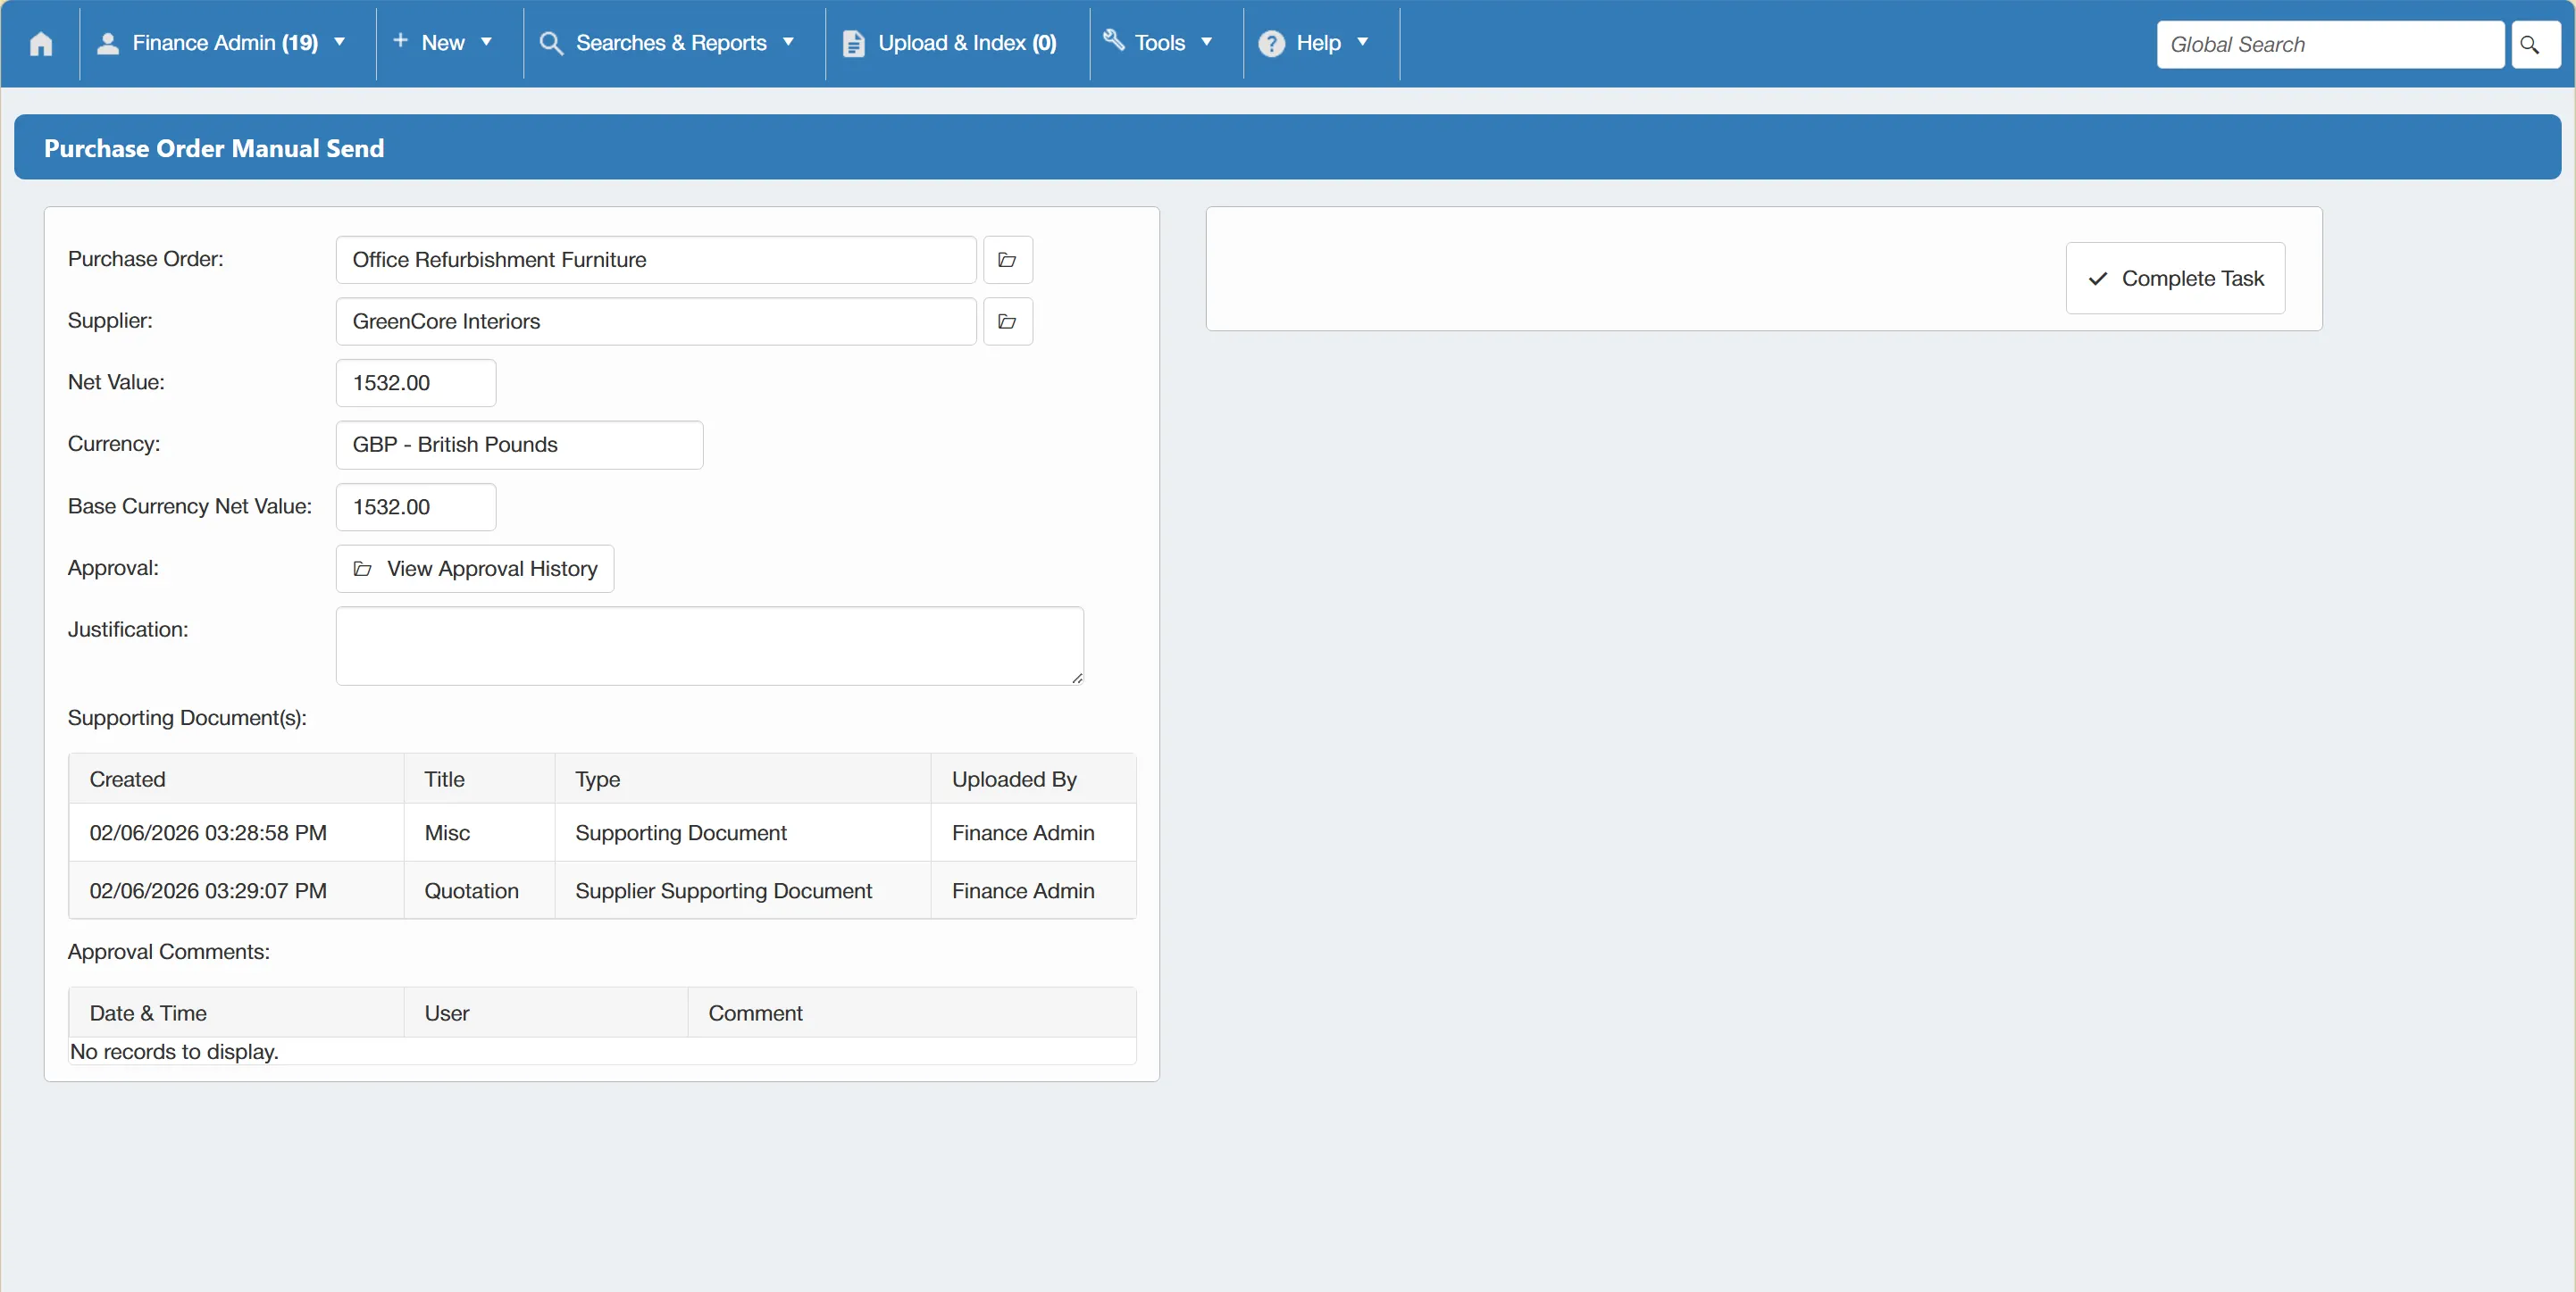
The task is laid out in two sections:
- On the left, you have the purchase order details along with Net Value, Currency, Approval History, Justification, Supporting Documents and Approval Comments.
- On the right, there are fields to add Supplier Contact details for future purchase orders.
Adding supplier contact details on this task will not automatically send this purchase order to the supplier, you would still need to do this manually.
If you wish to proceed without adding supplier contact details, simply click whilst leaving the fields blank.
If you wish to add supplier contact details, simply fill out the required fields and click .