My Menu | Purchase Order System
Every system comes with a My Menu and from this menu you can view various items within your own account. These include, Tasks, Recent Records, Draft Purchase Orders, Upcoming Actions and personal settings.
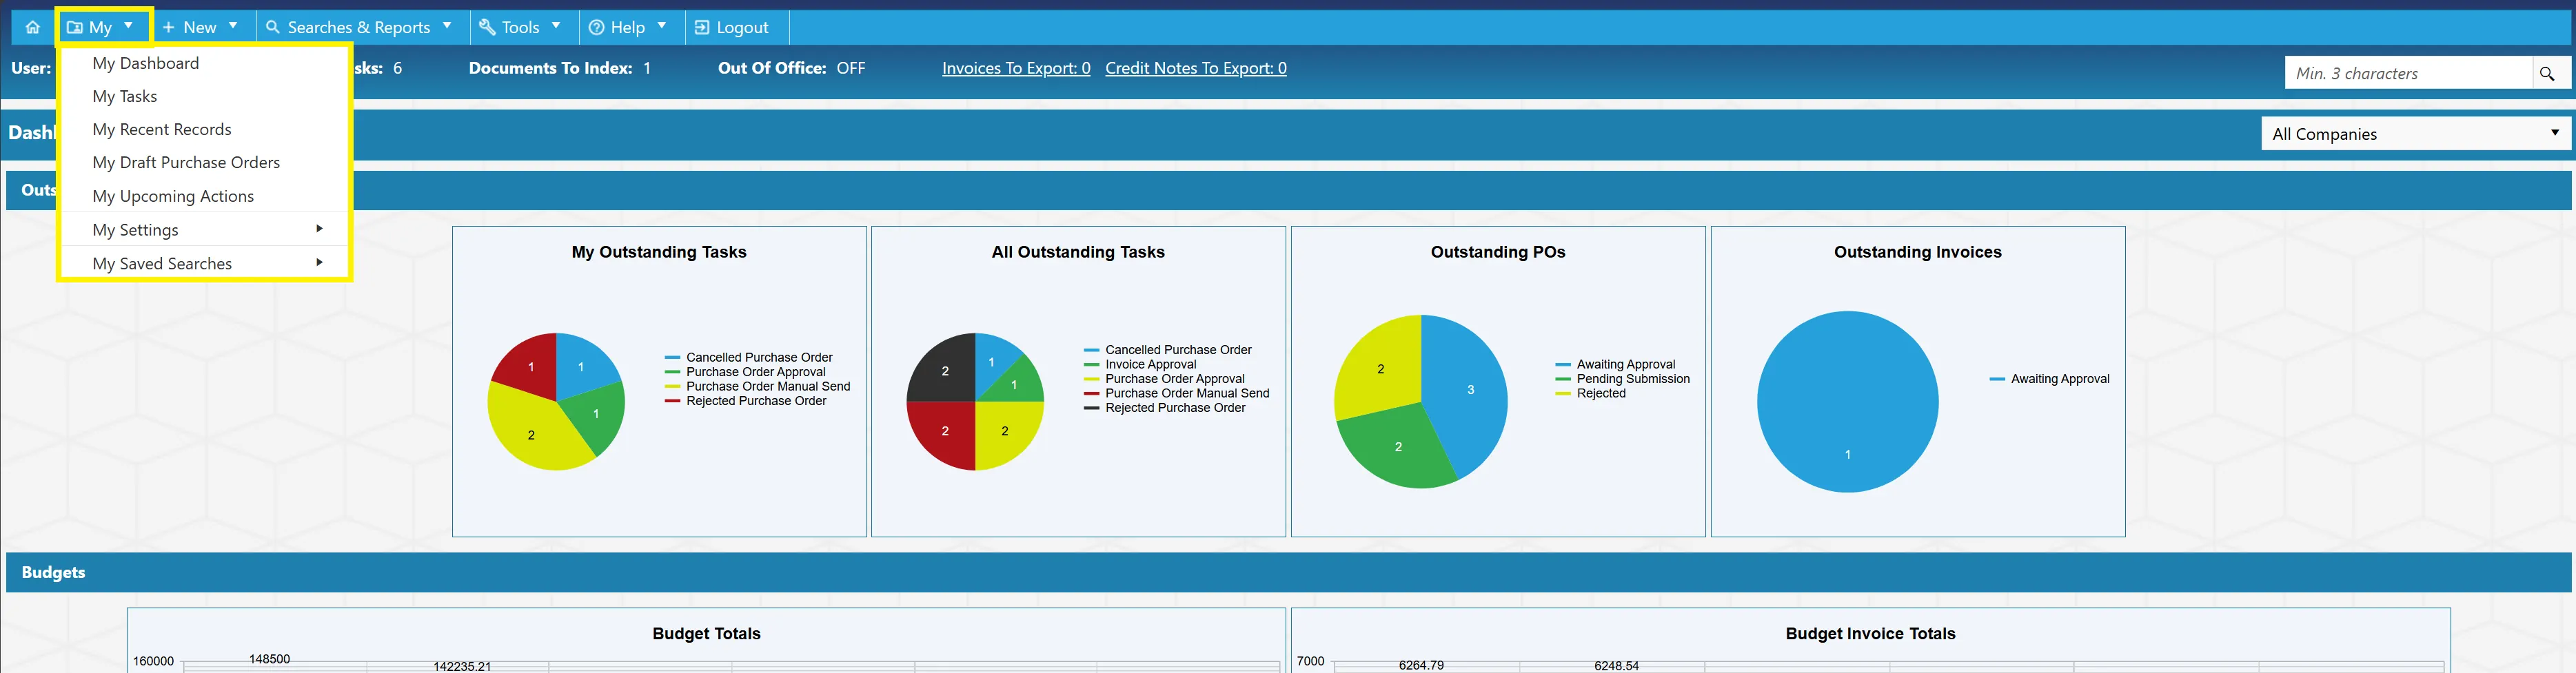
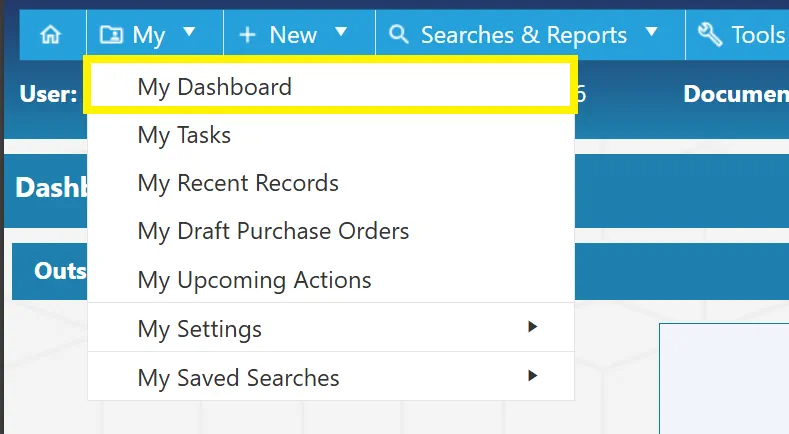
My Dashboard
Clicking on will bring you back to the dashboard window from anywhere within the system.
You can also click on the home icon to bring you back to the dashboard.
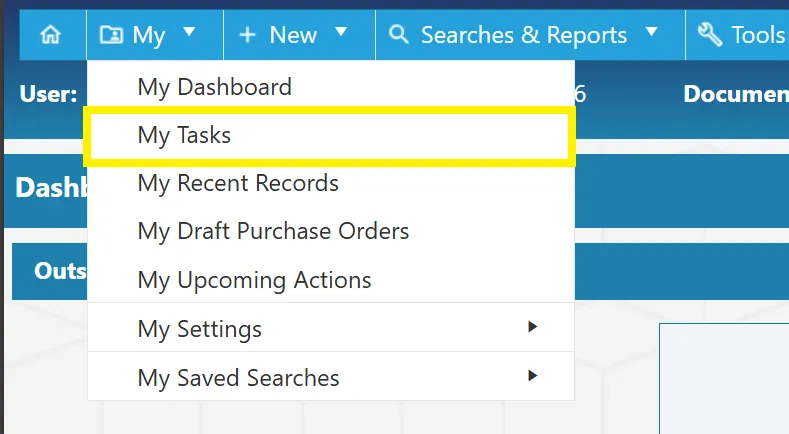
My Tasks
Clicking on will take you to the My Tasks grid.
From here you can view and action any tasks that are currently assigned to your user.
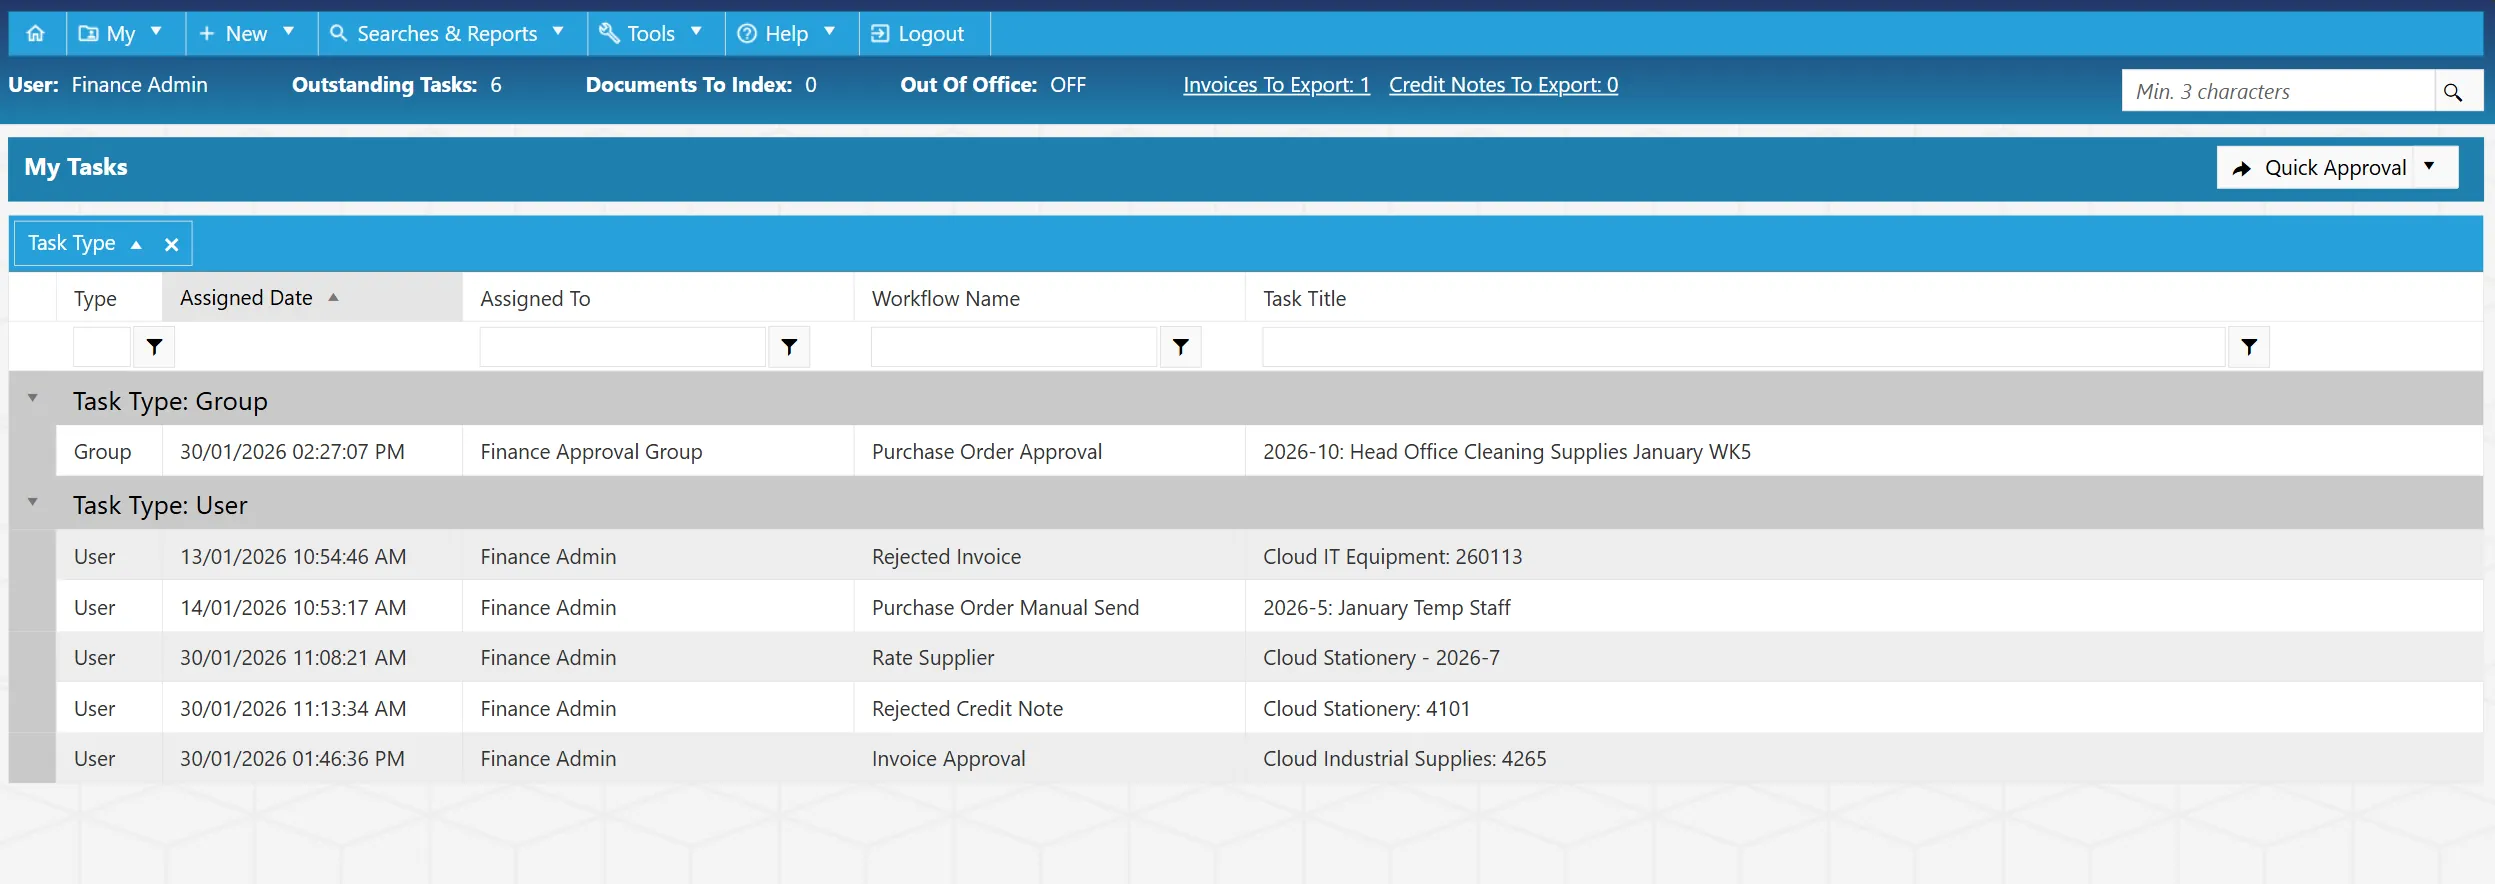
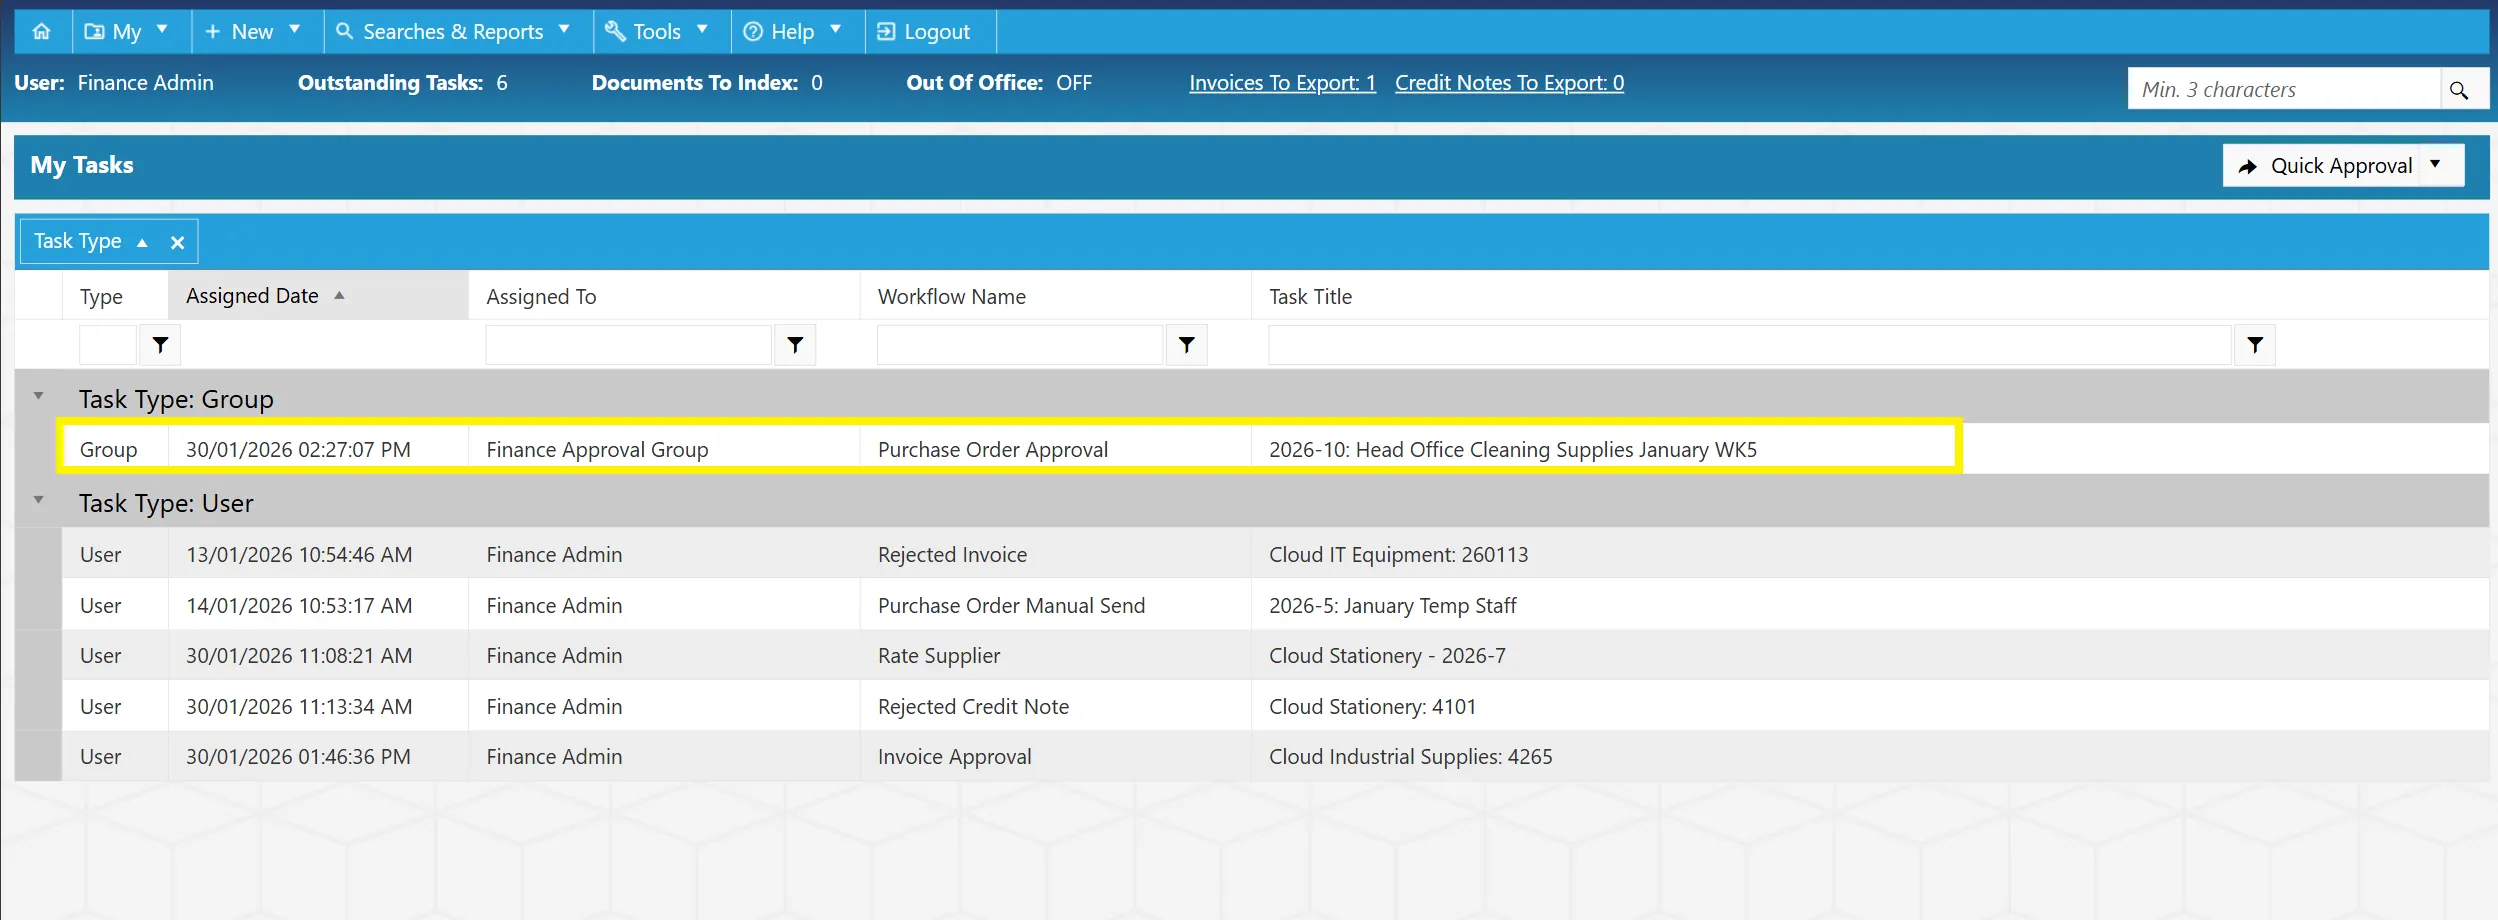
If you are part of an approval group, any group tasks will be displayed in their Task Type: Group section.
To open a task, simply click on the corresponding row. This will take you to the relevant task window.
The range of tasks that can appear in the system are as follows:
- Purchase Order Approval Task
- Rejected Purchase Order Task
- Cancelled Purchase Order Task
- Purchase Order Manual Send Task
- Invoice Approval Task
- Invoice Additional Approval Task
- Rejected Invoice Task
- Invoice Export Task
- Rate Supplier Task
- Credit Note Approval Task
- Rejected Credit Note Task
- Credit Note Export Task
For more information on a specific task, simply click on the relevant link above.
Invoice-related tasks are only available on systems with Invoice Processing Features
My Tasks - Quick Approval
The system has a Quick Approval facility available which allows you to quickly approve certain types of tasks such as Invoices.
To access this, simply click on the drop down. You can then select the type of quick approval task that you would like to carry out.
Quick Approval - Invoices
Invoice quick approval is only available for systems with Invoice Processing features.
Selecting from the drop down will take you to the Quick Invoice Approval window.
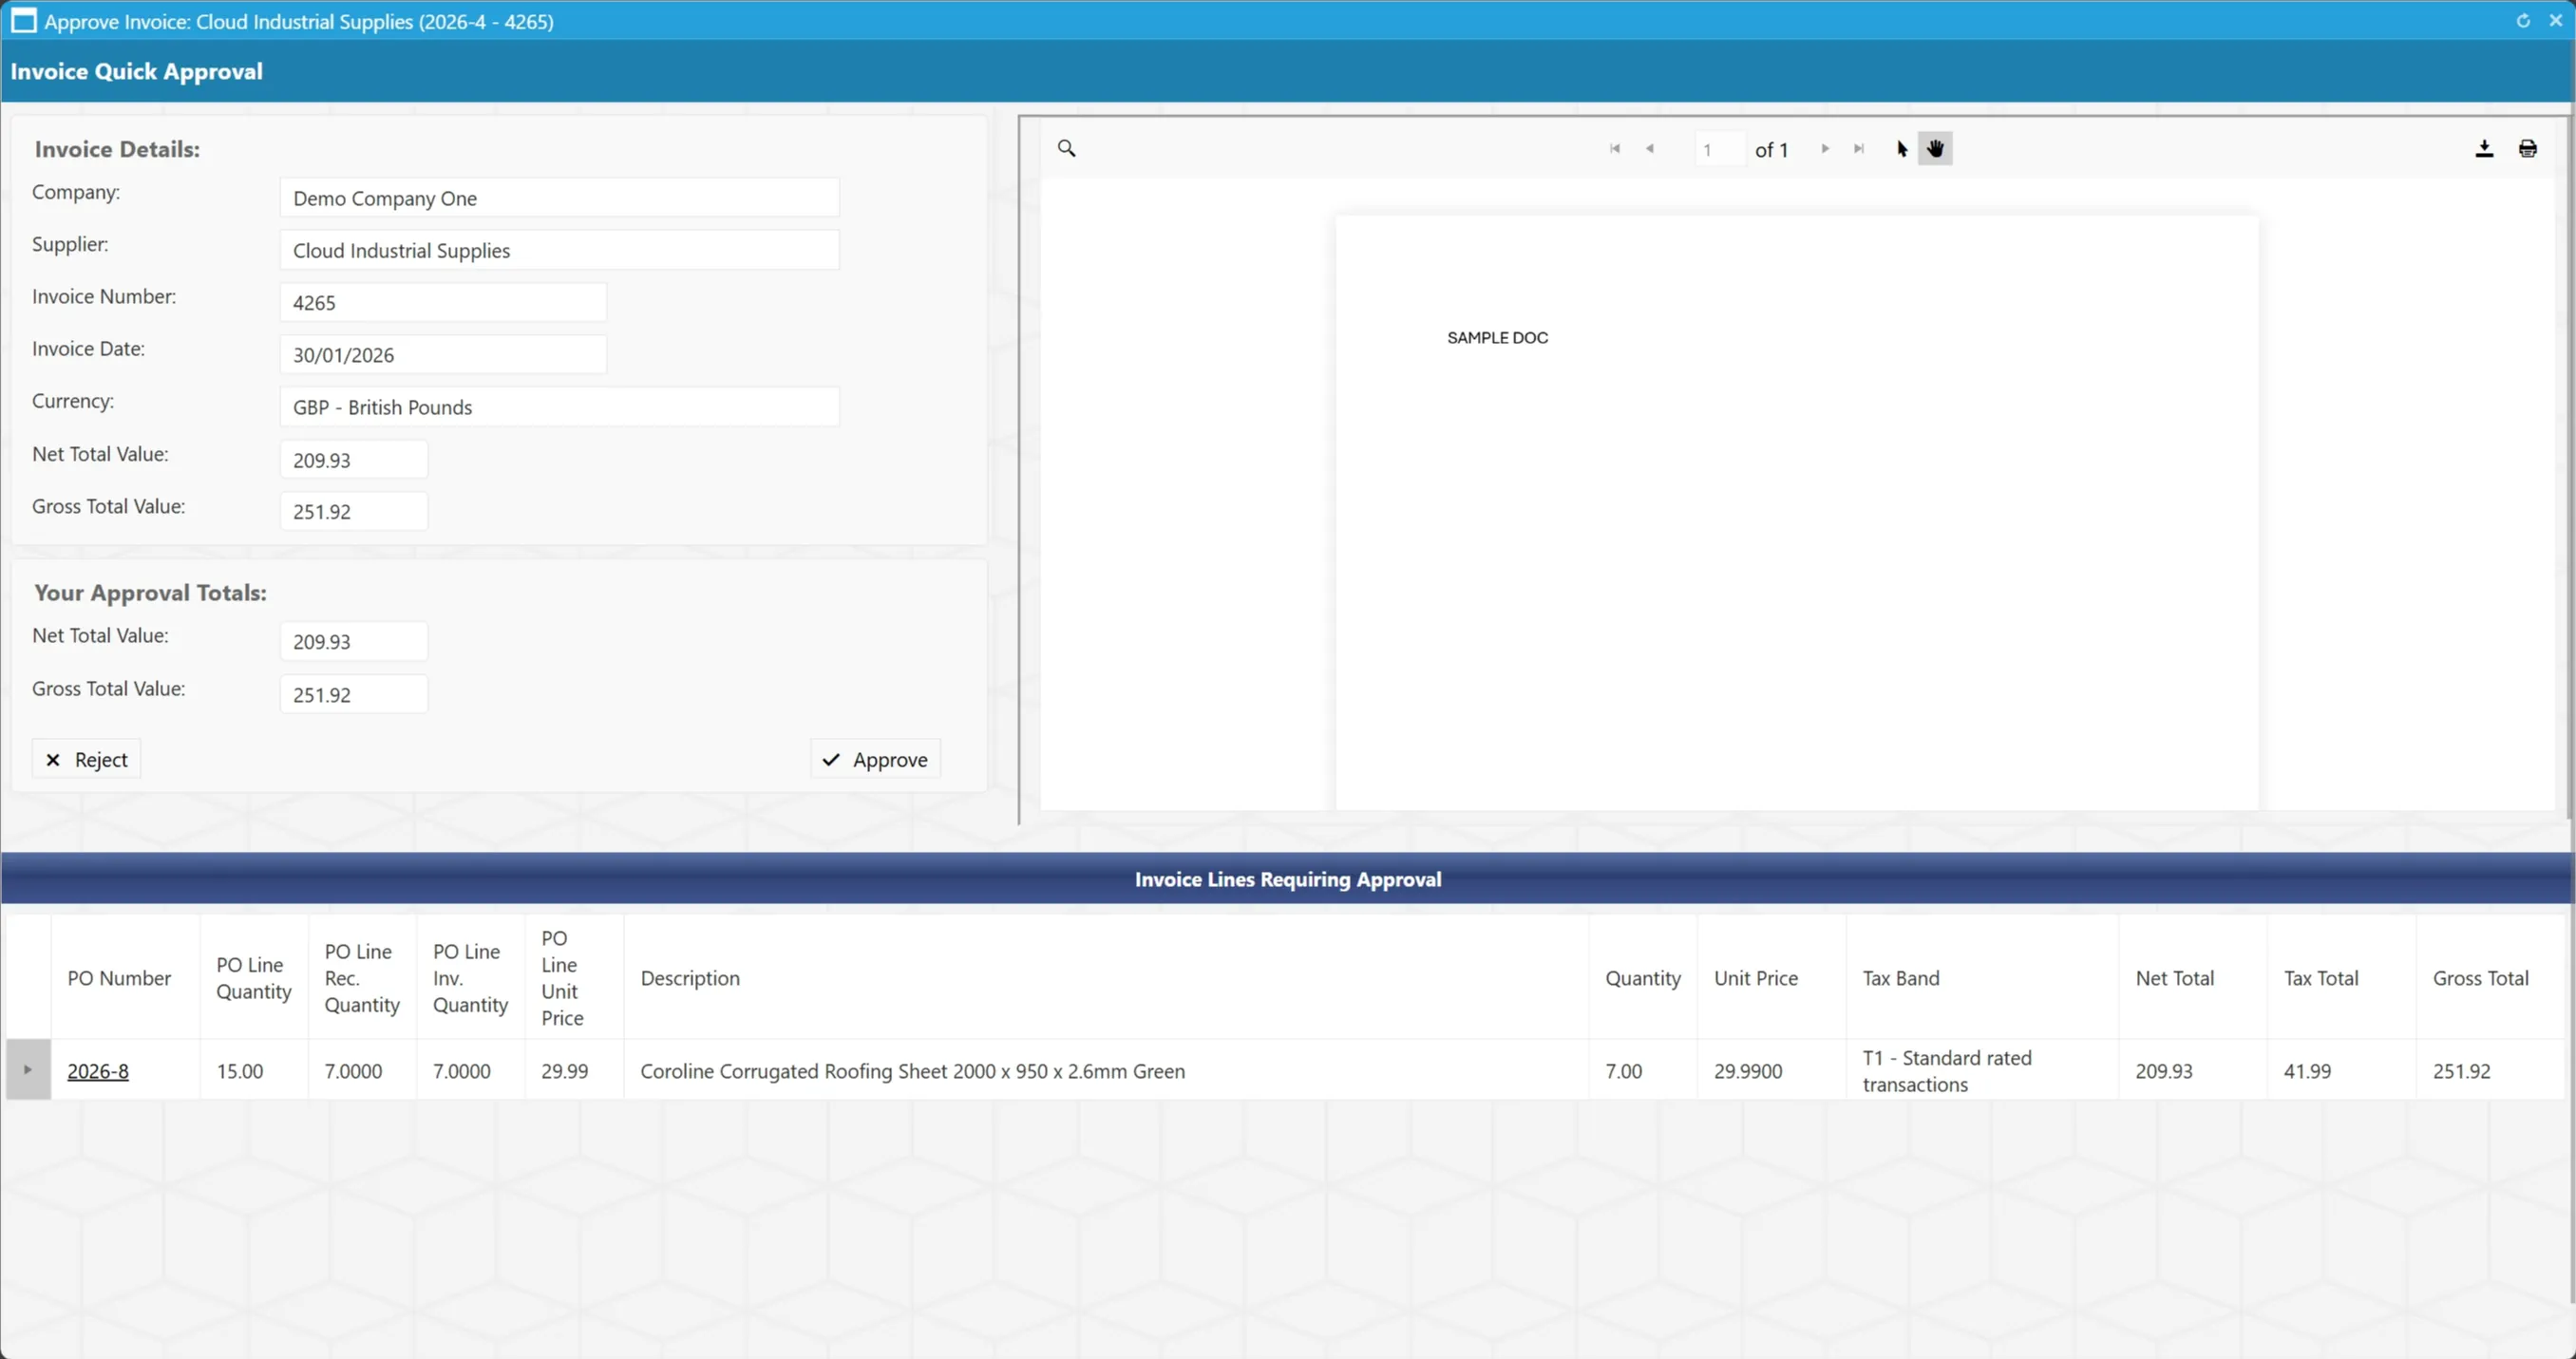
From here you can quickly approve or reject any invoice lines that are currently awaiting approval (providing the approval task is assigned to you).
Group Tasks
Within the system, you can set up approval groups for Purchase Orders and Invoices.
Invoice approval groups are only available for systems with Invoice Processing features.
For more information on setting up approval groups click here.
When a task is sent to an approval group, it will appear in the My Tasks window for any users that belong to the group. However, for simplicity, they are kept within a separate subheading.
Unassigning a Group Task
When you click on a group task, it is automatically assigned to yourself and removed from the group task list for other members of the group. However, if you want to return it to the group list, you can unassign it.
To unassign a task, simply click on the button.
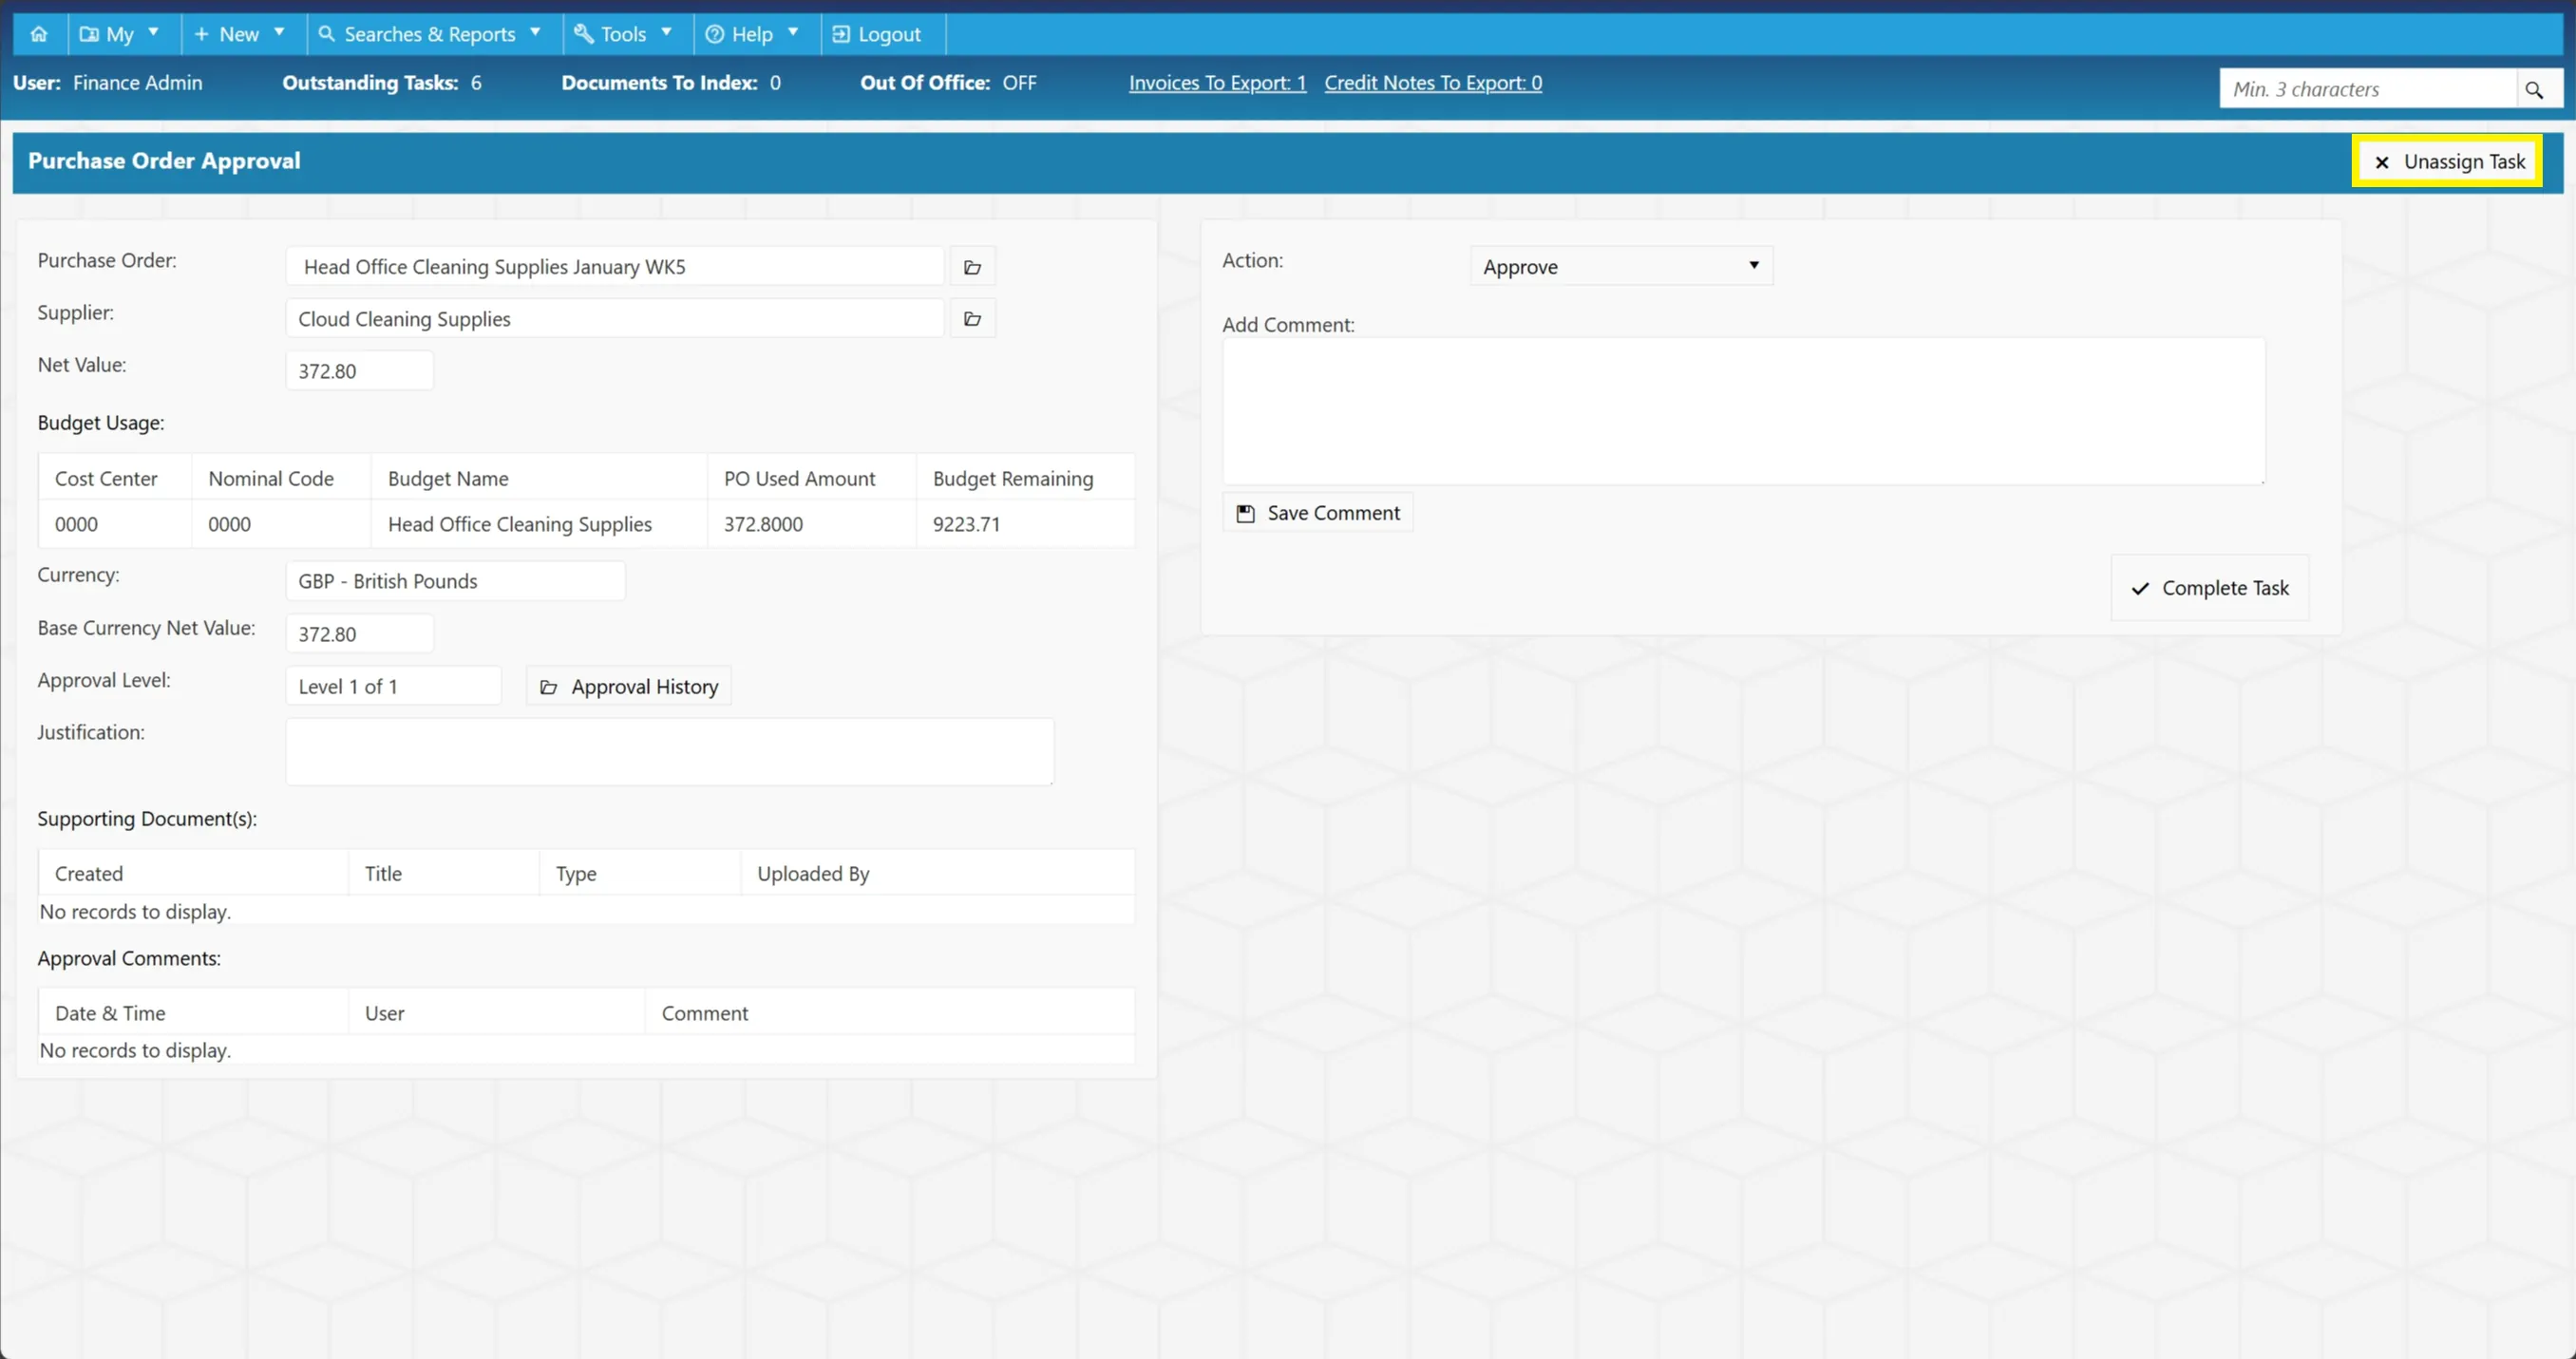
This will remove the task from your User Tasks list and re-allocate it back to the Group Tasks list for other members in the group to view and action.
My Recent Records
Clicking on the button will take you to the My Recent Records grid.
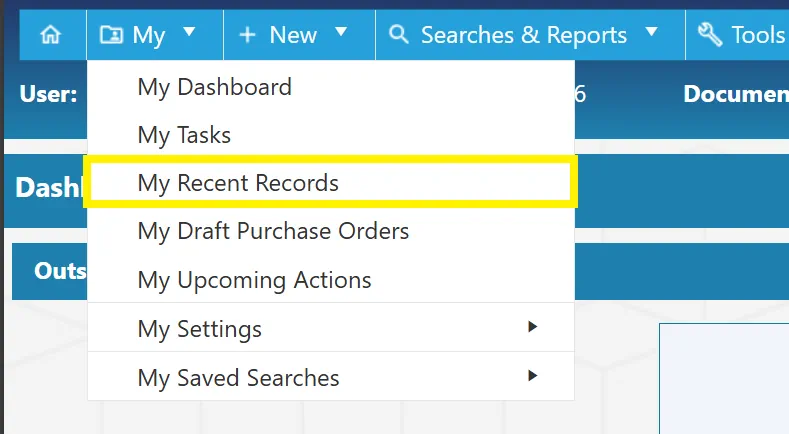
From here you can view your recent records.
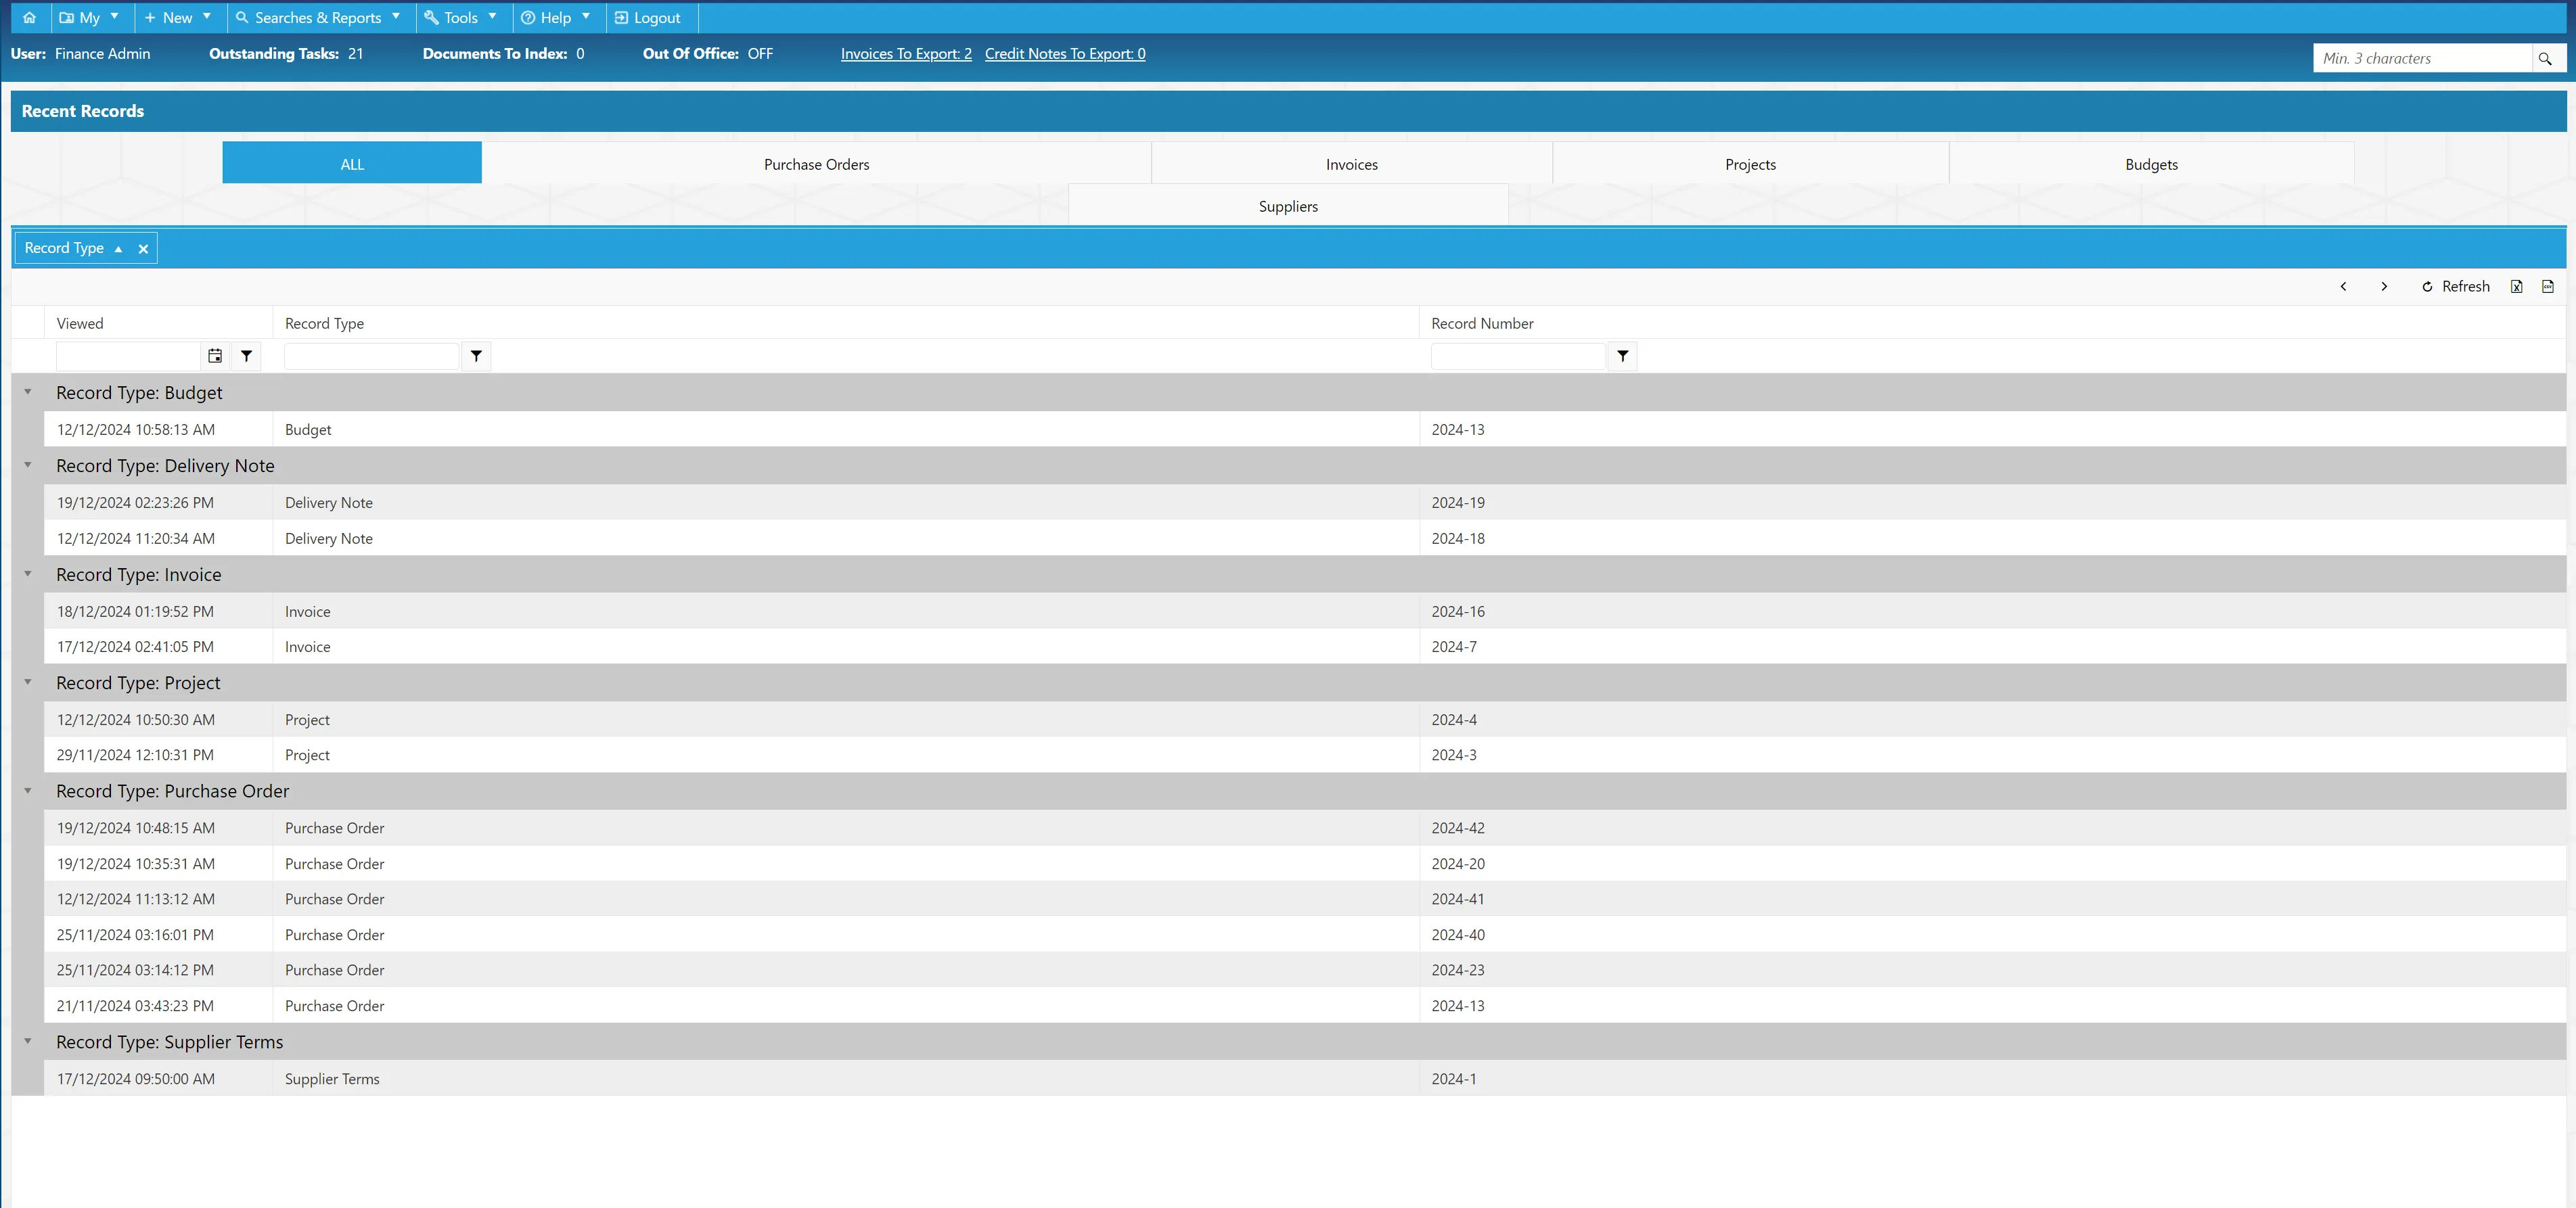
Recent records are the last 100 items viewed within the last 30 days.
The grid allows you to filter by the following record types:
- Purchase Orders
- Invoices
- Projects
- Budgets
- Suppliers
Invoices are only available on systems with the Invoice Processing module enabled.
To filter, simply click on the relevant heading at the top of the grid.

To open the record, simply click the relevant row within the grid.
My Draft Purchase Orders
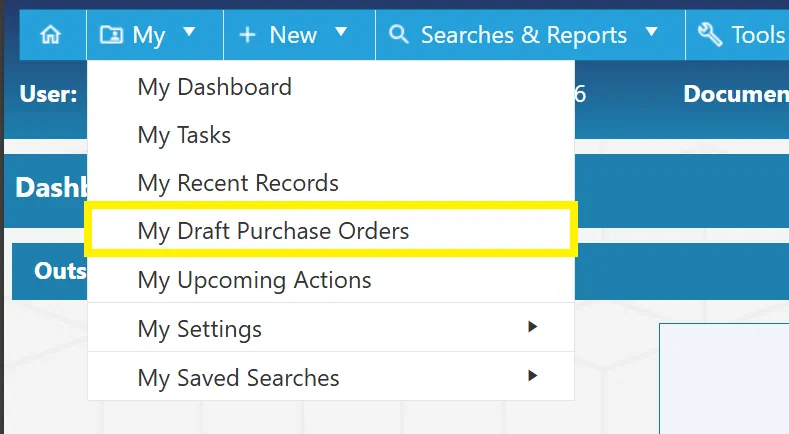
Clicking on the button on the My Menu will take you to the My Draft Purchase Orders grid.
From here, you can view any draft purchase orders you have in the system.
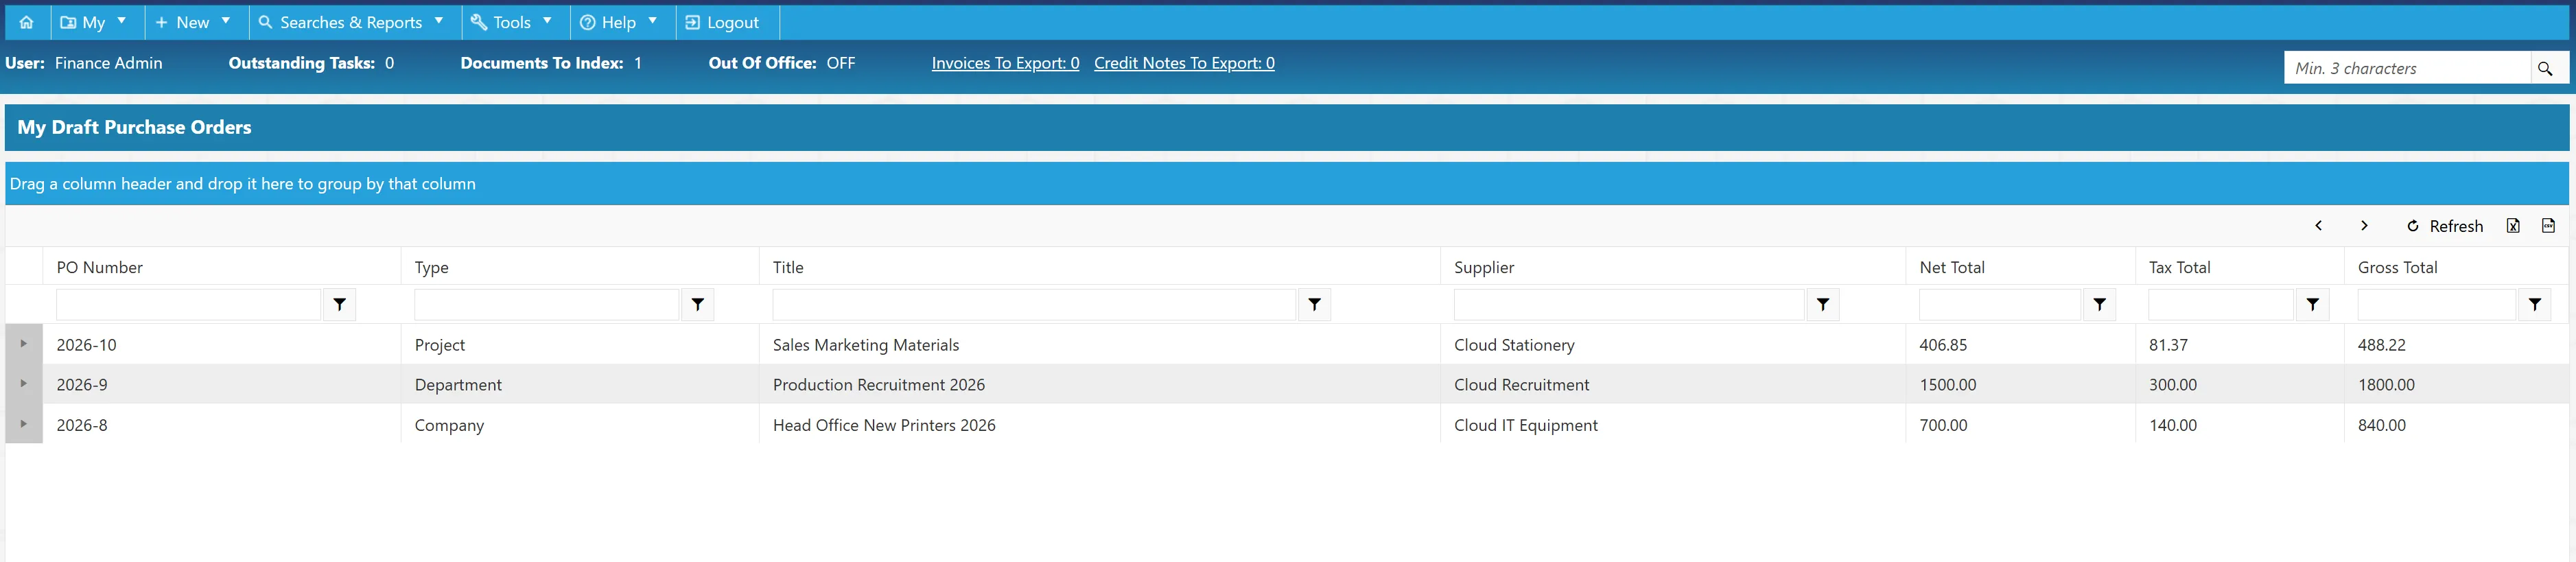
A draft purchase order is a purchase order that has been saved but not yet submitted for approval.
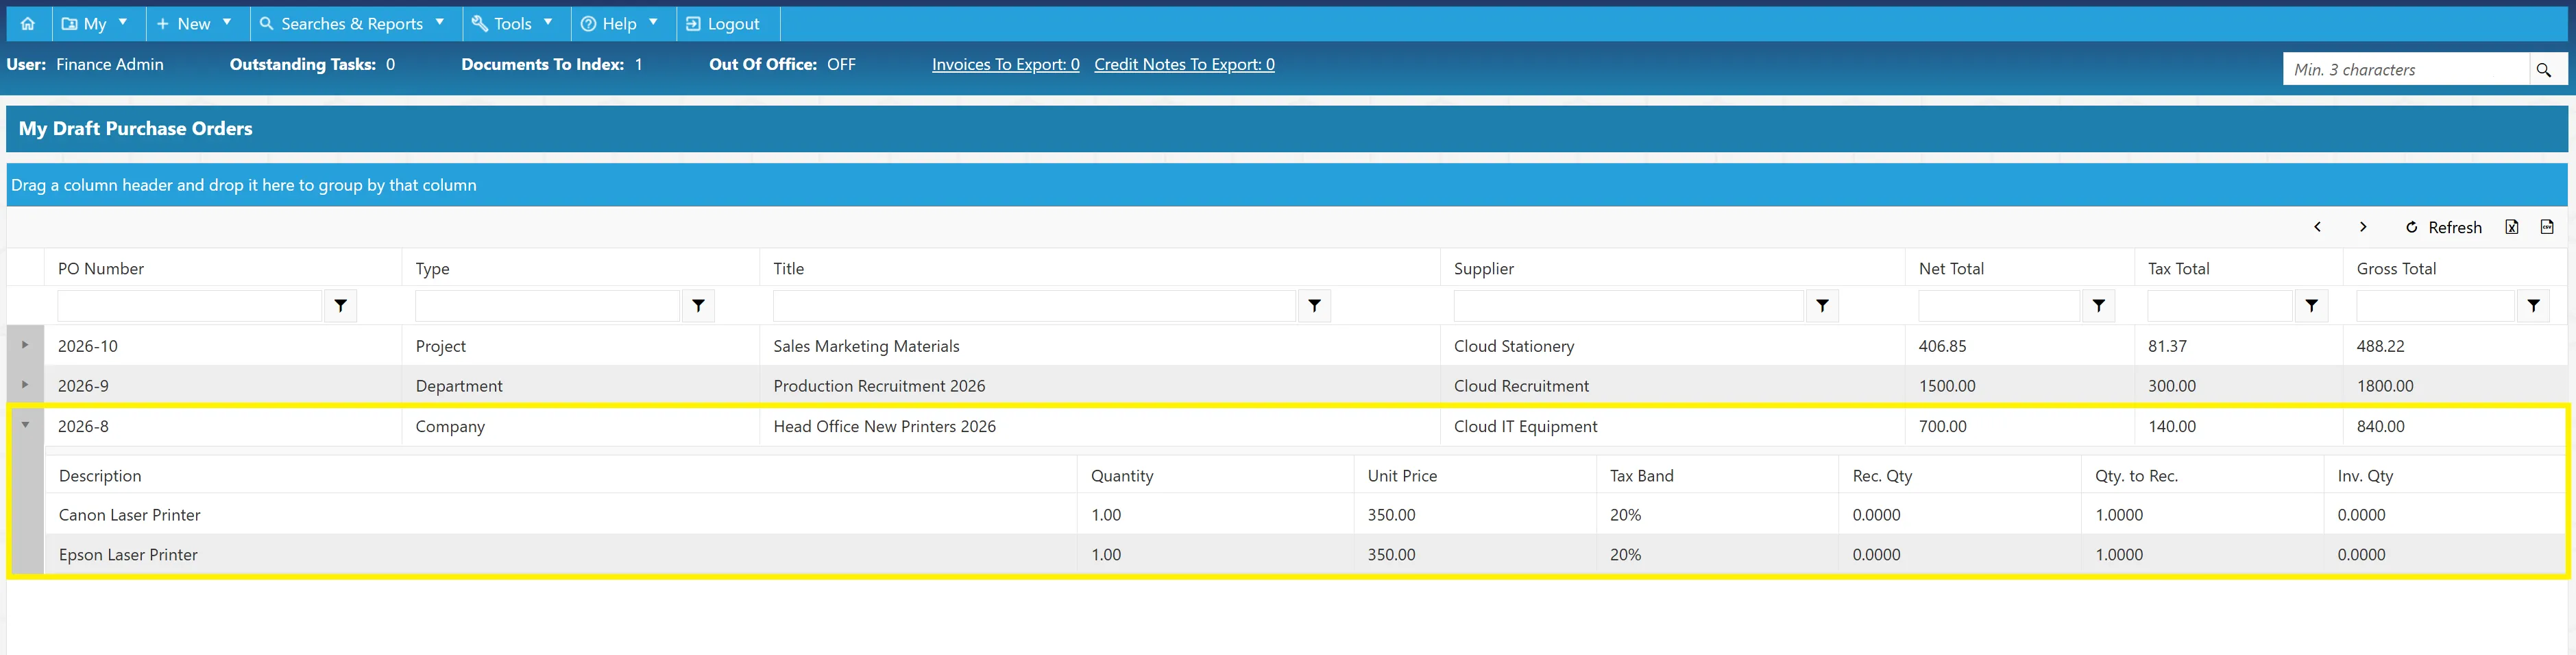
You can view individual purchase order lines by clicking on the chevron at the beginning of the row.

This allows you to view quantities and values on a PO line level without having to open the PO document.
My Upcoming Actions
Clicking on the button will take you to the My Upcoming Actions grid.
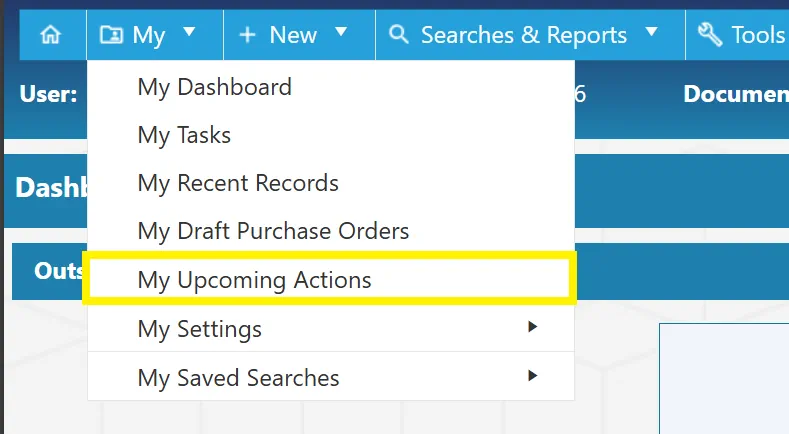
From here, you can view any upcoming actions for your user.

Actions are reminders that you can set for yourself against various items within the system such as; Suppliers, Purchase Orders, Budgets, Invoices, Credit Notes and Projects. You can assign a date and time for the action to occur, at which point you will receive an email notification and task.
To view a specific action, simply click on the relevant line. This opens a window displaying the action's details.
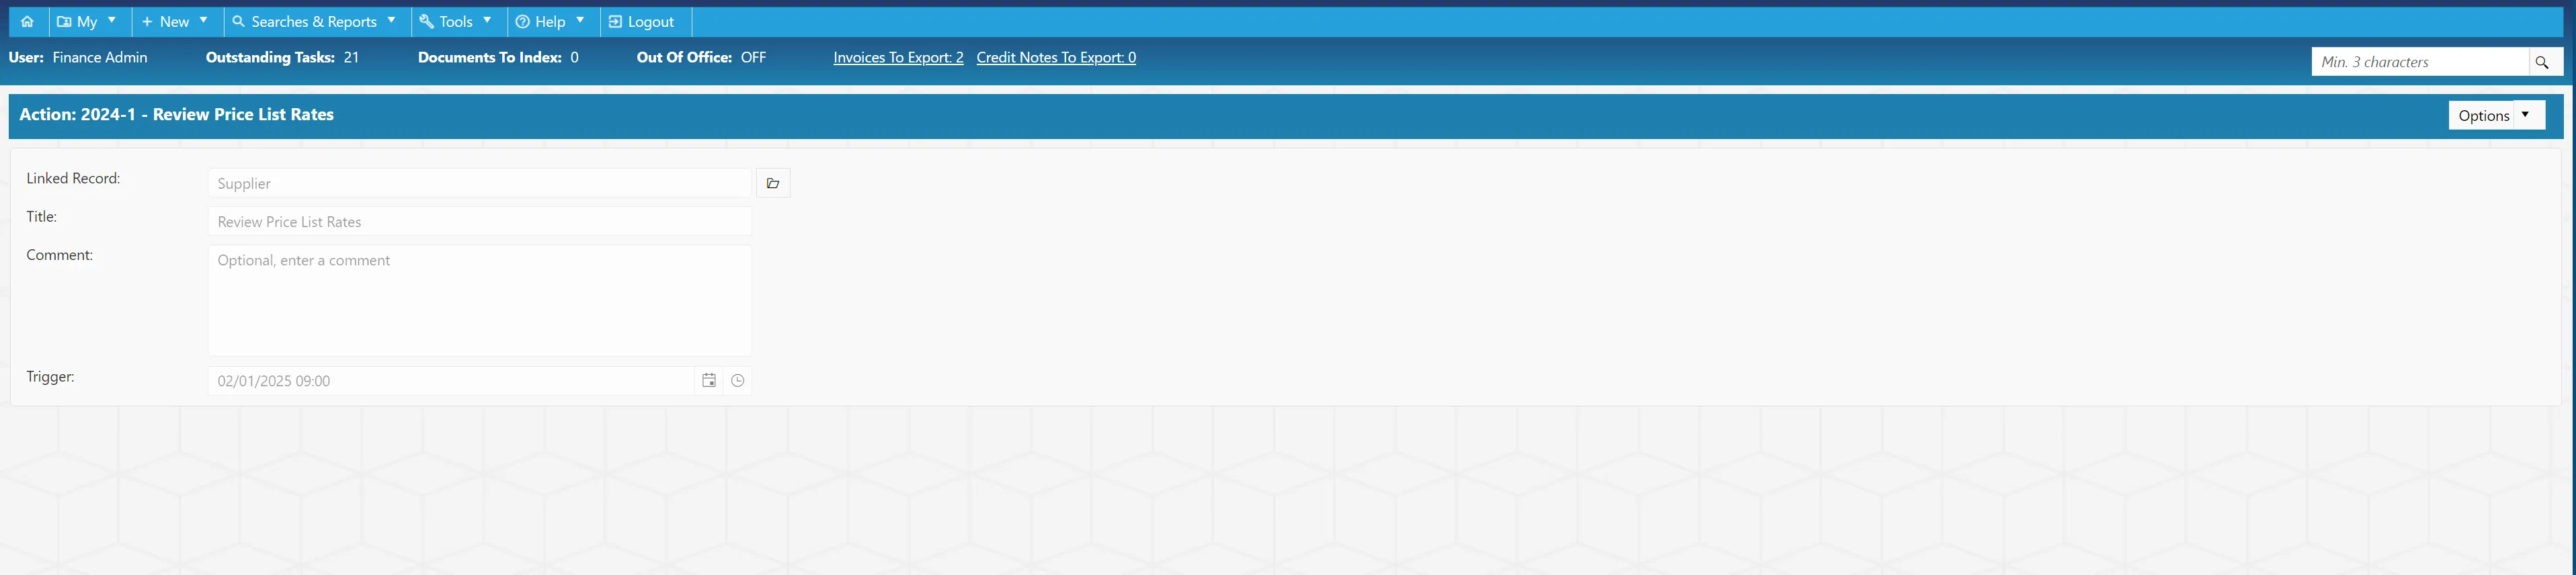
From this window, you can edit or cancel the action by simply selecting these from the drop down menu.
My Settings
To access settings related to your own account, simply click from the My Menu.
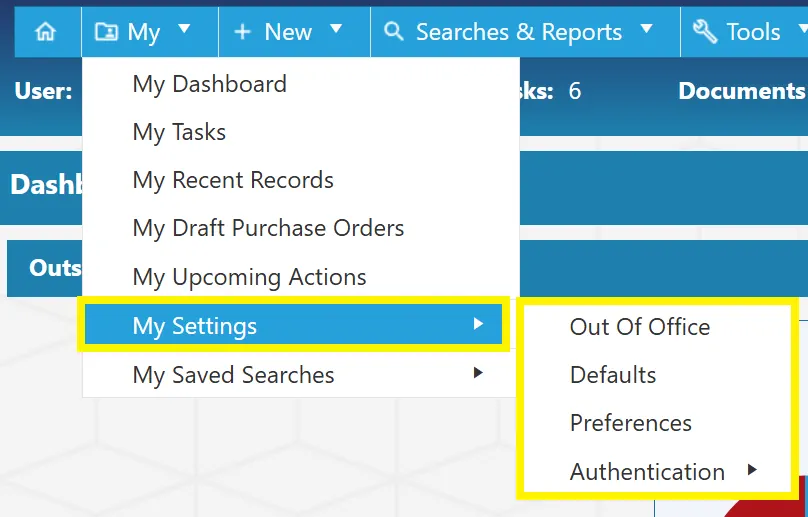
From this menu you can access the following items:
- Out Of Office
- Defaults
- Preferences
- Authentication
Out Of Office
Every user has an Out Of Office function available to them. Whilst active, this function ensures that any tasks assigned to the user are automatically re-assigned to a different user of their choice.
This feature does not affect tasks that were assigned prior to the out of office being active.
To access this feature, simply navigate to the button on the My Settings section of the My Menu.
For information on accessing the My Settings section click here.
Clicking on Out Of Office will take you to the Out of Office creation window.

You can now fill out the required details such as; Start Date, End Date and the users to whom you would like your tasks to be re-assigned in your absence.
You will need to specify the user for each type of task such as PO Tasks, Invoice Tasks and Credit Note Tasks.
Invoice Tasks are only applicable to systems with Invoice Processing features enabled.
Once you have filled in the relevant details, simply click to commit this to the system.
Defaults
You can set up default information for your user within the system. This will ensure that certain fields are pre-populated when you create a purchase order.
To access this feature, simply navigate to the button on the My Settings section of the My Menu.
For information on accessing the My Settings section click here.
Clicking on Defaults will take you to the My User Defaults window.
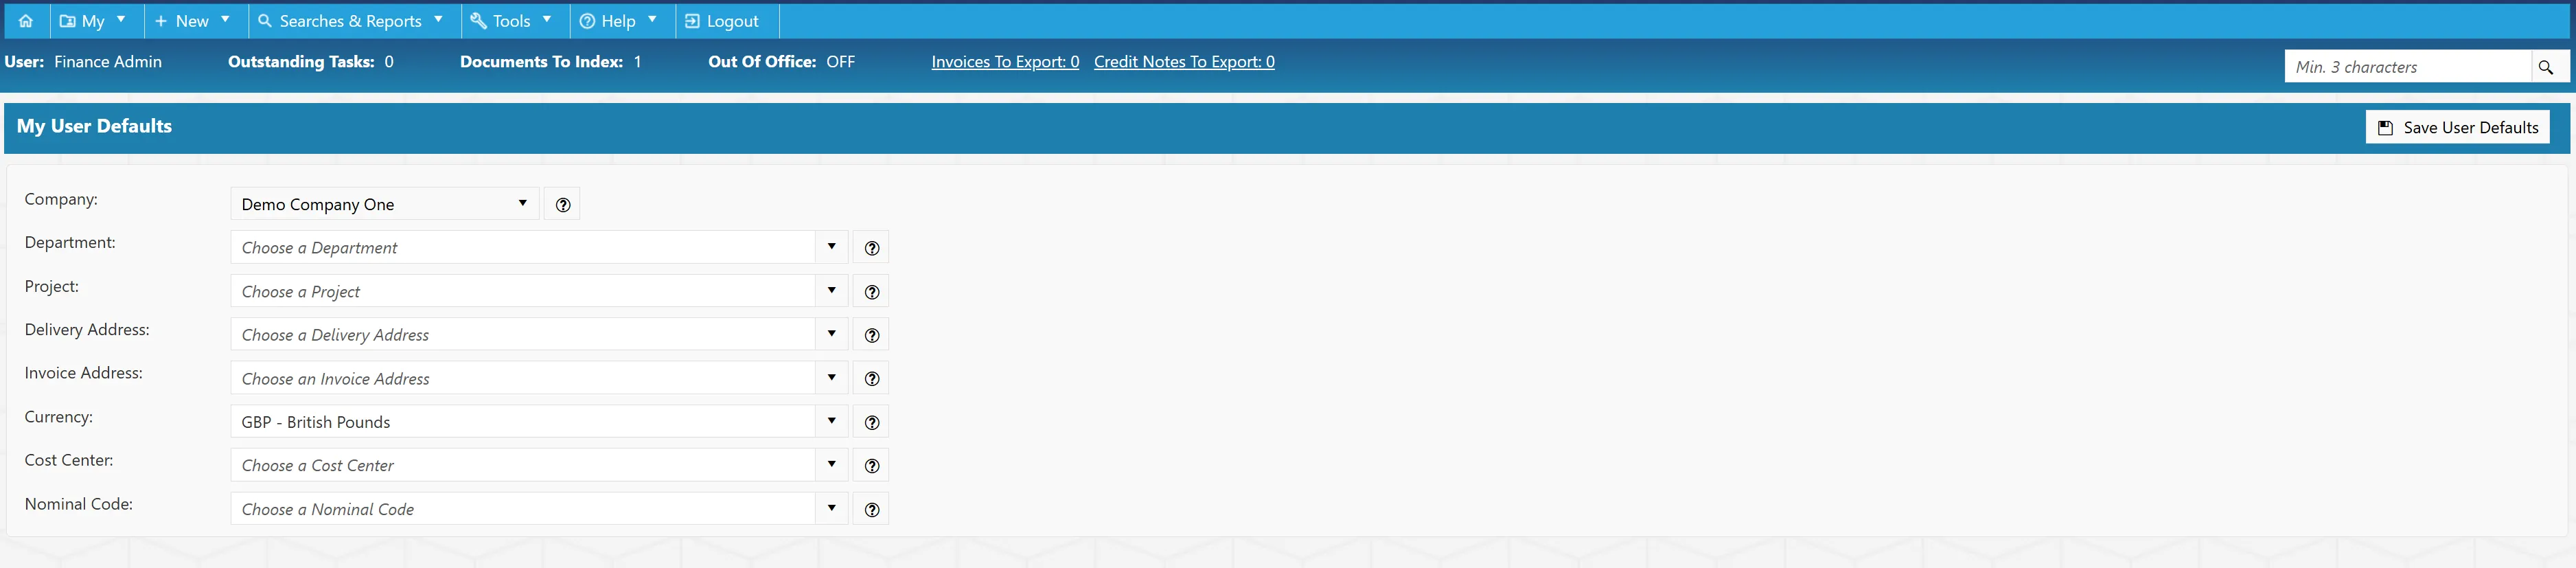
From this window, you can specify your default information for the following items:
- Company
- Department
- Project
- Delivery Address
- Invoice Address
- Currency
- Cost Center
- Nominal Code
With these choices selected, the relative fields will be pre-populated when creating a new purchase order.
To save your default choices, click .
Preferences
The Preferences section allows you to configure your user interface settings.
To access the Preferences window, navigate to the button on the My Settings section of the My Menu.
For information on accessing the My Settings section click here.
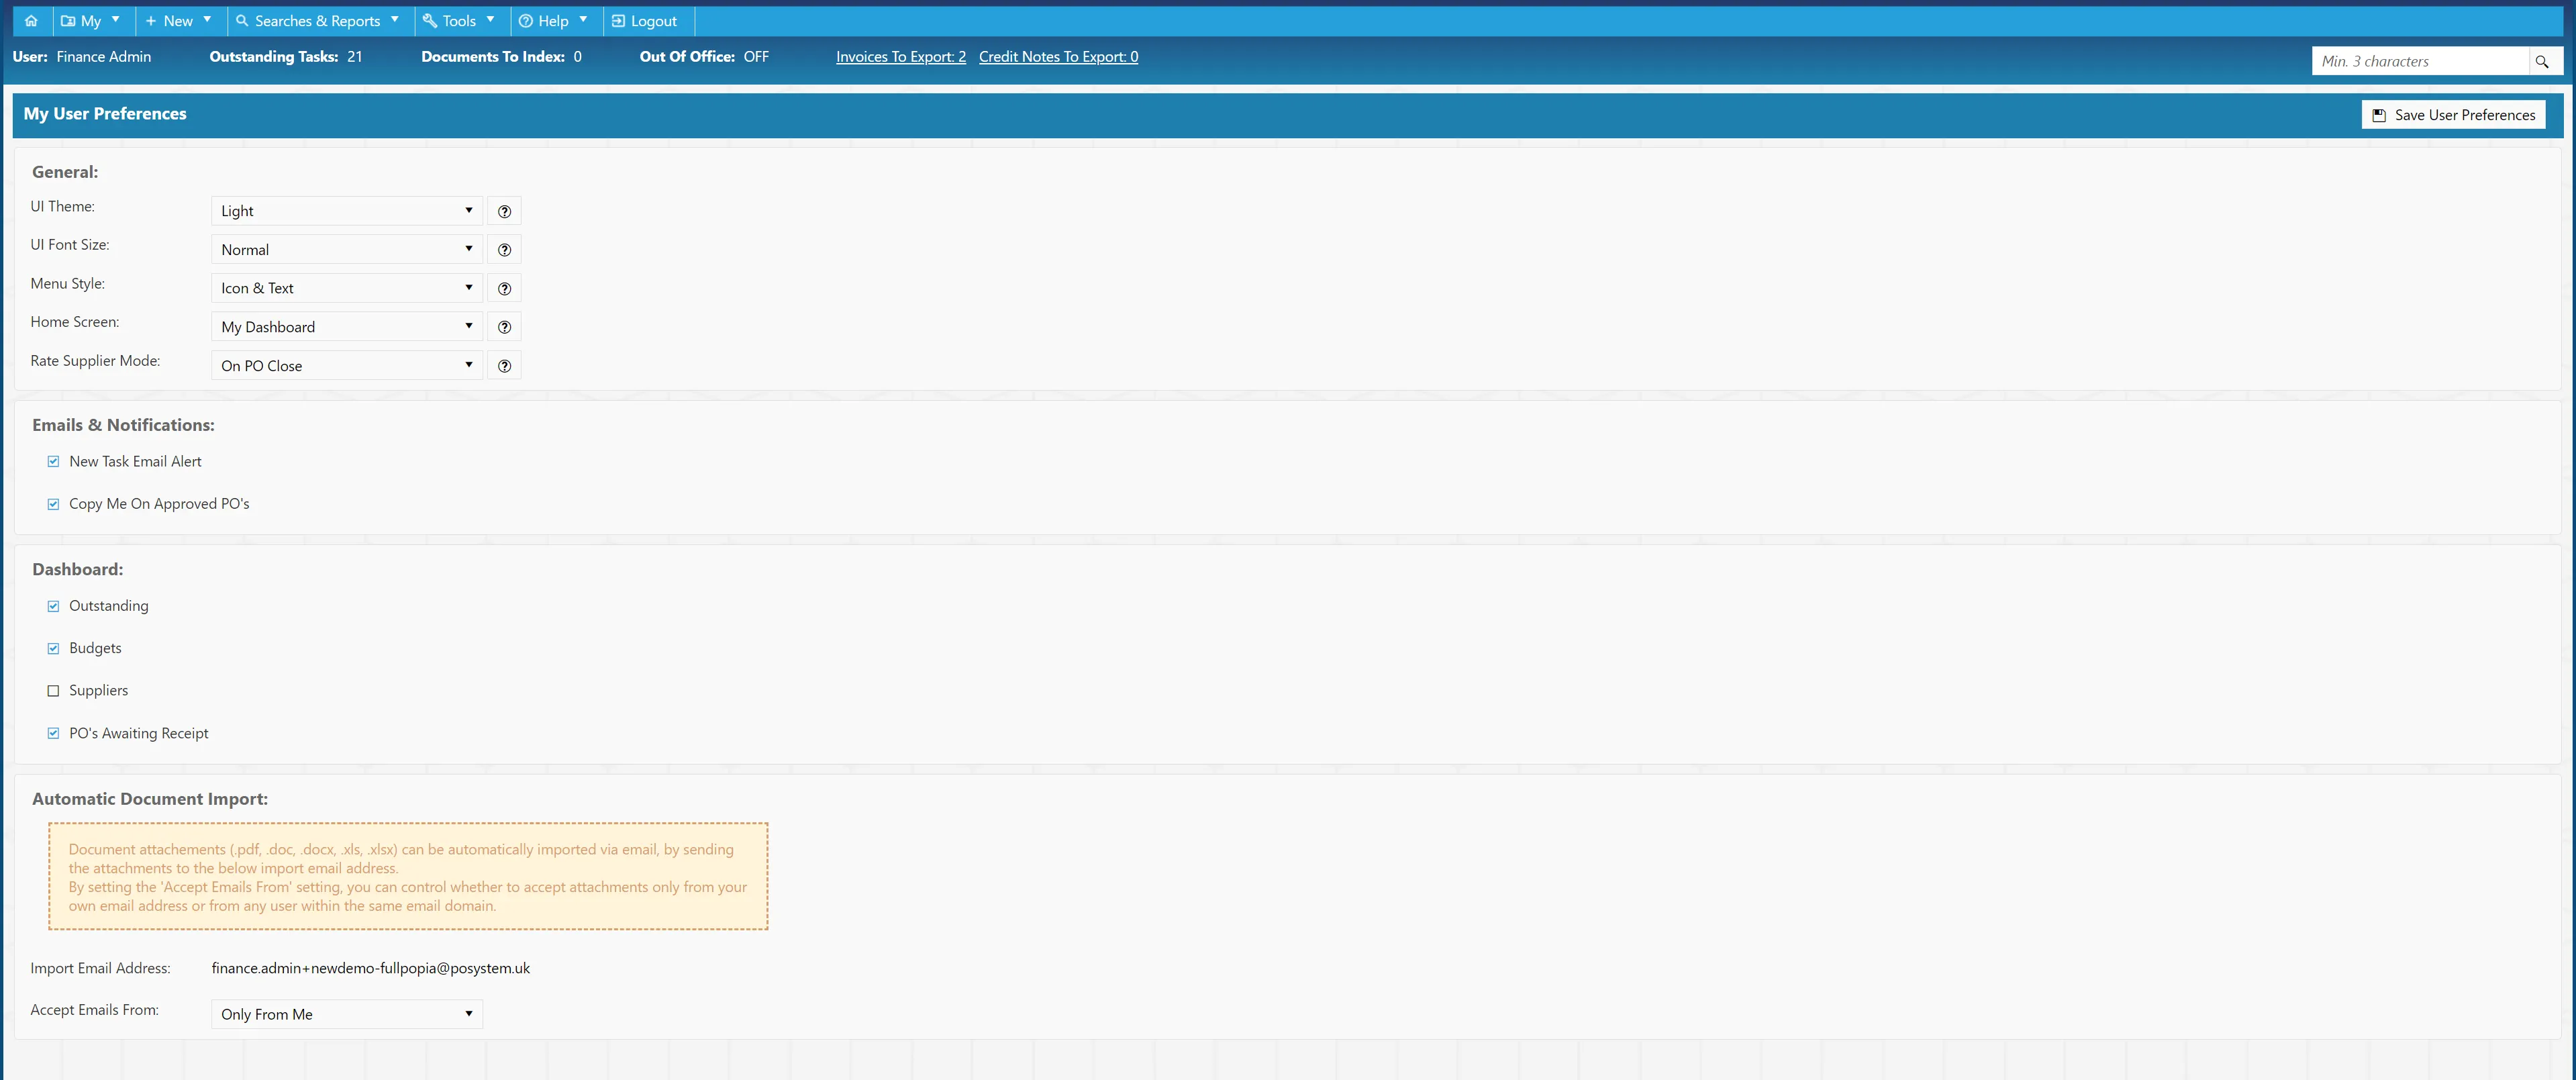
From this window, you can configure the following settings:
- General Appearance Settings
- Email & Notifications Settings
- Dashboard Appearance Settings
- Automatic Document Import Settings
Once you have completed your changes, simply click .
General
The General section allows you to change the general appearance of the system.
For information on accessing the preferences section, click here.
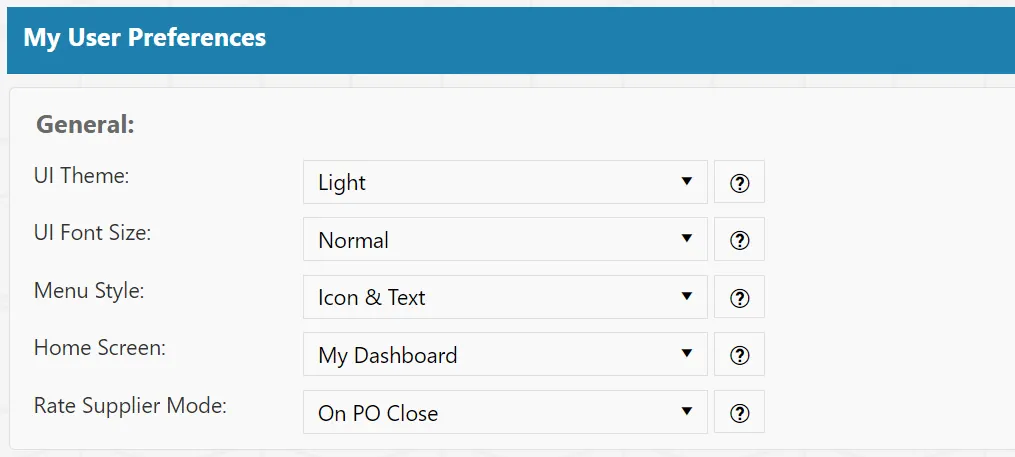
From this section, you can configure a number of appearance settings:
- UI Theme allows you to select the desired colour scheme of the system.
- UI Font Size allows you to set the size of the font within the system.
- Home Screen dictates which window loads when you click on the home icon.
- Rate Supplier Mode dictates the point in the workflow at which you will receive a Rate Supplier task.
Once you are happy with your choices, click to save them.
Emails & Notifications
The Emails & Notifications section allows you to dictate your email and notification settings with regards to tasks and approved purchase orders.
For information on accessing the preferences section, click here.
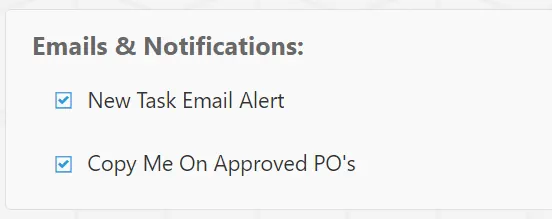
There are two tick-boxes available to configure within this section:
- allows you to specify whether you want to receive an email whenever you receive a task on the system.
- allows you to specify whether you want to be copied into emails that the system sends out to the supplier when the PO is approved.
Once you are happy with your choices, click to save them.
Dashboard
The Dashboard section allows you to choose which items appear on your dashboard.
For information on accessing the preferences section, click here.
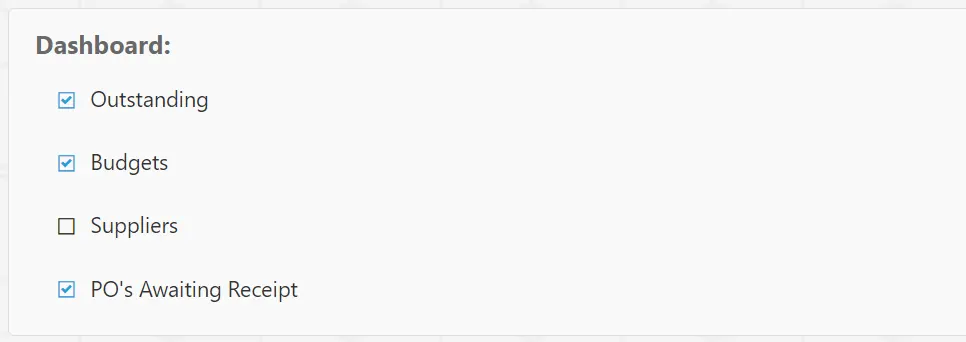
There are a number of items which can be specified to appear on your dashboard:
- relates to the Outstanding Tasks charts usually found on the top of the dashboard.
- relates to the Budget Watch List and Budgets Due To Expire tables.
- relates to the Suppliers rating tables.
- relates to the PO's Awaiting Receipt table from which you can receipt items.
To ensure these appear on your dashboard, simply tick the relevant boxes.
Once you are happy with your choices, click to save them.
Automatic Document Import
The Automatic Document Import section allows you to dictate the settings for the document import feature on the system.
The Automatic Document Import feature allows you to simply email documents to a specified email address as a means of importing them into the system as opposed to the manual upload process.
For more information on accessing the preferences section, click here.
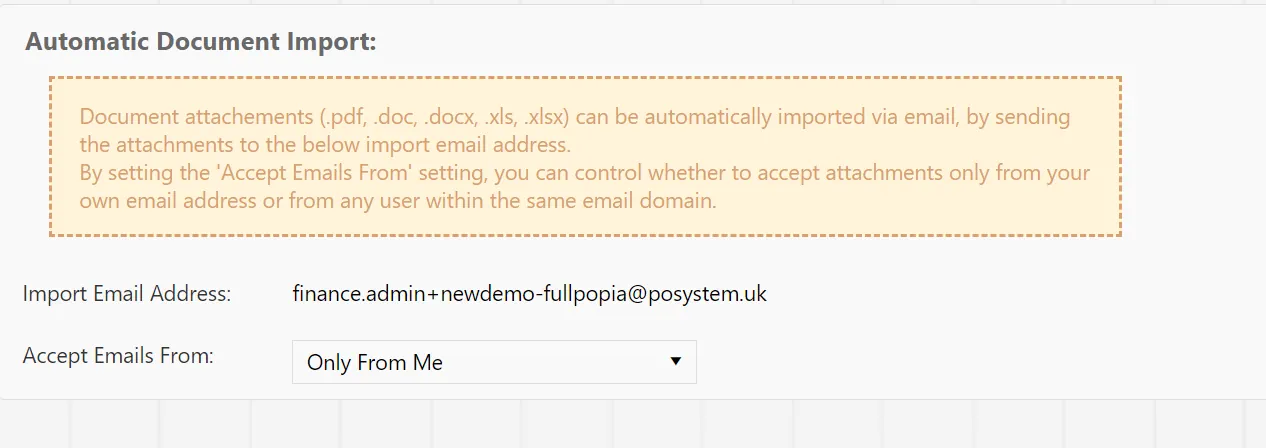
This section shows the email address to which you can send documents for import into the system.
This email address is specific to your user account.
There is also a drop down field named Accept Emails From:. This allows you to specify the parameters that the system will check when receiving documents via the email address. The parameters are:
- Only From Me: The system will only accept emails from yourself.
- My Email Domain: The system will accept emails from your email domain only.
- None: The system will not carry out any checks when receiving emails.
Once you are happy with your choice, click to save them.
Authentication & Password Change
The Authentication section of the My Settings menu allows you to change your own password.
To access the Change Password window, click on the button under Authentication on the My Settings section of the My Menu.
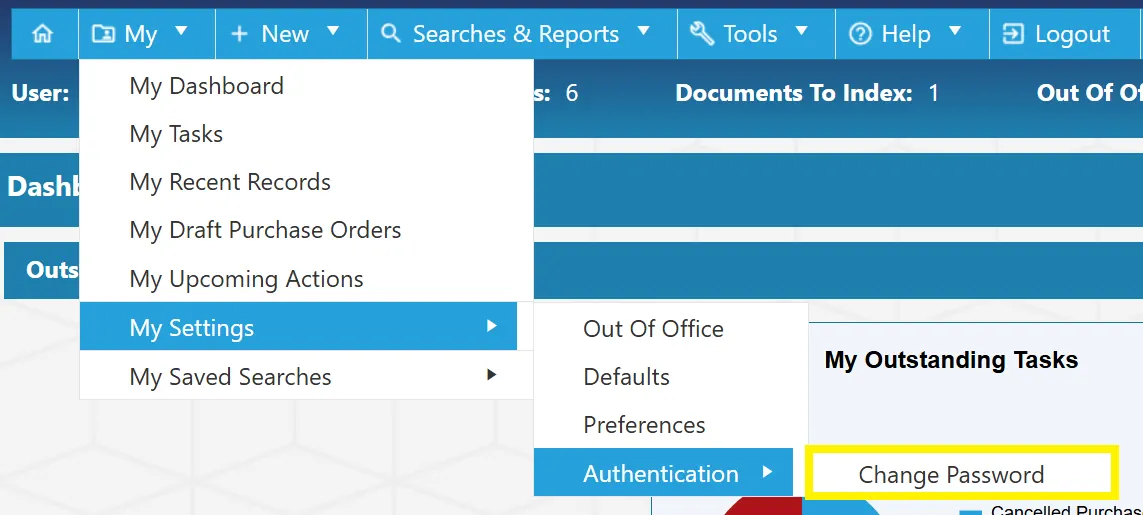
For information on accessing the My Settings section click here.
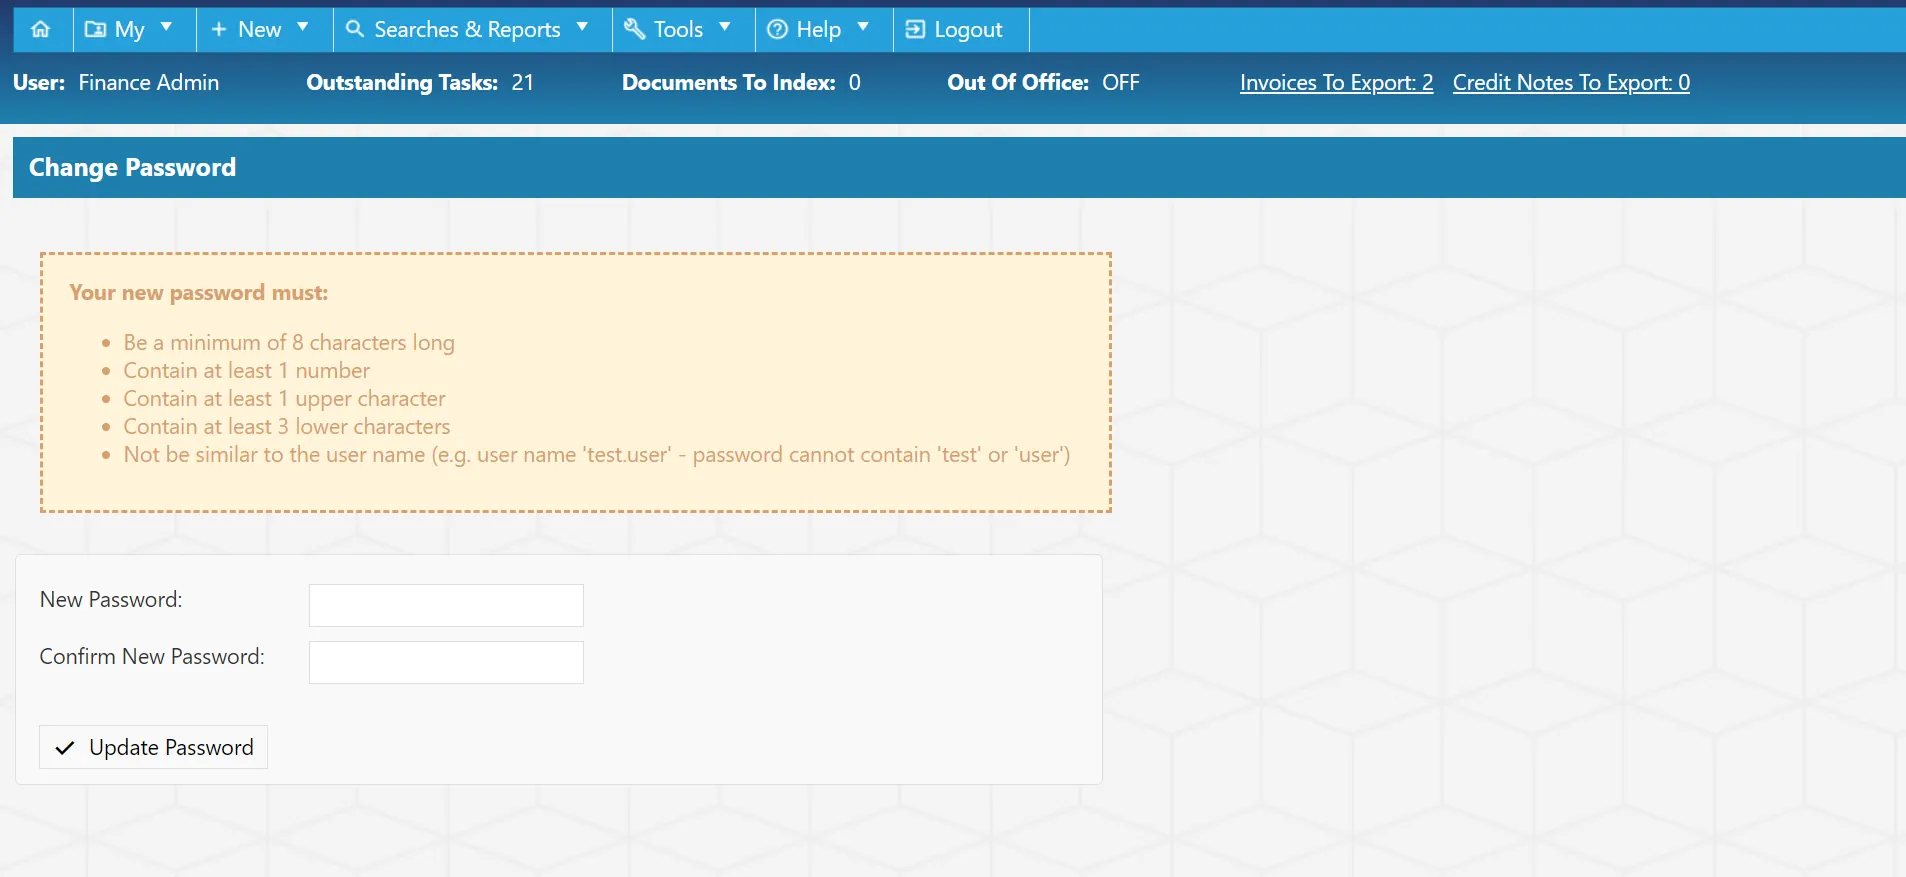
From the Change Password window, you can fill in the details of your new password.
There is an information box which shows you the requirements of your new password.
Once you are happy with the new password, simply click to update the password.
My Saved Searches
Users have the ability to save specific searches to their My Saved Searches section. This is particularly useful if you are regularly carrying out a specific search using set filters.
For steps on how to save a search, please click here to find your desired search level.
To access My Saved Searches, simply navigate to the My Menu and expand the My Saved Searches section. From here any saved searches will be dsiplayed.
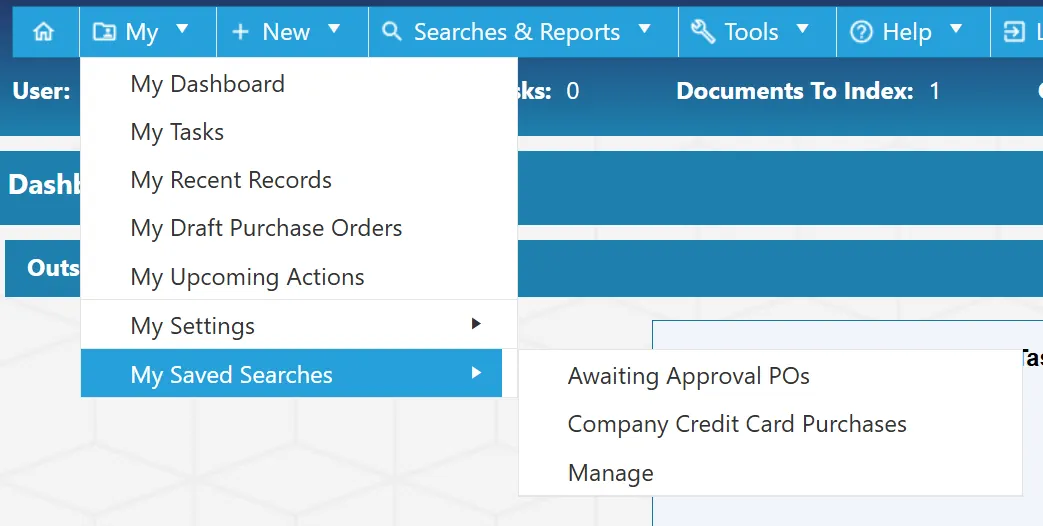
Clicking on one of the saved searches will bring you directly to the relevant search grid.

Managing Saved Searches
Once a search has been saved, the user has the option to edit or delete it. To do this, simply select from the My Menu
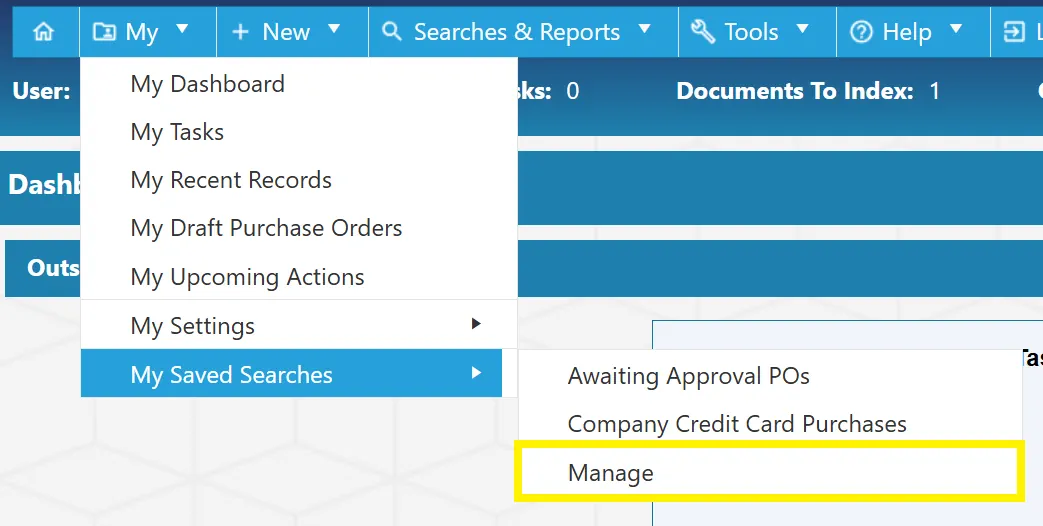
This will open a new window displaying a grid which contains all of the user's saved searches. From here they can select the icon to edit the name of the search.

Alternatively, they can delete the search by selecting the icon.